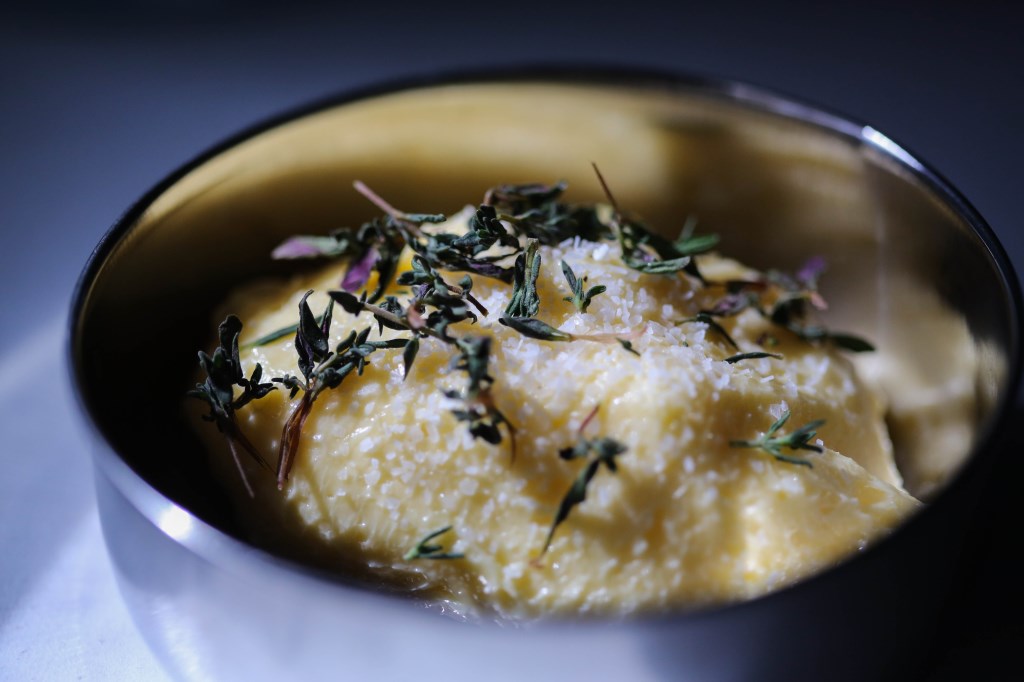
Since we found Pereira Pastures Dairy a couple months ago, I suddenly had access to raw cream and milk, which fulfills my dream of having a milk man. It doesn’t arrive on my porch in cute, glass bottles, but it does come from a friendly man in Abernathy who does his best every day with the land and beautiful Jersey cows God gave him to make the best product he can. He treats those cows so well and it shows in his product. I ordered a couple bottles of cream over the past two weeks and I’m telling you, this cream is legit. There was only a half inch at the bottom of the bottle where the cream had separated from the rest of the milk. THAT much raw cream just screams to be made into butter. So, after being inspired by a story in the May issue of Martha Stewart Living magazine about Diane St. Clair, who makes butter for the French Laundry and Per Se, I decided to make my own. I went a simpler route than the recipe featured in the magazine and just basically whipped the cream into oblivion until it separated into buttermilk and butter. I then kneaded it, washed it (washing it makes it last longer) added some salt and sprigs of fresh thyme from my “garden” and voila – I had made my very own compound raw butter.
Making compound butters (essentially butter with stuff mixed in to flavor it) is really easy. When the butter is at room temp, simply mix in herbs, seasonings, whatever you want and then wrap it up in plastic wrap and chill until firm. Then, like my salted thyme butter, use it on fish or chicken or just bread for something really wonderful. Sure, buying butter is so much easier. And less expensive. And less messy and time consuming. However, I think doing things from scratch offers a natural inclination for satisfaction and moderation that you just can’t buy. How much slower you’ll eat butter you made than stuff you can scoop out of a tub!

First, dump cream (I used two cups) into the bowl of a stand mixer fitted with a paddle attachment. Then, whip on medium high until whipped cream forms. Then, really, just let that sucker whip until it suddenly separates. This process can take anywhere from 10-15 minutes of solid whipping. You should have something that looks like this:

Strain the buttermilk out and save it to make pancakes or biscuits!

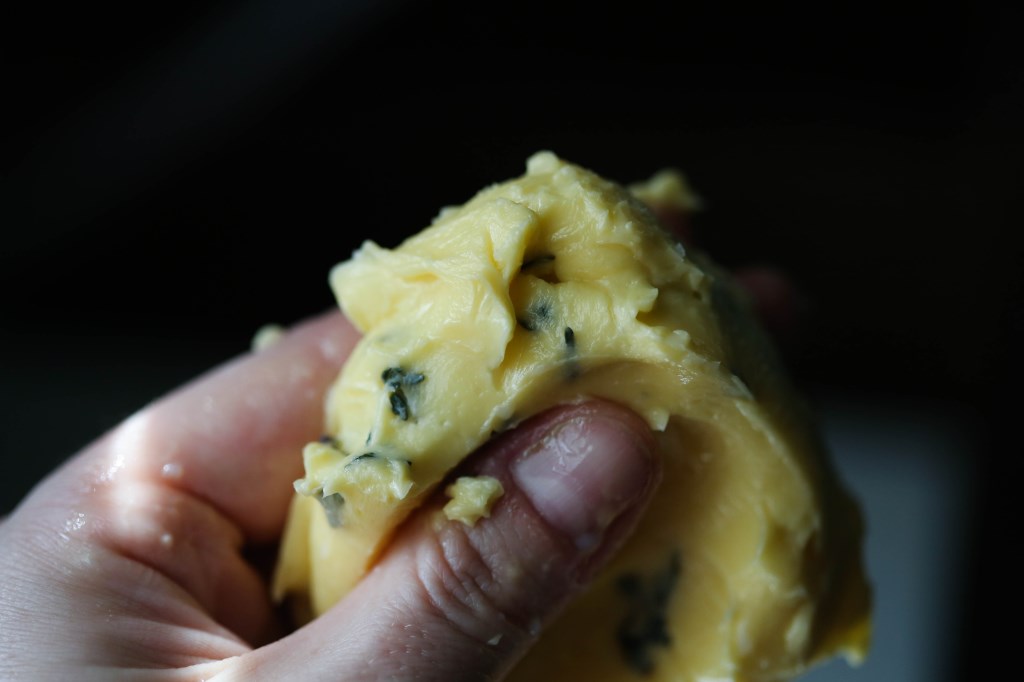
Then, gather the butter solids and knead them in your hands under running water, squeezing the excess buttermilk out. Then, you can either leave it alone for plain butter, or mix in salt and herbs, like I did here:
Then, transfer to a sheet of plastic wrap, form into a log and refrigerate until firm. Or leave it out on the counter if you’ll be using it right away.

And for a simple approach, just slice it and eat it on a cracker 🙂


Butter molds are also fun! My mother used to have a couple of them. They have a plunger of sorts and once the butter is firm, you push it out onto a pretty butter plate with the plunger. Some of them have designs in the plunger so that it leaves a pretty “stamp” on the top of the butter. I loved this blog. It brings back memories of making our own butter when I was being raised on the farm. My mother put the cream in a large jar with a lid and give it to one of us kids to shake until it separated and became butter. We’d sit on the couch and rock that jar back and forth on our laps or shake it. So good on fresh corn on the cob from Mother’s truck garden!
That sounds so good, Mom! I like that memory of yours! Don’t think I’d ever heard it till now! I want a butter mold, now! 🙂
I’m sure they have butter molds in kitchen stores, but look for antique ones. They are wonderful! My mother’s was wooden and most of the old ones are, but during the ’50s there were some heavy plastic ones available and even some glass ones, I think.
Oh my stars that looks amazing—I know it won’t be near as good as yours but this’ll work with store bought whip cream right?