Chocolate Banana Butter

banana chocolate butter-1 banana chocolate butter-3
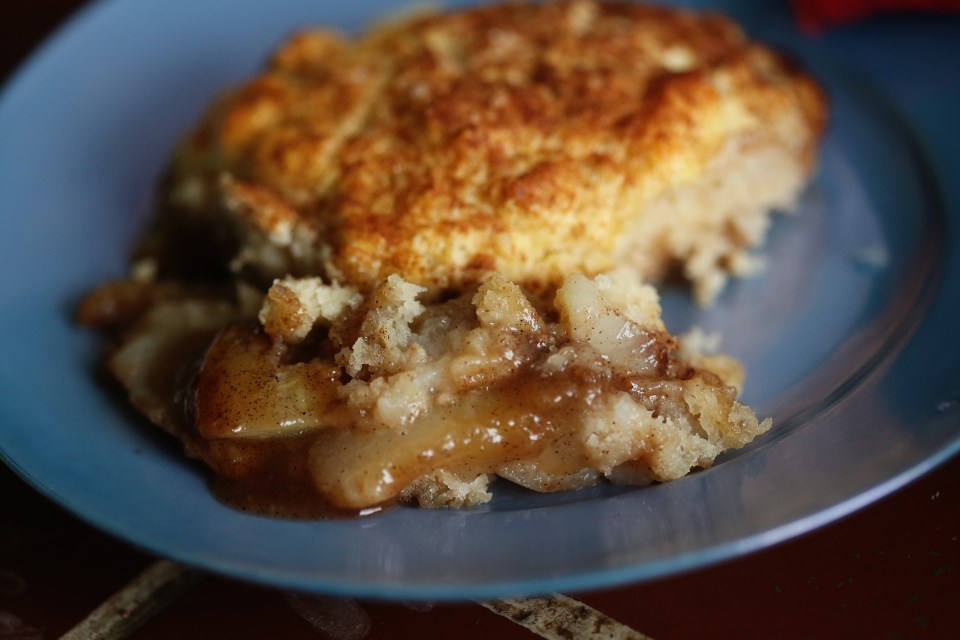
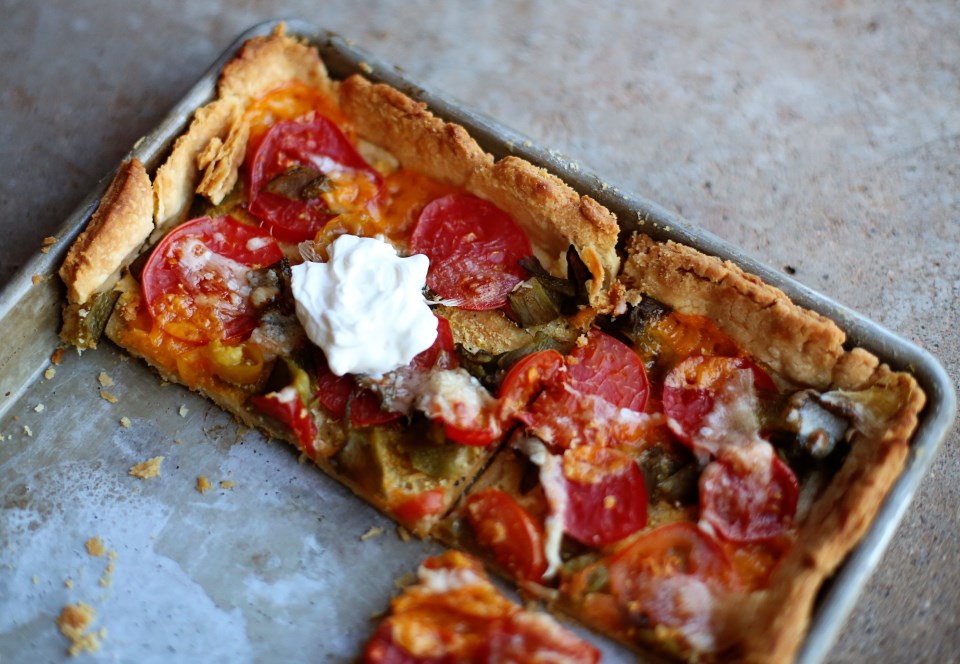
We almost waste more bananas in this house than I can count. The girls always swear they want a WHOLE ONE ALL BY MYSELF! But then they each eat two bites and are done. I typically use the leftover bananas for muffins or oatmeal or smoothies, but I wanted to do something a bit more exciting this time because if you don’t shake up your routine from time to time, despair sets in.

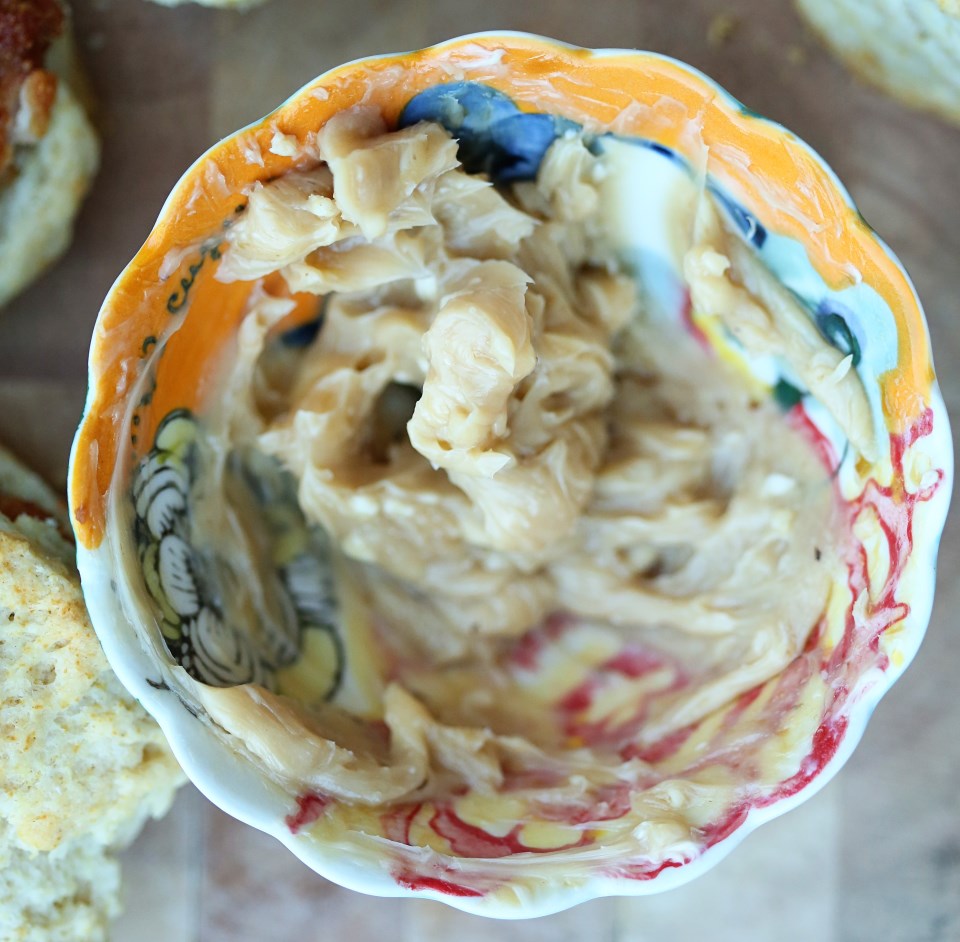
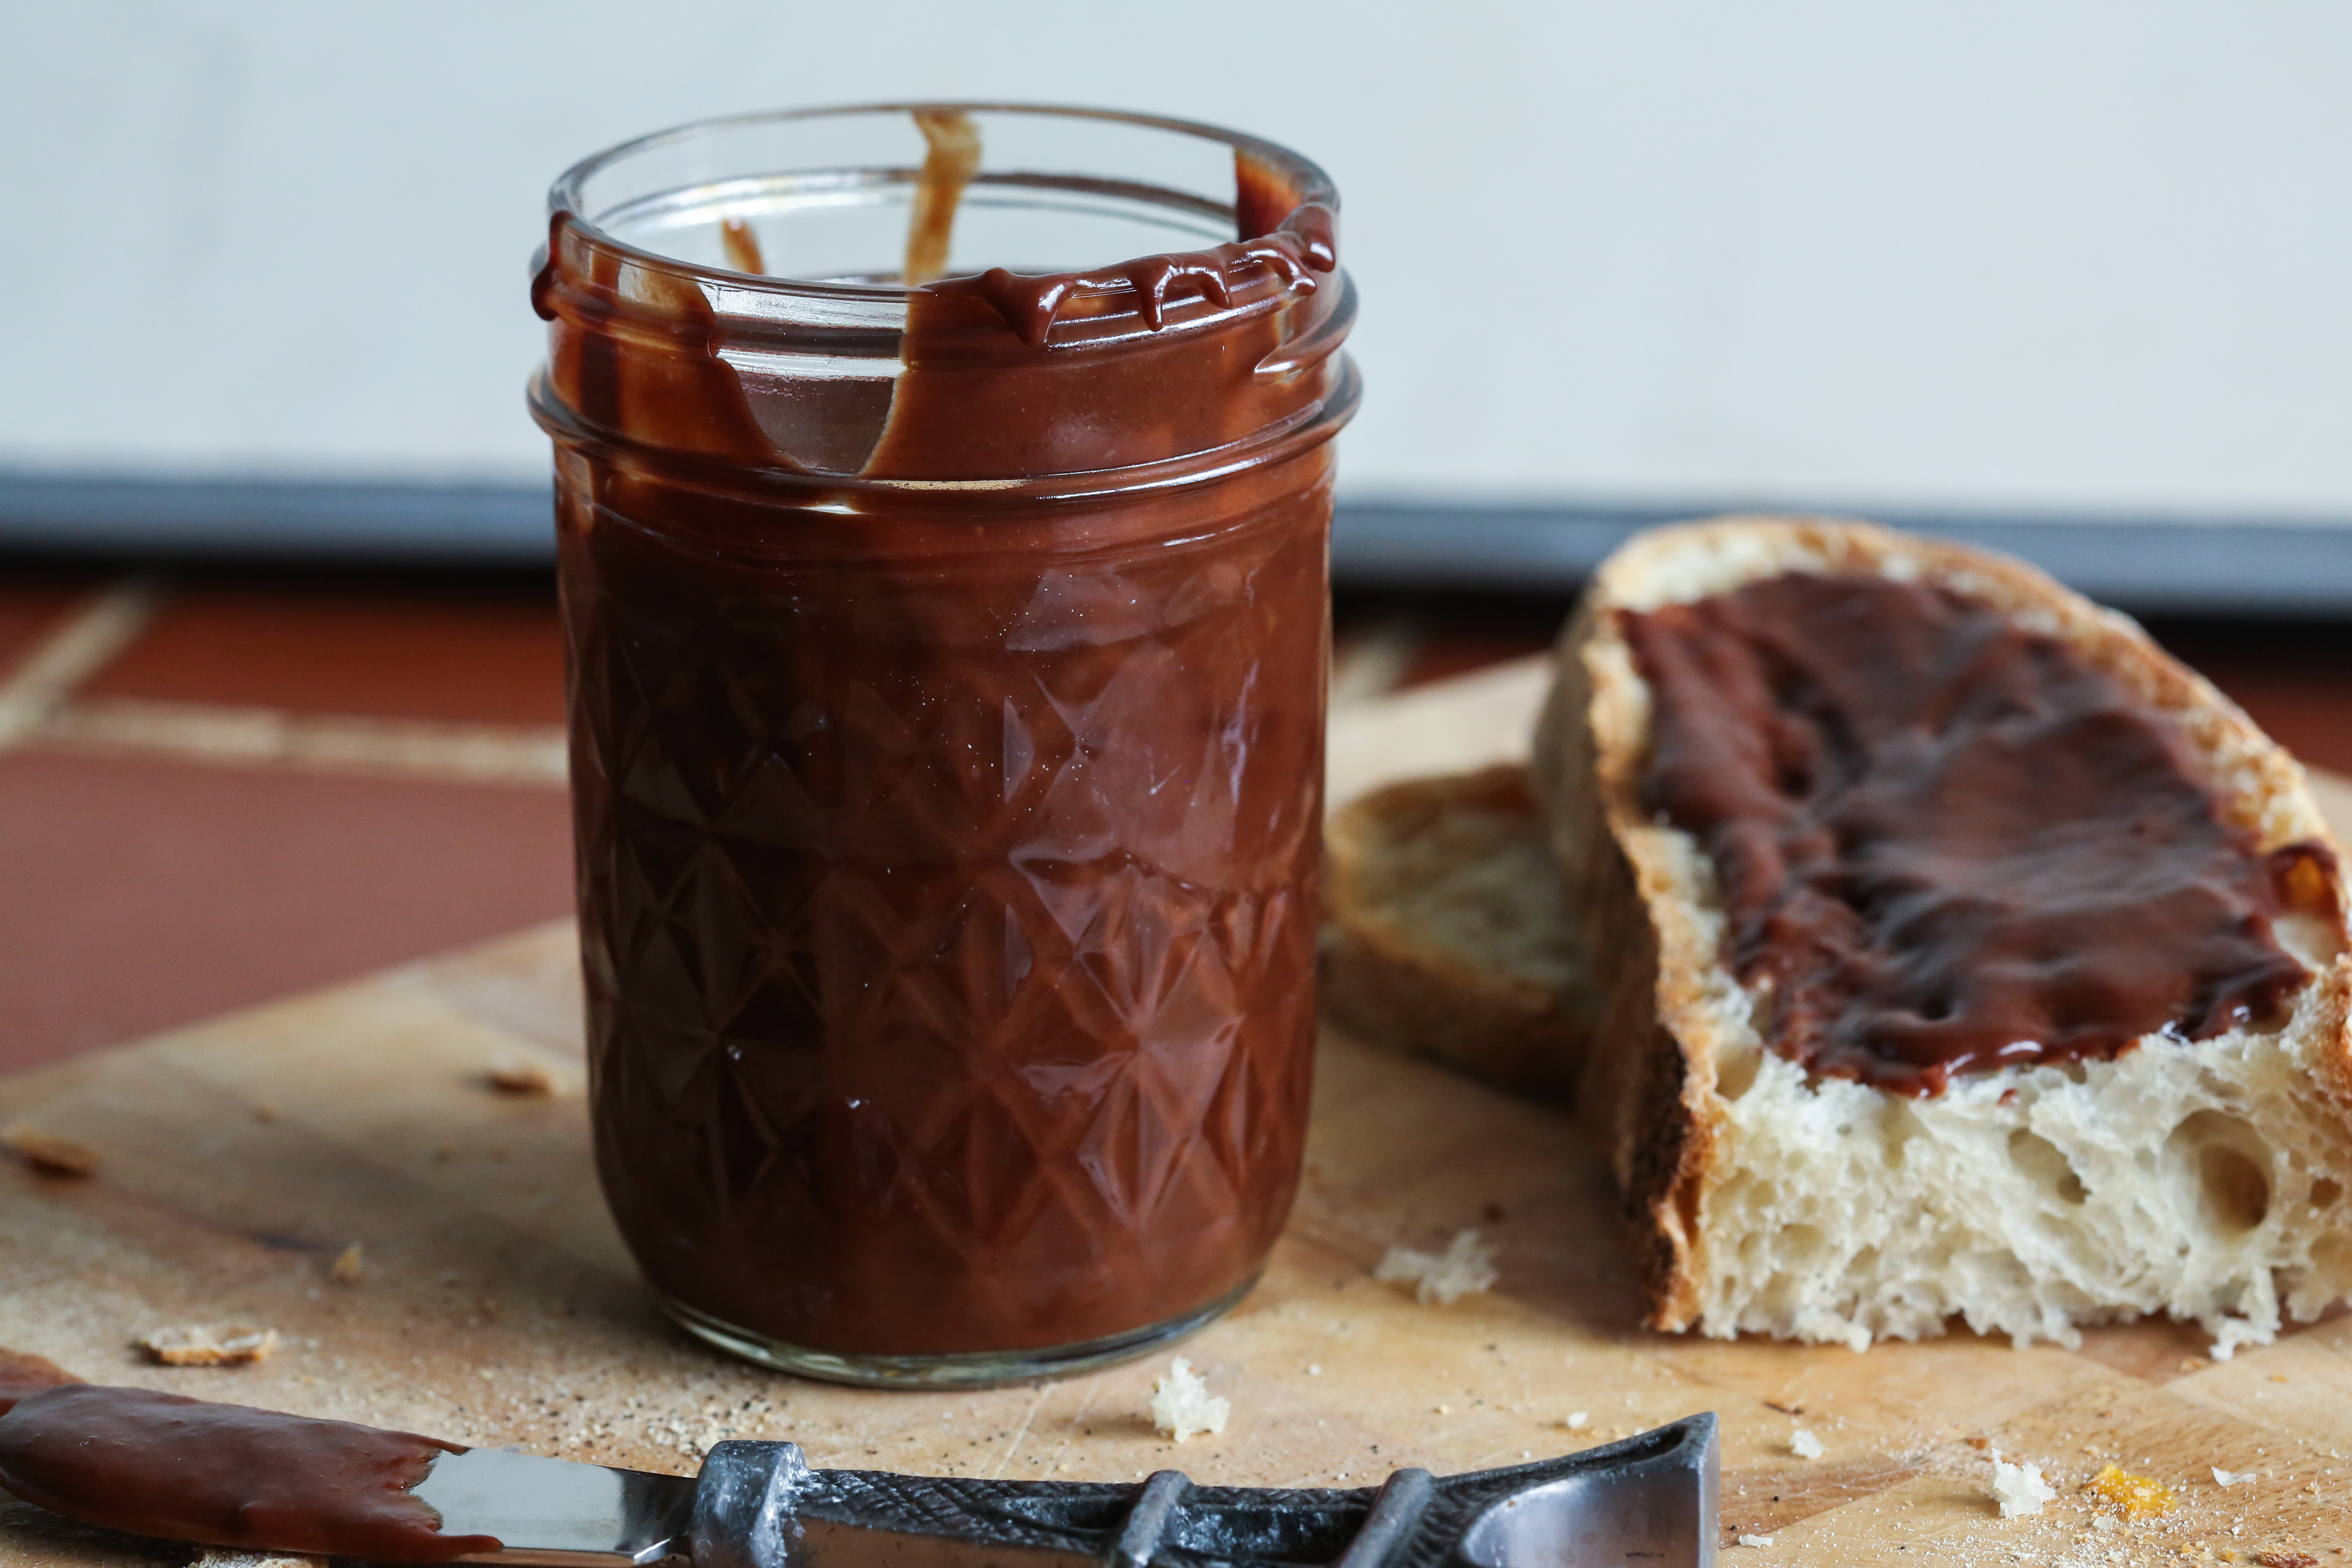
I found a recipe for banana jam with just a tish bit of chocolate and it sounded okay but I didn’t really want banana jam. I wanted banana with lots of chocolate and a softened butter consistency. So I just did my own thang.  Plus, it’s easier than making jam. And if you really want to live on the edge, you don’t even have to sterilize your jam jars. GASP. Just keep it in the fridge and no one has to know…

banana chocolate butter-6
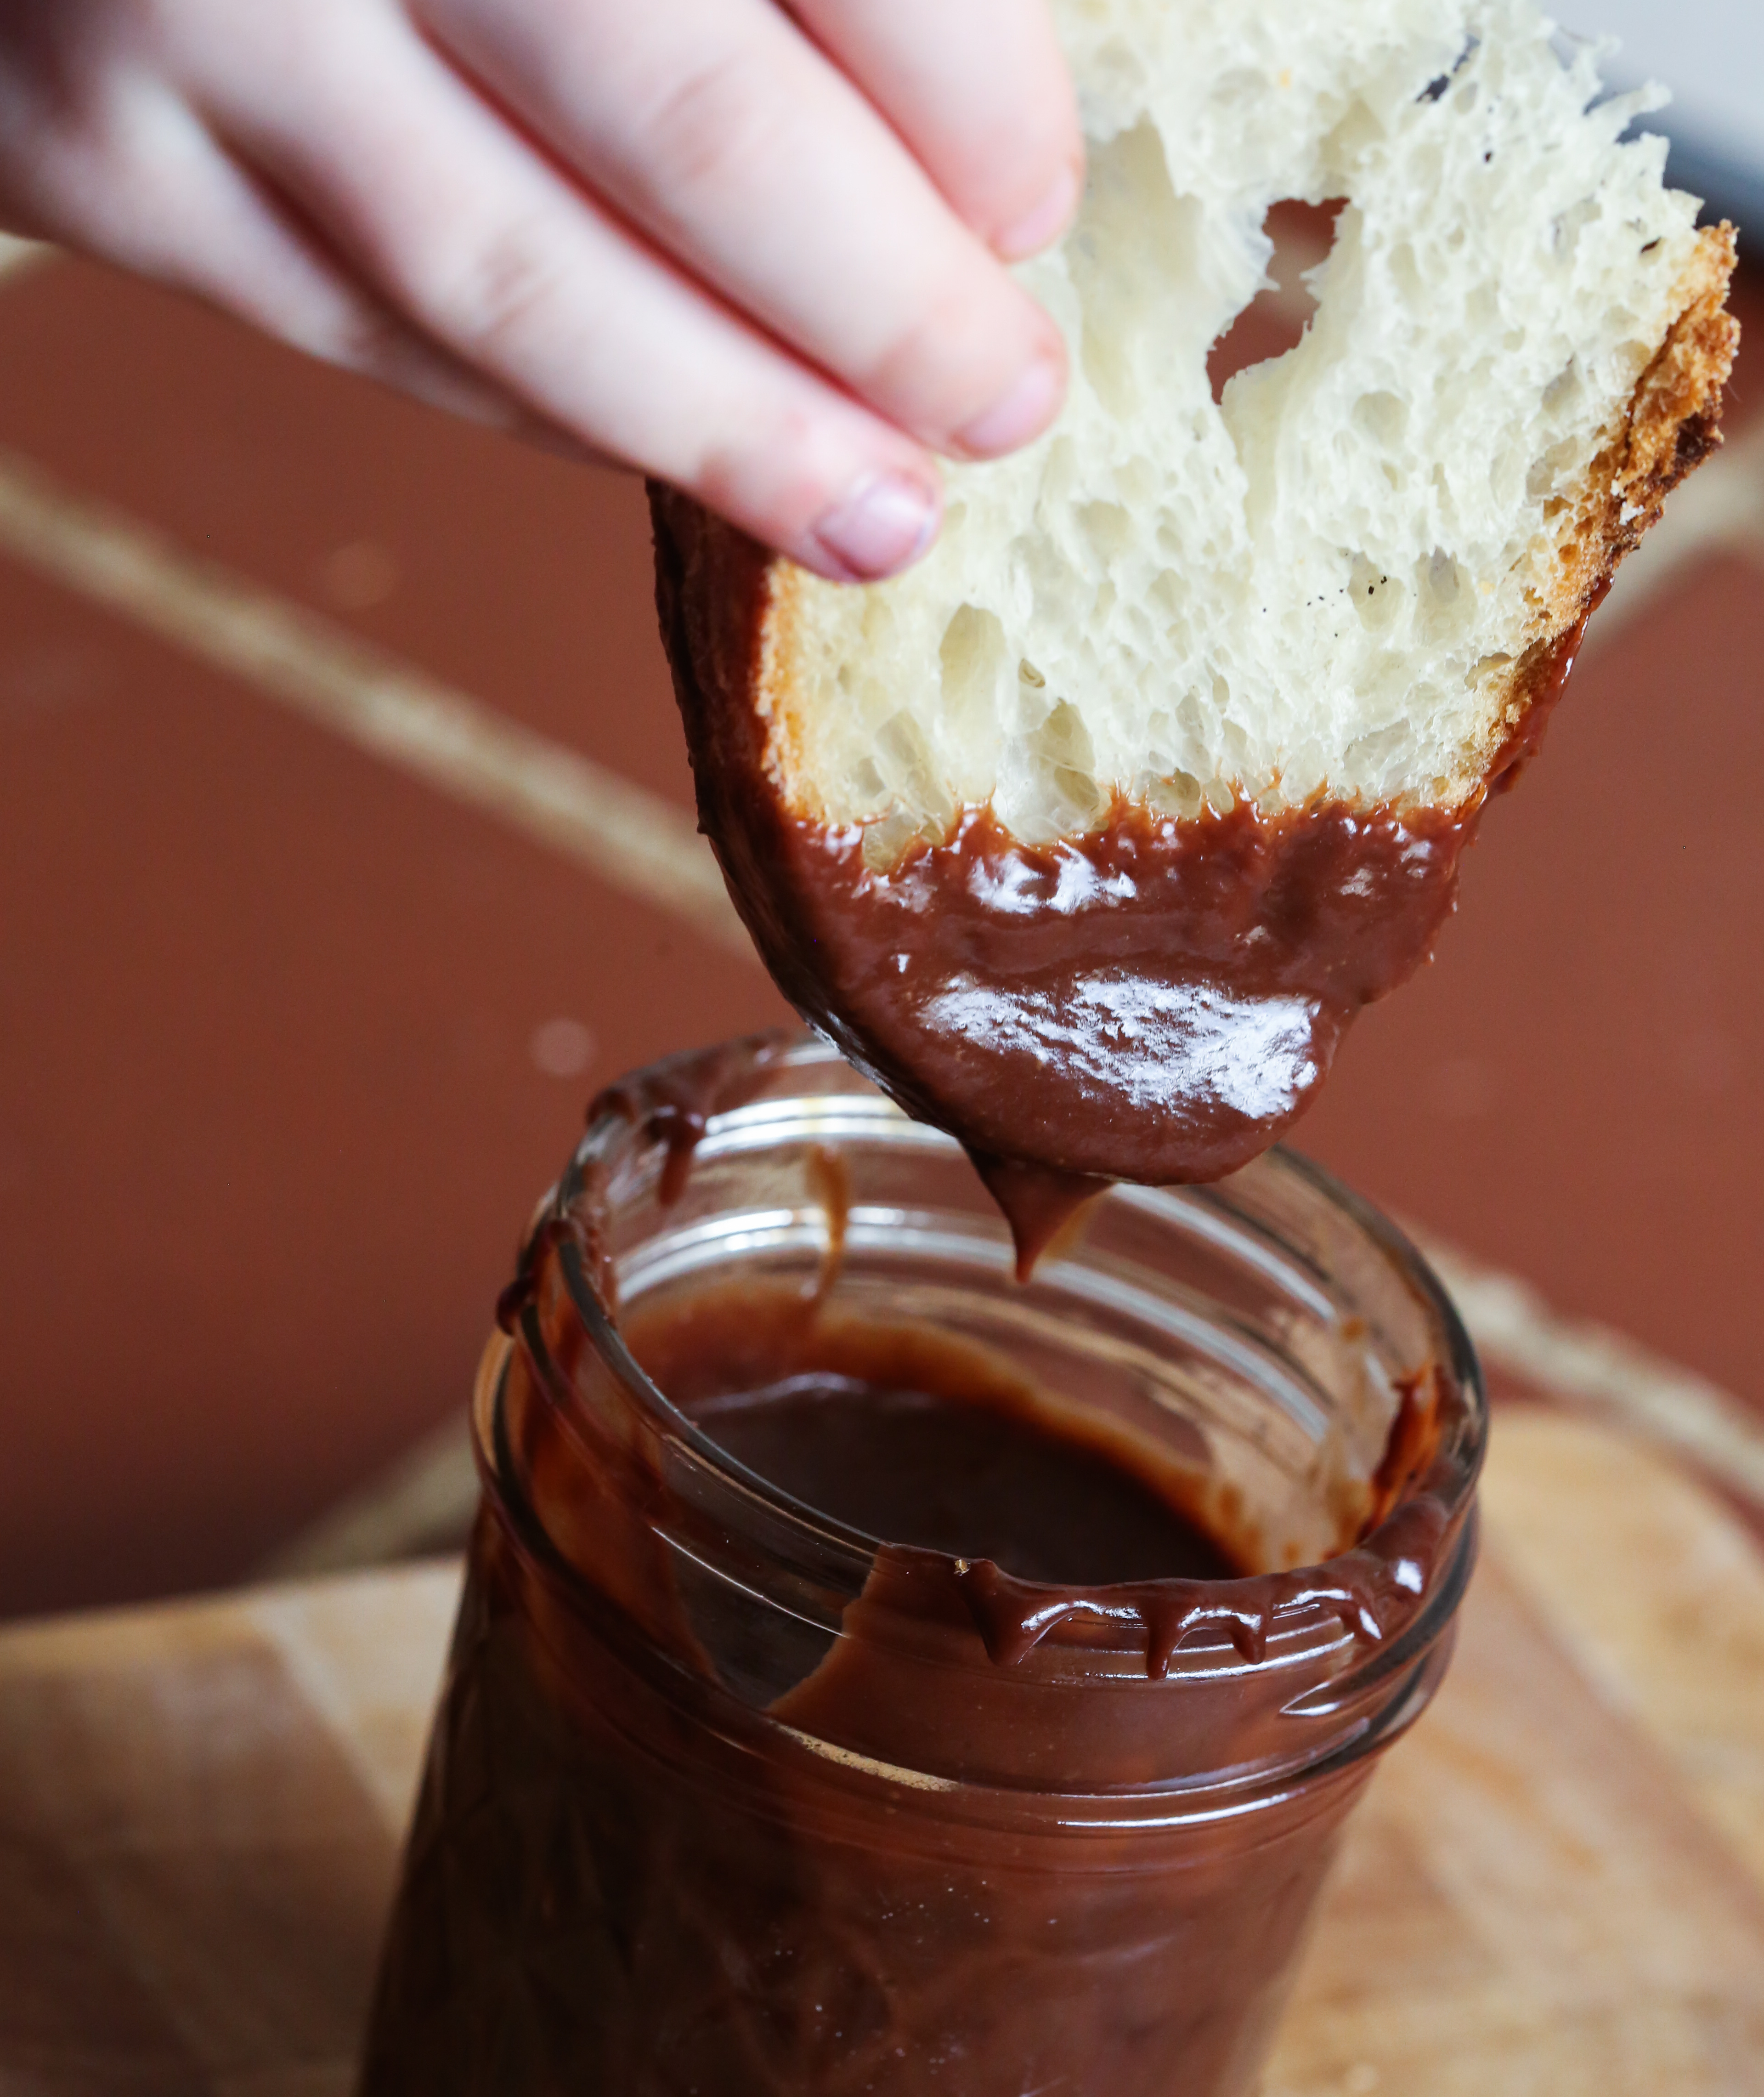
That’s little Ollie’s hand. So cute. She ate this shot. banana chocolate butter-4

Chocolate Banana Butter


makes about 24 ounces

5 super ripe bananas, cut into chunks
8 tablespoons brown sugar
2 tablespoons water
8 ounces dark chocolate, broken into small pieces
3 tablespoons unsalted butter, softened
kosher salt to taste

In a large saucepan, combine the bananas, brown sugar and water over medium heat and bring to a boil. Mash up the bananas with a spatula and boil for about 2 minutes, stirring. Remove from heat and stir in the dark chocolate. Pour the banana chocolate mixture into a food processor and blend until completely smooth. Add the butter and blend again. Taste test – add a sprinkle of kosher salt and let it blend once more. Add more salt to your taste. I tend to like my sweets with a salty edge, so I probably added about a half teaspoon when it was all said and done. Pour into jars and store in the fridge. We have ours on bread. I’m not really sure what else you’d need in life than good bread and chocolate.

Triple Berry Pie

triple berry pie-1triple berry pie-2Last night I had an inspiring conversation with my friend, Ashley, where we spoke of our frustration with “keeping up appearances” with our photography, Facebook, Instagram, whatever it is that we somehow feel compelled to keep going in order to please our various audiences (mostly those audiences just include my oversized ego.)  I had said that this blog was suffering because while I have been cooking pretty much every meal over the last few months and some of those meals have been really good (like mozzarella stuffed rice balls rolled in panko and fried), I just haven’t felt like taking our meals’ pictures.  And then she said, “Do it because you enjoy the process…remember life before the internet?”

Remember life before the internet?

Well, I do, even though a lot of “kids these days” don’t. And what I remember is that we just…did things. All the time. And no one knew about it. No one saw it. We did crafts and went outside and ate burritos without ever documenting the occasion. And I seem to remember enjoying life before the ever present, all-encompassing documentation of all the things in life.  No one in their right mind would spend valuable money on film to take a picture of their cup of coffee…every day.

But I WOULD have liked to share recipes I really love. And I would’ve written the recipes down on cute little cards and maybe even take a photo and put it in a book or send it to a friend. That, I would have done and those are going to be the types of recipes I share on this blog.

Like this pie. I had a brief moment of modern-woe yesterday in which I wished I had made it prettier so that I could’ve blogged about it. Shoot. It’s delicious – who needs it to be picture perfect?! I went all hodgepodge with the top crust instead of doing something perfectionist and I put lots of heart cut outs because I have little girls. So there you go. And I was super proud of the results. Perfect juice in this pie – not runny, not dry! No soggy crust – flaky throughout and super buttery and slightly grainy (in a good way).  I used a white whole wheat and added a bit of extra sugar for the crust and it gave the entire thing this hearty cornmeal-esque effect. Loved it. It’s perfect. And I think there was something to using all frozen fruits. So I can’t vouch for this if you use all fresh, although I bet you’d just have to adjust bake time. Whatever you do, try it. And take a picture to share with your friends if you want, but remember to just enjoy the process.

Thanks, Ashley. 🙂

triple berry pie-3

Eleanor waiting patiently while I did something utterly confusing to her… triple berry pie-4 triple berry pie-5 triple berry pie-6 triple berry pie-7

Triple Berry Pie

3 1/2 cups mixed frozen berries – I used blueberries, blackberries and raspberries
1 cup sugar
3 TBS flour (I used white whole wheat)
1/2 tsp cinnamon

2 sticks of butter (8 oz) cut into tiny cubes and reeeeally cold
2 cups white whole wheat flour
1 tsp salt
2 TBS sugar

Deep dish pie plate (if you don’t have a deep dish, you could easily make two small pies with this recipe)

For the crust, combine one cup of flour in a large mixing bowl and add the salt. With the paddle attachment and your mixer on medium, add all the cubes of butter in little increments until each addition stops beating against the side of the bowl. After all your butter is incorporated, add the second cup of flour and the two tablespoons of sugar and mix on low until well incorporated. Add a splash of icy cold water until the dough comes together. If it feels a bit too wet, add in a little more flour. I think I used about an extra 1/8th cup. Divide your dough into two portions with one being slightly bigger than the other and shape into discs, wrap in plastic wrap and refrigerate for at least 30 minutes. Roll out the bigger portion and line your pie plate and let it sit in the fridge while you mix up your filling.

Preheat the oven to 400F. Mix the fruit, sugar, 3 tablespoons of flour and cinnamon in a big bowl and let it sit for a few minutes, then stir to incorporate again. Pour the filling into your pie crust, top with whatever fancy shapes, basket weave, self portraits you want, brush with a beaten egg and sprinkle with sugar.

Place on a rimmed baking sheet and put on the center rack of your oven. REDUCE the heat to 350 and bake for 1 – 1.5 hours until the crust is golden brown and the filling is bubbling. It took mine a full hour and a half because of the frozen fruit, but if you’re using fresh, you may only need 45 minutes until it bubbles.

triple berry pie-10

Cherry Chocolate Chip Oatmeal Cookies

Cherry Chocolate Chip Oatmeal Cookies 2

Cherry Chocolate Chip Oatmeal Cookies
I’m sitting here after putting my “baby” down for a nap a few minutes ago (praying she’ll go longer than her usual 45 minutes) and Peg and Cat are singing loudly in the background as my very grown up four-year old gets out of taking a nap because I want her to be exhausted enough to go to sleep at nine instead of ten tonight.

I’m winging it this week – Matt is away on a company trip for three days and I’m a few hours in and feeling so, so tired. I have lots of coffee and a good sense of humor, so I’m sure I’ll be fine. But having help from 5:30-9 every night is vital to my sanity. There’s something about getting a fresh set of not-exhausted-yet hands to hold the babies or take them outside and swing them so I can cook dinner in peace. And he is kind of the best there is and the most helpful person on the planet, so it’s extra hard to be without him. So I’m going backwards with my usual routine – I’m cooking lunches this week and keeping dinners simple. Because the last thing I want to do after finally getting both girls in bed is to clean my dirty dishes. I plan on reading a book or doing half of a yoga routine. And while I don’t ever recommend eating your feelings because that’s a silly thing to say and they would probably taste like sauerkraut, anyway – just eat these cookies instead. All eating is emotional eating, after all.

It’s good to be back, friends 🙂

Cherry Chocolate Chip Oatmeal Cookies 3 Cherry Chocolate Chunk Oatmeal Cookies

Cherry Chocolate Chip Oatmeal Cookies

  • Servings: about 24 cookies
  • Print

1.5 cups packed brown sugar
1 cup softened, unsalted butter
1 teaspoon vanilla or vanilla bean paste
1 egg
2 cups rolled oats
1.5 cups all purpose flour
1 teaspoon baking soda
1/4 tsp salt
1 cup dark chocolate chips
1 cup chopped, dried cherriesHeat oven to 350°F. In large bowl, stir brown sugar and butter until blended. Stir in vanilla and egg until light and fluffy. Stir in oats, flour, baking soda and salt; stir in chocolate chips and cherries.
Onto ungreased cookie sheet, drop dough by rounded tablespoonfuls about 2 inches apart.
Bake 10 to 12 minutes or until golden brown. Cool slightly; remove from cookie sheet to wire rack.

Peanut Butter and Jelly Thumbprint Cookies

Peanut Butter and Jelly Thumbprint Cookies3
Hello there! This is a delightful little cookie that takes no time at all to make and is so much fun for little helpers! I had this idea a while back whenever I saw powdered peanut butter in the grocery store and have wanted to try it out. It took a little tweaking, but I loved the texture of the cookie itself. One word of advice: don’t use jelly! I know, I know, it’s a riff off of peanut butter jelly sandwiches, but use something a little thicker like a jam or preserve. I used grape jelly because it’s iconic and it really ran out of the cookies more than I would have liked. This did not stop them from being utterly addicting; it just kept them from looking super pretty.

Thumbprint cookies have always been a favorite of mine and this version is so fun and really makes you feel like a kid again. With Thanksgiving and Christmas around the corner, I think this would be a great recipe to have for a cookie exchange! Drizzle it with a bit of white or dark chocolate to make it even more fancy! Enjoy!

Peanut Butter and Jelly Thumbprint Cookies2

Peanut Butter and Jelly Thumbprint Cookies


makes about 2 dozen

1 cup salted butter, softened
½ cup confectioners’ (powdered) sugar, plus ¼ cup more for dusting
2 teaspoons pure vanilla extract
¼ tsp salt
1 1/4 cups all purpose flour
1 cup peanut butter powder

about 1/2 cup fruit preserves or jam

Preheat oven to 325°F. Line a baking sheet with parchment paper.

In the bowl of a stand mixer fitted with paddle attachment, blend butter and sugar until fluffy and light, 2 minutes. Add vanilla and salt, scraping down bowl as needed. Pick up the baby, who has been crying at your knee for the past ten minutes and hold her while you try to measure out peanut butter powder. Let her sneeze into it. Do everything with one arm tied behind your back. Switch to low and gently mix in flour and peanut butter powder, just until combined.

Roll tablespoonfuls of dough into 1-inch balls. Create some interest by making some pea-sized and some into the shape of a carrot. Pretend to eat them, but then actually do. Place dough balls on parchment lined baking sheets. Press down the center of each ball with your thumb, making a slight depression, or a hole clean through to where you can see the bottom of the baking sheet.

Fill cookie centers with a teaspoonful of preserves and be sure to lick the spoon between each cookie. Makes it better. Bake 12-15 minutes or until golden brown and puffy, but take care not to over-bake. Let cool a few minutes on baking sheet, then transfer to finish cooling on wire rack.

When cookies are completely cooled, eat seven or eight with a glass of milk while singing every song you know in your best cat voice. Cookies can be kept in airtight container at room temp for a few days. Emphasis on “can.”

*recipe adapted from Chew Out Loud

Peanut Butter and Jelly Thumbprint Cookies

Chicken in a Biskit Fried Chicken on a Biscuit

fried chicken and cream biscuits with maple butter
You read that right. Buttermilk-brined chicken thighs, breaded in ground up Chicken in a Biskit crackers and fried. Served on top of a fluffy cream biscuit and finished off with a spread of salted maple butter.
I make no apologies. For any of it. It was one of the best little chicken sandwiches I’ve ever had. And it really wasn’t that difficult! We had the idea a while back and thought it was too good of a play on words to not do it. So we did it! Matt put the chicken thighs in the brine the night before but the meal itself took less than an hour from start to finish. And a made a side of carrot “fries” to go along with everything.
Have you ever had Chicken in a Biskit crackers? If you haven’t, you should try them. Oddly addicting. They have a sweet/savory flavor combo that I’ve tasted in other crackers, but this one, in my opinion, was the first of its kind and remains the best. It’s an old cracker (well, not literally, but the brand is old!) I can remember these crackers as a kid and I honestly hadn’t bought a box since, but for this little project, it’s well worth it.

Start this the night before you want to eat it so that you can get your chicken in the brine. The rest doesn’t take that long – about an hour from baking the biscuits through frying the chicken.  Enjoy and let me know if you love it as much as we did!

Chicken in a Biskit Fried Chicken and Biscuits with Maple Butter

Chicken in a Biskit Fried Chicken on a Biscuit

  • Servings: 6-8 sandwiches
  • Print


For the Biscuits* (taken from Smitten Kitchen – which looks a lot like the scone recipe I use from America’s Test Kitchen – both are awesome and yield similar results):
3 tablespoons (45 grams) melted butter
2 cups (250 grams) all-purpose flour, plus more for dusting the surface
1 tablespoon (15 grams) baking powder
1/2 teaspoon salt
1 tablespoon (15 grams) sugar (optional)
1 1/2 cups (355 ml) heavy cream

Preheat the oven to 425°F. Line a baking sheet with parchment paper. Melt butter in a small pot or microwave dish, and set aside. Sift two cups flour, the baking powder, salt and (if using) sugar into a large bowl. Fold in 1 1/4 cups cream. If the dough is not soft or easily handled, fold in the remaining 1/4 cup cream, little by little. (I ended up using two additional tablespoons, or half the unused cream.)

Turn dough onto a floured surface, mound it into a ball and, using your hands, press it to a thickness of about 3/4 inch. Cut into rounds, 2 1/2 inches in diameter. Gather dough scraps and continue to make rounds. Dip the top of each round in melted butter and arrange on the baking sheet. Bake until golden, 12 to 15 minutes.

chicken in a biskit fried chicken on a cream biscuit

For the Chicken:

1 pound boneless, skinless chicken thighs; trimmed and cut in half
Buttermilk brine (we use Serious Eat’s Southern Fried Chicken for nearly every fried chicken recipe we do):
2 tablespoons paprika
2 tablespoons freshly ground black pepper
2 teaspoons garlic powder
2 teaspoons dried oregano
1/2 teaspoon cayenne pepper
1 cup buttermilk
1 large egg

For the Dredge:
1 cup flour
1 egg + 1/4 cup buttermilk
1 box Chicken in a Biskit crackers, pulsed fine in a food processor

vegetable oil for frying
Combine the paprika, black pepper, garlic powder, oregano, and cayenne in a small bowl and mix thoroughly with a fork.Whisk the buttermilk, egg, 1 tablespoon salt, and 2 tablespoons of the spice mixture in a large bowl. Add the chicken pieces and toss and turn to coat. Transfer the contents of the bowl to a gallon-sized zipper-lock freezer bag and refrigerate for at least 4 hours, and up to overnight, flipping the bag occasionally to redistribute the contents and coat the chicken evenly.

Take the chicken out and pat dry with paper towels. Dip the thighs in the flour first, then the egg/buttermilk mixture, then the cracker crumbs. I double dipped each piece to get lots of crunch (so dip once more in the egg and then the crackers.) Set aside till you’re done with all the pieces before frying.

Preheat your oven to 200F. (Your oven should still be hot from the biscuits! You’ll keep your fried chicken pieces in the oven to stay warm and crispy while you finish setting your table or wiping kids’ butts or whatever it is you have to do while you try to make dinner.)

Heat about an inch of oil in a skillet over medium high heat until it’s shimmering. Fry each piece of chicken for about 4-5 minutes per side, until the chicken is golden brown and registers 170F on an instant-read thermometer. If you’re thinking you’re about to burn the breading, transfer the chicken pieces to a baking sheet and finish cooking in the oven.

maple butter

For the Maple Butter:
4 tablespoons unsalted butter, room temp
1/4 teaspoon salt
2 tablespoons pure maple syrup

Combine all ingredients until thoroughly incorporated. Spread on biscuits and top with chicken pieces. We also doctored the sandwiches up with a bit of mustard, hot sauce and candied jalapenos, but just the chicken, biscuit and butter are enough.

Apple Crisp: Food Memories

Fall Apple Crisp
I’ve done a few posts on food memories from my own family and ones from friends and I love those posts more than any other. They are more than just recipes – they are links to the past and to feelings that can’t be accessed any other way. Food is such a tie to our heritage, to our families and to the love we felt when we first experienced those memorable dishes. I never tweak these recipes because it’s my job to post about and honor the memory, not the recipe itself. My dear friend, Becky, had this picture of her grandmother’s hand written recipe on her Instagram account and when I saw it, I knew I had to make it.

Last year, Becky invited me over to look through her grandmother’s things before they had an estate sale in the wake of her passing. I had the honor of taking home a patchwork quilt she had made. Not only do my girls play on it outside nearly every day, but I used it as a backdrop for the photos I took of the final dish. I hope it makes this post that much more meaningful for my friend.

The recipe itself is completely delicious and comforting and full of the essence of the fall season! I love that it calls for “oleo” – a sure sign the baker lived through the 50s 🙂 So this was the only tweak I made by using butter instead. I also topped the apple crisp with cinnamon horchata ice cream because I was all out of whipping cream. I’m sure if Nana could have tasted the ice cream, she wouldn’t mind the substitution.

recipe
I asked Becky to share a few thoughts about her Nana and this recipe. She also provided this amazing picture and it makes me wish I’d known her. She looked so joyful.

12087400_10207282108429358_1362057034_n
My Nana (Oma Lee) was the 5th of 6 kids born in 1926 to a generous, kind-hearted family. They took in the homeless, cared for the sick, fed the hungry. They also laughed more than most.

For a couple of years while I was in college, I got to live with her and got to know her on a deeper level. She was a counselor to me, a friend, comic relief, an adult when I acted like a child. We watched Miss America pageants and Hallmark movies together and ate dilly bars from DQ.

Nana shared an apple “pie” recipe with me during that time, and it’s the only apple pie I’ve ever made, because its kinda fool proof (I need that) and darn tasty.

I made it for her once and she went on and on about how delicious it was. When I reminded her it was one of her recipes, she laughed for the longest time then said in a straight voice, “well that’s why it’s so good”. Man, I miss her.

Apple Crisp 2

Apple Crisp

6 cups peeled, sliced apples
1/3 cup sugar
1 teaspoon cinnamon
1/2 teaspoon salt
2 tablespoons melted butter
For the streusel topping:
3/4 cup sugar
1/2 cup flour
1/3 cup butter

Whipped topping or ice cream to garnish

Preheat the oven to 375F. Mix together apples, sugar, cinnamon, salt and melted butter.  Place in a greased 8″ square baking dish. Set aside.

Combine the 3/4 cup sugar and flour and then cut in the butter until the texture is fine crumbles. Sprinkle over the apples. Bake for about 45 minutes, or until apples are tender*. Serve warm with dollops of whipped topping (or ice cream!)

*Becky advised that I brown the apple crisp for a few minutes under the broiler because it doesn’t really get brown during baking.

Caramelized Pear and Biscuit Pie

Caramelized Pear Biscuit Pie
Happy New Year’s Eve!  It is a frigid 20 degrees today with a windchill of about -5 and this morning as I got reluctantly out of my bed, I looked out the frosted window and saw gray.  Just gray with bits of white flocking everything in sight.  I thought of what I would make for breakfast for the redhead and for Matt, who was working from home due to the weather, and I wanted something warm and cozy with possibly a bit of cinnamon.  We had pears getting way too ripe on the counter and lest I waste such beautiful fruit, I decided to do a spin on Joy the Baker’s apple pie biscuits.  The apples for her recipe are obviously not mushy pear consistency and so they cut up and bake into biscuits nicely.  I knew that wouldn’t be possible with pears and I’d just end up frustrated, so I decided to do a free form biscuit/pie/tart mashup and the results were amazing.  I adapted her biscuit recipe to include creme and lemon juice instead of buttermilk and the result was cakey, tangy perfection on top of caramlized pears.

I highly recommend this dish.

Pear Biscuit Pie

Caramelized Pear and Biscuit Pie*

For the pears:
4 ripe pears, peeled and sliced
4 TBS brown sugar
4 TBS unsalted butter
1/2 tsp kosher salt

For the biscuits:
2 cups self-rising flour
2 TBS granulated sugar
4 TBS cold butter, cut into small pieces
3/4 heavy cream
2 TBS lemon juice
1/4 cup milk

In the super old, awesome, vintage skillet your husband got you for Christmas, melt the butter and brown sugar and salt together until bubbly.  Fold in the pears until they’re all coated and set aside.

Preheat your oven to 425F.  In a large bowl, cut the butter into the flour and sugar until it’s all well incorporated.  You can use your hands to break up the butter into tiny pieces in the flour, or just use a pastry cutter.  Either way, make sure it resembles tiny pea-sized crumbles.  Stir the lemon juice into the heavy cream and pour into the flour.  Stir up until it’s all moistened and then add the milk until a sticky dough forms.  You may need more milk.  Loosely form biscuits and layer on top of the pears.  Brush with a beaten egg and sprinkle with coarse sugar.  Bake for 25-30 minutes until the biscuits are golden brown.

*adapted from Joy the Baker

Pear and Biscuit Pie

Double Dark Chocolate Waffles

Double Dark Chocolate Waffles
The chocolate cravings have gone overboard.  I really blame it in all seriousness on pregnancy.  When I’m not pregnant, chocolate is good and fine, about on par with every other sweet. Not pregnant,  I don’t think about it outside of seeing it, I don’t dream up ways of using it to its maximum potential in breakfast foods, and I don’t think that it’s “needed” to get from 8 a.m. to 8 p.m. successfully.  When pregnant…well, all those things suddenly become priorities.  Like on Labor Day, I got up and looked up a basic buttermilk waffle recipe and then thought of the maximum way I could choco-fy it.  And I did.  Yes, I’ve had a similar waffle recipe on this blog before, BUT it wasn’t as good.  These waffles are fluffier, less dense, and the chocolate chips remain melty like a fresh-baked chocolate chip cookie during your entire breakfast.  So.  I’m not sorry for seeming repetitive.  If you’re pregnant, I’ll understand if I get a thank-you note in the mail later this week.
Double Chocolate Buttermilk Waffles
I topped these in three different ways and they were all good: melted butter and powdered sugar – easy, and the most cookie-like experience.  Butter with maple syrup: most waffle-like experience, but I’ve always felt that syrup on a chocolate anything is too much.  Turns out, it’s not.  And three: fresh raspberries all over the suckers.  Chocolate dipped fruit, anyone?  They were all good.  Dress it up, dress it down, this will be your new craving.

Double Chocolate Waffles
Double Dark Chocolate Waffles
makes about 12 Belgian-style waffles

2 cups AP flour
2 tablespoons brown sugar
2 tablespoons Dutch-process cocoa powder
2 teaspoons baking powder
1 teaspoon baking soda
1/2 teaspoon salt
2 cups buttermilk
1/3 cup vegetable oil
2 large eggs, lightly beaten
1 teaspoon vanilla extract
1 cup dark chocolate chips

Heat your waffle iron.  In a large bowl, combine the dry ingredients with a whisk until fully incorporated.  In a smaller bowl, whip up the wet ingredients.  Gently whisk the wet into the dry until just combined.  Fold in the chocolate chips.  Cook waffles to the waffle-iron’s suggested time (mine has a handy little light that goes off when they’re done) and keep in a 200 degree oven while you cook the rest to keep them nice and warm and crisp on the outside.  Serve with powdered sugar and melted butter, or whatever.  It really doesn’t matter – it’s all good.

Roasted Green Chile and Tomato Tart

Summer Tomato and Roasted Green Chile Tart
I am not a farmer.  I’m pretty crap at knowing why things die, what I’m doing wrong, why half my plant is brown and the other half is green, etc.  Last year, I all but neglected my tomatoes and they became like sea monsters in size and yielded dozens and dozens (if not with a little end-rot) of tomatoes.  This year, I switched where they were planted and am taking better care of them and they have all tapped out at about 4 feet tall, haven’t continued to grow in height in the last month and we’ve gotten maybe four, medium-sized tomatoes and a handful of cherry tomatoes, and all of them are split down the sides (too much watering).  Sigh.  It’s hard to win at tomatoes.  I’m sure some of you feel my pain.  I want that innate sense of what these plants need, but I am afraid I’ve learned that this instinct is no instinct at all, but trial and error.

The tomatoes pictured were, indeed, from our yard.  And they were, as all backyard tomatoes are, outstanding in flavor, despite their faults.  I will never know how a tomato that claims to be “field grown” at the store can STILL taste like NOTHING, and a tomato you go out and pick from your yard tastes like concentrated tomato paste, x 1,000,000,000.  Maybe it’s what Alton Brown said last week, that a tomato put in the fridge, even for a short time, loses a chemical designed especially for taste.  Whatever the reason, tasting just ONE perfect summer tomato will leave you satisfied for the rest of the year.  I don’t think I can be that enthusiastic about any other produce.  Especially since I’m such a crappy farmer.

Enter: the tomato tart.  Garnished with fresh, roasted, green chilies and a bit of cheddar and Parm, all baked on top of The Crust and a good slathering of green chile and caramelized onion dip.  It was just about as perfect as you can get.  And even if you don’t have a home-grown tomato, just go get one at a farmer’s market this weekend and DON’T refrigerate it and use that.  Or, since we’re baking these tomatoes, go ahead and use a supermarket tomato.  Roasting a tomato brings out great flavor in even the weakest, most genetically modified tomato.  Happy baking!

pre-baked tomato and green chile tart
Roasted Green Chile and Tomato Tart

1 recipe of The Ultimate Pie Crust
1/4 cup corn meal
1 cup green chile and caramelized onion dip
3-4 medium sized tomatoes (such as a Roma-size)
4 fresh roasted green chilies
salt and pepper
cheddar or Parmesan cheese, if desired

Get your pie crust rolled out and pressed into a 13×9″ tart pan, or like I did here, a half sheet pan.  Trim off the excess (and you will have some) and refrigerate the pan for about 30 minutes, while you get on with everything else.  Preheat oven to 450.  Line the crust with parchment paper and fill with pie weights – I use a bag of dried beans over and over for this purpose.  I even keep them in a bag labeled “Pie Beans.”  Bake the empty pie shell for 20 minutes, remove the weights and parchment and bake for another 5-10 minutes until the crust is golden on the bottom.  Set aside to cool.

Whip up a quick onion/chile dip if you don’t have time to make the full recipe by pureeing 4 ounces of cream cheese, two tablespoons of olive oil, a large garlic clove, two roasted green chilies and a tsp of salt in a food processor until smooth. Spread this mixture onto the bottom of the tart.  Then, sprinkle the 1/4 cup of cornmeal over the dip.  This will help absorb the juices from the tomatoes and chilies so you don’t have a soggy crust.

ingredients
Slice the tomatoes and chilies thin and layer onto your crust.  Drizzle with olive oil and sprinkle with salt and pepper.  I shredded up a tiny bit of leftover cheddar and Parmesan on top of mine and loved the result.  I think it’d be good without it.  Reduce your oven to 375 and bake for 25-30 minutes, until the tomatoes look slightly shriveled and bubbly.

Serve with a dollop of sour cream (really – it’s awesome) and enjoy!

Green Chile Tomato Tart


Blackberry Lime Cinnamon Rolls with Lime Vanilla Bean Icing

Blackberry Lime Cinnamon Roll - cross section
Good Sunday morning to you all!  This week has been a tough one for me.  I got sick on Tuesday and as anyone who has ever been pregnant knows, you can’t take the good meds when you’re sick.  So I had the usual, insulting cold in the middle of summer, had two weddings and one family shoot to edit, made a ginormous birthday cake for a friend which took up all of Tuesday AND my wonderful redhead decided to cut her usual nap time in half, so I had only one good hour during the day to get my photo work done (still got the wedding done in my two-week time frame – bragging, I don’t care, gotta throw that out there).

Blackberry Lime Morning Rolls
In the midst of my feeling like my head was stuck in a cloud and everything else, I felt it was the right time to make cinnamon rolls.  I don’t know – it was just therapeutic.  A few weeks ago, Matt made Joy the Baker’s first Baking Bootcamp recipe – a triple berry cinnamon swirl bread – and it was just outstanding.  Wonderful recipe and the flavors were so perfect.
Triple Berry Cinnamon Swirl Bread
The day he made it, I knew I wanted to turn it into cinnamon rolls with some kind of citrus glaze.  I finally got around to it and…score.  They were so bright and comforting at the same time.  I will definitely make these again when I’m not afflicted with Taste Blindness (I’ll expound on that, later).  And you should make them, too!  They take about an hour less than typical from-scratch cinnamon rolls and can be used with most any fruit – so get creative!

Morning Rolls - Blackberry Lime


Blackberry Lime Cinnamon Rolls with Lime Vanilla Bean Icing*

For the Dough:
2 1/4 teaspoons active dry yeast
1 tablespoon granulated sugar
3/4 cup whole milk, warmed to a warm lukewarm
1 large egg yolk 2 tablespoons unsalted butter, melted
2 1/4 cups King Arthur All-Purpose Flour
1/2 teaspoon salt a bit of olive oil for greasing the bowl

For the Filling: 1/4 cup unsalted butter, at room temperature
1/4 cup granulated sugar
3 teaspoons ground cinnamon
2 cups fresh blackberries
Zest from two limes
1 large egg, beaten for egg wash

In a medium bowl stir yeast with sugar. Stir in  the lukewarm milk and then add the egg yolk and melted butter.  Whisk together until thoroughly combined.  Allow mixture to rest for 5 minutes.  It should foam and froth. In a large bowl whisk together the flour and salt. Pour the milk mixture over the dry ingredients and start kneading it until it pulls away from the edges of the bowl. Place dough on a lightly floured counter and knead by hand for about 10 minutes more.  Dough ball should be smooth and damp, without being too sticky.  Shape dough into a ball. Grease a large bowl with olive oil.  Place the dough in the bowl and cover.  Allow to rest at warm room temperature for about 1 hours, or until doubled in size.

While the dough rises, whisk together the butter with sugar and cinnamon for the filling.  Preheat the oven to 375 degrees F. Grease a 9 inch cake pan.  Set aside. After the dough has doubled in size, place it on a lightly floured counter and knead twice.  Using a rolling pin to roll the dough to a rectangle of about 18×12 inches. Spoon the cinnamon filling over top, spreading evenly, leaving a clean 1-inch border around the edges. Sprinkle the fresh blackberries over the cinnamon filling and grate the lime zest over everything.
Blackberry Cinnamon Rolls
(My blackberries were apparently from the Land of Canaan, so I had to cut them up). Start by rolling the longest side of the dough.  The roll will be a bit lumpy because of all the berries. Using a sharp knife, cut the log into 1 1/2 inch rolls and place cut-side down.  Brush the rolls with the beaten egg. Bake for 20-25 minutes until golden brown.  Allow to cool for about 30 minutes before icing.

For the Icing:
1 cup powdered sugar
juice from one lime
3 tbs heavy cream
1 tsp vanilla bean paste
a good pinch of kosher salt

Mix everything together in a medium bowl and thin out the icing with more lime juice, or thicken it up with more sugar.  Easy as that!

Have a happy rest of your weekend 🙂

*I adapted Joy’s recipe for the Triple Berry Cinnamon Swirl Bread a bit, but you can see her original and wonderful recipe HERE.

Blackberry Lime Cinnamon Rolls