Chocolate Banana Butter

banana chocolate butter-1 banana chocolate butter-3We almost waste more bananas in this house than I can count. The girls always swear they want a WHOLE ONE ALL BY MYSELF! But then they each eat two bites and are done. I typically use the leftover bananas for muffins or oatmeal or smoothies, but I wanted to do something a bit more exciting this time because if you don’t shake up your routine from time to time, despair sets in.

I found a recipe for banana jam with just a tish bit of chocolate and it sounded okay but I didn’t really want banana jam. I wanted banana with lots of chocolate and a softened butter consistency. So I just did my own thang.  Plus, it’s easier than making jam. And if you really want to live on the edge, you don’t even have to sterilize your jam jars. GASP. Just keep it in the fridge and no one has to know…

banana chocolate butter-6
That’s little Ollie’s hand. So cute. She ate this shot. banana chocolate butter-4

Chocolate Banana Butter


makes about 24 ounces

5 super ripe bananas, cut into chunks
8 tablespoons brown sugar
2 tablespoons water
8 ounces dark chocolate, broken into small pieces
3 tablespoons unsalted butter, softened
kosher salt to taste

In a large saucepan, combine the bananas, brown sugar and water over medium heat and bring to a boil. Mash up the bananas with a spatula and boil for about 2 minutes, stirring. Remove from heat and stir in the dark chocolate. Pour the banana chocolate mixture into a food processor and blend until completely smooth. Add the butter and blend again. Taste test – add a sprinkle of kosher salt and let it blend once more. Add more salt to your taste. I tend to like my sweets with a salty edge, so I probably added about a half teaspoon when it was all said and done. Pour into jars and store in the fridge. We have ours on bread. I’m not really sure what else you’d need in life than good bread and chocolate.

Triple Berry Pie

triple berry pie-1triple berry pie-2Last night I had an inspiring conversation with my friend, Ashley, where we spoke of our frustration with “keeping up appearances” with our photography, Facebook, Instagram, whatever it is that we somehow feel compelled to keep going in order to please our various audiences (mostly those audiences just include my oversized ego.)  I had said that this blog was suffering because while I have been cooking pretty much every meal over the last few months and some of those meals have been really good (like mozzarella stuffed rice balls rolled in panko and fried), I just haven’t felt like taking our meals’ pictures.  And then she said, “Do it because you enjoy the process…remember life before the internet?”

Remember life before the internet?

Well, I do, even though a lot of “kids these days” don’t. And what I remember is that we just…did things. All the time. And no one knew about it. No one saw it. We did crafts and went outside and ate burritos without ever documenting the occasion. And I seem to remember enjoying life before the ever present, all-encompassing documentation of all the things in life.  No one in their right mind would spend valuable money on film to take a picture of their cup of coffee…every day.

But I WOULD have liked to share recipes I really love. And I would’ve written the recipes down on cute little cards and maybe even take a photo and put it in a book or send it to a friend. That, I would have done and those are going to be the types of recipes I share on this blog.

Like this pie. I had a brief moment of modern-woe yesterday in which I wished I had made it prettier so that I could’ve blogged about it. Shoot. It’s delicious – who needs it to be picture perfect?! I went all hodgepodge with the top crust instead of doing something perfectionist and I put lots of heart cut outs because I have little girls. So there you go. And I was super proud of the results. Perfect juice in this pie – not runny, not dry! No soggy crust – flaky throughout and super buttery and slightly grainy (in a good way).  I used a white whole wheat and added a bit of extra sugar for the crust and it gave the entire thing this hearty cornmeal-esque effect. Loved it. It’s perfect. And I think there was something to using all frozen fruits. So I can’t vouch for this if you use all fresh, although I bet you’d just have to adjust bake time. Whatever you do, try it. And take a picture to share with your friends if you want, but remember to just enjoy the process.

Thanks, Ashley. 🙂

triple berry pie-3

Eleanor waiting patiently while I did something utterly confusing to her… triple berry pie-4 triple berry pie-5 triple berry pie-6 triple berry pie-7

Triple Berry Pie

3 1/2 cups mixed frozen berries – I used blueberries, blackberries and raspberries
1 cup sugar
3 TBS flour (I used white whole wheat)
1/2 tsp cinnamon

2 sticks of butter (8 oz) cut into tiny cubes and reeeeally cold
2 cups white whole wheat flour
1 tsp salt
2 TBS sugar

Deep dish pie plate (if you don’t have a deep dish, you could easily make two small pies with this recipe)

For the crust, combine one cup of flour in a large mixing bowl and add the salt. With the paddle attachment and your mixer on medium, add all the cubes of butter in little increments until each addition stops beating against the side of the bowl. After all your butter is incorporated, add the second cup of flour and the two tablespoons of sugar and mix on low until well incorporated. Add a splash of icy cold water until the dough comes together. If it feels a bit too wet, add in a little more flour. I think I used about an extra 1/8th cup. Divide your dough into two portions with one being slightly bigger than the other and shape into discs, wrap in plastic wrap and refrigerate for at least 30 minutes. Roll out the bigger portion and line your pie plate and let it sit in the fridge while you mix up your filling.

Preheat the oven to 400F. Mix the fruit, sugar, 3 tablespoons of flour and cinnamon in a big bowl and let it sit for a few minutes, then stir to incorporate again. Pour the filling into your pie crust, top with whatever fancy shapes, basket weave, self portraits you want, brush with a beaten egg and sprinkle with sugar.

Place on a rimmed baking sheet and put on the center rack of your oven. REDUCE the heat to 350 and bake for 1 – 1.5 hours until the crust is golden brown and the filling is bubbling. It took mine a full hour and a half because of the frozen fruit, but if you’re using fresh, you may only need 45 minutes until it bubbles.

triple berry pie-10

Blueberry Muffin Oatmeal Cookies with Lemon Cream Glaze

blueberry oatmeal cookies002
My girls love to waste oatmeal. They pick their favorite jams to stir into a base that I so lovingly prepare with vanilla bean paste and butter and cinnamon. They seem excited. Then they eat two bites and say they’re all done. And so I eat a lot of oatmeal. And I really get tired of wasting it. I actually despise wasting food. We are a family who eats every bit of our leftovers if I can help it. So naturally I had to find a solution for the oatmeal leftovers (besides cooking something different for breakfast, which is obvious, but every time I think, “Today is the day. Today they will eat oatmeal.”)

Enter: leftover oatmeal cookies! It had to be a thing, right?! It is! I did a quick search on how to use leftover cooked oatmeal and modified the recipe to include some awesome blueberry jam and iced them with a super tart lemon cream glaze. They were pretty delicious! They taste like mini muffin cookies and they were so easy. The variations are endless, too, which is what I like. Brown sugar cinnamon? Cherry chocolate? Lemon poppy seed? They’d all be awesome! For now, here’s the blueberry version! Enjoy!

blueberry oatmeal cookies001

Blueberry Muffin Oatmeal Cookies with Lemon Cream Glaze

makes about 3-4 dozen cookies

2 cups flour
1 tsp baking powder
1/4 tsp baking soda
1 tsp salt
1 tsp cinnamon
3/4 cup brown sugar
2/3 cup unsalted butter, softened
2 eggs
1 1/2 c. cooked oatmeal


First, make your oatmeal if you don’t truly have leftover oatmeal. I make one cup (which makes about 2 cups cooked) and I make mine with butter and two to three tablespoons of blueberry preserves. You could really flavor your oatmeal any way you like. The secret to good cookies is a little more flavor add-ins than you’d do for just eating oatmeal. Let the oatmeal cool to room temp before making the cookies.

Preheat the oven to 375F.

Sift the flour, baking powder and soda, salt and cinnamon together. Mix the brown sugar and butter together until creamy. Add the eggs, one at a time, alternating with the flour mixture.  Mix the cooked oatmeal until just combined.

Drop by the tablespoon full onto greased cookie sheets. Bake for 12-15 minutes until lightly browned. Let the cookies cool completely before adding the glaze.

Lemon Cream Glaze

2 cups powdered sugar
1/4 cup heavy cream
1 tablespoon vanilla bean paste
zest from 1 large lemon
juice from the same lemon
salt to taste (this is important)

Add the cream to your powdered sugar until it forms a nice paste. You may not use the entire quarter cup. Add the zest and lemon juice and vanilla and then if you think it needs to be thinner, add more cream. The consistency should be like thin pancake batter. Gradually add pinches of salt, stirring well after each pinch, tasting along the way until the flavors start to sing a little louder. Salt is something I add to all my icings and glazes and it makes such a difference!


Cherry Chocolate Chip Oatmeal Cookies

Cherry Chocolate Chip Oatmeal Cookies 2

Cherry Chocolate Chip Oatmeal Cookies
I’m sitting here after putting my “baby” down for a nap a few minutes ago (praying she’ll go longer than her usual 45 minutes) and Peg and Cat are singing loudly in the background as my very grown up four-year old gets out of taking a nap because I want her to be exhausted enough to go to sleep at nine instead of ten tonight.

I’m winging it this week – Matt is away on a company trip for three days and I’m a few hours in and feeling so, so tired. I have lots of coffee and a good sense of humor, so I’m sure I’ll be fine. But having help from 5:30-9 every night is vital to my sanity. There’s something about getting a fresh set of not-exhausted-yet hands to hold the babies or take them outside and swing them so I can cook dinner in peace. And he is kind of the best there is and the most helpful person on the planet, so it’s extra hard to be without him. So I’m going backwards with my usual routine – I’m cooking lunches this week and keeping dinners simple. Because the last thing I want to do after finally getting both girls in bed is to clean my dirty dishes. I plan on reading a book or doing half of a yoga routine. And while I don’t ever recommend eating your feelings because that’s a silly thing to say and they would probably taste like sauerkraut, anyway – just eat these cookies instead. All eating is emotional eating, after all.

It’s good to be back, friends 🙂

Cherry Chocolate Chip Oatmeal Cookies 3 Cherry Chocolate Chunk Oatmeal Cookies

Cherry Chocolate Chip Oatmeal Cookies

  • Servings: about 24 cookies
  • Print

1.5 cups packed brown sugar
1 cup softened, unsalted butter
1 teaspoon vanilla or vanilla bean paste
1 egg
2 cups rolled oats
1.5 cups all purpose flour
1 teaspoon baking soda
1/4 tsp salt
1 cup dark chocolate chips
1 cup chopped, dried cherriesHeat oven to 350°F. In large bowl, stir brown sugar and butter until blended. Stir in vanilla and egg until light and fluffy. Stir in oats, flour, baking soda and salt; stir in chocolate chips and cherries.
Onto ungreased cookie sheet, drop dough by rounded tablespoonfuls about 2 inches apart.
Bake 10 to 12 minutes or until golden brown. Cool slightly; remove from cookie sheet to wire rack.

Apple Pie Roses

apple pie roses
So I saw this really fun video circulating on Facebook a few weeks ago and like everyone else, it gave me the confidence to try it out myself! These little roses are so much fun to make and they are so beautiful! I thought they’d make an excellent special occasion type dessert. I did the recipe exactly like the video said and I was pleased with the process but not really the results. I mean, they’re okay, but they are definitely prettier than they are tasty. And I honestly think that’s the point. It was a super fun and easy “cooking craft” to do with Olive and so I’ll give it points for that because not every baking recipe is truly kid-accessible. But I decided to alter the recipe to be as delicious as it is beautiful. Here’s a couple problems the original recipe has:

1. The bake time is long and the thin apple slices burn on top, so we cover them during part of baking.
2.They stick like dadgum superglue to the muffin pan and get ripped apart when you take them out, therefore…
3. I fixed that by removing them from the pan while they were still super hot, but…
4. There’s the problem with eating super-baked tiny shreds of apple peel. It gives it that rose look, however…
5. The apple peel feels like tough strings in your mouth. Not really two adjectives you want for your baked goods.
6. The apples snap in half from the original recipe, so I fixed that by soaking them in hot lemon water instead of cold.
7. They just fall flat, taste-wise, so I added a bit of scrumptiousness into the filling along with the apple slices by adding cinnamon roll type flavors.
8. Also, I’m a pie crust junkie, so I switched to pie crust instead of puff pastry and it was indeed more delicious, but…
9. The falling apartness was magnified with the pie crust, so you fix that once and for all by…
10. Using greased muffin liners to bake these babies in. Voila. Most of the problems solved.

So my suggestion for the final round of 100% deliciousness is to peel the apples. How to fix the “but they don’t look like a rose, anymore!” problem? Add a couple drops of red food coloring to the warm water while the apples soak, OR pomegranate or cranberry juice and BOOM! Red roses. I didn’t do this for my final pics because everyone in my house was getting rather sick of eating these tiny apple roses, BUT I did color some apple slices in pomegranate juice and they were BEAUTIFUL. So I’ll try them like that again and make a special Christmas rose wreath edition of this recipe for those who care. Which I think might be 5 people, total. In any case, I present to you:
apple roses Apple Rose

Apple Pie Roses

Ingredients:
1 box frozen pie crust, softened in the fridge (Yeah, yeah, I always make pie crust, but these don’t need that extra effort. It’s effort enough as it is and the store-bought crust tasted just great.)
1 apple, peeled (or not – up to you), and sliced into VERY THIN half moons
Hot water and the juice from 1/2 a lemon

For the filling:
1/4 cup dark brown sugar
1/8 tsp allspice
1/8 tsp nutmeg
1 tsp cinnamon
1 tsp vanilla
squeeze of the other half of the lemon
2 TBS melted butter
1/2 cup chopped golden raisins, softened for a few minutes in boiling water
melted butter for brushing the tops

Cut and soak your apple slices in boiling water and lemon while you do everything else. I let mine soak for nearly an hour but I don’t think that’s necessary.

Preheat your oven to 375F. Combine the filling ingredients in a bowl and set aside. Roll out your pie crust and cut into 2.5″ x 6″ strips. Mine were NOT perfectly cut. It doesn’t matter. Spoon about a teaspoon of the filling on the strips of dough and spread it around. Drain and layer the apple slices, slightly overlapping, along the top half of the dough. Fold the other half up over the apples and pinch at the ends to secure, and then roll up into a rose. Refer to the lovely video if you need help!

Place the roses into greased muffin cups (this is important). Brush the tops of the roses with melted butter and sprinkle with sugar. Bake, covered with foil, for 30 minutes. Then uncover and bake for another 20-30 minutes, watching to make sure the edges don’t burn.
IMG_7289

Peanut Butter and Jelly Thumbprint Cookies

Peanut Butter and Jelly Thumbprint Cookies3
Hello there! This is a delightful little cookie that takes no time at all to make and is so much fun for little helpers! I had this idea a while back whenever I saw powdered peanut butter in the grocery store and have wanted to try it out. It took a little tweaking, but I loved the texture of the cookie itself. One word of advice: don’t use jelly! I know, I know, it’s a riff off of peanut butter jelly sandwiches, but use something a little thicker like a jam or preserve. I used grape jelly because it’s iconic and it really ran out of the cookies more than I would have liked. This did not stop them from being utterly addicting; it just kept them from looking super pretty.

Thumbprint cookies have always been a favorite of mine and this version is so fun and really makes you feel like a kid again. With Thanksgiving and Christmas around the corner, I think this would be a great recipe to have for a cookie exchange! Drizzle it with a bit of white or dark chocolate to make it even more fancy! Enjoy!

Peanut Butter and Jelly Thumbprint Cookies2

Peanut Butter and Jelly Thumbprint Cookies


makes about 2 dozen

1 cup salted butter, softened
½ cup confectioners’ (powdered) sugar, plus ¼ cup more for dusting
2 teaspoons pure vanilla extract
¼ tsp salt
1 1/4 cups all purpose flour
1 cup peanut butter powder

about 1/2 cup fruit preserves or jam

Preheat oven to 325°F. Line a baking sheet with parchment paper.

In the bowl of a stand mixer fitted with paddle attachment, blend butter and sugar until fluffy and light, 2 minutes. Add vanilla and salt, scraping down bowl as needed. Pick up the baby, who has been crying at your knee for the past ten minutes and hold her while you try to measure out peanut butter powder. Let her sneeze into it. Do everything with one arm tied behind your back. Switch to low and gently mix in flour and peanut butter powder, just until combined.

Roll tablespoonfuls of dough into 1-inch balls. Create some interest by making some pea-sized and some into the shape of a carrot. Pretend to eat them, but then actually do. Place dough balls on parchment lined baking sheets. Press down the center of each ball with your thumb, making a slight depression, or a hole clean through to where you can see the bottom of the baking sheet.

Fill cookie centers with a teaspoonful of preserves and be sure to lick the spoon between each cookie. Makes it better. Bake 12-15 minutes or until golden brown and puffy, but take care not to over-bake. Let cool a few minutes on baking sheet, then transfer to finish cooling on wire rack.

When cookies are completely cooled, eat seven or eight with a glass of milk while singing every song you know in your best cat voice. Cookies can be kept in airtight container at room temp for a few days. Emphasis on “can.”

*recipe adapted from Chew Out Loud

Peanut Butter and Jelly Thumbprint Cookies

Apple Crisp: Food Memories

Fall Apple Crisp
I’ve done a few posts on food memories from my own family and ones from friends and I love those posts more than any other. They are more than just recipes – they are links to the past and to feelings that can’t be accessed any other way. Food is such a tie to our heritage, to our families and to the love we felt when we first experienced those memorable dishes. I never tweak these recipes because it’s my job to post about and honor the memory, not the recipe itself. My dear friend, Becky, had this picture of her grandmother’s hand written recipe on her Instagram account and when I saw it, I knew I had to make it.

Last year, Becky invited me over to look through her grandmother’s things before they had an estate sale in the wake of her passing. I had the honor of taking home a patchwork quilt she had made. Not only do my girls play on it outside nearly every day, but I used it as a backdrop for the photos I took of the final dish. I hope it makes this post that much more meaningful for my friend.

The recipe itself is completely delicious and comforting and full of the essence of the fall season! I love that it calls for “oleo” – a sure sign the baker lived through the 50s 🙂 So this was the only tweak I made by using butter instead. I also topped the apple crisp with cinnamon horchata ice cream because I was all out of whipping cream. I’m sure if Nana could have tasted the ice cream, she wouldn’t mind the substitution.

recipe
I asked Becky to share a few thoughts about her Nana and this recipe. She also provided this amazing picture and it makes me wish I’d known her. She looked so joyful.

12087400_10207282108429358_1362057034_n
My Nana (Oma Lee) was the 5th of 6 kids born in 1926 to a generous, kind-hearted family. They took in the homeless, cared for the sick, fed the hungry. They also laughed more than most.

For a couple of years while I was in college, I got to live with her and got to know her on a deeper level. She was a counselor to me, a friend, comic relief, an adult when I acted like a child. We watched Miss America pageants and Hallmark movies together and ate dilly bars from DQ.

Nana shared an apple “pie” recipe with me during that time, and it’s the only apple pie I’ve ever made, because its kinda fool proof (I need that) and darn tasty.

I made it for her once and she went on and on about how delicious it was. When I reminded her it was one of her recipes, she laughed for the longest time then said in a straight voice, “well that’s why it’s so good”. Man, I miss her.

Apple Crisp 2

Apple Crisp

6 cups peeled, sliced apples
1/3 cup sugar
1 teaspoon cinnamon
1/2 teaspoon salt
2 tablespoons melted butter
For the streusel topping:
3/4 cup sugar
1/2 cup flour
1/3 cup butter

Whipped topping or ice cream to garnish

Preheat the oven to 375F. Mix together apples, sugar, cinnamon, salt and melted butter.  Place in a greased 8″ square baking dish. Set aside.

Combine the 3/4 cup sugar and flour and then cut in the butter until the texture is fine crumbles. Sprinkle over the apples. Bake for about 45 minutes, or until apples are tender*. Serve warm with dollops of whipped topping (or ice cream!)

*Becky advised that I brown the apple crisp for a few minutes under the broiler because it doesn’t really get brown during baking.

Dark Chocolate Mousse Parfaits with Cherry Almond Syrup

Chocolate Cherry Almond Parfaits
Last week I bought lots and lots of cherries. Whenever I see that they are $2 pound, I get a little crazy. Olive loves them and will stand at the kitchen sink eating them until…well I don’t know how long she’d stand there because I’ve always intervened.  I should wait and see how long it goes on next time just for fun.

But the new wears off (slightly) and I need to use up the forgotten ones at the bottom of the colander for something.  Enter: cherry almond syrup. I layered dark chocolate mousse with the fresh made, chunky cherry almond syrup and it was so perfect. I also used the syrup on sourdough waffles and I’m still thinking about those perfect, crispy little things. It’s fun to make a “loose jam” like this syrup out of any fruit you find yourself needing to use up. It’s about to be apricot season and I can’t wait to make this with those! Or plums! Ah, stone-fruits.  You have my heart.  Dark Chocolate Cherry Parfaits

Cherry Almond Syrup

I used this recipe for the chocolate mousse and used 80% Lindt instead of semi-sweet chips.  Totally intense chocolate, but so perfect (for me.)

2 cups pitted cherries, chopped
1/4 cup brown sugar
2 TBS water
1/8th teaspoon almond extract

In a medium saucepan, bring the cherries, sugar and water to a boil and then reduce to a simmer and let it cook for about 2 minutes.  Remove from heat and stir in the almond extract.  Serve on top of ice cream, on waffles, pancakes, or in this tasty little layered parfait with dark chocolate mousse like I did.

Dark Chocolate Mousse with Cherry Almond Syrup

Homemade Baby Food – but you’ll sneak a few tastes, too!

Parsnip and Golden Beets
I’ve worked this past week on compiling a baby food post for anyone seeking out ideas for making baby food at home. I don’t make baby food at home because I’m a store-bought skeptic. In fact, the last time I was at Target and looked at all the baby food options, I was a little bit blown away. It’s completely dizzying how much variety there is in stores these days. So I’m totally for buying baby food. But at .99 cents a pouch, I’ve still got the price beat by making it at home. With a two dollar butternut squash, I can make almost a dozen jars! I also love cooking and tasting and seasoning food for my girls. I find myself sneaking a few bites of their food and I love knowing exactly what goes into the stuff they eat.

Making baby food gets me into a zen-like state in the kitchen as well. I’m not exactly sure why, but I love the process. I love choosing ingredients, maybe even ingredients I don’t use very often, and making something tasty for my babies. I also love the complete blank slate that a six month old baby is in that high chair. They have never tried a single food and I get to show them everything I’ve ever tasted! Hey baby, this is guacamole – you can thank me later.

In this post I have a couple of techniques for you to apply to literally any fruit or vegetable you can find in the freezer aisle. Then I have a couple recipes from my favorite baby food book, Tyler Florence’s, Start Fresh, and then I have a couple original recipes based on what sounded good to me and what was on sale at the grocery store. You’ll soon see that I don’t exactly follow the “rules” of baby-feeding. I find the rules restrictive, paranoid and somewhat unnecessary. You do not need to only introduce your baby to one food a week.  If they have a reaction, it will most likely occur within 24 hours.  It also makes no sense to me to start babies off on something that could be mistaken for wet cardboard in flavor and texture (rice cereal – have you tasted that stuff?!)  It’s no wonder kids are expected to eat “kid food” when they are started off on bland carbs and not challenged very much in the variety category thereafter. I started both my babies off with fruits and vegetables and have alternated and given them something new nearly every day after we hit the solids stage.  If you get in the habit of changing up what your baby eats from the very beginning, then variety will become the norm in your house and they’ll never know that most other kids only eat brown food.  That’s another rant for another day.

Here’s some recipes for you new moms out there – send me any ideas you have, too!  I love new ideas that help me get out of my cooking ruts!

Apricots and Maple

Roasted Maple Apricots with Mint
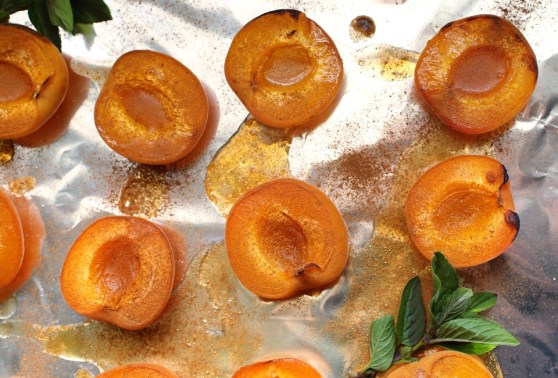
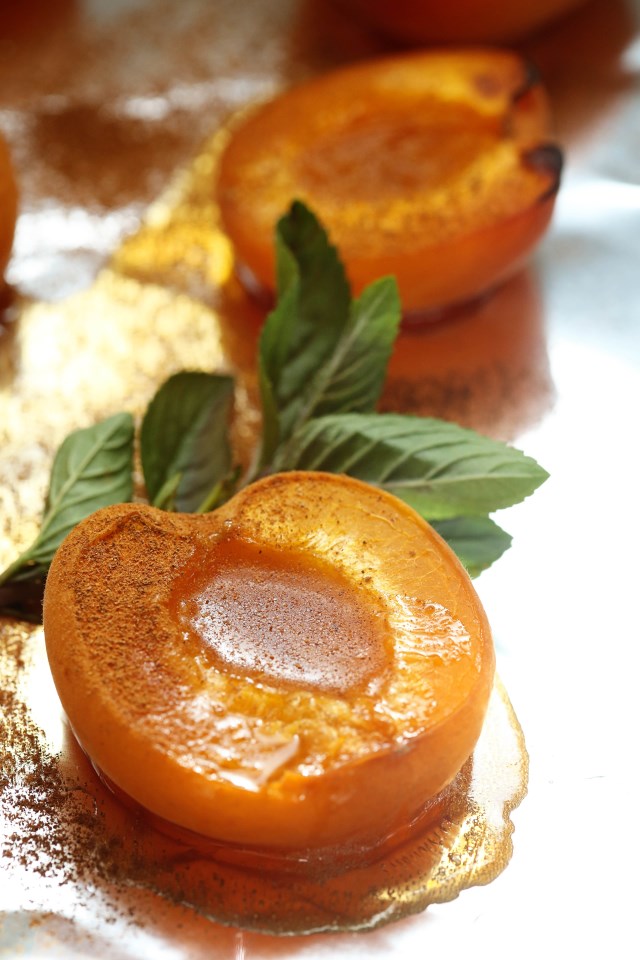
Roasted Apricots with Maple Syrup and Mint

8 apricots, split in half
3-4 TBS pure maple syrup (avoid honey until a year old!)
2 sprigs mint (I have a fun chocolate mint plant in my backyard that I used)

Preheat your oven to 350F. Arrange the split apricots on a foil lined baking sheet and drizzle with maple syrup.  Sprinkle with cinnamon (if you wish) and roast for 20 minutes.  Transfer to a blender or food processor and blend until smooth.  Add the mint leaves and pulse till combined.  Thin out with water if it’s too chunky.  I like to freeze baby food in muffin tins or ice cube trays and then once frozen, I store the cubes in a freezer bag for easy access.  I just label the bags with what’s inside and when I made it!

Avocado Pineapple and Yogurt

Banana Avocado Pineapple Yogurt
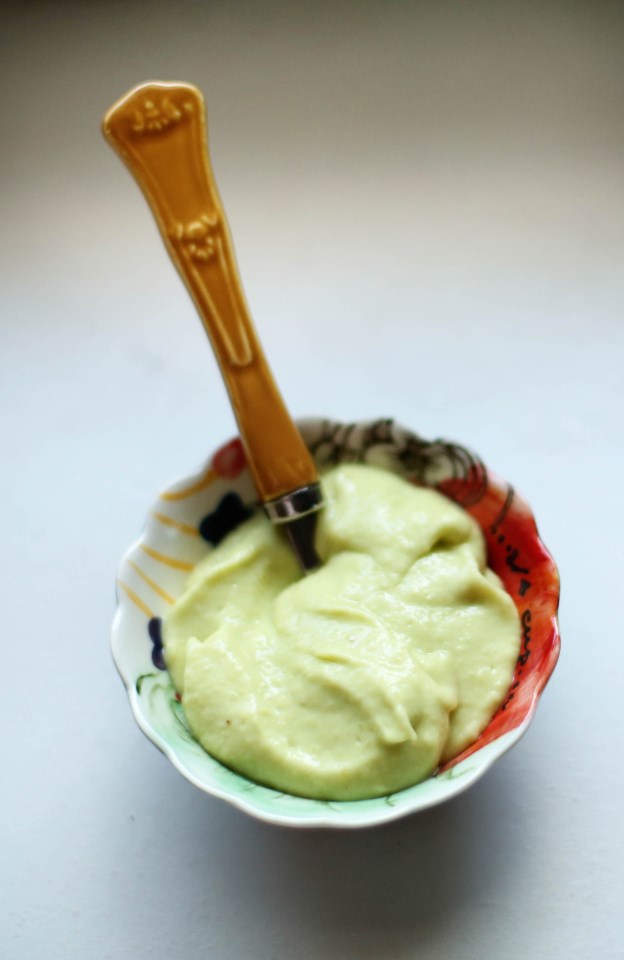
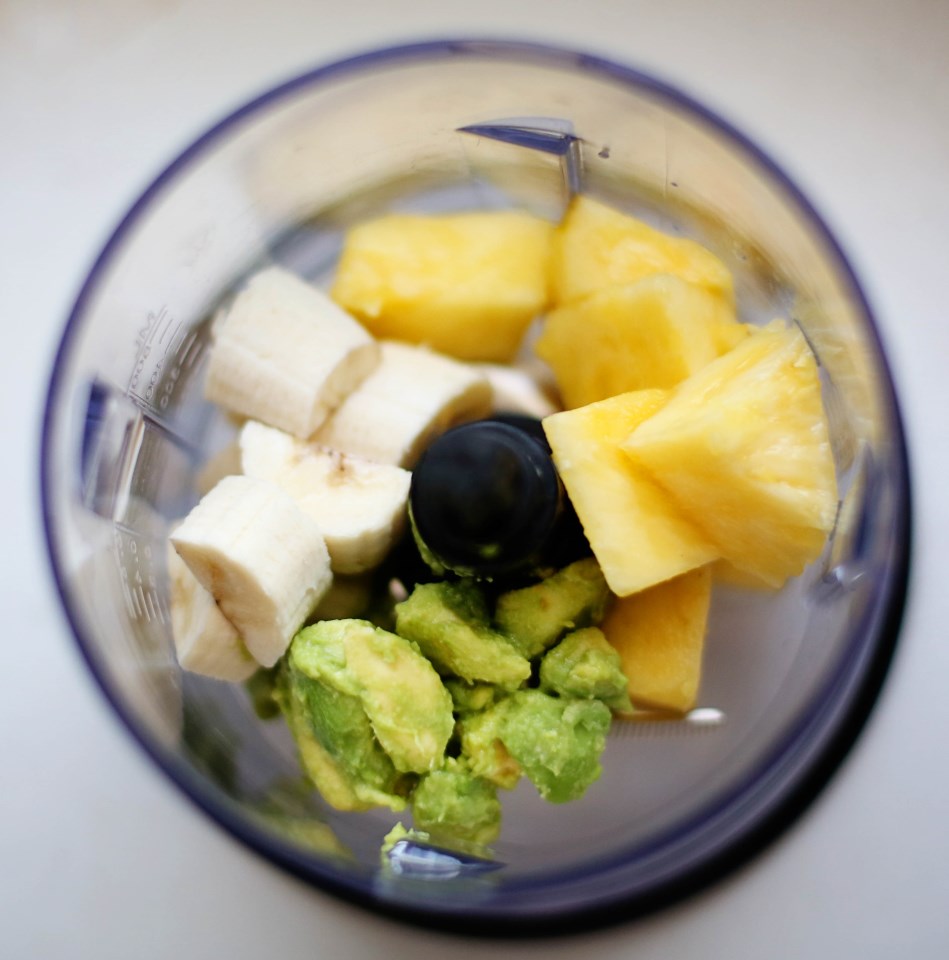
Banana Avocado and Pineapple Yogurt*

1/2 avocado
1 small banana (or half a large)
1 cup fresh pineapple chunks
1/4 cup whole fat, plain yogurt

Combine all ingredients in a food processor or blender and blend until smooth.  This doesn’t keep well the next day (it discolors – still tastes fine, but it turns a weird gray from the avocado) so best to keep the portions small.  I cut this recipe in half and Ellie ate it over the course of two days.

*from Start Fresh

Carrot Apple and Mango Puree
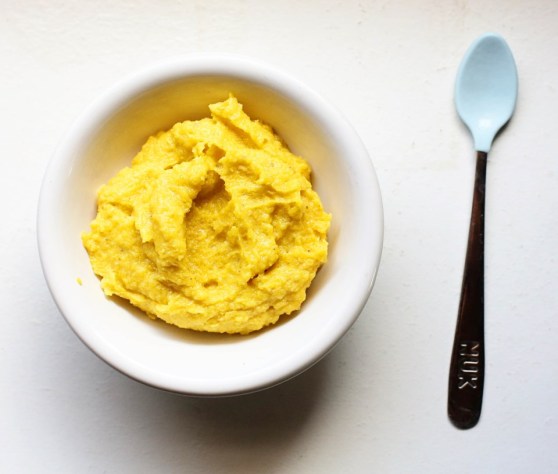
Carrot, Mango and Apple Puree

I made this and loved the flavors!  I think it needs longer than 25 minutes roasting – maybe because my oven is on the cool side.  But I think roasting mango alongside carrots doesn’t quite work because carrots and apple take way longer than a mango to roast and then your mango loses a lot of its water.  So, in my opinion, I would roast the carrots and apples together and then add in the mango at the end, or just when you blend.  Make sure you line your pan with foil.  The sugars in the mango will glue themselves to your pan if you don’t! – from Start Fresh

Frozen Peach
Frozen Fruit Baby Food

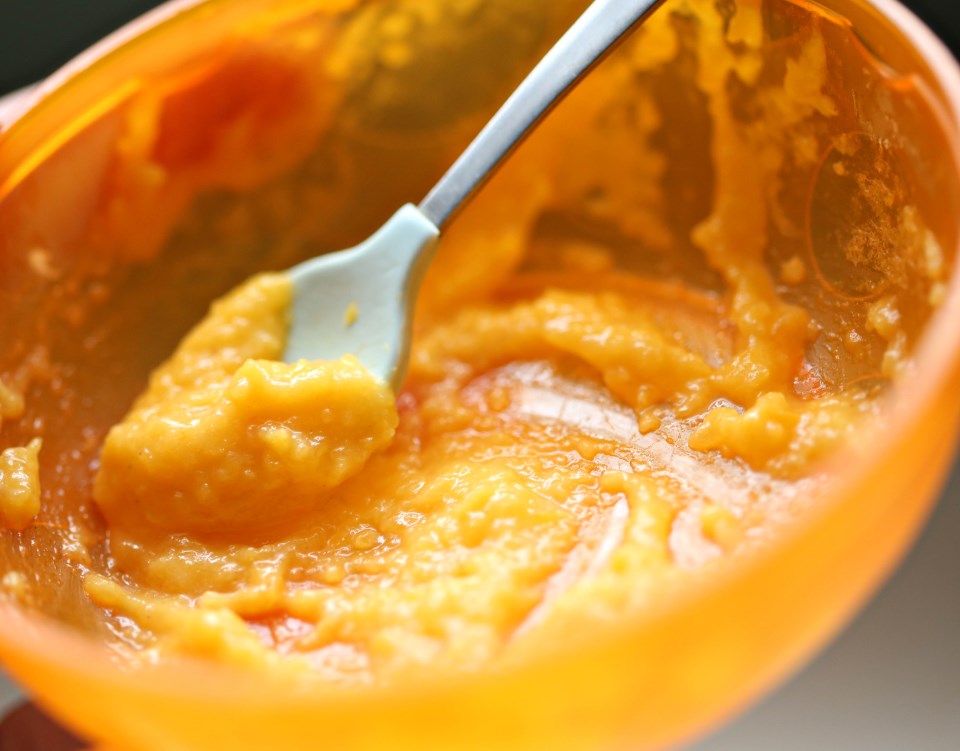
I love making baby food from frozen fruits and vegetables! There’s always an organic option if that’s important to you, and fruits and veggies are often flash frozen at the peak of freshness.  The only fruit I’ve encountered that isn’t so great frozen is mango. Everything else seems really ripe and awesome.  Here’s what I do:

1 bag frozen fruit – 8 oz (in the pic above it was a bag of peaches)
1 TBS unsalted butter
1 tsp vanilla or cinnamon or any spice you want to experiment with!

In a large saucepan, add the frozen fruit and butter and a splash of water.  Cook over medium heat until it starts to bubble and the fruit thaws.  Stir in your vanilla or cinnamon and let it simmer for a bit longer, smashing up chunks of the fruit.  Transfer to a blender and puree until smooth!

Frozen Spinach
Frozen Vegetable Baby Food

8 oz frozen vegetables – in the pic above, I used frozen spinach
2 TBS butter
a pinch of salt
a splash (1/4 cup) of water)

In a large pan, add the vegetables and a splash of water and bring to a simmer. If you’re using spinach, you won’t need that water. Most other veggies could use a little moisture, and if you’re using peas, add enough to where they boil in the water because you’ll just strain the peas out when you puree and add water to thin out the consistency. Add the butter and salt and stir until melted and then blend until smooth.

Parsnip and Golden Beets
Parsnip and Golden Beet Mash

3 parsnips, peeled and chopped
4 small golden beets, peeled and chopped
2 TBS olive oil
1 TBS butter
1/2 cup low sodium chicken or vegetable stock

Heat your oven to 375 and toss the beets and parsnips with oil and roast until softened and slightly browned, about 25 minutes.  Transfer to a food processor and add a tablespoon of butter and the chicken or vegetable stock and process until smooth.  You may need to add a bit more stock to get a smoother texture, but if you’re baby can handle chunky stuff, go for it.  This has a FABULOUS flavor.  There’s something magical about parsnips and butter, so I definitely don’t skip out on adding the butter.  Fat is good for baby’s brain development.  Don’t hold back! This is the puree you’ll want to eat, too.  It’d be a great substitute for mashed potatoes at a family dinner!

There you are, my friends.  I hope some of these recipes help you explore and try new things in your own kitchen!  Most all of these recipes can be altered to fit any combination of ingredients, so be creative! Add fresh herbs and onion or experiment with various seasonings like curry.  Have fun! That’s the whole point!

Turkey Sliders

Turkey Burgers with Cucumber Radish
We’ve been plugging away in the Palmer house, keeping ourselves alive and enjoying our lady babies. It’s shocking how little time I have to do extra things like take pictures of the food we eat so that I can write about it. I’m doing good most days to just get things on the table before someone needs a nap or a diaper change or to be held, all of which are pretty difficult while cooking or taking photographs. I say this to excuse myself for not writing for a month and to tell you that not everything is perfect all the time and I can’t and am not even trying to keep all the balls in the air that I used to. Looking back, having just one kid was a dadgum BREEZE. In fact, that’s when I started this blog – when Olive was just seven months old! My days are filled with super baby joy and crazy games of pretend and doing lots of laundry (Eleanor is a super spitter-upper) and cooking and reading endless Olivia books and knitting and sometimes working on my “real” job of editing photographs. It’s a whirlwind and I know that it will slow down soon and these babies won’t need me every five minutes.  But in the meantime, the meals coming out of here are going to be pretty basic, pretty tasty and pretty easy.

If you are in the stage of life where a little person is needing YOU every five minutes, you’ll appreciate this recipe.  It was mega easy. Super tasty. Didn’t miss the beef, AND it is covered in SriRancha.  That’s right, Sriracha sauce and ranch dressing.  Sriracha mixed with most things is wonderful, but mayo or ranch is especially awesome.  I topped them with super crunchy cucumber slices and icicle radish (hadn’t ever tried those before – they were a fun supermarket find and we loved them!) Try these tonight – you won’t be sorry!

Turkey Burgers

Turkey Sliders

1 lb ground turkey
1 shallot, diced (about 1/4 cup – you can use any kind of onion)
1 garlic clove, minced
1 tsp salt
1/2 tsp pepper
1/2 cup shredded cheddar cheese
Slider hamburger buns

Toppings:
1/2 a cucumber, sliced thin
Any kind of radish, sliced
Slices of American cheese (although you could use any, but I like the traditional taste of American and how it melts)
Sriracha sauce and Ranch dressing, mixed.  Use a ratio of 3 parts Ranch to one part Sriracha

In a large bowl, combine the turkey, shallot, garlic, salt, pepper and cheese until well mixed.  Form into about 1/4 cup size patties and cook in a skillet until a thermometer inserted reads at least 160F. If you don’t have an instant read thermometer, you should invest in one, and if you don’t want to invest in one, I would guess I cooked these for about 10 minutes per side on a medium-level heated cast iron skillet.

Turn on your oven’s broiler to high and place patties on a serving plate and top with slices of cheese (I used a quarter of a slice on each) and melt under the broiler.  Serve with generous amounts of SriRancha, cucumber and radish.