Chocolate Banana Butter

banana chocolate butter-1 banana chocolate butter-3We almost waste more bananas in this house than I can count. The girls always swear they want a WHOLE ONE ALL BY MYSELF! But then they each eat two bites and are done. I typically use the leftover bananas for muffins or oatmeal or smoothies, but I wanted to do something a bit more exciting this time because if you don’t shake up your routine from time to time, despair sets in.

I found a recipe for banana jam with just a tish bit of chocolate and it sounded okay but I didn’t really want banana jam. I wanted banana with lots of chocolate and a softened butter consistency. So I just did my own thang.  Plus, it’s easier than making jam. And if you really want to live on the edge, you don’t even have to sterilize your jam jars. GASP. Just keep it in the fridge and no one has to know…

banana chocolate butter-6
That’s little Ollie’s hand. So cute. She ate this shot. banana chocolate butter-4

Chocolate Banana Butter


makes about 24 ounces

5 super ripe bananas, cut into chunks
8 tablespoons brown sugar
2 tablespoons water
8 ounces dark chocolate, broken into small pieces
3 tablespoons unsalted butter, softened
kosher salt to taste

In a large saucepan, combine the bananas, brown sugar and water over medium heat and bring to a boil. Mash up the bananas with a spatula and boil for about 2 minutes, stirring. Remove from heat and stir in the dark chocolate. Pour the banana chocolate mixture into a food processor and blend until completely smooth. Add the butter and blend again. Taste test – add a sprinkle of kosher salt and let it blend once more. Add more salt to your taste. I tend to like my sweets with a salty edge, so I probably added about a half teaspoon when it was all said and done. Pour into jars and store in the fridge. We have ours on bread. I’m not really sure what else you’d need in life than good bread and chocolate.

Turkey Sliders

Turkey Burgers with Cucumber Radish
We’ve been plugging away in the Palmer house, keeping ourselves alive and enjoying our lady babies. It’s shocking how little time I have to do extra things like take pictures of the food we eat so that I can write about it. I’m doing good most days to just get things on the table before someone needs a nap or a diaper change or to be held, all of which are pretty difficult while cooking or taking photographs. I say this to excuse myself for not writing for a month and to tell you that not everything is perfect all the time and I can’t and am not even trying to keep all the balls in the air that I used to. Looking back, having just one kid was a dadgum BREEZE. In fact, that’s when I started this blog – when Olive was just seven months old! My days are filled with super baby joy and crazy games of pretend and doing lots of laundry (Eleanor is a super spitter-upper) and cooking and reading endless Olivia books and knitting and sometimes working on my “real” job of editing photographs. It’s a whirlwind and I know that it will slow down soon and these babies won’t need me every five minutes.  But in the meantime, the meals coming out of here are going to be pretty basic, pretty tasty and pretty easy.

If you are in the stage of life where a little person is needing YOU every five minutes, you’ll appreciate this recipe.  It was mega easy. Super tasty. Didn’t miss the beef, AND it is covered in SriRancha.  That’s right, Sriracha sauce and ranch dressing.  Sriracha mixed with most things is wonderful, but mayo or ranch is especially awesome.  I topped them with super crunchy cucumber slices and icicle radish (hadn’t ever tried those before – they were a fun supermarket find and we loved them!) Try these tonight – you won’t be sorry!

Turkey Burgers

Turkey Sliders

1 lb ground turkey
1 shallot, diced (about 1/4 cup – you can use any kind of onion)
1 garlic clove, minced
1 tsp salt
1/2 tsp pepper
1/2 cup shredded cheddar cheese
Slider hamburger buns

Toppings:
1/2 a cucumber, sliced thin
Any kind of radish, sliced
Slices of American cheese (although you could use any, but I like the traditional taste of American and how it melts)
Sriracha sauce and Ranch dressing, mixed.  Use a ratio of 3 parts Ranch to one part Sriracha

In a large bowl, combine the turkey, shallot, garlic, salt, pepper and cheese until well mixed.  Form into about 1/4 cup size patties and cook in a skillet until a thermometer inserted reads at least 160F. If you don’t have an instant read thermometer, you should invest in one, and if you don’t want to invest in one, I would guess I cooked these for about 10 minutes per side on a medium-level heated cast iron skillet.

Turn on your oven’s broiler to high and place patties on a serving plate and top with slices of cheese (I used a quarter of a slice on each) and melt under the broiler.  Serve with generous amounts of SriRancha, cucumber and radish.


Classic Bruschetta

bruschetta
It’s nice to know an Italian.  They have the goods on traditional recipes and the right way to process a bumper crop of tomatoes.  I have such a friend, Jennifer, and this year, fortune smiled on her plants and she started to get WAY more than she could use and process on her own.  So she asked if I wanted some. (huzzah)  Since that same fortune didn’t happen to fall on my plants this year and my crop looked more like a handful of marbles, I enthusiastically said YES (plus, what crazy person turns down garden tomatoes?!)  I was so happy we could finally make our homemade BLTs before the last whiff of summer is completely gone.  I made a wonderful, basic tomato sauce (recipe coming soon) and canned it for the winter and with the rest of the tomatoes she brought, I saved two for our BLTs and the rest I asked her for her favorite bruschetta recipe.

She told me that there wasn’t really a recipe, but that this was how her granddad always made it and those kind of recipes are my favorite, anyway.  In the spirit of handing down family recipes, I’m not going to list quantities. I’ll basically give it to you like she gave it to me – the taste and adjust method!  If you have any tomatoes still coming off the vine (as many of us in this region do) then I hope you enjoy this recipe! If your crop is done, then look for the ripest plum tomatoes you can find in the grocery store.  We served this with Matt’s plain country bread, and honestly, it was the best meal I’d had in weeks.  Sometimes, nothing beats pure and simple.  Thank you, Jen, for sharing your tomatoes and your recipe with us – we benefited greatly from both!

bruschetta 3

Classic Bruschetta
makes a good amount

Dice up a few, ripe, plum tomatoes.  Add in minced garlic, a nice pour of good olive oil and add in a handful of shredded fresh basil.  Mix to combine and then add in a generous grating of fresh Parmesan cheese and adjust the seasoning to your liking with salt and garlic powder.  Serve on toasted baguette or just about anywhere you can think to use it!

Deviled Egg Burgers

deviled egg burgers
Here’s a little joyous addition to your Labor Day grilling if you want something new!  Our dear friend, Shannon, who has been with us through all kinds of culinary adventures over the past 10 years as our most enthusiastic taste-tester, came up with this awesome idea.  We were sitting at our favorite restaurant in Lubbock, Crafthouse Gastropub, enjoying one of their creative appetizers, the fried deviled eggs, when the idea came to her.  This dish is pure genius: hard boiled eggs, fry the whites in a crunchy batter and then serve the little fried egg halves with deviled egg spread so you can put as much as you want on your egg.  So crunchy and amazing!  As we were enjoying the dish, Shannon said, “This would be so good on a burger.”  And we all sat in silence for a second and let it sink in that deviled egg filling would indeed, be the best burger spread, ever.

And it is.

Deviled Egg Burger Spread
Imagine the goodness of mayo, mustard, pickle, the tang of vinegar and the creaminess of the ever-popular-fried-egg-on-a-burger-trend, all combined into one spread for your burger.  It TOTALLY works.  So, I just whipped up a very traditional deviled egg mix and added the basics and it has been my favorite burger of the summer!  If you want to try it, a dozen eggs yields enough for about 6 burgers as a spread.  So cut it in half if you don’t have all deviled-egg enthusiasts at your party and see how you like it!  Thanks, Shannon, for being our partner in culinary crime 🙂  We love you!

Deviled Egg Burgers 2
Deviled Egg Spread for Burgers

makes enough for 6 burgers

1 dozen hard boiled egg yolks
1 tsp paprika
2 tablespoons mayo
2 tablespoons dijon mustard
1 tablespoon sour relish
1 teaspoon white wine vinegar (or any vinegar, really)
salt and pepper to taste

Hard boil the eggs by bringing all dozen up to a boil (start them in cool water) and once it reaches a boil, remove from heat, cover, and let sit for 12 minutes.  Drain, rinse in cold water and peel.  The glory of this dish is that you don’t have to keep those fussy whites in tact.  If they fall apart, they fall apart.  If you don’t want to waste the whites, I’m sure you could crumble them up and incorporate them in this recipe as an egg-salad kinda thing.  Do what you wish.

In a large bowl, add all the yolks and the other ingredients and mash well with a potato masher or whisk until smooth.  Adjust with extra mayo or mustard as you wish – really, I eyeballed this mixture, so I may have had slightly more of something, but these approximations are fairly close to what I did.  Spread on burgers, sandwiches, etc, and enjoy!


Roasted Green Chile and Tomato Tart

Summer Tomato and Roasted Green Chile Tart
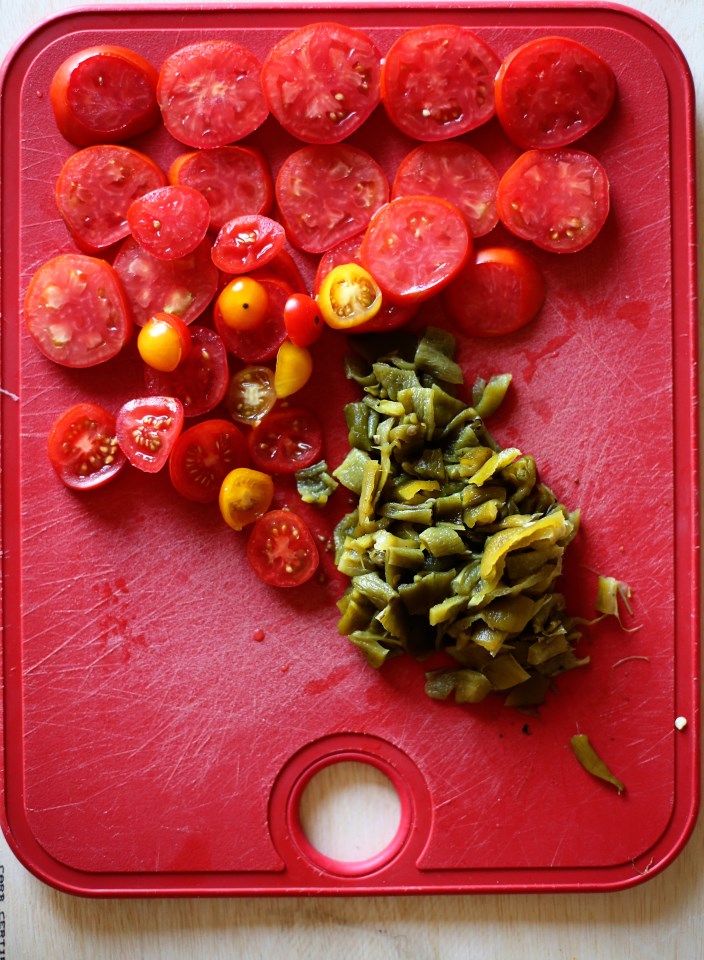
I am not a farmer.  I’m pretty crap at knowing why things die, what I’m doing wrong, why half my plant is brown and the other half is green, etc.  Last year, I all but neglected my tomatoes and they became like sea monsters in size and yielded dozens and dozens (if not with a little end-rot) of tomatoes.  This year, I switched where they were planted and am taking better care of them and they have all tapped out at about 4 feet tall, haven’t continued to grow in height in the last month and we’ve gotten maybe four, medium-sized tomatoes and a handful of cherry tomatoes, and all of them are split down the sides (too much watering).  Sigh.  It’s hard to win at tomatoes.  I’m sure some of you feel my pain.  I want that innate sense of what these plants need, but I am afraid I’ve learned that this instinct is no instinct at all, but trial and error.

The tomatoes pictured were, indeed, from our yard.  And they were, as all backyard tomatoes are, outstanding in flavor, despite their faults.  I will never know how a tomato that claims to be “field grown” at the store can STILL taste like NOTHING, and a tomato you go out and pick from your yard tastes like concentrated tomato paste, x 1,000,000,000.  Maybe it’s what Alton Brown said last week, that a tomato put in the fridge, even for a short time, loses a chemical designed especially for taste.  Whatever the reason, tasting just ONE perfect summer tomato will leave you satisfied for the rest of the year.  I don’t think I can be that enthusiastic about any other produce.  Especially since I’m such a crappy farmer.

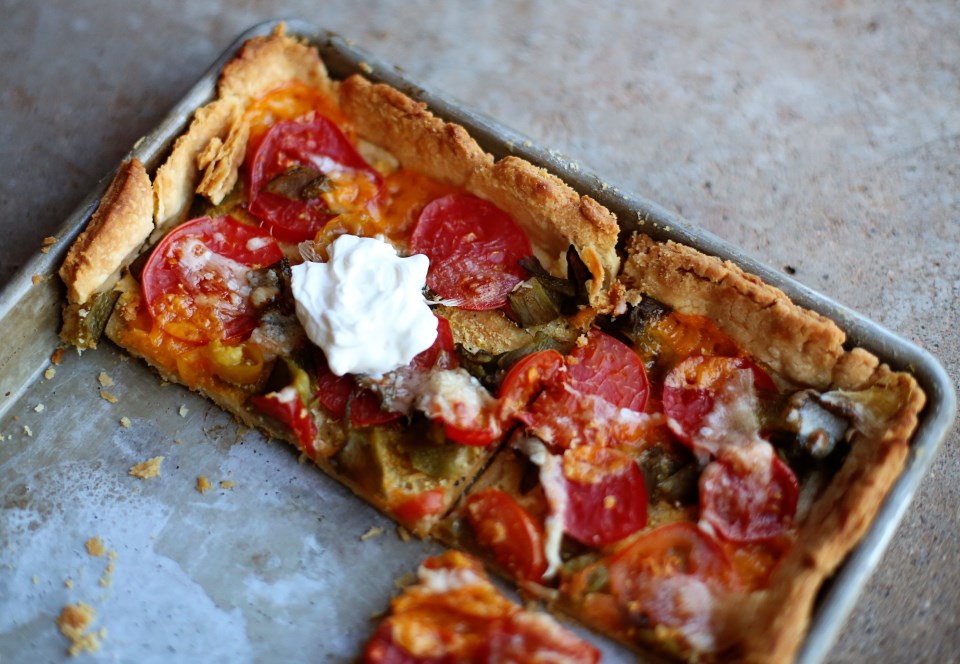
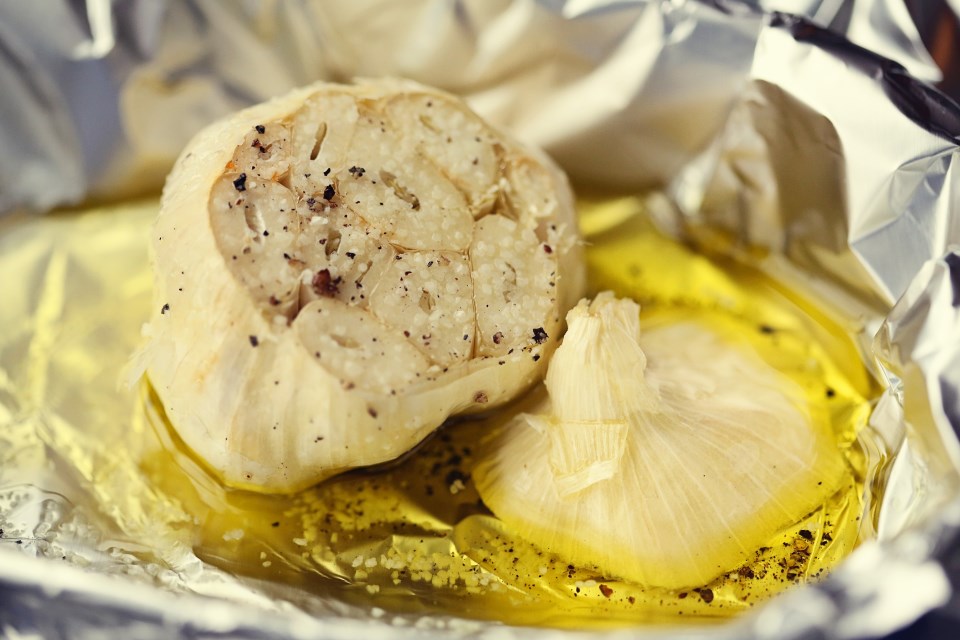
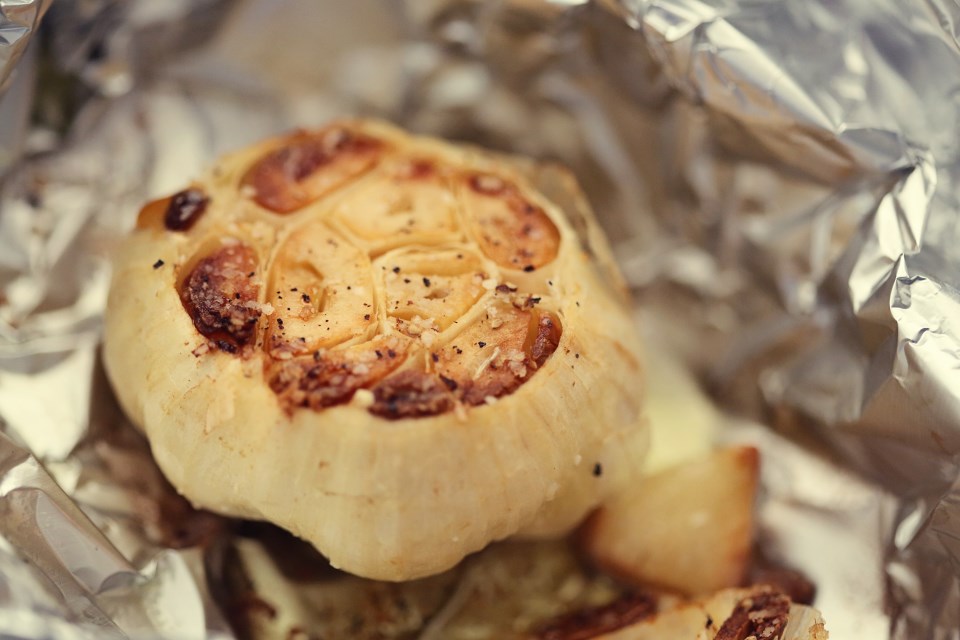
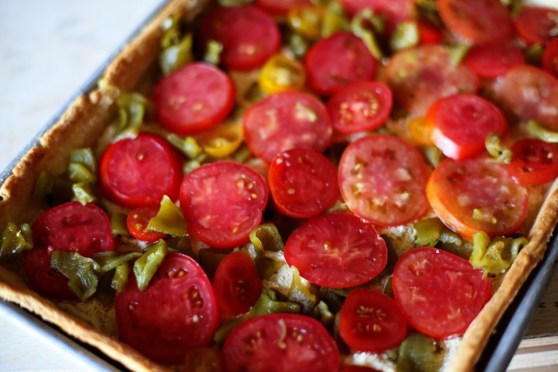
Enter: the tomato tart.  Garnished with fresh, roasted, green chilies and a bit of cheddar and Parm, all baked on top of The Crust and a good slathering of green chile and caramelized onion dip.  It was just about as perfect as you can get.  And even if you don’t have a home-grown tomato, just go get one at a farmer’s market this weekend and DON’T refrigerate it and use that.  Or, since we’re baking these tomatoes, go ahead and use a supermarket tomato.  Roasting a tomato brings out great flavor in even the weakest, most genetically modified tomato.  Happy baking!

pre-baked tomato and green chile tart
Roasted Green Chile and Tomato Tart

1 recipe of The Ultimate Pie Crust
1/4 cup corn meal
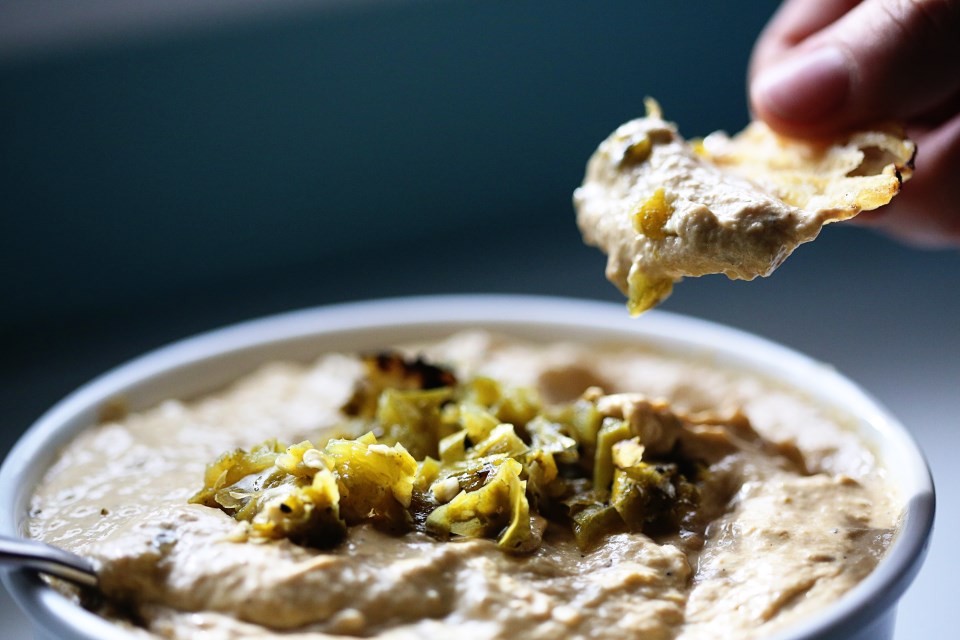
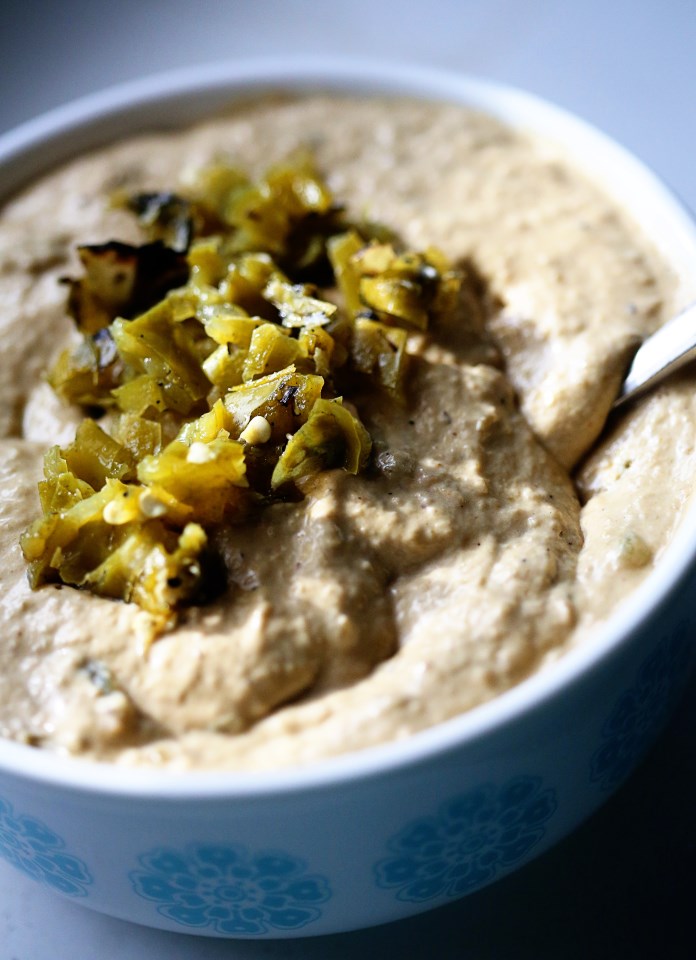
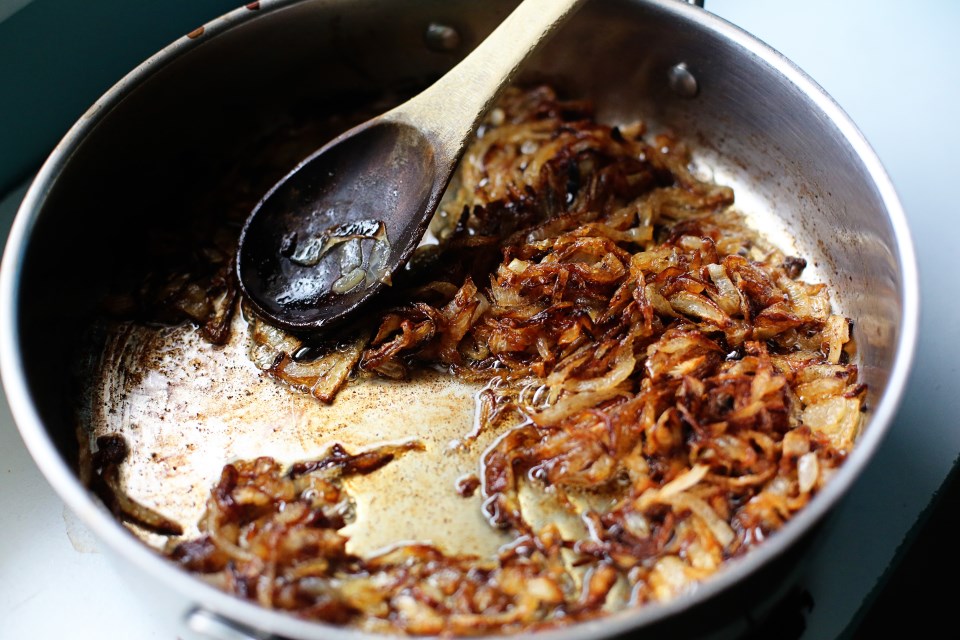
1 cup green chile and caramelized onion dip
3-4 medium sized tomatoes (such as a Roma-size)
4 fresh roasted green chilies
salt and pepper
cheddar or Parmesan cheese, if desired

Get your pie crust rolled out and pressed into a 13×9″ tart pan, or like I did here, a half sheet pan.  Trim off the excess (and you will have some) and refrigerate the pan for about 30 minutes, while you get on with everything else.  Preheat oven to 450.  Line the crust with parchment paper and fill with pie weights – I use a bag of dried beans over and over for this purpose.  I even keep them in a bag labeled “Pie Beans.”  Bake the empty pie shell for 20 minutes, remove the weights and parchment and bake for another 5-10 minutes until the crust is golden on the bottom.  Set aside to cool.

Whip up a quick onion/chile dip if you don’t have time to make the full recipe by pureeing 4 ounces of cream cheese, two tablespoons of olive oil, a large garlic clove, two roasted green chilies and a tsp of salt in a food processor until smooth. Spread this mixture onto the bottom of the tart.  Then, sprinkle the 1/4 cup of cornmeal over the dip.  This will help absorb the juices from the tomatoes and chilies so you don’t have a soggy crust.

ingredients
Slice the tomatoes and chilies thin and layer onto your crust.  Drizzle with olive oil and sprinkle with salt and pepper.  I shredded up a tiny bit of leftover cheddar and Parmesan on top of mine and loved the result.  I think it’d be good without it.  Reduce your oven to 375 and bake for 25-30 minutes, until the tomatoes look slightly shriveled and bubbly.

Serve with a dollop of sour cream (really – it’s awesome) and enjoy!
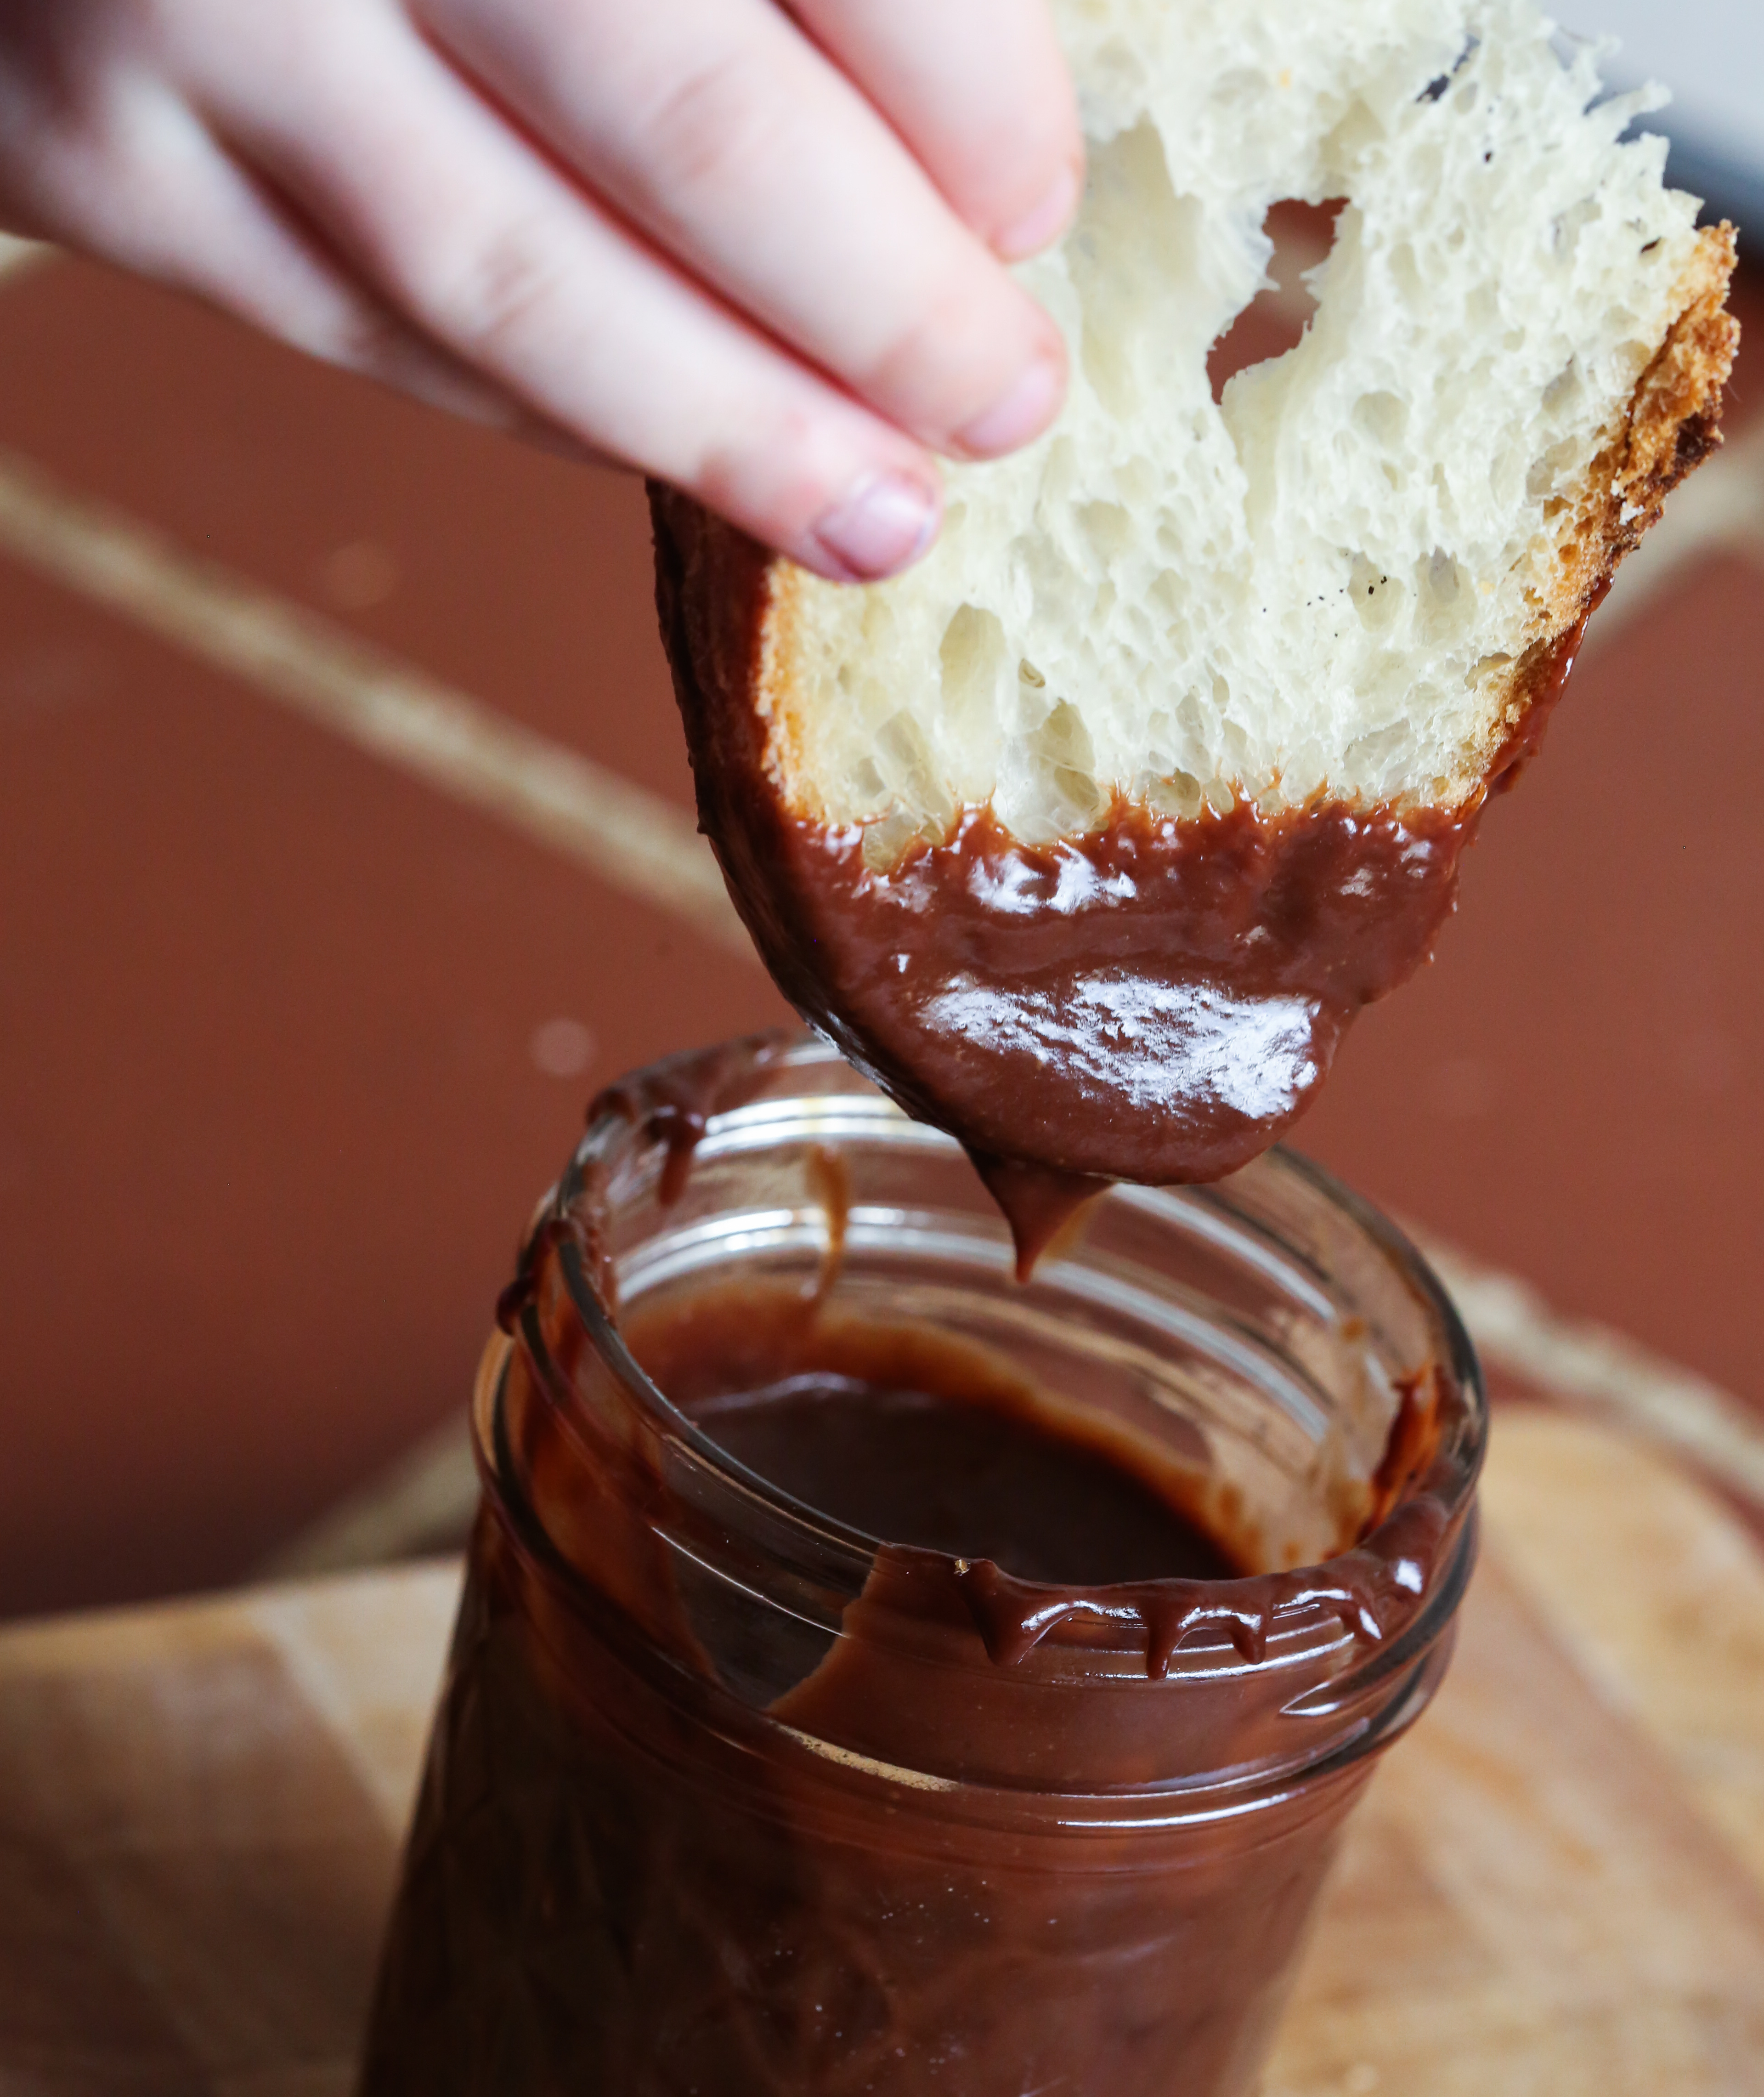
Green Chile Tomato Tart


Roasted Green Chile and Caramelized Onion Dip

Green Chili and Caramelized Onion Dip
Here in the West Texas/Eastern New Mexico region, we have a summertime tradition.  We wait all year for it and when the weekend comes, we can smell it in the air.  On every supermarket corner, there they are: green chiles, rotating in a huge, iron roaster over a fire, filling the air with the sweet and savory charred smell of heaven on earth.  A couple weekends ago, it was Chile Roasting Day.  It only happens for a couple weekends at the end of the summer or the beginning of the fall season, so there’s a sense of urgency to buy as many bags as we can before they’re gone.  There’s just one problem: letting them go to waste (they’ll mold within a couple weeks in your fridge) or freezing them, which takes away some of their magic, if you ask me.

So this year, we bought two bags like this:
bag of roasted green chilies
…and we promised we wouldn’t let them go to waste OR freeze them.  Maybe we should store up for winter, but there’s something pretty special about waiting all year for something.  Like a summer tomato.  It’s worth the wait and any other time of the year, it just isn’t the same. (blog post coming soon…)

So all week, I’m going to be posting green chile recipes!  If you happen to live in this region, go stock up because I fear this weekend will be the last.  If you don’t live in this region, I’m sorry.  It’s really the only thing we have on you because we have to deal with dirt storms for a third of our year and 100 degree heat for another third.  Let us revel in this, our only leg up on the competition.  (mostly kidding – I’d send you a bag, but I don’t want to freeze them). 🙂

Today your recipe is a roasted green chile dip with caramelized onions.  I posted about a caramelized onion dip last summer and I thought it would be the perfect base for adding some green chile magic.  So here you go, my friends.  Enjoy the first green chile recipe of the best week of the summer.

Roasted Green Chili Dip
Roasted Green Chile and Caramelized Onion Dip

makes about two cups

1/4 cup vegetable oil
3 TBS unsalted butter
2 large, yellow onions, sliced thin
8 oz cream cheese
1/2 cup sour cream
1/2 cup mayo
7-10 roasted, mild green chiles, seeded or not, it’s up to you.
1 TBS red wine vinegar
kosher salt to taste – I used about 2 teaspoons

In a large, deep sided skillet, add the oil and butter over medium-medium high heat until the butter starts to bubble.  Add the sliced onions and spread out into one layer and let them sizzle for about 5 minutes until they start to color.  Stir them around and repeat this process, not stirring too much to let them caramelize.  This process takes about 30 minutes and you want to err on the side of too caramelized than not enough.  Mine looked like this:
Caramelized Onions
Meanwhile, in a food processor, add the cream cheese, sour cream, mayo and vinegar and a teaspoon of salt.  Pulse until blended.  When the onions are done, scoop them into the food processor and add the green chiles.  I added just three at first, two seeded and peeled, and one whole, minus the stem.  It wasn’t enough green chile flavor for me, so I just kept adding them.  There are LOTS of amazing flavors in the roasted skins and since you are blending them up, it’s completely recommended to not peel the skins from your chiles when you add them.  So!  Add a few, pulse, and see how you like it.  Add some salt, pulse some more.  Add a few more chiles.  Really, it’s up to your taste and what you like.  We ended up adding 7 green chiles, 3 peeled and seeded and 4 whole (minus stem).  It was a perfect heat level for us AND we were using mild chiles, so obviously, with the hot variety, you might want to seed all of them.  I bought mild because I wanted LOTS AND LOTS of flavor without killer heat.  This is a fun game of taste testing, so have some chips ready.  Enjoy!


Summer Grilling: Romesco Sauce!

summer meal - romesco sauce
Ah, summer.  It’s upon us!  And even though I’m hoping no grilling will get done this weekend due to rain (please, oh please) we have fired up the grill several times already and hope to continue as the months continue to provide us with warm nights and light well into the 9 o’clock hour.  We had a truly noteworthy grilling session last weekend where the star of the show was that tasty little dollop of red pepper puree on the side of the asparagus called Romesco.

romesco sauce
Romesco is a blend of roasted red bell peppers, hazelnuts, almonds, garlic and roasted tomatoes.  I can’t explain how magical it all is when blended up together, but it is incredible as a topping for a grilled flank steak, a dip for asparagus, or even a spread for the grilled bread I’m hoping you’ll still try! We topped baked potatoes with our leftover romesco sauce this week and I just KNOW it would be fabulous on top of a simple omelet.  I love a sauce that can be so versatile because it won’t just sit in your fridge, unused.  There are literally endless options for this tasty sauce and I hope you will make this for your next summer meal!

grilled asparagus with romesco sauce

Romesco Sauce*
makes about 3 cups

4 Roma tomatoes, quartered
4 red bell peppers
6-8 cloves of garlic, still in their skins
3/4 cup olive oil, plus oil for roasting vegetables and toasting nuts
1/2 cup hazelnuts
1/2 cup almonds
1 cup day-old bread, cubed and toasted with olive oil
red wine vinegar
2 tsp Piment d’Esplette (or dried chili flakes)
salt and pepper to taste

Preheat the oven to 300F.  Season the tomatoes and peppers with 2 tablespoons of  olive oil, salt and pepper and place on a baking sheet. Bake the cloves of garlic along with the tomatoes and the peppers, until the garlic is soft, (remove them when they are to let the tomatoes and peppers finish) the tomatoes have begun to caramelize and the peppers are tender and beginning to blister, about 1 hour. Remove from the oven, cover the peppers with foil and set aside for 10 minutes, then peel the skin and remove the seeds and veins from the peppers.

In a small skillet set over medium heat, toast the almonds and hazelnuts with 1 teaspoon of the olive oil and salt.  

Remove the garlic cloves from their skins. In a food processor, combine the tomatoes, peppers, garlic, toasted nuts and bread. Add the Piment d’Esplette or chili flakes.  Slowly drizzle in the remaining ¾ cup of olive oil until the mixture forms a smooth paste. Season with red wine vinegar, salt and pepper until it’s to your liking.  We added about 2-3 tablespoons of vinegar and added about 2 tsp of kosher salt and some pepper.  Puree until very smooth, but the sauce will remain slightly chunky.  

Serve with grilled vegetables, meats, baked potatoes, bread, etc, etc, etc!

*we combined two recipes from Tasting Table to make our own version.


Cooking Basics: Basil Pesto

Basil Pesto Ingredients
This is an important recipe to have memorized.  If you know the basic formula, you can make a pesto with just about any green/oil/nut/hard cheese.  It’s a great way to dress up a simple pasta salad, a plain filet of fish, or even boiled potatoes for a spin on potato salad.  When it’s a pasta-only kinda day around here, pesto somehow makes me feel better about not trying harder to dish out variety.  I think, “At least Olive is eating something green and different on top of her pasta.”  While that may be the dinner equivalent to justifying nutella as a “healthy” snack, I’m sticking with calling pesto healthy.  In moderation.  The stuff is mostly olive oil.  But I think if it’s used as a garnish, it’s just fine  and a little goes a long way, anyway!
Pesto

So here is your Cooking Basic for the week –

Basil Pesto
makes about a cup and a half

3 cups packed fresh basil leaves
1/2 cup toasted pine nuts
1/2 cup grated Parmesan cheese
4 cloves of garlic
1/2 cup olive oil
salt and pepper to taste

Put everything except the oil in a food processor and turn it on.  While it’s whirring around, gradually drizzle in the olive oil through the open chute of the processor lid.  Let it process for about 30 seconds and then open and taste for salt and pepper.  I end up putting about a teaspoon of kosher salt and a few grinds of fresh cracked pepper to mine.  Pesto will keep on the counter for about a week or in the fridge for 2-3 weeks.  The top of the pesto will turn brown, but it can simply be scraped off before use.  Pressing a sheet of plastic wrap on its surface helps with the oxidization, too.

Basil Pesto Tortellini

Cooking Basics – Salted Caramel Sauce

Salted Caramel Sauce

This week is so busy with all the prep for our fundraiser dinner for Carpenter’s Church!  So, instead of an involved recipe, I decided to give you a simple kitchen basic that I have made about fifteen times in the past twenty-four hours as a topping for the banana bread pudding I’m doing for the dinner tomorrow.

Okay, okay, so maybe this isn’t the most basic kitchen skill to have.  It’s not exactly on par with the humble chicken stock. HOWEVER! It tastes outstanding and you have the ingredients in your house right now.  You could make a batch for ice cream, for brownies, as a topping for a cake or as a totally amazing sweet fondue for bread/fruit/a spoon.  You don’t need a reason.  You could jar this up and give it away as gifts at Christmas or any time.  You could make a few batches and keep them all to yourself – the only thing I know for sure is that if you try this recipe, you WILL be back for more…

Salted Caramel Sauce
makes about a cup

1 cup white sugar
1/4 cup water
1/2 cup warmed heavy cream (warm it in the microwave for a minute)
2 tablespoons unsalted butter
1 tablespoon vanilla bean paste (or extract)
3/4 teaspoon kosher salt

In a large saucepan over medium heat, add the sugar and water and stir with a spatula to fully incorporate.  Put a lid on the pot and let it come up to a simmer.  Have you ever read recipes that tell you to brush the sides of your pan with a wet basting brush to keep sugar crystals from forming while making caramel?  No more!  That’s tedious and I don’t like getting my fingers that close to boiling sugar.  The lid creates condensation that drips down and keeps all the sugar in place, instead of creeping up the sides like it will if the lid’s off.

Swirling occasionally while cooking, check for the color.  When it develops a nice golden amber color, remove it from the heat and stir in the heavy cream and vanilla.  This will bubble furiously, but just whisk, whisk, whisk until it calms down.  Add the butter and whisk to incorporate.  Then, add the salt and stir until dissolved.  Let it cool and taste test for salt level.  Store in jars on the counter for a week or in the fridge for a month.


Basics – Roasted Garlic

garlic cloves in oil
There are few smells better than roasting garlic.  The top 5, according to me, of most heavenly, coma-inducing kitchen smells are:

1. Bread baking
2. Garlic roasting
3. Onions cooking in butter
4. Browning butter
5. Bacon sizzling in the pan

We have plenty of days where our house smells like baking bread, but I don’t have that smell of garlic roasting near enough.  Roasting garlic turns the garlic into an almost caramelized, savory paste that softens the intensity of raw garlic, mellows out the flavor and makes it perfect for dressings, soups, pasta dishes, breads, and that doesn’t even include the wonderful uses of the garlic oil that is produced from the roasting process.  Garlic oil=liquid gold.

So today, in the first of my series on cooking basics, I’ll show you my process for roasting a head of garlic and then below, a simple recipe for garlic aioli that can be used on sandwiches as an amazing spread alternative to mayo!

First, lop off the top of a head of garlic and place in a large piece of tin foil.  Put that little package in a small dish to catch leaking oil.  Generously salt and pepper the cut tops and drizzle with about four tablespoons of oil.
ready for roasting
Next, place both cut-side down, crimp the foil together to form a tent and place in a 400F oven for about 30 minutes.  Your garlic should look like this when it’s done:

roasted garlic
I checked mine about half-way through to make sure I wasn’t cooking it too fast.  Let the head of garlic cool to where you can handle it and then just pick it up and squeeze, popping out all the cloves.  You’ll end up with this:
roasted garlic cloves in oil
Place the cloves in a jar and fill up with oil to cover the cloves.  This allows your oil to become infused with garlic-goodness and it keeps the garlic cloves from drying out.  Store on the counter to use for anything you can think of!  We use the oil to make a quick aioli to spread on burgers, sandwiches, or as a dip for roasted potatoes – heaven!

garlic in oil

Garlic Aioli

1 large egg
1 tablespoon lemon juice
1/2 teaspoon salt
1/4 teaspoon fresh ground pepper
1/2 cup garlic infused oil

Place the egg, lemon juice, salt and pepper in the bottom of a tall immersion cup.  Add the oil and submerge your immersion blender to the very bottom of the cup.  Turn the immersion blender on and slowly lift as you blend.  The oil will combine with the rest of the ingredients and by the time you get to the top, you should have a smooth consistency.  If you are using a basic blender or food processor, add the ingredients except for the oil.  Turn on the blender and then slowly stream the oil until all the oil is added.  Adjust the seasoning with salt and pepper and keep in an airtight container in the fridge for up to two weeks.  But it probably won’t last that long!