Rustic Tomato Galette

rustic tomato pie

Deep Dish Tomato Pie
Deep Dish Rustic Tomato Pie
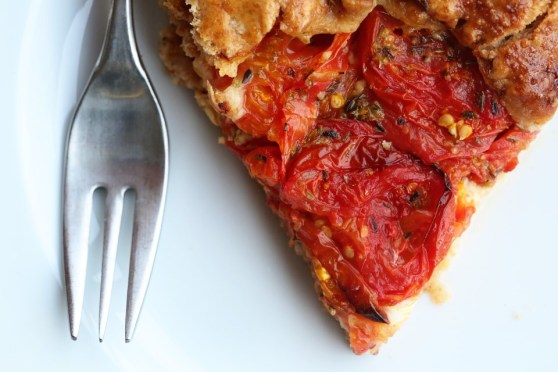
There’s no better time than the middle of October to post about a beautiful, summery tomato pie. 😛 In my defense, my tomato plants were late bloomers and didn’t really start ripening until the end of September. But I can see this amazing pie going either way: an homage to the bright, sweet, summertime flavors, or being comforting and warming with a depth of rich tomato flavor fitting for the colder months. I can not vouch for this recipe if you use tomatoes from the grocery store, but I would imagine it wouldn’t be half bad, considering the bake time and the way the tomatoes almost go sun-dried in flavor on the top layer. If you do that, make sure the tomatoes you buy are pretty soft and ripe and maybe just stick to Roma tomatoes to be safe.

This pie has a bright, peppery and tangy whole-grain mustard on the bottom of the tomatoes and the smooth, chewy layer of cheese in the middle and then topped with two layers of extra ripe heirloom, beefsteak and Roma tomatoes. I decided to use half whole-wheat flour in my usual crust recipe because whole wheat absorbs more moisture and I knew this pie would be pretty juicy. And it is quite juicy, but I decided to stop thinking it had to be like a tart and started to embrace the tomato for what it is: a fruit to be used in a fruit pie! And every fruit pie I’ve ever had, has an adequate amount of juiciness throughout. Why should a tomato pie be any different? So if you will embrace it, too, I think you will really love this recipe. The flavors are electric. And I hope that you have some good tomatoes left in your garden. And if you don’t, you’re more than welcome to stop by and pick some from mine! Happy October 🙂

Rustic Tomato Tart Rustic Deep Dish Tomato Pie

Rustic Tomato Galette

  • Servings: 6-8
  • Print

1 recipe fool-proof pie crust with half the flour being whole wheat
About 3 pounds fresh tomatoes in an assortment of sizes and varieties
2 tablespoons whole grain mustard
2 cups low-moisture mozzarella (shred it yourself – don’t buy pre-shredded or it won’t melt right)
dried oregano
salt and pepper
1 egg, whipped

Preheat the oven to 400F.

Slice the tomatoes into 1/4″ slices and lay out on paper towel-lined sheet pans. Sprinkle with kosher salt on each side of the tomato and let them sit and drain for a few minutes this way. This draws out excess moisture. Let the tomatoes drain while you handle the crust.

Roll your pie crust out and gently form it into a 10″ cast iron pan, letting the excess hang over the edges. Spread the whole grain mustard evenly on the bottom of the crust. (I used this brand and yes, it looks like nothing but mustard seeds!)

Spread the shredded mozzarella over the mustard and then give the cheese a generous sprinkling of dried oregano.

Arrange the tomato slices evenly over the cheese in an overlapping pattern. Sprinkle that layer with oregano and then finish up with the rest of the tomatoes. Gently fold the overhanging pie crust over the tomatoes. It doesn’t have the be perfect. “Galette” is French for “I stopped caring how this looks.” So you get a free pass. If the crust breaks off, just pinch it back together. Really, this is forgiving and you want the extra crust to be there. It’s a buttery, flaky, tomato-juice-absorbing wonder.*

Place the pie on a rimmed baking sheet and brush the crust with egg. Bake for an hour, until the crust is golden brown and the pie is bubbling like crazy. Place a sheet of tin foil over the pie and let it bake another 15 minutes. Let it sit for ten minutes before slicing and serving.

*At this point, you can chill your pie overnight if you’re making this ahead. If you do that, increase your bake time to an hour and a half (or even longer – you’re just wanting a deep brown in your crust and an almost caramelized top layer of tomatoes.)

Curried Corn Fritters

Curry Corn Fritter
Last week I posted a recipe for Curried Cream Corn and today I want to share with you what to do with the leftovers! In our house, we still have leftovers on a regular basis. With just two adults and one three year old who eats like a bird, we don’t usually use up side dishes in one meal. I transform a side dish into probably four different things by the time the week is over. I might start off with simple roasted corn at the beginning of the week and by the time it’s gone, it’s become part of a chicken wrap, a hash, an omelette, a souffle or perhaps just made into baby food.

With this curried cream corn, however, the flavors stack up perfectly to become a tasty little fritter. This is another recipe where I just eyeballed the amounts, but I think it’s pretty fool proof and I do have amount approximations for you to follow. Serve these fritters with a bit of sour cream and a side salad for a light(ish) Meatless Monday!

Curry Corn Fritters

Curried Corn Fritters

  • Servings: about 12 fritters
  • Print

2 cup of leftover curried cream corn
1 cup flour
1 egg
chopped chives
1/2 tsp kosher salt and fresh ground pepper
ooo, jalapenoes would be good!

In a large bowl, combine your creamed corn, flour, salt and pepper, egg and chives (and whatever else you think sounds good!) and whisk to combine. You may need more flour depending on how much liquid your curried cream corn still had remaining. You may have cooked off more than I did, so depending on how liquidy it is, add a bit more flour so that your mixture resembles thick cake batter. If it is dry, thin it out with a little milk.

Heat olive oil in a nonstick skillet over medium high heat until it shimmers and drop the fritter batter by tablespoons and let them fry about 2 minutes per side, or until dark brown on both sides. Remove and let them drain on a paper-towel lined baking sheet and keep them warm in a 200 degree oven until you’re ready to serve.

Creamy Potatoes with Thyme Browned Butter

creamy boiled potatoes with thyme and browned butter
Some days you just need someone to think up a side dish for you. This is not complicated.  This is nothing you couldn’t come up with on your own.  But your brain is zapped. And there are days I stand there with my fridge gaping and I just can’t be creative anymore.  I roasted the potatoes yesterday, I don’t want to roast them again! So, if you’re like me and you don’t necessarily want to do something crazy or ambitious on a Monday evening, but you DO want something different that someone else thought up for you – then this recipe is for you.  Clean, simple, warm, filling and utterly delicious.  Boiling the potatoes in their skins gives them that appealing pop when you bite through the skin and the interior is smooth and creamy.  Add in some browned thyme butter and this could almost be a meal in itself…

…but if you have a three year old who has a bit of an opinion about dinner, then you can’t serve these alone because then she’ll ask, “Where’s the rest of the meal?” She’s been asking me that for about a year, now.  Where she even got that phrase, I’ll never know.  But it’s pretty intimidating.

Creamy Potatoes with Thyme Browned Butter

Boiled Potatoes with Thyme Browned Butter

  • Servings: 4-6 as a side dish
  • Print

1 lb baby red potatoes (red creamers)
4 TBS unsalted butter
4-5 sprigs fresh thyme, plus a teaspoon of chopped leaves
kosher salt for seasoning

In a large pot, submerge potatoes and salt the water generously.  Bring to a boil and boil until soft when pierce with a knife.  This took me around 15 minutes.  Drain the potatoes and transfer into a large bowl.  In a small sauce pan, melt the butter over medium heat, and add the thyme sprigs and cook till the foaming subsides.  When brown butter solids start forming at the bottom of the pan and the butter smells nutty, immediately remove from the heat and add the thyme leaves.  Swirl around and then pour over the potatoes, tossing to coat evenly.  Sprinkle the potatoes with kosher salt and serve.

Savory Vegetable Souffles – Meatless Mondays Never Tasted So Good

Brussels Sprout and Cheddar Souffle Brussels Sprouts and Cheddar Souffle
Happy Monday After Daylight Savings Time!  This will be a hard week for many, getting used to the time change.  I love it once the adjustment takes place because I LOVE that it stays light outside till nearly 8:30 in the spring and nearly 10 in the summer.  We get to play later (it seems) and it’s important to not feel so closed in after months of the cold, dark evenings of winter.

I’ve been in a new, happy rut, lately.  On most Mondays lately, I’ve been making a vegetable souffle.  I hardly ever have my act together for dinner on Monday and I usually haven’t been to the store for the week (like today), but I nearly always have some sort of leftover veg in the fridge and (usually) four eggs.  Voila – this beautiful souffle, big enough for all of us to eat more than a big portion.  I’d say it would serve 4 as a side dish or 2.5 (like us) as a main. And it’s so versatile!Brussels Sprouts Souffle
The pics above were made with Brussels sprouts and cheddar and the pics below were spinach and gruyere.  I’ve done leftover broccoli with white cheddar, leek, and asparagus, too!  If you have eggs, cheese and some leftover vegetables, you have a meal!  And a really good one.  Every time I have made this, Olive has said, “this is a good meal, Mama.” Good enough for me!  It’s a wonderful vehicle for getting more vegetables into your little people, as well.
Spinach and Parmesan Souffle

Savory Vegetable Souffles

  • Servings: 4-6 as a side
  • Print

1/3 cup grated parmesan or fine bread crumbs
2 cups cooked vegetables, finely chopped.  Use boiled brussels sprouts, spinach, leeks, asparagus, kale, whatever floats your boat!
5 tablespoons butter
salt and pepper
1/4 cup flour
1 cup milk
4 eggs, room temp and separated
1/2 cup grated hard cheese – cheddar, gruyere, gouda, romano, parm, etc

Heat the oven to 375F. Butter a 6-cup souffle dish or 6 one cup ramekins, if you want everyone to have a nice, neat side dish of their very own.  Coat the sides of the dish with cheese or breadcrumbs. Cook your vegetable in salted boiling water until tender.  Drain and squeeze out as much moisture as you can.  Season with salt and pepper and set aside.

In a large saucepan, melt the 1/4 cup butter over medium heat, stir in the flour and cook, stirring frequently, for 2 minutes.  Whisk in the milk and cook until the sauce has thickened, whisking the entire time.  Season with salt and pepper to taste and add a splash more milk if it gets too thick (you want a thick gravy consistency).  Set aside off the heat.  Into your egg yolks, whisk in about 1/2 cup of the hot cream sauce to warm them and then return them to the rest of the sauce and whisk to incorporate.  Stir in the cheese and when it’s melted, fold in the vegetables.

With a mixer, beat the egg whites until stiff.  Stir a quarter of them into the souffle base and then fold in the remainder until no white streaks show.  Bake souffles on a rimmed baking sheet in the middle of the oven until risen and golden, 30-35 minutes.  The middle will be slightly wobbly if you’ve made it in one large dish.  Serve immediately!

*recipe adapted from The New Vegetarian Cooking for Everyone cookbook, which is completely fantastic so far.  Hasn’t steered us wrong, yet!


Spinach and Parmesan Souffles

Cheesy Potato Fritatta

spanish tortilla with scallions
It’s the middle of the week.  There has been a loss of momentum.  Or maybe you’ve just gained yours? Either way, you have no idea what to make for dinner and all you have are some leftover potatoes. Do you also have eggs? Everyone has eggs.  Do you have an onion?  Maybe some cheese?  A bit of salt and pepper and olive oil?  Then you’re set.  And dinner will be marvelous.  And filling.  And comforting.  You don’t have to make things complicated to make them delicious and I can’t count how many times I’ve declared, “There’s nothing to eat in this house!” only to be humbled by actually finding something, and not only something, but something truly delicious.  How lazy I can be sometimes!  This meal was inspired by a book called An Everlasting Meal, which is a sort of love-song to making the most out of everything you’re given.  It saved my family from take out with this simple recipe and I will certainly make it again!

potato egg fritatta

Potato Fritatta

2 small potatoes (about 2 cups, peeled and sliced into 1/4″ slices)
1 small onion, sliced thin
1/2 cup shredded cheddar cheeses (can be omitted without any damage done)
salt and pepper
3 eggs, beaten (four if you add the cheese, like I did)

Heat oven to 375F.
In a large skillet over medium heat, heat about 1/3 cup of olive oil and add the potatoes and onions.  Season well with salt and pepper. Cook, slightly covered, until the potatoes are soft. Strain the potatoes and onions out of the pan and put them in a bowl.  Reserve the olive oil from the pan.  Let the onions and potatoes cool and then add in the cheese, beaten eggs and more salt and pepper.  In a 10″ non-stick skillet, add some of the oil from your other skillet and make sure all the sides and bottom are nicely coated.  Pour the egg/potato mixture and cook over medium heat on the stove until the bottom looks set.  Transfer the pan to the oven and let it finish cooking until the top is slightly puffy, about 15 minutes.  Remove from the oven and let it cool for about 10 minutes, and then invert onto a serving plate.  Serve with sour cream, chopped chives or scallions and hot sauce! This dish is great warm, room temp, or even cold. It would be a super easy lunch on the go or weekend breakfast.  

Green Beans with Toasted Pecans and Blue Cheese

Green Beans with Toasted Pecans and Blue Cheese
I’m on a quest to serve up vegetables in a different way each week.  It’s not a New Year’s resolution or anything like that, but just a general promise to be more dedicated to making vegetables enticing.  So often I just rummage through my fridge or freezer and half heartedly throw a vegetable alongside whatever we’re having for dinner.  And I cook them the same way every time.  So every trip I make to the grocery store, now, I grab a would-be-boring vegetable and resolve to make it more interesting than my standard roast-everything method.

Last week I did this with green beans.  I usually boil them in salted water until they are tender (not squeaky!) and then brown a little butter and toss them.  It’s fine.  It’s just what I always do!  So this time, I boiled my green beans, set them aside and then tossed in some toasted pecans and blue cheese crumbles and a few dried cranberries and got everything all nice and warm and it was totally delicious. In fact, it was more exciting than the main course!  The best part – it was quick and easy and shocked us out of the same ol’ routine.  Not bad for a green bean.

Green Beans with Blue Cheese and Toasted Pecans

Green Beans with Pecans and Blue Cheese

  • Servings: 4-6 as a side
  • Print

  • 1 lb fresh green beans
  • 1 cup toasted pecans, roughly chopped
  • 1/4 cup blue cheese crumbles
  • 1/4 cup dried cranberries
  • salt and pepper to taste

In a large pot of adequately salted (that’s about 1/8 cup salt per stock pot.  Or more.  Tastes like the ocean, at least) boil green beans until tender.  Your teeth should not squeak when you chew them! Strain the green beans and set aside.  In a large skillet, toast the pecans until fragrant, and then toss in the green beans, blue cheese, cranberries and a dash of salt and pepper. Add a splash of olive oil if they seem too dry, but depending on your blue cheese, you may get enough oil from it to coat the beans nicely.  Don’t let your cheese burn!

Cheesy Broccoli Rice from Scratch

broccoli rice casserole
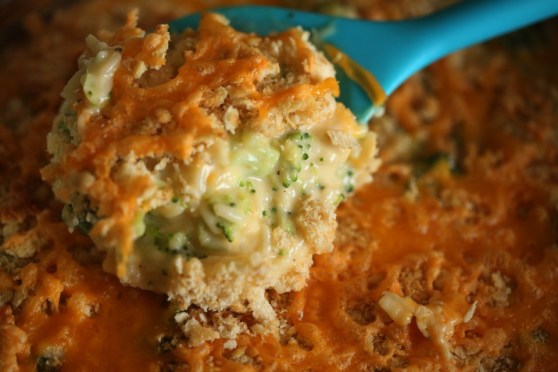
This was undoubtedly a comfort food for many of you growing up, as it was for me.  Creamy and cheesy with just a hint of something green, but mostly rice and cheese.  So all in all, the perfect vegetable dish. 😉 My mom made it a lot and sometimes I crave it but I’ve never made it myself.

A lot of recipes you see online call for cans of stuff, velveeta and things that just don’t seem like…food.  Now, I’m not saying that the from-scratch version is any better for you, BUT it has all real ingredients and gives you a good feeling and that’s what makes the indulgence worth it.  I decided one day I would make this dish and since I don’t keep any cream-of-whatever on hand, I made a simple bechemel (white gravy base) and added in lots of extra sharp cheddar.  Each ingredient cooked separately in chicken stock to give lots of added flavor and the results were fabulous!

We still have lots of snow on the ground and the roads are hard to travel, so warm, cheesy dishes are the perfect meal to stay inside and enjoy.  Be warm and well fed! 🙂

Cheesy Broccoli Rice Casserole


Cheesy Broccoli Rice

  • 1 head broccoli, chopped small
  • 2 cups chicken broth (although vegetable broth would enable the entire
  • dish to be vegetarian)
  • 1 cup white rice
  • pinch of salt
  • 4 TBS unsalted butter
  • 4 TBS flour
  • 1 cup whole milk (plus more to adjust consistency)
  • 1 cup shredded sharp cheddar
  • salt and pepper to taste
  • breadcrumbs and extra cheese for topping (I used crushed Ritz crackers)

Preheat oven to 400F.

In a large, deep skillet, bring the broth to a boil and throw in the broccoli.  Steam it with a lid covering until the broccoli is starting to get tender, about 5 minutes.  Remove the broccoli with a slotted spoon and set aside in a large bowl.  Add the rice to the broth and cook until tender (about 15-20 minutes).  Dump rice into the bowl with the broccoli (it’s okay if there’s a little extra liquid).

Wipe the skillet clean and melt the butter over medium heat.  Whisk in the flour until it’s all coated and bubbling, but not turning brown.  Whisk in the milk and let it come back up to a boil, adding more splashes of milk to maintain a gravy-like consistency.  I’m sorry I don’t have exact amounts, but it’s really an add enough until it looks right kinda thing.  Stir in the cheddar and whisk until melted.  Add more milk if it seems too thick.  Adjust the seasoning with salt and pepper until it tastes right and then stir in the broccoli and rice.  Top with breadcrumbs and extra cheese and melt in the oven until bubbling.

Creamy Roasted Carrot Soup

roasted carrot soup with cayenne and ginger
Fall means soup.  Soup means it’s cold enough outside to not want to die at the thought of eating soup for dinner.  And it being cold enough outside seems to make everything around here better.  I sleep better, we can play outside longer without my redhead overheating and everything just feels fresh.  And I’m a bit of a broken record when it comes to hailing soups as a surefire way to get your kids to eat their vegetables, but I’m going to say it, again.  Cooking just about any vegetable and pureeing it into a soup is the easiest way to get a baby, toddler, picky adult to eat a vegetable otherwise sneered at due to its texture or appearance.  Olive used to eat asparagus.  But then, she turned two and decided she was no longer interested.  But the other day I made a batch of asparagus soup and she drank it down.  Same flavor, different delivery vehicle.  And when you add a piece of crusty, buttery bread on the side, the soup suddenly seems like a complete meal.

My go-to soup in the fall is usually butternut squash.  But I nearly always have a half-used bag of carrots in the fridge, waiting to become something more exciting than diced up for chicken pot pie.  The other day I made this soup and I loved it.  We ate on it for several days – always a good side dish or starter, and good for dunking toasted bread.  I don’t need to say it, again, but this batch of soup would fill up about 12 baby food jars.  Can you lend 30 minutes to making a vegetable soup?  How about $3 for a 2lb bag of carrots?  How much is a jar of baby food, again?  You get the point.

Yay, soup!

roasted carrot soup
Roasted Carrot Soup
serves 6-8

1 sweet onion, diced
3 TBS olive oil
2 lbs carrots, peeled and chopped
6 cups vegetable or chicken stock
1/2 cup heavy cream
Salt and Pepper to taste
ground ginger and paprika for garnish

Heat the olive oil in a large pot over medium high heat until it shimmers.  Toss in the onion and saute until tender but not browned, about 5-6 minutes.  Add in the carrots and cook for about 10 minutes, stirring to coat in the oil.  Add the stock and let the pot come to a boil, then reduce the heat and simmer for about 20 minutes, or until the carrots are tender.  Puree directly in the pot with an immersion blender, or take in batches to a standard blender and puree until smooth.  If you used a standard blender, return the soup to the pot and add the heavy cream.  Season with salt and pepper to taste and then ladle into bowls and sprinkle with ground ginger, paprika and a splash of cream or sour cream.

Classic Bruschetta

bruschetta
It’s nice to know an Italian.  They have the goods on traditional recipes and the right way to process a bumper crop of tomatoes.  I have such a friend, Jennifer, and this year, fortune smiled on her plants and she started to get WAY more than she could use and process on her own.  So she asked if I wanted some. (huzzah)  Since that same fortune didn’t happen to fall on my plants this year and my crop looked more like a handful of marbles, I enthusiastically said YES (plus, what crazy person turns down garden tomatoes?!)  I was so happy we could finally make our homemade BLTs before the last whiff of summer is completely gone.  I made a wonderful, basic tomato sauce (recipe coming soon) and canned it for the winter and with the rest of the tomatoes she brought, I saved two for our BLTs and the rest I asked her for her favorite bruschetta recipe.

She told me that there wasn’t really a recipe, but that this was how her granddad always made it and those kind of recipes are my favorite, anyway.  In the spirit of handing down family recipes, I’m not going to list quantities. I’ll basically give it to you like she gave it to me – the taste and adjust method!  If you have any tomatoes still coming off the vine (as many of us in this region do) then I hope you enjoy this recipe! If your crop is done, then look for the ripest plum tomatoes you can find in the grocery store.  We served this with Matt’s plain country bread, and honestly, it was the best meal I’d had in weeks.  Sometimes, nothing beats pure and simple.  Thank you, Jen, for sharing your tomatoes and your recipe with us – we benefited greatly from both!

bruschetta 3

Classic Bruschetta
makes a good amount

Dice up a few, ripe, plum tomatoes.  Add in minced garlic, a nice pour of good olive oil and add in a handful of shredded fresh basil.  Mix to combine and then add in a generous grating of fresh Parmesan cheese and adjust the seasoning to your liking with salt and garlic powder.  Serve on toasted baguette or just about anywhere you can think to use it!

Roasted Green Chile and Tomato Tart

Summer Tomato and Roasted Green Chile Tart
I am not a farmer.  I’m pretty crap at knowing why things die, what I’m doing wrong, why half my plant is brown and the other half is green, etc.  Last year, I all but neglected my tomatoes and they became like sea monsters in size and yielded dozens and dozens (if not with a little end-rot) of tomatoes.  This year, I switched where they were planted and am taking better care of them and they have all tapped out at about 4 feet tall, haven’t continued to grow in height in the last month and we’ve gotten maybe four, medium-sized tomatoes and a handful of cherry tomatoes, and all of them are split down the sides (too much watering).  Sigh.  It’s hard to win at tomatoes.  I’m sure some of you feel my pain.  I want that innate sense of what these plants need, but I am afraid I’ve learned that this instinct is no instinct at all, but trial and error.

The tomatoes pictured were, indeed, from our yard.  And they were, as all backyard tomatoes are, outstanding in flavor, despite their faults.  I will never know how a tomato that claims to be “field grown” at the store can STILL taste like NOTHING, and a tomato you go out and pick from your yard tastes like concentrated tomato paste, x 1,000,000,000.  Maybe it’s what Alton Brown said last week, that a tomato put in the fridge, even for a short time, loses a chemical designed especially for taste.  Whatever the reason, tasting just ONE perfect summer tomato will leave you satisfied for the rest of the year.  I don’t think I can be that enthusiastic about any other produce.  Especially since I’m such a crappy farmer.

Enter: the tomato tart.  Garnished with fresh, roasted, green chilies and a bit of cheddar and Parm, all baked on top of The Crust and a good slathering of green chile and caramelized onion dip.  It was just about as perfect as you can get.  And even if you don’t have a home-grown tomato, just go get one at a farmer’s market this weekend and DON’T refrigerate it and use that.  Or, since we’re baking these tomatoes, go ahead and use a supermarket tomato.  Roasting a tomato brings out great flavor in even the weakest, most genetically modified tomato.  Happy baking!

pre-baked tomato and green chile tart
Roasted Green Chile and Tomato Tart

1 recipe of The Ultimate Pie Crust
1/4 cup corn meal
1 cup green chile and caramelized onion dip
3-4 medium sized tomatoes (such as a Roma-size)
4 fresh roasted green chilies
salt and pepper
cheddar or Parmesan cheese, if desired

Get your pie crust rolled out and pressed into a 13×9″ tart pan, or like I did here, a half sheet pan.  Trim off the excess (and you will have some) and refrigerate the pan for about 30 minutes, while you get on with everything else.  Preheat oven to 450.  Line the crust with parchment paper and fill with pie weights – I use a bag of dried beans over and over for this purpose.  I even keep them in a bag labeled “Pie Beans.”  Bake the empty pie shell for 20 minutes, remove the weights and parchment and bake for another 5-10 minutes until the crust is golden on the bottom.  Set aside to cool.

Whip up a quick onion/chile dip if you don’t have time to make the full recipe by pureeing 4 ounces of cream cheese, two tablespoons of olive oil, a large garlic clove, two roasted green chilies and a tsp of salt in a food processor until smooth. Spread this mixture onto the bottom of the tart.  Then, sprinkle the 1/4 cup of cornmeal over the dip.  This will help absorb the juices from the tomatoes and chilies so you don’t have a soggy crust.

ingredients
Slice the tomatoes and chilies thin and layer onto your crust.  Drizzle with olive oil and sprinkle with salt and pepper.  I shredded up a tiny bit of leftover cheddar and Parmesan on top of mine and loved the result.  I think it’d be good without it.  Reduce your oven to 375 and bake for 25-30 minutes, until the tomatoes look slightly shriveled and bubbly.

Serve with a dollop of sour cream (really – it’s awesome) and enjoy!

Green Chile Tomato Tart