Buffalo Chicken Tacos with Blue Cheese Celery Pico

Buffalo Chicken Taco
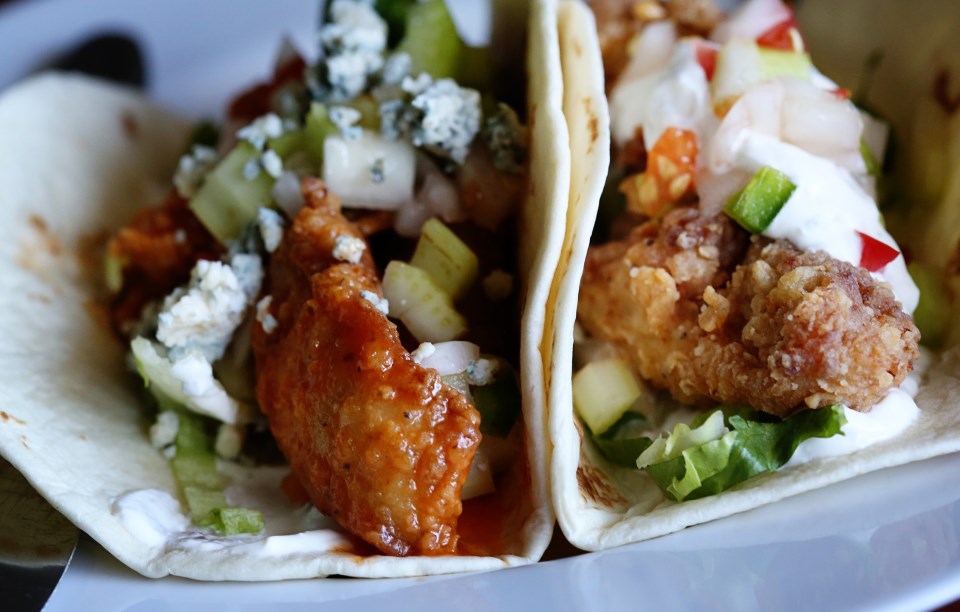
Buffalo sauce and blue cheese always make me think of football season. Maybe because this combination, for me, is rooted in the Superbowl array of gastronomical craziness or the fact that I see buffalo wings as “dude food” and one of my husband’s favorite flavor combinations. Whatever the reason, buffalo chicken and blue cheese is pretty darn delicious and these tacos make a more dinner-friendly version than the messy buffalo wing, fifteen-napkins-needed standard. (Guess who is Type A in our relationship?)

These tacos are AMAZING. Frying strips of boneless chicken thighs makes for extra tender pieces. We tossed the fried chicken in our standard tangy buffalo sauce, then topped them with some crunchy blue cheese celery pico and blue cheese sour cream. We did a non-buffalo version for our little girl and it was still delicious! I highly recommend this recipe for the fall season of football game get-togethers!

Buffalo Chicken Tacos buffalo chicken tacos with blue cheese cream and pico Fried Chicken Taco with Pico

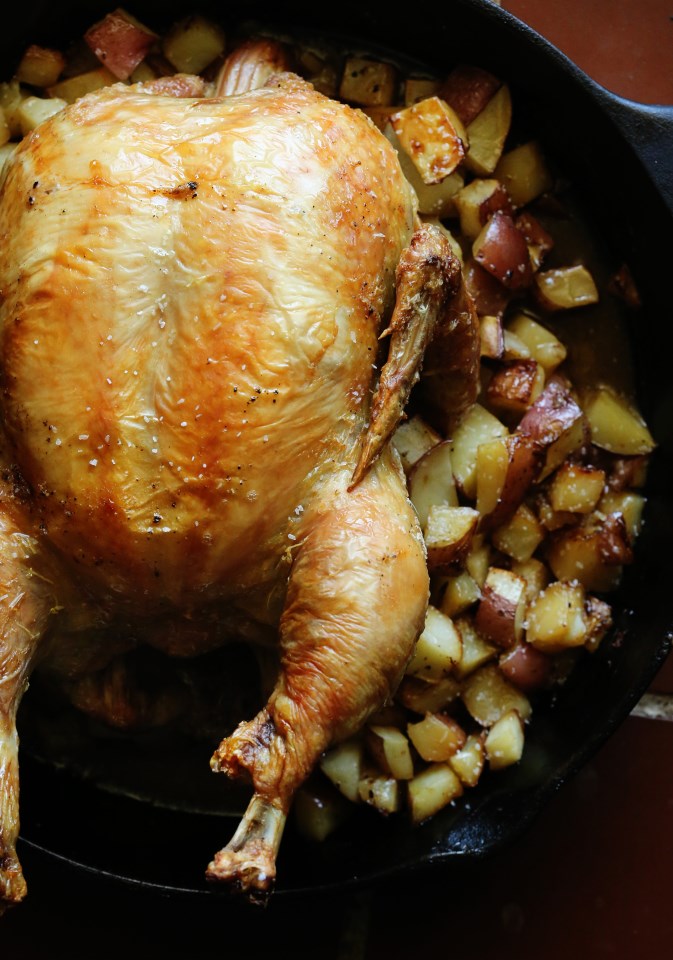
Buffalo Chicken Strips We used this exact recipe, but we used boneless chicken thighs and cut them into strips before marinating and breading. I’ll post the recipe below in case you don’t want to click 🙂

  • 2 tablespoons paprika
  • 2 tablespoons freshly ground black pepper
  • 2 teaspoons garlic powder
  • 2 teaspoons dried oregano
  • 1/2 teaspoon cayenne pepper
  • 1 cup buttermilk
  • 1 large egg
  • Kosher salt
  • 3 1/2 pounds bone-in, skin-on breasts, legs, drumsticks, and/or wings (We used boneless thighs cut into strips here)
  • 1 1⁄2 cups all-purpose flour
  • 1⁄2 cup cornstarch
  • 1 teaspoon baking powder
  • 4 cups vegetable shortening or peanut oil

    Combine the paprika, black pepper, garlic powder, oregano, and cayenne in a small bowl and mix thoroughly with a fork.

    Whisk the buttermilk, egg, 1 tablespoon salt, and 2 tablespoons of the spice mixture in a large bowl. Add the chicken pieces and toss and turn to coat. Transfer the contents of the bowl to a gallon-sized zipper-lock freezer bag and refrigerate for at least 4 hours, and up to overnight, flipping the bag occasionally to redistribute the contents and coat the chicken evenly.

    Whisk together the flour, cornstarch, baking powder, 2 teaspoons salt, and the remaining spice mixture in a large bowl. Add 3 tablespoons of the marinade from the zipper-lock bag and work it into the flour with your fingertips. Remove one piece of chicken from the bag, allowing excess buttermilk to drip off, drop the chicken into the flour mixture, and toss to coat. Continue adding chicken pieces to the flour mixture one at a time until they are all in the bowl. Toss the chicken until every piece is thoroughly coated, pressing with your hands to get the flour to adhere in a thick layer.

    Adjust an oven rack to the middle position and preheat the oven to 350°F. Heat the shortening or oil to 425°F in a 12-inch straight-sided cast-iron chicken fryer or a large wok over medium-high heat. Adjust the heat as necessary to maintain the temperature, being careful not to let the fat get any hotter.

    One piece at a time, transfer the coated chicken to a fine-mesh strainer and shake to remove excess flour. Transfer to a wire rack set on a rimmed baking sheet. Once all the chicken pieces are coated, place skin side down in the pan. The temperature should drop to 300°F; adjust the heat to maintain the temperature at 300°F for the duration of the cooking. Fry the chicken until it’s a deep golden brown on the first side, about 6 minutes; do not move the chicken or start checking for doneness until it has fried for at least 3 minutes, or you may knock off the coating. Care- fully flip the chicken pieces with tongs and cook until the second side is golden brown, about 4 minutes longer.

    Transfer the chicken to a clean wire rack set on a rimmed baking sheet and place in the oven. Cook until an instant-read thermometer inserted into the thickest part of the breast registers 150°F and the legs register 165°F, 5 to 10 minutes; remove the chicken pieces to a second rack or a paper-towel-lined plate as they reach their final temperature. Season with salt and serve—or, for extra-crunchy fried chicken, go to step

    Place the plate of cooked chicken in the refrigerator for at least 1 hour, and up to overnight. When ready to serve, reheat the oil to 400°F. Add the chicken pieces and cook, flipping them once halfway through cooking, until completely crisp, about 5 minutes. Transfer to a wire rack set on a rimmed baking sheet to drain, then serve immediately.

    *taken from Serious Eats

For the Celery Pico:

2 stalks celery, sliced
1 jalapeno, diced
1/4 cup diced tomato
1/4 diced white onion
1/2 cup blue cheese crumbles
squeeze of lime
pinch or two of celery salt
salt and pepper to taste

Combine all these things and adjust seasoning to taste!

For the Buffalo Sauce:
One bottle of Frank’s Red Hot
1 stick of butter
Salt to taste
1 tsp worchestershire sauce
1/2 tsp garlic powder

Combine the hot sauce and butter in a sauce pan and bring to a boil. Reduce to a simmer and adjust seasoning to taste.

Blue Cheese Sour Cream

Kinda self explanatory. Just take a half cup of sour cream and add in 1/2 cup blue cheese dressing and 1/4 cup fresh blue cheese crumbles. Adjust to taste with salt and pepper and lemon juice.


Crusty Country French Toast

Crusty Country French Toast
Everyone needs a good French toast recipe in their pocket. Especially if you are a home baker (or are married to one) and always have a stale butt-end of a loaf of bread on your counter. Matt makes bread all the time and it’s this really amazing, crusty, rustic sourdough that we plow through, typically, with only the tiniest bit on the end that dries out brick-tough that we give to our dog. But occasionally, he will make two loaves and I will have a bit more than I can use in a week. I wanted to have a French toast recipe that I didn’t have to look up – one that was easy to memorize – for just such occasions. I wanted it to work with a bread as crusty as a non-enriched loaf can get. (Enriched refers to added sugar, oil or butter that makes bread soft like sandwich bread, and makes bread less apt to get rock hard when it goes stale.) Matt just uses his sourdough starter, flour, salt and water. It makes an amazingly chewy, crusty bread, but it’s not exactly conducive to a pb&j for a little person.

This recipe will work with bread that is really tough and even soft bread like challah (the ultimate French toast bread). The difference is the soak time. If you’re using really soft, not-so-stale bread, just leave it in the mixture for less time. I left this bread in the mix for almost an hour, flipping them over after thirty minutes. I got up early to feed a baby, then she went blissfully back to sleep, so I had an hour 🙂 So the French toast had that sought-after custardy interior that is very easily obtained by using a softer loaf. Whatever bread you have, this recipe will work. Tuck it away for the weekend and try to memorize it – it’s worth it.

Country Bread French Toast Country Bread French Toast with Bananas

Crusty Country French Toast

8 thick slices of stale bread
4 large eggs
1/2 cup milk
1/2 cup heavy cream (you can honestly use whatever milk you have, but the richer the better, obviously)
1 tablespoon vanilla bean paste (or regular vanilla extract – I like vanilla)
1/2 teaspoon kosher salt (1/4 tsp table salt)
2 tablespoons brown sugar
1/8th of a teaspoon of almond extract

A few tablespoons of butter for frying

Preheat your oven to 200F.

Arrange the slices of bread in a 13×9″ dish and squeeze them in or cut them up into smaller pieces if you have to (or work in two batches if you have a smaller dish). Combine all the other ingredients in a large bowl and whip up till very well incorporated. Pour mixture over the bread and let the bread soak it up for 10-30 minutes per side, depending on the staleness of your bread. If you’re using a soft bread like Texas toast, just let it soak a few minutes per side until it oozes out if you poke it. For a rustic loaf that’s near crouton-consistency, let the slices soak for a good thirty minutes per side. If you have lots of leftover mixture (the thickness of your bread will determine this), you can save it in a sealed container for a week and use it again next weekend. Or just makes lots of batches and freeze the leftovers to pop in the toaster on another day!

In a non-stick skillet over medium high heat, melt a tablespoon of butter and work in batches, frying the toast until golden on each side, about 3-5 minutes per side. Keep the toast in a single layer in your oven to keep warm until you’re done cooking the rest. Serve with melted butter and your favorite topping. Shown below with my homemade peach preserves – hooray for summer! 🙂

Crusty French Toast

Potatoes That Taste Better Than The Chicken

Roasted Chicken and Potatoes
Fall is around the corner, my friends. The beginnings of fallish things are happening from the wonderful cooler temperatures and crisp mornings to the not-so-wonderful appearance of Christmas decorations ALREADY. I’m not one to start up the Christmas music until the day after Thanksgiving and I’m not one to drink a pumpkin spiced latte until it can actually do its job of warming me up because I’m cold from natural causes (as in, I didn’t sit in my car with my AC on full blast to get the same effect. That’s cheating AND rushing the perfect moment, which I feel, should come about authentically.) My friend Libby is rolling her eyes at me because she LOVES rushing fall and pretending it’s cold outside. In fact, she already had a pumpkin spiced latte! 🙂 I’m fine with seasonal enthusiasts. Honestly – whatever makes you happy! But as for me and my household, we won’t decorate for Christmas until Thanksgiving is over. 🙂

Another thing that makes me happy is starting to think about fall dinners. I love the braising and stewing and the simmering of heavy, warm spices on the stove. One meal that gets me to thinking about the warmth of the winter is this simple and yet divine dish: roasted chicken on top of potatoes. We made this recipe a loooong time ago by Jean-Georges Vongerichten. His recipe was so delicious, we’ve done it a few dozen times since and have varied and simplified and it’s always delicious and always perfect. I never mess this recipe up and it’s always so amazingly delicious. And let’s not ignore why: the potatoes are cooked in schmaltz. You’d also be delicious if you were roasted in chicken fat.

I also love this recipe because it is one of those dishes that everyone can agree on. Add a salad or some braised greens and you’ve got yourself a complete meal!

Potatoes Cooked in Chicken Fat Chicken Potatoes

Potatoes Taste Better Than the Chicken*

1 whole chicken, about 3 lbs
2 pounds potatoes, peeled and cut into 1″ pieces
coarsely ground salt and pepper
butter to coat the pan and chicken
1 head of garlic, sliced in half
sprigs of thyme, rosemary, whatever you have

Preheat oven to 450 degrees. Butter a large cast iron skillet and place the cut potatoes in a single layer. Sprinkle them with salt and pepper and drizzle with olive oil. Pat your chicken dry and season with salt and pepper. Rub with butter and then stick the halved garlic head into the chicken cavity and add whatever herbs you like. Place the chicken on one of its sides on top of the potatoes.

Roast for 20 minutes. Turn the chicken onto its other side and roast another 20. Then, turn the chicken breast-side up and continue roasting until juices run clear and an instant-read thermometer says at least 165F, about 15-20 minutes more. Let the chicken rest for 10 minutes and carve on top of the potatoes and serve them along with the chicken. Beautiful.

*adapted from Jean-Georges Vongerichten