Apple Pie Roses

apple pie roses
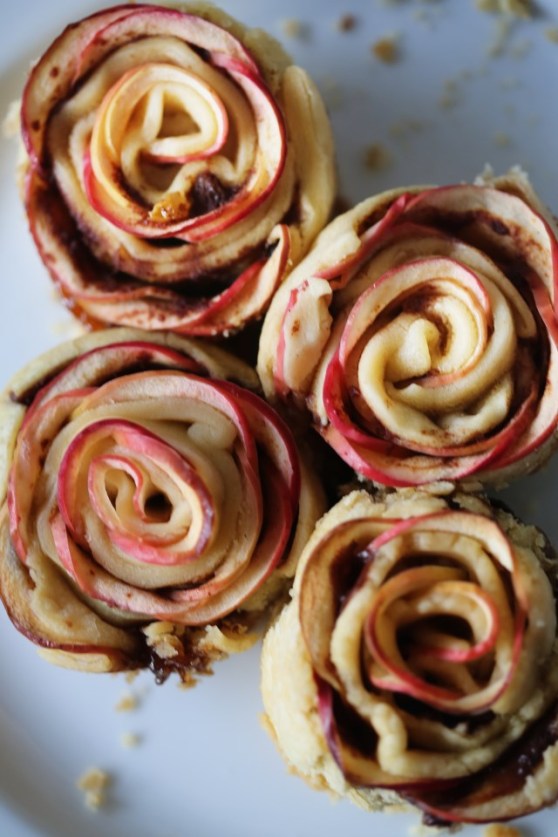
So I saw this really fun video circulating on Facebook a few weeks ago and like everyone else, it gave me the confidence to try it out myself! These little roses are so much fun to make and they are so beautiful! I thought they’d make an excellent special occasion type dessert. I did the recipe exactly like the video said and I was pleased with the process but not really the results. I mean, they’re okay, but they are definitely prettier than they are tasty. And I honestly think that’s the point. It was a super fun and easy “cooking craft” to do with Olive and so I’ll give it points for that because not every baking recipe is truly kid-accessible. But I decided to alter the recipe to be as delicious as it is beautiful. Here’s a couple problems the original recipe has:

1. The bake time is long and the thin apple slices burn on top, so we cover them during part of baking.
2.They stick like dadgum superglue to the muffin pan and get ripped apart when you take them out, therefore…
3. I fixed that by removing them from the pan while they were still super hot, but…
4. There’s the problem with eating super-baked tiny shreds of apple peel. It gives it that rose look, however…
5. The apple peel feels like tough strings in your mouth. Not really two adjectives you want for your baked goods.
6. The apples snap in half from the original recipe, so I fixed that by soaking them in hot lemon water instead of cold.
7. They just fall flat, taste-wise, so I added a bit of scrumptiousness into the filling along with the apple slices by adding cinnamon roll type flavors.
8. Also, I’m a pie crust junkie, so I switched to pie crust instead of puff pastry and it was indeed more delicious, but…
9. The falling apartness was magnified with the pie crust, so you fix that once and for all by…
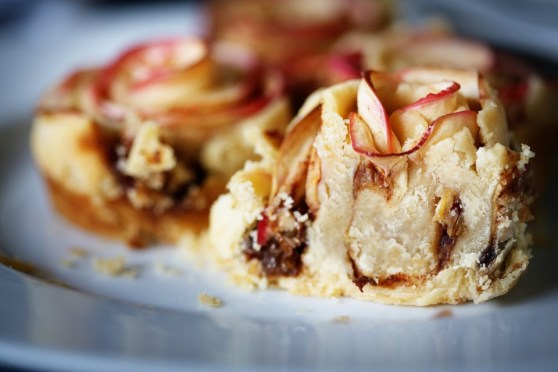
10. Using greased muffin liners to bake these babies in. Voila. Most of the problems solved.

So my suggestion for the final round of 100% deliciousness is to peel the apples. How to fix the “but they don’t look like a rose, anymore!” problem? Add a couple drops of red food coloring to the warm water while the apples soak, OR pomegranate or cranberry juice and BOOM! Red roses. I didn’t do this for my final pics because everyone in my house was getting rather sick of eating these tiny apple roses, BUT I did color some apple slices in pomegranate juice and they were BEAUTIFUL. So I’ll try them like that again and make a special Christmas rose wreath edition of this recipe for those who care. Which I think might be 5 people, total. In any case, I present to you:
apple roses Apple Rose

Apple Pie Roses

Ingredients:
1 box frozen pie crust, softened in the fridge (Yeah, yeah, I always make pie crust, but these don’t need that extra effort. It’s effort enough as it is and the store-bought crust tasted just great.)
1 apple, peeled (or not – up to you), and sliced into VERY THIN half moons
Hot water and the juice from 1/2 a lemon

For the filling:
1/4 cup dark brown sugar
1/8 tsp allspice
1/8 tsp nutmeg
1 tsp cinnamon
1 tsp vanilla
squeeze of the other half of the lemon
2 TBS melted butter
1/2 cup chopped golden raisins, softened for a few minutes in boiling water
melted butter for brushing the tops

Cut and soak your apple slices in boiling water and lemon while you do everything else. I let mine soak for nearly an hour but I don’t think that’s necessary.

Preheat your oven to 375F. Combine the filling ingredients in a bowl and set aside. Roll out your pie crust and cut into 2.5″ x 6″ strips. Mine were NOT perfectly cut. It doesn’t matter. Spoon about a teaspoon of the filling on the strips of dough and spread it around. Drain and layer the apple slices, slightly overlapping, along the top half of the dough. Fold the other half up over the apples and pinch at the ends to secure, and then roll up into a rose. Refer to the lovely video if you need help!

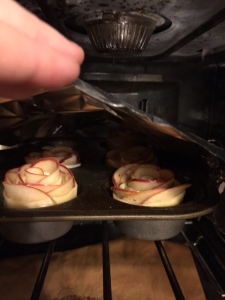
Place the roses into greased muffin cups (this is important). Brush the tops of the roses with melted butter and sprinkle with sugar. Bake, covered with foil, for 30 minutes. Then uncover and bake for another 20-30 minutes, watching to make sure the edges don’t burn.
IMG_7289

Peanut Butter and Jelly Thumbprint Cookies

Peanut Butter and Jelly Thumbprint Cookies3
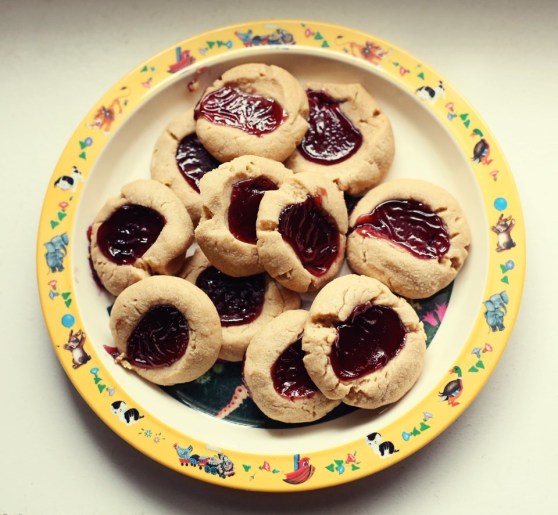
Hello there! This is a delightful little cookie that takes no time at all to make and is so much fun for little helpers! I had this idea a while back whenever I saw powdered peanut butter in the grocery store and have wanted to try it out. It took a little tweaking, but I loved the texture of the cookie itself. One word of advice: don’t use jelly! I know, I know, it’s a riff off of peanut butter jelly sandwiches, but use something a little thicker like a jam or preserve. I used grape jelly because it’s iconic and it really ran out of the cookies more than I would have liked. This did not stop them from being utterly addicting; it just kept them from looking super pretty.

Thumbprint cookies have always been a favorite of mine and this version is so fun and really makes you feel like a kid again. With Thanksgiving and Christmas around the corner, I think this would be a great recipe to have for a cookie exchange! Drizzle it with a bit of white or dark chocolate to make it even more fancy! Enjoy!

Peanut Butter and Jelly Thumbprint Cookies2

Peanut Butter and Jelly Thumbprint Cookies


makes about 2 dozen

1 cup salted butter, softened
½ cup confectioners’ (powdered) sugar, plus ¼ cup more for dusting
2 teaspoons pure vanilla extract
¼ tsp salt
1 1/4 cups all purpose flour
1 cup peanut butter powder

about 1/2 cup fruit preserves or jam

Preheat oven to 325°F. Line a baking sheet with parchment paper.

In the bowl of a stand mixer fitted with paddle attachment, blend butter and sugar until fluffy and light, 2 minutes. Add vanilla and salt, scraping down bowl as needed. Pick up the baby, who has been crying at your knee for the past ten minutes and hold her while you try to measure out peanut butter powder. Let her sneeze into it. Do everything with one arm tied behind your back. Switch to low and gently mix in flour and peanut butter powder, just until combined.

Roll tablespoonfuls of dough into 1-inch balls. Create some interest by making some pea-sized and some into the shape of a carrot. Pretend to eat them, but then actually do. Place dough balls on parchment lined baking sheets. Press down the center of each ball with your thumb, making a slight depression, or a hole clean through to where you can see the bottom of the baking sheet.

Fill cookie centers with a teaspoonful of preserves and be sure to lick the spoon between each cookie. Makes it better. Bake 12-15 minutes or until golden brown and puffy, but take care not to over-bake. Let cool a few minutes on baking sheet, then transfer to finish cooling on wire rack.

When cookies are completely cooled, eat seven or eight with a glass of milk while singing every song you know in your best cat voice. Cookies can be kept in airtight container at room temp for a few days. Emphasis on “can.”

*recipe adapted from Chew Out Loud

Peanut Butter and Jelly Thumbprint Cookies

Apple Crisp: Food Memories

Fall Apple Crisp
I’ve done a few posts on food memories from my own family and ones from friends and I love those posts more than any other. They are more than just recipes – they are links to the past and to feelings that can’t be accessed any other way. Food is such a tie to our heritage, to our families and to the love we felt when we first experienced those memorable dishes. I never tweak these recipes because it’s my job to post about and honor the memory, not the recipe itself. My dear friend, Becky, had this picture of her grandmother’s hand written recipe on her Instagram account and when I saw it, I knew I had to make it.

Last year, Becky invited me over to look through her grandmother’s things before they had an estate sale in the wake of her passing. I had the honor of taking home a patchwork quilt she had made. Not only do my girls play on it outside nearly every day, but I used it as a backdrop for the photos I took of the final dish. I hope it makes this post that much more meaningful for my friend.

The recipe itself is completely delicious and comforting and full of the essence of the fall season! I love that it calls for “oleo” – a sure sign the baker lived through the 50s 🙂 So this was the only tweak I made by using butter instead. I also topped the apple crisp with cinnamon horchata ice cream because I was all out of whipping cream. I’m sure if Nana could have tasted the ice cream, she wouldn’t mind the substitution.

recipe
I asked Becky to share a few thoughts about her Nana and this recipe. She also provided this amazing picture and it makes me wish I’d known her. She looked so joyful.

12087400_10207282108429358_1362057034_n
My Nana (Oma Lee) was the 5th of 6 kids born in 1926 to a generous, kind-hearted family. They took in the homeless, cared for the sick, fed the hungry. They also laughed more than most.

For a couple of years while I was in college, I got to live with her and got to know her on a deeper level. She was a counselor to me, a friend, comic relief, an adult when I acted like a child. We watched Miss America pageants and Hallmark movies together and ate dilly bars from DQ.

Nana shared an apple “pie” recipe with me during that time, and it’s the only apple pie I’ve ever made, because its kinda fool proof (I need that) and darn tasty.

I made it for her once and she went on and on about how delicious it was. When I reminded her it was one of her recipes, she laughed for the longest time then said in a straight voice, “well that’s why it’s so good”. Man, I miss her.

Apple Crisp 2

Apple Crisp

6 cups peeled, sliced apples
1/3 cup sugar
1 teaspoon cinnamon
1/2 teaspoon salt
2 tablespoons melted butter
For the streusel topping:
3/4 cup sugar
1/2 cup flour
1/3 cup butter

Whipped topping or ice cream to garnish

Preheat the oven to 375F. Mix together apples, sugar, cinnamon, salt and melted butter.  Place in a greased 8″ square baking dish. Set aside.

Combine the 3/4 cup sugar and flour and then cut in the butter until the texture is fine crumbles. Sprinkle over the apples. Bake for about 45 minutes, or until apples are tender*. Serve warm with dollops of whipped topping (or ice cream!)

*Becky advised that I brown the apple crisp for a few minutes under the broiler because it doesn’t really get brown during baking.

Crusty Country French Toast

Crusty Country French Toast
Everyone needs a good French toast recipe in their pocket. Especially if you are a home baker (or are married to one) and always have a stale butt-end of a loaf of bread on your counter. Matt makes bread all the time and it’s this really amazing, crusty, rustic sourdough that we plow through, typically, with only the tiniest bit on the end that dries out brick-tough that we give to our dog. But occasionally, he will make two loaves and I will have a bit more than I can use in a week. I wanted to have a French toast recipe that I didn’t have to look up – one that was easy to memorize – for just such occasions. I wanted it to work with a bread as crusty as a non-enriched loaf can get. (Enriched refers to added sugar, oil or butter that makes bread soft like sandwich bread, and makes bread less apt to get rock hard when it goes stale.) Matt just uses his sourdough starter, flour, salt and water. It makes an amazingly chewy, crusty bread, but it’s not exactly conducive to a pb&j for a little person.

This recipe will work with bread that is really tough and even soft bread like challah (the ultimate French toast bread). The difference is the soak time. If you’re using really soft, not-so-stale bread, just leave it in the mixture for less time. I left this bread in the mix for almost an hour, flipping them over after thirty minutes. I got up early to feed a baby, then she went blissfully back to sleep, so I had an hour 🙂 So the French toast had that sought-after custardy interior that is very easily obtained by using a softer loaf. Whatever bread you have, this recipe will work. Tuck it away for the weekend and try to memorize it – it’s worth it.

Country Bread French Toast Country Bread French Toast with Bananas

Crusty Country French Toast

8 thick slices of stale bread
4 large eggs
1/2 cup milk
1/2 cup heavy cream (you can honestly use whatever milk you have, but the richer the better, obviously)
1 tablespoon vanilla bean paste (or regular vanilla extract – I like vanilla)
1/2 teaspoon kosher salt (1/4 tsp table salt)
2 tablespoons brown sugar
1/8th of a teaspoon of almond extract

A few tablespoons of butter for frying

Preheat your oven to 200F.

Arrange the slices of bread in a 13×9″ dish and squeeze them in or cut them up into smaller pieces if you have to (or work in two batches if you have a smaller dish). Combine all the other ingredients in a large bowl and whip up till very well incorporated. Pour mixture over the bread and let the bread soak it up for 10-30 minutes per side, depending on the staleness of your bread. If you’re using a soft bread like Texas toast, just let it soak a few minutes per side until it oozes out if you poke it. For a rustic loaf that’s near crouton-consistency, let the slices soak for a good thirty minutes per side. If you have lots of leftover mixture (the thickness of your bread will determine this), you can save it in a sealed container for a week and use it again next weekend. Or just makes lots of batches and freeze the leftovers to pop in the toaster on another day!

In a non-stick skillet over medium high heat, melt a tablespoon of butter and work in batches, frying the toast until golden on each side, about 3-5 minutes per side. Keep the toast in a single layer in your oven to keep warm until you’re done cooking the rest. Serve with melted butter and your favorite topping. Shown below with my homemade peach preserves – hooray for summer! 🙂

Crusty French Toast

The Best Appetizer, Ever

warm dates with olive oil and salt
Okay, so it’s not spinach artichoke dip (the best junky appetizer, ever) but I love it. It’s just three ingredients! It’s salty, sweet, chewy, and indulgent all in one! It’s so easy that it hardly qualifies to be a blog post, but I can’t help it because we love it so much we have it at least once a week so I wanted to share it with you.  I present to you: Warmed dates with olive oil and kosher salt. That’s it.  Matt read about this appetizer in a book I got for him for Christmas called Delancey.  We ate at Delancey’s in Seattle when we were there last year and had some of the best pizza of our lives.  It’s a cute restaurant owned by a husband/wife duo and the book is the tale of their beginnings in the food world and how they combined their talents in opening the perfect pizza shop.  He bakes the pizza and she takes care of appetizers and desserts. It’s kind of a fantasy of Matt’s to do the same and own a brick oven style pizza joint. I could totally run the apps and desserts.  Maybe one day we will after our children are old enough to be our waitstaff 😉

7G9A8306
These warmed dates are in that book – just a simple appetizer that are completely satisfying.  I could honestly have these dates with a slice of Matt’s bread and be totally happy for dinner.  It seems weird and too simple, but it just works.  Simply heat fresh dates on the stove in some good olive oil until they are slightly sizzling.  Then, sprinkle with kosher salt and serve warm.  Amazing and easy and spiffs up your dinner in about 15 seconds.  Also, our opinionated three year old loves them.

Warmed Dates with Olive Oil and Kosher Salt

Cranberry Orange Upside Down Cake

Caramel Cranberry Orange Upside Down Cake
Lately, I find myself wandering through the house, doing chores, taking care of the little people and cooking and I think, “I should be doing something more.”  And not more in the sense of extra stuff, but more…grand? Important? I am not sure.  I haven’t quite been able to put my finger on just what it is I’m feeling.  I think I remember this feeling from when Olive was a baby.  There’s a certain amount of monotony to taking care of a baby in that first year.  Every day it’s the same feedings, the same breakfasts, the same play time, the same nap schedules, the same dinners, the same bedtime routines, etc.  It’s all the same thing, every day, for months.  And when they get a bit older, you can start shaking up the routine because they don’t have to eat and sleep every 3 hours.  But for a few months, there’s a bit of a Groundhog Day effect and I have felt it even more in the winter as we’re cooped up from the cold.

Each morning I pray that God will show me what needs to be done in His kingdom.  Who needs served?  Who needs a kind word or an encouragement? Who needs a meal or maybe even just a smile in the store?  I believe, although I don’t follow through with this belief far enough, that seeking God’s kingdom FIRST, really will cause everything else in my life “to be added to me.”  I get it so backwards.  I become so self-seeking.  How can my children or my husband make ME happy today?  When I seek God’s way of serving others first, I immediately feel content.  Enough.  Important. Working for self and for the approval of others is a bottomless well. It will never be filled and neither will I.  But flip the equation around and see to it that others’ bowls are filled before my own and God will see to it that my cup is running over.  It’s not always going to look like material wealth and health, but more importantly, it will start to look like real joy – from the inside out.

This cranberry cake was made for a few sweet ladies at a ministry our church helps out with from time to time called Family Promise. It’s a program that helps families who find themselves on the brink of homelessness to live and save up their income for rent while they live in the Family Promise house.  Our church volunteers to help a couple times a year by bringing dinners, having activities for the children and staying overnight. Last week was our week to serve so Matt and I signed up to take a meal and hang out with the families for a while after we ate.  There were two single mothers with infants and one single mother with a sweet, twelve year old girl living there, whom we’d met before and were so happy to see them, again.  We brought take-out from our favorite Hawaiian BBQ joint (I didn’t get my homemade meal-act together this time) and I brought this cranberry upside down cake.  We ate and watched TV together and played and I felt blessed by them.  We just brought the food – they brought perspective and showed us real joy – from the inside out.

Cranberry Upside Down Cake with Orange Zest Upside Down Cranberry Orange Cake


Cranberry Orange Upside Down Cake

For the fruit layer:
8 oz frozen cranberries
5 tablespoons unsalted butter
1 cup packed light brown sugar
2 tablespoons orange juice
zest from 1 orange

For the cake:
1 1/2 cups cake flour
1/2 teaspoon baking powder
1/4 teaspoon salt
6 tablespoons unsalted butter, softened
1/2 cup granulated sugar
1/2 cup packed light brown sugar
2 large eggs
1 teaspoon pure vanilla extract
1/4 teaspoon almond extract
3/4 cup sour cream (or Greek plain yogurt)

Preheat the oven to 350F.  Butter the bottom and sides of a 9 inch round cake pan and line the bottom with parchment paper.  I like to do this to ensure all the fruit filling comes off the pan.

Pour the cranberries on top of the parchment paper and sprinkle with orange zest.  In a medium-size sauce pan, melt the butter over medium-low heat.  Add the brown sugar, orange juice and cook, stirring, until the sugar melts and boils gently.  Pour the mixture over the cranberries in the pan.

In a small bowl, stir together the cake flour, baking powder, and salt.  In the bowl of an electric mixer, beat the butter, granulated sugar and brown sugar on medium until well blended.  Beat in the eggs and vanilla and almond until combined.  With the mixer on low, mix half the dry ingredients into the batter until just combined.  Mix in the sour cream and then the remaining dry ingredients until just combined (in other words, don’t over-mix).

Scoop the batter into the pan (it will be thick) and then spread it around evenly with a spatula.  Place cake pan on a rimmed baking sheet to catch drips.  Bake until a toothpick inserted in the center comes out clean, about 40 minutes.  Place the pan on a wire rack to cool for 10 minutes.  Run a knife around the edges of the pan to loosen the cake and invert onto a serving plate.  Serve warm.

*recipe adapted from the Bonne Femme Cookbook’s recipe for Pear Cake Reverse

Cranberry Orange Cake Cranberry Upside Down Cake

Poppyseed, Prune and Lemon Coffee Cake

coffeecake
Coffee cake has always seemed a bit boring to me.  In a land filled with pies and cookies and brownies, why would you ever choose a coffee cake?  It’s cake’s slightly dry cousin.  I never see a coffee cake recipe and think, “Yeah, I’ll spend time making that” when I could be spending time making something more satisfying.

That was all until I saw this recipe from Tasting Table.  Do you get the Tasting Table emails?  If not, you should.  So many great recipes and interesting gift ideas abound in every email.  This coffee cake looked absolutely decadent (it should – there’s almost three cups of sugar – ack!) But I figured in the name of Thanksgiving indulgence and postpartum cravings, I’d dive in and try it.  And I dadgum near ate the entire pan myself.  Not my proudest moment, but it was pretty enjoyable.  The filling reminded me of fig newtons and the lemon zest brightened the entire sugar-laden thing up.  I’d definitely recommend making this when you have family in your house over Christmas.  It makes a ton, it feeds and satisfies a lot (or one person over the course of a week) and it is super comforting.  Enjoy!

coffeecake2
Poppyseed, Prune and Lemon Coffee Cake
makes one 13×9 cake

For the Streusel:

1 cup all-purpose flour
3 tablespoon sugar
2 tablespoons packed light brown sugar
1¼ teaspoons ground ginger
2 teaspoons ground cinnamon
4 tablespoons unsalted butter, melted

For the Coffee Cake:

Softened unsalted butter, for greasing
3¾ cups all-purpose flour
2 cups sugar
1 tablespoon baking powder
1½ teaspoons salt
¼ teaspoon baking soda
1 cup (16 tablespoons) unsalted butter, melted
1 cup buttermilk
4 large eggs, at room temperature, beaten
¼ cup sour cream
2 teaspoons vanilla extract

For the Filling:
½ cup chopped prunes
½ cup packed dark brown sugar
¼ cup poppy seeds
Zest of 1 lemon

1. Make the streusel: In a medium bowl, whisk the flour, sugar, light brown sugar, ginger and cinnamon until everything is well incorporated. Add the melted butter to the flour-spice mixture and mix with a fork or a wooden spoon until fully incorporated and clumps begin to form. Make ahead: Unbaked streusel can be stored in an airtight container in the freezer for up to a month.

2. Make the cake: Preheat the oven to 350°. Grease a 13- x 9-inch baking pan with the softened butter and dust the pan with flour.

3. In a large bowl, whisk together the flour, sugar, baking powder, salt and baking soda.

4. In a separate large bowl, whisk together the buttermilk, eggs, sour cream, vanilla extract and melted butter until very smooth.

5. Using a rubber spatula, mix the dry ingredients into the wet ingredients until well combined.

6. Layer half the batter in the prepared baking pan; smooth it out to the edge leveling the top with an offset spatula. (Tip: Since the batter is so thick, it’s best to scoop it in ¼ cup mounds into the pan before spreading.)

7. Sprinkle the prunes evenly over the batter then sprinkle with the dark brown sugar and the poppy seeds. Top the filling with the lemon zest.

coffee cake
8. Layer the remaining batter over the filling using the same method mentioned above. Smooth out the top of the batter, ensuring it is even and reaches the edges of the pan. Sprinkle the top with the streusel, and then bake until a toothpick inserted in the center of the cake comes out clean, about 45 to 55 minutes.  I had to bake it over an hour to get the middle done.  I recommend rotating it halfway through baking!

*recipe from Tasting Table

Christmas Cookies: Cranberry Rosemary and White Chocolate

Christmas Cookies
Every year since who knows when, I’ve been making these lovely little biscotti that have a wonderful marriage of sweet, tangy and savory all packed into one crumbly bite.  This year I decided to turn my biscotti into a soft sugar cookie and I absolutely loved the results.  I took the batch to my knitting group and it got rave reviews – and those ladies are hard to please!  I just love this combination – it’s so Christmassy in color and taste.  A bit of pine essence from the rosemary and the in-season cranberries with a little snow-capped action from the white chocolate.  If you wanted a more festive presentation you could skip adding the white chocolate chips and drizzle the tops with melted white chocolate!  These are easy and bake up beautifully – perfect for your Christmas cookie exchange and more unique!

Christmas Cookies - soft sugar cookies with cranberries, rosemary and white chocolate

Christmas Cookies*
makes 2 dozen give or take

2 cups (10 oz) all purpose flour
1/2 tsp baking powder
1/4 tsp salt
2 sticks unsalted butter, softened
1 cup granulated sugar
1 TBS light brown sugar
1 large egg
1.5 tsp vanilla
2 TBS chopped fresh rosemary
1 cup dried cranberries
1 cup white chocolate chips

Preheat the oven to 375 degrees.  Line 2 large baking sheets with parchment paper or spray with nonstick spray.  Whisk the flour, baking powder, salt and rosemary in a medium bowl.

Cream the butter, sugar and brown sugar at medium speed until light and fluffy, about 3 minutes.  Add the egg and vanilla and beat at medium speed until combined, about 30 seconds.  Add the dry ingredients and beat at low speed until just combined.  Add the cranberries and white chocolate chips and fold in until just combined.  Scoop out onto baking sheets into about a 2 tablespoon sized ball and lightly press down with your fingers to flatten out the top.  Sprinkle with coarse sugar and bake 15 to 18 minutes, rotating halfway through.  Cool the cookies for a few minutes after they come out of the oven and then transfer to a cooling rack.  Serve with coffee and enjoy!

*base sugar cookie recipe from The New Best Recipe

Cranberry Rosemary White Chocolate Cookies


Sweet Potato Tortellini with Sage Brown Butter

homemade sweet potato tortellini
This pasta is a yearly tradition that Matt generally does at the beginning of the fall season.  The classic combination of roasted pumpkin and sage is glorified with browned butter and served simply with a shaving of fresh Parmesan and a side of crusty bread.  This year, we dipped into the all-encompassing guide to Italian cooking, Essentials of Classic Italian Cooking, by Marcella Hazan, for the recipe for the filling, which actually called for sweet potato instead of pumpkin (you can literally not taste the difference and the texture was great).  We also use her recipe for our pasta dough and it is velvety and amazing every time.  Making pasta from scratch is time consuming, but as we often do on the weekends, we incorporate the process of making the meal into our entertainment as well as our dinner.  I’ve included step by step photos of how to cut and fill the dough and for rolling it out, we have this hand-crank pasta machine.  It works great because I don’t feel like I can ever get pasta thin enough just rolling it out by hand.  I’m no Italian grandmother.

Also, just an FYI to the few of you who subscribe to this blog:  I’m due kind of any day, now.  So, as you’ve undoubtedly noticed, my posts have been waning at the end of this pregnancy, and when I have the baby, I’ll either drop off the face of the planet entirely for a few months, or have a ton of random pockets of time to do posts – I just don’t know how it’ll turn out!  But I’m thinking the former is more likely.  So I pray you are all here when I return!  And hey – when I return, I’ll be nearing the baby food making phase, again, and that may end up being great material for Family Meal posts, anyway!  Stay tuned…and a few prayers would be nice, too. 😉

cutting pasta
After rolling out the dough, for tortellini, cut into about 1.5″ squares.  It doesn’t have to be perfect and a good pizza cutter makes it super easy.
piping out tortellini filling
Pipe out the filling by teaspoons using a simple ziplock bag with one of it’s bottom tips cut off.  Using a serrated knife to lop off the portions helps tremendously so your hands don’t get all gunky.

folding tortellini
Wet the edges of the square with your finger dipped in water and fold one corner over to meet the other.  As you can tell, this particular one was not so “square.”


forming tortellini 2
Then, fold the opposite corner up, dotting with water to seal it.
forming pasta 2
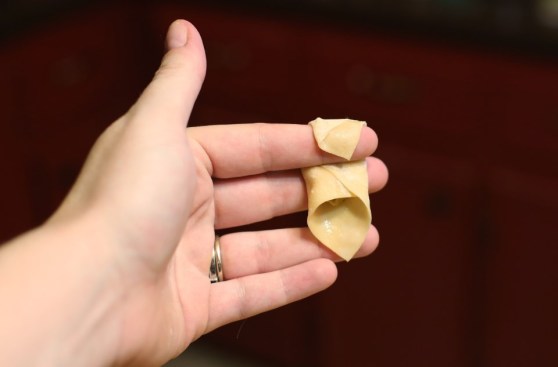
Wrap one of the other corners over your finger, and making sure your other corner is wet, bring it up and seal on top of the corner draped over your finger.
forming pasta
Voila – you have a tortellini.  Now – do this 100 more times till you’re done with all of them, laying the finished pasta on a parchment-lined baking sheet dusted with flour to keep them from sticking together.  Use parchment to separate layers of tortellini until you’re ready to boil.


forming tortellini

sweet potato tortellini

Sweet Potato Tortellini with Sage Browned Butter Sauce

For the Filling:

1 3/4 lbs orange-fleshed sweet potatoes (so really, yams if you can find them)
A pair of Italian amaretti cookies (I’ve only found these at World Market.  I have a huge bag if you need a couple.  Just swing by.)
1 egg yolk
3 tablespoons chopped prosciutto
1 1/2 cups freshly grated parmigiano-reggiano cheese
3 tablespoons parsley, chopped fine
whole nutmeg
salt

For the Pasta:  

*this is a great site and nearly the exact recipe we used.  He just gives so much great instruction and homemade pasta could be its own post entirely, so follow his steps and then continue on with rolling it out into tortellini as pictured in my post here.

For the Sauce:

5 tbs unsalted butter
12 sage leaves, roughly chopped and a few left whole

Instructions for the filling:

Preheat oven to 450F.  Bake the potatoes in the middle of the oven.  After 20 minutes turn the temp down to 400F and cook for another 35-40 min until potatoes are very tender when prodded with a fork. Turn off the oven. Split the potatoes in half lengthwise and return the potatoes to the oven, cut side up, leaving the oven door slightly ajar.  Remove after 10 minutes.  This helps dry out the potatoes some.

Peel the potatoes and scoop the flesh into a food processor.  Add the cookies, egg yolk, proscuitto, Parmesan, parsley a grating of nutmeg and about a teaspoon of salt and puree until smooth.  Adjust taste with salt.

Use this filling to fill your pasta and boil the formed pasta in salty water for 10 minutes, or until they’re al dente.  We take one out around 5 minutes and test it and we usually let it cook a little longer.  Remove pasta from water and keep it in a bowl with a splash of pasta water to keep it all from sticking together.  If it sticks, more pasta water should loosen them up.

For the sauce: over medium heat in a large saucepan, heat the butter until it stops foaming and brown solids begin to form.  Careful to not burn!  As soon as foaming starts to subside, add in the sage leaves and swirl them around to crisp them up.  Continue letting the butter brown until fragrant.  Spoon browned butter and sage leaves over the pasta, top with a grating of Parmesan and serve!


Double Dark Chocolate Waffles

Double Dark Chocolate Waffles
The chocolate cravings have gone overboard.  I really blame it in all seriousness on pregnancy.  When I’m not pregnant, chocolate is good and fine, about on par with every other sweet. Not pregnant,  I don’t think about it outside of seeing it, I don’t dream up ways of using it to its maximum potential in breakfast foods, and I don’t think that it’s “needed” to get from 8 a.m. to 8 p.m. successfully.  When pregnant…well, all those things suddenly become priorities.  Like on Labor Day, I got up and looked up a basic buttermilk waffle recipe and then thought of the maximum way I could choco-fy it.  And I did.  Yes, I’ve had a similar waffle recipe on this blog before, BUT it wasn’t as good.  These waffles are fluffier, less dense, and the chocolate chips remain melty like a fresh-baked chocolate chip cookie during your entire breakfast.  So.  I’m not sorry for seeming repetitive.  If you’re pregnant, I’ll understand if I get a thank-you note in the mail later this week.
Double Chocolate Buttermilk Waffles
I topped these in three different ways and they were all good: melted butter and powdered sugar – easy, and the most cookie-like experience.  Butter with maple syrup: most waffle-like experience, but I’ve always felt that syrup on a chocolate anything is too much.  Turns out, it’s not.  And three: fresh raspberries all over the suckers.  Chocolate dipped fruit, anyone?  They were all good.  Dress it up, dress it down, this will be your new craving.

Double Chocolate Waffles
Double Dark Chocolate Waffles
makes about 12 Belgian-style waffles

2 cups AP flour
2 tablespoons brown sugar
2 tablespoons Dutch-process cocoa powder
2 teaspoons baking powder
1 teaspoon baking soda
1/2 teaspoon salt
2 cups buttermilk
1/3 cup vegetable oil
2 large eggs, lightly beaten
1 teaspoon vanilla extract
1 cup dark chocolate chips

Heat your waffle iron.  In a large bowl, combine the dry ingredients with a whisk until fully incorporated.  In a smaller bowl, whip up the wet ingredients.  Gently whisk the wet into the dry until just combined.  Fold in the chocolate chips.  Cook waffles to the waffle-iron’s suggested time (mine has a handy little light that goes off when they’re done) and keep in a 200 degree oven while you cook the rest to keep them nice and warm and crisp on the outside.  Serve with powdered sugar and melted butter, or whatever.  It really doesn’t matter – it’s all good.