Chocolate Banana Butter

banana chocolate butter-1 banana chocolate butter-3We almost waste more bananas in this house than I can count. The girls always swear they want a WHOLE ONE ALL BY MYSELF! But then they each eat two bites and are done. I typically use the leftover bananas for muffins or oatmeal or smoothies, but I wanted to do something a bit more exciting this time because if you don’t shake up your routine from time to time, despair sets in.

I found a recipe for banana jam with just a tish bit of chocolate and it sounded okay but I didn’t really want banana jam. I wanted banana with lots of chocolate and a softened butter consistency. So I just did my own thang.  Plus, it’s easier than making jam. And if you really want to live on the edge, you don’t even have to sterilize your jam jars. GASP. Just keep it in the fridge and no one has to know…

banana chocolate butter-6
That’s little Ollie’s hand. So cute. She ate this shot. banana chocolate butter-4

Chocolate Banana Butter


makes about 24 ounces

5 super ripe bananas, cut into chunks
8 tablespoons brown sugar
2 tablespoons water
8 ounces dark chocolate, broken into small pieces
3 tablespoons unsalted butter, softened
kosher salt to taste

In a large saucepan, combine the bananas, brown sugar and water over medium heat and bring to a boil. Mash up the bananas with a spatula and boil for about 2 minutes, stirring. Remove from heat and stir in the dark chocolate. Pour the banana chocolate mixture into a food processor and blend until completely smooth. Add the butter and blend again. Taste test – add a sprinkle of kosher salt and let it blend once more. Add more salt to your taste. I tend to like my sweets with a salty edge, so I probably added about a half teaspoon when it was all said and done. Pour into jars and store in the fridge. We have ours on bread. I’m not really sure what else you’d need in life than good bread and chocolate.

Cherry Chocolate Chip Oatmeal Cookies

Cherry Chocolate Chip Oatmeal Cookies 2

Cherry Chocolate Chip Oatmeal Cookies
I’m sitting here after putting my “baby” down for a nap a few minutes ago (praying she’ll go longer than her usual 45 minutes) and Peg and Cat are singing loudly in the background as my very grown up four-year old gets out of taking a nap because I want her to be exhausted enough to go to sleep at nine instead of ten tonight.

I’m winging it this week – Matt is away on a company trip for three days and I’m a few hours in and feeling so, so tired. I have lots of coffee and a good sense of humor, so I’m sure I’ll be fine. But having help from 5:30-9 every night is vital to my sanity. There’s something about getting a fresh set of not-exhausted-yet hands to hold the babies or take them outside and swing them so I can cook dinner in peace. And he is kind of the best there is and the most helpful person on the planet, so it’s extra hard to be without him. So I’m going backwards with my usual routine – I’m cooking lunches this week and keeping dinners simple. Because the last thing I want to do after finally getting both girls in bed is to clean my dirty dishes. I plan on reading a book or doing half of a yoga routine. And while I don’t ever recommend eating your feelings because that’s a silly thing to say and they would probably taste like sauerkraut, anyway – just eat these cookies instead. All eating is emotional eating, after all.

It’s good to be back, friends 🙂

Cherry Chocolate Chip Oatmeal Cookies 3 Cherry Chocolate Chunk Oatmeal Cookies

Cherry Chocolate Chip Oatmeal Cookies

  • Servings: about 24 cookies
  • Print

1.5 cups packed brown sugar
1 cup softened, unsalted butter
1 teaspoon vanilla or vanilla bean paste
1 egg
2 cups rolled oats
1.5 cups all purpose flour
1 teaspoon baking soda
1/4 tsp salt
1 cup dark chocolate chips
1 cup chopped, dried cherriesHeat oven to 350°F. In large bowl, stir brown sugar and butter until blended. Stir in vanilla and egg until light and fluffy. Stir in oats, flour, baking soda and salt; stir in chocolate chips and cherries.
Onto ungreased cookie sheet, drop dough by rounded tablespoonfuls about 2 inches apart.
Bake 10 to 12 minutes or until golden brown. Cool slightly; remove from cookie sheet to wire rack.

Dark Chocolate Cherry Pie Biscuits

Black Cherry Chocolate Biscuits
Dark chocolate and cherry – a pretty perfect desert combination. I regularly make dark chocolate oatmeal for Olive and myself and I will stir in dried cherries almost every time. There’s just something special about the tart zinginess of the cherries combined with the rich, deep earthy heft of dark chocolate. I’m just full of adjectives tonight. This baking project was a fun one – Olive and I were watching Tangled on a Sunday afternoon and I decided to bake something fun. A while back, Joy the Baker had this really fun baking competition and one of the challenges were these amazing apple pie biscuits. I remembered the recipe seeming like it wouldn’t work because it was too sloppy and wet, but they turned out incredible. (And there’s wonderful step-by-step instructions for how to do her biscuits, which you can apply to this recipe as well.) Fast forward to my version of this recipe and I felt the same way all over again – that there would be too much juice from the cherries for this recipe to work the same. And honestly, there was a bit more juice than with the apple version, but nothing a little draining didn’t fix. These were fun, decadent and great for breakfast during the week!

They also look so white because I had recently bought expensive, pasture-raised eggs made by chickens with PhDs and I didn’t want to waste one on making an egg wash for a few biscuits. So I brushed them with heavy cream.  Not as pretty, but it saved an egg from not getting to fulfill its destiny of becoming a fried egg on my toast the next morning.

Dark Chocolate Cherry Almond Biscuits Cherry Chocolate Biscuits

Dark Chocolate Cherry Pie Biscuits*

For the cherry filling:
2 cups fresh, pitted cherries, roughly chopped
2 tablespoons unsalted butter
2 tablespoons packed brown sugar
1/8 teaspoon almond extract
squeeze of lemon

For the dough:
2 cups self-rising flour
1/4 cup cold, unsalted butter, cut into small cubes
2 tablespoons granulated sugar
2/3 to 3/4 cup cold buttermilk

Preheat your oven to 425F. Line a baking sheet with parchment and set aside.

In a skillet over medium heat, melt the butter and brown sugar until they are all incorporated and bubbling and then stir in the cherries. Mash them around (I use a drink muddler) and let the mixture cook for about 5 minutes. Stir in the extract and a squeeze of half a lemon and add a pinch of salt. Stir around and let it cook for one more minute. Drain off all but about 2-3 tablespoons of liquid (cherries give off more liquid than the original recipe’s apples, but you don’t want NO juice) and set the mixture aside to cool while you make the dough.

To make the dough, mix the flour and butter together with your hands or a pastry blender until the butter is broken up into small pea-sized bits. Stir in the sugar and then make a well in the center of your dough. Add the buttermilk and with a fork, stir together until combined. The dough should be soft and moist, so use a bit more buttermilk if needed.

Use all-purpose flour to dust your work surface. I ignored this step in the original recipe and the bottoms of my biscuits tasted sour because they were in dusted with self-rising and there’s baking powder in self-rising flour so DON’T BE LAZY LIKE ME and just get out the all purpose to dust. It isn’t that difficult.

Spoon the dough onto your floured surface and gently pat it into a small rectangle. Dust the top with a little extra flour and roll out into a rectangle about 7 x 10 inches. Arrange the cherries over half the long side of the dough and carefully fold the other half of the dough over the filling, crimping along the edges to seal in most of the filling. It doesn’t have to be perfect and it will be messy. If you have cracks, just gently pinch them closed and carry on. You want to have about a 6 x 8 inch rectangle when it’s all said and done, so just pat it into submission. Cut into 12 squares and place on prepared cookie sheet about 2 inches apart. Brush the biscuits with a beaten egg that was not raised by monks and sprinkle with sugar and cinnamon if desired (I just used sugar since cinnamon didn’t fit in with the flavor profile I was going for.)

Bake for 12-14 minutes, or until golden brown and serve right away. The sugar topping will melt if you store these in a plastic bag on your counter throughout the week, so it’s best to eat these the same day or store in an air-tight container.

*adapted from Joy the Baker

Dark Chocolate Mousse Parfaits with Cherry Almond Syrup

Chocolate Cherry Almond Parfaits
Last week I bought lots and lots of cherries. Whenever I see that they are $2 pound, I get a little crazy. Olive loves them and will stand at the kitchen sink eating them until…well I don’t know how long she’d stand there because I’ve always intervened.  I should wait and see how long it goes on next time just for fun.

But the new wears off (slightly) and I need to use up the forgotten ones at the bottom of the colander for something.  Enter: cherry almond syrup. I layered dark chocolate mousse with the fresh made, chunky cherry almond syrup and it was so perfect. I also used the syrup on sourdough waffles and I’m still thinking about those perfect, crispy little things. It’s fun to make a “loose jam” like this syrup out of any fruit you find yourself needing to use up. It’s about to be apricot season and I can’t wait to make this with those! Or plums! Ah, stone-fruits.  You have my heart.  Dark Chocolate Cherry Parfaits

Cherry Almond Syrup

I used this recipe for the chocolate mousse and used 80% Lindt instead of semi-sweet chips.  Totally intense chocolate, but so perfect (for me.)

2 cups pitted cherries, chopped
1/4 cup brown sugar
2 TBS water
1/8th teaspoon almond extract

In a medium saucepan, bring the cherries, sugar and water to a boil and then reduce to a simmer and let it cook for about 2 minutes.  Remove from heat and stir in the almond extract.  Serve on top of ice cream, on waffles, pancakes, or in this tasty little layered parfait with dark chocolate mousse like I did.

Dark Chocolate Mousse with Cherry Almond Syrup

Double Dark Chocolate Waffles

Double Dark Chocolate Waffles
The chocolate cravings have gone overboard.  I really blame it in all seriousness on pregnancy.  When I’m not pregnant, chocolate is good and fine, about on par with every other sweet. Not pregnant,  I don’t think about it outside of seeing it, I don’t dream up ways of using it to its maximum potential in breakfast foods, and I don’t think that it’s “needed” to get from 8 a.m. to 8 p.m. successfully.  When pregnant…well, all those things suddenly become priorities.  Like on Labor Day, I got up and looked up a basic buttermilk waffle recipe and then thought of the maximum way I could choco-fy it.  And I did.  Yes, I’ve had a similar waffle recipe on this blog before, BUT it wasn’t as good.  These waffles are fluffier, less dense, and the chocolate chips remain melty like a fresh-baked chocolate chip cookie during your entire breakfast.  So.  I’m not sorry for seeming repetitive.  If you’re pregnant, I’ll understand if I get a thank-you note in the mail later this week.
Double Chocolate Buttermilk Waffles
I topped these in three different ways and they were all good: melted butter and powdered sugar – easy, and the most cookie-like experience.  Butter with maple syrup: most waffle-like experience, but I’ve always felt that syrup on a chocolate anything is too much.  Turns out, it’s not.  And three: fresh raspberries all over the suckers.  Chocolate dipped fruit, anyone?  They were all good.  Dress it up, dress it down, this will be your new craving.

Double Chocolate Waffles
Double Dark Chocolate Waffles
makes about 12 Belgian-style waffles

2 cups AP flour
2 tablespoons brown sugar
2 tablespoons Dutch-process cocoa powder
2 teaspoons baking powder
1 teaspoon baking soda
1/2 teaspoon salt
2 cups buttermilk
1/3 cup vegetable oil
2 large eggs, lightly beaten
1 teaspoon vanilla extract
1 cup dark chocolate chips

Heat your waffle iron.  In a large bowl, combine the dry ingredients with a whisk until fully incorporated.  In a smaller bowl, whip up the wet ingredients.  Gently whisk the wet into the dry until just combined.  Fold in the chocolate chips.  Cook waffles to the waffle-iron’s suggested time (mine has a handy little light that goes off when they’re done) and keep in a 200 degree oven while you cook the rest to keep them nice and warm and crisp on the outside.  Serve with powdered sugar and melted butter, or whatever.  It really doesn’t matter – it’s all good.

Baked Double Chocolate Doughnuts

Chocolate Donuts
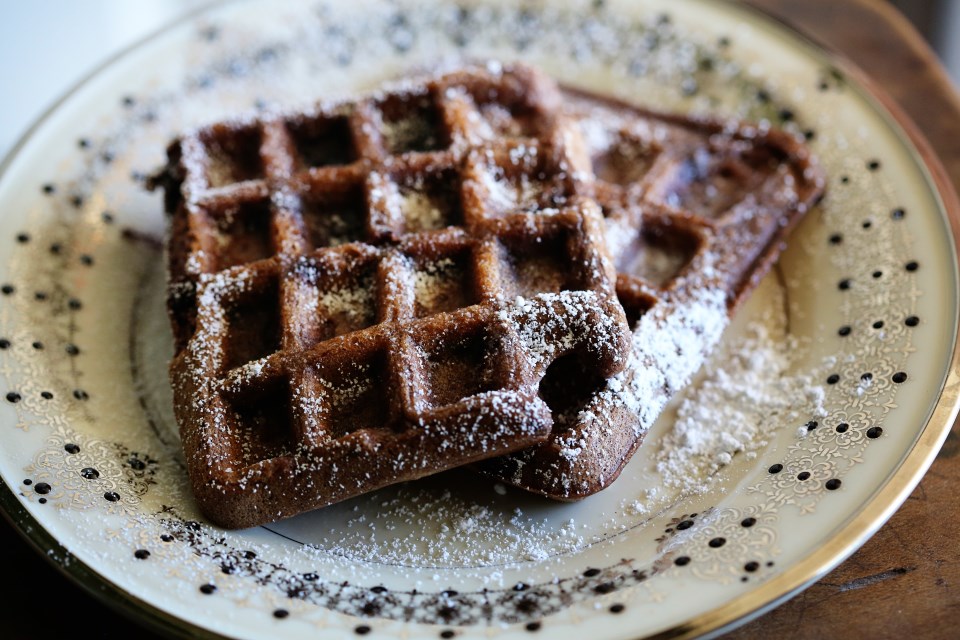
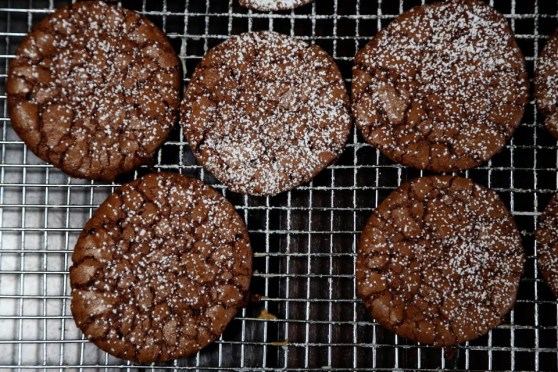
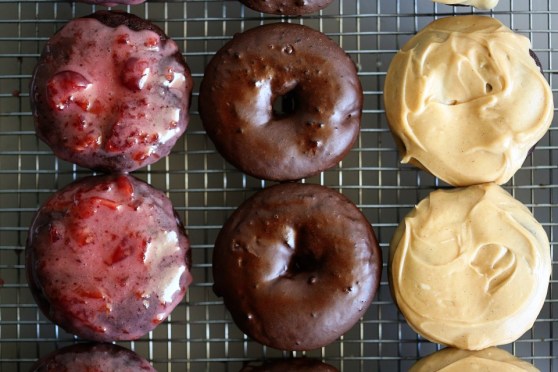
King Arthur Flour announced on their Facebook page that today is National Doughnut Day.  I was set up to post about a healthy snack today, but I was derailed by their incredible photos of this dark chocolate baked doughnut. I really hate frying things – not for any noble health reasons, but because I fright easily from splattering lava hot grease.  So these baked donuts were calling my name!  In the debate of cake vs raised doughnuts, I’m a cake gal.  I love the dense texture with the slightly crispy outside.  These baked doughnuts come mighty close to mimicking a fried cake doughnut and they were so easy to make!  I had fun with the different icings, too.  In the lineup were:

Espresso Double Chocolate Donuts
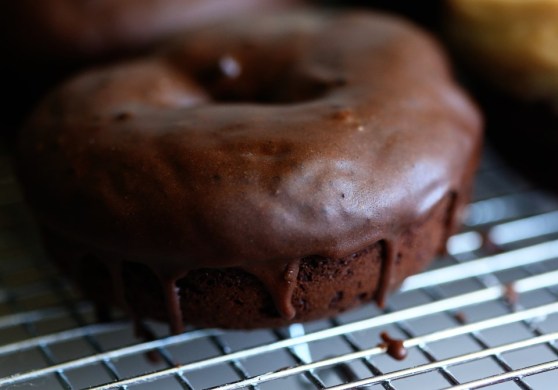
Espresso Glazed!  I don’t ever think I could pass up the coffee/chocolate combination if I tried, so I had to do this one.  My favorite, though, was…

Chocolate Chunk Donuts with Peanut Butter Frosting
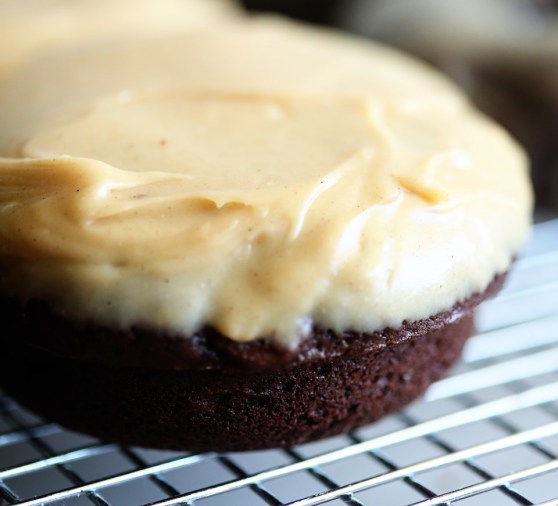
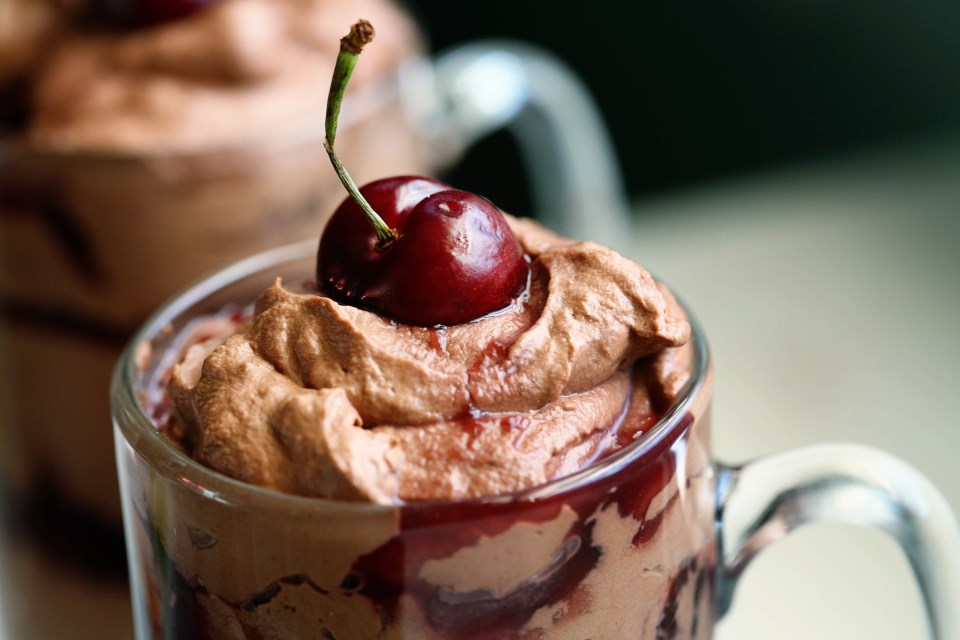
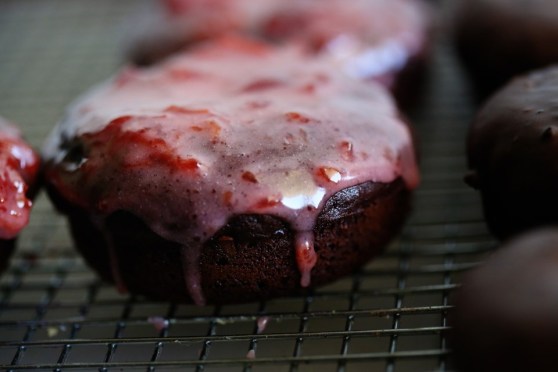
Peanut Butter Frosted!  Thick, creamy peanut buttery frosting on a double chocolate doughnut?  Well, if you insist.  And then, my wildcard was inspired by Olivia the Pig’s favorite ice cream flavor, cherry chocolate chunk (my little girl watches one single episode all. the. time.) So I made cherry almond!  Because me and almond go way back…

Cherry Almond Chocolate Chunk Donuts
This was a super fun derailment and I hope you all enjoy some crave-worthy doughnut photos!  And try this super easy baked doughnut recipe!  I’ll add my frosting variations below!

Double Chocolate Baked Doughnuts*
makes 12-14 doughnuts

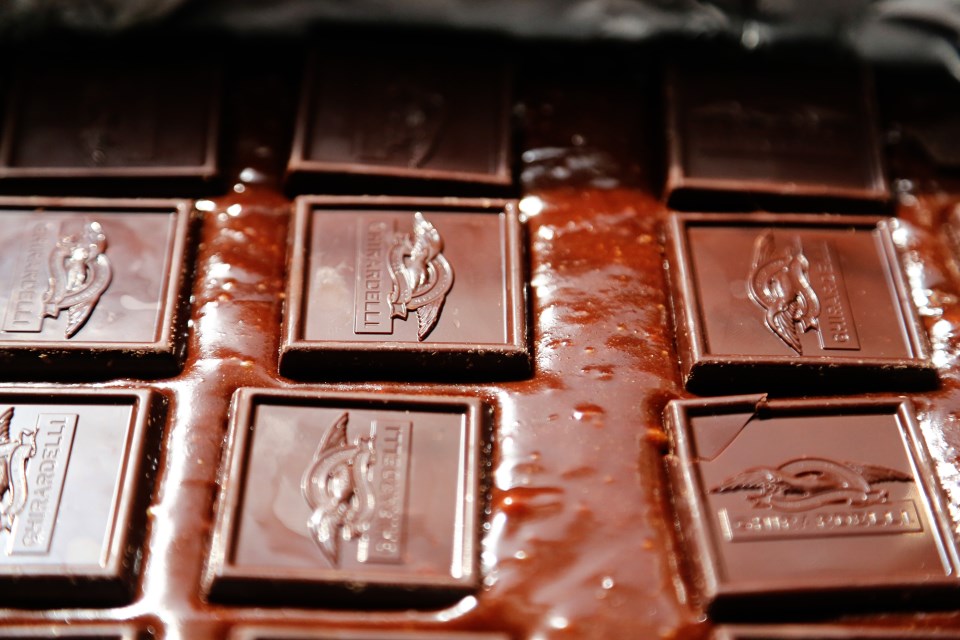
2/3 cup Dutch-process cocoa
1 3/4 cups King Arthur Unbleached All-Purpose Flour
1 1/4 cups light brown sugar
1 teaspoon baking powder
3/4 teaspoon espresso powder, optional
1 teaspoon cinnamon
pinch of cayenne
1 teaspoon baking soda
3/4 teaspoon salt
1 cup chocolate chips
2 large eggs
3/4 cup milk
2 teaspoons vanilla extract
2 teaspoons vinegar, white or cider
1/3 cup vegetable oil

Preheat the oven to 350°F. Lightly grease the wells of two standard doughnut pans. If you don’t have two pans, simply bake the batter in two batches. In a large mixing bowl, whisk together the cocoa, flour, sugar, baking powder, espresso powder, cinnamon, cayenne, baking soda, salt, and chocolate chips. Set aside.  (I added those other flavors because I’m addicted to Mexican chocolate).  In a large measuring cup or medium-sized mixing bowl, whisk together the eggs, milk, vanilla and vinegar.

Add the wet ingredients, along with the vegetable oil, to the dry ingredients, stirring to blend; there’s no need to beat the batter, just make sure everything is well-combined.
Spoon the batter into the prepared pan(s), filling them between 3/4 and full.
Bake the doughnuts for 12 to 15 minutes, or until a toothpick inserted into the center of one comes out clean.  Remove the doughnuts from the oven, and after 30 seconds or so, loosen their edges, turn the pan upside down over a rack, and gently let the doughnuts fall onto the rack.

*adapted from this recipe on King Arthur Flour

For the icings:

I filled three bowls with 1 cup of confectioner’s sugar each.  Then, I added 2-3 tablespoons of boiling water to each, whisking until smooth.

For the Peanut Butter Frosting:
To the sugar, I added 2 more tablespoons of boiling water and 2 tablespoons of creamy peanut butter.  I also added a teaspoon of vanilla bean paste because I have to add it to everything, and a pinch of salt.  Whisk until smooth.  If too thick, add more water.  If too thin, add more peanut butter.  You can’t lose.

For the Espresso Icing:
To the sugar, I added a teaspoon of espresso powder, a teaspoon of cocoa powder, a teaspoon of vanilla bean paste and whisked until smooth.  Thin out with more water if desired.

For the Cherry Almond Icing:
To the sugar, I added 2 tablespoons of boiling water to about 1/3 cup cherry preserves and whisked until smooth.  I added vanilla, a teaspoon of almond extract and a couple pinches of salt because it was just solid sweetness at first.

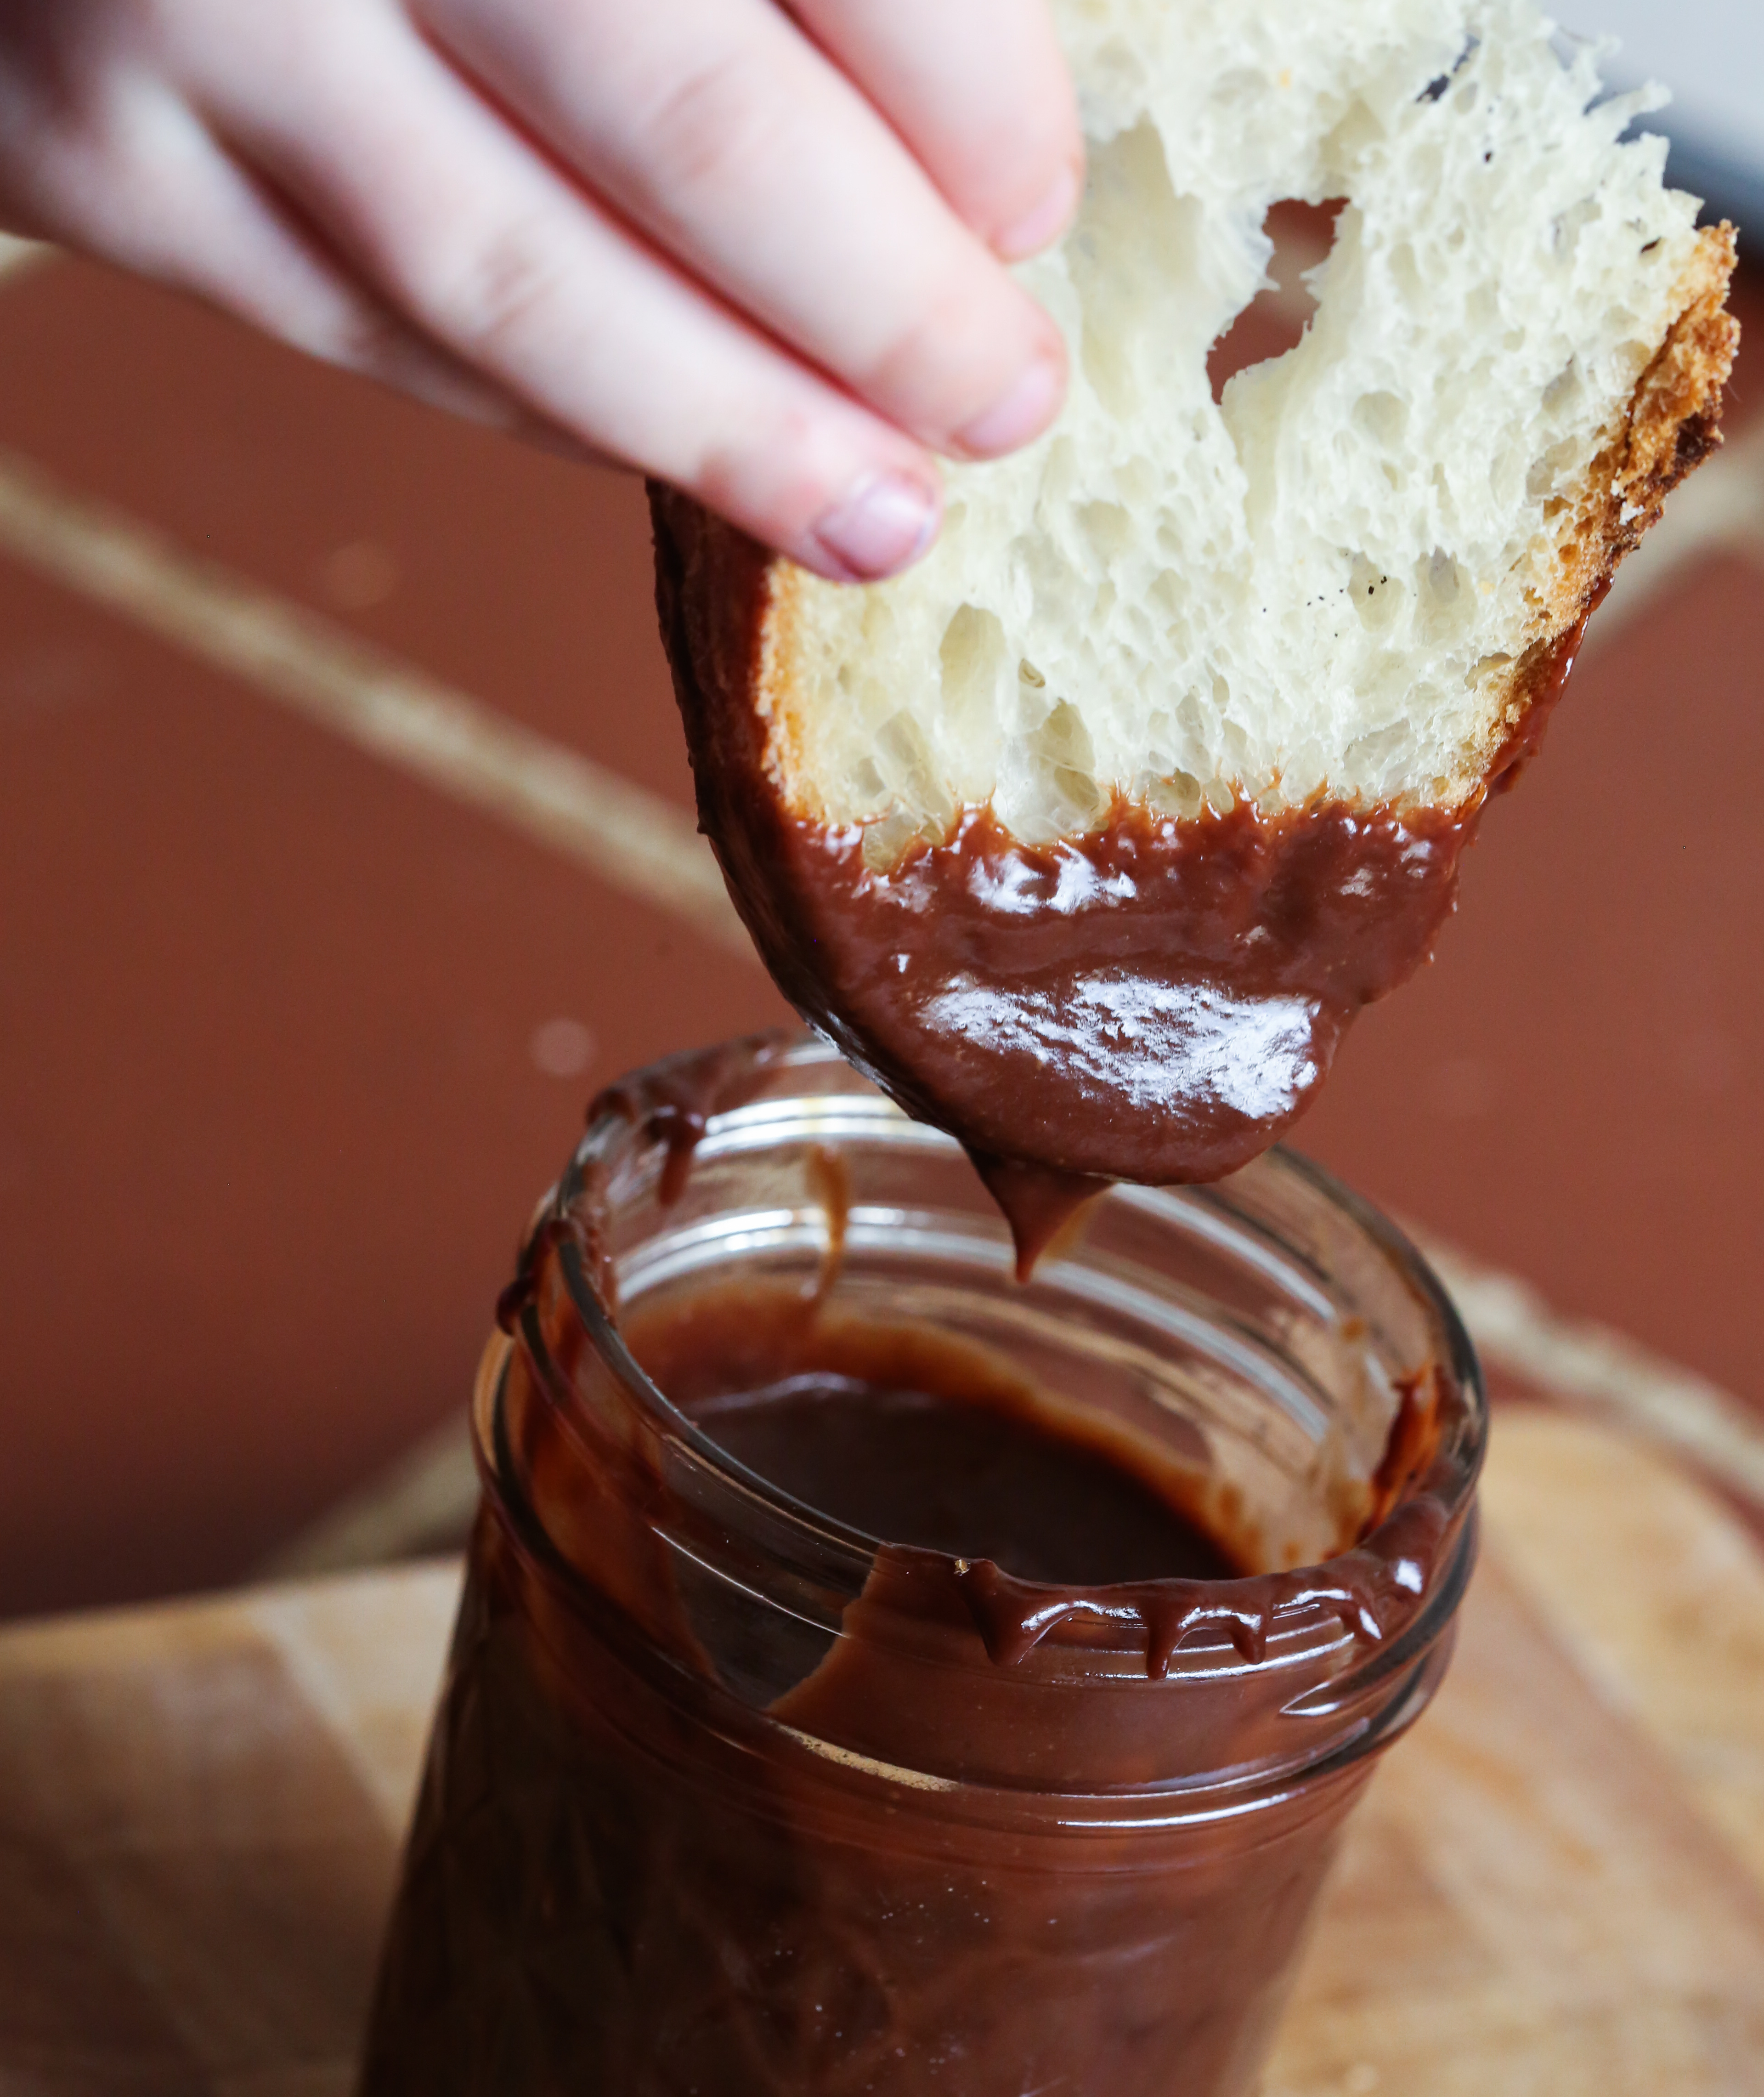
Let the doughnuts cool completely before dunking them halfway into the icing of your choice.  Enjoy!
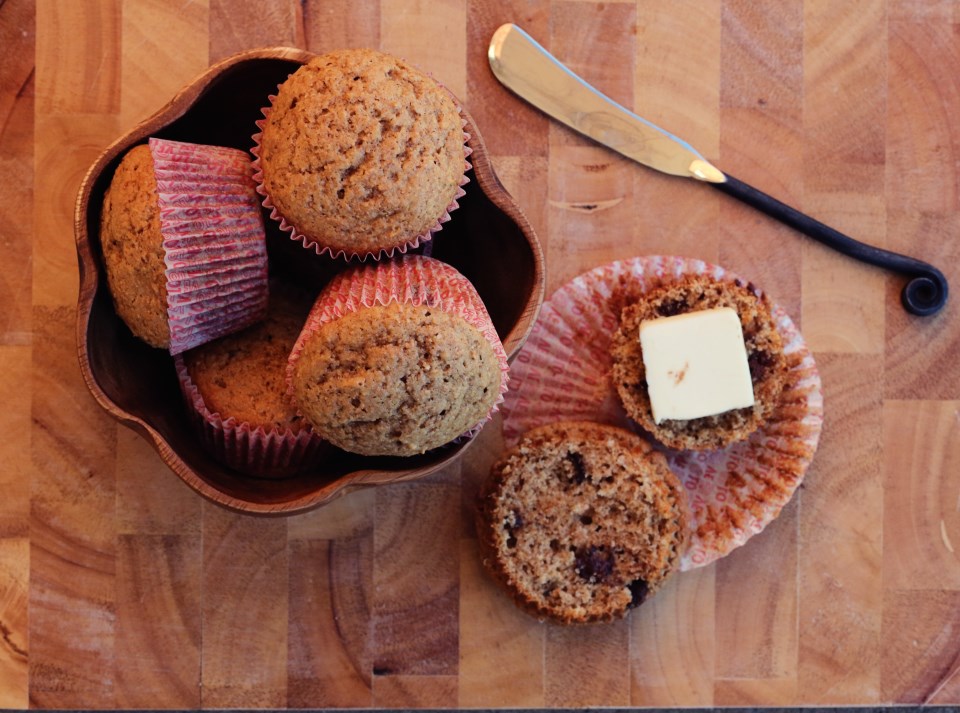
 

The Ultimate Dark Chocolate Brownies

The Ultimate Brownie
Just look at them.  Super dense.  Fudgy.  Chewy.  Crisp around the very edges and topped with a square of caramel chocolate so it oozes out when it’s cut.  Simply put: the best brownies you will ever eat.

The Bread Man made these a few years ago when we decided to host a Brownie Battle and invite about 20 of our friends to all bring brownies to taste test and enter into the competition for the Golden Whisk.  Yes, there was a golden whisk trophy.  We are serious about our food battles.  Matt baked these brownies and topped his with dark chocolate toffee bars, which is his favorite combination.  They tied up with another contender for Best Traditional Brownie out of about 20 pans of brownies!  When I went to make them last week, I bought Ghiradelli bars – the individually wrapped ones.  And I bought sea salt caramel (as seen pictured) and sea salt soiree with almonds to place on top of the batter.  Check it out, sinking down into the glossy batter…
Ultimate Brownies
This recipe is super simple and I nearly have it memorized.  We’ve adapted it from a stunning UK recipe and put it in slightly easier steps and terms for everyone.  I hope you make these soon.  If for nothing else than to cry with happiness.  It’ll happen.  And be creative with the type of chocolate bars you put on top!  There’s so many to choose from!  I thought if I were in the mood, a dark chocolate mint bar on top would be good.  Or dark chocolate and strawberry!  The fun thing about going with the individually wrapped bars is that it’s instant perfect portioning for cutting!  Have fun and let me know how you like them!

The Ultimate Dark Chocolate Brownie

The Ultimate Dark Chocolate Brownies
makes about 16 depending on how to slice it 😉

8 oz unsalted butter
8 oz dark chocolate chips (I use Ghiradelli 60%)
10 oz superfine sugar (I used Baker’s Sugar)
2 tsp vanilla extract
4 eggs
pinch of salt
5 oz cake flour
Your favorite chocolate bars for topping (I used these two kinds)

Preheat your oven to 400F.

In a double boiler (or a medium saucepan over low heat filled a couple inches up with water with a big heatproof glass bowl setting on top) melt the butter and chocolate together and stir with a rubber spatula until completely incorporated.  Gently stream in the sugar and whisk constantly until fully incorporated and smooth.  Whisk in the vanilla.  In a separate bowl, crack your eggs and lightly whip them up with a pinch of salt.  Take the bowl off the double boiler (if you haven’t already) and whisk in the eggs until smooth and then add the flour in two batches, stirring well to smooth out as many lumps as possible.

Line a 9×13″ pan with foil and spray with cooking spray.  Pour the brownie batter in the pan and smooth out the surface.  Dot the entire surface with chocolate bars and bake for 20 minutes.  It’s not going to look done, but take that sucker OUT and let it cool COMPLETELY before cutting.  Restrain yourself.  Plan ahead.  Gently lift the foil out of the pan and place the sheet of brownies on a cutting board and cut into squares.  Enjoy your life more than you ever have before. You’re welcome.

Double Dark Chocolate Brownies


Chewy Mexican Chocolate Cookies

Mexican Chocolate Cookies 3
This is one of my most favorite cookie recipes.  I found it a few years ago in a baking issue of Cooking Light magazine.  I’ve made it several times and I always get requests for the recipe.  The original recipe is soft out of the oven but then it hardens up pretty fast and becomes sort of like a short bread or pecan sandy texture.  I love the original, crunchy, good-with-coffee version, but I’m a soft and chewy cookie kinda gal.  So I adapted the recipe a bit to make the cookies more flat and chewy and I LOVED the results!  Crispy along the edges, soft in the middle – with a bite from the pepper and cinnamon!  As you can tell, I’m a fan of the Mexican chocolate flavor and I hope, within my life, to incorporate it into as many baked goods as possible.

Chewy Mexican Chocolate Cookies
I hope you try this recipe out!  If you’d like the cookies to be the original crunchy style, leave out the extra egg and cut back to 4 TBS butter.  But I don’t think you will want that after you taste these 🙂

Chewy Mexican Chocolate Cookies
makes about 30 cookies

5 oz bittersweet chocolate, coarsely chopped (I use Ghirardelli 60% chips and skip the chopping)
3.4 oz AP flour (about 3/4 cup)
1/2 tsp ground cinnamon
1/4 tsp baking powder
1/4 tsp salt
a few grinds of black pepper
a pinch of cayenne
1 1/4 cups sugar
6 TBS butter, softened
2 eggs
1 tsp vanilla extract

Preheat the oven to 350F. Place the chocolate in a small glass bowl and microwave for one minute, stir and microwave 30 seconds more to fully melt.  Stir with a rubber spatula to full incorporate and ensure it’s all melted and set aside to cool.

Combine the flour, cinnamon, baking powder, salt, cayenne and black pepper and stir well with a whisk.

Combine sugar and softened butter in a large bowl and beat with a mixer or by hand until well blended.  Add the eggs and beat well.  Add the cooled chocolate and vanilla and beat until just blended.  Fold in the flour mixture until fully incorporated.

Drop by level tablespoons 2 inches apart on a baking sheet lined with parchment paper (I’ve tried it without and they will come off a regular sheet pan if you spray it with enough oil.) Bake at 350F for 12 minutes or until cracked on top and almost set.  Let the cookies cool on the pan for a couple minutes and then transfer to a wire rack until cooled completely.  Dust with powdered sugar if desired!

Mexican Chocolate Cookies 2

*recipe adapted from Cooking Light magazine, 2010

Happy Valentine’s Day – Smokey Whiskey Truffles

Whiskey Truffles
So.  Valentine’s Day. Pink hearts and flowers and chocolate.  I do enjoy the cheerfulness of it all – the happy colors and the excuse to make everything heart-shaped.  I think next year it will be even more fun for celebrating with my little red-head as she’ll be close to three years old and will actually know what’s going on.  However, this holiday seems to be only geared toward women, full of expectations and children, full of sugar rage.  Not much love for the guys.  Guys seem to have all the pressure to pick out a gift that’s not TOO cliche, but also not too far off the expected path, because then we’d feel sad we didn’t get flowers.  I’m sorry, men.  I really am.

I love that chocolate is associated with Valentine’s, because there’s not much Matt likes more than chocolate, except maybe coffee and smokey things like bacon and…whiskey.  I skipped the bacon and went for the whiskey for his Valentine’s treat this year.  Dark chocolate ganache infused with Laphroaig whiskey and coated in a super thin shell of even darker chocolate.  For those who may not know, Laphroaig tastes like a campfire smells.  It could seriously make someone suspect of smoking because it’s THAT smokey.  For some strange reason, Matt loves it, and even though he might not initially approve of me putting his whiskey into anything except a glass, I think the results were good.  He took one bite and said, “They’re SO SMOKEY!” and that was a good thing 🙂

I was proud of the shell, too.  It’s quite hard to temper chocolate correctly so that it has a nice shine instead of dull streaks, and so that it’s perfectly, glassy thin, instead of thick and clumpy.  I’ve erred more on the side of thick and clumpy in the past than I’d like to admit.  I realized my success with these had a lot to do with the chocolate I used.  If you want to make a perfectly tempered chocolate shell, you can NOT use chocolate chips.  They’ve been coated in paraffin to make them not stick to each other in the bag and are already dull and streaky.  (chips are fine for the centers, though!) Pick a chocolate bar that is already shiny and has a good snap – that lets you know that it has been tempered properly already, so it will set you up for a better chance of success.  And if you don’t want to mess with the shell at all (and I wouldn’t blame you a bit) then simply roll the centers in cocoa powder or powdered sugar and call it a day!
Dark Chocolate Whiskey Truffles

Dark Chocolate Whiskey Truffles
makes about 2 dozen small truffles

For the centers:
10 oz dark chocolate chips (I used Ghirardelli 65%)
1/2 cup heavy cream
2 tablespoons unsalted butter at room temp
2 tablespoons whiskey (you can also use any liquor here – brandy or Kahlua would be great)

For the shell:
10 oz good quality dark chocolate (I used Lindt 70%), chopped fine

Place your chocolate chips in a medium bowl.  In a saucepan over medium heat, bring the heavy cream to a boil, then immediately take it off the heat and pour it over the chocolate.  Let this sit for about a minute and then, in the center of the bowl with a small spatula, begin stirring in tight circles until the chocolate melts and combines with the cream.  It takes longer than you think, but I promise – it will happen.  Keep stirring and don’t stop believin’.  Once the chocolate is completely melted, let it cool down a bit and then stir in the butter until completely incorporated.  Going one tablespoon at a time (depending on taste) stir in the whiskey.  Completely incorporate one tablespoon and then taste to see how you like it.  The whiskey really changes the viscosity of the chocolate, but don’t worry.  It just needs to be stirred a LOT.  Once you’ve got the level of flavor you want in the mixture, cover the bowl with plastic wrap and refrigerate until set – at least an hour.  When the chocolate has firmed up, using a teaspoon sized scoop, scoop out your centers and form into balls and place on a plate or cookie sheet and cover until ready to use.  I keep mine in the fridge until I’m ready to dip, but I let the centers set on the counter for about an hour before dipping so they wouldn’t bring down the temp of my tempered chocolate too fast.
Dark Chocolate Smokey Truffles

For tempering the chocolate:
In a double boiler, or a glass bowl set over a medium saucepan (this is my preferred way.  I feel the glass protects the chocolate from scorching better than a metal double boiler pan) slowly melt 2/3rds of your chocolate.  Stir constantly and bring the temp up to 115-118F.  Use an instant read thermometer to get the best reading.  Once the chocolate reaches 115, take it off the heat and add in the remaining 1/3 chopped chocolate, small amounts at a time and stir to melt.  Some pieces might not melt completely, but they will by the time you’re ready to dip.  And if they don’t, like mine didn’t, oh well.  Dip on!

As you are incorporating the remaining chopped chocolate, you’re wanting your chocolate to get down to 82F.  Once it gets down to 82, place the bowl back on your saucepan and bring the temp back up to 88-90F.  Once it reaches this range, you are ready to start dipping!  Your chocolate should be very liquidy and fall easily off the spatula in ribbons.  Dip the centers quickly and place on parchment to cool.  Don’t worry about being perfect – just dip!  Keep an eye on the temp of your chocolate.  If it drops below 88, your chocolate will start to get thicker.  No worries – just return the bowl to your saucepan and heat for about a minute.  Then keep dipping till you’re done!  I sprinkled cocoa nibs on top of the truffles before they dried and I love the extra bit of crunch it gives!

Dark Chocolate Truffles with Whiskey

Tempering chocolate requires a LOT of patience, most of the time I do not have.  But if you find yourself in a pretty zen-like state and you want to try it, I’d encourage you to.  It’s a nice process that yields really pretty results!  And if you have leftover tempered chocolate, do what I did and submerge gingersnaps in it 🙂

Whole Wheat Banana Chocolate Chip Muffins

whole wheat banana chocolate chip muffins
I had an abundance of bananas and buttermilk.  I had been eating pretty great all week as far as variety of vegetables and fruits and had kept my portions reasonable and so I didn’t want to totally derail that train by having two dozen muffins in my house.  So I scratched the banana layer cake recipe I found and turned it into a whole wheat muffin made with fresh buttermilk and raw sugar.  I am typically not a whole wheat flour fan because I feel that it gives breads that hint of Play-Doh that has never really appealed to me, much.

The good news about these muffins?  No Play-Doh! The banana and buttermilk mask the whole wheat “thing” and the texture was fluffy and not too dense or heavy like you might expect.  Of course, I added dark chocolate chips because I am a fan of the banana/chocolate combination and think a few more antioxidants never hurt anyone 🙂

Starting today and extending into next week, I’ll be posting good, wholesome recipes that aren’t too indulgent, but will also not leave you feeling deprived, either.  You can have your cake and eat it too, so to speak!

whole wheat banana chocolate muffins


Whole Wheat Banana Chocolate Chip Muffins*
makes 2 dozen

2 1/4 cups whole wheat flour
3/4 teaspoon baking soda
1/2 teaspoon baking powder
1 tsp cinnamon
1/2 teaspoon salt
1 cup mashed very ripe banana (about 2 large)
1/4 cup buttermilk or plain yogurt (I used buttermilk)
1 teaspoon vanilla bean paste or extract
1 stick (1/2 cup) unsalted butter, softened
1 cup raw, demerara sugar  (can substitute any type)
2 large eggs
1 cup chocolate chips

Preheat oven to 350° F.  Line two muffin pans with papers and spray the papers with non-stick spray.

Into a bowl sift together flour, baking soda, baking powder, cinnamon and salt. In a small bowl whisk together mashed banana, buttermilk, and vanilla. In a large bowl with an electric mixer beat together butter and sugar until light and fluffy and beat in eggs 1 at a time, beating well after each addition. Stir in flour and banana mixtures alternately, beginning and ending with flour mixture and stirring after each addition until just combined. (Do not overmix or you’ll get tough muffins – a few lumps are okay.)  Gently fold in the chocolate chips.

Divide batter evenly among muffin cups and bake in upper and lower thirds of oven, switching position of pans halfway through baking, about 25 minutes total, or until a tester comes out clean. Turn the muffins out on a cooling rack immediately as sitting in the muffin tins will cause the bottoms to brown too much.  Let them cool most of the way before serving.

*recipe adapted from Epicurious