Chicken in a Biskit Fried Chicken on a Biscuit

fried chicken and cream biscuits with maple butter
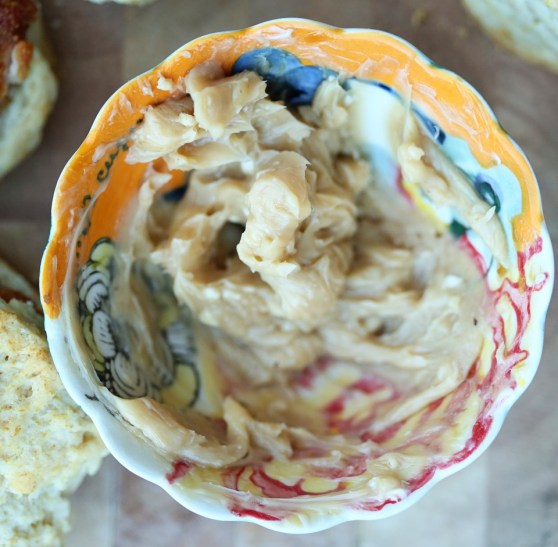
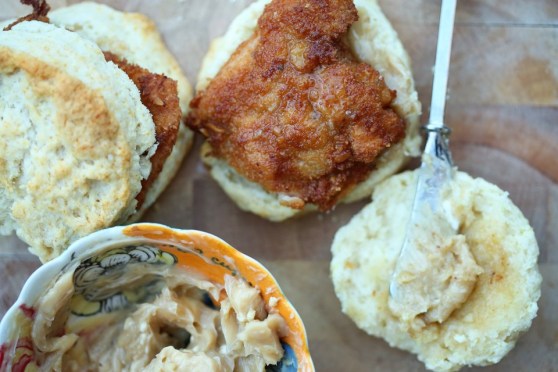
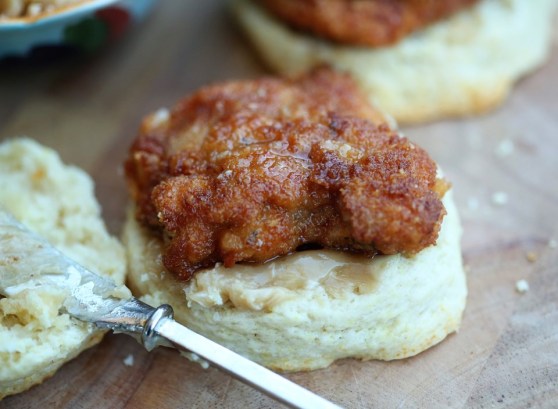
You read that right. Buttermilk-brined chicken thighs, breaded in ground up Chicken in a Biskit crackers and fried. Served on top of a fluffy cream biscuit and finished off with a spread of salted maple butter.
I make no apologies. For any of it. It was one of the best little chicken sandwiches I’ve ever had. And it really wasn’t that difficult! We had the idea a while back and thought it was too good of a play on words to not do it. So we did it! Matt put the chicken thighs in the brine the night before but the meal itself took less than an hour from start to finish. And a made a side of carrot “fries” to go along with everything.
Have you ever had Chicken in a Biskit crackers? If you haven’t, you should try them. Oddly addicting. They have a sweet/savory flavor combo that I’ve tasted in other crackers, but this one, in my opinion, was the first of its kind and remains the best. It’s an old cracker (well, not literally, but the brand is old!) I can remember these crackers as a kid and I honestly hadn’t bought a box since, but for this little project, it’s well worth it.

Start this the night before you want to eat it so that you can get your chicken in the brine. The rest doesn’t take that long – about an hour from baking the biscuits through frying the chicken.  Enjoy and let me know if you love it as much as we did!

Chicken in a Biskit Fried Chicken and Biscuits with Maple Butter

Chicken in a Biskit Fried Chicken on a Biscuit

  • Servings: 6-8 sandwiches
  • Print


For the Biscuits* (taken from Smitten Kitchen – which looks a lot like the scone recipe I use from America’s Test Kitchen – both are awesome and yield similar results):
3 tablespoons (45 grams) melted butter
2 cups (250 grams) all-purpose flour, plus more for dusting the surface
1 tablespoon (15 grams) baking powder
1/2 teaspoon salt
1 tablespoon (15 grams) sugar (optional)
1 1/2 cups (355 ml) heavy cream

Preheat the oven to 425°F. Line a baking sheet with parchment paper. Melt butter in a small pot or microwave dish, and set aside. Sift two cups flour, the baking powder, salt and (if using) sugar into a large bowl. Fold in 1 1/4 cups cream. If the dough is not soft or easily handled, fold in the remaining 1/4 cup cream, little by little. (I ended up using two additional tablespoons, or half the unused cream.)

Turn dough onto a floured surface, mound it into a ball and, using your hands, press it to a thickness of about 3/4 inch. Cut into rounds, 2 1/2 inches in diameter. Gather dough scraps and continue to make rounds. Dip the top of each round in melted butter and arrange on the baking sheet. Bake until golden, 12 to 15 minutes.

chicken in a biskit fried chicken on a cream biscuit

For the Chicken:

1 pound boneless, skinless chicken thighs; trimmed and cut in half
Buttermilk brine (we use Serious Eat’s Southern Fried Chicken for nearly every fried chicken recipe we do):
2 tablespoons paprika
2 tablespoons freshly ground black pepper
2 teaspoons garlic powder
2 teaspoons dried oregano
1/2 teaspoon cayenne pepper
1 cup buttermilk
1 large egg

For the Dredge:
1 cup flour
1 egg + 1/4 cup buttermilk
1 box Chicken in a Biskit crackers, pulsed fine in a food processor

vegetable oil for frying
Combine the paprika, black pepper, garlic powder, oregano, and cayenne in a small bowl and mix thoroughly with a fork.Whisk the buttermilk, egg, 1 tablespoon salt, and 2 tablespoons of the spice mixture in a large bowl. Add the chicken pieces and toss and turn to coat. Transfer the contents of the bowl to a gallon-sized zipper-lock freezer bag and refrigerate for at least 4 hours, and up to overnight, flipping the bag occasionally to redistribute the contents and coat the chicken evenly.

Take the chicken out and pat dry with paper towels. Dip the thighs in the flour first, then the egg/buttermilk mixture, then the cracker crumbs. I double dipped each piece to get lots of crunch (so dip once more in the egg and then the crackers.) Set aside till you’re done with all the pieces before frying.

Preheat your oven to 200F. (Your oven should still be hot from the biscuits! You’ll keep your fried chicken pieces in the oven to stay warm and crispy while you finish setting your table or wiping kids’ butts or whatever it is you have to do while you try to make dinner.)

Heat about an inch of oil in a skillet over medium high heat until it’s shimmering. Fry each piece of chicken for about 4-5 minutes per side, until the chicken is golden brown and registers 170F on an instant-read thermometer. If you’re thinking you’re about to burn the breading, transfer the chicken pieces to a baking sheet and finish cooking in the oven.

maple butter

For the Maple Butter:
4 tablespoons unsalted butter, room temp
1/4 teaspoon salt
2 tablespoons pure maple syrup

Combine all ingredients until thoroughly incorporated. Spread on biscuits and top with chicken pieces. We also doctored the sandwiches up with a bit of mustard, hot sauce and candied jalapenos, but just the chicken, biscuit and butter are enough.
Dark Chocolate Cherry Pie Biscuits

Black Cherry Chocolate Biscuits
Dark chocolate and cherry – a pretty perfect desert combination. I regularly make dark chocolate oatmeal for Olive and myself and I will stir in dried cherries almost every time. There’s just something special about the tart zinginess of the cherries combined with the rich, deep earthy heft of dark chocolate. I’m just full of adjectives tonight. This baking project was a fun one – Olive and I were watching Tangled on a Sunday afternoon and I decided to bake something fun. A while back, Joy the Baker had this really fun baking competition and one of the challenges were these amazing apple pie biscuits. I remembered the recipe seeming like it wouldn’t work because it was too sloppy and wet, but they turned out incredible. (And there’s wonderful step-by-step instructions for how to do her biscuits, which you can apply to this recipe as well.) Fast forward to my version of this recipe and I felt the same way all over again – that there would be too much juice from the cherries for this recipe to work the same. And honestly, there was a bit more juice than with the apple version, but nothing a little draining didn’t fix. These were fun, decadent and great for breakfast during the week!

They also look so white because I had recently bought expensive, pasture-raised eggs made by chickens with PhDs and I didn’t want to waste one on making an egg wash for a few biscuits. So I brushed them with heavy cream.  Not as pretty, but it saved an egg from not getting to fulfill its destiny of becoming a fried egg on my toast the next morning.

Dark Chocolate Cherry Almond Biscuits Cherry Chocolate Biscuits

Dark Chocolate Cherry Pie Biscuits*

For the cherry filling:
2 cups fresh, pitted cherries, roughly chopped
2 tablespoons unsalted butter
2 tablespoons packed brown sugar
1/8 teaspoon almond extract
squeeze of lemon

For the dough:
2 cups self-rising flour
1/4 cup cold, unsalted butter, cut into small cubes
2 tablespoons granulated sugar
2/3 to 3/4 cup cold buttermilk

Preheat your oven to 425F. Line a baking sheet with parchment and set aside.

In a skillet over medium heat, melt the butter and brown sugar until they are all incorporated and bubbling and then stir in the cherries. Mash them around (I use a drink muddler) and let the mixture cook for about 5 minutes. Stir in the extract and a squeeze of half a lemon and add a pinch of salt. Stir around and let it cook for one more minute. Drain off all but about 2-3 tablespoons of liquid (cherries give off more liquid than the original recipe’s apples, but you don’t want NO juice) and set the mixture aside to cool while you make the dough.

To make the dough, mix the flour and butter together with your hands or a pastry blender until the butter is broken up into small pea-sized bits. Stir in the sugar and then make a well in the center of your dough. Add the buttermilk and with a fork, stir together until combined. The dough should be soft and moist, so use a bit more buttermilk if needed.

Use all-purpose flour to dust your work surface. I ignored this step in the original recipe and the bottoms of my biscuits tasted sour because they were in dusted with self-rising and there’s baking powder in self-rising flour so DON’T BE LAZY LIKE ME and just get out the all purpose to dust. It isn’t that difficult.

Spoon the dough onto your floured surface and gently pat it into a small rectangle. Dust the top with a little extra flour and roll out into a rectangle about 7 x 10 inches. Arrange the cherries over half the long side of the dough and carefully fold the other half of the dough over the filling, crimping along the edges to seal in most of the filling. It doesn’t have to be perfect and it will be messy. If you have cracks, just gently pinch them closed and carry on. You want to have about a 6 x 8 inch rectangle when it’s all said and done, so just pat it into submission. Cut into 12 squares and place on prepared cookie sheet about 2 inches apart. Brush the biscuits with a beaten egg that was not raised by monks and sprinkle with sugar and cinnamon if desired (I just used sugar since cinnamon didn’t fit in with the flavor profile I was going for.)

Bake for 12-14 minutes, or until golden brown and serve right away. The sugar topping will melt if you store these in a plastic bag on your counter throughout the week, so it’s best to eat these the same day or store in an air-tight container.

*adapted from Joy the Baker

Apricot Cream Scones

apricot white chocolate cream scones
Here’s a wonderful recipe I’ve done countless ways over the past few months and it’s delicious every time.  Quick, easy and amazingly fluffy on the inside while being crispy on the outside – these scones are an amazing way to make breakfast better.  Today I’m sharing with you one of my favorite flavor combinations: apricot and white chocolate.  However, anything you want to add will work. I’ve done cheddar and chives for a savory version, a simple version with just currents and then just plain for the most amazing biscuits! This recipe comes from The Best New Recipe cookbook and so you know the recipes have been endlessly tested and work.  I loved this recipe because I had it memorized the first time I did it.  Four ingredients.  Doesn’t get easier than that.  No cutting in butter – these scones/biscuits/whatever you want to call them have just heavy cream!  I even skip the patting out and cutting into triangle method that Best New calls for and make it even easier by just making these drop-style.

I hope you add this to your arsenal of recipes to whip out when company arrives or a friend drops by for coffee (that still happens in my head, although not so much in reality).  My white chocolate chips got kind of torched, but no scone was left behind.
apricot cream scones

Apricot Cream Scones

10 ounces (2 cups, but start weighing your flour!) all purpose flour
2 teaspoons sugar
2 teaspoons baking powder
1/2 teaspoon salt
1 1/2 cups heavy cream

Add-Ins:
1/4 cup white chocolate chips
1/4 cup chopped, dried apricots

Preheat the oven to 425 degrees.  Line a baking sheet with parchment or spray with oil.  Whisk together the dry ingredients, stir in the white chocolate and apricots and then with a fork, whip in the cream.  It gets super sticky and super hard to stir.  If it seems too dry, add a splash or two more.  I usually add just a bit more.  Then, by the spoonful, drop mounds onto your baking sheet about 2 inches apart.  Brush the tops of the scones with more heavy cream and bake 15-20 minutes, until golden brown.  Serve immediately with butter.

Cheesy Cornmeal Waffles with Spicy Honey

Smoked Gruyere Cornmeal Waffles with Spicy Honey Smoked Gruyere Cornmeal Waffles
Parks and Recreation was one of our favorite shows of all time.  We were sad to see it end a few weeks ago and had to cook something special for the finale.  I debated quite a lot about what to cook.  I could’ve done a plain hamburger inspired by the episode where Ron and Chris battle it out in a food war. We thought about doing bacon wrapped shrimp served with all the bacon and eggs the store had to offer, but I figured that might be a tad wasteful. And so we settled on waffles, as Leslie Knope would’ve wanted.  I decided to do a savory waffle with a side of bacon and plenty of melted butter and Mike’s Hot Honey on top.  Mike’s makes some amazingly spicy and delicious honey that we love putting on our pizza crusts and it’s really good on so many things like buffalo wings or smoked sausages, but it was especially good on top of this cheesy waffle!

Smoked Gruyere Cornmeal Waffles and Spicy Honey


Cheesy Cornmeal Waffles with Hot Honey

  • Servings: about 8 Belgian waffles
  • Print


  • 1 cup of self rising flour
  • 1 cup of all purpose cornmeal
  • 2 teaspoons of baking powder
  • 1/2 teaspoon of salt
  • 1 tablespoon of sugar
  • 1/2 cup grated cheddar cheese
  • 2 scallions, sliced thin
  • 1/2 tsp smoked paprika (optional)
  • 1/8 tsp cayenne (optional)
  • eggs
  • 1 cup buttermilk
  • 1/3 cup water
  • 1/4 cup of canola oil

Get your waffle iron heating up.  In a large bowl, mix the dry ingredients along with the cheese and scallions.  In a separate bowl, whisk the eggs, buttermilk, water and oil until well blended.  Add the wet ingredients to the dry and beat with a fork until no dry parts remain.  Cook in a waffle iron and keep warm in a 200 degree oven until you’re finished cooking all the waffles.  Serve with hot honey, regular syrup, sweet bbq sauce, or anything you can think of. Hey, why not a fried egg on top?! And make sure you have plenty of crispy bacon alongside.  Enjoy!


Bacon and Blue Cheese Scones

bacon blue cheese scones
I’ve noticed a trend.  Every time it’s freezing, lately, snowing in particular, I post a blog entry.  I also bake something.  Today I made a banana chocolate chip bread with Olive and after putting her down for her “quiet” time (hardly ever quiet, but at least she stays in there), I came to write right away before the littler one wakes up from her nap.  Everything happens in thirty-minute windows, lately.  Feedings, naps, playtimes, snacks, lunch, cleanup, laundry folding, getting dressed, errands – it all goes like clockwork.

I remember this feeling of monotony and spinning my wheels when Olive was a baby.  I don’t know what it is about the infant phase – it is all at once sweet, boring, thrilling, gross, blissful and extremely isolating.  I think the feelings of isolation come from the cabin fever.  It’s hard to get a baby ready to go out and do something outside the home when you know you’ll have to do something baby related in another hour.  I love this phase but I am always looking forward to getting out of the house more and feeling productive.  January is the antithesis of productive as far as my photography business goes.  No hustle and bustle of bridal and engagement shoots, yet.  Everything is dead, gray and cold.  And maybe that’s okay.  It’s a big, gigantic pause button and one that I (usually) am glad to press each year.  But I’m a people-person.  And not just a little-people person.  I love interacting with grown-ups and perhaps that’s the catharsis of this blog.  It was born the year my first daughter was born and it kept me connected to all of you who love cooking just as much as I do.  I hope one day to have a cooking class.  How grand would that be?!  But the time isn’t right, yet.  For now, I’ll write about scones and look forward to hearing from you all.  And go feed the baby in another thirty minutes…

I improvised this lovely recipe from Annie’s Eats because I had neither scallions or cheddar and only about half the bacon her recipe called for.  I first made her original recipe when I went on a road trip and they were just wonderful.  My altered version was also great and amazing as a little side treat with a cup of soup.  Especially on a day like today, there’s nothing quite like the smell of bacon coming from the oven.  And with a bit of cold butter melting on top of one of these babies, you’ll be set.

Bacon and Blue Cheese Scones

Bacon and Blue Cheese Scones

3 cups all-purpose flour
1 tbsp. baking powder
1 tsp. salt
1-2 tsp. ground black pepper
8 tbsp. cold unsalted butter, cut into small cubes
1/2 cup blue cheese crumbles
5 slices bacon, cooked and chopped into small pieces
1 cup buttermilk (plus up to ½ cup extra, if needed)

For the egg wash:
1 large egg
2 tbsp. water

Preheat oven to 400F.

In a large bowl, combine the flour, baking powder, salt and pepper and then cut in the butter with a pastry blender or a fork until broken down and the butter resembles crumbly sand.  Fold in the blue cheese and bacon and then stir in the buttermilk.  Add a little extra to form a sticky dough if it seems too dry.  Turn out onto a floured work space and form into a rectangle, about 1/2 inch thick.  Cut into squares or circles or daisies or whatever you prefer and place on a greased cookie sheet.  Brush with egg wash.  Bake for 20-25 minutes until golden brown.  Serve with cold butter.

Caramelized Pear and Biscuit Pie

Caramelized Pear Biscuit Pie
Happy New Year’s Eve!  It is a frigid 20 degrees today with a windchill of about -5 and this morning as I got reluctantly out of my bed, I looked out the frosted window and saw gray.  Just gray with bits of white flocking everything in sight.  I thought of what I would make for breakfast for the redhead and for Matt, who was working from home due to the weather, and I wanted something warm and cozy with possibly a bit of cinnamon.  We had pears getting way too ripe on the counter and lest I waste such beautiful fruit, I decided to do a spin on Joy the Baker’s apple pie biscuits.  The apples for her recipe are obviously not mushy pear consistency and so they cut up and bake into biscuits nicely.  I knew that wouldn’t be possible with pears and I’d just end up frustrated, so I decided to do a free form biscuit/pie/tart mashup and the results were amazing.  I adapted her biscuit recipe to include creme and lemon juice instead of buttermilk and the result was cakey, tangy perfection on top of caramlized pears.

I highly recommend this dish.

Pear Biscuit Pie

Caramelized Pear and Biscuit Pie*

For the pears:
4 ripe pears, peeled and sliced
4 TBS brown sugar
4 TBS unsalted butter
1/2 tsp kosher salt

For the biscuits:
2 cups self-rising flour
2 TBS granulated sugar
4 TBS cold butter, cut into small pieces
3/4 heavy cream
2 TBS lemon juice
1/4 cup milk

In the super old, awesome, vintage skillet your husband got you for Christmas, melt the butter and brown sugar and salt together until bubbly.  Fold in the pears until they’re all coated and set aside.

Preheat your oven to 425F.  In a large bowl, cut the butter into the flour and sugar until it’s all well incorporated.  You can use your hands to break up the butter into tiny pieces in the flour, or just use a pastry cutter.  Either way, make sure it resembles tiny pea-sized crumbles.  Stir the lemon juice into the heavy cream and pour into the flour.  Stir up until it’s all moistened and then add the milk until a sticky dough forms.  You may need more milk.  Loosely form biscuits and layer on top of the pears.  Brush with a beaten egg and sprinkle with coarse sugar.  Bake for 25-30 minutes until the biscuits are golden brown.

*adapted from Joy the Baker

Pear and Biscuit Pie

Baked Pumpkin Doughnuts

pumpkin doughnuts
I haven’t posted in a really long time.  I apologize.  Not that any of you were waiting around without anything to eat or lacking another post about complex carbs to drool over, but still.  I don’t like being inconsistent, but I’m thinking that may be the new word that will begin to define my life, starting in about four weeks.

We’ve been doing all kinds of prep to the house for the arrival of this tiny baby.  Amazing what all “needs” to be done to accommodate something that only weighs eight pounds.  But I’m a planner.  I love my ducks all in a row and a few of those ducks were still squawking around in my head, so we’ve been getting things done. We rearranged Olive’s room and Eleanor’s nursery, which will also be a guest bedroom.  I’ve made a Quiet Book for Olive for the one Sunday morning a month that our church doesn’t have their children’s program during services, and I’ve been trying to knit Eleanor a cardigan, which I’m sure she’ll like to put on one of her dolls when she’s five, because I think that’s about when I’ll be done with it.  Matt finished building Olive’s bed and I’ve bought the requisite new rug (I feel the need to buy a rug for each new life occasion) for the nursery and so we’re getting there.  Slowly but surely, I’ll be ready for this baby to enter our world.  Things left to do: buy Christmas presents for as many people as I can, write a few dozen blog posts, finish up my last three photo shoots, have a few cooking days to stock our freezer with ready to make meals for the winter, and create/shoot our annual Christmas card.  Yes, we will go to just as much trouble as we always do.  Unfortunately/fortunately.  It’s going to be epic. 🙂

So in the midst of all this planning, I woke at 6 last Sunday morning with my parents in town for a visit, a quiet house, and THIS picture on my Instagram feed.  I quickly scanned my brain pantry for the items and they were all there.  So, I got up and made them.  They were fantastically successful.  So easy and so worth buying a little doughnut pan, although I’m sure they’d bake up into amazing little mini muffins, as well, if you don’t have a doughnut pan.

I promise more regular posts in the coming weeks.  Life’s changing, but we still have to eat, right?!  I hope things have been going well for you.  And if they haven’t, these doughnuts will start you off in a better direction tomorrow.

baked pumpkin doughnuts

Baked Pumpkin Doughnuts*
makes 16

1/2 cup vegetable oil
3 large eggs
1 1/2 cups granulated sugar
1 1/2 cups canned pumpkin
1 1/2 teaspoons pumpkin pie spice, or 3/4 teaspoon ground cinnamon plus heaping 1/4 teaspoon each ground nutmeg and ground ginger
1 1/2 teaspoons salt
1 1/2 teaspoons baking powder
1 3/4 cups + 2 tablespoons all-purpose flour

Preheat the oven to 350°F. Lightly grease two standard doughnut pans. If you don’t have doughnut pans, you can bake these in a standard muffin tin; they just won’t be doughnuts.
Beat together the oil, eggs, sugar, pumpkin, spices, salt, and baking powder until smooth.
Add the flour, stirring just until smooth.

Fill the wells of the doughnut pans about 3/4 full; use a scant 1/4 cup of batter in each well. If you’re making muffins, fill each well about 3/4 full; the recipe makes about 15, so you’ll need to bake in two batches (unless you have two muffin pans).  Bake the doughnuts for 15 to 18 minutes, or until a cake tester inserted into the center of one comes out clean. If you’re making muffins, they’ll need to bake for 23 to 25 minutes.

Remove the doughnuts from the oven, and after about 5 minutes, loosen their edges, and transfer them to a rack to cool.

While the doughnuts are still warm (but no longer fragile), gently shake them in a bag with cinnamon-sugar. If you’ve made muffins, sprinkle their tops heavily with cinnamon-sugar.
Cool completely, and store (not wrapped tight) at room temperature for several days.  I’d recommend a tupperware as opposed to a plastic bag.  They sweat like the dickens.

*taken from the King Arthur Flour website, which you all should subscribe to


Double Dark Chocolate Waffles

Double Dark Chocolate Waffles
The chocolate cravings have gone overboard.  I really blame it in all seriousness on pregnancy.  When I’m not pregnant, chocolate is good and fine, about on par with every other sweet. Not pregnant,  I don’t think about it outside of seeing it, I don’t dream up ways of using it to its maximum potential in breakfast foods, and I don’t think that it’s “needed” to get from 8 a.m. to 8 p.m. successfully.  When pregnant…well, all those things suddenly become priorities.  Like on Labor Day, I got up and looked up a basic buttermilk waffle recipe and then thought of the maximum way I could choco-fy it.  And I did.  Yes, I’ve had a similar waffle recipe on this blog before, BUT it wasn’t as good.  These waffles are fluffier, less dense, and the chocolate chips remain melty like a fresh-baked chocolate chip cookie during your entire breakfast.  So.  I’m not sorry for seeming repetitive.  If you’re pregnant, I’ll understand if I get a thank-you note in the mail later this week.
Double Chocolate Buttermilk Waffles
I topped these in three different ways and they were all good: melted butter and powdered sugar – easy, and the most cookie-like experience.  Butter with maple syrup: most waffle-like experience, but I’ve always felt that syrup on a chocolate anything is too much.  Turns out, it’s not.  And three: fresh raspberries all over the suckers.  Chocolate dipped fruit, anyone?  They were all good.  Dress it up, dress it down, this will be your new craving.

Double Chocolate Waffles
Double Dark Chocolate Waffles
makes about 12 Belgian-style waffles

2 cups AP flour
2 tablespoons brown sugar
2 tablespoons Dutch-process cocoa powder
2 teaspoons baking powder
1 teaspoon baking soda
1/2 teaspoon salt
2 cups buttermilk
1/3 cup vegetable oil
2 large eggs, lightly beaten
1 teaspoon vanilla extract
1 cup dark chocolate chips

Heat your waffle iron.  In a large bowl, combine the dry ingredients with a whisk until fully incorporated.  In a smaller bowl, whip up the wet ingredients.  Gently whisk the wet into the dry until just combined.  Fold in the chocolate chips.  Cook waffles to the waffle-iron’s suggested time (mine has a handy little light that goes off when they’re done) and keep in a 200 degree oven while you cook the rest to keep them nice and warm and crisp on the outside.  Serve with powdered sugar and melted butter, or whatever.  It really doesn’t matter – it’s all good.

The Best Fresh Blueberry Muffins

Fresh Blueberry Muffins 3
Sorry for the delay in posts.  I can’t really blame it on anything except feeling bloated, it’s 100 degrees outside, I don’t feel like cooking anything that’s picture-worthy and I’m rearranging my entire house to make room for a little human that will only weigh about 7 pounds.  So here’s another indulgent baked goods recipe that both me and my little growing baby demand in spades these days (hey, I passed my glucose test almost too well.  This kid needs sugar!)
Blueberries are $1.30 for a pint at our local supermarket!  I bought a couple pints and plan on freezing some for those lonely winter months without a fresh berry in sight.  Plus, I need to start thinking about literally storing up for winter as we will have a brand new baby to feed around the clock during the holidays, on top of everything else that will need to be done!  I’m thinking these muffins will be perfect to freeze and gently warm in the oven when we need breakfast, yet don’t have the brain capacity to read a recipe.
Fresh Blueberry Muffins 2
I made these last week  from the New Best Recipe cookbook and they turned out magically perfect.  I used fresh instead of frozen, as the recipe suggests, and I indeed had “explosions of tart berries throughout the muffins” but I certainly didn’t mind.  Because the recipe was testing in the winter when blueberries were out of season.  The blueberries in the store now taste like…blueberries!  So grab them while you can and whip these up for breakfast tomorrow morning!  I brushed these with melted butter and sprinkled them with cinnamon sugar for a little extra love.  Fresh Blueberry Muffins with Cinnamon Sugar

The Best Fresh Blueberry Muffins*
makes a dozen

10 ounces (2 cups) unbleached AP flour (Gold Medal makes a softer muffin because it doesn’t have as much protein as King Arthur.)
1 TBS baking powder
1/2 tsp salt
1 large egg
7 ounces (1 cup) sugar
4 TBS unsalted butter, melted and cooled slightly
10 ounces (1 1/4 cups) sour cream
7-8 ounces (1 1/2 cups) frozen or fresh blueberries

Adjust oven rack to the middle position and heat the oven to 350 degrees.  Grease a 12 cup muffin tin or line with papers, like I do, because I live in terror of baked goods sticking.

Whisk the flour, baking powder, and salt in a medium bowl.  Whisk the egg in a separate medium bowl until well combined and light colored, about 20 seconds.  Add the sugar and whisk vigorously until thick and homogenous, about 30 seconds; add the melted butter in 2 or 3 additions, whisking to combine after each addition. Add the sour cream in 2 additions, whisking just to combine.

Add the berries to the dry ingredients and gently toss until they’re all coated.  Add the sour cream mixture and fold with a rubber spatula until the batter comes together and the berries are evenly distributed, 25-30 seconds.  Don’t overmix, some spots of flour will remain.

Scoop into the muffin cups about 3/4 of the way full.  Bake until muffins are light golden brown and a toothpick comes out clean, about 25-30 minutes, rotating the pan about halfway through baking time.  Dump the muffins onto a wire rack, stand the muffins upright and let them cool 5 minutes.  Serve as is, or brushed with butter and dipped into cinnamon sugar.  You win either way.

*taken from The Best New Recipe.  This cookbook will make you look so, so smart.

Blackberry Lime Cinnamon Rolls with Lime Vanilla Bean Icing

Blackberry Lime Cinnamon Roll - cross section
Good Sunday morning to you all!  This week has been a tough one for me.  I got sick on Tuesday and as anyone who has ever been pregnant knows, you can’t take the good meds when you’re sick.  So I had the usual, insulting cold in the middle of summer, had two weddings and one family shoot to edit, made a ginormous birthday cake for a friend which took up all of Tuesday AND my wonderful redhead decided to cut her usual nap time in half, so I had only one good hour during the day to get my photo work done (still got the wedding done in my two-week time frame – bragging, I don’t care, gotta throw that out there).

Blackberry Lime Morning Rolls
In the midst of my feeling like my head was stuck in a cloud and everything else, I felt it was the right time to make cinnamon rolls.  I don’t know – it was just therapeutic.  A few weeks ago, Matt made Joy the Baker’s first Baking Bootcamp recipe – a triple berry cinnamon swirl bread – and it was just outstanding.  Wonderful recipe and the flavors were so perfect.
Triple Berry Cinnamon Swirl Bread
The day he made it, I knew I wanted to turn it into cinnamon rolls with some kind of citrus glaze.  I finally got around to it and…score.  They were so bright and comforting at the same time.  I will definitely make these again when I’m not afflicted with Taste Blindness (I’ll expound on that, later).  And you should make them, too!  They take about an hour less than typical from-scratch cinnamon rolls and can be used with most any fruit – so get creative!

Morning Rolls - Blackberry Lime


Blackberry Lime Cinnamon Rolls with Lime Vanilla Bean Icing*

For the Dough:
2 1/4 teaspoons active dry yeast
1 tablespoon granulated sugar
3/4 cup whole milk, warmed to a warm lukewarm
1 large egg yolk 2 tablespoons unsalted butter, melted
2 1/4 cups King Arthur All-Purpose Flour
1/2 teaspoon salt a bit of olive oil for greasing the bowl

For the Filling: 1/4 cup unsalted butter, at room temperature
1/4 cup granulated sugar
3 teaspoons ground cinnamon
2 cups fresh blackberries
Zest from two limes
1 large egg, beaten for egg wash

In a medium bowl stir yeast with sugar. Stir in  the lukewarm milk and then add the egg yolk and melted butter.  Whisk together until thoroughly combined.  Allow mixture to rest for 5 minutes.  It should foam and froth. In a large bowl whisk together the flour and salt. Pour the milk mixture over the dry ingredients and start kneading it until it pulls away from the edges of the bowl. Place dough on a lightly floured counter and knead by hand for about 10 minutes more.  Dough ball should be smooth and damp, without being too sticky.  Shape dough into a ball. Grease a large bowl with olive oil.  Place the dough in the bowl and cover.  Allow to rest at warm room temperature for about 1 hours, or until doubled in size.

While the dough rises, whisk together the butter with sugar and cinnamon for the filling.  Preheat the oven to 375 degrees F. Grease a 9 inch cake pan.  Set aside. After the dough has doubled in size, place it on a lightly floured counter and knead twice.  Using a rolling pin to roll the dough to a rectangle of about 18×12 inches. Spoon the cinnamon filling over top, spreading evenly, leaving a clean 1-inch border around the edges. Sprinkle the fresh blackberries over the cinnamon filling and grate the lime zest over everything.
Blackberry Cinnamon Rolls
(My blackberries were apparently from the Land of Canaan, so I had to cut them up). Start by rolling the longest side of the dough.  The roll will be a bit lumpy because of all the berries. Using a sharp knife, cut the log into 1 1/2 inch rolls and place cut-side down.  Brush the rolls with the beaten egg. Bake for 20-25 minutes until golden brown.  Allow to cool for about 30 minutes before icing.

For the Icing:
1 cup powdered sugar
juice from one lime
3 tbs heavy cream
1 tsp vanilla bean paste
a good pinch of kosher salt

Mix everything together in a medium bowl and thin out the icing with more lime juice, or thicken it up with more sugar.  Easy as that!

Have a happy rest of your weekend 🙂

*I adapted Joy’s recipe for the Triple Berry Cinnamon Swirl Bread a bit, but you can see her original and wonderful recipe HERE.

Blackberry Lime Cinnamon Rolls