Chicken in a Biskit Fried Chicken on a Biscuit

fried chicken and cream biscuits with maple butter
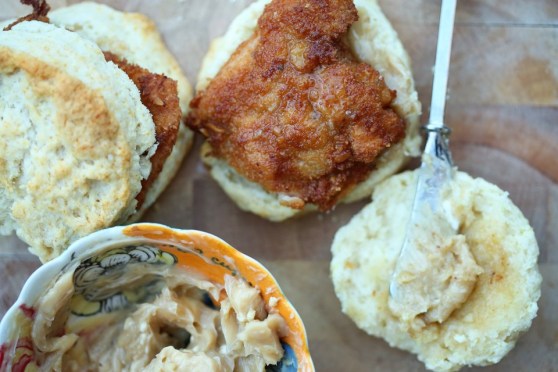
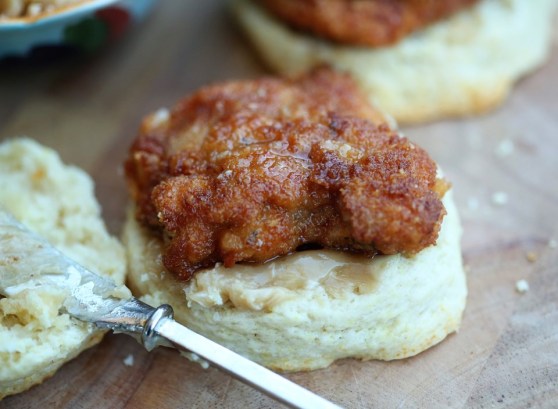
You read that right. Buttermilk-brined chicken thighs, breaded in ground up Chicken in a Biskit crackers and fried. Served on top of a fluffy cream biscuit and finished off with a spread of salted maple butter.
I make no apologies. For any of it. It was one of the best little chicken sandwiches I’ve ever had. And it really wasn’t that difficult! We had the idea a while back and thought it was too good of a play on words to not do it. So we did it! Matt put the chicken thighs in the brine the night before but the meal itself took less than an hour from start to finish. And a made a side of carrot “fries” to go along with everything.
Have you ever had Chicken in a Biskit crackers? If you haven’t, you should try them. Oddly addicting. They have a sweet/savory flavor combo that I’ve tasted in other crackers, but this one, in my opinion, was the first of its kind and remains the best. It’s an old cracker (well, not literally, but the brand is old!) I can remember these crackers as a kid and I honestly hadn’t bought a box since, but for this little project, it’s well worth it.

Start this the night before you want to eat it so that you can get your chicken in the brine. The rest doesn’t take that long – about an hour from baking the biscuits through frying the chicken.  Enjoy and let me know if you love it as much as we did!

Chicken in a Biskit Fried Chicken and Biscuits with Maple Butter

Chicken in a Biskit Fried Chicken on a Biscuit

  • Servings: 6-8 sandwiches
  • Print


For the Biscuits* (taken from Smitten Kitchen – which looks a lot like the scone recipe I use from America’s Test Kitchen – both are awesome and yield similar results):
3 tablespoons (45 grams) melted butter
2 cups (250 grams) all-purpose flour, plus more for dusting the surface
1 tablespoon (15 grams) baking powder
1/2 teaspoon salt
1 tablespoon (15 grams) sugar (optional)
1 1/2 cups (355 ml) heavy cream

Preheat the oven to 425°F. Line a baking sheet with parchment paper. Melt butter in a small pot or microwave dish, and set aside. Sift two cups flour, the baking powder, salt and (if using) sugar into a large bowl. Fold in 1 1/4 cups cream. If the dough is not soft or easily handled, fold in the remaining 1/4 cup cream, little by little. (I ended up using two additional tablespoons, or half the unused cream.)

Turn dough onto a floured surface, mound it into a ball and, using your hands, press it to a thickness of about 3/4 inch. Cut into rounds, 2 1/2 inches in diameter. Gather dough scraps and continue to make rounds. Dip the top of each round in melted butter and arrange on the baking sheet. Bake until golden, 12 to 15 minutes.

chicken in a biskit fried chicken on a cream biscuit

For the Chicken:

1 pound boneless, skinless chicken thighs; trimmed and cut in half
Buttermilk brine (we use Serious Eat’s Southern Fried Chicken for nearly every fried chicken recipe we do):
2 tablespoons paprika
2 tablespoons freshly ground black pepper
2 teaspoons garlic powder
2 teaspoons dried oregano
1/2 teaspoon cayenne pepper
1 cup buttermilk
1 large egg

For the Dredge:
1 cup flour
1 egg + 1/4 cup buttermilk
1 box Chicken in a Biskit crackers, pulsed fine in a food processor

vegetable oil for frying
Combine the paprika, black pepper, garlic powder, oregano, and cayenne in a small bowl and mix thoroughly with a fork.Whisk the buttermilk, egg, 1 tablespoon salt, and 2 tablespoons of the spice mixture in a large bowl. Add the chicken pieces and toss and turn to coat. Transfer the contents of the bowl to a gallon-sized zipper-lock freezer bag and refrigerate for at least 4 hours, and up to overnight, flipping the bag occasionally to redistribute the contents and coat the chicken evenly.

Take the chicken out and pat dry with paper towels. Dip the thighs in the flour first, then the egg/buttermilk mixture, then the cracker crumbs. I double dipped each piece to get lots of crunch (so dip once more in the egg and then the crackers.) Set aside till you’re done with all the pieces before frying.

Preheat your oven to 200F. (Your oven should still be hot from the biscuits! You’ll keep your fried chicken pieces in the oven to stay warm and crispy while you finish setting your table or wiping kids’ butts or whatever it is you have to do while you try to make dinner.)

Heat about an inch of oil in a skillet over medium high heat until it’s shimmering. Fry each piece of chicken for about 4-5 minutes per side, until the chicken is golden brown and registers 170F on an instant-read thermometer. If you’re thinking you’re about to burn the breading, transfer the chicken pieces to a baking sheet and finish cooking in the oven.

maple butter

For the Maple Butter:
4 tablespoons unsalted butter, room temp
1/4 teaspoon salt
2 tablespoons pure maple syrup

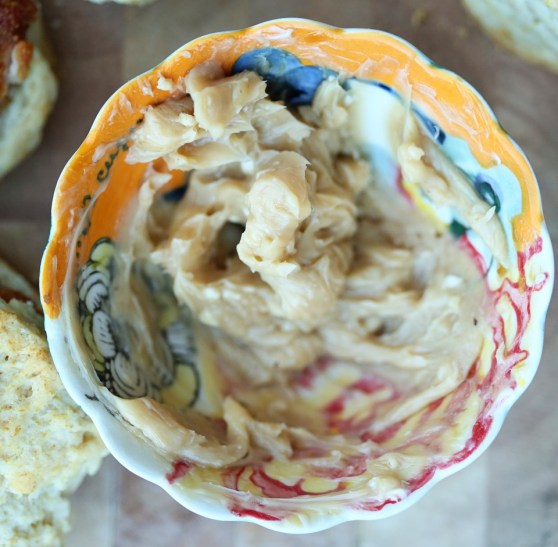
Combine all ingredients until thoroughly incorporated. Spread on biscuits and top with chicken pieces. We also doctored the sandwiches up with a bit of mustard, hot sauce and candied jalapenos, but just the chicken, biscuit and butter are enough.
Turkey Sliders

Turkey Burgers with Cucumber Radish
We’ve been plugging away in the Palmer house, keeping ourselves alive and enjoying our lady babies. It’s shocking how little time I have to do extra things like take pictures of the food we eat so that I can write about it. I’m doing good most days to just get things on the table before someone needs a nap or a diaper change or to be held, all of which are pretty difficult while cooking or taking photographs. I say this to excuse myself for not writing for a month and to tell you that not everything is perfect all the time and I can’t and am not even trying to keep all the balls in the air that I used to. Looking back, having just one kid was a dadgum BREEZE. In fact, that’s when I started this blog – when Olive was just seven months old! My days are filled with super baby joy and crazy games of pretend and doing lots of laundry (Eleanor is a super spitter-upper) and cooking and reading endless Olivia books and knitting and sometimes working on my “real” job of editing photographs. It’s a whirlwind and I know that it will slow down soon and these babies won’t need me every five minutes.  But in the meantime, the meals coming out of here are going to be pretty basic, pretty tasty and pretty easy.

If you are in the stage of life where a little person is needing YOU every five minutes, you’ll appreciate this recipe.  It was mega easy. Super tasty. Didn’t miss the beef, AND it is covered in SriRancha.  That’s right, Sriracha sauce and ranch dressing.  Sriracha mixed with most things is wonderful, but mayo or ranch is especially awesome.  I topped them with super crunchy cucumber slices and icicle radish (hadn’t ever tried those before – they were a fun supermarket find and we loved them!) Try these tonight – you won’t be sorry!

Turkey Burgers

Turkey Sliders

1 lb ground turkey
1 shallot, diced (about 1/4 cup – you can use any kind of onion)
1 garlic clove, minced
1 tsp salt
1/2 tsp pepper
1/2 cup shredded cheddar cheese
Slider hamburger buns

Toppings:
1/2 a cucumber, sliced thin
Any kind of radish, sliced
Slices of American cheese (although you could use any, but I like the traditional taste of American and how it melts)
Sriracha sauce and Ranch dressing, mixed.  Use a ratio of 3 parts Ranch to one part Sriracha

In a large bowl, combine the turkey, shallot, garlic, salt, pepper and cheese until well mixed.  Form into about 1/4 cup size patties and cook in a skillet until a thermometer inserted reads at least 160F. If you don’t have an instant read thermometer, you should invest in one, and if you don’t want to invest in one, I would guess I cooked these for about 10 minutes per side on a medium-level heated cast iron skillet.

Turn on your oven’s broiler to high and place patties on a serving plate and top with slices of cheese (I used a quarter of a slice on each) and melt under the broiler.  Serve with generous amounts of SriRancha, cucumber and radish.


Chicken Tikka Masandwiches

Chicken Tikka Sandwich with Cucumbers
I made one of our favorite Indian dishes the other day from a recipe I saw in the latest issue of Real Simple Magazine and it turned out great!  We had a ton of leftovers and so the next day, I decided to turn them into these amazing little sub sandwiches.  With tons of cilantro, crunchy cucumber and cold sour cream to offset the spicy chicken, it became the perfect sandwich.  I highly recommend doing this original recipe and then adapting it into these tasty little sandwiches.  It would also make an amazing wrap with black beans and rice!

Chicken Tikka Sandwich Shredded Chicken Tikka Sandwich

Chicken Tikka Masala (sandwiches)

1-15 ounce can crushed tomatoes
1 medium onion, chopped
2 cloves garlic, chopped
2 tablespoons tomato paste
2 teaspoons garam masala
salt and pepper
1 1/2 pounds boneless, skinless chicken thighs (about 8 and I used bone-in and the bones came right out – no problem)
1/2 cup heavy cream

In a 4-6 quart slow cooker, add the tomatoes, onion, garlic, tomato paste and spices and stir and taste for seasoning.  Place the chicken thighs over the tomato mixture and cook on low for 8 hours or on high for 4.  Shred the chicken and remove bones (if you used bone-in).  Stir in the heavy cream and let it keep cooking for about 10 minutes while you get everything else ready.  Serve over rice with lots of cilantro, or make these sandwiches by splitting hoagie rolls down the center and layering the chicken with sour cream and topping with fresh sliced cucumber and cilantro.  And garnish with lots of sriracha sauce for extra spice!

Buffalo Burgers with Rosemary Roasted Root Vegetables

Buffalo Burgers
Get your grill heated up this weekend – it’s supposed to be beautiful!  I actually don’t know that for sure, but I’m trying to stay positive.  I made these burgers for us this week after seeing a recipe for lamb burgers.  I couldn’t find ground lamb here and didn’t really want to pay to have some lamb loin ground up so I figured I’d go with something just as lean (the appeal of a lamb burger) and go with buffalo!  We have a very small section in our local grocery store and they have a few pounds of ground buffalo always available.  I know it’s really, really lean, so it can dry out really easily.  The trick is cooking it low and slow, so I’d suggest if you’re grilling, to keep it off the direct flame and give it some extra time.  I love chopped onion in my burgers, so I added some to these and also a little bit of grated Swiss cheese and a couple tablespoons of water – a trick I learned in making the best meatballs ever, that gives the meat that extra tender-juiciness without adding a bunch of fat.  We topped these burgers with sliced avocado, baby bell peppers, pickles and extra cheese – they were really wonderful and still juicy!

I served the burgers with some roasted carrots and potatoes.  I love roasting vegetables with rosemary and just a touch of olive oil, and had I had more root vegetables, I’d have added them right in!  I’ve done this before with beets, turnips and parsnips and I’ve loved them all!

roasted root vegetables

Buffalo Burgers with Roasted Root Vegetables

1 lb ground buffalo
1/2 cup diced white onion
1/2 cup shredded Swiss cheese
1 tsp kosher salt
1 tsp pepper
2 TBS water

In a large bowl, mix the buffalo and all the other ingredients until well incorporated and form into loose patties.  Salt and pepper both sides and cook on the stovetop over medium heat, or on the grill off direct heat for about 5 minutes per side, or until desired doneness is achieved.  I cooked mine until they were about 135F inside and that gave us a tiny bit of pink in the middle.  I served our burgers on toasted buns with mayo, sliced avocado, sliced baby bell peppers, sliced baby kosher pickles and extra Swiss cheese.  Top however you like!

For the root veggies:

A mix of carrots, potatoes, beets, turnips, etc (about 2-3 each)
2 TBS olive oil
2 TBS chopped fresh rosemary
salt and pepper

Heat your oven to 400F.  On a foil-lined baking sheet, toss the chopped vegetables with the olive oil and rosemary and sprinkle with salt and pepper.  Roast for about 30 minutes, or until the veggies start to get a little crispy along the edges.

Buffalo Burgers with Avocado and Swiss

Homemade Sweet, White Sandwich Bread

Two Loaves of Sweet, White Sandwich Bread Sandwich Bread
This is home.  To smell this bread baking is to realize that everything is going to be alright. One of the blessings of being married to The Bread Man is that he bakes stuff like this.  He started baking this bread a few months ago. The recipe makes two loaves at a time and we can blaze through both in a week.  Perhaps we shouldn’t and in a better world, I’d give a loaf away.  But it makes the perfect toast in the morning, the perfect grilled cheese sandwich at lunch, the perfect cinnamon toast for a snack in the afternoon and the perfect toast with jam for dessert after dinner.  No, we don’t do all those things in one day.  I’m just telling you that you will NEVER tire of this bread.  It stays fresh for so long AND, unlike most homemade breads, this stuff doesn’t get mold for more than a week – on the counter!  It’s perfect.  Sweet, smooth, silky inner texture and a perfectly crisp crust when toasted – not too thick, not too thin.  Your kids won’t even tear off the crust.

Homemade Sandwich Bread
You can see my lack of restraint that in the thirty seconds it took me to cut the slice to put the slices in the toaster, I bit the corner of that cinnamon/sugar slice.  I could NOT help it.  You’ll see why.  This bread is what’s good about being a kid, again.  This bread sings of wholesome goodness and peace and harmony.

1375973_10152292138695169_2128879586_n
I may be going too far.  Just try it out. And start it the night before you want it because I don’t want you to get all fussy when you see that it has to rise in your fridge for 8 hours.  Suck it up – it’s worth it.

Sandwich Loaf

Homemade Sandwich Bread*
makes two, 8″ loaves

9 grams (1 tbs) instant yeast
425 grams (1 3/4 cups, plus 2 tbs) lukewarm whole milk
794 grams (6 1/4 cups) unbleached bread flour
14 grams (2 tsp) salt
78 grams (5 1/2 tbs) sugar
85 grams (6 tbs) vegetable oil or melted, unsalted butter
1 egg (50 grams)

Do Ahead:

Whisk the yeast into the lukewarm milk until dissolved.  Set aside for 1 to 5 minutes.  Combine the flour, salt, sugar, oil, and egg in a mixing bowl, then pour in the milk mixture.  If using a mixer, use the paddle attachment and mix on the lowest speed for 2 minutes.  If mixing by hand (go you) use a large spoon and stir for about 2 minutes.  The dough should be coarse and slightly sticky.

Switch to the dough hook and mix on medium-low speed for 4 to 5 minutes, or knead by hand on a lightly floured work surface for 4 to 5 minutes, until the dough is soft, supple, and tacky but not sticky.

Whichever mixing method you use, knead the dough by hand for 1 minute, then form it into a ball. Place the dough in a clean, lightly oiled bowl, cover the bowl tightly with plastic wrap, and refrigerate overnight or for up to 4 days. (You can bake the dough in batches over different days if you want and portion the dough into two or more oiled bowls at this stage.)

On Baking Day:

Remove the dough from the refrigerator about 2 1/2 hours before you plan to bake and divide it in half; each piece should weigh about 25 ounces (709 g) which is perfect for 4 1/2 x 8 inch loaf pans.  For a 5 x 9 inch pan, use 28 to 32 ounces of dough.  Shape into sandwich loaves (read method below), then place them in greased loaf pans to rise. Mist the dough with spray oil and cover the pans loosely with plastic wrap or a towel; then let the dough rise at room temperature for about 2 1/2 hours or longer, until it domes about 1 inch above the rims of the pans.

About 15 minutes before baking, preheat the oven to 350F.

Bake for 20 minutes, then rotate the pans and bake for another 20 to 30 minutes.  The bread is done when the top is a rich, golden brown, the sides are firm and the loaf sounds hollow if tapped on the bottom and the internal temperature is at least 185F in the center.

Remove from the pans and cool on a wire rack for at least 1 hour before slicing and serving.  I DID exercise restraint, here.  If you cut into them too early, you’ll have gummy bread.  Don’t say I didn’t warn you.

* from Peter Reinhart’s Artisan Breads Every Day – we love him


Shaping the Sandwich Loaves for baking:

To shape a sandwich loaf, flatten the dough into a 5 by 8 inch rectangle.  Working from the 5 inch side of the dough, roll up the length of the dough (like a fat cinnamon roll).  Pinch the final seam closed using your fingertips or the back edge of your hand.  Gently rock the loaf to even it out.  Don’t taper the ends; keep the top surface of the loaf even.  Place the loaf in a greased pan, seam side down, cover, and proof.

How to Make a Patty Melt – without rye bread!

Patty Melt with Beet Chips
My dear sister in law called me last week and asked my advice for making a patty melt at home.  It occurred to me that I hadn’t actually ever made one, before.  I think Matt did at one point, but I wasn’t involved.  So I gave her my best guess-advice and when we hung up, ALL I COULD THINK ABOUT was eating a patty melt.  So, the next day, I went to the store and bought some ground beef and when I got home, I realized I’d forgotten rye bread.  Honey child, you simply can’t call a sandwich a patty melt if you don’t put it on rye.  It becomes a hamburger sandwich.  No go.  However, we had three loaves of homemade bread at home, already, and I felt it would be batty to go buy a fourth.  So I got creative and put the rye flavor IN the patty by toasting caraway seeds and adding them to the ground beef!  Then I added tons of diced onions and grilled the patties and then melted gooey Swiss all over the bun and patty.  It was actually perfect.  Tasted exactly like a patty melt on rye!

I highly recommend you try this method.  Now, it might be easier for you to go buy a loaf of rye than it would for you to hunt through your spice drawers and find caraway seeds, which I’m sure you’ve only used maybe once or never.  If you go that route, you can still follow my recipe – just leave the seeds out of the beef!  Cheers to you all – I’m super hungry, now.
Patty Melt

Homemade Patty Melt
makes four patty melts

1 lb ground beef (85/15 is a good fat ratio for flavor)
1/2 cup sweet yellow onion, diced small
1 TBS caraway seeds, toasted and crushed
salt and pepper for seasoning
vegetable oil for the griddle
8 slices Swiss cheese
8 slices toasted bread – any kind, I used a sweet homemade white bread, which will be blogged about later this week – so good

In a large bowl, mix the ground beef, onion and caraway seeds together until well mixed.  Form four patties from the meat and set aside.  Season both sides of the patties with kosher salt and pepper.

Heat a griddle or skillet over medium-high heat and brush with vegetable oil.  Cook the patties about 5-8 minutes on each side.  Lay a slice of Swiss cheese on top of each patty and place a lid over the patty until the cheese melts all around it.  Toast the bread in a toaster, then lay a slice of cheese on the bread, top with a patty and the other slice of bread.  To gild the lily, melt a tablespoon of butter in a non-stick skillet and toast the bread again on each side.  This further melts the cheese slices and gives everything that super awesome butter flavor.

Beet Chips (I served them on the side and got a request for the recipe, so here you go)

4 large beets, peeled and rinsed
2 tablespoons olive oil
kosher salt and pepper

Preheat your oven to 425F.  Slice the beets about 1/8th of an inch thick – if you’re knife skills are lacking, use a mandoline (just watch out for your knuckles). Toss in a large bowl with olive oil and then spread them out on a foil lined baking sheet and sprinkle with salt and pepper.  Roast in the oven for about 15 minutes and start checking them.  You’ll need to remove the smaller ones so they won’t burn and leave the bigger ones in so they won’t just be soggy.  Let them cool for about 5 minutes before serving!

The Homegrown B.L.T. with a recipe for amazing mayo!

The perfect BLT

Every year we look forward to this.  An entirely home-grown (or made) BLT!  When we are fortunate enough to have a tomato crop, as we were this summer, the homemade BLT is the first thing in our minds to make.  So when the tomatoes started looking like this:
image_1

…we knew it was time to assemble the ultimate sandwich.  Matt cures pork belly and then smokes it in our electric smoker, I made the mayo, Matt made the bread and we grew the tomatoes, but sadly had no lettuce this year.  So other than the lettuce, this was entirely from scratch!  And what a good feeling.  I think this is kind of like remembering how good the food was on vacation – most of the goodness came from the setting or the mood, or the fact that you didn’t have to cook.  Similarly with this sandwich, the ingredients are certainly wonderful, but part of the joy is knowing that we worked for each component (minus the lettuce).  We thoroughly enjoyed this sandwich and this moment and Olive deconstructed hers, discarded the impostor (lettuce) and ate the rest.  She’s adoring these tomatoes, and I absolutely get giddy knowing that she likes tomatoes and that her first taste of tomatoes (besides tomato sauces) was out of our yard!  She won’t remember, but I know we will.

For the recipes, I will post our mayo recipe and method, which is super easy and totally worth it for the huge flavor you get.  I’ve posted Matt’s bread before, which is the bread we used for this (plus an addition of rosemary) and for the tomatoes, well, you’re probably too late to grow them yourself, but if you know someone who has an abundance, beg one off them and grab some good, thick-cut bacon and have yourself a BLT party!

open faced BLT

Mayo (made with an immersion blender -might be my most used kitchen tool, next to my knife)

2 egg yolks
1.5 cups light oil like canola.  I used a blend of canola and olive oil
1 TBS lemon juice
1 tsp white vinegar
1 tsp dijon mustard (or even dry would work)
Salt, pepper and a dash of cayenne and paprika for me!

Place the egg yolks in the bottom of a tall, wide cup (immersion blenders come with their own).  Place all the other ingredients on top of the egg yolks and stick your immersion blender all the way down to the bottom.  Turn it on the lower setting and start graaaaaaaaadddddddduuuuualllllly pulling the immersion blender up toward the surface of the oil.  As you pull up, the oil will slowly become incorporated into the egg yolk/spice mixture and in about 45 seconds, you will have perfect mayo!  It will keep two weeks in the fridge and I recommend slathering both sides of your bread and searing it on a griddle before assembling your sandwich.  Hey, if you only eat a proper BLT once a year, make it a good one.

image