Chicken in a Biskit Fried Chicken on a Biscuit

fried chicken and cream biscuits with maple butter
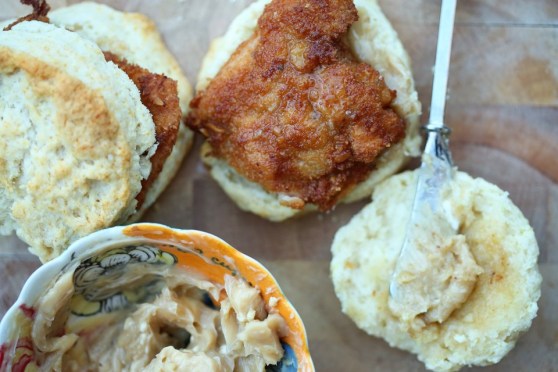
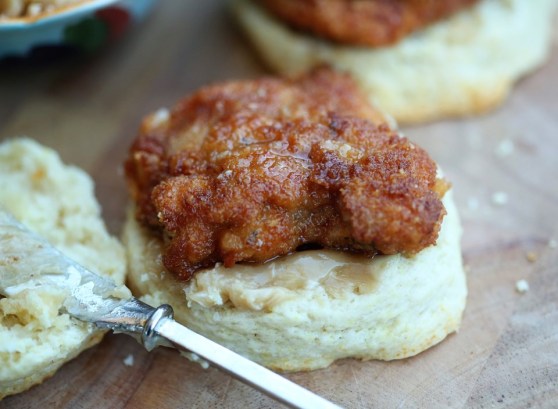
You read that right. Buttermilk-brined chicken thighs, breaded in ground up Chicken in a Biskit crackers and fried. Served on top of a fluffy cream biscuit and finished off with a spread of salted maple butter.
I make no apologies. For any of it. It was one of the best little chicken sandwiches I’ve ever had. And it really wasn’t that difficult! We had the idea a while back and thought it was too good of a play on words to not do it. So we did it! Matt put the chicken thighs in the brine the night before but the meal itself took less than an hour from start to finish. And a made a side of carrot “fries” to go along with everything.
Have you ever had Chicken in a Biskit crackers? If you haven’t, you should try them. Oddly addicting. They have a sweet/savory flavor combo that I’ve tasted in other crackers, but this one, in my opinion, was the first of its kind and remains the best. It’s an old cracker (well, not literally, but the brand is old!) I can remember these crackers as a kid and I honestly hadn’t bought a box since, but for this little project, it’s well worth it.

Start this the night before you want to eat it so that you can get your chicken in the brine. The rest doesn’t take that long – about an hour from baking the biscuits through frying the chicken.  Enjoy and let me know if you love it as much as we did!

Chicken in a Biskit Fried Chicken and Biscuits with Maple Butter

Chicken in a Biskit Fried Chicken on a Biscuit

  • Servings: 6-8 sandwiches
  • Print


For the Biscuits* (taken from Smitten Kitchen – which looks a lot like the scone recipe I use from America’s Test Kitchen – both are awesome and yield similar results):
3 tablespoons (45 grams) melted butter
2 cups (250 grams) all-purpose flour, plus more for dusting the surface
1 tablespoon (15 grams) baking powder
1/2 teaspoon salt
1 tablespoon (15 grams) sugar (optional)
1 1/2 cups (355 ml) heavy cream

Preheat the oven to 425°F. Line a baking sheet with parchment paper. Melt butter in a small pot or microwave dish, and set aside. Sift two cups flour, the baking powder, salt and (if using) sugar into a large bowl. Fold in 1 1/4 cups cream. If the dough is not soft or easily handled, fold in the remaining 1/4 cup cream, little by little. (I ended up using two additional tablespoons, or half the unused cream.)

Turn dough onto a floured surface, mound it into a ball and, using your hands, press it to a thickness of about 3/4 inch. Cut into rounds, 2 1/2 inches in diameter. Gather dough scraps and continue to make rounds. Dip the top of each round in melted butter and arrange on the baking sheet. Bake until golden, 12 to 15 minutes.

chicken in a biskit fried chicken on a cream biscuit

For the Chicken:

1 pound boneless, skinless chicken thighs; trimmed and cut in half
Buttermilk brine (we use Serious Eat’s Southern Fried Chicken for nearly every fried chicken recipe we do):
2 tablespoons paprika
2 tablespoons freshly ground black pepper
2 teaspoons garlic powder
2 teaspoons dried oregano
1/2 teaspoon cayenne pepper
1 cup buttermilk
1 large egg

For the Dredge:
1 cup flour
1 egg + 1/4 cup buttermilk
1 box Chicken in a Biskit crackers, pulsed fine in a food processor

vegetable oil for frying
Combine the paprika, black pepper, garlic powder, oregano, and cayenne in a small bowl and mix thoroughly with a fork.Whisk the buttermilk, egg, 1 tablespoon salt, and 2 tablespoons of the spice mixture in a large bowl. Add the chicken pieces and toss and turn to coat. Transfer the contents of the bowl to a gallon-sized zipper-lock freezer bag and refrigerate for at least 4 hours, and up to overnight, flipping the bag occasionally to redistribute the contents and coat the chicken evenly.

Take the chicken out and pat dry with paper towels. Dip the thighs in the flour first, then the egg/buttermilk mixture, then the cracker crumbs. I double dipped each piece to get lots of crunch (so dip once more in the egg and then the crackers.) Set aside till you’re done with all the pieces before frying.

Preheat your oven to 200F. (Your oven should still be hot from the biscuits! You’ll keep your fried chicken pieces in the oven to stay warm and crispy while you finish setting your table or wiping kids’ butts or whatever it is you have to do while you try to make dinner.)

Heat about an inch of oil in a skillet over medium high heat until it’s shimmering. Fry each piece of chicken for about 4-5 minutes per side, until the chicken is golden brown and registers 170F on an instant-read thermometer. If you’re thinking you’re about to burn the breading, transfer the chicken pieces to a baking sheet and finish cooking in the oven.

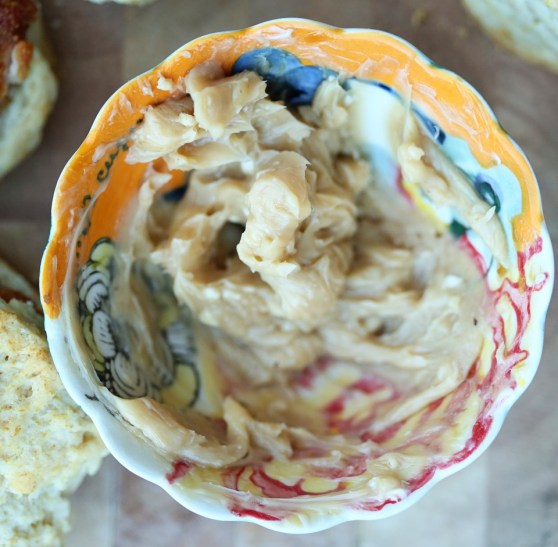
maple butter

For the Maple Butter:
4 tablespoons unsalted butter, room temp
1/4 teaspoon salt
2 tablespoons pure maple syrup

Combine all ingredients until thoroughly incorporated. Spread on biscuits and top with chicken pieces. We also doctored the sandwiches up with a bit of mustard, hot sauce and candied jalapenos, but just the chicken, biscuit and butter are enough.
Lamb Burgers with Cucumber and Mint

Lamb Burgers
Burgers are a favorite dinner item in this house. I can put nearly anything on a burger and my three year old will eat it. She may pick it off after a bite or two, but it’s almost like the word “burger” justifies just about anything included. I couldn’t quite sell her on having the tangy mint and cilantro lime yogurt on top, but I figure as long as she is willing to try something that looks like this, we are doing good.

I don’t really cook with lamb all that often. It’s not on my carnivore radar, but it really is deeply flavorful and lean at the same time. Because of it’s low fat percentage, I added an egg to the meat mixture, kind of reminiscent of a meatball recipe. We topped the burgers with cool slices of cucumber, lots of chopped mint and cilantro and the zesty yogurt sauce and called it a success. I think bits of feta incorporated into the patties would’ve been even better – there’s always room for creativity and error in creating a burger and that’s why it’s one of the most enjoyable dinners to make around here. Not to mention everyone can top them in their own way, so a particular palette doesn’t get ridiculed.

lamb burgers with mint, sour cream and cucumber

Lamb Burgers with Cucumber and Mint

1 pound ground lamb
1/2 sweet onion, diced fine (about 1/2 cup)
1 egg
1/2 cup chopped cilantro and mint, divided
1/2 cup full fat plain yogurt or sour cream
1 tablespoon lime juice
salt and pepper to taste
1/2 cucumber, sliced
buttered onion rolls

In a medium bowl, combine the lamb, onion, egg and half the cilantro and mint. Add a teaspoon of salt and pepper and mix well to combine. Form into somewhat loose patties and cook on a buttered grill or griddle about 2 minutes per side and an instant read thermometer reads at least 160F.

Combine the yogurt, lime juice and other half of the cilantro and mint and season with salt and pepper to taste. Serve on top of burgers with sliced cucumbers on buttered onion rolls.


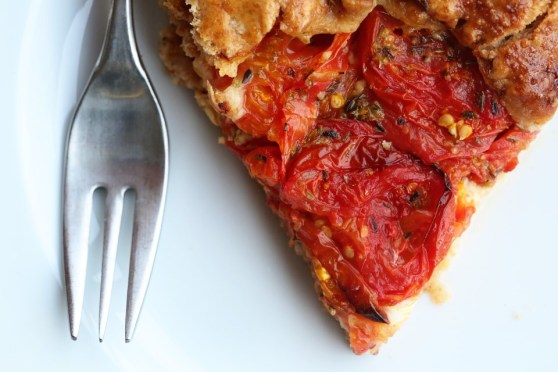
Rustic Tomato Galette

rustic tomato pie

Deep Dish Tomato Pie
Deep Dish Rustic Tomato Pie
There’s no better time than the middle of October to post about a beautiful, summery tomato pie. 😛 In my defense, my tomato plants were late bloomers and didn’t really start ripening until the end of September. But I can see this amazing pie going either way: an homage to the bright, sweet, summertime flavors, or being comforting and warming with a depth of rich tomato flavor fitting for the colder months. I can not vouch for this recipe if you use tomatoes from the grocery store, but I would imagine it wouldn’t be half bad, considering the bake time and the way the tomatoes almost go sun-dried in flavor on the top layer. If you do that, make sure the tomatoes you buy are pretty soft and ripe and maybe just stick to Roma tomatoes to be safe.

This pie has a bright, peppery and tangy whole-grain mustard on the bottom of the tomatoes and the smooth, chewy layer of cheese in the middle and then topped with two layers of extra ripe heirloom, beefsteak and Roma tomatoes. I decided to use half whole-wheat flour in my usual crust recipe because whole wheat absorbs more moisture and I knew this pie would be pretty juicy. And it is quite juicy, but I decided to stop thinking it had to be like a tart and started to embrace the tomato for what it is: a fruit to be used in a fruit pie! And every fruit pie I’ve ever had, has an adequate amount of juiciness throughout. Why should a tomato pie be any different? So if you will embrace it, too, I think you will really love this recipe. The flavors are electric. And I hope that you have some good tomatoes left in your garden. And if you don’t, you’re more than welcome to stop by and pick some from mine! Happy October 🙂

Rustic Tomato Tart Rustic Deep Dish Tomato Pie

Rustic Tomato Galette

  • Servings: 6-8
  • Print

1 recipe fool-proof pie crust with half the flour being whole wheat
About 3 pounds fresh tomatoes in an assortment of sizes and varieties
2 tablespoons whole grain mustard
2 cups low-moisture mozzarella (shred it yourself – don’t buy pre-shredded or it won’t melt right)
dried oregano
salt and pepper
1 egg, whipped

Preheat the oven to 400F.

Slice the tomatoes into 1/4″ slices and lay out on paper towel-lined sheet pans. Sprinkle with kosher salt on each side of the tomato and let them sit and drain for a few minutes this way. This draws out excess moisture. Let the tomatoes drain while you handle the crust.

Roll your pie crust out and gently form it into a 10″ cast iron pan, letting the excess hang over the edges. Spread the whole grain mustard evenly on the bottom of the crust. (I used this brand and yes, it looks like nothing but mustard seeds!)

Spread the shredded mozzarella over the mustard and then give the cheese a generous sprinkling of dried oregano.

Arrange the tomato slices evenly over the cheese in an overlapping pattern. Sprinkle that layer with oregano and then finish up with the rest of the tomatoes. Gently fold the overhanging pie crust over the tomatoes. It doesn’t have the be perfect. “Galette” is French for “I stopped caring how this looks.” So you get a free pass. If the crust breaks off, just pinch it back together. Really, this is forgiving and you want the extra crust to be there. It’s a buttery, flaky, tomato-juice-absorbing wonder.*

Place the pie on a rimmed baking sheet and brush the crust with egg. Bake for an hour, until the crust is golden brown and the pie is bubbling like crazy. Place a sheet of tin foil over the pie and let it bake another 15 minutes. Let it sit for ten minutes before slicing and serving.

*At this point, you can chill your pie overnight if you’re making this ahead. If you do that, increase your bake time to an hour and a half (or even longer – you’re just wanting a deep brown in your crust and an almost caramelized top layer of tomatoes.)

Apple Crisp: Food Memories

Fall Apple Crisp
I’ve done a few posts on food memories from my own family and ones from friends and I love those posts more than any other. They are more than just recipes – they are links to the past and to feelings that can’t be accessed any other way. Food is such a tie to our heritage, to our families and to the love we felt when we first experienced those memorable dishes. I never tweak these recipes because it’s my job to post about and honor the memory, not the recipe itself. My dear friend, Becky, had this picture of her grandmother’s hand written recipe on her Instagram account and when I saw it, I knew I had to make it.

Last year, Becky invited me over to look through her grandmother’s things before they had an estate sale in the wake of her passing. I had the honor of taking home a patchwork quilt she had made. Not only do my girls play on it outside nearly every day, but I used it as a backdrop for the photos I took of the final dish. I hope it makes this post that much more meaningful for my friend.

The recipe itself is completely delicious and comforting and full of the essence of the fall season! I love that it calls for “oleo” – a sure sign the baker lived through the 50s 🙂 So this was the only tweak I made by using butter instead. I also topped the apple crisp with cinnamon horchata ice cream because I was all out of whipping cream. I’m sure if Nana could have tasted the ice cream, she wouldn’t mind the substitution.

recipe
I asked Becky to share a few thoughts about her Nana and this recipe. She also provided this amazing picture and it makes me wish I’d known her. She looked so joyful.

12087400_10207282108429358_1362057034_n
My Nana (Oma Lee) was the 5th of 6 kids born in 1926 to a generous, kind-hearted family. They took in the homeless, cared for the sick, fed the hungry. They also laughed more than most.

For a couple of years while I was in college, I got to live with her and got to know her on a deeper level. She was a counselor to me, a friend, comic relief, an adult when I acted like a child. We watched Miss America pageants and Hallmark movies together and ate dilly bars from DQ.

Nana shared an apple “pie” recipe with me during that time, and it’s the only apple pie I’ve ever made, because its kinda fool proof (I need that) and darn tasty.

I made it for her once and she went on and on about how delicious it was. When I reminded her it was one of her recipes, she laughed for the longest time then said in a straight voice, “well that’s why it’s so good”. Man, I miss her.

Apple Crisp 2

Apple Crisp

6 cups peeled, sliced apples
1/3 cup sugar
1 teaspoon cinnamon
1/2 teaspoon salt
2 tablespoons melted butter
For the streusel topping:
3/4 cup sugar
1/2 cup flour
1/3 cup butter

Whipped topping or ice cream to garnish

Preheat the oven to 375F. Mix together apples, sugar, cinnamon, salt and melted butter.  Place in a greased 8″ square baking dish. Set aside.

Combine the 3/4 cup sugar and flour and then cut in the butter until the texture is fine crumbles. Sprinkle over the apples. Bake for about 45 minutes, or until apples are tender*. Serve warm with dollops of whipped topping (or ice cream!)

*Becky advised that I brown the apple crisp for a few minutes under the broiler because it doesn’t really get brown during baking.