Chicken in a Biskit Fried Chicken on a Biscuit

fried chicken and cream biscuits with maple butter
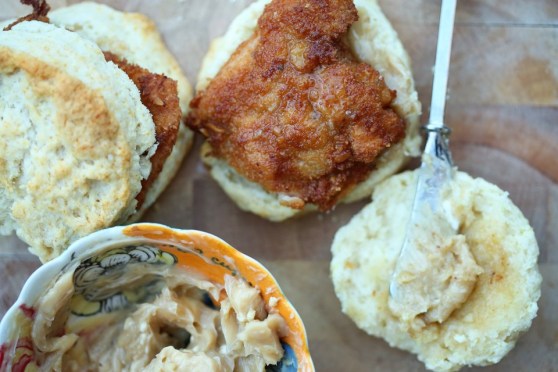
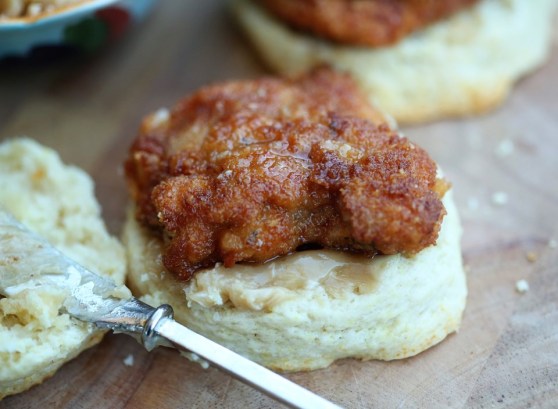
You read that right. Buttermilk-brined chicken thighs, breaded in ground up Chicken in a Biskit crackers and fried. Served on top of a fluffy cream biscuit and finished off with a spread of salted maple butter.
I make no apologies. For any of it. It was one of the best little chicken sandwiches I’ve ever had. And it really wasn’t that difficult! We had the idea a while back and thought it was too good of a play on words to not do it. So we did it! Matt put the chicken thighs in the brine the night before but the meal itself took less than an hour from start to finish. And a made a side of carrot “fries” to go along with everything.
Have you ever had Chicken in a Biskit crackers? If you haven’t, you should try them. Oddly addicting. They have a sweet/savory flavor combo that I’ve tasted in other crackers, but this one, in my opinion, was the first of its kind and remains the best. It’s an old cracker (well, not literally, but the brand is old!) I can remember these crackers as a kid and I honestly hadn’t bought a box since, but for this little project, it’s well worth it.

Start this the night before you want to eat it so that you can get your chicken in the brine. The rest doesn’t take that long – about an hour from baking the biscuits through frying the chicken.  Enjoy and let me know if you love it as much as we did!

Chicken in a Biskit Fried Chicken and Biscuits with Maple Butter

Chicken in a Biskit Fried Chicken on a Biscuit

  • Servings: 6-8 sandwiches
  • Print


For the Biscuits* (taken from Smitten Kitchen – which looks a lot like the scone recipe I use from America’s Test Kitchen – both are awesome and yield similar results):
3 tablespoons (45 grams) melted butter
2 cups (250 grams) all-purpose flour, plus more for dusting the surface
1 tablespoon (15 grams) baking powder
1/2 teaspoon salt
1 tablespoon (15 grams) sugar (optional)
1 1/2 cups (355 ml) heavy cream

Preheat the oven to 425°F. Line a baking sheet with parchment paper. Melt butter in a small pot or microwave dish, and set aside. Sift two cups flour, the baking powder, salt and (if using) sugar into a large bowl. Fold in 1 1/4 cups cream. If the dough is not soft or easily handled, fold in the remaining 1/4 cup cream, little by little. (I ended up using two additional tablespoons, or half the unused cream.)

Turn dough onto a floured surface, mound it into a ball and, using your hands, press it to a thickness of about 3/4 inch. Cut into rounds, 2 1/2 inches in diameter. Gather dough scraps and continue to make rounds. Dip the top of each round in melted butter and arrange on the baking sheet. Bake until golden, 12 to 15 minutes.

chicken in a biskit fried chicken on a cream biscuit

For the Chicken:

1 pound boneless, skinless chicken thighs; trimmed and cut in half
Buttermilk brine (we use Serious Eat’s Southern Fried Chicken for nearly every fried chicken recipe we do):
2 tablespoons paprika
2 tablespoons freshly ground black pepper
2 teaspoons garlic powder
2 teaspoons dried oregano
1/2 teaspoon cayenne pepper
1 cup buttermilk
1 large egg

For the Dredge:
1 cup flour
1 egg + 1/4 cup buttermilk
1 box Chicken in a Biskit crackers, pulsed fine in a food processor

vegetable oil for frying
Combine the paprika, black pepper, garlic powder, oregano, and cayenne in a small bowl and mix thoroughly with a fork.Whisk the buttermilk, egg, 1 tablespoon salt, and 2 tablespoons of the spice mixture in a large bowl. Add the chicken pieces and toss and turn to coat. Transfer the contents of the bowl to a gallon-sized zipper-lock freezer bag and refrigerate for at least 4 hours, and up to overnight, flipping the bag occasionally to redistribute the contents and coat the chicken evenly.

Take the chicken out and pat dry with paper towels. Dip the thighs in the flour first, then the egg/buttermilk mixture, then the cracker crumbs. I double dipped each piece to get lots of crunch (so dip once more in the egg and then the crackers.) Set aside till you’re done with all the pieces before frying.

Preheat your oven to 200F. (Your oven should still be hot from the biscuits! You’ll keep your fried chicken pieces in the oven to stay warm and crispy while you finish setting your table or wiping kids’ butts or whatever it is you have to do while you try to make dinner.)

Heat about an inch of oil in a skillet over medium high heat until it’s shimmering. Fry each piece of chicken for about 4-5 minutes per side, until the chicken is golden brown and registers 170F on an instant-read thermometer. If you’re thinking you’re about to burn the breading, transfer the chicken pieces to a baking sheet and finish cooking in the oven.

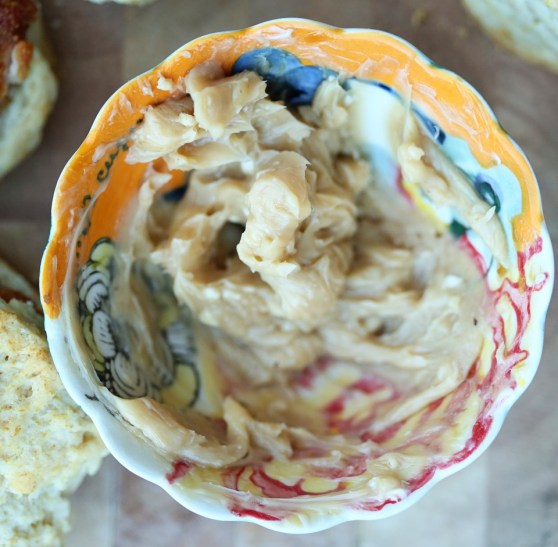
maple butter

For the Maple Butter:
4 tablespoons unsalted butter, room temp
1/4 teaspoon salt
2 tablespoons pure maple syrup

Combine all ingredients until thoroughly incorporated. Spread on biscuits and top with chicken pieces. We also doctored the sandwiches up with a bit of mustard, hot sauce and candied jalapenos, but just the chicken, biscuit and butter are enough.
Potatoes That Taste Better Than The Chicken

Roasted Chicken and Potatoes
Fall is around the corner, my friends. The beginnings of fallish things are happening from the wonderful cooler temperatures and crisp mornings to the not-so-wonderful appearance of Christmas decorations ALREADY. I’m not one to start up the Christmas music until the day after Thanksgiving and I’m not one to drink a pumpkin spiced latte until it can actually do its job of warming me up because I’m cold from natural causes (as in, I didn’t sit in my car with my AC on full blast to get the same effect. That’s cheating AND rushing the perfect moment, which I feel, should come about authentically.) My friend Libby is rolling her eyes at me because she LOVES rushing fall and pretending it’s cold outside. In fact, she already had a pumpkin spiced latte! 🙂 I’m fine with seasonal enthusiasts. Honestly – whatever makes you happy! But as for me and my household, we won’t decorate for Christmas until Thanksgiving is over. 🙂

Another thing that makes me happy is starting to think about fall dinners. I love the braising and stewing and the simmering of heavy, warm spices on the stove. One meal that gets me to thinking about the warmth of the winter is this simple and yet divine dish: roasted chicken on top of potatoes. We made this recipe a loooong time ago by Jean-Georges Vongerichten. His recipe was so delicious, we’ve done it a few dozen times since and have varied and simplified and it’s always delicious and always perfect. I never mess this recipe up and it’s always so amazingly delicious. And let’s not ignore why: the potatoes are cooked in schmaltz. You’d also be delicious if you were roasted in chicken fat.

I also love this recipe because it is one of those dishes that everyone can agree on. Add a salad or some braised greens and you’ve got yourself a complete meal!

Potatoes Cooked in Chicken Fat Chicken Potatoes

Potatoes Taste Better Than the Chicken*

1 whole chicken, about 3 lbs
2 pounds potatoes, peeled and cut into 1″ pieces
coarsely ground salt and pepper
butter to coat the pan and chicken
1 head of garlic, sliced in half
sprigs of thyme, rosemary, whatever you have

Preheat oven to 450 degrees. Butter a large cast iron skillet and place the cut potatoes in a single layer. Sprinkle them with salt and pepper and drizzle with olive oil. Pat your chicken dry and season with salt and pepper. Rub with butter and then stick the halved garlic head into the chicken cavity and add whatever herbs you like. Place the chicken on one of its sides on top of the potatoes.

Roast for 20 minutes. Turn the chicken onto its other side and roast another 20. Then, turn the chicken breast-side up and continue roasting until juices run clear and an instant-read thermometer says at least 165F, about 15-20 minutes more. Let the chicken rest for 10 minutes and carve on top of the potatoes and serve them along with the chicken. Beautiful.

*adapted from Jean-Georges Vongerichten

Carrots and Celery: A Colorful Spin on Steak House Sides

Steak, Roasted Carrots and Celery Salad
Summer hasn’t felt very summery until these past two weeks. The rains finally stopped and the heat finally reached into the upper 90’s and it’s starting to feel like Lubbock, again. We weren’t sure what to do with all that rain and all that…not watering our lawns, so we sorta forgot how. I was so used to my garden looking like Swamp Thing that I honestly forgot to keep watering about a week after it quit raining so heavily. Then when things started to wilt, I realized that everything might be thirsty. So I’m back in the swing of watering every other day and I’m enjoying seeing things grow. However, if we had to survive off of what I have growing in my garden, we’d have all died a few weeks ago. I want to be better and grow enough to sustain us year round, but I’m not there, yet. I grew up in a family of farmers but I am not one of them.

We benefit from families of farmers in this town, however, and one of those families is Holy Cow Beef, a family that produces amazing beef products right here in Lubbock, TX. They run an honest, humane, grass-fed beef corporation and their products are extremely high-quality. We bought a New York strip from them, among other cuts, when they were at the Lubbock Downtown Farmer’s Market last weekend and happily made this weeknight meal for our family last week. Matt seared the steak in butter on the stove and finished it in the oven – a favorite and classic way we like to cook a steak. The three of us ate dinner from just one portion!  I roasted orange and purple carrots along with parsnips and served that and the beef along with a blue cheese celery salad. Yes, this plate was served to our three-year-old (no short-order cooking around here) and here’s how it went:

“I only like the orange carrots.”
“I will only eat one celery.”
“More meat, please.”

So I’d highly recommend if you’re in this area, to stop by the farmer’s market on Saturdays and check out what Holy Cow Beef has to offer! We’ve been eating less meat in general, and so buying high quality products from local producers helps us value the days we do have meat a little more. Quality over quantity is a good idea, especially if you, like me, are a carnivore.


Blue Cheese Celery Salad
I wanted to share the recipe for the blue cheese and celery salad with you, today. It was so refreshing and different as a side for the steak. I think it would make an amazing topping for a burger, a different dish during football season, or as a side for BBQ!

Blue Cheese Celery Salad*
serves 4

¼ cup mayonnaise
4 cups celery, cut into ⅛-inch-thick half moons (about 8 stalks)
¼ cup fresh orange juice
1½ teaspoons kosher salt
3 tablespoons chile oil
¼ cup celery leaves
3 tablespoons finely chopped chives
½ cup (2 ounces) crumbled blue cheese

Spread the mayonnaise among 4 plates. In a medium mixing bowl, toss the celery with the orange juice and season generously with salt. Drizzle with the chile oil (you could also use olive oil and crushed red pepper), then toss in the celery leaves. Scatter the dressed celery on top of the mayonnaise, then top with the chives and lots of blue cheese, and serve.

*adapted from Tasting Table


Roasted Carrots
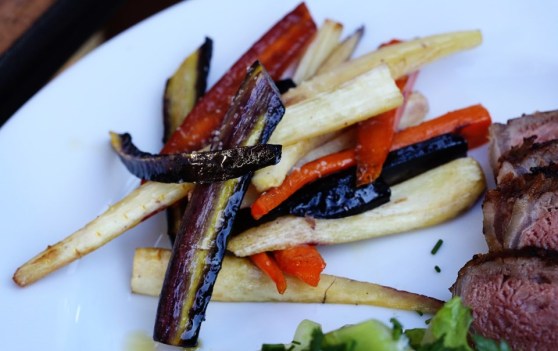
And instead of the classic fries or a baked potato that you typically see alongside a steak, I did a colorful trio of roasted carrots. I simply peeled and sliced three of each orange and purple carrots and parsnips and coated them in olive oil and sprinkled with salt and pepper and then roasted them at 400 until soft when pierced with a knife. Then I browned one tablespoon of butter and tossed them right before serving.


Blue Cheese Celery Salad with Seared Steak

Homemade Baby Food – but you’ll sneak a few tastes, too!

Parsnip and Golden Beets
I’ve worked this past week on compiling a baby food post for anyone seeking out ideas for making baby food at home. I don’t make baby food at home because I’m a store-bought skeptic. In fact, the last time I was at Target and looked at all the baby food options, I was a little bit blown away. It’s completely dizzying how much variety there is in stores these days. So I’m totally for buying baby food. But at .99 cents a pouch, I’ve still got the price beat by making it at home. With a two dollar butternut squash, I can make almost a dozen jars! I also love cooking and tasting and seasoning food for my girls. I find myself sneaking a few bites of their food and I love knowing exactly what goes into the stuff they eat.

Making baby food gets me into a zen-like state in the kitchen as well. I’m not exactly sure why, but I love the process. I love choosing ingredients, maybe even ingredients I don’t use very often, and making something tasty for my babies. I also love the complete blank slate that a six month old baby is in that high chair. They have never tried a single food and I get to show them everything I’ve ever tasted! Hey baby, this is guacamole – you can thank me later.

In this post I have a couple of techniques for you to apply to literally any fruit or vegetable you can find in the freezer aisle. Then I have a couple recipes from my favorite baby food book, Tyler Florence’s, Start Fresh, and then I have a couple original recipes based on what sounded good to me and what was on sale at the grocery store. You’ll soon see that I don’t exactly follow the “rules” of baby-feeding. I find the rules restrictive, paranoid and somewhat unnecessary. You do not need to only introduce your baby to one food a week.  If they have a reaction, it will most likely occur within 24 hours.  It also makes no sense to me to start babies off on something that could be mistaken for wet cardboard in flavor and texture (rice cereal – have you tasted that stuff?!)  It’s no wonder kids are expected to eat “kid food” when they are started off on bland carbs and not challenged very much in the variety category thereafter. I started both my babies off with fruits and vegetables and have alternated and given them something new nearly every day after we hit the solids stage.  If you get in the habit of changing up what your baby eats from the very beginning, then variety will become the norm in your house and they’ll never know that most other kids only eat brown food.  That’s another rant for another day.

Here’s some recipes for you new moms out there – send me any ideas you have, too!  I love new ideas that help me get out of my cooking ruts!

Apricots and Maple

Roasted Maple Apricots with Mint
Roasted Apricots with Maple Syrup and Mint

8 apricots, split in half
3-4 TBS pure maple syrup (avoid honey until a year old!)
2 sprigs mint (I have a fun chocolate mint plant in my backyard that I used)

Preheat your oven to 350F. Arrange the split apricots on a foil lined baking sheet and drizzle with maple syrup.  Sprinkle with cinnamon (if you wish) and roast for 20 minutes.  Transfer to a blender or food processor and blend until smooth.  Add the mint leaves and pulse till combined.  Thin out with water if it’s too chunky.  I like to freeze baby food in muffin tins or ice cube trays and then once frozen, I store the cubes in a freezer bag for easy access.  I just label the bags with what’s inside and when I made it!

Avocado Pineapple and Yogurt

Banana Avocado Pineapple Yogurt
Banana Avocado and Pineapple Yogurt*

1/2 avocado
1 small banana (or half a large)
1 cup fresh pineapple chunks
1/4 cup whole fat, plain yogurt

Combine all ingredients in a food processor or blender and blend until smooth.  This doesn’t keep well the next day (it discolors – still tastes fine, but it turns a weird gray from the avocado) so best to keep the portions small.  I cut this recipe in half and Ellie ate it over the course of two days.

*from Start Fresh

Carrot Apple and Mango Puree
Carrot, Mango and Apple Puree

I made this and loved the flavors!  I think it needs longer than 25 minutes roasting – maybe because my oven is on the cool side.  But I think roasting mango alongside carrots doesn’t quite work because carrots and apple take way longer than a mango to roast and then your mango loses a lot of its water.  So, in my opinion, I would roast the carrots and apples together and then add in the mango at the end, or just when you blend.  Make sure you line your pan with foil.  The sugars in the mango will glue themselves to your pan if you don’t! – from Start Fresh

Frozen Peach
Frozen Fruit Baby Food

I love making baby food from frozen fruits and vegetables! There’s always an organic option if that’s important to you, and fruits and veggies are often flash frozen at the peak of freshness.  The only fruit I’ve encountered that isn’t so great frozen is mango. Everything else seems really ripe and awesome.  Here’s what I do:

1 bag frozen fruit – 8 oz (in the pic above it was a bag of peaches)
1 TBS unsalted butter
1 tsp vanilla or cinnamon or any spice you want to experiment with!

In a large saucepan, add the frozen fruit and butter and a splash of water.  Cook over medium heat until it starts to bubble and the fruit thaws.  Stir in your vanilla or cinnamon and let it simmer for a bit longer, smashing up chunks of the fruit.  Transfer to a blender and puree until smooth!

Frozen Spinach
Frozen Vegetable Baby Food

8 oz frozen vegetables – in the pic above, I used frozen spinach
2 TBS butter
a pinch of salt
a splash (1/4 cup) of water)

In a large pan, add the vegetables and a splash of water and bring to a simmer. If you’re using spinach, you won’t need that water. Most other veggies could use a little moisture, and if you’re using peas, add enough to where they boil in the water because you’ll just strain the peas out when you puree and add water to thin out the consistency. Add the butter and salt and stir until melted and then blend until smooth.

Parsnip and Golden Beets
Parsnip and Golden Beet Mash

3 parsnips, peeled and chopped
4 small golden beets, peeled and chopped
2 TBS olive oil
1 TBS butter
1/2 cup low sodium chicken or vegetable stock

Heat your oven to 375 and toss the beets and parsnips with oil and roast until softened and slightly browned, about 25 minutes.  Transfer to a food processor and add a tablespoon of butter and the chicken or vegetable stock and process until smooth.  You may need to add a bit more stock to get a smoother texture, but if you’re baby can handle chunky stuff, go for it.  This has a FABULOUS flavor.  There’s something magical about parsnips and butter, so I definitely don’t skip out on adding the butter.  Fat is good for baby’s brain development.  Don’t hold back! This is the puree you’ll want to eat, too.  It’d be a great substitute for mashed potatoes at a family dinner!

There you are, my friends.  I hope some of these recipes help you explore and try new things in your own kitchen!  Most all of these recipes can be altered to fit any combination of ingredients, so be creative! Add fresh herbs and onion or experiment with various seasonings like curry.  Have fun! That’s the whole point!

Creamy Potatoes with Thyme Browned Butter

creamy boiled potatoes with thyme and browned butter
Some days you just need someone to think up a side dish for you. This is not complicated.  This is nothing you couldn’t come up with on your own.  But your brain is zapped. And there are days I stand there with my fridge gaping and I just can’t be creative anymore.  I roasted the potatoes yesterday, I don’t want to roast them again! So, if you’re like me and you don’t necessarily want to do something crazy or ambitious on a Monday evening, but you DO want something different that someone else thought up for you – then this recipe is for you.  Clean, simple, warm, filling and utterly delicious.  Boiling the potatoes in their skins gives them that appealing pop when you bite through the skin and the interior is smooth and creamy.  Add in some browned thyme butter and this could almost be a meal in itself…

…but if you have a three year old who has a bit of an opinion about dinner, then you can’t serve these alone because then she’ll ask, “Where’s the rest of the meal?” She’s been asking me that for about a year, now.  Where she even got that phrase, I’ll never know.  But it’s pretty intimidating.

Creamy Potatoes with Thyme Browned Butter

Boiled Potatoes with Thyme Browned Butter

  • Servings: 4-6 as a side dish
  • Print

1 lb baby red potatoes (red creamers)
4 TBS unsalted butter
4-5 sprigs fresh thyme, plus a teaspoon of chopped leaves
kosher salt for seasoning

In a large pot, submerge potatoes and salt the water generously.  Bring to a boil and boil until soft when pierce with a knife.  This took me around 15 minutes.  Drain the potatoes and transfer into a large bowl.  In a small sauce pan, melt the butter over medium heat, and add the thyme sprigs and cook till the foaming subsides.  When brown butter solids start forming at the bottom of the pan and the butter smells nutty, immediately remove from the heat and add the thyme leaves.  Swirl around and then pour over the potatoes, tossing to coat evenly.  Sprinkle the potatoes with kosher salt and serve.

Apricot Cream Scones

apricot white chocolate cream scones
Here’s a wonderful recipe I’ve done countless ways over the past few months and it’s delicious every time.  Quick, easy and amazingly fluffy on the inside while being crispy on the outside – these scones are an amazing way to make breakfast better.  Today I’m sharing with you one of my favorite flavor combinations: apricot and white chocolate.  However, anything you want to add will work. I’ve done cheddar and chives for a savory version, a simple version with just currents and then just plain for the most amazing biscuits! This recipe comes from The Best New Recipe cookbook and so you know the recipes have been endlessly tested and work.  I loved this recipe because I had it memorized the first time I did it.  Four ingredients.  Doesn’t get easier than that.  No cutting in butter – these scones/biscuits/whatever you want to call them have just heavy cream!  I even skip the patting out and cutting into triangle method that Best New calls for and make it even easier by just making these drop-style.

I hope you add this to your arsenal of recipes to whip out when company arrives or a friend drops by for coffee (that still happens in my head, although not so much in reality).  My white chocolate chips got kind of torched, but no scone was left behind.
apricot cream scones

Apricot Cream Scones

10 ounces (2 cups, but start weighing your flour!) all purpose flour
2 teaspoons sugar
2 teaspoons baking powder
1/2 teaspoon salt
1 1/2 cups heavy cream

Add-Ins:
1/4 cup white chocolate chips
1/4 cup chopped, dried apricots

Preheat the oven to 425 degrees.  Line a baking sheet with parchment or spray with oil.  Whisk together the dry ingredients, stir in the white chocolate and apricots and then with a fork, whip in the cream.  It gets super sticky and super hard to stir.  If it seems too dry, add a splash or two more.  I usually add just a bit more.  Then, by the spoonful, drop mounds onto your baking sheet about 2 inches apart.  Brush the tops of the scones with more heavy cream and bake 15-20 minutes, until golden brown.  Serve immediately with butter.

Savory Vegetable Souffles – Meatless Mondays Never Tasted So Good

Brussels Sprout and Cheddar Souffle Brussels Sprouts and Cheddar Souffle
Happy Monday After Daylight Savings Time!  This will be a hard week for many, getting used to the time change.  I love it once the adjustment takes place because I LOVE that it stays light outside till nearly 8:30 in the spring and nearly 10 in the summer.  We get to play later (it seems) and it’s important to not feel so closed in after months of the cold, dark evenings of winter.

I’ve been in a new, happy rut, lately.  On most Mondays lately, I’ve been making a vegetable souffle.  I hardly ever have my act together for dinner on Monday and I usually haven’t been to the store for the week (like today), but I nearly always have some sort of leftover veg in the fridge and (usually) four eggs.  Voila – this beautiful souffle, big enough for all of us to eat more than a big portion.  I’d say it would serve 4 as a side dish or 2.5 (like us) as a main. And it’s so versatile!Brussels Sprouts Souffle
The pics above were made with Brussels sprouts and cheddar and the pics below were spinach and gruyere.  I’ve done leftover broccoli with white cheddar, leek, and asparagus, too!  If you have eggs, cheese and some leftover vegetables, you have a meal!  And a really good one.  Every time I have made this, Olive has said, “this is a good meal, Mama.” Good enough for me!  It’s a wonderful vehicle for getting more vegetables into your little people, as well.
Spinach and Parmesan Souffle

Savory Vegetable Souffles

  • Servings: 4-6 as a side
  • Print

1/3 cup grated parmesan or fine bread crumbs
2 cups cooked vegetables, finely chopped.  Use boiled brussels sprouts, spinach, leeks, asparagus, kale, whatever floats your boat!
5 tablespoons butter
salt and pepper
1/4 cup flour
1 cup milk
4 eggs, room temp and separated
1/2 cup grated hard cheese – cheddar, gruyere, gouda, romano, parm, etc

Heat the oven to 375F. Butter a 6-cup souffle dish or 6 one cup ramekins, if you want everyone to have a nice, neat side dish of their very own.  Coat the sides of the dish with cheese or breadcrumbs. Cook your vegetable in salted boiling water until tender.  Drain and squeeze out as much moisture as you can.  Season with salt and pepper and set aside.

In a large saucepan, melt the 1/4 cup butter over medium heat, stir in the flour and cook, stirring frequently, for 2 minutes.  Whisk in the milk and cook until the sauce has thickened, whisking the entire time.  Season with salt and pepper to taste and add a splash more milk if it gets too thick (you want a thick gravy consistency).  Set aside off the heat.  Into your egg yolks, whisk in about 1/2 cup of the hot cream sauce to warm them and then return them to the rest of the sauce and whisk to incorporate.  Stir in the cheese and when it’s melted, fold in the vegetables.

With a mixer, beat the egg whites until stiff.  Stir a quarter of them into the souffle base and then fold in the remainder until no white streaks show.  Bake souffles on a rimmed baking sheet in the middle of the oven until risen and golden, 30-35 minutes.  The middle will be slightly wobbly if you’ve made it in one large dish.  Serve immediately!

*recipe adapted from The New Vegetarian Cooking for Everyone cookbook, which is completely fantastic so far.  Hasn’t steered us wrong, yet!


Spinach and Parmesan Souffles

Cheesy Potato Fritatta

spanish tortilla with scallions
It’s the middle of the week.  There has been a loss of momentum.  Or maybe you’ve just gained yours? Either way, you have no idea what to make for dinner and all you have are some leftover potatoes. Do you also have eggs? Everyone has eggs.  Do you have an onion?  Maybe some cheese?  A bit of salt and pepper and olive oil?  Then you’re set.  And dinner will be marvelous.  And filling.  And comforting.  You don’t have to make things complicated to make them delicious and I can’t count how many times I’ve declared, “There’s nothing to eat in this house!” only to be humbled by actually finding something, and not only something, but something truly delicious.  How lazy I can be sometimes!  This meal was inspired by a book called An Everlasting Meal, which is a sort of love-song to making the most out of everything you’re given.  It saved my family from take out with this simple recipe and I will certainly make it again!

potato egg fritatta

Potato Fritatta

2 small potatoes (about 2 cups, peeled and sliced into 1/4″ slices)
1 small onion, sliced thin
1/2 cup shredded cheddar cheeses (can be omitted without any damage done)
salt and pepper
3 eggs, beaten (four if you add the cheese, like I did)

Heat oven to 375F.
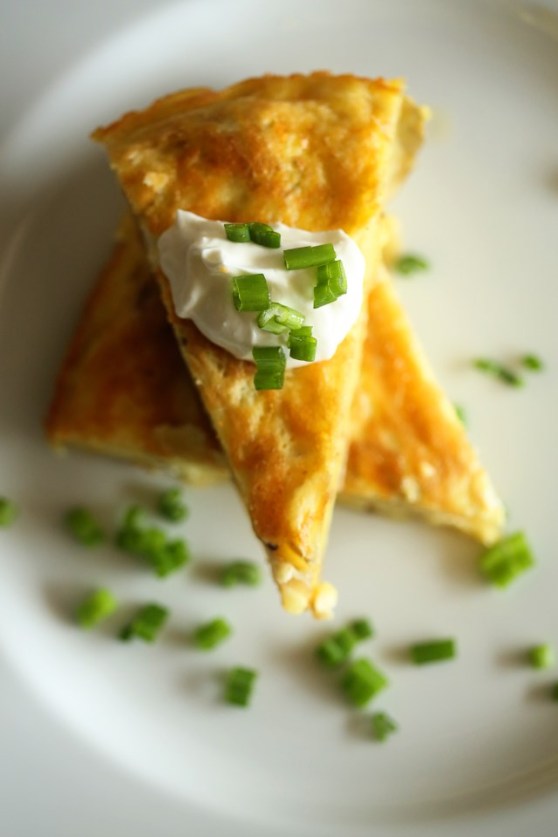
In a large skillet over medium heat, heat about 1/3 cup of olive oil and add the potatoes and onions.  Season well with salt and pepper. Cook, slightly covered, until the potatoes are soft. Strain the potatoes and onions out of the pan and put them in a bowl.  Reserve the olive oil from the pan.  Let the onions and potatoes cool and then add in the cheese, beaten eggs and more salt and pepper.  In a 10″ non-stick skillet, add some of the oil from your other skillet and make sure all the sides and bottom are nicely coated.  Pour the egg/potato mixture and cook over medium heat on the stove until the bottom looks set.  Transfer the pan to the oven and let it finish cooking until the top is slightly puffy, about 15 minutes.  Remove from the oven and let it cool for about 10 minutes, and then invert onto a serving plate.  Serve with sour cream, chopped chives or scallions and hot sauce! This dish is great warm, room temp, or even cold. It would be a super easy lunch on the go or weekend breakfast.  

Creamy Roasted Carrot Soup

roasted carrot soup with cayenne and ginger
Fall means soup.  Soup means it’s cold enough outside to not want to die at the thought of eating soup for dinner.  And it being cold enough outside seems to make everything around here better.  I sleep better, we can play outside longer without my redhead overheating and everything just feels fresh.  And I’m a bit of a broken record when it comes to hailing soups as a surefire way to get your kids to eat their vegetables, but I’m going to say it, again.  Cooking just about any vegetable and pureeing it into a soup is the easiest way to get a baby, toddler, picky adult to eat a vegetable otherwise sneered at due to its texture or appearance.  Olive used to eat asparagus.  But then, she turned two and decided she was no longer interested.  But the other day I made a batch of asparagus soup and she drank it down.  Same flavor, different delivery vehicle.  And when you add a piece of crusty, buttery bread on the side, the soup suddenly seems like a complete meal.

My go-to soup in the fall is usually butternut squash.  But I nearly always have a half-used bag of carrots in the fridge, waiting to become something more exciting than diced up for chicken pot pie.  The other day I made this soup and I loved it.  We ate on it for several days – always a good side dish or starter, and good for dunking toasted bread.  I don’t need to say it, again, but this batch of soup would fill up about 12 baby food jars.  Can you lend 30 minutes to making a vegetable soup?  How about $3 for a 2lb bag of carrots?  How much is a jar of baby food, again?  You get the point.

Yay, soup!

roasted carrot soup
Roasted Carrot Soup
serves 6-8

1 sweet onion, diced
3 TBS olive oil
2 lbs carrots, peeled and chopped
6 cups vegetable or chicken stock
1/2 cup heavy cream
Salt and Pepper to taste
ground ginger and paprika for garnish

Heat the olive oil in a large pot over medium high heat until it shimmers.  Toss in the onion and saute until tender but not browned, about 5-6 minutes.  Add in the carrots and cook for about 10 minutes, stirring to coat in the oil.  Add the stock and let the pot come to a boil, then reduce the heat and simmer for about 20 minutes, or until the carrots are tender.  Puree directly in the pot with an immersion blender, or take in batches to a standard blender and puree until smooth.  If you used a standard blender, return the soup to the pot and add the heavy cream.  Season with salt and pepper to taste and then ladle into bowls and sprinkle with ground ginger, paprika and a splash of cream or sour cream.

Parchment Baked Fish with Bruschetta and Pine Nuts

parchment steamed tilapia with bruschetta
A totally simple weeknight dinner recipe for you using the bruschetta recipe from Monday!  We bake, roast, and pan fry fish a LOT around here.  I buy the bags of frozen fillets and throughout the week, when I “don’t have anything to cook” I can generally reach in, grab three fillets and thaw them out in about 30 minutes to use alongside rice, roasted potatoes, soup, etc.  Olive thankfully loves all fish and so it’s a meal that is never stressful for me.  What’s even easier is just placing the fillets on some parchment paper (foil also works) with some oil and seasonings, wrap it up and let them bake!  I did this last week and it always feels like I went to a lot of trouble, is healthier than my usual pan-fry standard preparation, and the fish is always steamed perfectly.

Get creative with the ingredients you put in with the fish – the possibilities are endless!

steamed fish with bruschetta
Parchment Baked Fish with Bruschetta and Pine Nuts
serves 4

4 tilapia or cod fillets (really, any type of fish will work)
1 TBS butter or olive oil
3 TBS prepared bruschetta 
1 TBS toasted pine nuts
salt and pepper and a squeeze of lemon

Preheat your oven to 400F.  Tear off four squares of parchment paper or foil.  Place the butter in the center of each square and place a fish fillet on top of the butter.  Season the fillet with salt and pepper.  Top with bruschetta and pine nuts and squeeze a lemon over the top of all of it.  Fold the sides up and together and crimp to close.  Place packages on a rimmed baking sheet and bake together for 20 minutes.

You can add just about anything to the fish that you have in your fridge – olive tapenade, green beans, corn relish, fresh herbs and sour cream – honestly, just have fun!