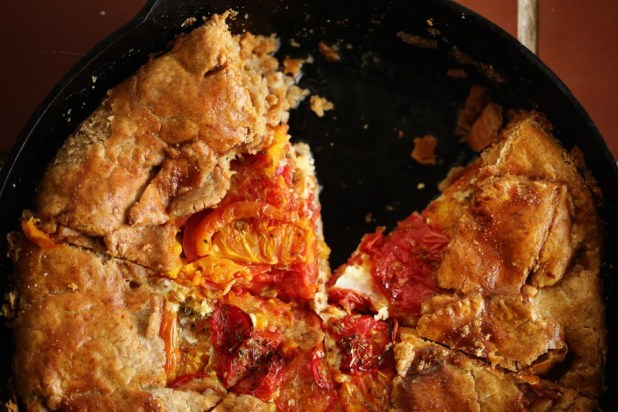


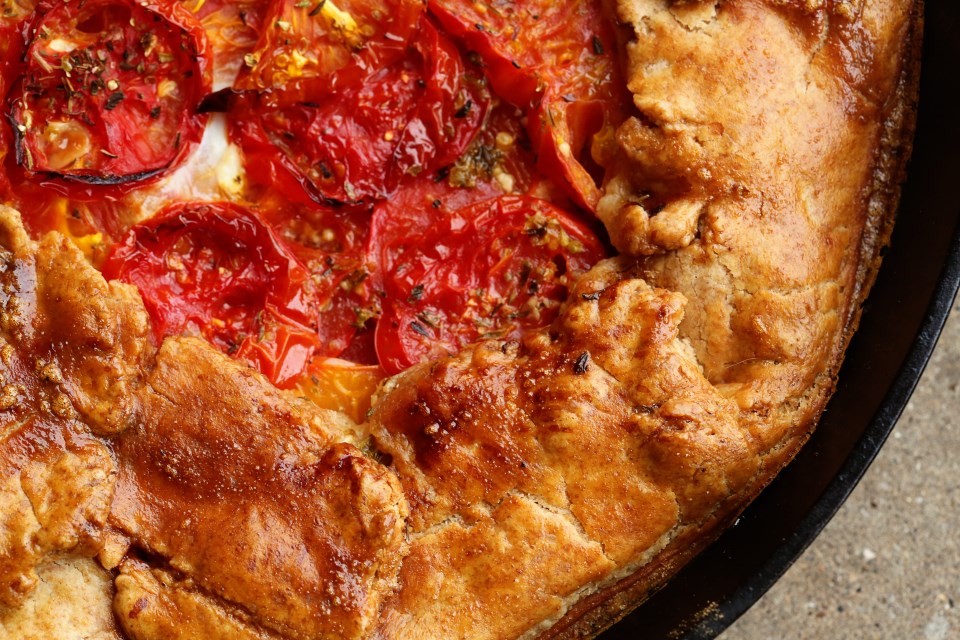
There’s no better time than the middle of October to post about a beautiful, summery tomato pie. 😛 In my defense, my tomato plants were late bloomers and didn’t really start ripening until the end of September. But I can see this amazing pie going either way: an homage to the bright, sweet, summertime flavors, or being comforting and warming with a depth of rich tomato flavor fitting for the colder months. I can not vouch for this recipe if you use tomatoes from the grocery store, but I would imagine it wouldn’t be half bad, considering the bake time and the way the tomatoes almost go sun-dried in flavor on the top layer. If you do that, make sure the tomatoes you buy are pretty soft and ripe and maybe just stick to Roma tomatoes to be safe.
This pie has a bright, peppery and tangy whole-grain mustard on the bottom of the tomatoes and the smooth, chewy layer of cheese in the middle and then topped with two layers of extra ripe heirloom, beefsteak and Roma tomatoes. I decided to use half whole-wheat flour in my usual crust recipe because whole wheat absorbs more moisture and I knew this pie would be pretty juicy. And it is quite juicy, but I decided to stop thinking it had to be like a tart and started to embrace the tomato for what it is: a fruit to be used in a fruit pie! And every fruit pie I’ve ever had, has an adequate amount of juiciness throughout. Why should a tomato pie be any different? So if you will embrace it, too, I think you will really love this recipe. The flavors are electric. And I hope that you have some good tomatoes left in your garden. And if you don’t, you’re more than welcome to stop by and pick some from mine! Happy October 🙂
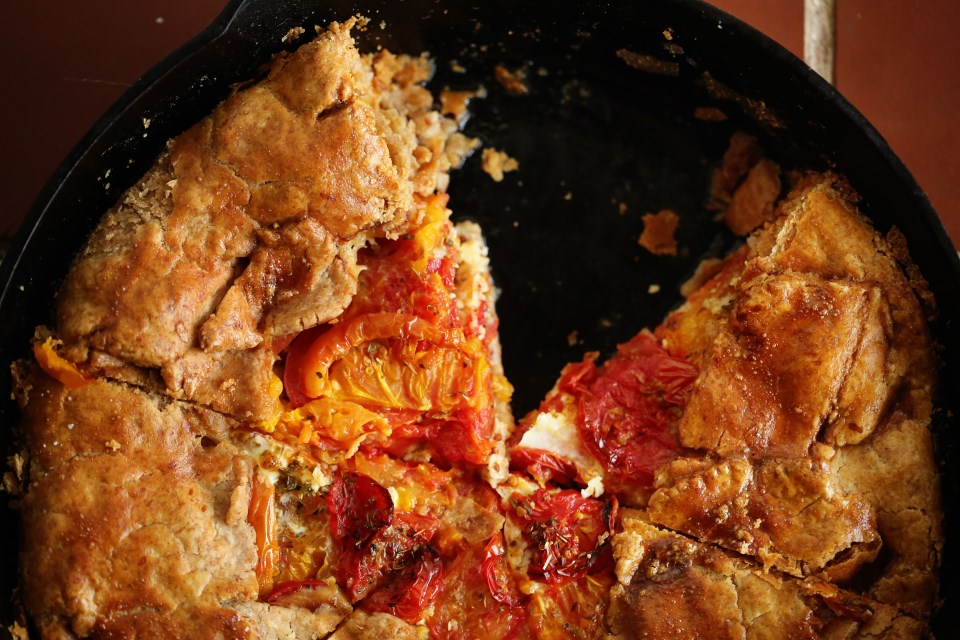

Rustic Tomato Galette
1 recipe fool-proof pie crust with half the flour being whole wheat
About 3 pounds fresh tomatoes in an assortment of sizes and varieties
2 tablespoons whole grain mustard
2 cups low-moisture mozzarella (shred it yourself – don’t buy pre-shredded or it won’t melt right)
dried oregano
salt and pepper
1 egg, whipped
Preheat the oven to 400F.
Slice the tomatoes into 1/4″ slices and lay out on paper towel-lined sheet pans. Sprinkle with kosher salt on each side of the tomato and let them sit and drain for a few minutes this way. This draws out excess moisture. Let the tomatoes drain while you handle the crust.
Roll your pie crust out and gently form it into a 10″ cast iron pan, letting the excess hang over the edges. Spread the whole grain mustard evenly on the bottom of the crust. (I used this brand and yes, it looks like nothing but mustard seeds!)
Spread the shredded mozzarella over the mustard and then give the cheese a generous sprinkling of dried oregano.
Arrange the tomato slices evenly over the cheese in an overlapping pattern. Sprinkle that layer with oregano and then finish up with the rest of the tomatoes. Gently fold the overhanging pie crust over the tomatoes. It doesn’t have the be perfect. “Galette” is French for “I stopped caring how this looks.” So you get a free pass. If the crust breaks off, just pinch it back together. Really, this is forgiving and you want the extra crust to be there. It’s a buttery, flaky, tomato-juice-absorbing wonder.*
Place the pie on a rimmed baking sheet and brush the crust with egg. Bake for an hour, until the crust is golden brown and the pie is bubbling like crazy. Place a sheet of tin foil over the pie and let it bake another 15 minutes. Let it sit for ten minutes before slicing and serving.
*At this point, you can chill your pie overnight if you’re making this ahead. If you do that, increase your bake time to an hour and a half (or even longer – you’re just wanting a deep brown in your crust and an almost caramelized top layer of tomatoes.)