I always look for interesting sides to put with lunch and dinner every day. It has been a challenge for me as the typical American cook to think of vegetables as a main component to meals. For most of us, vegetables are exactly as we call them – a side dish (a side thought!) and we obligingly scrounge a bag of vegetables from the freezer to make our meals “complete” when we very rarely enjoy those components and most of them, if we are honest, get put in a leftover container and saved until we no longer have guilt about throwing them away.
Maybe this is just me. I’ve wanted and tried this year to think of vegetables as the main component and meats and carbs as a side dish. To balance the plate in the opposite direction. This. Is. Hard. I will be the first to admit that I know how to cook meats, starches and carbs MUCH better than I know how to cook a vegetable. But I’m trying! And I’ve looked to cuisines that tend to focus on vegetables as main dishes for inspiration. Indian cuisine is wonderful for this approach, but even I tire of the cumin/cardamom/curry combination of flavors pretty quick. There needs to be a balance to the approach of getting more vegetables on your dinner plate, and so for me, I’m taking winter as a wonderful excuse to make some slightly more indulgent and comforting vegetable dishes to get me in the habit of seeing them as the star of the show, instead of a side act.
Speaking of winter: I am in love with a new cookbook. Well, I suppose it isn’t exactly new, but it’s new to me, and it’s called Homemade Winter by Yvette Van Boven. I absolutely love when a cookbook has recipes listed by seasonal availability. This cookbook is ALL about winter – sure, winter in Holland, but STILL! Most winter vegetables in this hemisphere are available and relatively fresh no matter where you reside, and so this cookbook has introduced me to a season of cooking that has previously been nothing but soups and stews and squash. Goodness, how many times can I eat squash?!
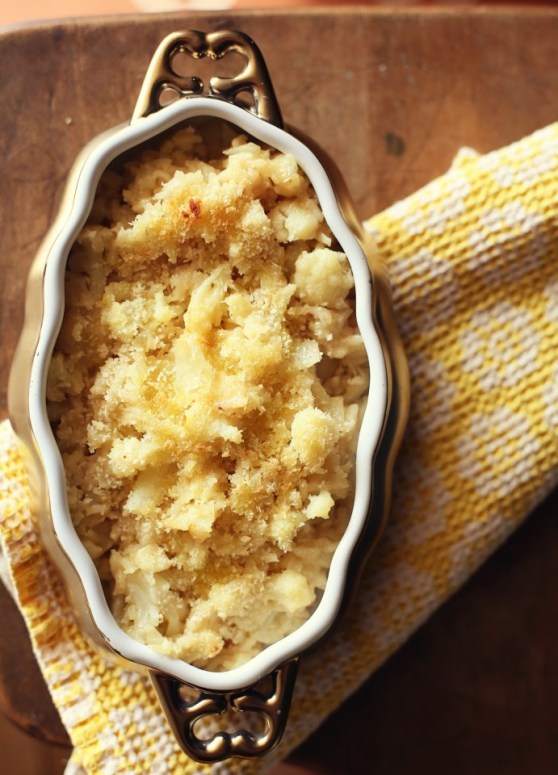
Enter: cauliflower and rice baked with swiss into a creamy but not-too-heavy dish. I made this yesterday for our lunch and it was the main component. In her cookbook, Yvette calls it a risotto, but I didn’t have arborio rice and so I made it with what I had – plain ol’ white, short-grain rice – and it worked beautifully. I love a recipe that is accessible and works, no matter what you have on hand. A lot of home cooks don’t have arborio in the pantry, yet most people have regular white rice! The only splurge for this dish was some good Comte cheese, but I believe it could be just as flavorful with nearly any cheese you have in the fridge.
We loved it – it was warm, filling and satisfying as a main dish and perfect for a freezing day like today. In fact, I turned the leftovers into cauliflower rice fritters today for lunch and served them along side a white bean soup I will blog about very soon, and it was an awesome lunch! Hope you all stay warm, today and have an extra cup of coffee with me!
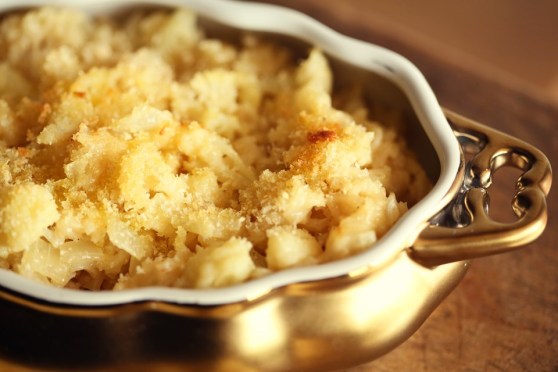
Cheesy Cauliflower Rice Bake
serves 6-8 as a side or 4-6 as a main
1 small head cauliflower
1 TBS olive oil
1 large onion, diced
2 garlic cloves, minced
1 cup shredded cheese such as Comte, Emmentaler or Gruyere – would work with any hard cheese, though
1 cup of white, short-grain rice
2 3/4 cups chicken or vegetable broth
1/2 cup panko or plain bread crumbs
drizzle of olive oil
Boil the cauliflower for 10 minutes until tender. Drain and set aside.
Preheat the oven to 350F. Heat the oil in a large skillet (12″ at least). Add the onion and saute for about 5 minutes. Add the garlic and cook for one minute more, then add the rice and stir to combine. Saute all this for another 2 minutes or so. Add the broth and bring to a boil. Stir in the cauliflower and cheese and cover the skillet with a lid and bake in the oven for 25 minutes until all liquid has absorbed.
Remove from the oven and let sit for 5 minutes before uncovering. Sprinkle the bread crumbs and drizzle the top with olive oil and bake until the breadcrumbs are toasted, or just stick it under the broiler for 5 minutes.
Serve in bowls with lots of cracked pepper!