You Only Get One Night

seattle301
This post won’t have a recipe.  It’s about one night that we spent with our friends in Seattle this summer when we went on our big adventure.  This was our first full day exploring Seattle with our friends.  Little did we know the day before that Rod’s mother would pass away and he and Jill would have to abruptly alter their year-long travel plans and drive home the next day.  We had planned on enjoying another full week with our traveling companions and that week was reduced to just a few  hours.  We asked them what they’d like to do on their first and last night in Seattle and we all agreed that having a crab boil on the beach in Bainbridge Island where our hosts, the Ware family, lives, would be the best way to enjoy each others’ company and make some lasting memories for everyone and for Rod and Jill who would be going home the next day.IMG_5071
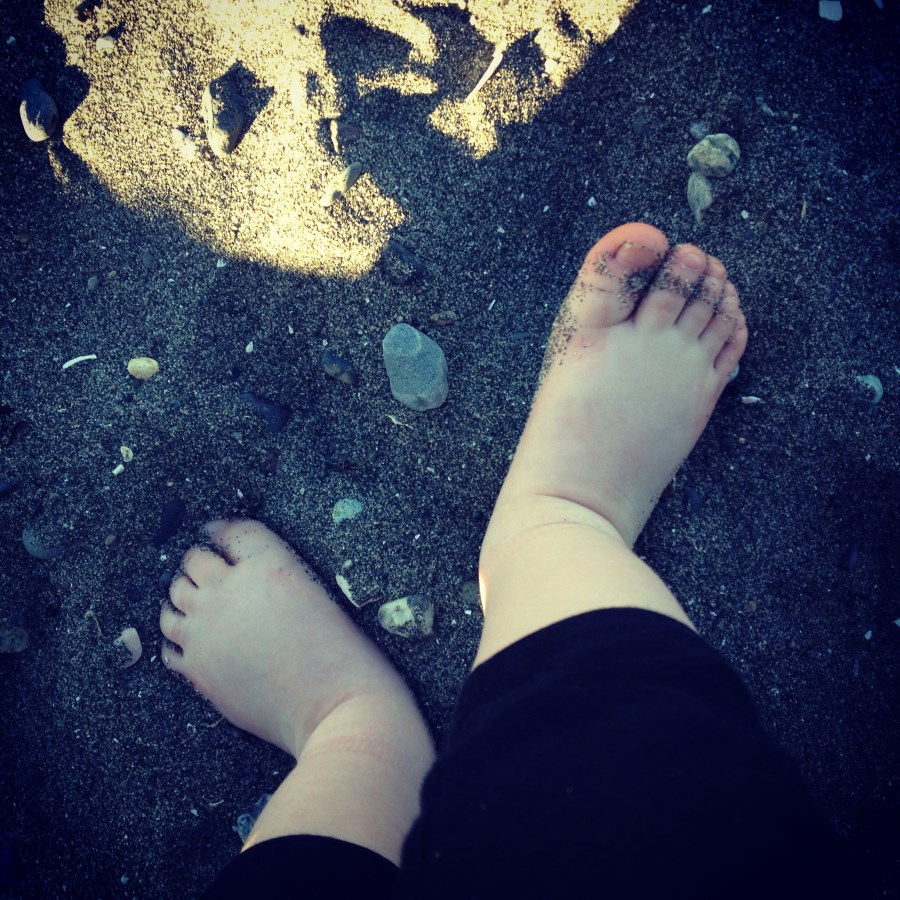
So we packed up all the needed supplies and we drove down to the beach.  We played in the sand and watched Ollie girl experience the ocean and sand between her toes for the first time.IMG_5060
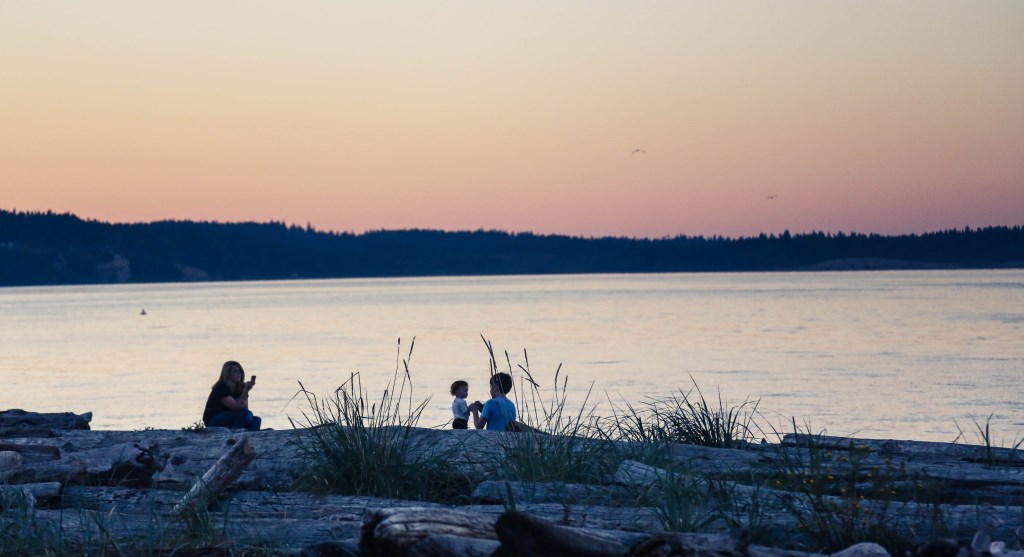
There were long conversations sitting on logs overlooking the water and the amazing view of Mt. Rainier in the background with the glorious pink moon that was settling on the water as a backdrop for our meal together.seattle284seattle298

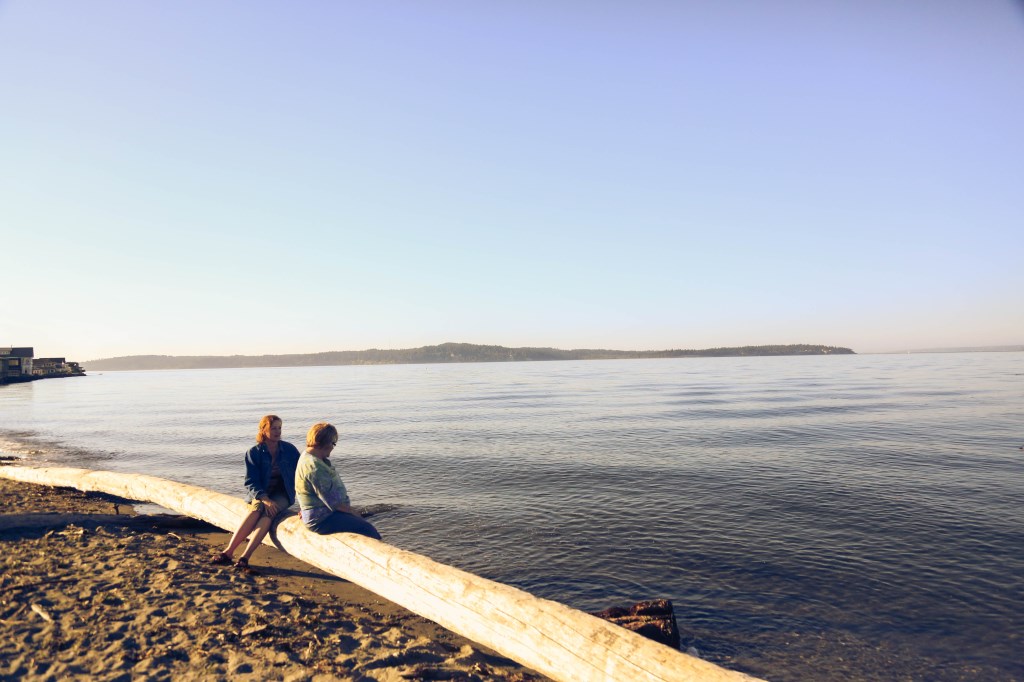
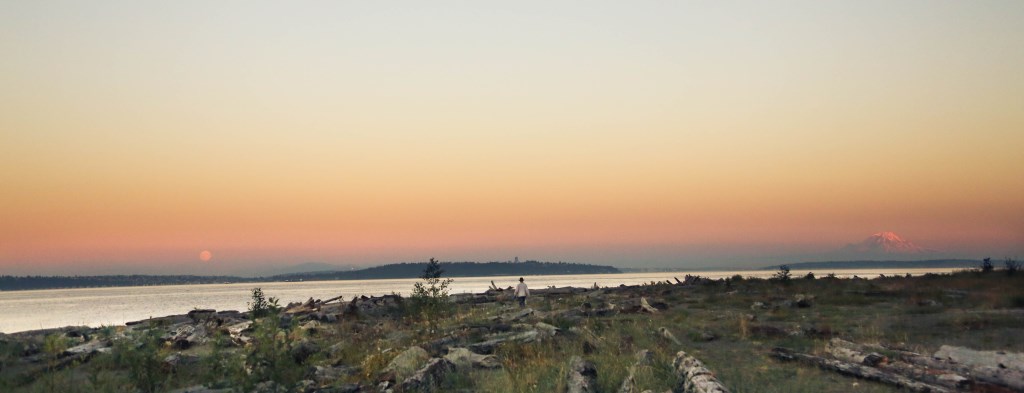
Mount Rainier and the rising moon in the same shot.  An other-worldly experience.seattle290 IMG_5050
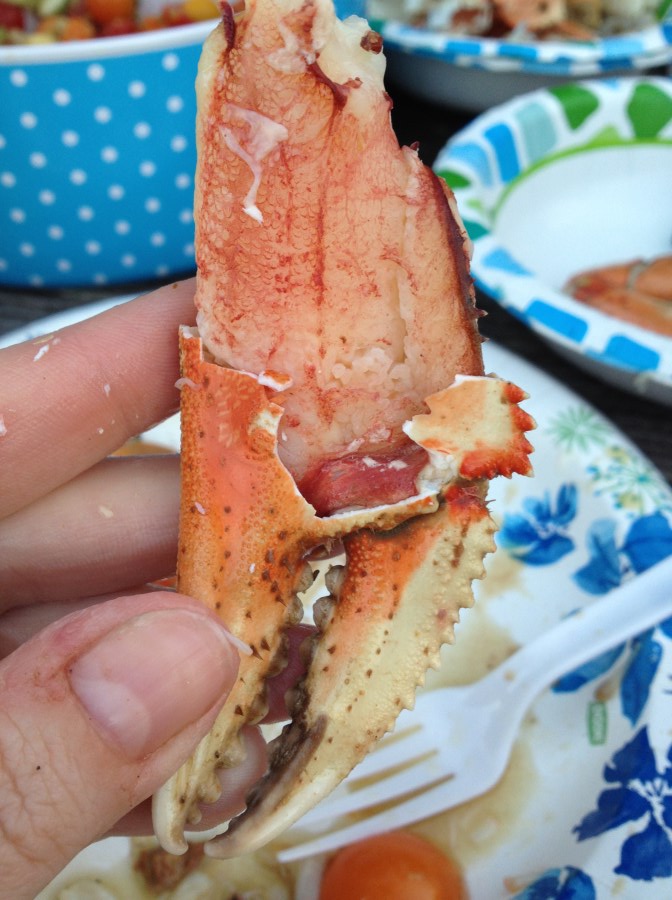
We brought live crabs and potatoes, corn and sausages and got our water to boiling and while everything simmered, we played in the fading light of a very long and adventure-packed day.IMG_5047  seattle294
It was one of those nights you read about in books written about summertime.  It was like one giant cliche for how you’re supposed to spend your summer.  I’d never had the opportunity to do anything like it, being from a place where there’s no water in sight for miles.  And our lovely hosts knew exactly what to do to arrange a beautiful trip for us, and through their giving and sacrificing spirit, we had the time of our lives.  The whole trip, not just this night, was a dream!
seattle297
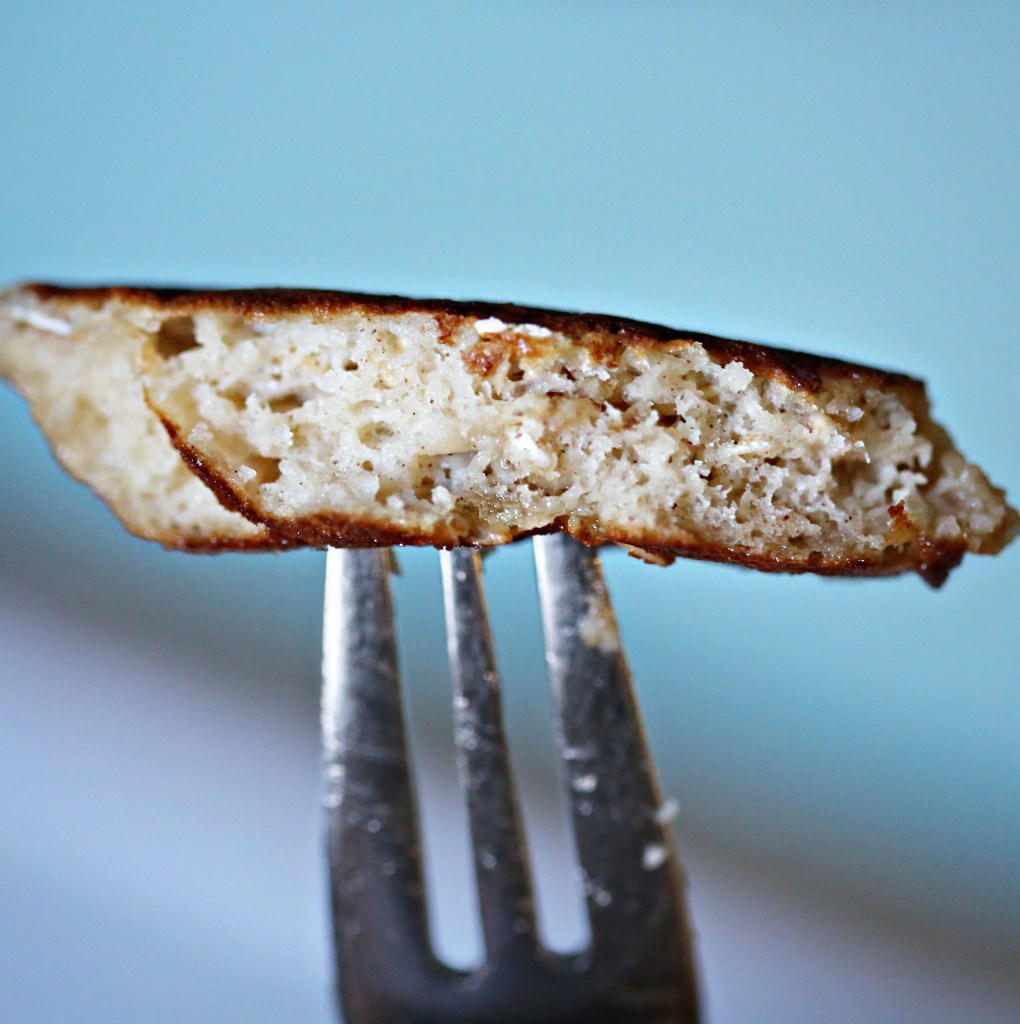
I had my first oyster – a briny, creamy and amazingly flavorful little creature that I will admit, I wasn’t sure if I loved or hated.  It gave me shivers – whatever that means.  But I’m glad in THAT place with THOSE people, that I tried something new and didn’t hold back from the experience.

Because, you see, you only get one night.

This evening is the last evening you’ll get to spend with the people you love.  It’s the last meal you will enjoy and it’s the last evening of doing whatever it is that you love with whomever you love most.  I’m not trying to be morbid, I just realize with new clarity that we are not guaranteed tomorrow and so today, tonight, this present moment is all we have.  How often we spend our days planning for tomorrow.  How often we waste our moments fretting about the past, what our lives should have been or could have been.  And every moment we do that is a moment wasted and gone forever.  Today is it.  You survived the night – how will you celebrate that fact today?IMG_5066
IMG_5065
IMG_5064
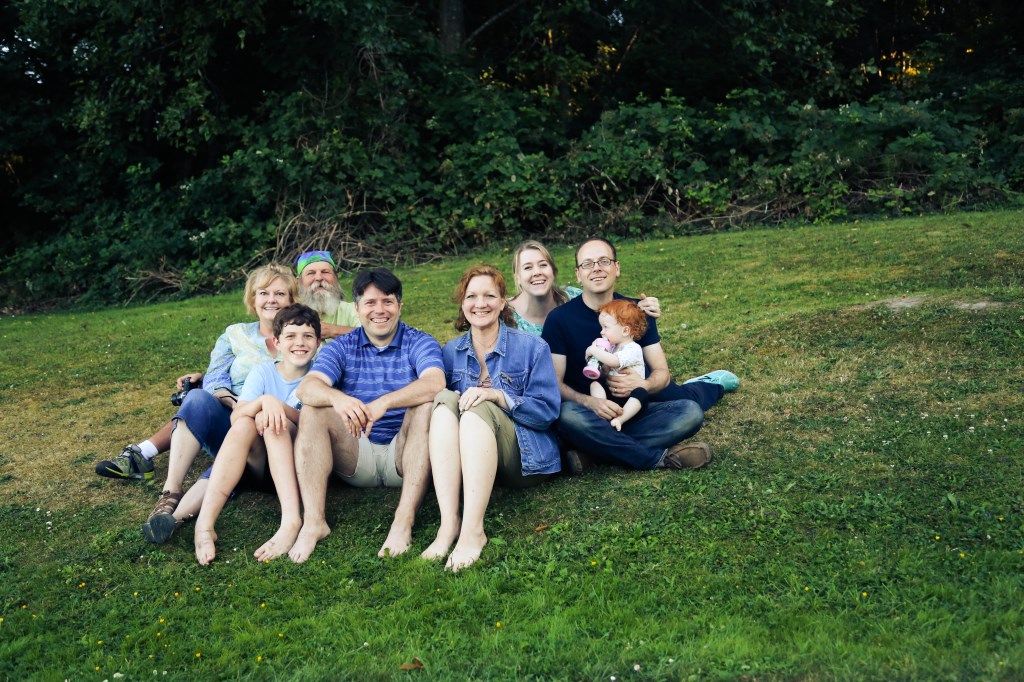
The meal was amazing and we were salty and smelled like the sea from head to toe when we all piled back into the cars to go home.  I got to spend that night with some of my favorite people in the world and I’m glad that Rod and Jill got to experience such a perfect moment before having to cut their trip short to go home and deal with much more serious matters.  We snapped this picture right before we lost the light and I think it’s one of my favorite pictures from the trip.  I am forever grateful to the Wares for sharing their home, their beach and their city with us.  I think we spent our “one night” very well and I can say that I had no regrets or “should haves” on this trip.seattle295

Strawberry Pots de Creme

Strawberry Pots de Creme

Here’s a beautifully simple dessert that is silky and rich and bright with the last memories of summer strawberries.  Fresh is always best if you can find good ones, but if they’re out, or have already sky-rocketed in price, frozen would work just fine.  It’s a custard kind of week here on the Family Meal blog.  I get good use out of my cute little ramekins and I have really embraced them as they are a perfect little size for toddler hands.  Oh yeah, and that spoon is part of this set, which I really just couldn’t resist.  I love them for Olive and for dips and jams and even my morning coffee.  Plus, what little girl wouldn’t feel excited to get to eat her oatmeal in the morning with a gold glitter spoon?  Olive couldn’t really care less.  It’s for me.  🙂

Strawberry Cream Pots


Strawberry Pots de Creme (pronounced: poh-duh-crem)
makes 4-6 depending on your vessels

  • 8 ounces strawberries (7 or 8 large berries), hulled
  • 3 tablespoons superfine sugar
  • 4 large egg yolks
  • 1 1/2 cups heavy cream
  • 1 tsp vanilla bean paste (or extract)
  • 1 tsp Cointreau (I left this out for Ollie)

Preheat oven to 275 degrees. In a tall cup or blender, combine strawberries, sugar and egg yolks. Process with your handy immersion blender (or regular blender) until pureed.

Bring a kettle of water to a boil. Pour the strawberry mixture into a large bowl.  Add 1 cup cream and the vanilla and Cointreau if using. Mix well. Divide mixture evenly among four 1-cup ramekins. Place ramekins in a baking dish, and add enough boiling water to come halfway up the sides of ramekins.

Place baking dish in the oven, and bake until the custard is just set, about 1 hour. Check by jiggling the pan – if they still look pretty liquidy in the center, rotate the pan and let it go another 15-20 minutes. Remove from the oven; place ramekins on a rack, and cool. Cover with foil or plastic wrap, and refrigerate at least 6 hours. To serve, top with diced strawberries or whipped cream and enjoy with your sparkle spoons!  🙂


Crustless Asparagus Quiche and the End of All Dieting

asparagus custard

I was first introduced to a savory custard by the wonderful food blogger, Helene Garcia of French Foodie Baby.  The first savory custard I made was her leek and chive flan and I was a bit afraid at first because we just have ingrained in our minds that custards and flans are supposed to be sweet, but this was a very happy and luxurious surprise.  Basically, in American terms, this is a crustless quiche.  Only waaaaay better of a texture than the quiche of your childhood.  Please do refer back to my quiche post on how its texture should be.  I was happy that it was such a silky texture and that Olive could eat it just fine with her limited spoon wielding skills.

I stumbled upon this asparagus and bacon custard in a book called French Women Don’t Get Fat, which I’m reading and working my way through the steps to reshape my life and my patterns of eating.  The book presents a bit of a strict start (a cleanse, which I don’t think is totally necessary for success, just optional) followed by three months of self evaluation of the patterns you’ve made over the years and ways in which you could cut back without feeling deprived.  After three months, by the book, you should only be HALF WAY to your goal weight.  If you are, then she advises to add back a few more pleasures and get on with your life!  If not, then keep going with the plan, making additional adjustments if necessary.

I’m happy to have finally found a book that doesn’t restrict you, doesn’t say that a particular food or food group is bad, and doesn’t push supplements.  I’m DONE with that vicious cycle of crash dieting and then giving up, gaining back and doing it all over again because every new diet makes a new promise.  Why do we keep doing this to ourselves?  I found myself having an epiphany the other day that a diet that promises you’ll lose all the weight you need to lose in a few weeks will only work if it only took you a few weeks to gain that weight.  And like me, I’m sure most of us with serious weight issues have struggled a BIT longer than weeks or even years with our weight.  So why does it not register in our minds that in order to keep a good, healthy weight, we should logically change the way we do things for 10-15 years at least?  Personally speaking, I’ve struggled with my weight for about twenty two years and most of that time was wasted, going through diet after diet that restricted too much, left me wanting and frustrated and ultimately, feeling like I am a loser and can never succeed.

After 11 days of following this book and eating what I personally feel was a bit too indulgent of a menu, I’m down seven pounds.  I know what you’re thinking: all water weight, and besides, wasn’t she just preaching that weight loss shouldn’t be sudden?!  You’re right, it shouldn’t.  But for one, I have a lot to lose and the more you have to lose, generally, the quicker you will drop pounds (at first).  Second, I’ve completely cut out all snacking and all second helpings.  Man, that adds up to a lot with just those two bad habits!  Especially if you snack several times a  day!  The only other thing I’ve given up has been cream in my coffee and that, for me, was the biggest challenge because I love my coffee.  But, for these first three months of “readjusting” how I do things, I don’t consider it that much of a burden to give up roughly 200 calories a day that used to be dedicated to cream in my coffee!  I have even started to prefer it black with just a little sweetner (stevia, for those concerned).  I haven’t been stressed about working out – I just have been taking more walks and enjoying the new, cooler fall weather and I’ve been pulling a few weeds here and there.  This is my new life.  I was done with diets a few years ago, but I was still engaging in bad habits.  It’s hard to undo years of emotional eating, but I’ve found that the distraction of Olive is a grand one.  Or, if I just HAVE to ingest something in the afternoon, I make a cup of cinnamon tea (it’s naturally sweet) and get productive!

This custard recipe was breakfast for a few days last week.  Again, I know what you will say.  This has cream, eggs, bacon AND it’s in a “diet” book?  Yep.  Moderation + Fulfilling Meals = Success.  Moderation + Drab, Restrictive Meals = Failure. I really recommend you picking up this book IF and only if you are done yo-yo dieting,  if you like to cook and you are ready to stop restricting yourself and feeling guilty for eating things like butter.  I’ll keep you posted on my progress and I hope that I can encourage some of you to stop the fad madness and just start “eating real food, not too much, mostly plants.” (from the omnivore’s dilemma) 🙂

Asparagus custards

Asparagus Custard (crustless quiche, if it makes you feel better to call it that)
makes 6 – 1 cup ramekin servings

16 asparagus spears, tough ends cut off and peeled
4 ounces bacon, coarsely chopped
8 eggs
2 cups milk
1 cup heavy cream
8 sprigs chives, minced
1/4 teaspoon salt
1/4 teaspoon black pepper

Preheat oven to 350F. Boil the asparagus in salted water for 5 minutes. Drain and let cool. Chop each stalk into a small dice and set aside.  Saute the bacon in a nonstick frying pan till crisp. Drain on paper towel and set aside.  Mix remaining ingredients in a large bowl (reserving some chives for garnish). Pour the egg mixture into individual ramekins. Sprinkle in the asparagus and bacon. Bake for 15-20 minutes till the custard is set but not dried out.  Serve with pieces of toast, crackers, or with some fresh fruit and enjoy your day!

Brown Butter Vanilla Bean Cinnamon Rolls

Brown Butter Vanilla Bean Cinnamon Rolls

RECIPE UPDATED!  I made some changes and they’re even better, now!  Go make these, QUICK!

For the South Plains Fair this year, I decided to enter the cinnamon roll category, if for no other reason than to de-throne my friend, Rod from his previous win in the category.  A little healthy rivalry makes everything more fun and I KNOW his are amazing.  But in the night, right before drifting off, I came up with what I figured would be a wonderful way to make the filling for the cinnamon rolls and the icing.  The dough, I figured, could be altered to fit in with the rest.  So I got kind of excited to embark on the process and after killing the yeast in my dough from boiling hot butter in the first round, I ended up with a good second batch of dough and proceeded with the plan!  I think the secret to anything truly delicious in a baked good is butter.  And I figure everyone knows, but in case you don’t, browned butter is the goodness of butter x 1,000,000.  So at every turn, I turned the butter into browned butter and I formed a paste with the filling instead of doing the traditional method of smearing on a lot of butter and then dumping sugar and cinnamon, which, when rolled up and cut, inevitably dumps out a little on your cutting board.

The paste. was. genius.  I’m not even going to act humble about this.  I browned the butter with two vanilla beans that were split (holy mother that was a great smell) and once browned, I combined the sugar and a little less cinnamon than the original recipe called for and formed this amazing smelling liquid that I let firm up in the fridge a bit so that it would harden up enough to be spread like jam instead of being liquid.  It made the filling so incredibly easy to get perfectly uniform so that each cinnamon roll had exactly the same amount of filling.

And then…The Icing.  I’m definitely not one of those people who says something is “too sweet” when it comes to desserts.  Desserts are supposed to be sweet.  However, the traditional powdered sugar and milk icings for cinnamon rolls can be just SUGAR and nothing else and I thought a cream cheese icing would be too strong a flavor for the delicate brown butter and vanilla beans.  So I used heavy cream, milk, powdered sugar, vanilla bean paste (so it would be pretty and flecked) and THEN I gradually added tiny pinches of kosher salt and stirred after each addition, until the edge of the sweetness was taken off and it was perfect.  I will henceforth salt all my icings.  Just a bit – it MATTERS!  I was amazed at how good these turned out and….

TA-DA!  Blue Ribbon!  I was quite giddy!

And then sad, because my husbands absolutely perfect bread didn’t place and my thoughts were that it was too sophisticated and the fair is a veritable sugar bomb.  I think it just depends on what you respect when it comes to traditional bread, and Matt is a purest.  4 or 5 ingredients at the most.  This guy is the most amazing baker I know!  Anyone can make a good bread if it’s slathered in sugar and butter, but only a true baker can make a bread SING with only 4 ingredients.
These were our submissions – Matt submitted his biscuits, baguette and traditional boule.  All perfect and the best I’ve tried, but sometimes in a sea of bundt cakes and chocolate sugar loaves, plain bread doesn’t get noticed. A shame, really.
Smorgasbord

Brown Butter Vanilla Bean Cinnamon Rolls with Vanilla Cream Icing
makes about 16 rolls, depending on how thick you slice them

For the Dough:

1 cup whole milk
2 1/2 teaspoons active dry yeast (bread machine yeast
1/4 cup sugar
4 TBS unsalted butter, browned and cooled
2 large egg yolks
2 tsp vanilla bean paste
2 3/4 cups AP flour
3/4 tsp salt

For the Filling:
12 TBS unsalted butter, browned with two split vanilla beans
1/2 cup granulated sugar
2 TBS cinnamon

For the Icing:
1 heaping cup powdered sugar
1/4 cup heavy cream
1 tsp vanilla bean paste
2-3 TBS whole milk
a few pinches of kosher salt

Make your Filling first!  Brown the butter in a large, stainless steel skillet (non stick you can’t see the butter browning) with the split vanilla beans, mushing them around as they warm up to release their seeds.  Once browned, remove from heat and stir in your sugar until fully incorporated.  Then add in the cinnamon, stirring to combine.  You can do this a day in advance – you want this paste to be slightly firmed up so put it in the fridge and stir it once in a while until it’s the consistency of wet sand.

For the dough: brown your butter on the stove by swirling it around in the pan over medium heat until solids begin to form at the bottom and it’s giving off a nutty aroma.  Remove from heat and place in a medium bowl and let it cool for a few minutes.  Once cooled (about 5 minutes), add the milk, the egg yolks and vanilla paste.  Whisk to combine.  Then whisk in the yeast.
Whisk the flour, sugar and salt in the bowl of a stand mixer.  Make a well in the center and pour in the milk mixture.  Mix on low speed with a dough hook until thick and slightly sticky.  Knead on medium speed until the dough gathers around the hook, adding up to 2 more tablespoons of flour to get a nice, smooth texture.  Don’t beat it to death.

Remove the dough and shape into a ball.  Butter the mixing bowl and return the dough to the bowl, turning to coat in the butter.  Cover with a towel and put it in a warmish place (like on your dryer) for a couple hours until doubled in size.  This is a pretty slow-rising dough.  Don’t lose hope.

Roll out the dough on a floured work surface to a shape of about 10″ x 16″ (about 1/4″ thick all around).  Now comes the fun part!  Spread your filling all over the dough with an offset spatula until completely covered, leaving about 1/4″ all around clean for ease of rolling up the dough.  Starting on the long side, roll the dough up tight and then slice about 1.5″ slices and arrange them on a buttered, double lined rimmed baking sheet (if you don’t have one, you can always stack pans together to form a double wall) and cover with loose plastic wrap and set in that same warm place to rise about an hour until doubled.

Preheat the oven to 325 and bake about 30 minutes, until golden brown (mine were done in about 28 min).  Cool in the pan 15 minutes.  Meanwhile, make the icing by adding the cream to the sugar in a bowl and whisking till smooth.  Then add the vanilla and milk until a nice, smooth texture is achieved.  Then, little by little, tasting along the way, add pinches of salt till it tastes right.  I can’t really tell you how much I added.  Probably two and a half pinches!  Stir till fully incorporated and pour over the rolls!

Enjoy!

Cherry Almond Scones

Cherry Almond Scones with butter

Dear goodness, I love a good scone.  Some people think they are too dry or would prefer a muffin, instead.  Cake is cake so there’s really no comparing it with a muffin.  Scones are meant to be enjoyed warm, with a sliver of cold butter and a hot cup of coffee or tea.  How very English.  Their merit of being on the verge of dry is that they pair well with butter and a warm drink.  And like their fluffy muffin-cousins, the varieties are endless.  I love a savory scone with cheddar and onion just as much as a sweet variety.  These particular scones have a magical pairing – almond and cherries!  I bought some hippie soap this weekend with that combination and I didn’t intend to buy soap if I hadn’t smelled it, but there it was, cherry almond soap, screaming, “I’M SO COMFORTING!  INHALE ME WHILE YOU DRIVE HOME!”  And so I did.  And it was a really great car ride.

When I received my copy of King Arthur Flour magazine, one of the first scone mixes inside was cherry almond.  I knew I had to make these on my own, instead of waiting on a mix to arrive on my doorstep.  So, I looked up the nearest recipe online and adapted it to be more almondy (there really is never enough almond-flavored things in the world) and got to baking!  They turned out soft on the inside and crispy on the outside – perfect!  I want to make them again, soon, and figure out a way to make them a little more cherry, too.  Perhaps a swirl of homemade cherry preserves in the dough!  They’re really great as is, though – just don’t forget the (real) butter!

Happy Beginning of the Week!

Cherry Almond Scones with Vanilla Bean

Cherry Almond Scones*
makes 8-10 scones, depending on the cut

3 cups all-purpose flour
1 cup sugar
1 tablespoon baking powder
Pinch salt
1 teaspoon ground cinnamon
1 1/2 sticks cold butter, cut into pea size pieces
1 cup dried cherries, roughly chopped
1/2 cup toasted sliced almonds
1/2 cup milk with a tsp of vanilla and a tsp of almond extract mixed in!

In a small bowl, combine the flour, sugar, baking powder, salt and cinnamon. Add in the butter and rub with your fingers into the dry ingredients until a coarse meal forms. Add in the cherries and almonds. Add the milk and extracts and combine it into the butter flour mixture.

Form the dough into a 1-inch thick disk and cut it into 8 rounds with a biscuit cutter (You can really cut them however you like.)  Transfer the scones to a greased cookie sheet and bake in the preheated oven for 17 to 18 minutes, turning the pan halfway through.

*Adapted from Anne Burrell

The Homegrown B.L.T. with a recipe for amazing mayo!

The perfect BLT

Every year we look forward to this.  An entirely home-grown (or made) BLT!  When we are fortunate enough to have a tomato crop, as we were this summer, the homemade BLT is the first thing in our minds to make.  So when the tomatoes started looking like this:
image_1

…we knew it was time to assemble the ultimate sandwich.  Matt cures pork belly and then smokes it in our electric smoker, I made the mayo, Matt made the bread and we grew the tomatoes, but sadly had no lettuce this year.  So other than the lettuce, this was entirely from scratch!  And what a good feeling.  I think this is kind of like remembering how good the food was on vacation – most of the goodness came from the setting or the mood, or the fact that you didn’t have to cook.  Similarly with this sandwich, the ingredients are certainly wonderful, but part of the joy is knowing that we worked for each component (minus the lettuce).  We thoroughly enjoyed this sandwich and this moment and Olive deconstructed hers, discarded the impostor (lettuce) and ate the rest.  She’s adoring these tomatoes, and I absolutely get giddy knowing that she likes tomatoes and that her first taste of tomatoes (besides tomato sauces) was out of our yard!  She won’t remember, but I know we will.

For the recipes, I will post our mayo recipe and method, which is super easy and totally worth it for the huge flavor you get.  I’ve posted Matt’s bread before, which is the bread we used for this (plus an addition of rosemary) and for the tomatoes, well, you’re probably too late to grow them yourself, but if you know someone who has an abundance, beg one off them and grab some good, thick-cut bacon and have yourself a BLT party!

open faced BLT

Mayo (made with an immersion blender -might be my most used kitchen tool, next to my knife)

2 egg yolks
1.5 cups light oil like canola.  I used a blend of canola and olive oil
1 TBS lemon juice
1 tsp white vinegar
1 tsp dijon mustard (or even dry would work)
Salt, pepper and a dash of cayenne and paprika for me!

Place the egg yolks in the bottom of a tall, wide cup (immersion blenders come with their own).  Place all the other ingredients on top of the egg yolks and stick your immersion blender all the way down to the bottom.  Turn it on the lower setting and start graaaaaaaaadddddddduuuuualllllly pulling the immersion blender up toward the surface of the oil.  As you pull up, the oil will slowly become incorporated into the egg yolk/spice mixture and in about 45 seconds, you will have perfect mayo!  It will keep two weeks in the fridge and I recommend slathering both sides of your bread and searing it on a griddle before assembling your sandwich.  Hey, if you only eat a proper BLT once a year, make it a good one.

image


Citrus Cured Salmon

7G9A1929


It’s Monday – time to scale back.  Drink more water, take a walk after dinner.  Eat lighter, eat simpler.  Undo what might have been done over the weekend of eating out with friends, drinks with co-workers or quick meals eaten on the run out of paper bags.  I am currently in a very scaled-back mindset.  This blog obviously has the most popularity when I post sugar and flour concoctions (don’t worry, there’s plenty in the queue) but for this week, I’m going to write about simple, clean, mindfully healthy recipes that are also incredibly fulfilling and delicious.

Over the weekend I dipped into Michael Ruhlman’s cookbook, “Ruhlman’s Twenty” and tackled the citrus cured salmon.  This is not the type of recipe that calls my name. I love cured salmon in the form of lox, but this type of do-it-from-scratch recipe is a direct influence of my husband.  He has made me see the joy in cooking for cooking’s sake.  Not just eating the food, but enjoying the process.  I can honestly say I thought he was crazy when I first heard him say, “I don’t even need to eat what I made, as long as I taste it and see that it came out well, I can move on.”  I used to think this was ridiculous because I used to be a quantity over quality type eater.  I used to think more was more.  More mediocre food is better than less high-quality food.  This is a mindset of an over-eater.  As Matt taught me the joy of the process of cooking, I began to see what he meant.  Just tasting that something you spent hours making came out well is beginning to be enough of a pay-off for me. And when you don’t eat as much, you have more to share.  Which puts you in the middle of what food should be: communal.

I know what you’re thinking: this stuff is pretty easy to buy in the store.  However, I never want to buy it because how old is that fish, anyway?  And where did it come from?  All these questions  are answered simply if you just do it yourself.  So, we bought a pound of salmon from the fresh fish counter, I grated lots and lots of zest and dumped kosher salt on it.  24 hours later – perfectly cured salmon with a HUGE citrus flavor.  Amazing with cream cheese and capers and diced shallots on top of Matt’s homemade, toasted bread.  This is eating simply and without regret!

Happy Zesty Monday.

Citrus Cured Salmon

Citrus Cured Salmon*

1.5 lb salmon filet
1 tsp orange zest
2 tsp lemon zest
1 tsp lime zest
1/2 cup kosher salt
1/4 cup sugar

In a small bowl, combine the salt and sugar and stir to distribute the sugar throughout the salt.  In another bowl, combine the citrus zests.  (Buy a Microplane.)

Lay a sheet of aluminum foil large enough to extend beyond the length of the salmon.  Spread a third of the salt mixture in the center of the foil to serve as a bed for the salmon.  Place the salmon skin-side down on the salt.  Distribute the zest evenly across the salmon.  Pour the remaining salt mixture over the salmon.  It should be covered.  Fold the foil up to contain the salt.  Place another sheet of foil over the salmon and crimp the sheets together firmly.  The idea is to have a tight package in which the salt mixture is in contact with all surfaces of the salmon.

Set the foil package on a baking sheet.  Set another baking sheet or dish on top of the salmon and weight it down with a brick or a few cans from your pantry.  This will help press the water out of the salmon as it cures.  Refrigerate the salmon for 24 hours.

Unwrap the salmon and remove it from the cure, discarding the foil and the cure.  Rinse the salmon and pat dry with paper towels.  To remove the skin, place the salmon skin-side down on a cutting board.  Holding a sharp, thin, flexible knife at about a 30-degree angle, cut between the flesh and the skin.  When you can get a grip on the skin, pull it back and forth against the knife to separate it from the flesh.  Set the salmon on a rack or on paper towels on a tray and refrigerate for 8 to 24 hours, to allow the salt concentration to equalize and to dry the salmon out further.  Wrap the salmon in parchment and store in the fridge for up to 2 weeks.

Serve sliced extremely thin on crackers, bagels, or with scrambled eggs for a hearty breakfast – the options are up to your tastes!

*adapted from Rhulman’s book in that we could only find 1.5lb filets of salmon and his recipe called for 2-3lbs.

lox

Espresso Chocolate Cake with Cinnamon Cream

Espresso Chocolate Cake with Cinnamon Whipped Cream
I’m a pretty big fan of the combination of chocolate and cinnamon.  They compliment each other so well in baked goods and the combination nearly exudes warmth.  This flourless indulgence boasts the rich flavors of espresso, as well.  And if there’s anything the first year of motherhood has taught me, it’s that coffee is from the Good Lord.  Chocolate is, as well, but coffee has really become a friend in need this year.  Together, they have become our go-to desserts.  This cake should be enjoyed with coffee if you are into that kind of supreme happiness.  The original recipe doesn’t call for cinnamon, but lately I’ve been adding it to just about everything including the fresh whipped cream I made for this cake.  I put more cinnamon than I thought I should and it turned out perfect.  And then I sprinkled it with cinnamon.  Maybe I have a deficiency?

Either way – try this cake.  And don’t leave out the whipped cream.  It was extra special.  Happy weekend and happy baking!

Flourless Espresso Chocolate Cake

Flourless Espresso Chocolate Cake with Cinnamon Cream*
makes one, 9″ round cake

  • 3 tablespoons unsalted butter, plus more for cake pan
  • 6 ounces bittersweet chocolate, preferably 70 percent cacao, chopped
  • 6 large eggs, separated, room temperature
  • 1 cup sugar, divided
  • 3 tablespoons instant-espresso powder
  • 1 tsp cinnamon
  • 1/4 teaspoon coarse salt
  • 1 tablespoon pure vanilla extract
  • 2 cups heavy cream
  • 2 tbs cinnamon

Preheat oven to 350 degrees. Butter the sides and bottom of a springform pan. Melt butter and chocolate in a glass or other heat proof bowl in the microwave at 30 second increments until melting and stir together to fully melt and incorporate.  Set aside.

Beat together egg yolks and 1/2 cup sugar with a mixer on medium-high speed until thick and pale, about 3 minutes. Add espresso powder, 1 tsp cinnamon and salt; beat until combined, about 1 minute. Add vanilla and melted-chocolate mixture; beat about 1 minute more.

In another bowl, beat egg whites on medium-high speed until foamy. Increase speed to high; gradually add remaining 1/2 cup sugar, beating until stiff peaks form, about 5 minutes. Fold into chocolate mixture in 3 batches. Transfer batter to pan and bake until set, 40 to 45 minutes. Let cake cool completely in pan on a wire rack. Remove side of pan; transfer cake to a serving plate. Serve whipped cream alongside cake.  To make the whipped cream, beat the heavy cream in a mixer on medium-high until soft peaks form.  Sprinkle in the cinnamon and whip a little longer, but not too long – you want the cream to stay soft, not get clumpy (which happens from too much whipping.)  Serve with coffee and be sure and save some for yourself for breakfast tomorrow!

*adapted from Martha Stewart Living

Cinnamon Oatmeal and Yogurt Pancakes

Cinnamon Oat Pancakes

I don’t believe in labeling food as “healthy” or “not healthy.”  I believe in good habits and bad habits.  I think it’s a bad habit to eat lots of refined sugar and processed junk that lives in a box on a shelf on a daily basis.  I think it’s a good habit to enjoy a totally sugar-laden cupcake once or twice a month and really enjoy the cuss out of it.  I think it’s a bad habit to eat fast food multiple times a week.  I think it’s a good habit to enjoy an amazing cheeseburger and fries on a weekend and have no regrets!   I think it’s a bad habit to let kids snack between meals on junk like salty fish shaped crackers and candy posing as “fruit.”  I think it’s a good habit to let your kids know what snack food is and that it is to be eaten once in a while and not every day and certainly not in place of a meal.  Good habits and bad habits – to heck with worrying about good foods and bad foods or worrying that I’m bad for having refined flour and sugar in the house.  If you really believe in the adage of “everything in moderation” you won’t run from these ingredients.  You’ll just put them in their time and place.

Because of the awesome blog by Dina Rose that I read on a regular basis, I am coming more and more into the understanding of focusing on conquering habits instead of worrying about the nutrition of each individual meal I cook.  I’ve developed a few habits I’m proud of and I’m working on changing the habits I’m not so proud to admit.  A bad habit I’m working on is eliminating my “adult right” to snacking throughout the day.  I have been bad about this in the past.  A piece of chocolate here, a cracker and cheese or seven there…I don’t want Olive to grow up snacking between meals and having her around has really shed light on my bad habits for randomly and mindlessly eating.  I’ve been tackling that problem this week and it’s getting easier and easier to wait till the next meal – just like I expect her to learn.

A good habit I really love is cooking a bit more indulgently on the weekends.  This Saturday it was just us girls as Matt was somewhere in the Colorado wilderness hiking and eating freeze dried gravy.  I love not camping.  So for breakfast, before Olive woke up, I looked up a recipe for yogurt pancakes and modified the one I found to have cinnamon, oatmeal and a splash of sweetened milk I had in the fridge from the tres leches cakes I made a couple weeks ago.  It was the best stack of pancakes I’ve ever made.  They were wonderful. These pancakes are by no means “healthy” in that you should eat them all the time, but they are filled with good ingredients and that just adds a bonus to getting to dig into a stack of pancakes on a weekend.  I topped them with banana slices and a bit of my favorite syrup – dark amber agave nectar (tastes like caramel) – and they were awesome.  And filling.  I threw the leftovers in the toaster this morning before church and they were magical all over again.  Three cheers for refined flour weekends and learning good habits!

Cinnamon Oatmeal Yogurt Pancakes


Cinnamon Oatmeal Pancakes
made about 8, 3 inch pancakes

1/2 cup flour
1/2 cup rolled oats
1/2 tsp baking soda
1/4 tsp salt
1/2 tsp cinnamon
1 cup plain yogurt
2 eggs
2 tbs melted butter
2 tbs milk or heavy cream or evaporated milk (I had leftover tres leches concoction in my fridge)

Heat a griddle or a non-stick frying pan over medium high heat.  Combine all the dry ingredients into a large mixing bowl.  Then, in a separate bowl, combine all the wet ingredients and whip up the eggs in the mixture until smooth.  Pour the wet ingredients into the dry and blend with a fork until fully incorporated.  Spray the skillet with spray oil with each batch of pancakes and cook till browned on both edges, 2-3 minutes per side.

Serve with sliced bananas or peanut butter and syrup – whatever makes you happy!

Cinnamon Oatmeal Pancakes