Chocolate Banana Butter

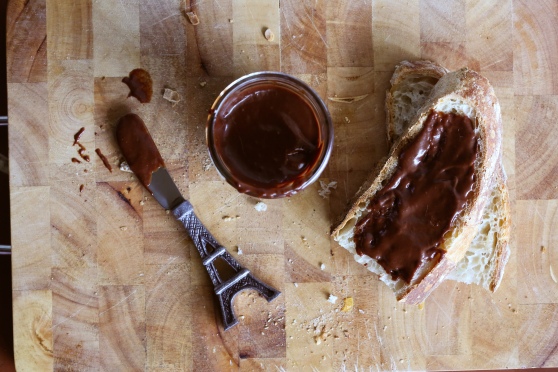
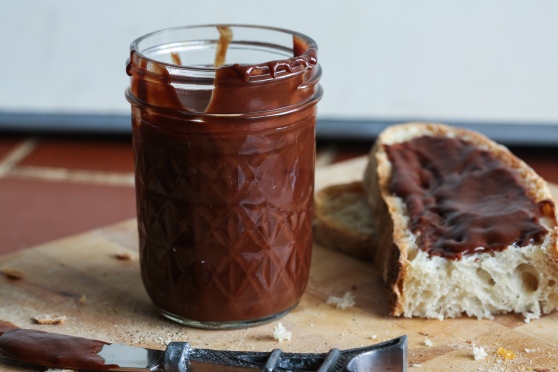
banana chocolate butter-1 banana chocolate butter-3We almost waste more bananas in this house than I can count. The girls always swear they want a WHOLE ONE ALL BY MYSELF! But then they each eat two bites and are done. I typically use the leftover bananas for muffins or oatmeal or smoothies, but I wanted to do something a bit more exciting this time because if you don’t shake up your routine from time to time, despair sets in.

I found a recipe for banana jam with just a tish bit of chocolate and it sounded okay but I didn’t really want banana jam. I wanted banana with lots of chocolate and a softened butter consistency. So I just did my own thang.  Plus, it’s easier than making jam. And if you really want to live on the edge, you don’t even have to sterilize your jam jars. GASP. Just keep it in the fridge and no one has to know…

banana chocolate butter-6
That’s little Ollie’s hand. So cute. She ate this shot. banana chocolate butter-4
Chocolate Banana Butter


makes about 24 ounces

5 super ripe bananas, cut into chunks
8 tablespoons brown sugar
2 tablespoons water
8 ounces dark chocolate, broken into small pieces
3 tablespoons unsalted butter, softened
kosher salt to taste

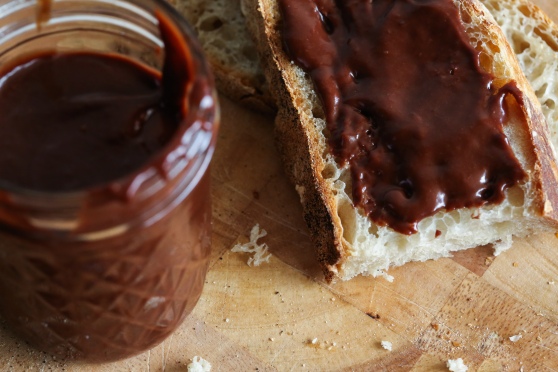
In a large saucepan, combine the bananas, brown sugar and water over medium heat and bring to a boil. Mash up the bananas with a spatula and boil for about 2 minutes, stirring. Remove from heat and stir in the dark chocolate. Pour the banana chocolate mixture into a food processor and blend until completely smooth. Add the butter and blend again. Taste test – add a sprinkle of kosher salt and let it blend once more. Add more salt to your taste. I tend to like my sweets with a salty edge, so I probably added about a half teaspoon when it was all said and done. Pour into jars and store in the fridge. We have ours on bread. I’m not really sure what else you’d need in life than good bread and chocolate.

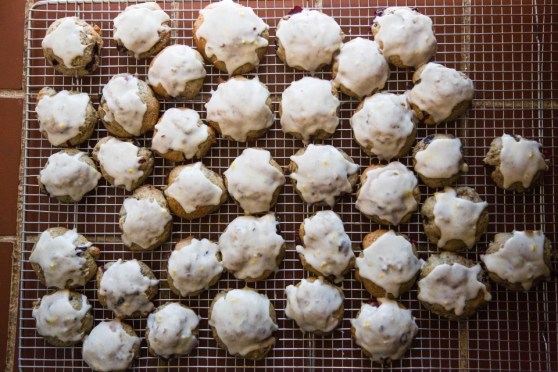
Blueberry Muffin Oatmeal Cookies with Lemon Cream Glaze

blueberry oatmeal cookies002
My girls love to waste oatmeal. They pick their favorite jams to stir into a base that I so lovingly prepare with vanilla bean paste and butter and cinnamon. They seem excited. Then they eat two bites and say they’re all done. And so I eat a lot of oatmeal. And I really get tired of wasting it. I actually despise wasting food. We are a family who eats every bit of our leftovers if I can help it. So naturally I had to find a solution for the oatmeal leftovers (besides cooking something different for breakfast, which is obvious, but every time I think, “Today is the day. Today they will eat oatmeal.”)

Enter: leftover oatmeal cookies! It had to be a thing, right?! It is! I did a quick search on how to use leftover cooked oatmeal and modified the recipe to include some awesome blueberry jam and iced them with a super tart lemon cream glaze. They were pretty delicious! They taste like mini muffin cookies and they were so easy. The variations are endless, too, which is what I like. Brown sugar cinnamon? Cherry chocolate? Lemon poppy seed? They’d all be awesome! For now, here’s the blueberry version! Enjoy!

blueberry oatmeal cookies001

Blueberry Muffin Oatmeal Cookies with Lemon Cream Glaze

makes about 3-4 dozen cookies

2 cups flour
1 tsp baking powder
1/4 tsp baking soda
1 tsp salt
1 tsp cinnamon
3/4 cup brown sugar
2/3 cup unsalted butter, softened
2 eggs
1 1/2 c. cooked oatmeal


First, make your oatmeal if you don’t truly have leftover oatmeal. I make one cup (which makes about 2 cups cooked) and I make mine with butter and two to three tablespoons of blueberry preserves. You could really flavor your oatmeal any way you like. The secret to good cookies is a little more flavor add-ins than you’d do for just eating oatmeal. Let the oatmeal cool to room temp before making the cookies.

Preheat the oven to 375F.

Sift the flour, baking powder and soda, salt and cinnamon together. Mix the brown sugar and butter together until creamy. Add the eggs, one at a time, alternating with the flour mixture.  Mix the cooked oatmeal until just combined.

Drop by the tablespoon full onto greased cookie sheets. Bake for 12-15 minutes until lightly browned. Let the cookies cool completely before adding the glaze.

Lemon Cream Glaze

2 cups powdered sugar
1/4 cup heavy cream
1 tablespoon vanilla bean paste
zest from 1 large lemon
juice from the same lemon
salt to taste (this is important)

Add the cream to your powdered sugar until it forms a nice paste. You may not use the entire quarter cup. Add the zest and lemon juice and vanilla and then if you think it needs to be thinner, add more cream. The consistency should be like thin pancake batter. Gradually add pinches of salt, stirring well after each pinch, tasting along the way until the flavors start to sing a little louder. Salt is something I add to all my icings and glazes and it makes such a difference!


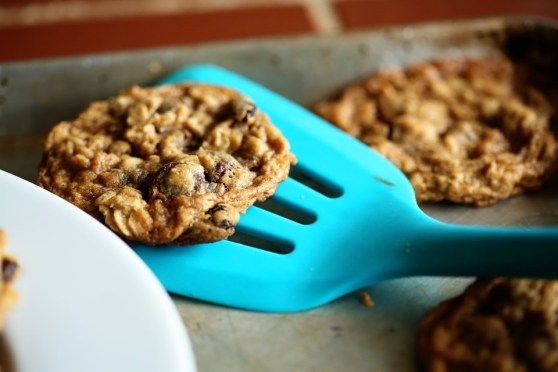
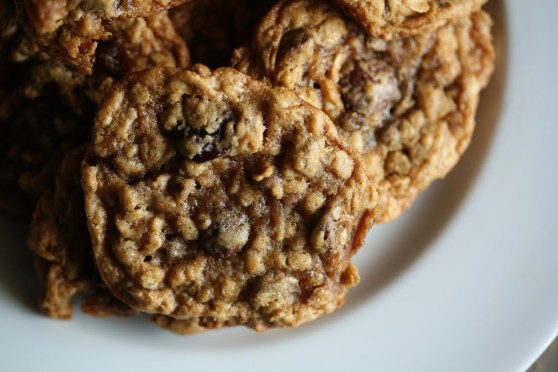
Cherry Chocolate Chip Oatmeal Cookies

Cherry Chocolate Chip Oatmeal Cookies 2

Cherry Chocolate Chip Oatmeal Cookies
I’m sitting here after putting my “baby” down for a nap a few minutes ago (praying she’ll go longer than her usual 45 minutes) and Peg and Cat are singing loudly in the background as my very grown up four-year old gets out of taking a nap because I want her to be exhausted enough to go to sleep at nine instead of ten tonight.

I’m winging it this week – Matt is away on a company trip for three days and I’m a few hours in and feeling so, so tired. I have lots of coffee and a good sense of humor, so I’m sure I’ll be fine. But having help from 5:30-9 every night is vital to my sanity. There’s something about getting a fresh set of not-exhausted-yet hands to hold the babies or take them outside and swing them so I can cook dinner in peace. And he is kind of the best there is and the most helpful person on the planet, so it’s extra hard to be without him. So I’m going backwards with my usual routine – I’m cooking lunches this week and keeping dinners simple. Because the last thing I want to do after finally getting both girls in bed is to clean my dirty dishes. I plan on reading a book or doing half of a yoga routine. And while I don’t ever recommend eating your feelings because that’s a silly thing to say and they would probably taste like sauerkraut, anyway – just eat these cookies instead. All eating is emotional eating, after all.

It’s good to be back, friends 🙂

Cherry Chocolate Chip Oatmeal Cookies 3 Cherry Chocolate Chunk Oatmeal Cookies

Cherry Chocolate Chip Oatmeal Cookies

  • Servings: about 24 cookies
  • Print

1.5 cups packed brown sugar
1 cup softened, unsalted butter
1 teaspoon vanilla or vanilla bean paste
1 egg
2 cups rolled oats
1.5 cups all purpose flour
1 teaspoon baking soda
1/4 tsp salt
1 cup dark chocolate chips
1 cup chopped, dried cherriesHeat oven to 350°F. In large bowl, stir brown sugar and butter until blended. Stir in vanilla and egg until light and fluffy. Stir in oats, flour, baking soda and salt; stir in chocolate chips and cherries.
Onto ungreased cookie sheet, drop dough by rounded tablespoonfuls about 2 inches apart.
Bake 10 to 12 minutes or until golden brown. Cool slightly; remove from cookie sheet to wire rack.

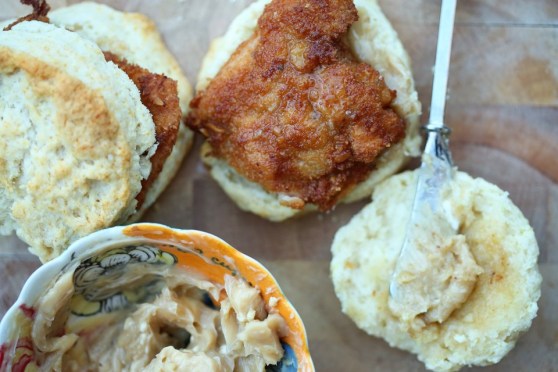
Chicken in a Biskit Fried Chicken on a Biscuit

fried chicken and cream biscuits with maple butter
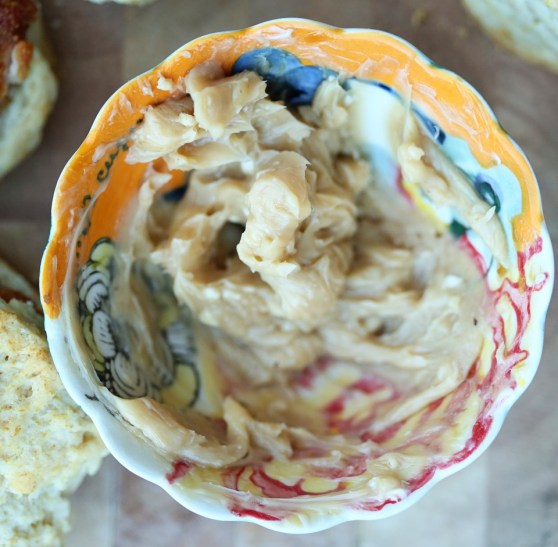
You read that right. Buttermilk-brined chicken thighs, breaded in ground up Chicken in a Biskit crackers and fried. Served on top of a fluffy cream biscuit and finished off with a spread of salted maple butter.
I make no apologies. For any of it. It was one of the best little chicken sandwiches I’ve ever had. And it really wasn’t that difficult! We had the idea a while back and thought it was too good of a play on words to not do it. So we did it! Matt put the chicken thighs in the brine the night before but the meal itself took less than an hour from start to finish. And a made a side of carrot “fries” to go along with everything.
Have you ever had Chicken in a Biskit crackers? If you haven’t, you should try them. Oddly addicting. They have a sweet/savory flavor combo that I’ve tasted in other crackers, but this one, in my opinion, was the first of its kind and remains the best. It’s an old cracker (well, not literally, but the brand is old!) I can remember these crackers as a kid and I honestly hadn’t bought a box since, but for this little project, it’s well worth it.

Start this the night before you want to eat it so that you can get your chicken in the brine. The rest doesn’t take that long – about an hour from baking the biscuits through frying the chicken.  Enjoy and let me know if you love it as much as we did!

Chicken in a Biskit Fried Chicken and Biscuits with Maple Butter

Chicken in a Biskit Fried Chicken on a Biscuit

  • Servings: 6-8 sandwiches
  • Print


For the Biscuits* (taken from Smitten Kitchen – which looks a lot like the scone recipe I use from America’s Test Kitchen – both are awesome and yield similar results):
3 tablespoons (45 grams) melted butter
2 cups (250 grams) all-purpose flour, plus more for dusting the surface
1 tablespoon (15 grams) baking powder
1/2 teaspoon salt
1 tablespoon (15 grams) sugar (optional)
1 1/2 cups (355 ml) heavy cream

Preheat the oven to 425°F. Line a baking sheet with parchment paper. Melt butter in a small pot or microwave dish, and set aside. Sift two cups flour, the baking powder, salt and (if using) sugar into a large bowl. Fold in 1 1/4 cups cream. If the dough is not soft or easily handled, fold in the remaining 1/4 cup cream, little by little. (I ended up using two additional tablespoons, or half the unused cream.)

Turn dough onto a floured surface, mound it into a ball and, using your hands, press it to a thickness of about 3/4 inch. Cut into rounds, 2 1/2 inches in diameter. Gather dough scraps and continue to make rounds. Dip the top of each round in melted butter and arrange on the baking sheet. Bake until golden, 12 to 15 minutes.

chicken in a biskit fried chicken on a cream biscuit

For the Chicken:

1 pound boneless, skinless chicken thighs; trimmed and cut in half
Buttermilk brine (we use Serious Eat’s Southern Fried Chicken for nearly every fried chicken recipe we do):
2 tablespoons paprika
2 tablespoons freshly ground black pepper
2 teaspoons garlic powder
2 teaspoons dried oregano
1/2 teaspoon cayenne pepper
1 cup buttermilk
1 large egg

For the Dredge:
1 cup flour
1 egg + 1/4 cup buttermilk
1 box Chicken in a Biskit crackers, pulsed fine in a food processor

vegetable oil for frying
Combine the paprika, black pepper, garlic powder, oregano, and cayenne in a small bowl and mix thoroughly with a fork.Whisk the buttermilk, egg, 1 tablespoon salt, and 2 tablespoons of the spice mixture in a large bowl. Add the chicken pieces and toss and turn to coat. Transfer the contents of the bowl to a gallon-sized zipper-lock freezer bag and refrigerate for at least 4 hours, and up to overnight, flipping the bag occasionally to redistribute the contents and coat the chicken evenly.

Take the chicken out and pat dry with paper towels. Dip the thighs in the flour first, then the egg/buttermilk mixture, then the cracker crumbs. I double dipped each piece to get lots of crunch (so dip once more in the egg and then the crackers.) Set aside till you’re done with all the pieces before frying.

Preheat your oven to 200F. (Your oven should still be hot from the biscuits! You’ll keep your fried chicken pieces in the oven to stay warm and crispy while you finish setting your table or wiping kids’ butts or whatever it is you have to do while you try to make dinner.)

Heat about an inch of oil in a skillet over medium high heat until it’s shimmering. Fry each piece of chicken for about 4-5 minutes per side, until the chicken is golden brown and registers 170F on an instant-read thermometer. If you’re thinking you’re about to burn the breading, transfer the chicken pieces to a baking sheet and finish cooking in the oven.

maple butter

For the Maple Butter:
4 tablespoons unsalted butter, room temp
1/4 teaspoon salt
2 tablespoons pure maple syrup

Combine all ingredients until thoroughly incorporated. Spread on biscuits and top with chicken pieces. We also doctored the sandwiches up with a bit of mustard, hot sauce and candied jalapenos, but just the chicken, biscuit and butter are enough.

Curried Corn Fritters

Curry Corn Fritter
Last week I posted a recipe for Curried Cream Corn and today I want to share with you what to do with the leftovers! In our house, we still have leftovers on a regular basis. With just two adults and one three year old who eats like a bird, we don’t usually use up side dishes in one meal. I transform a side dish into probably four different things by the time the week is over. I might start off with simple roasted corn at the beginning of the week and by the time it’s gone, it’s become part of a chicken wrap, a hash, an omelette, a souffle or perhaps just made into baby food.

With this curried cream corn, however, the flavors stack up perfectly to become a tasty little fritter. This is another recipe where I just eyeballed the amounts, but I think it’s pretty fool proof and I do have amount approximations for you to follow. Serve these fritters with a bit of sour cream and a side salad for a light(ish) Meatless Monday!

Curry Corn Fritters

Curried Corn Fritters

  • Servings: about 12 fritters
  • Print

2 cup of leftover curried cream corn
1 cup flour
1 egg
chopped chives
1/2 tsp kosher salt and fresh ground pepper
ooo, jalapenoes would be good!

In a large bowl, combine your creamed corn, flour, salt and pepper, egg and chives (and whatever else you think sounds good!) and whisk to combine. You may need more flour depending on how much liquid your curried cream corn still had remaining. You may have cooked off more than I did, so depending on how liquidy it is, add a bit more flour so that your mixture resembles thick cake batter. If it is dry, thin it out with a little milk.

Heat olive oil in a nonstick skillet over medium high heat until it shimmers and drop the fritter batter by tablespoons and let them fry about 2 minutes per side, or until dark brown on both sides. Remove and let them drain on a paper-towel lined baking sheet and keep them warm in a 200 degree oven until you’re ready to serve.

The Best Appetizer, Ever

warm dates with olive oil and salt
Okay, so it’s not spinach artichoke dip (the best junky appetizer, ever) but I love it. It’s just three ingredients! It’s salty, sweet, chewy, and indulgent all in one! It’s so easy that it hardly qualifies to be a blog post, but I can’t help it because we love it so much we have it at least once a week so I wanted to share it with you.  I present to you: Warmed dates with olive oil and kosher salt. That’s it.  Matt read about this appetizer in a book I got for him for Christmas called Delancey.  We ate at Delancey’s in Seattle when we were there last year and had some of the best pizza of our lives.  It’s a cute restaurant owned by a husband/wife duo and the book is the tale of their beginnings in the food world and how they combined their talents in opening the perfect pizza shop.  He bakes the pizza and she takes care of appetizers and desserts. It’s kind of a fantasy of Matt’s to do the same and own a brick oven style pizza joint. I could totally run the apps and desserts.  Maybe one day we will after our children are old enough to be our waitstaff 😉

7G9A8306
These warmed dates are in that book – just a simple appetizer that are completely satisfying.  I could honestly have these dates with a slice of Matt’s bread and be totally happy for dinner.  It seems weird and too simple, but it just works.  Simply heat fresh dates on the stove in some good olive oil until they are slightly sizzling.  Then, sprinkle with kosher salt and serve warm.  Amazing and easy and spiffs up your dinner in about 15 seconds.  Also, our opinionated three year old loves them.

Warmed Dates with Olive Oil and Kosher Salt

Chewy Molasses Cookies

Chewy Ginger Molasses Cookies Ginger Molasses Cookies
These cookies are like the feeling you get when you step out into a sunbeam with your bare feet and feel the warmth coming off the floor. You were previously a little cold and uncomfortable and now you’re warm and happy.  All that, my friends, in a cookie.  I made these a couple weeks ago when friends were coming to visit.  Paired with coffee and with the help of a red headed jabber-mouth, we had a very lovely afternoon together.  And because there was company, the redhead got three cookies before lunch.  So interesting how she didn’t want to eat her lunch that day…

There will be two original ideas from these cookies coming to you in time for Valentine’s Day.  The base recipe is from The New Best Recipe cookbook and like everything in that cookbook, it’s flawless.  Enjoy and make sure you have a friend over to help you enjoy them.

Ginger Cookies

Chewy Molasses Cookies

11 1/4 ounces (2 1/4 cups) all purpose flour (use Gold Medal – it has lower protein than most which will make a softer cookie)
1 teaspoon baking soda
1 1/2 teaspoons ground cinnamon
1 1/2 teaspoons ground ginger
1/2 teaspoon ground cloves
1/4 teaspoon allspice
1/4 teaspoon ground black pepper
1/4 teaspoon salt
1 1/2 sticks butter, softened (12 tablespoons)
1/3 cup (2 1/3 ounces) dark brown sugar
1/3 cup granulated sugar, plus more for rolling
1 large egg yolk
1 teaspoon vanilla
1/2 cup light or dark molasses

Adjust the oven rack to the middle position and heat the oven to 375 degrees.  Line a large baking sheet with parchment paper or spray with nonstick spray.

Whisk the flour, baking soda, spices, pepper, and salt in a medium bowl until thoroughly combined; set aside.

Beat the butter with the brown sugar and the 1/3 cup granulated sugar at medium-high until light and fluffy, about 3 minutes.  Reduce the speed to medium-low and add the yolk and vanilla; increase the speed to medium and beat until incorporated, about 20 seconds.  Reduce the speed to medium-low and add the molasses; beat until fully incorporated, about 20 seconds, scraping down the sides of the bowl as you go.  Reduce the speed to the lowest setting and add the flour mixture and beat until just combined.  The dough will be very soft.

With a tablespoon measure, scoop out the dough and with wet hands, roll the dough into balls, then roll in the granulated sugar.  Place on the baking sheet 2 inches apart.  Bake until the cookies are browned and still puffy, the edges have begun to set, and the centers are still soft (the cookies will look raw between the cracks), about 11 minutes, rotating the sheet from front to back halfway through baking time.  Don’t overbake!

Cool the cookies on the baking sheet for 5 minutes, then let them cool on a wire rack to room temp.  Eat post haste.  

Bacon and Blue Cheese Scones

bacon blue cheese scones
I’ve noticed a trend.  Every time it’s freezing, lately, snowing in particular, I post a blog entry.  I also bake something.  Today I made a banana chocolate chip bread with Olive and after putting her down for her “quiet” time (hardly ever quiet, but at least she stays in there), I came to write right away before the littler one wakes up from her nap.  Everything happens in thirty-minute windows, lately.  Feedings, naps, playtimes, snacks, lunch, cleanup, laundry folding, getting dressed, errands – it all goes like clockwork.

I remember this feeling of monotony and spinning my wheels when Olive was a baby.  I don’t know what it is about the infant phase – it is all at once sweet, boring, thrilling, gross, blissful and extremely isolating.  I think the feelings of isolation come from the cabin fever.  It’s hard to get a baby ready to go out and do something outside the home when you know you’ll have to do something baby related in another hour.  I love this phase but I am always looking forward to getting out of the house more and feeling productive.  January is the antithesis of productive as far as my photography business goes.  No hustle and bustle of bridal and engagement shoots, yet.  Everything is dead, gray and cold.  And maybe that’s okay.  It’s a big, gigantic pause button and one that I (usually) am glad to press each year.  But I’m a people-person.  And not just a little-people person.  I love interacting with grown-ups and perhaps that’s the catharsis of this blog.  It was born the year my first daughter was born and it kept me connected to all of you who love cooking just as much as I do.  I hope one day to have a cooking class.  How grand would that be?!  But the time isn’t right, yet.  For now, I’ll write about scones and look forward to hearing from you all.  And go feed the baby in another thirty minutes…

I improvised this lovely recipe from Annie’s Eats because I had neither scallions or cheddar and only about half the bacon her recipe called for.  I first made her original recipe when I went on a road trip and they were just wonderful.  My altered version was also great and amazing as a little side treat with a cup of soup.  Especially on a day like today, there’s nothing quite like the smell of bacon coming from the oven.  And with a bit of cold butter melting on top of one of these babies, you’ll be set.

Bacon and Blue Cheese Scones

Bacon and Blue Cheese Scones

3 cups all-purpose flour
1 tbsp. baking powder
1 tsp. salt
1-2 tsp. ground black pepper
8 tbsp. cold unsalted butter, cut into small cubes
1/2 cup blue cheese crumbles
5 slices bacon, cooked and chopped into small pieces
1 cup buttermilk (plus up to ½ cup extra, if needed)

For the egg wash:
1 large egg
2 tbsp. water

Preheat oven to 400F.

In a large bowl, combine the flour, baking powder, salt and pepper and then cut in the butter with a pastry blender or a fork until broken down and the butter resembles crumbly sand.  Fold in the blue cheese and bacon and then stir in the buttermilk.  Add a little extra to form a sticky dough if it seems too dry.  Turn out onto a floured work space and form into a rectangle, about 1/2 inch thick.  Cut into squares or circles or daisies or whatever you prefer and place on a greased cookie sheet.  Brush with egg wash.  Bake for 20-25 minutes until golden brown.  Serve with cold butter.

Chewy Dark Chocolate and Apricot Granola Bars

chewy granola
Well, friends, I’m happy to report that my daughter, Eleanor, was born three weeks (almost 4!) ago and she’s doing amazing and we are surviving the sleepless nights and the toddler-sister adjustment without too many scrapes and bruises.  Life is certainly different than it was just a month ago.  But it’s also a billion times sweeter.  Here’s my new family (pics taken by my wonderful friend, Katrina):

ep-118

ep-117

ep-158
ep-150
It’s remarkable how little time in the day I actually can get things done, which explains further why posting recipes took a very, very far back burner to everything else.  I also didn’t cook a single thing for two weeks.  It felt weird, but it was nice to have a break. We have remarkable friends who brought us dinner for nearly two whole weeks and then it was Thanksgiving and although we didn’t travel, we certainly cooked!  And a few of those recipes will come in the following weeks.  I wanted to post an easy and satisfying snack for my first post back, because that’s what I need in my new life, now, and honestly, I’m hungry all the time while nursing a baby around the clock.  I find myself insanely hungry when Eleanor wakes up for her 2 a.m. feed but too tired to go to the kitchen to find something and so I fixed that problem yesterday by making some truly crave-worthy granola bars.  Chewy, almost falling apart, no-bake, and filled with my favorite things – namely, dark chocolate, apricots and almonds.

I hope you enjoy these and I am looking forward to getting back in the kitchen around the baking-est time of the year.  🙂

Chewy Granola Bars


Chewy Dark Chocolate Apricot Granola Bars
makes about 16-24

2 cups puffed rice cereal
2 cups rolled oats
1/2 cup wheat germ
1 cup mix-ins (I used dark chocolate, dried apricots and some leftover trail mix that had almonds and raisins – you use what you can find!)
3/4 cup honey
1/2 cup dark brown sugar
1/2 tsp kosher salt
3/4 cup creamy peanut butter

Combine the dry ingredients into a large bowl.  In a medium saucepan, combine the honey, sugar, salt and peanut butter and let it come to a boil for about a minute.  Remove from heat and pour over the dry ingredients (if you don’t want your chocolate melting, add it after you get everything else combined.  I didn’t care and it didn’t melt that much).  Stir until fully incorporated and then press in either a 13×9 greased baking dish, or like I did, a rimmed sheet pan (for slightly thinner bars).  Let it cool completely and then slice and store.

Classic Bruschetta

bruschetta
It’s nice to know an Italian.  They have the goods on traditional recipes and the right way to process a bumper crop of tomatoes.  I have such a friend, Jennifer, and this year, fortune smiled on her plants and she started to get WAY more than she could use and process on her own.  So she asked if I wanted some. (huzzah)  Since that same fortune didn’t happen to fall on my plants this year and my crop looked more like a handful of marbles, I enthusiastically said YES (plus, what crazy person turns down garden tomatoes?!)  I was so happy we could finally make our homemade BLTs before the last whiff of summer is completely gone.  I made a wonderful, basic tomato sauce (recipe coming soon) and canned it for the winter and with the rest of the tomatoes she brought, I saved two for our BLTs and the rest I asked her for her favorite bruschetta recipe.

She told me that there wasn’t really a recipe, but that this was how her granddad always made it and those kind of recipes are my favorite, anyway.  In the spirit of handing down family recipes, I’m not going to list quantities. I’ll basically give it to you like she gave it to me – the taste and adjust method!  If you have any tomatoes still coming off the vine (as many of us in this region do) then I hope you enjoy this recipe! If your crop is done, then look for the ripest plum tomatoes you can find in the grocery store.  We served this with Matt’s plain country bread, and honestly, it was the best meal I’d had in weeks.  Sometimes, nothing beats pure and simple.  Thank you, Jen, for sharing your tomatoes and your recipe with us – we benefited greatly from both!

bruschetta 3

Classic Bruschetta
makes a good amount

Dice up a few, ripe, plum tomatoes.  Add in minced garlic, a nice pour of good olive oil and add in a handful of shredded fresh basil.  Mix to combine and then add in a generous grating of fresh Parmesan cheese and adjust the seasoning to your liking with salt and garlic powder.  Serve on toasted baguette or just about anywhere you can think to use it!