Classic Bruschetta

bruschetta
It’s nice to know an Italian.  They have the goods on traditional recipes and the right way to process a bumper crop of tomatoes.  I have such a friend, Jennifer, and this year, fortune smiled on her plants and she started to get WAY more than she could use and process on her own.  So she asked if I wanted some. (huzzah)  Since that same fortune didn’t happen to fall on my plants this year and my crop looked more like a handful of marbles, I enthusiastically said YES (plus, what crazy person turns down garden tomatoes?!)  I was so happy we could finally make our homemade BLTs before the last whiff of summer is completely gone.  I made a wonderful, basic tomato sauce (recipe coming soon) and canned it for the winter and with the rest of the tomatoes she brought, I saved two for our BLTs and the rest I asked her for her favorite bruschetta recipe.

She told me that there wasn’t really a recipe, but that this was how her granddad always made it and those kind of recipes are my favorite, anyway.  In the spirit of handing down family recipes, I’m not going to list quantities. I’ll basically give it to you like she gave it to me – the taste and adjust method!  If you have any tomatoes still coming off the vine (as many of us in this region do) then I hope you enjoy this recipe! If your crop is done, then look for the ripest plum tomatoes you can find in the grocery store.  We served this with Matt’s plain country bread, and honestly, it was the best meal I’d had in weeks.  Sometimes, nothing beats pure and simple.  Thank you, Jen, for sharing your tomatoes and your recipe with us – we benefited greatly from both!

bruschetta 3

Classic Bruschetta
makes a good amount

Dice up a few, ripe, plum tomatoes.  Add in minced garlic, a nice pour of good olive oil and add in a handful of shredded fresh basil.  Mix to combine and then add in a generous grating of fresh Parmesan cheese and adjust the seasoning to your liking with salt and garlic powder.  Serve on toasted baguette or just about anywhere you can think to use it!

Advertisement

Vegetable Puff Pastry Pizza

Vegetable Pizza on Puff Pastry
This was lunch for me and Olive, today.  I LOVED it.  We had a random selection of leftover veg in the fridge and my mind always goes the leftover route of omelet or fritatta, but not today.  We had puff pastry in the fridge and a tiny bit of leftover Romesco sauce and so I knew I had a pizza in there, somewhere.  The flavors were amazing and the whole thing took 20 minutes to make (minus the time it took to let the puff pastry thaw out.)  Super winner in my book.

Olive took two bites of one tiny square and declared herself done, not hungry, anymore.  Okay!  I have to roll with things like that.  Inside my head, I think, “What could I offer her that I know she’d eat? Crackers?  Pasta?  Something without kale and asparagus on it?”  But no.  I can not get into that habit or I’ll have the toughest time getting out of it.  In the last few months, I’ve seen Olive eat potatoes of all colors (those purple things on the pizza are potatoes), tomatoes, asparagus, kale, carrots and cheese.  So in my head, I knew that this wasn’t a challenging meal for her.  She’s had a tough week with food, though, and I knew before I even made it that it would probably tank.  I asked her later how she liked lunch and she said, “It was good! I tried two bites!”  So there you go.  To her it wasn’t a failure.  To me it was because she didn’t inhale it like she would’ve a pizza with just pepperoni and cheese.  Quantity doesn’t always mean quality.  I have to remember that exposure and consistency are the major keys to training up good eaters.  Mere exposure is helpful because then you don’t have the kid that cries at the sight of vegetables on their plate and familiarity breeds comfort, eventually.  Eventually.  Eventually is the result of patience and to be honest, it’s not my strongest attribute.  But I’m learning and I’m trying and I will tell myself on days when my little half-pint only eats four bites all day that she will be okay.  She’ll learn.  Eventually.

unbaked Veggie Pizza
Here’s the pizza raw so you can see better what I found in my fridge to add:  kale rubbed with a bit of olive oil, leftover roasted root vegetables, leftover grilled asparagus and half a tomato.  The sauce was our leftover Romesco sauce and I put all this on top of one sheet of frozen puff pastry.  Puff pastry is flawless.  Super fancy-seeming lunch in 20 minutes.  I’ll take it!

Veggie Pizza


Vegetable Puff Pastry Pizza
serves two as a main or 4 as an appetizer

One sheet frozen puff pastry, thawed
2 TBS tomato sauce or Romesco sauce
Any toppings you like.  I used:
1/2 cup chopped kale
1/2 cup chopped (already cooked) asparagus
Half a tomato, cut into wedges
1/2 cup (already roasted) potatoes and carrots
1/2 cup shredded Italian blend cheese

On a rimmed baking sheet, spray with oil and lay out your puff pastry to thaw.  When thawed enough to unfold, spread it out and roll it out bigger on each side to be about 1″ longer all the way around.  Spread your sauce and then sprinkle the cheese to cover it well.  Arrange your vegetables and coat the kale in a little bit of olive oil and rub it into the leaves to soften them up.  Bake in a 400F oven for 15-20 minutes until golden brown.

Leftover Veggie Pizza

Homemade Pizza with Duck, Sage and Dried Cherries

Duck Sage and Cherry Pizza

It’s Use Up the Leftovers Before the Christmas Road Trip Day!  This can be a fun little game and can even force you into being more creative than usual.  I love leaving an empty fridge before a big trip.  Helps to not have Ghosts of Dinners Past to greet you when you get back.  When the holidays are over, I want to move forward.  I don’t want to stare at a pan of bread pudding in the fridge.  I want to start fresh!

I had a bit of leftover duck terrine from Sunday (another wonderful recipe from Homemade Winter), a few sage leaves and dried cherries and thought that would be a great pizza combination.  It was, indeed!  We also made a pizza with leftover ground beef, goat cheese and sauteed leeks, and one with Matt’s favorite combo: Parmesan, pistachios and rosemary.  I made my trusty tomato soup and we dunked our pizza crusts in it, and had a wonderful “Pre-Christmas” lunch together before heading off tomorrow to spend a week going here and there and everywhere!

I’d recommend instead of the duck terrine, which I am 99.9% sure you don’t have in your fridge, that you just use any good quality ground sausage.  The combo of sausage and sage and cherries is classic and works no matter what.  For the sauce, just use a drizzle of olive oil and sprinkle Parmesan cheese all over the crust before topping it.  I put the sage leaves on during the last few minutes of cooking so they wouldn’t burn, and I positioned some plain mozzarella over the cherries so they wouldn’t burn, and it worked out great.

For the recipe, I’ll include a link to Matt’s perfected pizza crust, which makes 3 medium sized pizzas, and I’ll let YOU raid your own fridge for the toppings you so desire!  Here are some fun combinations:

  • Corn, chorizo and potato
  • Ham, cheddar and scallion
  • Canned tomatoes, basil, mozzarella and sliced garlic
  • Leek, goat cheese and bacon
  • Broccoli, alfredo sauce, bacon and parmesan
  • Asparagus, red onion and manchego

The fun is in the leftovers you find.  Don’t limit yourself to “normal” toppings – you never know what great combinations you could create!

Sage, Duck and Cherry Pizza

Pizza Night!

sun dried tomato, mozz and basil


We do pizza night nearly once a week.  It’s kind of a weekend thing because Matt makes the dough the night before and we think up a new topping combination we haven’t tried, yet while flipping through magazines and cookbooks.  It’s even better to have friends over, make individual pizzas and let everyone top their own.  Matt has the crust down to an art.  It’s perfect every time and trust me, he’s tried at least a half dozen different recipes and ways of doing the crust.  He finally got the texture he was searching for: chewy, crispy, even in the very center under all the toppings and sauce, and great flavor.  It’s honestly lacking nothing.  And it makes us bitter when we go out for pizza, thinking, “Why didn’t we just make our own?”

We have Jim Lahey to thank, the pizza guru himself.  His book, My Pizza, is forever bookmarked on the crust and sauces recipes.  The recipe isn’t the only trick, though!  We have a stone that we start heating up as soon as we begin prepping.  We heat it as high as the oven will go – ours is 500 – and let it heat for at least 30 minutes.  Then, right when we’re about to cook, we switch it to the high broil setting so that it cooks the top as fast as the stone cooks the bottom.  I don’t trust my pizza peel skills, so I let Matt put them in the oven.  (Self admitted wimp when it comes to this and frying things.  I’m scared of lunging heat particles.)

You need never buy pizza sauce again in your life.  If you do, you’re probably sacrificing flavor, money and freshness.  The only thing it won’t save is time.  But really, it doesn’t take that long and you get to squish tomatoes between your fingers.  Always a bonus.

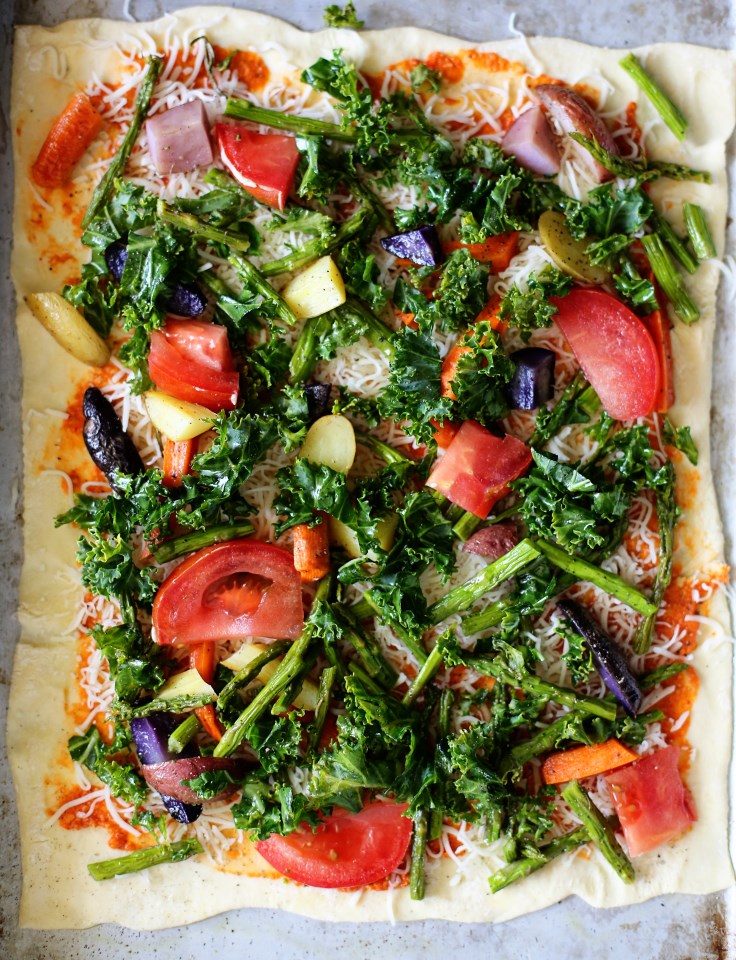
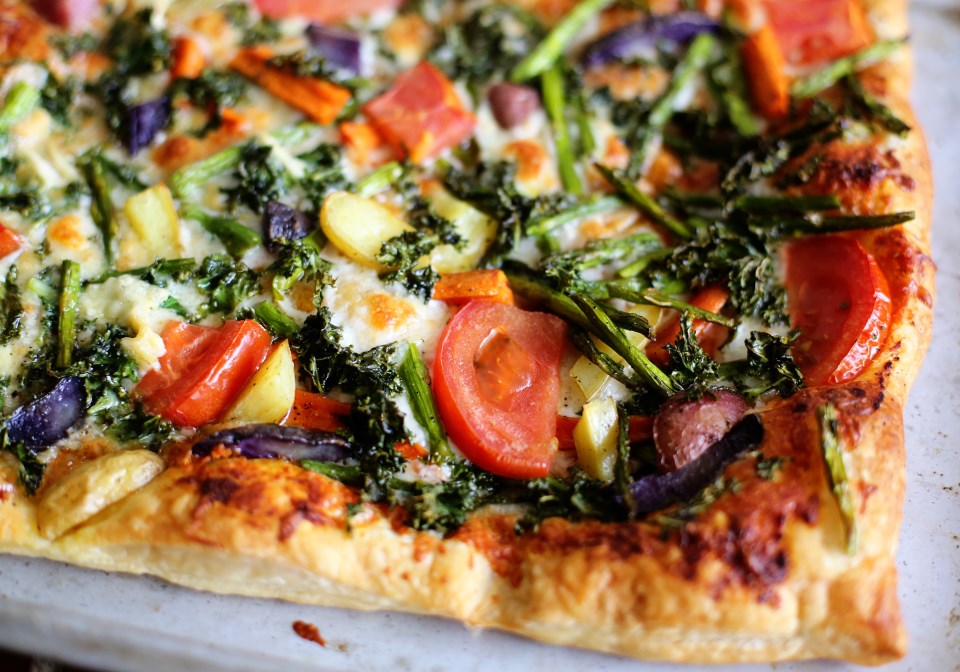
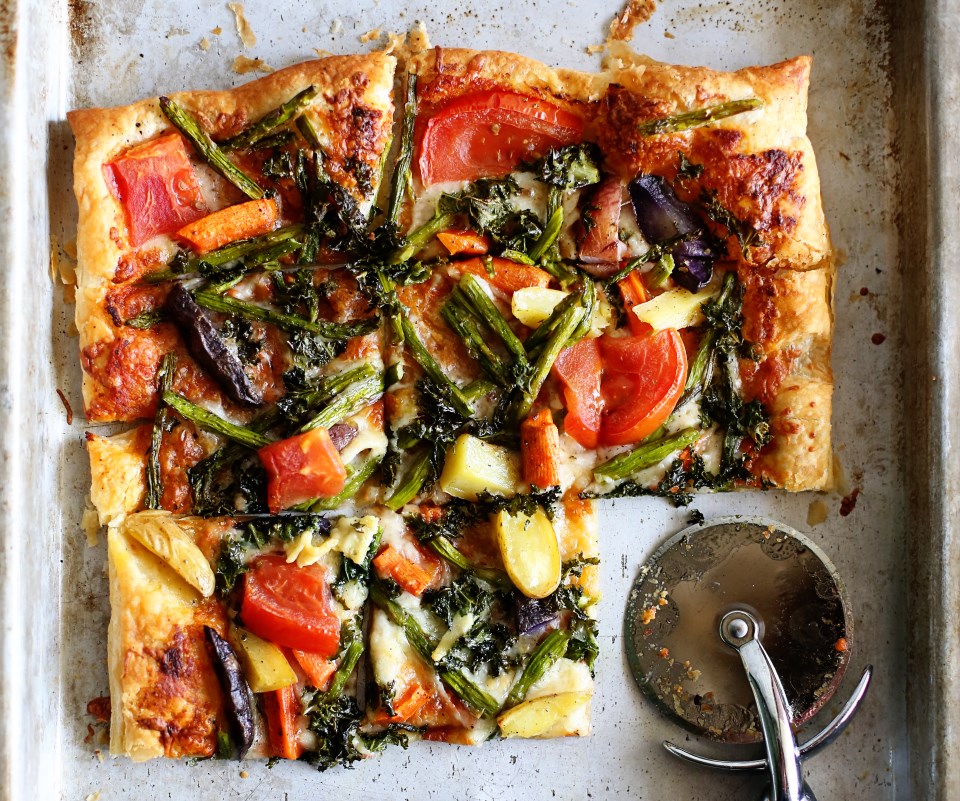
The topping combinations we came up with this week:

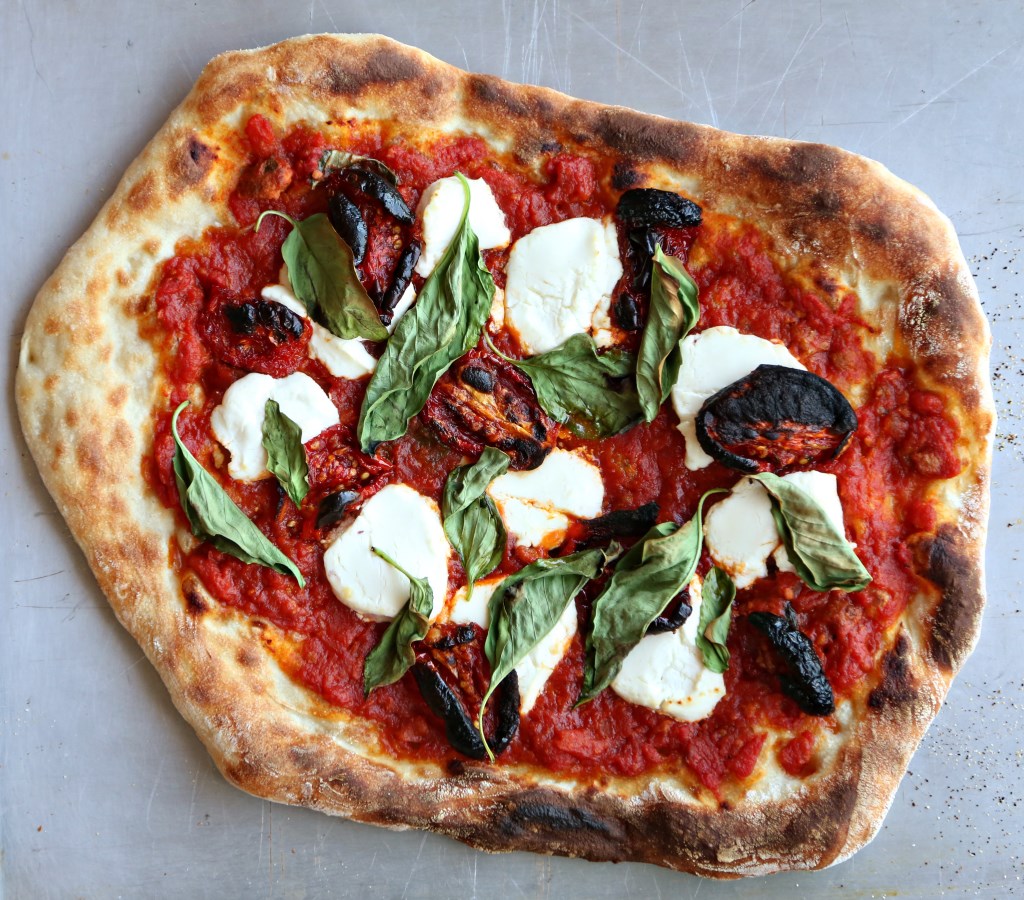
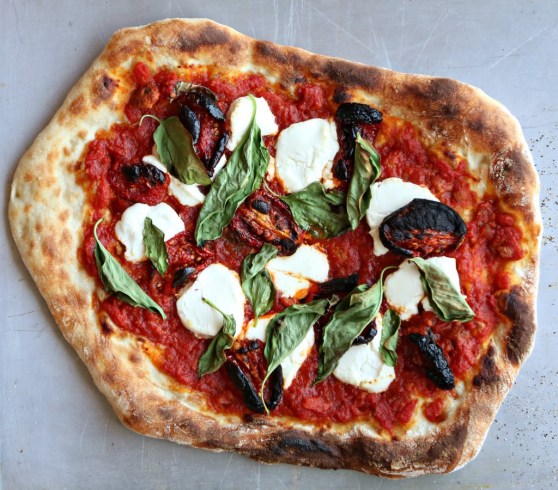
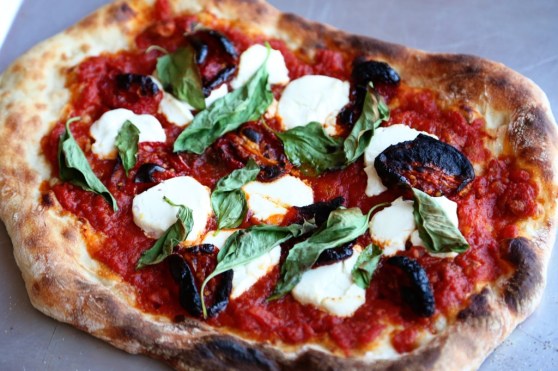
Sun Dried Tomato, Goat Cheese and Basil
sun dried tomato

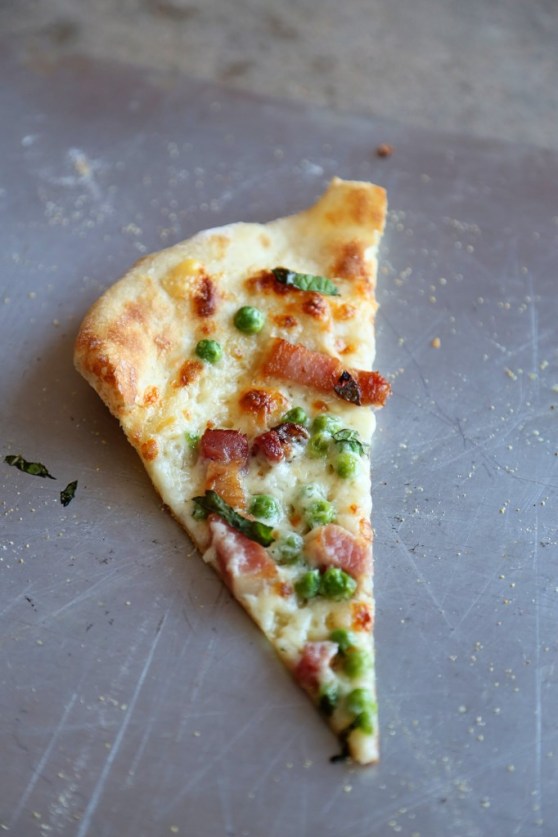
Pea, Bacon and Mint with Bechemel Sauce (alfredo, basically)
pea, bacon, mint

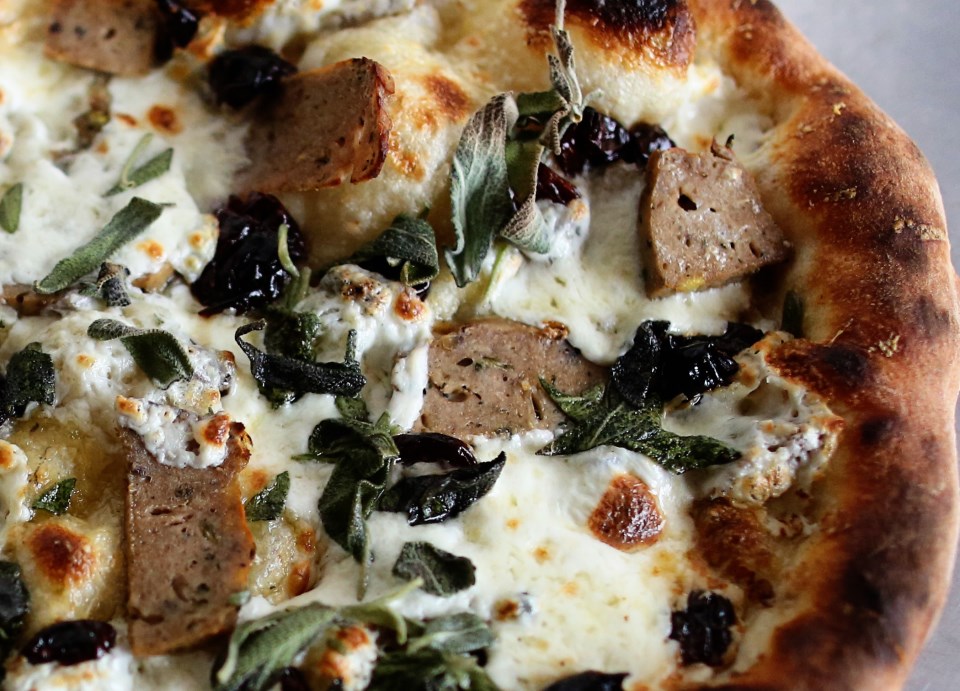
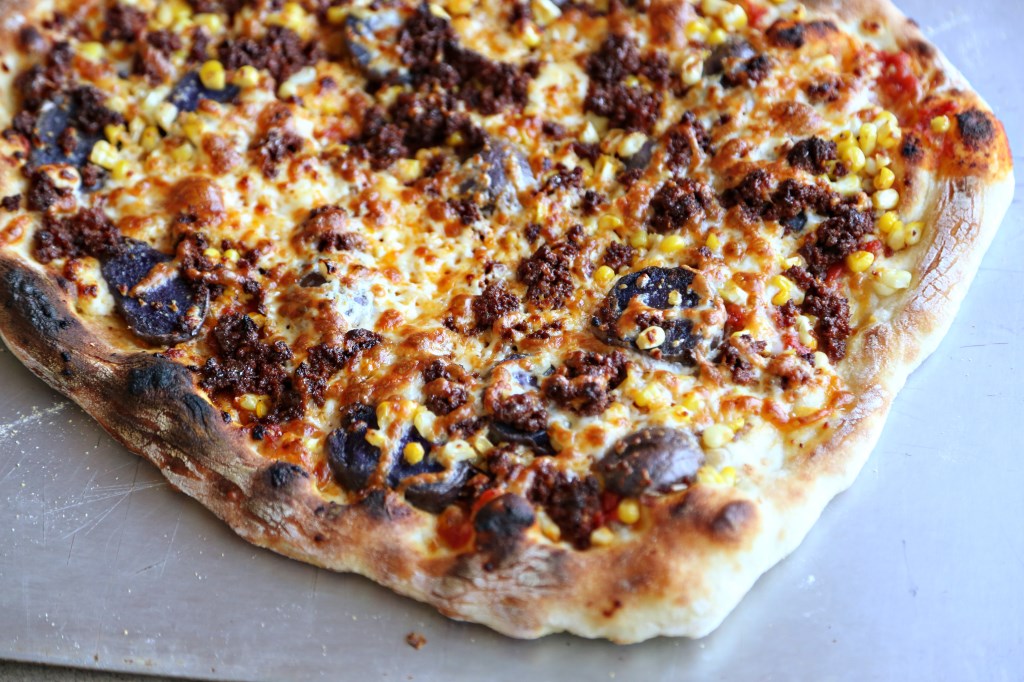
Mexican Chorizo, Purple Potato, Queso Fresco and Fresh Corn (this was my idea and my favorite of the three, but chorizo is cheating because it makes everything delicious like bacon or butter.  Three cheers for lymph nodes and salivary glands and such – I’m at least comforted that they don’t try to hide these ingredients from the list)

purple potato, chorizo, roasted corn and queso fresco


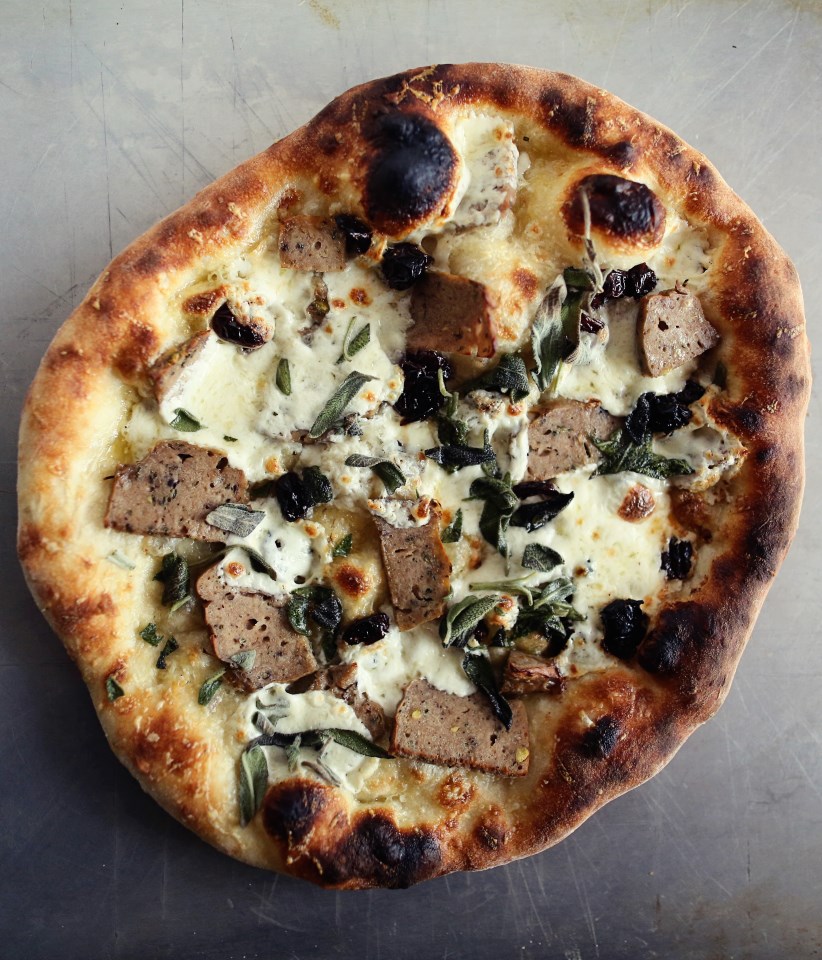
The best part of pizza night is that there’s no limit to your topping choices!  We’ve done so many from buffalo chicken to dried cherries and sausage (a fav) and even Thai chicken.  Get creative and get a pizza stone!

Pizza Dough:

500 grams all purpose flour
350 grams water
1/4 tsp active dry yeast
2 tsp fine sea salt

In a medium bowl, thoroughly blend the flour, yeast, and salt.  Add the water and with a wooden spoon or your hands, mix thoroughly.

Cover the bowl with plastic wrap or a kitchen towel and allow it to rise at room temp for 18 hours or until it has more than doubled.  it will take longer in a chilly room and less time in a very warm one.

Flour a work surface and scrape the dough out of the bowl.  Divide it into 4 equal parts and shape them:  For each portion, start with the right side of the dough and pull it toward the center; then do the same with the left, then the top, then the bottom.  The order doesn’t actually matter; what you want is four folds. Shape each portion into a round and turn seam side down.  Mold the dough into a neat circular mound.  The mounds should not be sticky; if they are, dust with more flour.

If you don’t intend to use the dough right away, wrap the balls individually in plastic and refrigerate for up to 3 days.  Return to room temp by leaving them out on the counter, covered in a damp cloth for 2 to 3 hours before needed.

Shape each ball into about an 8-9″ round (about 1/4″ thick).  Put on a pizza peel (we have a wooden one and we dust it with cornmeal so that the dough slides off easily once topped) and top with a thin layer of desired sauce. We’ve used plain olive oil, pesto, bechemel, marinara, buffalo sauce, homemade ranch dressing, etc – possibilities are endless and should correspond with your toppings!  One tip if you’re using a fresh mozzarella that might be watery is to sprinkle the top of the cheese with a little corn meal.  It absorbs the extra moisture!  Top your pizza as desired – maybe don’t go crazy because the weight makes it hard to get off the peel.  If you’re using fresh herbs, put them on once your pizza comes out, unless you just want that charred effect.  We cook our pizzas at a preheated 500F oven for exactly 5 minutes.  Right before we put the pizzas in, we turn our oven to broil.  Some of this may be trial and error depending on how your oven cooks (oh, for a wood-burning stove!) but that’s part of the fun of cooking – figure out what works!

Marinara Sauce that we use every time:

1 – 28oz. can whole tomatoes.  We like San Marzano
2 tablespoons olive oil
1/4 tsp salt
2 tbs red wine vinegar

Combine all ingredients and crush tomatoes with your hands, removing the tough stem ends of the tomatoes.  Mix well.  That’s it!  🙂