Curried Corn Fritters

Curry Corn Fritter
Last week I posted a recipe for Curried Cream Corn and today I want to share with you what to do with the leftovers! In our house, we still have leftovers on a regular basis. With just two adults and one three year old who eats like a bird, we don’t usually use up side dishes in one meal. I transform a side dish into probably four different things by the time the week is over. I might start off with simple roasted corn at the beginning of the week and by the time it’s gone, it’s become part of a chicken wrap, a hash, an omelette, a souffle or perhaps just made into baby food.

With this curried cream corn, however, the flavors stack up perfectly to become a tasty little fritter. This is another recipe where I just eyeballed the amounts, but I think it’s pretty fool proof and I do have amount approximations for you to follow. Serve these fritters with a bit of sour cream and a side salad for a light(ish) Meatless Monday!

Curry Corn Fritters

Curried Corn Fritters

  • Servings: about 12 fritters
  • Print

2 cup of leftover curried cream corn
1 cup flour
1 egg
chopped chives
1/2 tsp kosher salt and fresh ground pepper
ooo, jalapenoes would be good!

In a large bowl, combine your creamed corn, flour, salt and pepper, egg and chives (and whatever else you think sounds good!) and whisk to combine. You may need more flour depending on how much liquid your curried cream corn still had remaining. You may have cooked off more than I did, so depending on how liquidy it is, add a bit more flour so that your mixture resembles thick cake batter. If it is dry, thin it out with a little milk.

Heat olive oil in a nonstick skillet over medium high heat until it shimmers and drop the fritter batter by tablespoons and let them fry about 2 minutes per side, or until dark brown on both sides. Remove and let them drain on a paper-towel lined baking sheet and keep them warm in a 200 degree oven until you’re ready to serve.

Chinese Chicken and Rice Soup

Chinese Chicken and Rice Soup - spin on the traditional Chinese Chicken and Rice Soup
I placed Olive’s bowl at the table first so it would have time to cool down while I got mine and Matt’s ready. I started hearing Olive saying, “Mmm!” and “This is so good and juicy, Mama” and at first I assumed she was putting on another one-act play because Olive hasn’t been too enthusiastic about meals, lately.  Certainly not enthusiastic enough to compliment the food.  Usually, it seems as if she just merely tolerates food until she can get down and play again.  And as I thought back while she was inhaling this soup, I remembered the last time she was this enthusiastic about food, it had very similar ingredients in a potato curry Matt made.  She is apparently our Asian flavor lover.  And I love that.  I love that she won’t bat an eye at cilantro, rice wine vinegar, fish sauce and lemongrass.  She will certainly protest if I try to get her to eat…lettuce, or something else benign like that.  But big, bold flavors are her bag (as long as it’s not SPICY!) And the occasional chorus of “mmm” and “this is good, Mama,” is so few and far between that I make mental note of the dishes that inspire that response in her.  I never thought I’d care so much about someone’s opinion of food until I had a child.  But sharing food and sharing a JOY of food is precious and even more so when that person is family.

We’ve done a few spins on classic dishes in the past and have loved the results. We’ve done biscuits and curry “gravy” and a green chili corn chowder and loved the fusion of classic American dishes and flavors from other cultures.  I made up a spin on the classic Campbell’s Chicken and Rice you may have grown up eating, but instead, included all the flavors we love from Asian cultures.  It was super comforting and would be fantastic for a cold, rainy day like we’re having today.  I didn’t have coconut milk, but I think it would be a fantastic addition in place of the heavy cream.  This soup is built with lots and lots of taste-testing along the way.  Every soup should be, I think.  So I’m giving approximate ingredient amounts, but I encourage you to taste and add things you love for yourself.  We added Sriracha (of course) and lots and lots of cilantro as a garnish and some tasty frozen Vietnamese egg rolls for a side and enjoyed the heck out of this dish.  I hope you do, too!  Happy Monday.

Chinese Chicken and Rice

Chinese Chicken and Rice Soup

2 cups shredded chicken from two chicken breasts or 4 chicken legs/thighs (bone in)
2 kaffir lime leaves
A two inch piece of peeled ginger
2 stalks lemongrass, split
1/2 white onion
2 cloves garlic, minced
2 TBS rice wine vinegar
1 TBS brown sugar
1 tsp fish sauce
1/2 cup heavy cream (or coconut milk)
salt to taste
1 cup jasmine rice
1 carrot, diced small

In a large stock pot, add the (raw) chicken (bone-in) and cover with water till it’s submerged by abut 2 inches. Add the kaffir lime leaves (can be found at most chinese markets in the freezer or fridge section – this isn’t essential but it gives the soup that thing that I can’t describe but it’s wonderful), ginger, lemongrass, onion and garlic and bring the water to a boil.  Let the chicken boil until the internal temp registers at least 165 when inserted into the thickest part of the meat.  Remove the chicken, let it cool, and pull off all the meat.  Return the bones to the pot and let it continue to boil while you cook the rice.

In a small saucepan, add 1 3/4 cups water, a tablespoon of olive oil, the diced carrot and a pinch of salt and the cup of rice.  Bring to a boil, reduce heat, stir and simmer, covered, for 15-20 minutes until tender.

Remove the chicken bones, the lemongrass and onion and discard.  Return the shredded meat to the pot.  Add the vinegar, sugar, fish sauce and salt to the broth until it tastes…right. 🙂 This is the point where you need to trust your palate. You may like it with more vinegar or more sugar, more fish sauce, whatever.  I tasted and adjusted and then added the heavy cream.

Spoon rice into bowls and ladle the chicken soup on top.  Garnish with LOTS of cilantro and serve!

Creamy Potatoes with Thyme Browned Butter

creamy boiled potatoes with thyme and browned butter
Some days you just need someone to think up a side dish for you. This is not complicated.  This is nothing you couldn’t come up with on your own.  But your brain is zapped. And there are days I stand there with my fridge gaping and I just can’t be creative anymore.  I roasted the potatoes yesterday, I don’t want to roast them again! So, if you’re like me and you don’t necessarily want to do something crazy or ambitious on a Monday evening, but you DO want something different that someone else thought up for you – then this recipe is for you.  Clean, simple, warm, filling and utterly delicious.  Boiling the potatoes in their skins gives them that appealing pop when you bite through the skin and the interior is smooth and creamy.  Add in some browned thyme butter and this could almost be a meal in itself…

…but if you have a three year old who has a bit of an opinion about dinner, then you can’t serve these alone because then she’ll ask, “Where’s the rest of the meal?” She’s been asking me that for about a year, now.  Where she even got that phrase, I’ll never know.  But it’s pretty intimidating.

Creamy Potatoes with Thyme Browned Butter

Boiled Potatoes with Thyme Browned Butter

  • Servings: 4-6 as a side dish
  • Print

1 lb baby red potatoes (red creamers)
4 TBS unsalted butter
4-5 sprigs fresh thyme, plus a teaspoon of chopped leaves
kosher salt for seasoning

In a large pot, submerge potatoes and salt the water generously.  Bring to a boil and boil until soft when pierce with a knife.  This took me around 15 minutes.  Drain the potatoes and transfer into a large bowl.  In a small sauce pan, melt the butter over medium heat, and add the thyme sprigs and cook till the foaming subsides.  When brown butter solids start forming at the bottom of the pan and the butter smells nutty, immediately remove from the heat and add the thyme leaves.  Swirl around and then pour over the potatoes, tossing to coat evenly.  Sprinkle the potatoes with kosher salt and serve.

Roasted Coriander Chicken

Cinnamon Coriander Roast Chicken
This is a fabulous way to revive the same ol’ chicken recipes you’ve been using every week for your family.  We came across this flavor combination years ago from Michael Symon but I’ve done this so many times I’ve strayed pretty far from the original recipe for chicken wings and have adapted it to be a wonderful roasted chicken dish.  Have you ever used coriander seeds in your cooking before?  It’s got this tutti-fruity flavor that reminds me of Fruity Pebbles cereal (don’t be horrified, it’s actually really good).  And combine that flavor with cinnamon and the smokiness of cumin and something kind of magical happens.

If you have a problem spending money on a spice you hardly use, let me be the first to direct you to the Ghandi Bazaar on 34th Street here in Lubbock.  If you don’t live in Lubbock, find a local Indian food market or some kind of ethnic market because they sell spices CHEAP.  Why? Because they USE THEM A LOT.  It’s a staple to most other cultures like flour and sugar is to an American.  We bought a 16 oz bag of coriander seeds at Ghandi Bazaar for $2!  That sure beats a tiny jar for $4.50 at the grocery store.  I don’t think I’ll ever use it up…unless I keep making this chicken…which I need to do this week.
Cinnamon Coriander Chicken

Roasted Coriander Chicken

1 chicken, cut into 8 pieces (or pre-cut, but make sure it’s bone-in and skin on)
1/4 cup crushed coriander seeds
1 TBS cinnamon
2 tsp ground cumin
1 TBS kosher salt
1/4 cup olive oil

Preheat oven to 375F.

In a large, ziplock bag, add the chicken pieces and the spices and rub everything around until the chicken is completely coated.  Pour in the olive oil and mush the bag around again, making sure (to the best of your ability) that all the chicken is coated relatively even.

In a 9×13″ glass pan, or on a cooking rack over a rimmed baking sheet sprayed with oil, add the chicken, evenly spaced apart.  Roast for 25-30 minutes, or until a thermometer reads 165 in the thickest piece. I can’t cook chicken without a meat thermometer, so I can’t tell you an exact time.  I just start taking the temp after 30 minutes and leave it in there if it’s not done. 

*so good I made it twice on this blog 😉 with slightly different ratios this time.  See?  I change it all the time.  But it’s always good!

Savory Vegetable Souffles – Meatless Mondays Never Tasted So Good

Brussels Sprout and Cheddar Souffle Brussels Sprouts and Cheddar Souffle
Happy Monday After Daylight Savings Time!  This will be a hard week for many, getting used to the time change.  I love it once the adjustment takes place because I LOVE that it stays light outside till nearly 8:30 in the spring and nearly 10 in the summer.  We get to play later (it seems) and it’s important to not feel so closed in after months of the cold, dark evenings of winter.

I’ve been in a new, happy rut, lately.  On most Mondays lately, I’ve been making a vegetable souffle.  I hardly ever have my act together for dinner on Monday and I usually haven’t been to the store for the week (like today), but I nearly always have some sort of leftover veg in the fridge and (usually) four eggs.  Voila – this beautiful souffle, big enough for all of us to eat more than a big portion.  I’d say it would serve 4 as a side dish or 2.5 (like us) as a main. And it’s so versatile!Brussels Sprouts Souffle
The pics above were made with Brussels sprouts and cheddar and the pics below were spinach and gruyere.  I’ve done leftover broccoli with white cheddar, leek, and asparagus, too!  If you have eggs, cheese and some leftover vegetables, you have a meal!  And a really good one.  Every time I have made this, Olive has said, “this is a good meal, Mama.” Good enough for me!  It’s a wonderful vehicle for getting more vegetables into your little people, as well.
Spinach and Parmesan Souffle

Savory Vegetable Souffles

  • Servings: 4-6 as a side
  • Print

1/3 cup grated parmesan or fine bread crumbs
2 cups cooked vegetables, finely chopped.  Use boiled brussels sprouts, spinach, leeks, asparagus, kale, whatever floats your boat!
5 tablespoons butter
salt and pepper
1/4 cup flour
1 cup milk
4 eggs, room temp and separated
1/2 cup grated hard cheese – cheddar, gruyere, gouda, romano, parm, etc

Heat the oven to 375F. Butter a 6-cup souffle dish or 6 one cup ramekins, if you want everyone to have a nice, neat side dish of their very own.  Coat the sides of the dish with cheese or breadcrumbs. Cook your vegetable in salted boiling water until tender.  Drain and squeeze out as much moisture as you can.  Season with salt and pepper and set aside.

In a large saucepan, melt the 1/4 cup butter over medium heat, stir in the flour and cook, stirring frequently, for 2 minutes.  Whisk in the milk and cook until the sauce has thickened, whisking the entire time.  Season with salt and pepper to taste and add a splash more milk if it gets too thick (you want a thick gravy consistency).  Set aside off the heat.  Into your egg yolks, whisk in about 1/2 cup of the hot cream sauce to warm them and then return them to the rest of the sauce and whisk to incorporate.  Stir in the cheese and when it’s melted, fold in the vegetables.

With a mixer, beat the egg whites until stiff.  Stir a quarter of them into the souffle base and then fold in the remainder until no white streaks show.  Bake souffles on a rimmed baking sheet in the middle of the oven until risen and golden, 30-35 minutes.  The middle will be slightly wobbly if you’ve made it in one large dish.  Serve immediately!

*recipe adapted from The New Vegetarian Cooking for Everyone cookbook, which is completely fantastic so far.  Hasn’t steered us wrong, yet!


Spinach and Parmesan Souffles

White Bean Stew with Smoked Sausage and Kale – Using Up Leftovers!

Scrappy Stew - White Beans, Kale and Roast Chicken
So it seems winter is going to beat us down at least one more time before spring officially arrives.  Maybe more, but I’m hoping for just one last hurrah.  I used to love winter and all its coziness and hot tea and warm socks.  But now that I’m a mother of two little people, I find winter to be quite suffocating.  I just NEED there to be the option to go outside.  When I had Ellie back in November, I quickly taught Ollie how to open the backyard door by herself.  That was probably the best move I made all year.  She could come and go while I fed the baby and everyone was happy.  But when it snows, there’s this expectation from Ollie that we MUST GO OUTSIDE NOW AND YOU MUST GO WITH ME.  And it just isn’t that easy.  And frankly, as most of you know, it takes 15 minutes to get a child bundled up to go outside and then 5 minutes for them to get so cold they want to come back in.  I fail to see how it’s worth the effort.

The one thing I DO love about cold weather is the food. I love making a huge pot of beans and eating it over the following days in various ways.  Over cornbread, with smoked sausage, in a quesadilla, with a fried egg, whatever, it’s all good.  And this most recent batch of stew we made was my favorite.  Because Matt made it.  Seriously, though, we both make our beans in the same way and much in the spirit of the Family Meal Blog, I always love when a recipe is made by someone else in this family.  This stew also does my most favorite thing in the entire kitchen-world: it uses up leftovers!  We threw in a half used can of diced tomatoes, a handful of kale, onion, and some leftover turkey and sausage from a local bbq joint and it was frankly, amazing.  The beauty of a good bean stew is that you can add anything and if the beans are good, you’re good to go.  For this, I recommend using dried beans instead of canned, although canned would cut the prep/cook time by a good 8 hours.  They just don’t have the depth of flavor that starting with dried beans does.  And because we’re a part of Rancho Gordo’s Bean of the Month Club, (yes) I recommend you get their beans if you can find them!

White Bean and Kale Stew


White Bean Stew with Smoked Sausage and Kale

  • Servings: 8-10
  • Print

*start this recipe the day before you want to eat it! Modified for a slow cooker below the recipe!

1 lb dried white beans, such as canellini
2 bay leaves
1 small onion, diced
1 carrot, diced
1 stalk of celery, diced (these three ingredients together are called mire poix)
2 garlic cloves, smashed
1 can fire roasted tomatoes (we used half a can because that’s what we had leftover in our fridge)
1 smoked sausage link, chopped
4 oz. smoked turkey breast
1 small bunch of kale, rinsed and chopped

The night before you want to eat this stew, rinse the beans and then submerge them in a large stockpot by about 2 inches of water along with the bay leaf.

In the morning, bring the beans to a boil in the same water you soaked them in and add the onion, carrot and celery and garlic cloves.  Season with salt and pepper.  Reduce to an active simmer and cook until beans are tender.  This time can really vary.  I’d say on average, I have the beans simmering for about 2 hours before they are a texture I like.  Some like al dente beans.  I’m not one of those people.  I also don’t like them to be total mush, like canned, but it’s your preference, really.  Just start tasting them after an hour and keep going if you’re not satisfied.

After about an hour of simmering, add in the tomatoes and meats (and honestly, the meats were leftovers in our fridge. You could add bacon, ground beef, no meat at all – this soup will be amazing no matter what).  Toss the kale in about 30 minutes before serving and adjust the seasoning of the stew with extra salt and pepper.  Remove the bay leaves and serve with crusty buttered bread.

Slow Cooker Note: this could all be done in a slow cooker if you wanted to get it on before you go to work.  Just soak the beans in a large slow cooker overnight with the bay leaves with at least 2-3 inches of water covering the beans.  In the morning before you leave for work, add in the mire poix and garlic and turn it to low.  When you get home, add in the rest of the ingredients and turn it on high for about 30 minutes to let it boil.  Adjust the seasoning and serve.

Cheesy Potato Fritatta

spanish tortilla with scallions
It’s the middle of the week.  There has been a loss of momentum.  Or maybe you’ve just gained yours? Either way, you have no idea what to make for dinner and all you have are some leftover potatoes. Do you also have eggs? Everyone has eggs.  Do you have an onion?  Maybe some cheese?  A bit of salt and pepper and olive oil?  Then you’re set.  And dinner will be marvelous.  And filling.  And comforting.  You don’t have to make things complicated to make them delicious and I can’t count how many times I’ve declared, “There’s nothing to eat in this house!” only to be humbled by actually finding something, and not only something, but something truly delicious.  How lazy I can be sometimes!  This meal was inspired by a book called An Everlasting Meal, which is a sort of love-song to making the most out of everything you’re given.  It saved my family from take out with this simple recipe and I will certainly make it again!

potato egg fritatta

Potato Fritatta

2 small potatoes (about 2 cups, peeled and sliced into 1/4″ slices)
1 small onion, sliced thin
1/2 cup shredded cheddar cheeses (can be omitted without any damage done)
salt and pepper
3 eggs, beaten (four if you add the cheese, like I did)

Heat oven to 375F.
In a large skillet over medium heat, heat about 1/3 cup of olive oil and add the potatoes and onions.  Season well with salt and pepper. Cook, slightly covered, until the potatoes are soft. Strain the potatoes and onions out of the pan and put them in a bowl.  Reserve the olive oil from the pan.  Let the onions and potatoes cool and then add in the cheese, beaten eggs and more salt and pepper.  In a 10″ non-stick skillet, add some of the oil from your other skillet and make sure all the sides and bottom are nicely coated.  Pour the egg/potato mixture and cook over medium heat on the stove until the bottom looks set.  Transfer the pan to the oven and let it finish cooking until the top is slightly puffy, about 15 minutes.  Remove from the oven and let it cool for about 10 minutes, and then invert onto a serving plate.  Serve with sour cream, chopped chives or scallions and hot sauce! This dish is great warm, room temp, or even cold. It would be a super easy lunch on the go or weekend breakfast.  

Cheesy Broccoli Rice from Scratch

broccoli rice casserole
This was undoubtedly a comfort food for many of you growing up, as it was for me.  Creamy and cheesy with just a hint of something green, but mostly rice and cheese.  So all in all, the perfect vegetable dish. 😉 My mom made it a lot and sometimes I crave it but I’ve never made it myself.

A lot of recipes you see online call for cans of stuff, velveeta and things that just don’t seem like…food.  Now, I’m not saying that the from-scratch version is any better for you, BUT it has all real ingredients and gives you a good feeling and that’s what makes the indulgence worth it.  I decided one day I would make this dish and since I don’t keep any cream-of-whatever on hand, I made a simple bechemel (white gravy base) and added in lots of extra sharp cheddar.  Each ingredient cooked separately in chicken stock to give lots of added flavor and the results were fabulous!

We still have lots of snow on the ground and the roads are hard to travel, so warm, cheesy dishes are the perfect meal to stay inside and enjoy.  Be warm and well fed! 🙂

Cheesy Broccoli Rice Casserole


Cheesy Broccoli Rice

  • 1 head broccoli, chopped small
  • 2 cups chicken broth (although vegetable broth would enable the entire
  • dish to be vegetarian)
  • 1 cup white rice
  • pinch of salt
  • 4 TBS unsalted butter
  • 4 TBS flour
  • 1 cup whole milk (plus more to adjust consistency)
  • 1 cup shredded sharp cheddar
  • salt and pepper to taste
  • breadcrumbs and extra cheese for topping (I used crushed Ritz crackers)

Preheat oven to 400F.

In a large, deep skillet, bring the broth to a boil and throw in the broccoli.  Steam it with a lid covering until the broccoli is starting to get tender, about 5 minutes.  Remove the broccoli with a slotted spoon and set aside in a large bowl.  Add the rice to the broth and cook until tender (about 15-20 minutes).  Dump rice into the bowl with the broccoli (it’s okay if there’s a little extra liquid).

Wipe the skillet clean and melt the butter over medium heat.  Whisk in the flour until it’s all coated and bubbling, but not turning brown.  Whisk in the milk and let it come back up to a boil, adding more splashes of milk to maintain a gravy-like consistency.  I’m sorry I don’t have exact amounts, but it’s really an add enough until it looks right kinda thing.  Stir in the cheddar and whisk until melted.  Add more milk if it seems too thick.  Adjust the seasoning with salt and pepper until it tastes right and then stir in the broccoli and rice.  Top with breadcrumbs and extra cheese and melt in the oven until bubbling.

Classic Bruschetta

bruschetta
It’s nice to know an Italian.  They have the goods on traditional recipes and the right way to process a bumper crop of tomatoes.  I have such a friend, Jennifer, and this year, fortune smiled on her plants and she started to get WAY more than she could use and process on her own.  So she asked if I wanted some. (huzzah)  Since that same fortune didn’t happen to fall on my plants this year and my crop looked more like a handful of marbles, I enthusiastically said YES (plus, what crazy person turns down garden tomatoes?!)  I was so happy we could finally make our homemade BLTs before the last whiff of summer is completely gone.  I made a wonderful, basic tomato sauce (recipe coming soon) and canned it for the winter and with the rest of the tomatoes she brought, I saved two for our BLTs and the rest I asked her for her favorite bruschetta recipe.

She told me that there wasn’t really a recipe, but that this was how her granddad always made it and those kind of recipes are my favorite, anyway.  In the spirit of handing down family recipes, I’m not going to list quantities. I’ll basically give it to you like she gave it to me – the taste and adjust method!  If you have any tomatoes still coming off the vine (as many of us in this region do) then I hope you enjoy this recipe! If your crop is done, then look for the ripest plum tomatoes you can find in the grocery store.  We served this with Matt’s plain country bread, and honestly, it was the best meal I’d had in weeks.  Sometimes, nothing beats pure and simple.  Thank you, Jen, for sharing your tomatoes and your recipe with us – we benefited greatly from both!

bruschetta 3

Classic Bruschetta
makes a good amount

Dice up a few, ripe, plum tomatoes.  Add in minced garlic, a nice pour of good olive oil and add in a handful of shredded fresh basil.  Mix to combine and then add in a generous grating of fresh Parmesan cheese and adjust the seasoning to your liking with salt and garlic powder.  Serve on toasted baguette or just about anywhere you can think to use it!

Hot Chicken!

Hot Chicken
Guest Post from The Bread Man, today:

When we went to Nashville to visit my family this summer I knew I had to try some hot chicken. I asked my brother and my cousin if they had been to Prince’s, and both replied that they would like to, but hadn’t found anyone willing to visit that part of town with them. Problem solved. We took my grandparents’ Buick to a little strip mall in east Nashville, and after a quick trip to the ATM (Prince’s is cash only) we ordered a bunch of chicken in heat levels ranging from mild to extra hot. We waited for our order for something close to an hour, with the kitchen constantly calling out orders. The room was always crowded, even on a weeknight, but I think I only saw one table where people were eating – everyone seems to order carry out. You can call ahead, but I got nothing but a busy signal whenever I tried.

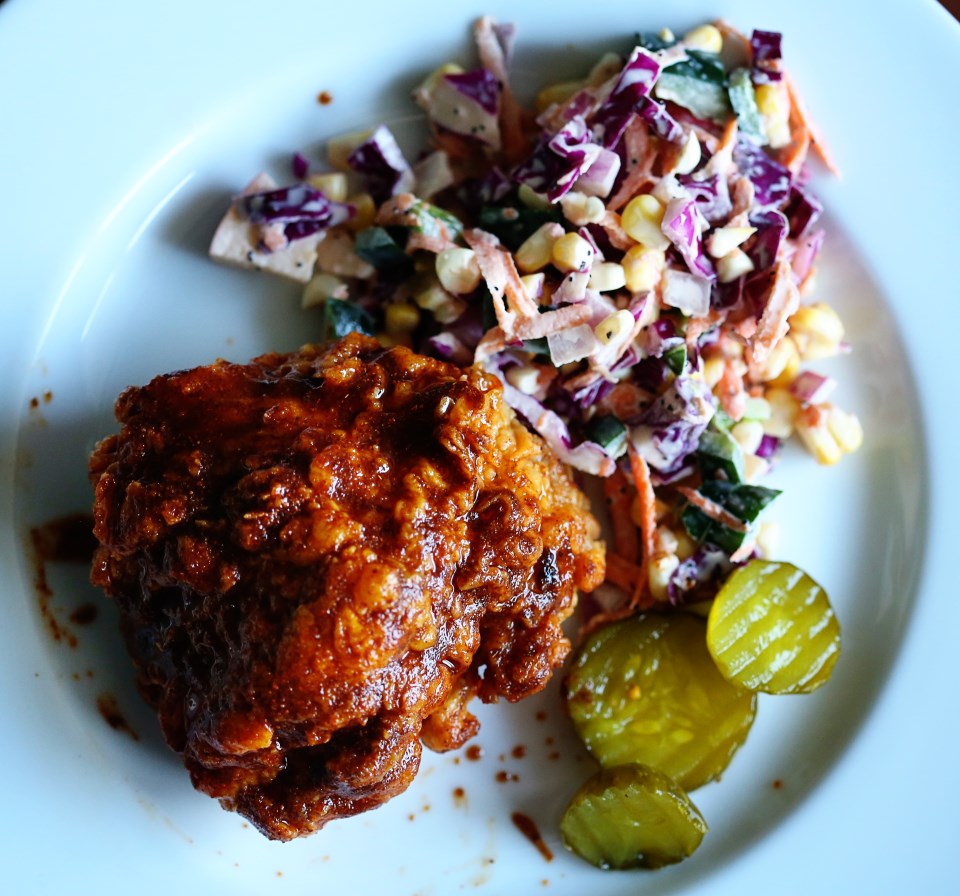
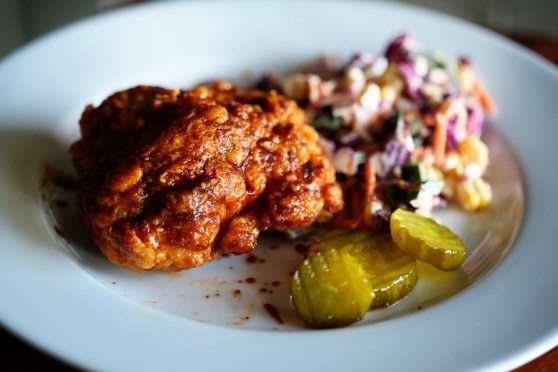
When we got home everyone dug in. The chicken isn’t saucy like Buffalo chicken, the heat comes from a mix of oil and spices (notably cayenne) that is brushed on the chicken after frying. The bread each piece was packed with had soaked up the excess oil, making the chicken a relatively clean meal. Bread is a good idea too – or potato salad, or anything else you can find to tame the heat! I love it when I get something with just the right amount of heat – it builds until it seems too much, but a couple of minutes later I’m reaching for another piece. The crust on Prince’s chicken is super crunchy despite the oil, the chicken was juicy, and the spice is great – garlicky with a hint of sweetness. The “hot” chicken was about perfect for me, but even the medium is respectably hot. The mild was tame enough that my notoriously heat-averse grandfather enjoyed it. The extra hot? Too much for me. I know a couple of people that would probably enjoy it, but I couldn’t handle more than a couple of bites.
I loved making hot chicken at home. The oil and spice mix is a great technique – we made some cayenne-free pieces for Olive and the flavor of the brown sugar and garlic stands out so much more when brushed on after frying than it does when the spice is in the flour. Even if you aren’t making hot chicken, this trick is worth stealing. I encourage you though to be brave and mix entire tablespoons of cayenne into the oil – when do you ever get to put even a single tablespoon of cayenne in anything?. Get a jar of pickles, a side of potato salad, a stack of soft white bread, and find that sweet spot.

Hot Chicken Dinner
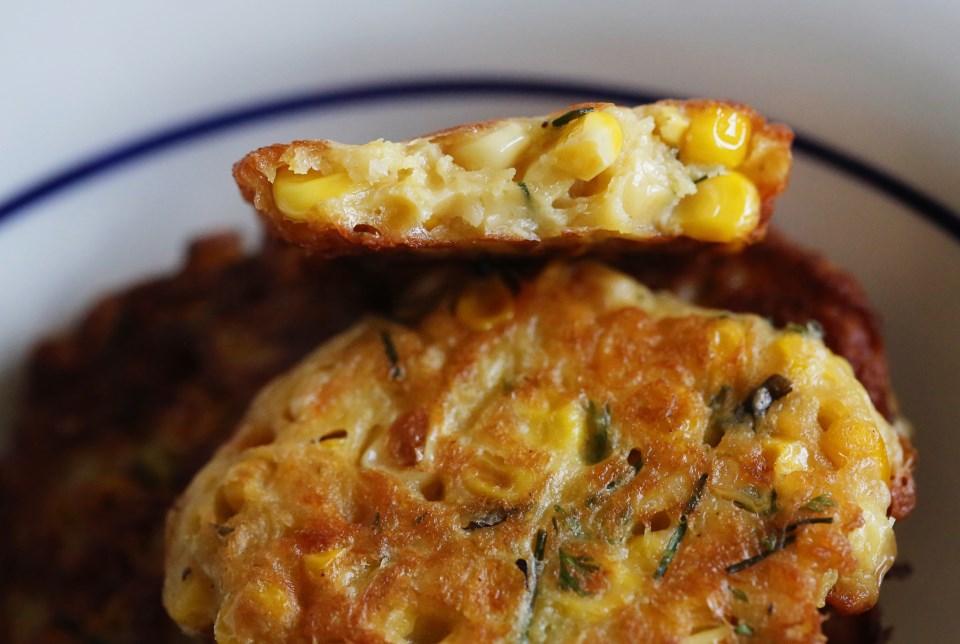
Seen here with a side of corn slaw and sweet pickles.  Perfect!

Hot Chicken*

2 – 3.5-4 lb chicken, each cut into 10 pieces (breasts halved)
1 TBS fresh ground black pepper
2 TBS  plus 4 tsp kosher salt
4 eggs
2 cups buttermilk or whole milk
2 TBS vinegar-based hot sauce
4 cups AP flour
Vegetable oil (for frying – about 10 cups)
6 TBS cayenne pepper
2 TBS dark brown sugar
1 tsp chili powder
1 tsp garlic powder
1 tsp paprika

Toss chicken with black pepper and 2 TBS salt in a large bowl.  Cover and chill for at least 3 hours.

Whisk eggs, buttermilk and hot sauce in a large bowl.  Whisk flour and remaining 4 tsp salt in another large bowl.

Fit a Dutch oven with a thermometer; pour in oil to measure 2 inches up the side.  Heat over medium-high heat until thermometer registers 325F. Pat chicken dry.  Working with 1 piece at a time, dredge in flour mixture, shaking off excess, then dip in buttermilk mixture, letting excess drip back into bowl.  Dredge again in flour mixture and place on a baking sheet.

Working in 4 batches and returning oil to 325F between batches, fry chicken, turning occasionally, until skin is deep golden borwn and crisp and an instant-read thermometer inserted into the thickest part registers 160F for white meat and 165 for dark, 15-18 minutes.  Transfer to a clean wire rack set inside a baking sheet.  Let oil cool slightly.

Whisk cayenne, brown sugar, chili powder, garlic powder and paprika in a medium bowl; carefully whisk in 1 cup frying oil.  Brush fried chicken with spicy oil.  Serve with bread and pickles.

*taken from the July issue of Bon Appetit magazine