Chicken in a Biskit Fried Chicken on a Biscuit

fried chicken and cream biscuits with maple butter
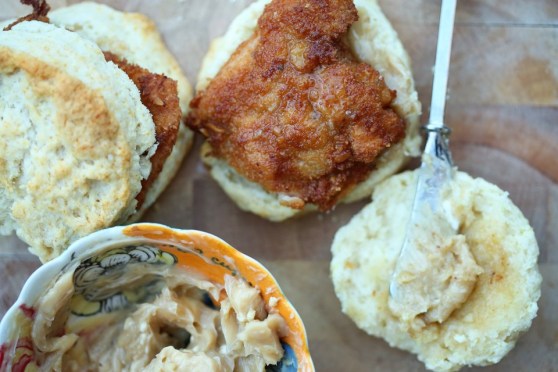
You read that right. Buttermilk-brined chicken thighs, breaded in ground up Chicken in a Biskit crackers and fried. Served on top of a fluffy cream biscuit and finished off with a spread of salted maple butter.
I make no apologies. For any of it. It was one of the best little chicken sandwiches I’ve ever had. And it really wasn’t that difficult! We had the idea a while back and thought it was too good of a play on words to not do it. So we did it! Matt put the chicken thighs in the brine the night before but the meal itself took less than an hour from start to finish. And a made a side of carrot “fries” to go along with everything.
Have you ever had Chicken in a Biskit crackers? If you haven’t, you should try them. Oddly addicting. They have a sweet/savory flavor combo that I’ve tasted in other crackers, but this one, in my opinion, was the first of its kind and remains the best. It’s an old cracker (well, not literally, but the brand is old!) I can remember these crackers as a kid and I honestly hadn’t bought a box since, but for this little project, it’s well worth it.

Start this the night before you want to eat it so that you can get your chicken in the brine. The rest doesn’t take that long – about an hour from baking the biscuits through frying the chicken.  Enjoy and let me know if you love it as much as we did!

Chicken in a Biskit Fried Chicken and Biscuits with Maple Butter

Chicken in a Biskit Fried Chicken on a Biscuit

  • Servings: 6-8 sandwiches
  • Print


For the Biscuits* (taken from Smitten Kitchen – which looks a lot like the scone recipe I use from America’s Test Kitchen – both are awesome and yield similar results):
3 tablespoons (45 grams) melted butter
2 cups (250 grams) all-purpose flour, plus more for dusting the surface
1 tablespoon (15 grams) baking powder
1/2 teaspoon salt
1 tablespoon (15 grams) sugar (optional)
1 1/2 cups (355 ml) heavy cream

Preheat the oven to 425°F. Line a baking sheet with parchment paper. Melt butter in a small pot or microwave dish, and set aside. Sift two cups flour, the baking powder, salt and (if using) sugar into a large bowl. Fold in 1 1/4 cups cream. If the dough is not soft or easily handled, fold in the remaining 1/4 cup cream, little by little. (I ended up using two additional tablespoons, or half the unused cream.)

Turn dough onto a floured surface, mound it into a ball and, using your hands, press it to a thickness of about 3/4 inch. Cut into rounds, 2 1/2 inches in diameter. Gather dough scraps and continue to make rounds. Dip the top of each round in melted butter and arrange on the baking sheet. Bake until golden, 12 to 15 minutes.

chicken in a biskit fried chicken on a cream biscuit

For the Chicken:

1 pound boneless, skinless chicken thighs; trimmed and cut in half
Buttermilk brine (we use Serious Eat’s Southern Fried Chicken for nearly every fried chicken recipe we do):
2 tablespoons paprika
2 tablespoons freshly ground black pepper
2 teaspoons garlic powder
2 teaspoons dried oregano
1/2 teaspoon cayenne pepper
1 cup buttermilk
1 large egg

For the Dredge:
1 cup flour
1 egg + 1/4 cup buttermilk
1 box Chicken in a Biskit crackers, pulsed fine in a food processor

vegetable oil for frying
Combine the paprika, black pepper, garlic powder, oregano, and cayenne in a small bowl and mix thoroughly with a fork.Whisk the buttermilk, egg, 1 tablespoon salt, and 2 tablespoons of the spice mixture in a large bowl. Add the chicken pieces and toss and turn to coat. Transfer the contents of the bowl to a gallon-sized zipper-lock freezer bag and refrigerate for at least 4 hours, and up to overnight, flipping the bag occasionally to redistribute the contents and coat the chicken evenly.

Take the chicken out and pat dry with paper towels. Dip the thighs in the flour first, then the egg/buttermilk mixture, then the cracker crumbs. I double dipped each piece to get lots of crunch (so dip once more in the egg and then the crackers.) Set aside till you’re done with all the pieces before frying.

Preheat your oven to 200F. (Your oven should still be hot from the biscuits! You’ll keep your fried chicken pieces in the oven to stay warm and crispy while you finish setting your table or wiping kids’ butts or whatever it is you have to do while you try to make dinner.)

Heat about an inch of oil in a skillet over medium high heat until it’s shimmering. Fry each piece of chicken for about 4-5 minutes per side, until the chicken is golden brown and registers 170F on an instant-read thermometer. If you’re thinking you’re about to burn the breading, transfer the chicken pieces to a baking sheet and finish cooking in the oven.

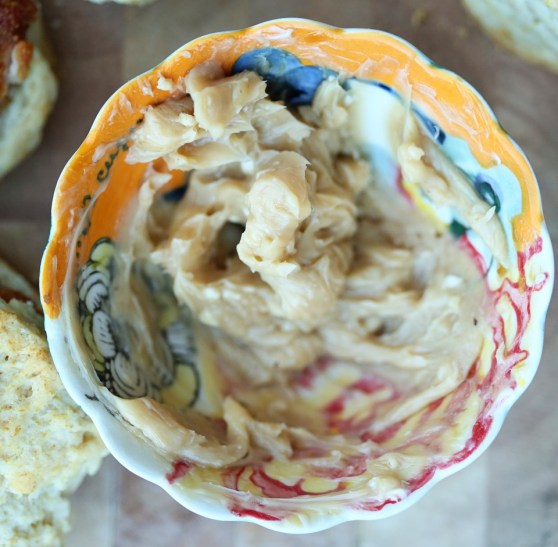
maple butter

For the Maple Butter:
4 tablespoons unsalted butter, room temp
1/4 teaspoon salt
2 tablespoons pure maple syrup

Combine all ingredients until thoroughly incorporated. Spread on biscuits and top with chicken pieces. We also doctored the sandwiches up with a bit of mustard, hot sauce and candied jalapenos, but just the chicken, biscuit and butter are enough.

Potatoes That Taste Better Than The Chicken

Roasted Chicken and Potatoes
Fall is around the corner, my friends. The beginnings of fallish things are happening from the wonderful cooler temperatures and crisp mornings to the not-so-wonderful appearance of Christmas decorations ALREADY. I’m not one to start up the Christmas music until the day after Thanksgiving and I’m not one to drink a pumpkin spiced latte until it can actually do its job of warming me up because I’m cold from natural causes (as in, I didn’t sit in my car with my AC on full blast to get the same effect. That’s cheating AND rushing the perfect moment, which I feel, should come about authentically.) My friend Libby is rolling her eyes at me because she LOVES rushing fall and pretending it’s cold outside. In fact, she already had a pumpkin spiced latte! 🙂 I’m fine with seasonal enthusiasts. Honestly – whatever makes you happy! But as for me and my household, we won’t decorate for Christmas until Thanksgiving is over. 🙂

Another thing that makes me happy is starting to think about fall dinners. I love the braising and stewing and the simmering of heavy, warm spices on the stove. One meal that gets me to thinking about the warmth of the winter is this simple and yet divine dish: roasted chicken on top of potatoes. We made this recipe a loooong time ago by Jean-Georges Vongerichten. His recipe was so delicious, we’ve done it a few dozen times since and have varied and simplified and it’s always delicious and always perfect. I never mess this recipe up and it’s always so amazingly delicious. And let’s not ignore why: the potatoes are cooked in schmaltz. You’d also be delicious if you were roasted in chicken fat.

I also love this recipe because it is one of those dishes that everyone can agree on. Add a salad or some braised greens and you’ve got yourself a complete meal!

Potatoes Cooked in Chicken Fat Chicken Potatoes

Potatoes Taste Better Than the Chicken*

1 whole chicken, about 3 lbs
2 pounds potatoes, peeled and cut into 1″ pieces
coarsely ground salt and pepper
butter to coat the pan and chicken
1 head of garlic, sliced in half
sprigs of thyme, rosemary, whatever you have

Preheat oven to 450 degrees. Butter a large cast iron skillet and place the cut potatoes in a single layer. Sprinkle them with salt and pepper and drizzle with olive oil. Pat your chicken dry and season with salt and pepper. Rub with butter and then stick the halved garlic head into the chicken cavity and add whatever herbs you like. Place the chicken on one of its sides on top of the potatoes.

Roast for 20 minutes. Turn the chicken onto its other side and roast another 20. Then, turn the chicken breast-side up and continue roasting until juices run clear and an instant-read thermometer says at least 165F, about 15-20 minutes more. Let the chicken rest for 10 minutes and carve on top of the potatoes and serve them along with the chicken. Beautiful.

*adapted from Jean-Georges Vongerichten

Homemade Baby Food – but you’ll sneak a few tastes, too!

Parsnip and Golden Beets
I’ve worked this past week on compiling a baby food post for anyone seeking out ideas for making baby food at home. I don’t make baby food at home because I’m a store-bought skeptic. In fact, the last time I was at Target and looked at all the baby food options, I was a little bit blown away. It’s completely dizzying how much variety there is in stores these days. So I’m totally for buying baby food. But at .99 cents a pouch, I’ve still got the price beat by making it at home. With a two dollar butternut squash, I can make almost a dozen jars! I also love cooking and tasting and seasoning food for my girls. I find myself sneaking a few bites of their food and I love knowing exactly what goes into the stuff they eat.

Making baby food gets me into a zen-like state in the kitchen as well. I’m not exactly sure why, but I love the process. I love choosing ingredients, maybe even ingredients I don’t use very often, and making something tasty for my babies. I also love the complete blank slate that a six month old baby is in that high chair. They have never tried a single food and I get to show them everything I’ve ever tasted! Hey baby, this is guacamole – you can thank me later.

In this post I have a couple of techniques for you to apply to literally any fruit or vegetable you can find in the freezer aisle. Then I have a couple recipes from my favorite baby food book, Tyler Florence’s, Start Fresh, and then I have a couple original recipes based on what sounded good to me and what was on sale at the grocery store. You’ll soon see that I don’t exactly follow the “rules” of baby-feeding. I find the rules restrictive, paranoid and somewhat unnecessary. You do not need to only introduce your baby to one food a week.  If they have a reaction, it will most likely occur within 24 hours.  It also makes no sense to me to start babies off on something that could be mistaken for wet cardboard in flavor and texture (rice cereal – have you tasted that stuff?!)  It’s no wonder kids are expected to eat “kid food” when they are started off on bland carbs and not challenged very much in the variety category thereafter. I started both my babies off with fruits and vegetables and have alternated and given them something new nearly every day after we hit the solids stage.  If you get in the habit of changing up what your baby eats from the very beginning, then variety will become the norm in your house and they’ll never know that most other kids only eat brown food.  That’s another rant for another day.

Here’s some recipes for you new moms out there – send me any ideas you have, too!  I love new ideas that help me get out of my cooking ruts!

Apricots and Maple

Roasted Maple Apricots with Mint
Roasted Apricots with Maple Syrup and Mint

8 apricots, split in half
3-4 TBS pure maple syrup (avoid honey until a year old!)
2 sprigs mint (I have a fun chocolate mint plant in my backyard that I used)

Preheat your oven to 350F. Arrange the split apricots on a foil lined baking sheet and drizzle with maple syrup.  Sprinkle with cinnamon (if you wish) and roast for 20 minutes.  Transfer to a blender or food processor and blend until smooth.  Add the mint leaves and pulse till combined.  Thin out with water if it’s too chunky.  I like to freeze baby food in muffin tins or ice cube trays and then once frozen, I store the cubes in a freezer bag for easy access.  I just label the bags with what’s inside and when I made it!

Avocado Pineapple and Yogurt

Banana Avocado Pineapple Yogurt
Banana Avocado and Pineapple Yogurt*

1/2 avocado
1 small banana (or half a large)
1 cup fresh pineapple chunks
1/4 cup whole fat, plain yogurt

Combine all ingredients in a food processor or blender and blend until smooth.  This doesn’t keep well the next day (it discolors – still tastes fine, but it turns a weird gray from the avocado) so best to keep the portions small.  I cut this recipe in half and Ellie ate it over the course of two days.

*from Start Fresh

Carrot Apple and Mango Puree
Carrot, Mango and Apple Puree

I made this and loved the flavors!  I think it needs longer than 25 minutes roasting – maybe because my oven is on the cool side.  But I think roasting mango alongside carrots doesn’t quite work because carrots and apple take way longer than a mango to roast and then your mango loses a lot of its water.  So, in my opinion, I would roast the carrots and apples together and then add in the mango at the end, or just when you blend.  Make sure you line your pan with foil.  The sugars in the mango will glue themselves to your pan if you don’t! – from Start Fresh

Frozen Peach
Frozen Fruit Baby Food

I love making baby food from frozen fruits and vegetables! There’s always an organic option if that’s important to you, and fruits and veggies are often flash frozen at the peak of freshness.  The only fruit I’ve encountered that isn’t so great frozen is mango. Everything else seems really ripe and awesome.  Here’s what I do:

1 bag frozen fruit – 8 oz (in the pic above it was a bag of peaches)
1 TBS unsalted butter
1 tsp vanilla or cinnamon or any spice you want to experiment with!

In a large saucepan, add the frozen fruit and butter and a splash of water.  Cook over medium heat until it starts to bubble and the fruit thaws.  Stir in your vanilla or cinnamon and let it simmer for a bit longer, smashing up chunks of the fruit.  Transfer to a blender and puree until smooth!

Frozen Spinach
Frozen Vegetable Baby Food

8 oz frozen vegetables – in the pic above, I used frozen spinach
2 TBS butter
a pinch of salt
a splash (1/4 cup) of water)

In a large pan, add the vegetables and a splash of water and bring to a simmer. If you’re using spinach, you won’t need that water. Most other veggies could use a little moisture, and if you’re using peas, add enough to where they boil in the water because you’ll just strain the peas out when you puree and add water to thin out the consistency. Add the butter and salt and stir until melted and then blend until smooth.

Parsnip and Golden Beets
Parsnip and Golden Beet Mash

3 parsnips, peeled and chopped
4 small golden beets, peeled and chopped
2 TBS olive oil
1 TBS butter
1/2 cup low sodium chicken or vegetable stock

Heat your oven to 375 and toss the beets and parsnips with oil and roast until softened and slightly browned, about 25 minutes.  Transfer to a food processor and add a tablespoon of butter and the chicken or vegetable stock and process until smooth.  You may need to add a bit more stock to get a smoother texture, but if you’re baby can handle chunky stuff, go for it.  This has a FABULOUS flavor.  There’s something magical about parsnips and butter, so I definitely don’t skip out on adding the butter.  Fat is good for baby’s brain development.  Don’t hold back! This is the puree you’ll want to eat, too.  It’d be a great substitute for mashed potatoes at a family dinner!

There you are, my friends.  I hope some of these recipes help you explore and try new things in your own kitchen!  Most all of these recipes can be altered to fit any combination of ingredients, so be creative! Add fresh herbs and onion or experiment with various seasonings like curry.  Have fun! That’s the whole point!

Parchment Baked Fish with Bruschetta and Pine Nuts

parchment steamed tilapia with bruschetta
A totally simple weeknight dinner recipe for you using the bruschetta recipe from Monday!  We bake, roast, and pan fry fish a LOT around here.  I buy the bags of frozen fillets and throughout the week, when I “don’t have anything to cook” I can generally reach in, grab three fillets and thaw them out in about 30 minutes to use alongside rice, roasted potatoes, soup, etc.  Olive thankfully loves all fish and so it’s a meal that is never stressful for me.  What’s even easier is just placing the fillets on some parchment paper (foil also works) with some oil and seasonings, wrap it up and let them bake!  I did this last week and it always feels like I went to a lot of trouble, is healthier than my usual pan-fry standard preparation, and the fish is always steamed perfectly.

Get creative with the ingredients you put in with the fish – the possibilities are endless!

steamed fish with bruschetta
Parchment Baked Fish with Bruschetta and Pine Nuts
serves 4

4 tilapia or cod fillets (really, any type of fish will work)
1 TBS butter or olive oil
3 TBS prepared bruschetta 
1 TBS toasted pine nuts
salt and pepper and a squeeze of lemon

Preheat your oven to 400F.  Tear off four squares of parchment paper or foil.  Place the butter in the center of each square and place a fish fillet on top of the butter.  Season the fillet with salt and pepper.  Top with bruschetta and pine nuts and squeeze a lemon over the top of all of it.  Fold the sides up and together and crimp to close.  Place packages on a rimmed baking sheet and bake together for 20 minutes.

You can add just about anything to the fish that you have in your fridge – olive tapenade, green beans, corn relish, fresh herbs and sour cream – honestly, just have fun!

Homemade Banana Meringue Pudding

Banana Meringue Pudding
I’ve had a long-standing love for banana pudding.  Between it and Bananas Foster, I have a hard time choosing my favorite.  At one point, it was my favorite dessert on earth.  I bounce back and forth, now, between Sticky Toffee Pudding or Bananas Foster.  Or anything with lemon.  Or chocolate.

My favorite type of banana pudding, however, is the one that has the sweetened condensed milk and sour cream and extra Nilla wafers and all that awesome goodness, but I’m always up for trying a new version. (Matt made this version pictured, by the way).  I’ve seen pastry chefs putting meringue on more than just pies for a while.  So when we saw a meringue on top of a banana pudding in the latest issue of Bon Appetit, we knew it had to be a winner.  And it was!  However, I immediately knew a few tweaks I wanted to do to it once we tasted it.  First, the base custard just wasn’t banana-y enough.  We always keep a few black bananas in our freezer – when you want banana flavor, nothing beats an over-ripe banana.  It’s so concentrated that just one will do to amp up the flavor in a vanilla pudding to make it burst with sweet banana flavor.  Also, I would use a cooked meringue or a brown sugar meringue instead of the one from this recipe because the meringue wept too much, filling the leftovers up with water.  Ick.  Cooking your egg whites and sugar before whipping takes care of this problem.

However, for a eat-in-one-sitting recipe, the Bon Appetit version was great (but not banana-y enough, and leftovers got weird).  So as long as you have a crowd, this dessert will impress and satisfy!  (for the recipe below, I’ve included my favorite meringue and I’ve added a super-ripe banana, pureed into the base).

Banana Pudding with Meringue
Banana Meringue Pudding

4 large eggs
cup sugar
¼ cup cornstarch
4 cups whole milk
2 tablespoons unsalted butter
2 teaspoons vanilla extract
1 super ripe (black) banana
Pinch of kosher salt


Lightly whisk eggs in a large bowl just to blend. Whisk sugar and cornstarch in a medium saucepan. Gradually whisk milk into sugar mixture and heat over medium heat, whisking often, until very warm to the touch. Gradually whisk half of hot milk mixture into eggs, then whisk egg mixture back into milk mixture in saucepan.

Cook, whisking constantly, until thickened and whisk leaves a trail in pudding (it should be the consistency of mayonnaise), about 4 minutes. Remove from heat, add butter, vanilla, a super-duper ripe banana and salt and puree with an immersion blender until butter is melted and mixture is smooth.


Cover pudding with plastic wrap, pressing directly onto the surface. Chill until cool, about 2 hours.
For the meringue:

3 large egg whites (room temp)
1/8 teaspoon cream of tartar
3/4 cups firmly packed brown sugar

Place the egg whites and cream of tartar in an electric mixer fitted with the whip attachment. Place the brown sugar in a medium, heavy saucepan with high sides (that sugar will boil up and scare the meringue right out of you if you have a small pan), add water to cover, attach a candy thermometer to the pan, and turn the heat on high. When the sugar is at about 240 degrees, start whipping the whites on high speed (they should be foamy and starting to thicken before you add the sugar). When the sugar is at the high soft-ball stage (245 degrees), remove the thermometer from the sugar and, with the mixer still running, carefully avoiding the whip, pour the sugar into the egg whites in a thin stream. When steam starts to come off the whites, add the sugar more quickly. When all sugar has been added, continue whipping until firm but soft peaks form.

For Assembly:

1 box Nilla wafers
3 ripe bananas, sliced

Spread one third of the banana pudding into a casserole dish (9×9 or 9×13 will do fine).  Top with a layer of alternating bananas and cookies, then more pudding and repeat until most or all of your ingredients are used up.  Top with meringue and torch with a blow torch if that’s how you roll, or under a broiler with a very watchful eye (as in, don’t take your eyes off it).

Basil Risotto – Herbs are Vegetables, Too

Basil Risotto
Leafy greens.  For most Americans, this isn’t the most appealing set of words.  However, most of us might just think LETTUCE or  SPINACH or KALE and think, “How on earth am I supposed to eat several cups of that a week?!  Lettuce not forget about herbs (please forgive that pun, I really had no other choice.)  They are brimming with nutrients! It’s such an easy and flavorful way to add more vitamins and fiber to your diet and your recipes.  I always tend to forget that things like basil, thyme, oregano, mint – these are quite leafy and quite green, too!  Sure, you can’t eat as much of them as you can kale in one sitting, but a mild basil goes amazingly well with spinach and can really add a lot of interest to a dish.  Basil is full of beta-carotene, Vitamin A, K and its leaves are rich with essential oils known for being anti-inflammatory.  And lucky you, the summertime is a time when basil grows like a weed!  

I realize that lettuces, spinach, cabbages, etc, are sometimes challenging for little ones (and me) to eat.  But I’ve fully gotten Olive acclimated to the flavors of pesto and I consider that a small victory.  It’s green, so it opens the door for other vegetables to eventually be accepted as well.  For this creamy, bright risotto, I made a pureed basil (not really pesto as I didn’t have Parmesan or pine nuts on hand) with just basil, garlic and garlic oil and stirred it into my risotto in the last minute of cooking.  Garnished with a chiffonade of fresh basil and we had lunch!  Olive loved it and I loved that while it seemed like comfort food, it was actually quite healthy and nutritious for us both.  Not a lot of butter and oil – just good chicken stock (which is amazing for your health on its own), basil, onion and rice!

I encourage you to think of herbs as a choice for getting more vegetables into your diet.  And what better herb to start with than basil?

Pesto Risotto
Basil Risotto

serves 6-8 as a meal

2 cups arborio rice
2 TBS butter
5-6 cups good chicken stock (low sodium if store-bought or just use water and season later)
1/2 cup chopped onion
1 large garlic clove
2 cups packed basil leaves
4 TBS olive oil (I used garlic oil)
2 garlic cloves
salt and pepper to taste

In a large cup with an immersion blender or in a food processor, blend the basil leaves, olive oil, garlic and about a half tsp salt and pepper.  Taste and adjust seasoning to your liking.  You can full out make a regular pesto if you want, but this is what I had on hand and it worked great.  If you make a full batch of pesto, only stir in about 1/4th of a cup into your risotto.

In a large saucepan, heat the chicken stock to a simmer.

In a large, deep skillet over medium heat, melt the butter until it starts to bubble and then saute the onion and garlic until soft, stirring to not let the garlic burn.  Stir in the rice and stir to fully coat in the butter and onion.  Begin adding 1/2 cups of stock to the pan, stirring pretty regularly to ensure the rice doesn’t stick to the bottom of the pan.  When the liquid cooks off, add another 1/2 cup and keep this process up until you’re down to about a cup of stock and have been cooking it for at least 20 minutes.  Near the end, taste the rice – you don’t want it crunchy, but you don’t want it mushy either.  Think of it like pasta – a nice bite to it is key.  Stir in another half cup of stock if you think it could use it and then add in the basil paste.  Remove pan from the heat and serve immediately.  Garnish with fresh basil or a grating of fresh Parmesan and cracked pepper.

Homemade Sweet, White Sandwich Bread

Two Loaves of Sweet, White Sandwich Bread Sandwich Bread
This is home.  To smell this bread baking is to realize that everything is going to be alright. One of the blessings of being married to The Bread Man is that he bakes stuff like this.  He started baking this bread a few months ago. The recipe makes two loaves at a time and we can blaze through both in a week.  Perhaps we shouldn’t and in a better world, I’d give a loaf away.  But it makes the perfect toast in the morning, the perfect grilled cheese sandwich at lunch, the perfect cinnamon toast for a snack in the afternoon and the perfect toast with jam for dessert after dinner.  No, we don’t do all those things in one day.  I’m just telling you that you will NEVER tire of this bread.  It stays fresh for so long AND, unlike most homemade breads, this stuff doesn’t get mold for more than a week – on the counter!  It’s perfect.  Sweet, smooth, silky inner texture and a perfectly crisp crust when toasted – not too thick, not too thin.  Your kids won’t even tear off the crust.

Homemade Sandwich Bread
You can see my lack of restraint that in the thirty seconds it took me to cut the slice to put the slices in the toaster, I bit the corner of that cinnamon/sugar slice.  I could NOT help it.  You’ll see why.  This bread is what’s good about being a kid, again.  This bread sings of wholesome goodness and peace and harmony.

1375973_10152292138695169_2128879586_n
I may be going too far.  Just try it out. And start it the night before you want it because I don’t want you to get all fussy when you see that it has to rise in your fridge for 8 hours.  Suck it up – it’s worth it.

Sandwich Loaf

Homemade Sandwich Bread*
makes two, 8″ loaves

9 grams (1 tbs) instant yeast
425 grams (1 3/4 cups, plus 2 tbs) lukewarm whole milk
794 grams (6 1/4 cups) unbleached bread flour
14 grams (2 tsp) salt
78 grams (5 1/2 tbs) sugar
85 grams (6 tbs) vegetable oil or melted, unsalted butter
1 egg (50 grams)

Do Ahead:

Whisk the yeast into the lukewarm milk until dissolved.  Set aside for 1 to 5 minutes.  Combine the flour, salt, sugar, oil, and egg in a mixing bowl, then pour in the milk mixture.  If using a mixer, use the paddle attachment and mix on the lowest speed for 2 minutes.  If mixing by hand (go you) use a large spoon and stir for about 2 minutes.  The dough should be coarse and slightly sticky.

Switch to the dough hook and mix on medium-low speed for 4 to 5 minutes, or knead by hand on a lightly floured work surface for 4 to 5 minutes, until the dough is soft, supple, and tacky but not sticky.

Whichever mixing method you use, knead the dough by hand for 1 minute, then form it into a ball. Place the dough in a clean, lightly oiled bowl, cover the bowl tightly with plastic wrap, and refrigerate overnight or for up to 4 days. (You can bake the dough in batches over different days if you want and portion the dough into two or more oiled bowls at this stage.)

On Baking Day:

Remove the dough from the refrigerator about 2 1/2 hours before you plan to bake and divide it in half; each piece should weigh about 25 ounces (709 g) which is perfect for 4 1/2 x 8 inch loaf pans.  For a 5 x 9 inch pan, use 28 to 32 ounces of dough.  Shape into sandwich loaves (read method below), then place them in greased loaf pans to rise. Mist the dough with spray oil and cover the pans loosely with plastic wrap or a towel; then let the dough rise at room temperature for about 2 1/2 hours or longer, until it domes about 1 inch above the rims of the pans.

About 15 minutes before baking, preheat the oven to 350F.

Bake for 20 minutes, then rotate the pans and bake for another 20 to 30 minutes.  The bread is done when the top is a rich, golden brown, the sides are firm and the loaf sounds hollow if tapped on the bottom and the internal temperature is at least 185F in the center.

Remove from the pans and cool on a wire rack for at least 1 hour before slicing and serving.  I DID exercise restraint, here.  If you cut into them too early, you’ll have gummy bread.  Don’t say I didn’t warn you.

* from Peter Reinhart’s Artisan Breads Every Day – we love him


Shaping the Sandwich Loaves for baking:

To shape a sandwich loaf, flatten the dough into a 5 by 8 inch rectangle.  Working from the 5 inch side of the dough, roll up the length of the dough (like a fat cinnamon roll).  Pinch the final seam closed using your fingertips or the back edge of your hand.  Gently rock the loaf to even it out.  Don’t taper the ends; keep the top surface of the loaf even.  Place the loaf in a greased pan, seam side down, cover, and proof.

How to Make a Patty Melt – without rye bread!

Patty Melt with Beet Chips
My dear sister in law called me last week and asked my advice for making a patty melt at home.  It occurred to me that I hadn’t actually ever made one, before.  I think Matt did at one point, but I wasn’t involved.  So I gave her my best guess-advice and when we hung up, ALL I COULD THINK ABOUT was eating a patty melt.  So, the next day, I went to the store and bought some ground beef and when I got home, I realized I’d forgotten rye bread.  Honey child, you simply can’t call a sandwich a patty melt if you don’t put it on rye.  It becomes a hamburger sandwich.  No go.  However, we had three loaves of homemade bread at home, already, and I felt it would be batty to go buy a fourth.  So I got creative and put the rye flavor IN the patty by toasting caraway seeds and adding them to the ground beef!  Then I added tons of diced onions and grilled the patties and then melted gooey Swiss all over the bun and patty.  It was actually perfect.  Tasted exactly like a patty melt on rye!

I highly recommend you try this method.  Now, it might be easier for you to go buy a loaf of rye than it would for you to hunt through your spice drawers and find caraway seeds, which I’m sure you’ve only used maybe once or never.  If you go that route, you can still follow my recipe – just leave the seeds out of the beef!  Cheers to you all – I’m super hungry, now.
Patty Melt

Homemade Patty Melt
makes four patty melts

1 lb ground beef (85/15 is a good fat ratio for flavor)
1/2 cup sweet yellow onion, diced small
1 TBS caraway seeds, toasted and crushed
salt and pepper for seasoning
vegetable oil for the griddle
8 slices Swiss cheese
8 slices toasted bread – any kind, I used a sweet homemade white bread, which will be blogged about later this week – so good

In a large bowl, mix the ground beef, onion and caraway seeds together until well mixed.  Form four patties from the meat and set aside.  Season both sides of the patties with kosher salt and pepper.

Heat a griddle or skillet over medium-high heat and brush with vegetable oil.  Cook the patties about 5-8 minutes on each side.  Lay a slice of Swiss cheese on top of each patty and place a lid over the patty until the cheese melts all around it.  Toast the bread in a toaster, then lay a slice of cheese on the bread, top with a patty and the other slice of bread.  To gild the lily, melt a tablespoon of butter in a non-stick skillet and toast the bread again on each side.  This further melts the cheese slices and gives everything that super awesome butter flavor.

Beet Chips (I served them on the side and got a request for the recipe, so here you go)

4 large beets, peeled and rinsed
2 tablespoons olive oil
kosher salt and pepper

Preheat your oven to 425F.  Slice the beets about 1/8th of an inch thick – if you’re knife skills are lacking, use a mandoline (just watch out for your knuckles). Toss in a large bowl with olive oil and then spread them out on a foil lined baking sheet and sprinkle with salt and pepper.  Roast in the oven for about 15 minutes and start checking them.  You’ll need to remove the smaller ones so they won’t burn and leave the bigger ones in so they won’t just be soggy.  Let them cool for about 5 minutes before serving!

Wright’s Smoked Sausage and Leek Orecchiette

sausage and leek pasta
I’m here to proclaim my love for a particular brand of sausage.  No one is paying me, I’m just that fanatic about it.  If you try it, you will feel the same way.  Wright’s has been making amazing pork products for years.  We first fell in love with their peppered, thick-cut bacon a few years back when our friend, John, made these amazing bacon wrapped jalapenos for a company party and said, “The secret is Wright’s!”  Just a couple months ago we noticed their line of ground sausage.  They have a regular, hot and spicy, sage and smoked.  The smoked is astoundingly good.  I can’t adequately describe it so I’ll just say – go buy it and put it in everything from eggs, to pizza to pasta to your sausage gravy and you will not only gain at least ten pounds at the end of your quest, but you will be happier.  At least that’s how it happened to me.

I created this little pasta dish with ground smokey sausage, sauteed leeks and crushed red pepper.  A pretty classic combination but with that smokey sausage, it takes it to a new level.  The orecchiette pasta was perfect for holding little bits of sausage and leek – this is a fast dinner that is completely satisfying and easy to throw together after work.  After you try this sausage, you will keep one on hand at all times.

leek and sausage pasta

Smokey Sausage and Leek Orecchiette
serves 4-6

8 oz orecchiette pasta, or any short and broad pasta
2 medium sized leeks, cleaned, halved and chopped into 1/4″ strips (about 2 cups of leeks)
8 oz Wright’s Smoked Sausage
1/4 cup shredded cheddar cheese
1/2 cup leftover pasta water after boiling
crushed red pepper flakes

Bring a large pot of salted water to boil. (More salt than you think – for a gallon pot, I’d say at least 1/4 cup of salt.  I know – the pasta is flavored by it, it doesn’t absorb it all.  Your pasta will be good enough to eat plain.) Add the pasta and cook to the package directions – usually 12-15 minutes until al dente.  While the pasta water is coming to a boil and while the pasta cooks, cook the sausage, leaving in moderate sized chunks, until cooked through.  Drain the sausage on paper towels and drain off all but a tablespoon of the grease and saute the leeks until  starting to color on the edges.  Then, add a splash of water, cover, and let steam for 10 minutes until soft.
Add the cooked pasta to the leeks and fold in the sausage.  Add the cheddar cheese and stir till melted.  Then add the 1/2 cup of pasta water and stir until fully incorporated and everything is smooth (pasta water is an instant sauce-maker for pasta.)  Garnish with crushed red pepper and serve!  The baby ate this UP.


Challah French Toast with Caramelized Bananas and Toasted Almonds

Challah French Toast with Caramelized Bananas
So when Matt made Challah a couple weekends ago, the leftover loaf sat on our counter among other homemade rolls he made.  We ate the rolls, but the Challah just sat there, threatening to mold.  So I stuck it in the fridge to prolong its life and waited for the weekend.  Saturday rolled around and I turned that almost-moldy bread into amazing French toast.  Cinnamon, vanilla bean, a touch of almond extract made the batter extra decadent.  I pan fried some bananas and almond slices in a touch of butter and agave nectar and sprinkled them on top.  It was so good and once again, I got the satisfaction of knowing I didn’t let Matt’s bread go to waste!  

Happy Weekend!  
Challah French Toast
batter makes enough for about 8-10 slices of thick toast

4 eggs
2/3 cup milk
1 tsp cinnamon
1 tsp vanilla bean paste or extract
1/4 tsp almond extract
8-10 thick slices of bread – any bread will do, but dense, enriched bread works best
2 bananas, sliced
1/4 cup sliced almonds
Butter for pan
Syrup of your choice – I chose dark amber agave nectar

*Give yourself a 30 minute head start so the bread can soak! Heat your oven to 200F.  

Whisk the eggs, milk, cinnamon and extracts together and pour into a 9×13″ pan.  Arrange the bread till it fills the pan and let it soak on one side for 15 minutes, then flip and let it soak for another 15 minutes, pressing down to soak up more batter.  

Heat a large non-stick skillet or griddle over medium heat and add butter.  When butter starts to bubble, add the slices of bread (work in batches) and cook till golden brown on each side, about 5 minutes per side.  As they finish, put them on a baking sheet and place in the oven to keep warm while you finish the rest.

When you’re done with the toast, wipe the skillet out with a few paper towels and over medium high heat, toast the almonds until brown and fragrant.  Remove and add one tablespoon of butter, a swirl of syrup and the bananas and cook until golden on each side, about 1-2 minutes per side.  Top the toast with almonds and bananas and syrup and serve!