Homemade Banana Meringue Pudding

Banana Meringue Pudding
I’ve had a long-standing love for banana pudding.  Between it and Bananas Foster, I have a hard time choosing my favorite.  At one point, it was my favorite dessert on earth.  I bounce back and forth, now, between Sticky Toffee Pudding or Bananas Foster.  Or anything with lemon.  Or chocolate.

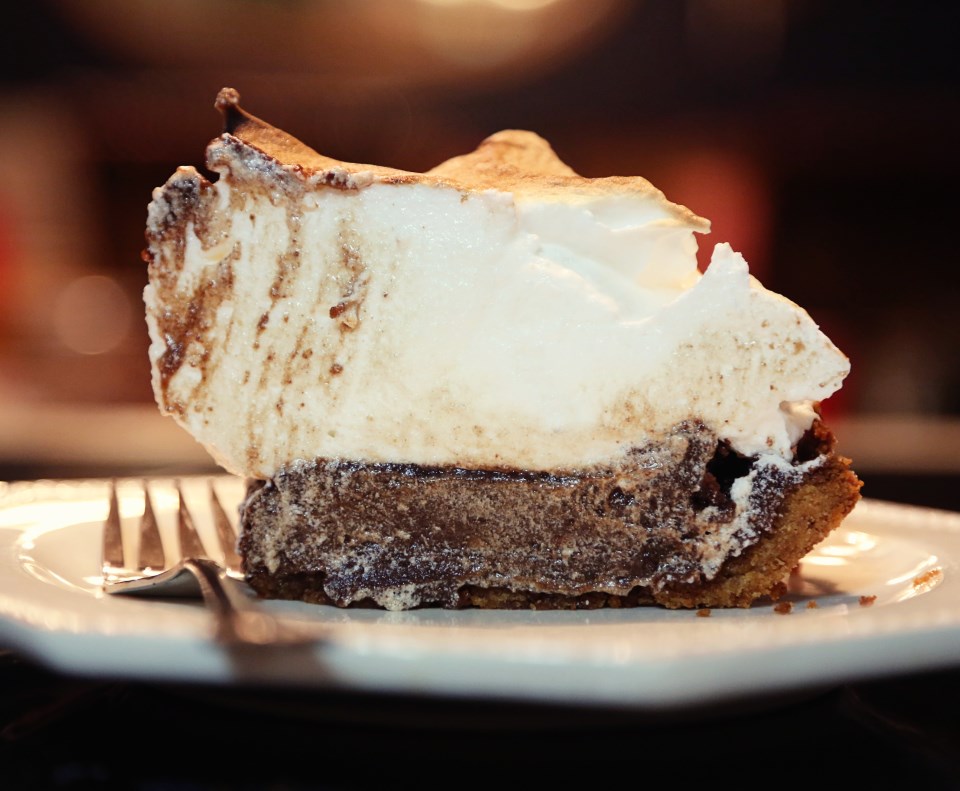
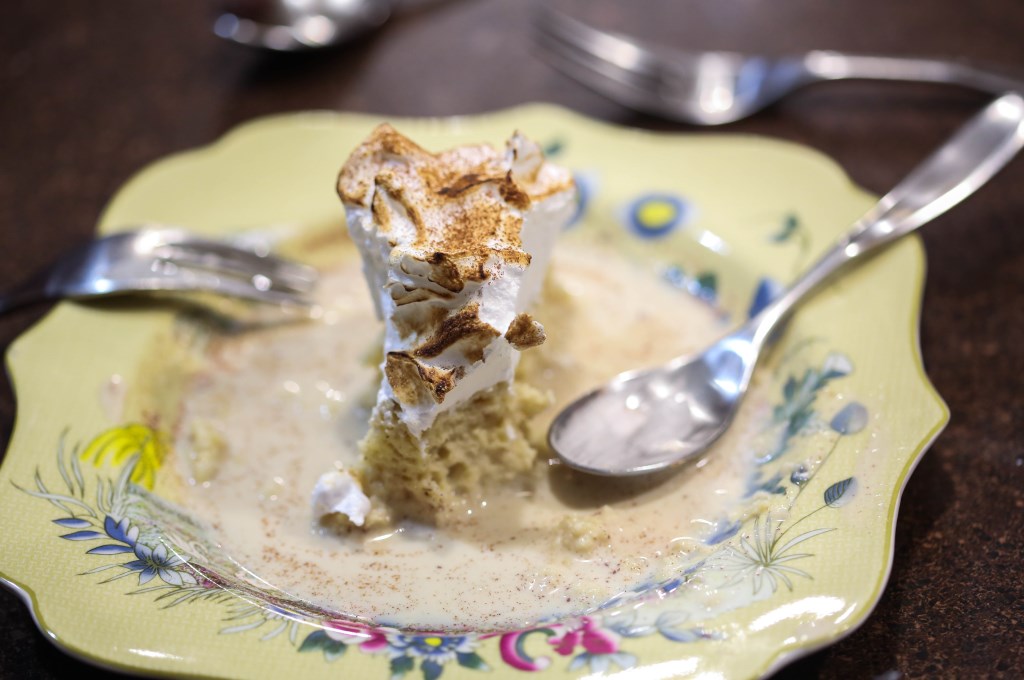
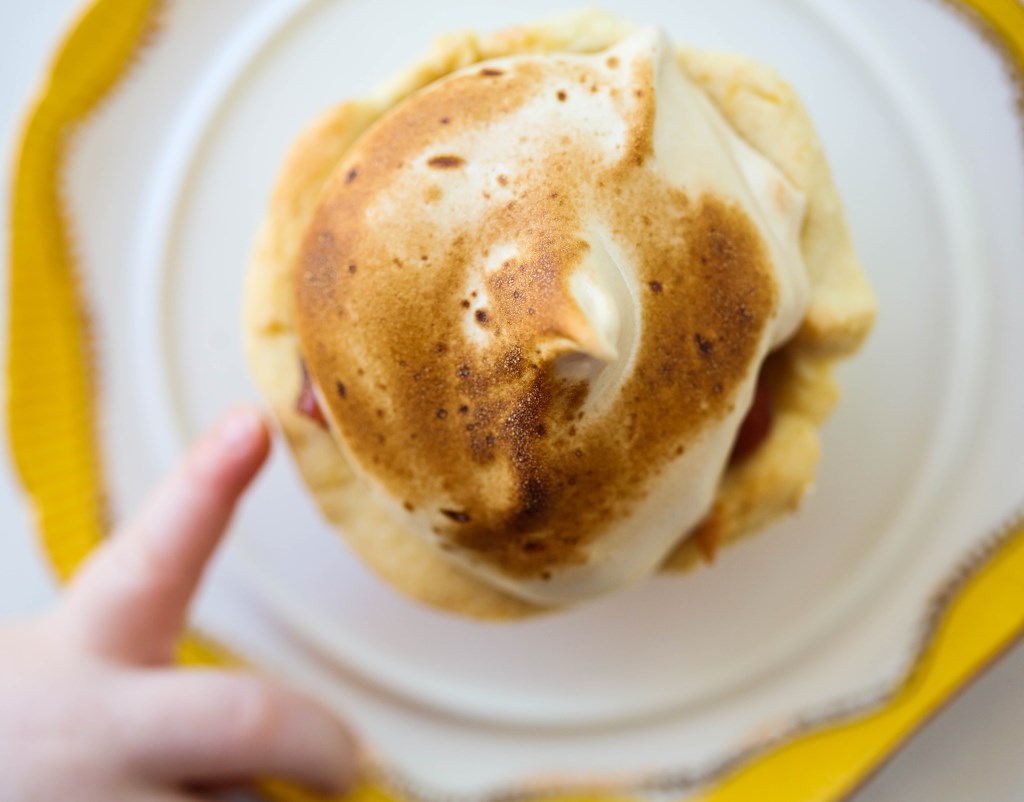
My favorite type of banana pudding, however, is the one that has the sweetened condensed milk and sour cream and extra Nilla wafers and all that awesome goodness, but I’m always up for trying a new version. (Matt made this version pictured, by the way).  I’ve seen pastry chefs putting meringue on more than just pies for a while.  So when we saw a meringue on top of a banana pudding in the latest issue of Bon Appetit, we knew it had to be a winner.  And it was!  However, I immediately knew a few tweaks I wanted to do to it once we tasted it.  First, the base custard just wasn’t banana-y enough.  We always keep a few black bananas in our freezer – when you want banana flavor, nothing beats an over-ripe banana.  It’s so concentrated that just one will do to amp up the flavor in a vanilla pudding to make it burst with sweet banana flavor.  Also, I would use a cooked meringue or a brown sugar meringue instead of the one from this recipe because the meringue wept too much, filling the leftovers up with water.  Ick.  Cooking your egg whites and sugar before whipping takes care of this problem.

However, for a eat-in-one-sitting recipe, the Bon Appetit version was great (but not banana-y enough, and leftovers got weird).  So as long as you have a crowd, this dessert will impress and satisfy!  (for the recipe below, I’ve included my favorite meringue and I’ve added a super-ripe banana, pureed into the base).

Banana Pudding with Meringue
Banana Meringue Pudding

4 large eggs
cup sugar
¼ cup cornstarch
4 cups whole milk
2 tablespoons unsalted butter
2 teaspoons vanilla extract
1 super ripe (black) banana
Pinch of kosher salt


Lightly whisk eggs in a large bowl just to blend. Whisk sugar and cornstarch in a medium saucepan. Gradually whisk milk into sugar mixture and heat over medium heat, whisking often, until very warm to the touch. Gradually whisk half of hot milk mixture into eggs, then whisk egg mixture back into milk mixture in saucepan.

Cook, whisking constantly, until thickened and whisk leaves a trail in pudding (it should be the consistency of mayonnaise), about 4 minutes. Remove from heat, add butter, vanilla, a super-duper ripe banana and salt and puree with an immersion blender until butter is melted and mixture is smooth.


Cover pudding with plastic wrap, pressing directly onto the surface. Chill until cool, about 2 hours.
For the meringue:

3 large egg whites (room temp)
1/8 teaspoon cream of tartar
3/4 cups firmly packed brown sugar

Place the egg whites and cream of tartar in an electric mixer fitted with the whip attachment. Place the brown sugar in a medium, heavy saucepan with high sides (that sugar will boil up and scare the meringue right out of you if you have a small pan), add water to cover, attach a candy thermometer to the pan, and turn the heat on high. When the sugar is at about 240 degrees, start whipping the whites on high speed (they should be foamy and starting to thicken before you add the sugar). When the sugar is at the high soft-ball stage (245 degrees), remove the thermometer from the sugar and, with the mixer still running, carefully avoiding the whip, pour the sugar into the egg whites in a thin stream. When steam starts to come off the whites, add the sugar more quickly. When all sugar has been added, continue whipping until firm but soft peaks form.

For Assembly:

1 box Nilla wafers
3 ripe bananas, sliced

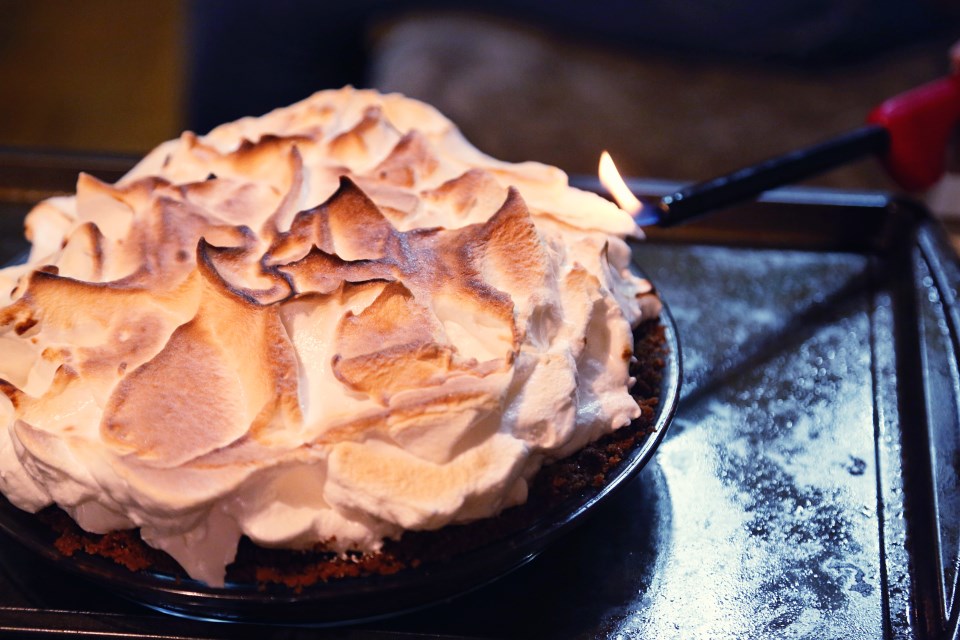
Spread one third of the banana pudding into a casserole dish (9×9 or 9×13 will do fine).  Top with a layer of alternating bananas and cookies, then more pudding and repeat until most or all of your ingredients are used up.  Top with meringue and torch with a blow torch if that’s how you roll, or under a broiler with a very watchful eye (as in, don’t take your eyes off it).

Advertisement

Banana Caramel Cream Pavlova

Bananas Foster Pavlova
This seems like a Sunday afternoon dessert.  Ethereal, light, comforting and sweet.  For many during the season of Lent, Sunday is a break from their chosen 40 day fast.  We had to break our fast this morning as we had family in town and went to church and then they had to get a quick lunch and get on the road.  So we had brunch out at our favorite place, Crafthouse.  Does it count if we didn’t pay for the meal? 🙂 Anyway, we are dedicated to our no-eating-out fast and will continue throughout the weeks and will not plan on breaking the fast on Sundays.

One of my plans for Lent is to plan meals that are more exciting than going out to eat – things we look forward to more than going to a restaurant!  This fancy-schmancy dessert could make anyone feel as if they were at a posh little bistro having dessert and coffee!  I’ve done a pavlova on this blog before, and I love how versatile they can be.  A few weeks ago I bought this yogurt in a moment of weakness.  I always buy plain yogurt and add my own sugar because flavored yogurts have SO MUCH SUGAR.  However, I couldn’t resist the flavor description: honey salted caramel?! After we tasted it, Matt suggested it would be awesome on a pavlova and that we could add bananas and have it be a shockingly all-white dessert.  Cloud like, from the Greek Gods themselves.  I added vanilla bean to my pavlova and torched raw sugar on top of the bananas and with the combination of the salted caramel tanginess of the yogurt, it made an incredible dessert!  It makes me want to try lots of different combinations with various yogurt flavors!  I’ll post my pavlova recipe for you, here, again and you can do whatever toppings you can dream up!

Vanilla Bean Pavlovas
makes 12-15 small meringues

1 1/2 teaspoons vanilla bean paste
1/2 teaspoon cream of tartar
1 1/2 Tbsp cornstarch
1 1/2 cups granulated sugar
5-6 (about 6 oz) large egg whites, room temperature
Pinch salt

Place rack in the middle of the oven and preheat the oven to 275°. Line a large baking sheet with parchment paper.  Stir the cornstarch into the sugar in a small bowl.

In a large bowl of a heavy-duty mixer, fitted with whisk attachment, whip egg whites, cream of tartar and salt, starting on low, increasing to medium speed until soft peaks start to become visible, approximately 2 to 3 minutes.

Increase speed to medium-high, slowly and gradually sprinkling in the sugar-cornstarch mixture. A few minutes after these dry ingredients are added, slowly pour in the vanilla.  Increase speed a bit and whip until meringue is glossy, and stiff peaks form when the whisk is lifted, 4 to 5 minutes.

Pipe or spoon the meringue into 8-10 large round mounds that are 3 inches wide on the parchment-lined baking sheet.  With the back of a spoon, create an indentation in the middle of the mound for holding the filling once meringue is baked.

Place baking sheet in the oven. Reduce oven temperature to 250°F. Bake for 50-60 minutes, or until the meringues are crisp, dry to the touch on the outside, and white — not tan-colored or cracked. The interiors should have a marshmallow-like consistency. Check on meringues at least once during the baking time. If they appear to be taking on color or cracking, reduce temperature 25 degrees, and turn pan around.

Gently lift from the baking sheet and cool on a wire rack. Will keep in a tightly sealed container at room temperature for a week.

S’mores Pie

S'mores Pie

I had a wonderful Thanksgiving and I hope you did, too!  I got to spend it with my whole family!  Both my brothers came down with their children and with them and my parents, there were 16 of us bedding down in our old childhood home! I got to see my grandmother and my sweet Aunt Mary, too!  I really don’t think I’ve seen that much family in one weekend in several years. It was good for the soul and I don’t feel like I even overate as much as I usually do, which enabled me to enjoy the heck out of this pie I created on Friday night.

S’mores pie!  When we showed Olive s’mores for the first time this summer, we made them with dark chocolate.  I loved the balance the dark chocolate gave to the super sweet marshmallow and graham cracker.  So when thinking of a pie to make for Thanksgiving, I thought of doing the darkest chocolate pie I knew how to do and topping it with my favorite meringue and then torch the heck out of the top.

Best.  Chocolate Pie. Ever.

Seriously, if you want to win some kind of chocolate pie award, this is your pie.  Make it with a traditional crust and serve it with soft whipped cream and that is all you’ll need for ultimate bragging rights.  I nearly skipped out on the meringue, but I wanted that dramatic torched effect so I went with it.  I think if I were to do this pie over, I would give it more s’moresy flavor by just dumping a bunch of marshmallows on top and burning them to a crisp.  Because I’m that s’mores gal – the one who likes to eat slightly sweet bits of char instead of marshmallows.  I’d say most people aren’t like this or don’t have a coal deficiency or whatever, so I erred on the side of not-too-burnt.  The results were great and I will definitely make this pie again at Christmas!

torching the smores pie helping torch the pie
My nephew, Landon, helped me torch it!

aerial s'mores pie

S’mores Pie

2 eggs, beaten
1-5 ounce can of evaporated milk
1 cup white sugar
1/4 cup brown sugar
2 TBS cocoa powder
1 TBS instant coffee granules
3.5 ounces dark chocolate, chopped
1/4 cup butter
2 TBS corn meal
For the crust:
1 and a half packages of graham crackers, crushed fine (12 large)
2 TBS sugar
4 TBS butter, melted
2 TBS water
pinch of salt
Preheat oven to 350 degrees.  Combine the crushed graham crackers, sugar, salt and butter until it’s well combined.  If it doesn’t hold together when you press it between your fingers, add the tablespoons of water.  Press into a 9″ pie plate and set aside.
Combine the eggs, evaporated milk and sugars until smooth.  Put the cocoa powder and instant coffee in a small cup and add a tablespoon of water and whip it into a paste.  Whisk this paste into the egg/milk mixture.  Melt the dark chocolate and butter together in a microwave at 30 second increments, stirring after each time until completely smooth and glossy.  Add the chocolate and butter to the egg mixture and then whisk in the corn meal until smooth.
Pour into the pie shell and place your pie on a rimmed baking sheet and bake for 45 minutes to an hour, until the middle doesn’t jiggle anymore.  Let the pie come to room temp before making the meringue!
For the meringue:
5 egg whites, room temp (room temp is important)
1 cup of sugar
1/3 cup water
Place the sugar and water in a small saucepan and bring to a gentle boil till the temp reaches 250 on a candy thermometer.  While it’s boiling, put the egg whites in a mixer at medium speed and beat with a pinch of salt until soft peaks form.  When the sugar is up to temp, remove from heat and while the mixer is going on medium, drizzle the syrup in a very thin stream until completely incorporated and then increase speed to high and whip until the bowl cools down.  This takes a while so be patient.
Assemble!
Dump ALL the meringue on top of your ROOM TEMP pie and with a blow torch (such a great addition to any kitchen) or a dainty creme brulee torch (not as fun) torch the meringue until evenly browned.  If you have neither, you can brown it in the oven under the broiler but you have to be VIGILANT as to not burn the meringue.  A broiler works scary fast.

Coffee Infused Tres Leches Cake

manyleches005


There are three things that make a dessert experience truly great:
1. The occasion
2. The company who helps you eat it
3. The number of leches involved

This particular dessert experience was one I will always remember.  My friend, Becky came into town for a few short days and because of her husband’s nomadic ways, they have traveled far away from Lubbock, I fear, never to return.  I cherish the times she comes back into town and actually spends some good, quality time over at our house.  I shot Becky and Trevor’s wedding four years ago and we became fast friends, immediately glued together by our love of food and cooking.  I was elated when she said she’s spend the better part of the day with me, so the first question we naturally discussed was, “What are we going to bake?!”

Becky is one of those people who knows how to cook.  It’s in her soul – she was taught from a very early age how to work her way around a kitchen, learning from her father and grandmother.  Becky’s happy place is in the kitchen, and so naturally, we both had a zen-like afternoon baking together.  We shared stories, we complained about bad food and we ATE our creation with gusto and silent, head-nodding approval between bites.  It was perfect.

We decided to do Rick Bayless’ Coffee Infused Tres Leches Cake that I’d recently seen on his show, Mexico, One Plate at a Time.  Rick Bayless is one of those safe names in the cooking world.  If the recipe is from his show, or from one of his many restaurants, or amazing cookbooks, you can rest assured the recipe will work, and will become one of your favorites to return to again and again.  This has happened to me many times and this cake happily joins the ranks.

This cake is intense.  It should be paired with a strong cup of black coffee and nothing else.  The addition of the coffee in the milk mixture is pure genius.  It cuts the richness just right and adds depth where there might just be a generic sweetness.  It has this incredibly creamy texture with hints of cinnamon and coffee.  It’s the best tres leches cake I’ve ever had.  (And I grew up around here – I’ve had plenty.)  It made me think of the wonderful flavors of horchata, and I think next time I make this, I’ll replace horchata for the heavy cream.

manyleches006

Coffee Tres Leches Cake*
serves 6

For the cake:
1 cup all purpose flour
¾ cup sugar
1 ½ teaspoons baking powder
Salt
4 eggs at room temperature
¼ cup vegetable oil
¼ teaspoon vanilla extract, preferably Mexican
½ teaspoon cream of tartar

For the milk mixture:
1 cup heavy cream
1 12-ounce can evaporated milk
1 14-ounce can sweetened condensed milk
½ cup freshly brewed espresso or strongly brewed coffee
1 teaspoon vanilla extract, preferably Mexican
¼ teaspoon cinnamon
1 cup sugar
5 egg whites at room temperature
½ teaspoon cream of tartar
extra cinnamon for dusting (or cocoa powder – or espresso powder would be good, too!)

Heat the oven to 350 degrees. Line a muffin pan that makes 6 large muffins with muffin papers. Or, I don’t have a huge muffin pan, so I used little ramekins and lined the bottom of each with parchment.  Just do it and you won’t be sad, scraping your cake off the bottom of the dish.
Place the flour, 6 tablespoons of the sugar, the baking powder and a pinch of salt in a large bowl and whisk to combine. Separate the eggs, dropping the whites into the bowl of a mixer and the yolks into a medium bowl.  Add the oil, vanilla and 2 tablespoons of water to the yolks and mix well. Beat the egg whites with the cream of tartar until they start to thicken and form soft peaks.  Gradually add the remaining 6 tablespoons of sugar and continue to beat until stiff peaks form.
Add 1/3 of the flour mixture to the egg yolks and mix well. Gently fold in 1/3 of the beaten egg whites. Repeat, alternating the flour mixture and egg whites until everything is thoroughly combined.  Scoop the fluffy batter into the prepared muffin tins, place in the hot oven and bake until the tops spring back when touched, 20 to 22 minutes. Allow to cool slightly, then take the individual cakes out of the dishes and invert them into a deep 13×9 inch baking dish.

Combine the heavy cream, evaporated milk, condensed milk, coffee, vanilla, cinnamon and a pinch of salt in a bowl and mix well. Slowly pour the mixture over the cakes, soaking them thoroughly. Cover with plastic wrap and refrigerate for 1 hour to allow the milks to be absorbed into the cakes.  It actually took longer than that for mine to absorb.  We spooned the mixture over the cakes and poked extra holes in them so they’d soak up more milk.  In the end, I still had some leftover, so don’t worry about that.

Combine the sugar with 1/3 cup water in a small (2-quart) saucepan and bring to a boil over high heat, swirling the pan gently until all the sugar is dissolved.  Dip a brush in water and use it to clean the sides of the pan so no sugar crystals remain.  (This is an important step in keeping the syrup from recrystallizing.) Lower the heat to medium and boil the syrup until it reaches soft ball stage (about 240 degrees).
While the syrup is boiling, beat the egg whites with the cream of tartar and a pinch of salt until the whites form soft peaks.  Drizzle in the hot sugar syrup very slowly while the mixer is running.  Continue to beat until the bottom of the bowl is cool.  This takes forever, so do what Becky does and place ice packs on the outside of your bowl.  Or peas.
To serve, place each soaked cake on a plate, decorate with a big dollop of meringue, toasting the peaks with a kitchen torch.  Sprinkle with the cinnamon or cocoa and eat with great gusto!

*only slightly adapted from the original recipe

manyleches003 manyleches007 manyleches009


Thank you for that afternoon, Becky.  It will sustain me for months to come.  Until next time!  XOXO

Pavlovas with Black Cherry Syrup

Cherry Pavlova with Greek Yogurt


While we were on our trip last week, Matt and I stole away, left the kid with our friends, and had a little adventure in Seattle.  After a ferry ride and a crazy time trying to catch the bus in the midst of 300,000 people watching a parade downtown, we finally made it to Delancy – a pizza place that’s out of this world.  We seek out pizza in nearly every town we visit.  Okay, okay, we seek out FOOD in every town we visit, but more often than not, that will include a pizza joint.  Matt has been perfecting his pizza crust for the past few years and I can safely say after hundreds of pizzas made at home and hundreds we have tried out and about, Delancy is the best out and about and Matt’s is just as good – only it’s in our own kitchen.  Score one for Palmsey.  

This is beginning to sound like a pizza post, but it’s not.  I already did that a few months ago and the recipe hasn’t changed!  This is a post about how awesome Delancy was, and how you should go there, and when you do go there, go next door to get a drink because you’ll have an hour wait.  Next door is an extension of Delancy’s kitchen called Essex and they have wonderful appetizers and desserts.  One of which we ordered at the end of our perfect pizza experience – a pavlova with Greek yogurt and raspberries.  I’d had pavlova (baked meringue) with other fruits and it’s traditionally served with creme anglais or ice cream, but the Greek yogurt was such a wonderful way to cut the almost-too-sweet combination of a sugary meringue and raspberry syrup.  This desert was gone in about 5 seconds and went immediately on my list of recipes to recreate once I got home.

So here we are.  I got home on Tuesday and went shopping.  Raspberries were $3 for a half pint.  No thank you.  Cherries were $1.50 for a whole pound.  Sold.  I cooked the cherries down in a little brown sugar and let the juices bubble away and form a syrup and whipped up a little full-fat, plain Greek yogurt to place in the meringues once they were baked.  When Matt got home, I had two portions set out and while Olive napped, we ate.  Before dinner.  The joys of being an adult.  Matt even exclaimed, “This is EXACTLY RIGHT” which, if you know Matt, really means something.  I was proud of the recreation and I’ll definitely make it, again.  Maybe next time with apricot preserves…the options are really endless!

Pavlova with Black Cherry Syrup and Greek Yogurt


Pavlovas with Cherries and Yogurt*
makes 8-10 pavlovas, depending on size

1 1/2 teaspoons pure vanilla extract
1/2 teaspoon cream of tartar
1 1/2 Tbsp cornstarch
1 1/2 cups granulated sugar
5-6 (about 6 oz) large egg whites, room temperature
Pinch salt

Place rack in the middle of the oven and preheat the oven to 275°. Line a large baking sheet with parchment paper.  Stir the cornstarch into the sugar in a small bowl.

In a large bowl of a heavy-duty mixer, fitted with whisk attachment, whip egg whites, cream of tartar and salt, starting on low, increasing to medium speed until soft peaks start to become visible, approximately 2 to 3 minutes.

Increase speed to medium-high, slowly and gradually sprinkling in the sugar-cornstarch mixture. A few minutes after these dry ingredients are added, slowly pour in the vanilla.  Increase speed a bit and whip until meringue is glossy, and stiff peaks form when the whisk is lifted, 4 to 5 minutes.

Pipe or spoon the meringue into 8-10 large round mounds that are 3 inches wide on the parchment-lined baking sheet.  With the back of a spoon, create an indentation in the middle of the mound for holding the filling once meringue is baked.

Place baking sheet in the oven. Reduce oven temperature to 250°F. Bake for 50-60 minutes, or until the meringues are crisp, dry to the touch on the outside, and white — not tan-colored or cracked. The interiors should have a marshmallow-like consistency. Check on meringues at least once during the baking time. If they appear to be taking on color or cracking, reduce temperature 25 degrees, and turn pan around.

Gently lift from the baking sheet and cool on a wire rack. Will keep in a tightly sealed container at room temperature for a week.

*recipe adapted from Simply Recipes

Black Cherry Pavlova

Cherry Compote
makes about a cup

2 cups pitted cherries
1/4 cup brown sugar
Squeeze of lemon

Put the cherries and the brown sugar in a saucepan over medium heat and let it come to a simmer.  Let it cook for about 20 minutes, mashing the cherries a bit as you go.  When the syrup starts to thicken a bit, take it off the heat and squeeze a lemon over it all and stir it up until incorporated.  Let the sauce come to room temp before topping the pavlovas.  

To Assemble:

Take one meringue shell and place it on a plate.  Scoop out a generous 1/4 cup of full-fat Greek yogurt and place on top of the meringue.  Top the yogurt generously with the chunky cherry syrup and serve!  Modify as you wish with whipped cream, creme anglais, frozen yogurt – whatever you like!  And if you can’t make a fruity compote, I suppose warming up some preserves wouldn’t be too shabby 🙂


Chocolate Mousse

15ollie012

French Kids Eat Everything was the second book I read in my brainwashing of French food culture (the first was Bringing Up Bebe) and it was the best one in the trend of “the French know what you’re doing wrong”, in my opinion.  In the book, the author, Karen Le Billon, describes her struggle raising her two little girls on the streets of Paris, trying to fit in to a food culture so different from our own.  She noticed toddlers sitting in restaurants for an hour meal without making a peep and eating the entire time.  She never saw public temper tantrums in grocery stores over a product not bought, even if desired (kids know they can’t have snacks unless it’s 4 p.m. and even then, most are not used to packaged food aisle-fare).  She wanted to know how the French managed to raise children who ate peacefully and in turn, made having a meal together actually appear fun for the adults, as well!

There are a lot of great take-away tips in this book and one of them is to make the 4p.m. snack (or 3ish, in our case) really good – something a child won’t mind waiting for.  The French have an appointed time for snacks in the afternoon because between noon and 8 is a long time to wait for food (although they expect adults to wait!  Snacks only apply to children – dang it).  So I’ve been trying to find fun things to make and at the back of the book, there are some real recipes found in the daycare systems in Paris, as well as in every day homes.  One of those recipes is for a simple chocolate mousse.  I had procured some amazingly fresh eggs from my dear friend, Katrina, and I thought there would be no more honorable way to consume them than to eat them raw.

I just lost some readers.

Seriously, though, eating eggs from a reliable source, from happy chickens whose eggs are only a few days old – you would more likely get eaten by a goat than get sick from eggs like this.  I’ve never been one to shy away from a raw egg in cookie dough, even with the old eggs from the store, but for a recipe that calls for 6 whole eggs, I don’t think I would have been too comfortable eating them if I didn’t know how old they really were.  And I knew, in this case, because Katrina gathered them from the hen house a day before I took them home.  You all should hook up with a friend who has chickens.  They can never eat as many eggs as they end up getting!  And if you have chickens, this type of recipe is great for using up excess eggs!

This mousse is light, fluffy and has an amazing texture and flavor with the added zing of orange zest.  You must eat it very very cold or the texture gets a little too loose.  But straight from the fridge, they are amazing and Olive enjoyed it a LOT, and I exercised my patience with messy eating and happily took pictures of the chocolate chaos.

15ollie013 15ollie010

chocolate mousse001

Chocolate Mousse
Serves 6

1/2 pound semi-sweet Baker’s chocolate (I actually used Ghirardelli 60% chips)
4 teaspoons butter (oh, just use two tablespoons)
6 eggs, whites and yolks separated
Zest of half an orange (I also think a 1/4 tsp almond extract would be awesome!)
Pinch of salt

Melt the chocolate and butter in a double boiler on the stove over low heat.  Quick method: melt in the microwave on 30 second increments, stirring gently until melted and smooth.  When the chocolate is melted and cooled a bit, add in the egg yolks and orange zest and stir well. Set aside.

In a stand mixer with the whisk attachment (or in a large metal bowl with metal whisk, by hand, if you know what you’re made of) beat the egg whites until they reach stiff peaks (adding a pinch of salt at the start will help them stiffen).

Gently fold one-third of the egg whites into the chocolate mixture.  Mix gently, then fold in the other half, mixing very gently.  Spoon the mousse into little serving dishes and chill for 2 to 3 hours or over night until firm.

chocolate mousse002

Mini Cherry Pies with Brown Sugar Meringue

cherry meringue mini pies-23

I fulfilled a little dream, today.  I baked with my daughter.  And she even wore a mini-apron. In just a few more months, she’ll be able to stand beside me on her stool and really help.  Today, she got to sit on the counter, play with the rolling pin, say, “row, row, row” as she rolled the dough and even properly sneaked little bites of the raw dough to eat.  This girl knows how to live.  And I’m so happy that she’s teaching me how to live mine, all over again.

image_1 photo

I found cherries on sale for $2.97, regularly over $7!  Cherries are in season in May, so I really hope they stay cheap for a few more weeks!  I did a couple things with my purchase.  First, I put a few whole in a jar and covered them with bourbon.

cherry meringue mini pies-20

A great addition to cocktails in a few weeks, I’m sure!  Or a grown up ice cream Sunday.  Or, a merciful substitution for those horrid Maraschino circles of candy that call themselves cherries.

cherry meringue mini pies-19

For my second act, I overcooked a batch of cherry pie filling so much that it resembled bits of dried cherries, resting comfortably in glue.  (I’d left it on the stove to “simmer” while I went to see my friend in the hospital.  Um, don’t ask why I did that.)  Matt rescued my near-break down by going and getting me another pound at 10:00 last night, then helped me pit every last one of them so I could start over.  That’s true love.

So I had a vague vision of what I wanted to do.  I wanted to make mini pies, fill them with tart cherry filling and use a brown sugar meringue that I’ve used before and wanted to make again because it’s close to perfection and is SO SWEET that it can really only be paired with something tart.  So these little devils are a combination of three recipes: Martha Stewart’s hand pie dough, My Baking Addiction’s cherry pie filling and Cindy Pawlcyn’s brown sugar meringue that she uses on her mile high lemon meringue pie at her amazing restaurant, Mustards Grill in Napa Valley (we went! we ate! we went into a food coma!)

The results were pretty great.  I think next time, I’d use my tried and true pie crust recipe and just add lemon zest to it.  Other than that, this recipe is a winner!  Especially for this super hot weekend that reminds us all too well that we live in the desert and it is officially summer.

cherry meringue mini pies-1

Mini Cherry Pies with Brown Sugar Meringue
makes two dozen

For the Crust

3 cups AP flour
1/4 tsp baking soda
1 tsp baking powder
1/2 tsp salt
2 tsp lemon zest (this microplane works best!)
1 stick of butter (1/2 cup, room temp)
1 cup sugar
1 large egg
3 oz. cream cheese at room temp
2 tbs buttermilk
1 tsp vanilla extract

In a medium bowl, whisk together the flour, baking soda, baking powder, salt and zest.

With an electric mixer on high speed (I used my stand mixer with the paddle attachment), beat butter and sugar until pale and fluffy, about 5 minutes.  Add the egg and beat until just combined.  Add cream cheese, buttermilk, and vanilla; beat until well combined.  Add reserved flour mixture, and beat until smooth.  Form dough into a ball and cover with plastic wrap and flatten into a disc.  Refrigerate 1 hour, up to overnight or freeze up to 1 month.

Let the dough come up to room temp and then roll out into a circle about 1/4 inch thick.  Cut out 4″ rounds and press them into a standard muffin tin, making sure to patch up any holes that form.  This dough is kind of crackly, so don’t fret.  It patches up pretty easily.  Prick the bottom of each pie with a fork and bake in a preheated 375 degree oven for 15 minutes, or until golden brown.  Some of the bottoms of the pies will puff up, but when they’ve cooled just press the puffed up centers down a bit before filling.  I wasn’t about to cut 24 parchment rounds and fill each cup with pie weights.  I’m not THAT dedicated to perfection.

For the Filling

5 to 6 cups fresh, pitted cherries
1/2 cup water
2 tbs lemon juice (fresh!)
2/3 cup sugar
4 tbs constarch
1/2 tsp almond extract

In a saucepan over medium heat, combine the cherries, water, lemon juice, sugar and cornstarch.  Bring to a boil; reduce heat to low and cook, stirring frequently, for about 10 minutes.  Stir in the almond extract and cool slightly before using.

image

I really love using my copper jam pot – (pardon the iPhone pic) The copper heats up almost instantly, as do the sides, so it cooks jam more evenly.  There are lovely, affordable ones here!

For the Meringue:

3/4 cup egg whites (about 6 large)
1/4 teaspoon cream of tartar
1 1/2 cups firmly packed brown sugar

Place the egg whites and cream of tartar in an electric mixer fitted with the whip attachment. Place the brown sugar in a medium, heavy saucepan with high sides (that sugar will boil up and scare the meringue right out of you if you have a small pan), add water to cover, attach a candy thermometer to the pan, and turn the heat on high. When the sugar is at about 240 degrees, start whipping the whites on high speed (they should be foamy and starting to thicken before you add the sugar). When the sugar is at the high soft-ball stage (245 degrees), remove the thermometer from the sugar and, with the mixer still running, carefully avoiding the whip, pour the sugar into the egg whites in a thin stream. When steam starts to come off the whites, add the sugar more quickly. When all sugar has been added, continue whipping until firm but soft peaks form.

Assemble!

Fill each pie shell with the filling.  Then top each with a generous dollop of meringue (you’ll have leftover meringue) and then get a torch and torch those suckers.  I don’t like toasting meringue in my oven because I inevitably scorch them and that makes me feel like a failure and I try to avoid that feeling whenever possible.  It’s all about setting yourself up to succeed in the kitchen that will keep you coming back.

I think these are best served with iced coffee because that’s what you need on a 100 degree day like today!

cherry meringue mini pies-6


Little fingers are very curious 🙂


cherry meringue mini pies-8


cherry meringue mini pies-17


JOY!