Coffee Infused Tres Leches Cake

manyleches005


There are three things that make a dessert experience truly great:
1. The occasion
2. The company who helps you eat it
3. The number of leches involved

This particular dessert experience was one I will always remember.  My friend, Becky came into town for a few short days and because of her husband’s nomadic ways, they have traveled far away from Lubbock, I fear, never to return.  I cherish the times she comes back into town and actually spends some good, quality time over at our house.  I shot Becky and Trevor’s wedding four years ago and we became fast friends, immediately glued together by our love of food and cooking.  I was elated when she said she’s spend the better part of the day with me, so the first question we naturally discussed was, “What are we going to bake?!”

Becky is one of those people who knows how to cook.  It’s in her soul – she was taught from a very early age how to work her way around a kitchen, learning from her father and grandmother.  Becky’s happy place is in the kitchen, and so naturally, we both had a zen-like afternoon baking together.  We shared stories, we complained about bad food and we ATE our creation with gusto and silent, head-nodding approval between bites.  It was perfect.

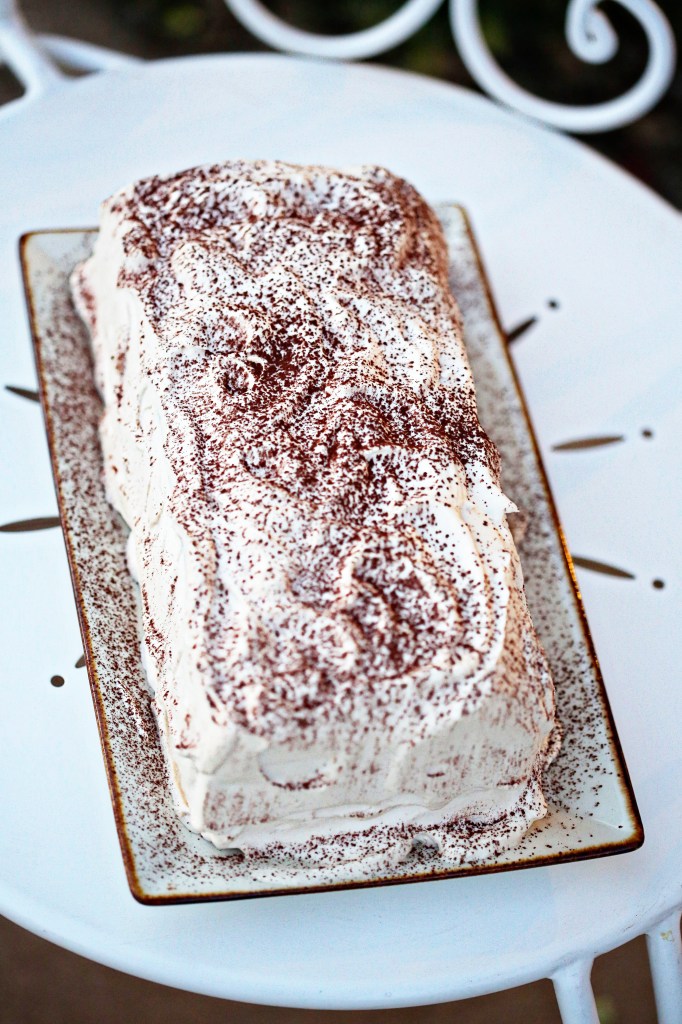
We decided to do Rick Bayless’ Coffee Infused Tres Leches Cake that I’d recently seen on his show, Mexico, One Plate at a Time.  Rick Bayless is one of those safe names in the cooking world.  If the recipe is from his show, or from one of his many restaurants, or amazing cookbooks, you can rest assured the recipe will work, and will become one of your favorites to return to again and again.  This has happened to me many times and this cake happily joins the ranks.

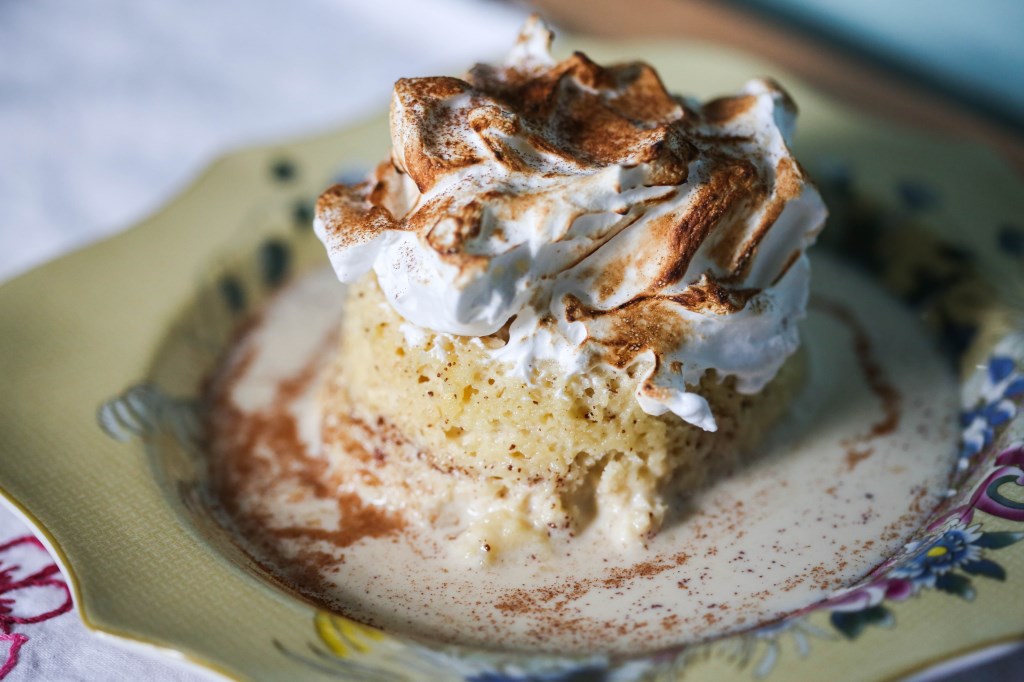
This cake is intense.  It should be paired with a strong cup of black coffee and nothing else.  The addition of the coffee in the milk mixture is pure genius.  It cuts the richness just right and adds depth where there might just be a generic sweetness.  It has this incredibly creamy texture with hints of cinnamon and coffee.  It’s the best tres leches cake I’ve ever had.  (And I grew up around here – I’ve had plenty.)  It made me think of the wonderful flavors of horchata, and I think next time I make this, I’ll replace horchata for the heavy cream.

manyleches006

Coffee Tres Leches Cake*
serves 6

For the cake:
1 cup all purpose flour
¾ cup sugar
1 ½ teaspoons baking powder
Salt
4 eggs at room temperature
¼ cup vegetable oil
¼ teaspoon vanilla extract, preferably Mexican
½ teaspoon cream of tartar

For the milk mixture:
1 cup heavy cream
1 12-ounce can evaporated milk
1 14-ounce can sweetened condensed milk
½ cup freshly brewed espresso or strongly brewed coffee
1 teaspoon vanilla extract, preferably Mexican
¼ teaspoon cinnamon
1 cup sugar
5 egg whites at room temperature
½ teaspoon cream of tartar
extra cinnamon for dusting (or cocoa powder – or espresso powder would be good, too!)

Heat the oven to 350 degrees. Line a muffin pan that makes 6 large muffins with muffin papers. Or, I don’t have a huge muffin pan, so I used little ramekins and lined the bottom of each with parchment.  Just do it and you won’t be sad, scraping your cake off the bottom of the dish.
Place the flour, 6 tablespoons of the sugar, the baking powder and a pinch of salt in a large bowl and whisk to combine. Separate the eggs, dropping the whites into the bowl of a mixer and the yolks into a medium bowl.  Add the oil, vanilla and 2 tablespoons of water to the yolks and mix well. Beat the egg whites with the cream of tartar until they start to thicken and form soft peaks.  Gradually add the remaining 6 tablespoons of sugar and continue to beat until stiff peaks form.
Add 1/3 of the flour mixture to the egg yolks and mix well. Gently fold in 1/3 of the beaten egg whites. Repeat, alternating the flour mixture and egg whites until everything is thoroughly combined.  Scoop the fluffy batter into the prepared muffin tins, place in the hot oven and bake until the tops spring back when touched, 20 to 22 minutes. Allow to cool slightly, then take the individual cakes out of the dishes and invert them into a deep 13×9 inch baking dish.

Combine the heavy cream, evaporated milk, condensed milk, coffee, vanilla, cinnamon and a pinch of salt in a bowl and mix well. Slowly pour the mixture over the cakes, soaking them thoroughly. Cover with plastic wrap and refrigerate for 1 hour to allow the milks to be absorbed into the cakes.  It actually took longer than that for mine to absorb.  We spooned the mixture over the cakes and poked extra holes in them so they’d soak up more milk.  In the end, I still had some leftover, so don’t worry about that.

Combine the sugar with 1/3 cup water in a small (2-quart) saucepan and bring to a boil over high heat, swirling the pan gently until all the sugar is dissolved.  Dip a brush in water and use it to clean the sides of the pan so no sugar crystals remain.  (This is an important step in keeping the syrup from recrystallizing.) Lower the heat to medium and boil the syrup until it reaches soft ball stage (about 240 degrees).
While the syrup is boiling, beat the egg whites with the cream of tartar and a pinch of salt until the whites form soft peaks.  Drizzle in the hot sugar syrup very slowly while the mixer is running.  Continue to beat until the bottom of the bowl is cool.  This takes forever, so do what Becky does and place ice packs on the outside of your bowl.  Or peas.
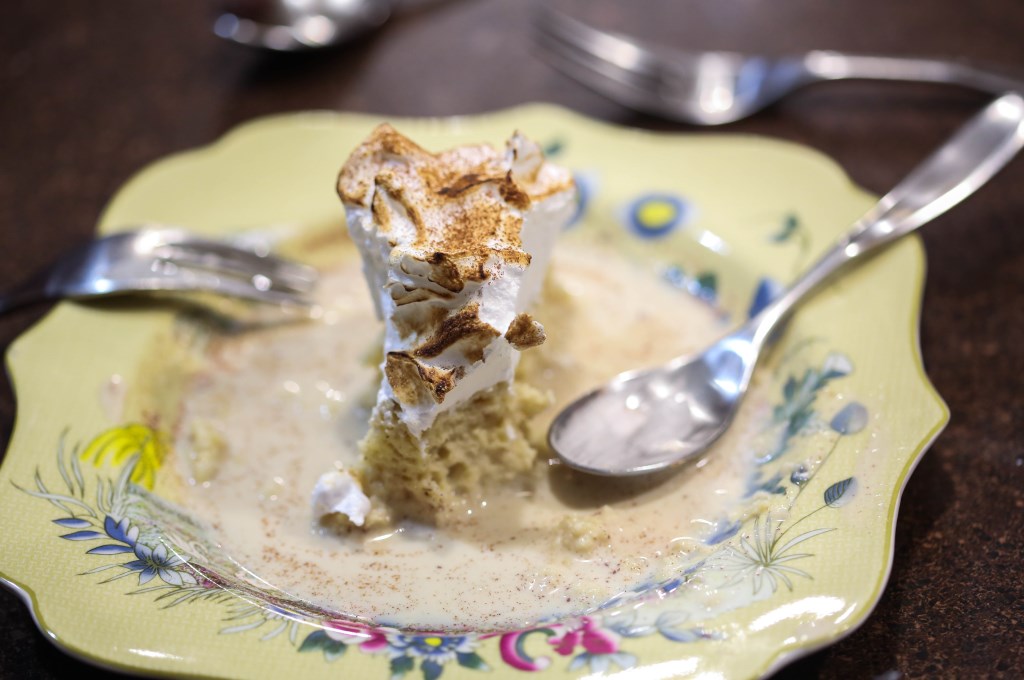
To serve, place each soaked cake on a plate, decorate with a big dollop of meringue, toasting the peaks with a kitchen torch.  Sprinkle with the cinnamon or cocoa and eat with great gusto!

*only slightly adapted from the original recipe

manyleches003 manyleches007 manyleches009


Thank you for that afternoon, Becky.  It will sustain me for months to come.  Until next time!  XOXO

Advertisement

Brown Butter Almond Brittle Ice Cream

almond brittle ice cream002

I promise you that this is the best ice cream you will ever make at home.  We stumbled on Jeni’s Splendid Ice Creams at Home a couple years ago and I believe the first recipes I made from this book were the Kona Stout  and the Roasted Strawberry and Buttermilk for Matt’s company picnic.  Both flavors got such rave reviews, that when I went to buy this book for my friend, Anna’s birthday, a week later, Barnes and Noble told us that they’d recently sold the rest of their copies – all to Matt’s co-workers, it turned out 🙂  I think the way Jeni makes ice cream is a revelation.  She combines a bit of cornstarch into the base and then adds just one and a half ounces of cream cheese per quart recipe, and the texture and consistency turns out amazing.  Perfectly creamy, freezes well, and her flavors are never too sweet – always a perfect balance.  The recipes in this book range from really unique (gouda and vodka plumped cranberries) to traditional (vanilla bean) to genius (sweet potato with torched marshmallows – gotta try this one, next).

Summer time is the perfect time to buy this book and try out a new recipe at each and every opportunity you get.  Our little ice cream maker will get a work out during these hot months to come!  But we have faith that it feels it is finally getting to do what it was created to do, thanks to Jeni’s Splendid ice creams and our not-so-splendid hundred degree days!

This week, I made three flavors out of this book:  Brown Butter Almond Brittle, Roasted Pistachio and Bourbon Butter Pecan.  All amazing.  The Almond Brittle was the most requested at our church get-together last night, and the most consumed (although I adore the pistachio), so I’ve written out the recipe for you here today.  It calls for almost a pound of butter.  ACTUALLY you only use a tablespoon of that pound of butter.  The solids that settle to the bottom of the pan after you brown butter is what gets mixed into the base and it creates a divinely nutty, roasted flavor in the ice cream base.  Yet another way brown butter makes the world a better place.

almond brittle ice cream004

Brown Butter Almond Brittle Ice Cream*
makes about 1 quart

for the base:
2 cups whole milk
1 tablespoon plus 1 teaspoon cornstarch
1.5 oz (3 tbs) softened cream cheese
1/8 tsp fine sea salt (I use kosher)
3/4 lb unsalted butter
1 1/4 cups heavy cream
2/3 cup sugar
2 tbs light corn syrup

1 cup crushed Almond Brittle (recipe below)

Mix about 2 tbs of the milk with the cornstarch in a small bowl to make a smooth slurry.  Whisk the cream cheese and salt in a large bowl until smooth.  Fill a large bowl with ice and water.

Melt the butter over medium heat in a 4 quart saucepan.  Bring to a boil and let bubble until the foam starts to subside and the butter is a rich dark brown (not black!).  Remove from the heat and let stand until the butter solids settle to the bottom of the pan, about 5 minutes.

Pour the clear butter oil into a storage container (once it solidifies you can use it as you normally would for cooking so it’s not a waste!) As you get closer to the butter solids in the bottom of the pan, use a teaspoon to remove as much liquid butter as you can.  You should have about 1 tablespoon of brown butter solids and a little bit of melted fat in the bottom of the pan (it’s impossible to remove all the fat).

Add the remaining milk, cream, sugar and corn syrup to the butter solids, bring to a rolling boil over medium-high heat and boil for 4 minutes.  Remove from the heat and gradually whisk in the cornstarch slurry (you’ll need to stir it up again as it will settle and solidify some).  Bring the mixture back to a boil over medium high heat and cook, stirring with a heatproof spatula or whisk, until slightly thickened, about 1 minute.  Remove from the heat.

Gradually whisk the hot milk mixture into the cream cheese mixture until smooth.  Pour the mixture into a 1 gallon Ziploc freezer bag and submerge the sealed bag in the ice bath.  Let stand, adding more ice as necessary, until cold, about 30 minutes.

Pour the ice cream base into the frozen canister of your ice cream maker and spin until thick and creamy.  Pack the ice cream into a storage container, folding in the chopped almond brittle as you go.  Press a sheet of parchment directly against the surface of the ice cream (this is important to avoid freezer burn and maintain a good consistency) and seal with an airtight lid.  Freeze until firm, at least 4 hours.

Almond Brittle*
makes about 2 cups

1 cup sugar
1/2 cup light corn syrup
1/4 cup water
3/4 teaspoon salt
1 stick of unsalted butter, cut into 1 inch pieces
2 cups slivered almonds
1/2 teaspoon baking soda

Generously oil a large baking sheet.

Combine the sugar, corn syrup, water, and salt in a 4 quart saucepan and bring to a boil over medium-high heat, stirring to dissolve the sugar. Insert a candy thermometer in the pan, add the butter, and bring back to a boil, then cook until the mixture reaches 300F.  Remove from the heat and immediately stir in the almonds and then the baking soda, working quickly but combining them thoroughly.

Pour the mixture out onto the oiled baking sheet, spreading it to a 1/4 inch thick layer.  Allow to cool completely before smashing to bits. 🙂

*recipes taken nearly word for word from Jeni’s book.

almond brittle ice cream005

Potatoes Gratin

food-12

This is such a beautifully simple dish.  It’s also quite rich and begs that you throw away your fear of dairy, potatoes and butter and embrace how amazing those ingredients, in combination, can truly be.  This is not the potatoes gratin you are used to where rather thick slices of potato are all stacked on top of each other in a huge dish, covered in cheese.  This recipe actually has no cheese.  I know I’d had the dehydrated versions of potatoes gratin out of the box, and possibly something similar at a buffet, but I’d never tried making it myself until we read the book, Must Have Been Something I Ate, by Jeffrey Steingarten. (This book will change you.)

The section of his book that this recipe comes from is entitled “There is a God in Heaven”, (I love a person as emphatic about food as I am)  with the quote beneath the section headline, “But as luck would have it, there is a God in Heaven.  Medical researchers now know that not all saturated fats are the same, and that cocoa butter does not raise our cholesterol.”  And in that section is an entire chapter dedicated to Gratin Dauphinois (the French created this dish, of course), or Potatoes Gratin.  Gratin, coming from the word “gratter”, meaning, “to scrape”  referring to the crispy bits of cream that get glued to the sides of the pan and scrape off and crunch so amazingly well.  Say no more.

We have eaten this dish as a meal, before, but it goes best as an accompaniment to a really great steak and a really fresh salad or other light side.  Also, don’t make the mistake of serving a rich dessert  after eating these potatoes.  I’m all for indulgence and you will never, ever find me saying that you should avoid entire food groups or ingredients altogether (bring on the corn, cheese, gluten, you name the poison) but I am also not dumb enough to serve a rich dessert after a dish this heavy.  You’d sink all the way to the bottom of the playa lake.  Everything in balance!

food-15

Potatoes Gratin*
serves 6-8 as a side

4 tbs butter, softened to room temp
1 cup whole milk
1 large garlic clove, peeled and lightly crushed
1/2 tsp freshly ground pepper
3/4 tsp salt
1/8 tsp freshly ground nutmeg
1.5 lbs baking potatoes
1.5 cups heavy cream

Preheat your oven to 425F. Place the milk, garlic clove, pepper, salt and nutmeg in a small saucepan, stir, bring to a boil and then remove from the heat.
Meanwhile, liberally butter the bottom and sides of a 9×13″ baking dish, using about half the butter.  Peel the potatoes, rinse them, and pat them dry.  Then, slice them 1/8th of an inch thick, discarding the smallest slices (This is easier with a mandoline) The cooking times really depend on this thickness, so don’t go too much thicker.  Under no circumstances should you wash the potatoes after they have been sliced — the surface starch is absolutely indispensable.

Evenly arrange the potatoes in the buttered dish in ONE LAYER of overlapping slices.  You will undoubtedly have some slices left over.  Don’t try to cram them in.  Bring the milk to a boil again and pour it over the potatoes, removing the garlic.  Cover the pan with a sheet of foil and bake in the middle of the oven for about 15 minutes, until most of the milk has been absorbed.  Meanwhile, bring the cream to a boil and remove from heat.  When the potatoes are ready, remove and discard the foil.  Bring the cream back to a boil and pour it over the potatoes, dotting the surface with the remaining butter.

Bake, uncovered, for another 20 to 25 minutes, until the potatoes have turned golden brown, spotted with darker, crisp areas.  You may need to rotate the dish halfway through cooking to ensure an even browning. We love thyme leaves in this dish and will sprinkle some on when the dish is nearly done baking.  Let the gratin settle for 10 minutes.  Then eat immediately – taste and texture suffer with each passing minute.  Cut into 6 to 8 rectangles and serve with a wide, metal slotted spatula.

*most of the text taken directly from Jeffrey Steingarten’s book.  Go get it!

food-14

Cappuccino Chocolate Cake

cappcake3

Some things get better with time: wine, cheese, beards…this cake.  I made it on Sunday afternoon and we had a piece and it was extremely good, but we wrapped it up and let it sit in the fridge for a few days and THEN it was something to behold.  The layers meld into one another after a couple days in the fridge.  The whipped cream softens the layers of chocolate cake and it transforms into a Swiss Cake Roll/Tirimisu kinda thing and it’s amazing.  Good news: it’s a really great cake if you eat it instantly.  Greater news: it only gets better from there.

The recipe comes from Fran Bigelow’s wonderful book, Pure Chocolate.  I learned how to make truffles from this book with much sweat, tears and good results.  Fran is the expert when it comes to chocolate and none of her recipes have steered me wrong.  Her truffles and chocolate tempering require huge amounts of patience.  They simply can’t be rushed.  And when I have about 2 days, I want to try her recipe for dark chocolate brandied apricot torte.  But I didn’t have that much time and saw that this cake took only a couple hours. It delivered rich chocolate and creamy coffee flavors and honestly, what is better than that combination?  This is the perfect party cake or good to have in your fridge (since it lasts all week) to whip out with a cup of coffee when a friend stops by.  Given that friends still stop by in your neck of the woods.  Oh, to live in Mayberry…

cappcake


Cappuccino Chocolate Cake
serves 10-12

6 ounces bittersweet chocolate (70% is preferable), finely chopped
6 large eggs, separated
1/2 cup plus 1 tbs sugar
3 tablespoons brewed cooled espresso
Cappuccino Whipped Cream (recipe below)
dark cocoa powder for dusting

With a rack positioned in the middle of the oven, preheat to 325F.

Lightly butter a 9×13″ or quarter sheet pan and line with parchment paper.  Lightly butter the parchment paper.

In a glass bowl set over a sauce pan of barely simmering water (I prefer this to a double boiler, as my DB always heats too quickly and scorches the chocolate = sad Alisa) and melt the chocolate.  Remove when nearly melted and continue stirring until smooth.  Set aside.

In a mixer fitted with the whisk attachment or using a hand mixer, combine the egg yolks and half the sugar and whip on medium high speed.  Once combined, scrape the sides of the bowl and increase the speed to high.  Continue whipping until the mixture becomes thick, pale yellow in color, and the sugar has dissolved, 5 to 6 minutes.

Clean the whisk and in another clean bowl, begin whipping the egg whites on medium high speed, increasing the speed until frothy.  Slowly add the remaining sugar and continue whipping until the peaks are stiff but not dry.

Pour the cooled coffee into the melted chocolate all at once and quickly stir together to prevent seizing.  If it does thicken and start to separate, don’t worry.  Constant stirring will make it smooth and creamy.

Lighten the chocolate mixture by folding in one-third of the yolks.  Then add the lightened chocolate mixture to the remaining yolks and gently fold.  The mixture will become light and airy with large air bubbles where some traces of yolk remain.  That’s okay and kind of pretty, anyway.

Lighten the yolk mixture by quickly folding in one-quarter of the whites, then gently fold in the remaining whites in 3 parts, trying not to over mix and lose the volume.

Pour the glossy dark chocolate batter into the prepared pan, smoothing the top.  The pan will be more than three-quarters full.  Bake for 20-25 minutes, until the top is slightly domed in the center and dry to the touch.  A tester inserted will come out dry and clean with a few crumbs.  Let cool in the pan at room temp.  The layer will pull away from the sides of the pan as it cools.

Have ready the Cappuccino Whipped Cream filling in the fridge.  Remove the cooled cake by running a thin bladed knife around the edges of the pan.  Place the bottom of the baking sheet lined with parchment over the cake and invert.  Peel the parchment paper off.

Using a ruler and the tip of a paring knife, mark the cake into 3 equal sections across the width.  Cut the cake with a serrated blade to make 3 layers about 4 inches wide each.

Place one chilled cake layer on a serving plate.  With a metal spatula, spread one third of the filling over the layer, generously overlapping the edges.  Repeat with second layer and a layer of filling. (The layers should be equal in height to each other.)  Top with the last chilled cake layer.  Be careful not to overwork the cream and frost the top and sides.  Refrigerate at least 4 to 6 hours to set the cake an meld the flavors.  Before serving, dust with cocoa powder.  Can be stored in the fridge for up to 2 days (or a week, if you’re us)

Variation: to make this child-friendly(er): just omit the espresso from the whipped cream.

Cappuccino Whipped Cream
makes 3 1/2 cups

1/4 cup plus 2 tbs sugar
3 tbs brewed espresso
2 cups heavy cream, chilled

In a stand mixer fit with the whisk attachment, whisk together the sugar and coffee until frothy.  The sugar will begin to dissolve.  Add the cream and whisk until thoroughly combined and soft peaks form.  Take care not to over whip the cream as it may begin to lose its creamy texture.  Store in the fridge till ready to use.

cappcake2

Baby Food – Creamed Spinach and Basil

spinach

Yesterday was one of those days when things just weren’t quite right.  I was getting over a stomach virus so I was getting nothing done and Olive refused to eat any part of a dish I cooked because it had peas (a dish she’s eaten before with much gusto), and thus, ate only orange foods and milk all day.  I really haven’t quite figured out days like that.  I try not to put too much thought into it and move on to the next meal, assuming she’ll eat more at dinner if she didn’t eat much at lunch and vice versa.  It’s hard to remember that babies aren’t little robots you can program as you like.  Some days I don’t feel like eating much for lunch, but I’m ravenous at dinner.  Some days I feel like bacon and eggs and toast and jam for breakfast and some days I’m just in the mood for coffee.  I only assume children are the same (maybe not the coffee part.)  I think it’s important in these seemingly picky-eating times to remain consistent.  Don’t start a bad habit just to get through a rough patch.  If through the picky days, we remain calm and smiling and say, “These two things are for lunch – take them or leave them” I think children will catch on a lot quicker that meal times are directed by mom and dad – and not by them.  A world where a baby dictates what we have for dinner – Lord, help us all…

Today was a little bit better.  Olive ate a two ounce portion of this spinach basil dish, and some leftover mango from yesterday – that was lunch!  Oh, and bits of our chicken, after we thought she had enough to eat 🙂

This is, by far, one of my favorite side dishes, and one of my favorite ways to cook/eat/enjoy spinach.  Matt and I found this recipe from watching an episode of Martha Stewart Living, where the great Jean-Georges Vongerichten cooked his amazing chicken and potatoes (where the potatoes are better than the chicken) and served this spinach on the side.  What a warm, comforting, indulgent family meal!  We have made both of these recipes multiple times over the past few years and each time, they feel new and exciting.  The spinach and basil would be absolutely perfect at Thanksgiving as a side dish.  There’s something about the basil that adds so much depth of flavor to the dish.  The cream helps with that, too…

Today, I didn’t have any fennel or serrano peppers, so I left them out of the original recipe, (which I highly recommend)  but I found it to still be wonderful and ideal for a baby in the 8 month and up range.  To make this for a baby just introduced to solids, simply blend with a couple tablespoons of water or chicken stock.

Creamed Spinach and Basil

serves 4 small portions.  Or 2 and a hungry baby

  • Coarse salt and freshly ground white pepper to taste
  • 3 cups tightly packed spinach leaves
  • 3 cups tightly packed basil leaves
  • 1 tablespoon olive oil
  • 4 tablespoons finely chopped shallots
  • 2 teaspoons finely chopped garlic
  • 3 tablespoons very finely chopped celery
  • 1 1/2 cups heavy cream
  1. Bring a large pot of salted water to a boil. Add spinach and basil and cook until wilted. Immediately transfer to an ice-water bath. Drain and squeeze dry; coarsely chop and set aside. (It looks like there’s hardly enough for one person – it spreads out and thickens up with the addition of the other ingredients, promise.)

  2. Heat oil in a medium skillet over medium-high heat. Add garlic and shallots and cook until golden. Add celery and continue cooking until soft and translucent.

  3. Add cream and let reduce until thickened, about 10 to 15 minutes. Add spinach and basil and stir to combine. Cook until warmed through. Season with salt and pepper; serve immediately.


Spinach and Basil 2


A little side note for any moms out there who might have a similar issue to me – Olive eats more…diligently…if she is holding something in her hand.  I am not a fan of letting her try to feed herself, yet, and letting her hold a toy is too distracting.  Most things are too distracting, but if we find that she can’t focus on the meal, I usually offer her one of her “salt and pepper” shakers.  She can hold them in her hands and it almost seems the instant she grabs one, she will happily take several more bites.  So, these are her salt and pepper shakers.  Filled with white and long grain black rice, respectively.  They make a nice shaking sound, the rice stays IN the container, and later, as she develops, she can even pretend to season her food.  Although we will certainly teach her to not season before she tastes, as a courtesy to the chef. 😉

spinach and basil 4


spinach and basil 3


7G9A0510

Bye-bye, Papa (said every day after lunch when he goes back to work – she’s going to be one tomorrow – how on earth did we get to this point?)


Snow Ice Cream

Snow Ice Cream

It snowed more today than it has in years, and nearly all of my Facebook feed filled up with my friends excitedly making snowmen, snow angels and snow ice cream!  I rhetorically asked Matt, “You’ve had snow ice cream, right?” And he said no!  I must have had it a dozen times growing up.  He even grew up in a place that got more snow than me!  Bent on fixing this incredible flaw, I strapped on my rain boots and went out gathering snow.  If you’ve never made snow ice cream before – stick to the tall drifts.  If there are no drifts, be careful scooping.  Dirt, stuff from trees, dog “things” can be lurking – stick to the tippy top of the snow.  I’ve also heard that you shouldn’t eat the first snow fall of the year.  If it never snows where you are and you have an opportunity – throw caution to the wind, my friends.

Snow Ice Cream – kinda fancy

8 cups of fresh snow
1 can sweetened condensed milk
2 tsp of vanilla bean paste (that’s vanilla bean flecks in my ice cream, not dirt!)
1 tsp almond extract

Clothe yourself in cute rain boots, gloves and if you have a metal bowl, bring that and a two cup measure.  Scoop up 8 cups of snow into your bowl, watching for sticks, poo, yellow snow, etc.  March in place at your door step to get all the snow off your boots.  Maybe even do a little dance.  Once warmly inside, drizzle a can of sweetened condensed milk all over the snow.  Mix well, smashing the clods of snow against the side of the bowl until it’s all worked throughout.  Mix in your vanilla paste and almond extract (use regular vanilla extract in equal amounts if you don’t have the paste.  The paste is fun – buy some.)
Serve immediately to lucky children and husbands alike.

Snow Ice Cream 2