Creamy White Bean Soup

White Bean and Celery Cream Soup


So these days, I’m either making soups, roasting something, caramelizing something, or melting chocolate.  Tis’ the season, right?  I found another gem in Homemade Winter of an incredibly filling, rich soup loaded with protein, fiber and veggies.  As a pureed soup, Olive had no problem drinking it from her little soup cup, and as I’ve said before, I think soups are THE easiest and most efficient way for toddlers to try a myriad of vegetables, flavors and colors.  And how easy they are to convert to “baby food”!  Back when I was making baby food, I would make a batch of vegetable soup, and after pureeing it, I could fill nearly a dozen jars.  Try buying a dozen jars of baby food in the store vs. a butternut squash and some chicken stock.  The price difference says it all!

Olive has been very into “sauce!” lately, no matter what it is.  She covets it, even though she doesn’t like any of it except “tomato sauce” (ketchup).  Any time we have Srirracha or Tapatio or mustard – whatever – she wants it.  So we give her tastes of anything she requests.  She usually raises her eyebrows and fusses a bit, especially if it’s spicy, but hey, that’s how she learns!  This soup has a smoky chili oil drizzled on top, and I thought it was a genius addition.   I didn’t have any celeriac, and it was one of those super cold days where I didn’t want to run out to the store for one ingredient, so I used the celery I had in my fridge, and I thought it worked great.

More, yes, MORE post from Homemade Winter to come.  It’s so perfect for this season, it’s unbelievable.  Enjoy this soup!

Creamy White Bean Soup* – START THIS SOUP A DAY AHEAD
makes a lot

1 1/2 cups dried white beans
1/4 cup olive oil
2 leeks, white and light green parts, washed well and finely chopped
4 stalks of celery, diced
2 cloves of garlic, minced
6 1/2 cups chicken or vegetable broth (I used chicken)
2 tsp  minced fresh rosemary, or 1 tsp dried
salt and ground black pepper
juice of 1/2 lemon
drizzle of chili oil – I bought mine at an Asian Mart, but I think you could find it in the Asian section of any grocery store

Soak the beans overnight in enough water to cover them by 2 inches.

Heat the oil in a large saucepan or stock pot and add the leeks and celery.  Saute, stirring constantly, until the leeks are soft.  Add the garlic, stir for a bit, and then add the broth.

Drain the beans and add them to the saucepan.  Add the rosemary and season with salt and pepper.  Slowly bring to a boil.  Reduce the heat and let the soup simmer over low heat with the lid partway on for 2 hours.

Puree the soup with an immersion blender or in several batches in a regular blender (why on earth haven’t you bought an immersion, yet?!)  Stir in the lemon juice and taste for salt and pepper.  Serve hot with a drizzle of chili oil or Srirracha would be great, too!

*Homemade Winter adaptation


Advertisement

Kale Paneer

7G9A1648

I received several requests for kale recipes when I asked a couple weeks ago for ideas for this blog.  I wanted to do something a little more challenging or interesting than the typical things you see for kale in the sea of Pinterest such as kale chips, kale salads, wilted kale, etc.  Basically, all the things you could use spinach for, if you were less ambitious.  I’m still not altogether familiar with kale’s flavor profile, but after turning a big bunch of it into creamy, soul-satisfying Indian food, I’m dedicated to finding ways to use this super food.

One of our favorite things to order at our local Indian restaurant is spinach paneer.  Creamy spinach with warm cubes of Indian cheese that doesn’t melt, but spreads wonderfully on a piece of garlic naan.  Truly a comfort food.  I saw this recipe for kale paneer and so I decided to try it for myself.  This girl calls for making a cream by boiling a cup of cashews soaked in hot water.  That sounded like a vegan move and I didn’t really want to buy a cup of cashews (hello, expensive) so I just subbed in  heavy cream, which I always seem to have on hand, and it turned out wonderful.  I also decided after tasting it that the cashews would have added a certain sweetness, so I added in two tablespoons of brown sugar and it was the right move – just enough sweetness to offset the bitterness of the kale and all the spices and it mellowed everything out really well.

For all of you who were wishing I’d do something a little more healthy with kale, like I said; there’s always next time.  But especially on this snowy day (wha?!) I think this recipe fits the bill.  If you lack the myriad of spices this recipe calls for, (I had them all! Proud moment) don’t waste your money at a regular grocery store.  Please go to Ghandi Bazar if you live in Lubbock, (or come to my house; seriously) and if you live elsewhere, I’m sure you can find an Indian market on some back street in your own town.  They know their spices and they’re cheaper than you’d EVER find at a chain grocery store.  Oh, and I didn’t go to Ghandi Bazar to find the paneer.  I was at United and looked up that Queso Blanco (or queso fresco) is very similar to paneer as it won’t melt and has very similar flavors.  It turned out great and got better with each day!

Kale Paneer*
1 medium yellow onion
2 – 3 Garlic Cloves
1 tbsp Minced Ginger
1 tbsp Sunflower or Canola oil
1 1/2 tsp Turmeric
1 1/2 tsp Ground Cumin
1 tsp Black Mustard Seeds
1 tsp Cumin Seeds
1/2 tsp Ground Coriander
1/2 tsp Garam Masala
1/4 – 1/2 tsp Ground Indian Chili Powder OR Cayenne (depending on how spicy you want it to be)
6 cups Chopped Curly Green Kale, packed
1 cup Plain Yogurt
1/4 cup heavy cream
2 tbs brown sugar
8 oz Paneer* OR Queso Blanco
Salt, to taste

Roughly chop the onion, garlic, and ginger. Heat a large pot over low-medium heat, add oil, then the onion, garlic, and ginger. Saute over low-medium heat until the onions begin to brown, at least 5 minutes. Once browned, add all of the spices and saute for another 1 or 2 minutes.
Add the chopped kale to the pot and saute until bright green.
Add the heavy cream to the kale mixture along with the yogurt and brown sugar, and stir in. Begin pureeing the curry with an immersion blender (or in batches in the regular blender) until smooth and no lumps remain, then transfer to a large bowl.
Once the entire curry has been pureed continue to cook over low heat, stirring occasionally.
Slice the cheese into small cubes and add to the simmering curry. Keep cooking, uncovered, stirring occasionally, until the curry thickens. If you prefer a thinner sauce, or you find the curry has gotten too thick, just add more water until it reaches your desired consistency. Season with salt, to taste, and more brown sugar, if necessary.

*recipe adapted from the adorable blog, Noms for the Poor (what a great name)

Asparagus Tart – Roasting is still the best way to eat vegetables

asparagus tart 3

I know I said I’d write about what got the most requests on my question last week, but I haven’t had time to do a good job with the requests I got, so that will come at a later post.  The top requests were for kale.  Honestly, I’m a bit stumped.  What, exactly, is the mystery?  Put it in stuff?  Ha!  That would be my suggestion.  Stir it into soups, toss it in salads and wilt it a bit with warm roasted chicken or hot bacon.  However, I don’t want to be flippant, so I will look up some good uses for kale, the sad-replacement-for-chips, and get back to you.  The other suggestion that intrigued me was for proper hash browns.  My friend, Maria, said that she had tried them several times and hadn’t gotten that good, diner-esque texture to them.  Honestly, I haven’t, either.  So I am interested to look up ways to cook hash browns well and that will most definitely be a post, as it will be a learning process for me, as well.

Today I wanted to simply give you an awesome recipe that we had last night for dinner, as our “starter” dish.  A beautiful use of asparagus (hey, Tracey, you asked for asparagus recipes, too!) and a lovely and exciting way to serve them that feels indulgent (bet you’ve never used that word in association with asparagus) and fun for children, and even doable for one-year-olds learning to eat bigger chunks of food.  Olive ate about 6 bits of this tart and then she was done. I consider that a success.

Having a box of frozen puff pastry in your freezer at all times is a good move.  This stuff can make you look like a fabulous cook in about 20 minutes.  You can top it with anything and bake and have great appetizers, desserts, or a crust for a savory tart, like this one.

Also, I wanted to mention my deep love and perhaps borderline obsession with using up leftovers.  My goal at the end of most weeks is for my fridge to be empty, save condiments and milk.  It’s good to think of ways to use up your leftovers and I know no better way than to use eggs to achieve almost-better-than-the original-meal leftovers.  This morning, I took leftover pieces of the asparagus tart and fried an egg and put it on top.  Lots of fresh ground pepper and a few drops of hot sauce.  So good.

breakfast2

Asparagus Tart

serves 4

1 sheet of puff pastry, thawed
1 bundle of fresh asparagus, ends snipped and cut in half, length-wise (I found that this helped them cook faster than the original recipe)
Olive oil to coat the asparagus – 2 tbs
Freshly ground pepper and kosher salt
2 oz shredded Manchego cheese – Parmesan or Swiss would also work

Preheat the oven to 400F.  On a greased, rimmed baking sheet, roll out your puff pastry to about 9×13″ rectangle.  Poke all over the bottom with a fork and bake for 15 minutes, until golden.  Toss your asparagus in olive oil. When the pastry comes out, it will have shrunk.  It’s okay, I swear.  Cover the tart in the shredded cheese and lay your asparagus spears side by side, touching, and alternating head to toe (this just makes more asparagus fit and it looks prettier.)

asparagus tart 1


Sprinkle the top of the tart with salt and pepper.  If you have leftover asparagus spears, just place them, cut side down, on the baking sheet around the tart.  They turned out to be gloriously crispy when they came out.  Bake for 25 minutes until the asparagus is nicely wilted and slightly browned.  Let cool slightly, cut with a sharp knife into squares and serve!

In the morning, heat leftovers in a 350F oven and fry an egg to place on top.  Enjoy with a cup of coffee and try not to think about the fact that it’s only Wednesday.

asparagus tart 2

breakfast

*original recipe from Martha Stewart Living

Green on Green Salad

green on green 2

It’s the first day of Spring!  I used to be a complete fall/winter gal, and as far as loving cardigans to a fault, I still am.  But the new mother side of my life has made me  crave warmer weather, the ability to leave the screen door open so we can hear the birds, and not worrying if my kid is constantly too cold.  This time last year, I had a two week old baby in the house.  We were scared and bewildered, yet happy to have her as a part of our pack.  It’s been such a learning process.  Is there a “right” way to do things?  Well, if there is, I was sure on the hunt this year.  I asked every person I knew who might have an ounce of understanding or empathy, what they thought the “right” way was to feed/sleep/play/instruct my baby.  I’m sure they, like me, are breathing a sigh of slight relief that along with her first birthday passing, so has a large amount of my questions.  I think part of me craves that close knit village type atmosphere of raising a baby.  Mothers, grandmothers, aunts, cousins; all within arms reach of advice.  While that isn’t our reality, I am very thankful for technology that has made virtual villages out of our spread-apart lives.

One of my favorite parts of this “virtual village” is the way in the short time this blog has been up and running, I’ve been able to answer questions of fellow moms across several states on the basics of cooking, what to cook for baby, where on earth do you get Chinese 5 Spice?! and so on.  I love cooking so much and I hope that along the way, I can make at least one other person excited to cook a meal for their family or try something new.  I love when someone tells me, “I salt my pasta water because of you” (which is funny because at least three people have told me this, and I learned it from Mario Batali. Salty like the ocean!) I feel useful, even though I might be stuck in this house (or feel stuck from time to time), I feel knit together with so many by a common ambition for the quest for good food and a simple sense of accomplishment.

This salad is once again, from THE best cookbook of my year, so far, The Bonne Femme cookbook.  I served this salad with the broccoli and cauliflower recipe from Monday and seared chicken breasts with a simple pan sauce  (butter, chicken stock, pan drippings, reduce, reduce, reduce) and sliced, toasted almonds.  Very filling meal, very heart healthy – no one felt deprived!  (baby side note: Olive didn’t try this.  She was still sickly when I made it.  Will try again with her soon)

Green on Green Salad

serves 4

1 garlic clove, minced
Salt and freshly ground black pepper (about 1/4 tsp each)
2 tablespoons fresh lime juice
4 tablespoons extra virgin olive oil
2 teaspoons honey
a few drops of Tabasco, Cholula, Tapatio, or whatever peppe sauce you like best
4 cups baby arugula or just a bag of mixed greens
1/2 cup, halved, thinly sliced cucumber
1/4 cup thinly sliced scallions
1 avocado, peeled and sliced

In a small bowl, use the back of a spoon (or I use a drink muddler) to mash the garlic clove with the salt and pepper.  Add the lime juice and whisk until the salt is dissolved.  Add the olive oil, whisking until incorporated.  Whisk in the honey and red pepper sauce.

In a large bowl, toss the greens with enough dressing to make the leaves coated, but not too heavy.  Arrange the arugula on a large platter.  Toss the cucumber and scallions with a bit of the dressing and arrange them on top of the greens.  Arrange the avocado slices across the top of the salad.  Drizzle just a little more dressing on top of the avocado and serve.

green on green 3


Confession Time and a Side Dish You Never Thought You’d Love

roasted broccoli

I said I’d be honest on this blog and today is just such a post.  Last week, a sweet friend of mine said, ” You are officially one of those moms that makes me question my ability to fully parent and live well/completely.” I wasn’t exactly sure what to do with that comment, but I think I know, now.  It’s time to be honest!  Last week wasn’t good.  Olive got sick on Tuesday with her first stomach bug in her little year on this earth.  It wrecked her appetite, needless to say, and she subsisted for the rest of the week on mostly bananas, bits of bread, small bites of chicken and forced bites of a few benign vegetables like carrots and…carrots.  My little super-eater turned into the “picky eater” kid and even today, isn’t back at full steam.  She plays fine, acts fine, but when it comes to eating – it’s a fight.

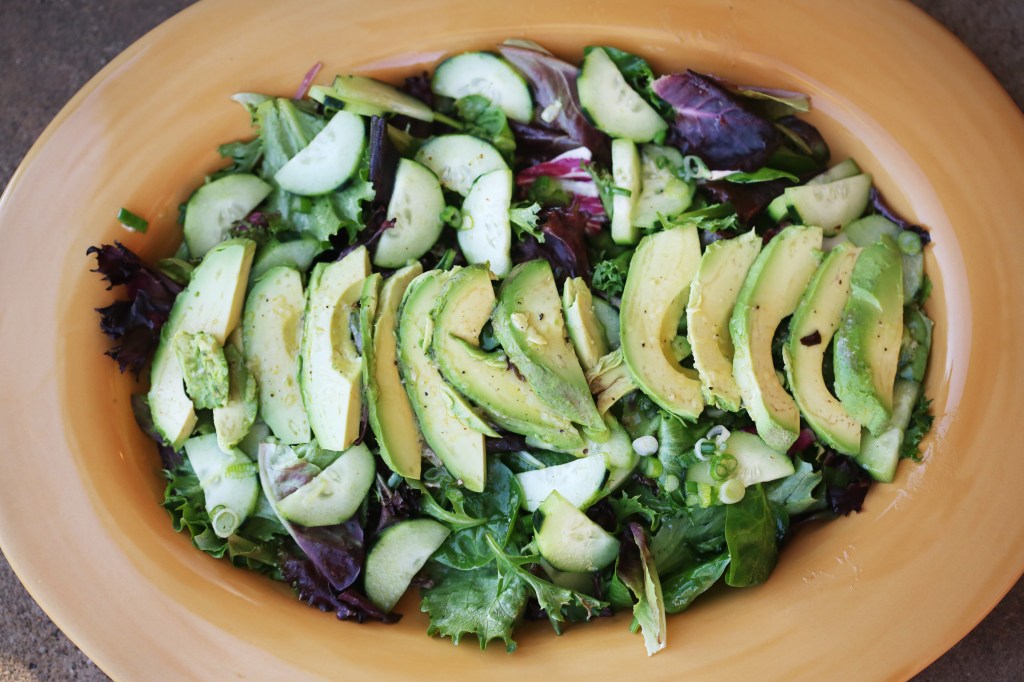
I tried my best to stay the course; don’t force her, don’t get stressed, if she doesn’t eat much at lunch, she’ll catch up at dinner – but I was fearful all week that this stomach bug would make her afraid of food, of eating, of trying new things and in one week, all would be lost.  You think I’m exaggerating for the sake of this blog.  I wish I was.  I guess, today, my confession is that I try too dadgum hard to make things go perfectly, and when they don’t, I feel like an utter failure.  Perhaps this isn’t the day to write because last night I slept maybe three hours (my inability to turn my brain off and relax) but I thought about my friend’s comment on my status, and I just wanted to tell her that we only show our best online.  We only write statuses we are either proud of or find ironically funny.  So no one heard all week how scared I was that Olive was sick, or how miserable I felt when she wouldn’t eat a bite all day for a couple days in a row.  And of course I didn’t write statuses about how I got angry with her and made her cry because she kept dropping food off the side of the high chair.  I don’t like writing about that part of life.  The hard part.  The part that makes you question if you’re doing everything wrong and will, inevitably, scar your child when it’s all said and done.  I thought, “How much would everyone love if Olive ended up hating a variety of food just because I want her to love food so much?”  And it’s sad, but I really do feel that most of the people I know would secretly laugh if that happened.  And I can’t say that I blame them.  I’m very passionate about cooking and food and banning “kid-food” and teaching children to eat well and have manners at the table.  I wouldn’t say that I have much camaraderie in that area, at least not locally.  Or maybe I just don’t feel it because I’m not admitting to the hard parts that happen, as well.  I’m only telling you that she ate baby bok choy with fish sauce vinaigrette last week and loved it.  Not that she cried big, fat tears today because I wouldn’t let her hold a fork while she ate (she’d just throw it or poke herself in the face).  Sigh.

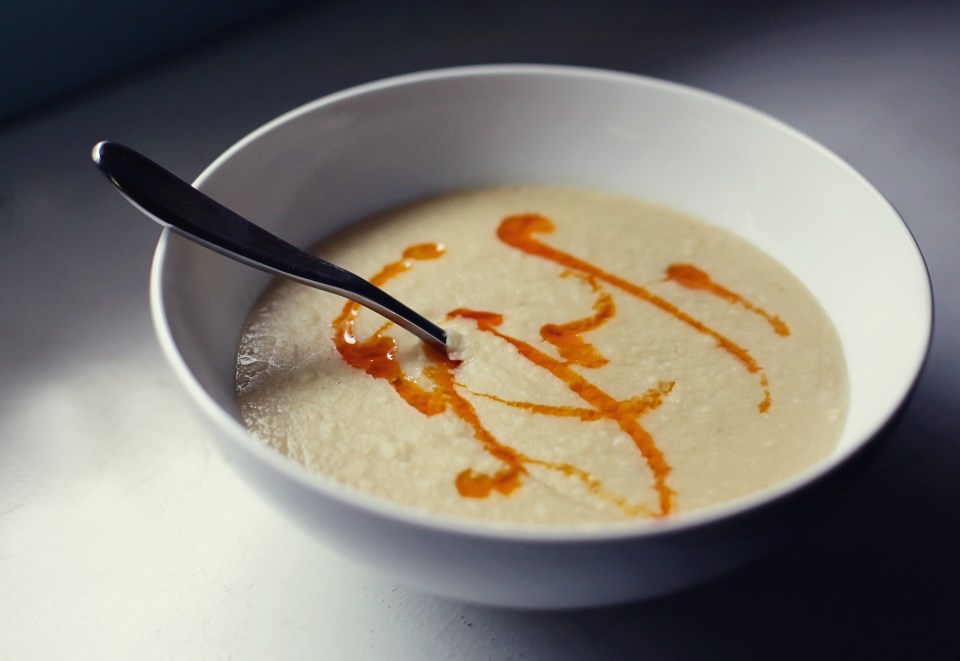
Our hard week came to a head this morning as Olive had her one year check up and got 5 shots in her little legs.  So, I made a soup for her for lunch.  Cream of celery, and I pureed the heck out of it so that there’d be no chunks.  I just didn’t feel like challenging her today. She ate fine.  Not as much as last week, but enough.  And I will continue to do what I know in my heart to be best.  Let her be a person with feelings and a new found opinion on things, and try not to force her to like something just because I do.  She’ll come around.  And if today, she only wants the texture of soups and yogurt, then that’s fine.  Maybe tomorrow she’ll eat something more challenging.  The point, I think, is to get back to the heart of what makes food and cooking beautiful: it’s something to be shared.  Eating, first, should be enjoyable.  Not nutritious, not organic – but delicious.  Good for the soul.  Shared with family and friends.  Happy.  Stress-free.  Not another lesson to pass or fail.  I vow to back off in my intensity for success at having a “good eater” a bit and get back to what makes food so amazing.  It’s good.

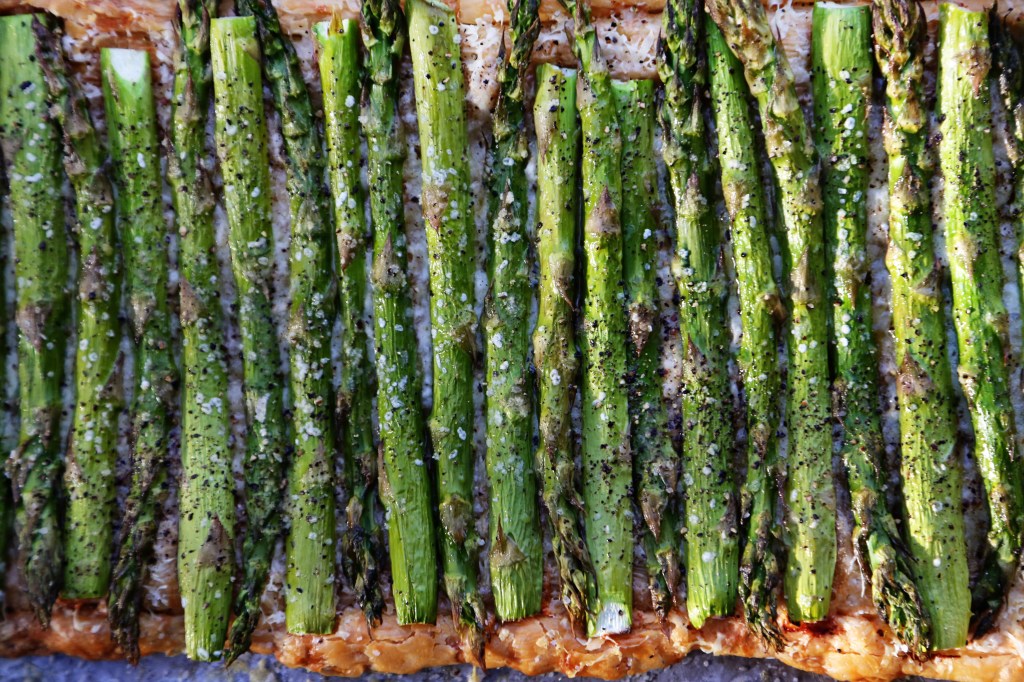
An incredible way to enjoy a couple of vegetables that might not be everyone’s favorite is first: roast them till they’re a little crispy.  And second: toss them in a vinaigrette!  In today’s recipe, that vinaigrette is one that contains fish sauce and it’s incredible.  I know you wouldn’t typically put “fish sauce” and “incredible” in the same sentence, but you’ll start to once you try this.  Also, it’s from David Chang’s genius book, Momofuku, and I’m pretty sure he’s never made anything bad in his life.  It’s so simple and the vinaigrette recipe makes a lot, so you can save it in your fridge to toss with pretty much any roasted vegetable.  The original recipe called to toss it with roasted brussels sprouts, which is a vegetable most think they don’t like.  But I’m pretty convinced you’re always just one recipe away from liking something you thought you never would.  So!  Try this today and let me know what you think.  Fish sauce can be found in most Asian sections of supermarkets near all the soy sauce, but if you have trouble, you can definitely find it at any Asian mart in town.

roasted broccoli and brussels sprouts


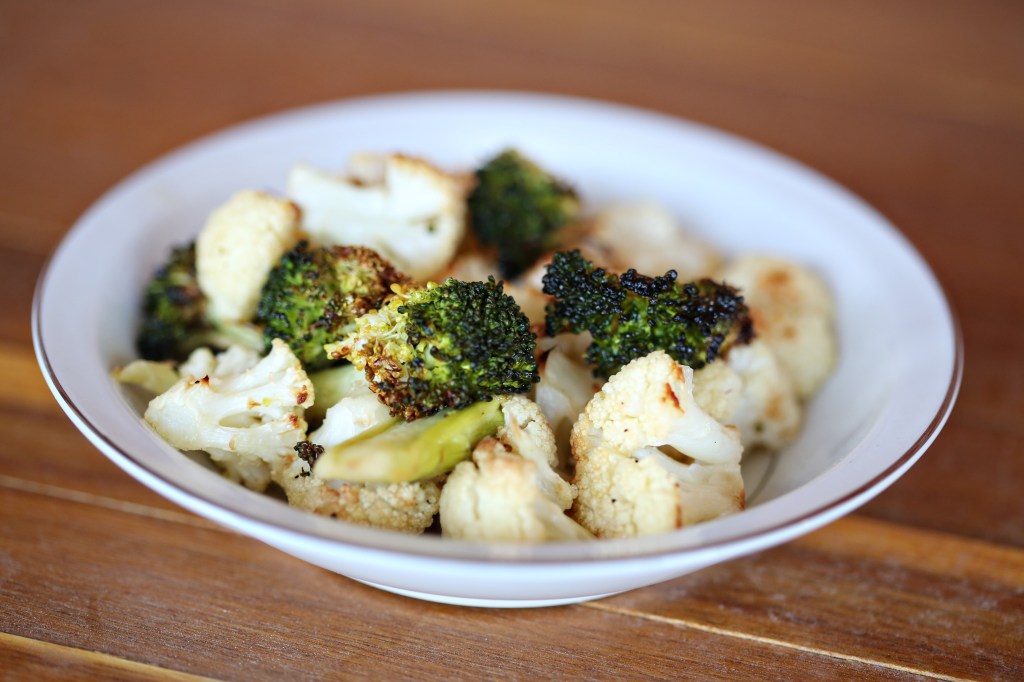
Roasted Broccoli and Cauliflower with Fish Sauce Vinagrette

1 medium head broccoli
1/2 head cauliflower
Olive oil
Salt and pepper to taste
4 tbs Fish Sauce Vinaigrette (recipe follows)

Preheat oven to 400F.  Cut up the broccoli and cauliflower into small, bite sized pieces.  I trim the “trees” in half so that they roast better.  You want to aim to make the size of your vegetables all nearly the same so they cook at the same rate.  Toss in a couple tablespoons of olive oil and spread out on a large rimmed baking sheet.  Don’t crowd the pan.  Put it on two pans if you need to.  Sprinkle with salt and pepper and roast for about 20 minutes, or until they start to get kinda crispy and browned on the edges like in the photo above.  When they’re done, toss in a large bowl with the vinaigrette and serve immediately.  For some reason, broccoli gets cold faster than any other vegetable known to man.

Fish Sauce Vinaigrette

1/2 cup fish sauce
1/4 cup water
2 tbs rice wine vinegar
Juice of 1 lime
1/4 cup sugar
1 garlic clove, minced
1 to 3 red bird’s-eye chilies, thinly sliced

Combine everything in a large mason jar with a tight fitting lid.  Or any container with a tight fitting lid that won’t leak.  Shake it all around until the sugar dissolves.  Keep in the fridge for up to a week.

Time for Spring

We have less than ideal weather conditions in this region.  Lubbock has some of the worst dirt storms imaginable, the worst wind and the hottest summers.  We’ve been suffering through a drought the past 3 years and two years ago it was the worst we’d seen in nearly a century.  No rain that year from January till April of the next year (and even when the rain did come, it was one or two light showers).  Trees died and were uprooted, everyone’s yards were yellow like straw.  Farmers had to look for employment elsewhere, wildfires burned up homes, livestock, and thousands of acres of land.  Everywhere there were severe water restrictions and the people who cheated could be seen a mile away with their green, foot-thick sod yards that they clearly watered around the clock.  Needless to say, things haven’t been growing very well for aspiring back-yard farmers lately.  But with a few inches of rain last year and a few inches of snow this winter, we are more hopeful for the spring.  There’s still watering restrictions – we can only water on Tuesdays and Fridays, using either drip irrigation or standing there, holding a hose, but we are optimistic that maybe this year, something can grow.

Seeing growth is healing.  When you sow a seed and water it and leave, trusting that it will grow, you have faith in the purest form.  And when that faith is rewarded by a tiny, green shoot popping out of the dirt (and it’s not a weed) it gives such a rush that you want to do it again and again.  I’ve never been a successful gardener (rain helps) but this year, I’m going to try my best.  Choosing vegetables that say “full sun” is a start, and I’m focusing on herbs, which are used most frequently and are the most pricey per-ounce at the store.  And since nearly every single recipe in my most recent cookbook obsession calls for parsley, chives, tarragon, or chervil, and chervil is no where to be found in this town, I’m going to just grow my own.  (Lord willing.)

After working in the yard today and feeling the warmth creeping in the air, I decided to keep dinner light tonight.  I chose a green lentil, leek and endive salad and roasted some free sausages Matt got as a thanks from the butcher for buying a good cut of beef on Saturday.  Odd, but hey, we’ll take it.  And you’re welcome, Mr. Butcher.  Thank YOU for carrying dry-aged USDA prime.  Oh, and Olive wasn’t a fan of the texture of this salad.  She immediately scraped her tongue with her fingers to get every last lentil off.  Ah well, at least she tried it! green lentil salad 2 green lentil salad1

Green Lentil, Leek and Endive Salad

serves 4 to 6

1 cup green lentils
3 cups water
3 tbs extra-virgin olive oil
1 leek (white and pale green parts only), halved lengthwise, rinsed, and thinly sliced
1 garlic clove, minced
1 large head Belgian endive (or two small), root trimmed off and leaves sliced
1 tbs snipped fresh chives
2 tbs heavy cream
1 tbs white wine vinegar
Salt and pepper to taste

Rinse, drain and pick through the lentils to discard any debris.
Place the lentils in a large saucepan with the water and bring to a boil.  Reduce the heat and simmer, partially covered, until the lentils are tender but still firm, about 15 minutes.  Drain, rinse with cool water, and drain again.  Transfer the lentils to a serving bowl.
Heat 1 tbs of the olive oil in a small saucepan over medium heat.  Add the leeks and cook, stirring, until they are slightly wilted but still have some crunch, about 2 minutes.  Add the garlic and cook, stirring, about 30 seconds more.  Add the leeks and garlic to the bowl with the lentils, along with the sliced endive and chives.
In a small bowl, whisk together the remaining 2 tablespoons olive oil, the heavy cream, vinegar, and salt and pepper.  Add this dressing to the lentils.  Toss to combine.


Serve the salad immediately at room temp.  Sear off some sausages for a full meal.

Baby Food – Creamed Spinach and Basil

spinach

Yesterday was one of those days when things just weren’t quite right.  I was getting over a stomach virus so I was getting nothing done and Olive refused to eat any part of a dish I cooked because it had peas (a dish she’s eaten before with much gusto), and thus, ate only orange foods and milk all day.  I really haven’t quite figured out days like that.  I try not to put too much thought into it and move on to the next meal, assuming she’ll eat more at dinner if she didn’t eat much at lunch and vice versa.  It’s hard to remember that babies aren’t little robots you can program as you like.  Some days I don’t feel like eating much for lunch, but I’m ravenous at dinner.  Some days I feel like bacon and eggs and toast and jam for breakfast and some days I’m just in the mood for coffee.  I only assume children are the same (maybe not the coffee part.)  I think it’s important in these seemingly picky-eating times to remain consistent.  Don’t start a bad habit just to get through a rough patch.  If through the picky days, we remain calm and smiling and say, “These two things are for lunch – take them or leave them” I think children will catch on a lot quicker that meal times are directed by mom and dad – and not by them.  A world where a baby dictates what we have for dinner – Lord, help us all…

Today was a little bit better.  Olive ate a two ounce portion of this spinach basil dish, and some leftover mango from yesterday – that was lunch!  Oh, and bits of our chicken, after we thought she had enough to eat 🙂

This is, by far, one of my favorite side dishes, and one of my favorite ways to cook/eat/enjoy spinach.  Matt and I found this recipe from watching an episode of Martha Stewart Living, where the great Jean-Georges Vongerichten cooked his amazing chicken and potatoes (where the potatoes are better than the chicken) and served this spinach on the side.  What a warm, comforting, indulgent family meal!  We have made both of these recipes multiple times over the past few years and each time, they feel new and exciting.  The spinach and basil would be absolutely perfect at Thanksgiving as a side dish.  There’s something about the basil that adds so much depth of flavor to the dish.  The cream helps with that, too…

Today, I didn’t have any fennel or serrano peppers, so I left them out of the original recipe, (which I highly recommend)  but I found it to still be wonderful and ideal for a baby in the 8 month and up range.  To make this for a baby just introduced to solids, simply blend with a couple tablespoons of water or chicken stock.

Creamed Spinach and Basil

serves 4 small portions.  Or 2 and a hungry baby

  • Coarse salt and freshly ground white pepper to taste
  • 3 cups tightly packed spinach leaves
  • 3 cups tightly packed basil leaves
  • 1 tablespoon olive oil
  • 4 tablespoons finely chopped shallots
  • 2 teaspoons finely chopped garlic
  • 3 tablespoons very finely chopped celery
  • 1 1/2 cups heavy cream
  1. Bring a large pot of salted water to a boil. Add spinach and basil and cook until wilted. Immediately transfer to an ice-water bath. Drain and squeeze dry; coarsely chop and set aside. (It looks like there’s hardly enough for one person – it spreads out and thickens up with the addition of the other ingredients, promise.)

  2. Heat oil in a medium skillet over medium-high heat. Add garlic and shallots and cook until golden. Add celery and continue cooking until soft and translucent.

  3. Add cream and let reduce until thickened, about 10 to 15 minutes. Add spinach and basil and stir to combine. Cook until warmed through. Season with salt and pepper; serve immediately.


Spinach and Basil 2


A little side note for any moms out there who might have a similar issue to me – Olive eats more…diligently…if she is holding something in her hand.  I am not a fan of letting her try to feed herself, yet, and letting her hold a toy is too distracting.  Most things are too distracting, but if we find that she can’t focus on the meal, I usually offer her one of her “salt and pepper” shakers.  She can hold them in her hands and it almost seems the instant she grabs one, she will happily take several more bites.  So, these are her salt and pepper shakers.  Filled with white and long grain black rice, respectively.  They make a nice shaking sound, the rice stays IN the container, and later, as she develops, she can even pretend to season her food.  Although we will certainly teach her to not season before she tastes, as a courtesy to the chef. 😉

spinach and basil 4


spinach and basil 3


7G9A0510

Bye-bye, Papa (said every day after lunch when he goes back to work – she’s going to be one tomorrow – how on earth did we get to this point?)