This is a good meal for many reasons. The pork chops were actually a good thickness, and lean, and were buy one pack, get another pack for free (4 really thick chops in each package. I get ridiculously excited for discounts in the meat department.) I bought a 5 pound bag of carrots two weeks ago, and so I am currently looking for different ways to prepare them, and found a stunningly simple and flavorful way on one of my favorite blogs, French Foodie Baby. Say what you will about my French obsession, but those people KNOW their food, and from a very loving depth that centers around family and love of pure ingredients. Helene, from FFB, is one of the best writers in the myriad of food blogs out there. I literally exhale with relaxation when I read her posts. She challenges me and inspires me and makes me want to be better at being thoughtful about what I put on the plate for my family.
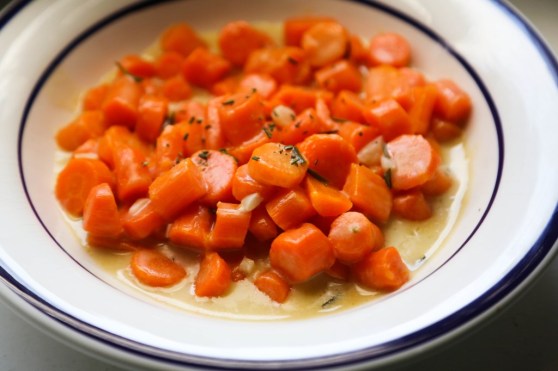
The braised carrots in coconut milk was from her blog and I just took the concept and did it in a much bigger batch on my stove so that I’d have leftover finger foods for Olive for the week. And so I could use up the never ending bag of carrots. I swear that thing is multiplying.
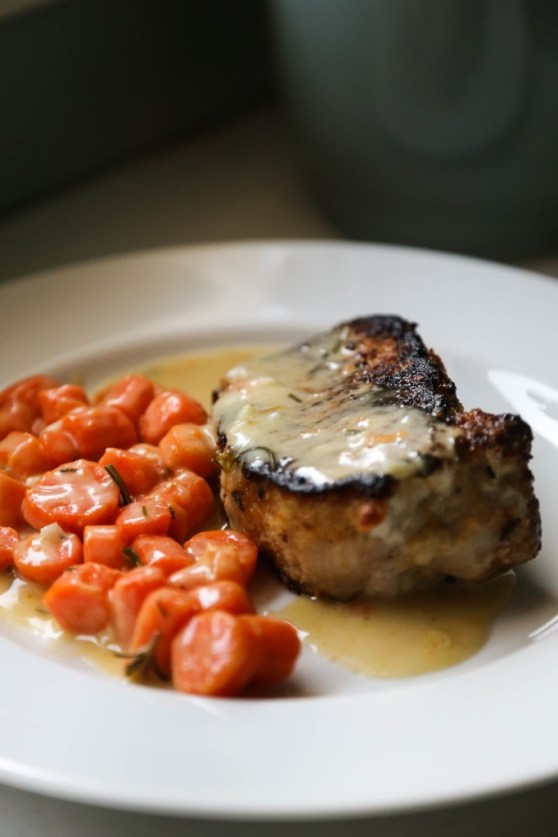
I don’t know much, but I do know that pork and rosemary are best friends. So when I saw that Helene put rosemary in with her coconut milk to braise the carrots, I thought: instant pan sauce! And it turned out wonderful! The extra sauce from the carrots made an amazing garnish for a thick, crispy, rosemary-infused pork chop! I was happy with this meal and wanted to share its simplicity and comfort-food qualities with you today!

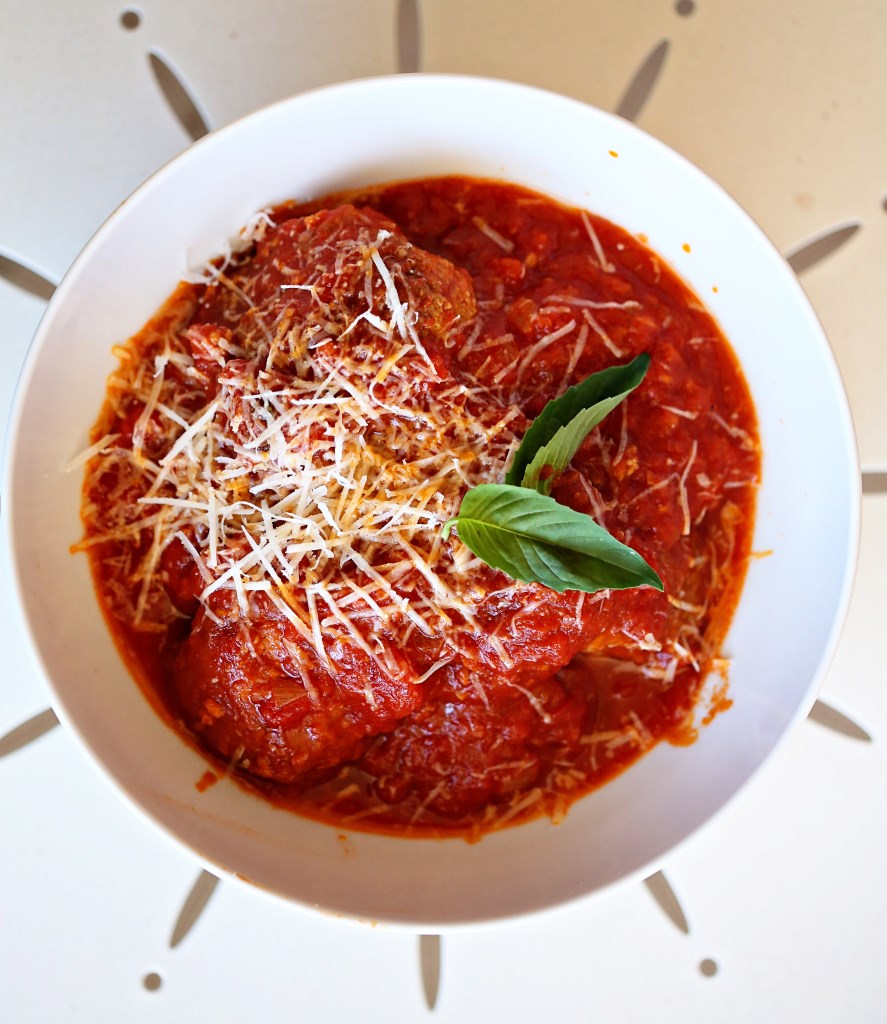
Rosemary Crusted Pork Chop with Coconut Milk Braised Carrots
serves 4-6
4 boneless pork chops, thick cut, if you can find them (the ones I found were about an inch thick)
1/4 cup flour
Salt and pepper – about a half teaspoon of each
2 tbs chopped fresh rosemary – I would think dried would be fine, but it wouldn’t be as aromatic
4 tbs butter or olive oil for pan frying the chops
For the carrots:
1 lb carrots, peeled and chopped into half inch rounds
1 can of coconut milk
2 cloves of garlic, crushed but left mostly in tact
two sprigs of fresh rosemary
salt and pepper to taste
Get the carrots on the stove to braise first, as they take the longest. In a deep skillet, heat the coconut milk over medium heat along with the cloves of crushed garlic and the rosemary sprigs. Add in the carrots and let it simmer on the stove until the carrots are tender, about 20 minutes. I put a lid on halfway through as to not lose too much moisture. When the carrots are done, remove the pan from the heat and set aside.
For the chops: pat them dry with paper towels and season both sides with salt and pepper. Put the flour and rosemary and a few dashes more of salt and pepper in a bowl and toss well to combine. Coat each side of the chops in the flour mixture and set aside. Heat the butter or olive oil in a non-stick skillet over medium heat until shimmering (or bubbling if using butter) and add in the chops, cooking about 5-6 minutes per side. If they are browning too quickly, reduce the heat after you get a good sear/crust on each side of the chop. If your chops are really thick, you may need to transfer them to a preheated oven to finish cooking. I had to do this for one of the chops because it was way bigger than the rest and wouldn’t cook through without burning the crust. At any rate, you need a meat thermometer for this because we no longer have to cook our pork to death to be safe. Some farmer told me that no one’s gotten sick from pork in years, but everyone is still cooking it like they could. A pink center is fine – I made sure mine got up to 150-160 and called it good, regardless of how the centers looked.
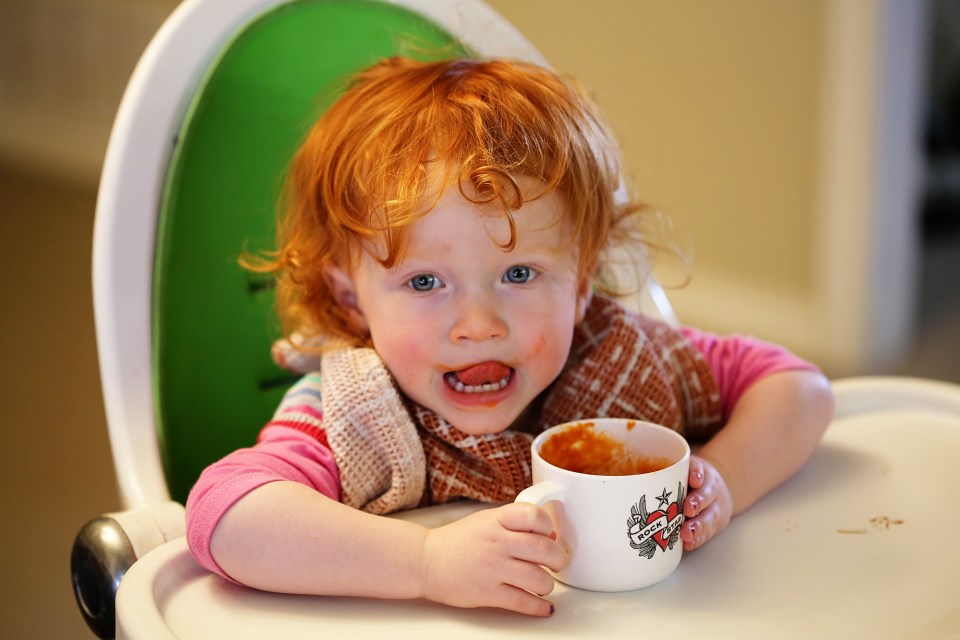
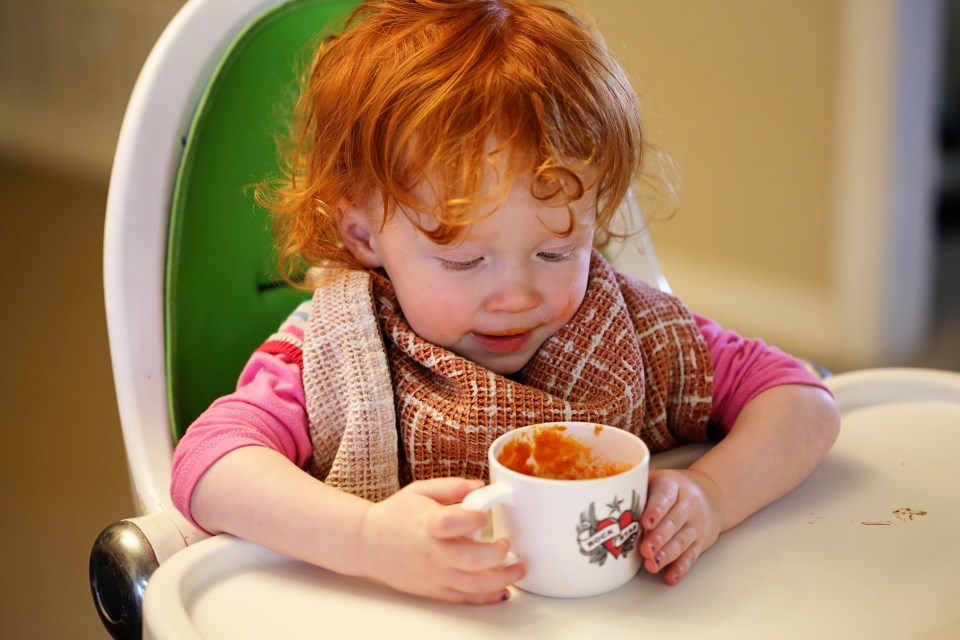
Place the chops on plates and for the sauce garnish, move the carrots to a bowl, reserving about a 1/2 cup of the coconut milk in the pan. Taste for salt and season as necessary. Remove the rosemary sprigs and the cloves of garlic and spoon the sauce over each chop and serve alongside the carrots. If you don’t cook the chops too much, they will be soft enough for a baby to chew, given she has at least 3 molars, which mine does. She loved the carrots (she’s 15 months old) and ate a few pieces of pork and called it good. And lately, that has to be good enough for me! For smaller babies, the carrots would be IDEAL pureed or just left in tact for finger foods. They are so soft, sweet and a little salty – perfect! I would have blended up the pork with some coconut milk back in the 6-9 month days for Olive.
Enjoy!