Mexican Chocolate and Horchata Risotto

Horchata Risotto
I really can’t think of a better day to make this dish than today.  It’s cold, cloudy and all I want to do is eat complex carbs, sprinkle cinnamon on them and then take a nap.  The other day, I found a recipe in my cute little French non-diet diet book for a simple chocolate rice pudding.  I started improvising and adding cinnamon.  Then more cinnamon.  Then some cream, then more vanilla.  It started tasting exactly like horchata, my favorite Mexican beverage, and I was happy.  I even thought, “Why ruin this horchata by adding the chocolate the recipe calls for?”  So I ladled out half of the rice pudding and added the chocolate to the other half.  Woah.  Insanely good.  The intense cinnamon and vanilla, mixed with the dark chocolate was a revelation.  Such a depth of flavor you wouldn’t really expect from something as seemingly bland as a rice pudding.  It was amazing.  And with just a little extra cream to loosen up the consistency, it was exactly the way risotto should be, only sweet!  Dessert risotto – you heard it here first, folks.  I think it should be a “thing” if it isn’t already.  It’s going to be a “thing” in this house, at least!

Mexican Chocolate Risotto

Horchata/Mexican Chocolate Risotto
serves 4 as a dessert

2 cups milk
1/4 cup sugar
Pinch of salt
1 cup Arborio rice (this is risotto rice that plumps up and absorbs a lot of moisture.  I’d really recommend not using any other kind)
1 tsp vanilla bean paste
1 tbs cinnamon
– then, for Mexican Chocolate, stir in 3 ounces dark chocolate chips (the darker the better – I used 70%)

Pour the milk, sugar and salt into a saucepan and bring to a boil over medium heat.  Add the rice and cook for 20 minutes, stirring occasionally, until the milk is absorbed.  You may need to add  a few more splashes of milk or cream to keep the rice creamy.  It may take more time and more milk in order for the rice to not be crunchy anymore.

Stir in the vanilla and cinnamon and taste.  Revel.  Feel happy.  Then, when you’re ready, add in the chocolate to the entire batch or just half, like I did.  Stir until fully melted and incorporated.  Sprinkle with extra cinnamon and a sprinkle of cayenne if you dare.  Serve with a warm cup of hot chocolate and be sure you’re wearing fuzzy slippers.

Enjoy.

Advertisement

Pavlovas with Black Cherry Syrup

Cherry Pavlova with Greek Yogurt


While we were on our trip last week, Matt and I stole away, left the kid with our friends, and had a little adventure in Seattle.  After a ferry ride and a crazy time trying to catch the bus in the midst of 300,000 people watching a parade downtown, we finally made it to Delancy – a pizza place that’s out of this world.  We seek out pizza in nearly every town we visit.  Okay, okay, we seek out FOOD in every town we visit, but more often than not, that will include a pizza joint.  Matt has been perfecting his pizza crust for the past few years and I can safely say after hundreds of pizzas made at home and hundreds we have tried out and about, Delancy is the best out and about and Matt’s is just as good – only it’s in our own kitchen.  Score one for Palmsey.  

This is beginning to sound like a pizza post, but it’s not.  I already did that a few months ago and the recipe hasn’t changed!  This is a post about how awesome Delancy was, and how you should go there, and when you do go there, go next door to get a drink because you’ll have an hour wait.  Next door is an extension of Delancy’s kitchen called Essex and they have wonderful appetizers and desserts.  One of which we ordered at the end of our perfect pizza experience – a pavlova with Greek yogurt and raspberries.  I’d had pavlova (baked meringue) with other fruits and it’s traditionally served with creme anglais or ice cream, but the Greek yogurt was such a wonderful way to cut the almost-too-sweet combination of a sugary meringue and raspberry syrup.  This desert was gone in about 5 seconds and went immediately on my list of recipes to recreate once I got home.

So here we are.  I got home on Tuesday and went shopping.  Raspberries were $3 for a half pint.  No thank you.  Cherries were $1.50 for a whole pound.  Sold.  I cooked the cherries down in a little brown sugar and let the juices bubble away and form a syrup and whipped up a little full-fat, plain Greek yogurt to place in the meringues once they were baked.  When Matt got home, I had two portions set out and while Olive napped, we ate.  Before dinner.  The joys of being an adult.  Matt even exclaimed, “This is EXACTLY RIGHT” which, if you know Matt, really means something.  I was proud of the recreation and I’ll definitely make it, again.  Maybe next time with apricot preserves…the options are really endless!

Pavlova with Black Cherry Syrup and Greek Yogurt


Pavlovas with Cherries and Yogurt*
makes 8-10 pavlovas, depending on size

1 1/2 teaspoons pure vanilla extract
1/2 teaspoon cream of tartar
1 1/2 Tbsp cornstarch
1 1/2 cups granulated sugar
5-6 (about 6 oz) large egg whites, room temperature
Pinch salt

Place rack in the middle of the oven and preheat the oven to 275°. Line a large baking sheet with parchment paper.  Stir the cornstarch into the sugar in a small bowl.

In a large bowl of a heavy-duty mixer, fitted with whisk attachment, whip egg whites, cream of tartar and salt, starting on low, increasing to medium speed until soft peaks start to become visible, approximately 2 to 3 minutes.

Increase speed to medium-high, slowly and gradually sprinkling in the sugar-cornstarch mixture. A few minutes after these dry ingredients are added, slowly pour in the vanilla.  Increase speed a bit and whip until meringue is glossy, and stiff peaks form when the whisk is lifted, 4 to 5 minutes.

Pipe or spoon the meringue into 8-10 large round mounds that are 3 inches wide on the parchment-lined baking sheet.  With the back of a spoon, create an indentation in the middle of the mound for holding the filling once meringue is baked.

Place baking sheet in the oven. Reduce oven temperature to 250°F. Bake for 50-60 minutes, or until the meringues are crisp, dry to the touch on the outside, and white — not tan-colored or cracked. The interiors should have a marshmallow-like consistency. Check on meringues at least once during the baking time. If they appear to be taking on color or cracking, reduce temperature 25 degrees, and turn pan around.

Gently lift from the baking sheet and cool on a wire rack. Will keep in a tightly sealed container at room temperature for a week.

*recipe adapted from Simply Recipes

Black Cherry Pavlova

Cherry Compote
makes about a cup

2 cups pitted cherries
1/4 cup brown sugar
Squeeze of lemon

Put the cherries and the brown sugar in a saucepan over medium heat and let it come to a simmer.  Let it cook for about 20 minutes, mashing the cherries a bit as you go.  When the syrup starts to thicken a bit, take it off the heat and squeeze a lemon over it all and stir it up until incorporated.  Let the sauce come to room temp before topping the pavlovas.  

To Assemble:

Take one meringue shell and place it on a plate.  Scoop out a generous 1/4 cup of full-fat Greek yogurt and place on top of the meringue.  Top the yogurt generously with the chunky cherry syrup and serve!  Modify as you wish with whipped cream, creme anglais, frozen yogurt – whatever you like!  And if you can’t make a fruity compote, I suppose warming up some preserves wouldn’t be too shabby 🙂


Figs with Cream and Honey

figs and honey
Fresh figs are exceptionally hard to find around here.  I’m not exactly sure, why, because our climate is perfect for the fig plant.  Maybe I’m just going to the store at the wrong time of day.  Maybe some old lady waits till she sees the truck and loads up the back of her Cadillac so she can make jam.  Whatever the reason, I’ve never had much luck finding them.  Most that we can find are dried and the fresh ones are crazy expensive.  So when I happened to pass these by, I got really excited.  I got some from a friend a few years ago and made some killer port wine figpote, but I’d never just given the fig a chance to be eaten plain without dumping a bunch of sugar on it.  (I know – I dumped honey on it.  But not a lot, really.  And it seems okay when it’s not white sugar by the cupfuls in a huge jam pot.)

These figs are currently at Market Street and they are beautifully ripe.  A fig is nearly an instant dessert without doing any fancy prep to it.  It has such a luscious texture and the flavor is mellow and pairs well with so many things.  So, with just a little work, you can escalate a simple fig into a high-end dessert you might get charged $12 for at a restaurant that claims to be “up-scale.”  Not to mention, it’s wonderfully easy for a baby or toddler to eat, and it goes so well with wine, you might just feel like it’s the weekend in the middle of the week.  Desserts can do that.  And because this is a very sensible dessert, I’m giving you permission to eat it on a Tuesday, instead of waiting for the weekend.

figs with creme fraiche

Figs with Cream and Honey
serves two

4-6 fresh figs, depending on size
1/4 cup creme fraiche
1 tbs honey, plus more for drizzling
2 tbs roasted, salted pistachios

So, basically, the ingredients are the instructions.  Wash the figs, slice them down the middle and remove the stems.  Arrange them on a plate and whip up the creme fraiche with the honey until smooth and place in the center of the figs.  Top the creme fraiche with the pistachios and drizzle the whole thing with extra honey and serve!  Creme fraiche can be replaced by greek yogurt, fresh whipped creme, or even marscapone cheese.  The pistachios were a last minute addition but they totally brought everything together and added real depth to the dish.  In the tone of James Oseland, I give this dish 3 and a half starrrrrrs.

figs with creme fraiche, honey and pistachios

Brown Butter Almond Brittle Ice Cream

almond brittle ice cream002

I promise you that this is the best ice cream you will ever make at home.  We stumbled on Jeni’s Splendid Ice Creams at Home a couple years ago and I believe the first recipes I made from this book were the Kona Stout  and the Roasted Strawberry and Buttermilk for Matt’s company picnic.  Both flavors got such rave reviews, that when I went to buy this book for my friend, Anna’s birthday, a week later, Barnes and Noble told us that they’d recently sold the rest of their copies – all to Matt’s co-workers, it turned out 🙂  I think the way Jeni makes ice cream is a revelation.  She combines a bit of cornstarch into the base and then adds just one and a half ounces of cream cheese per quart recipe, and the texture and consistency turns out amazing.  Perfectly creamy, freezes well, and her flavors are never too sweet – always a perfect balance.  The recipes in this book range from really unique (gouda and vodka plumped cranberries) to traditional (vanilla bean) to genius (sweet potato with torched marshmallows – gotta try this one, next).

Summer time is the perfect time to buy this book and try out a new recipe at each and every opportunity you get.  Our little ice cream maker will get a work out during these hot months to come!  But we have faith that it feels it is finally getting to do what it was created to do, thanks to Jeni’s Splendid ice creams and our not-so-splendid hundred degree days!

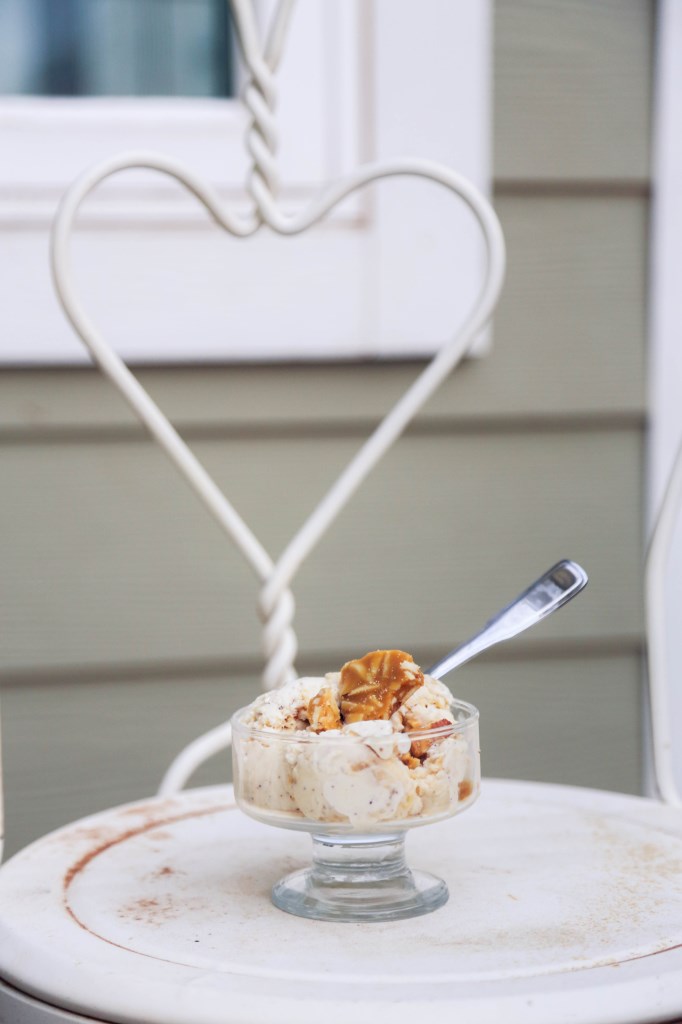
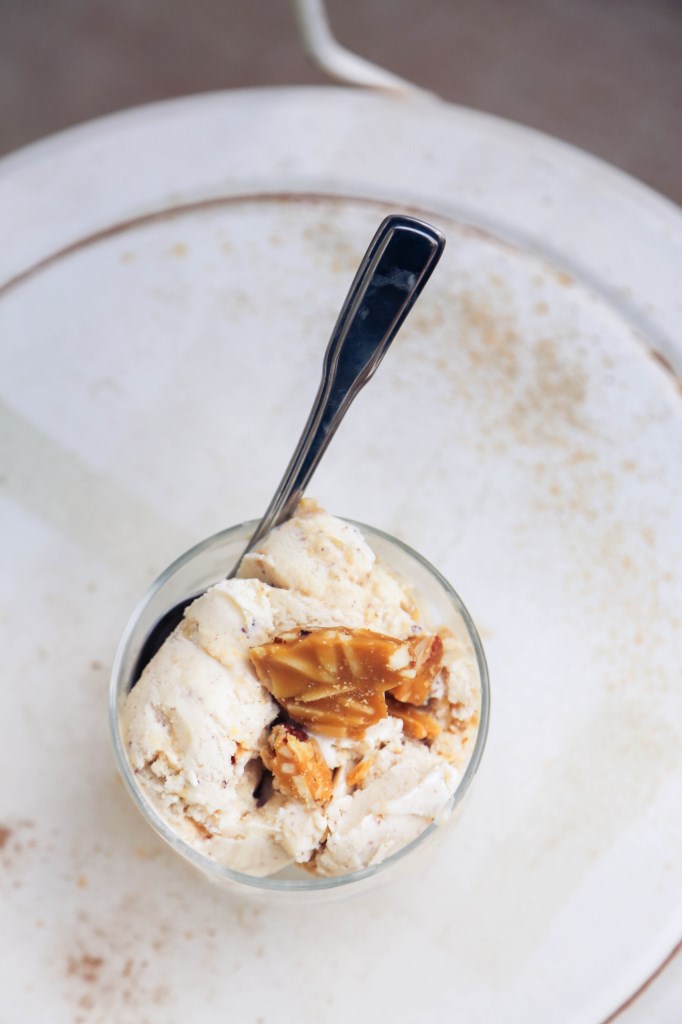
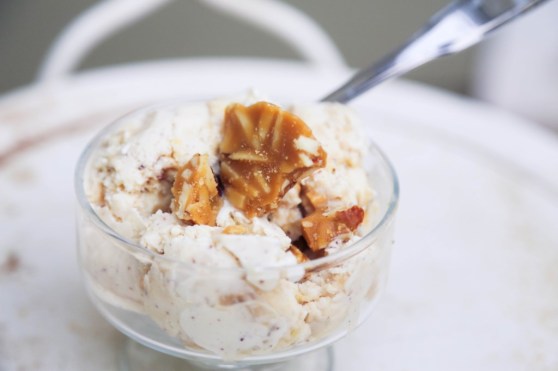
This week, I made three flavors out of this book:  Brown Butter Almond Brittle, Roasted Pistachio and Bourbon Butter Pecan.  All amazing.  The Almond Brittle was the most requested at our church get-together last night, and the most consumed (although I adore the pistachio), so I’ve written out the recipe for you here today.  It calls for almost a pound of butter.  ACTUALLY you only use a tablespoon of that pound of butter.  The solids that settle to the bottom of the pan after you brown butter is what gets mixed into the base and it creates a divinely nutty, roasted flavor in the ice cream base.  Yet another way brown butter makes the world a better place.

almond brittle ice cream004

Brown Butter Almond Brittle Ice Cream*
makes about 1 quart

for the base:
2 cups whole milk
1 tablespoon plus 1 teaspoon cornstarch
1.5 oz (3 tbs) softened cream cheese
1/8 tsp fine sea salt (I use kosher)
3/4 lb unsalted butter
1 1/4 cups heavy cream
2/3 cup sugar
2 tbs light corn syrup

1 cup crushed Almond Brittle (recipe below)

Mix about 2 tbs of the milk with the cornstarch in a small bowl to make a smooth slurry.  Whisk the cream cheese and salt in a large bowl until smooth.  Fill a large bowl with ice and water.

Melt the butter over medium heat in a 4 quart saucepan.  Bring to a boil and let bubble until the foam starts to subside and the butter is a rich dark brown (not black!).  Remove from the heat and let stand until the butter solids settle to the bottom of the pan, about 5 minutes.

Pour the clear butter oil into a storage container (once it solidifies you can use it as you normally would for cooking so it’s not a waste!) As you get closer to the butter solids in the bottom of the pan, use a teaspoon to remove as much liquid butter as you can.  You should have about 1 tablespoon of brown butter solids and a little bit of melted fat in the bottom of the pan (it’s impossible to remove all the fat).

Add the remaining milk, cream, sugar and corn syrup to the butter solids, bring to a rolling boil over medium-high heat and boil for 4 minutes.  Remove from the heat and gradually whisk in the cornstarch slurry (you’ll need to stir it up again as it will settle and solidify some).  Bring the mixture back to a boil over medium high heat and cook, stirring with a heatproof spatula or whisk, until slightly thickened, about 1 minute.  Remove from the heat.

Gradually whisk the hot milk mixture into the cream cheese mixture until smooth.  Pour the mixture into a 1 gallon Ziploc freezer bag and submerge the sealed bag in the ice bath.  Let stand, adding more ice as necessary, until cold, about 30 minutes.

Pour the ice cream base into the frozen canister of your ice cream maker and spin until thick and creamy.  Pack the ice cream into a storage container, folding in the chopped almond brittle as you go.  Press a sheet of parchment directly against the surface of the ice cream (this is important to avoid freezer burn and maintain a good consistency) and seal with an airtight lid.  Freeze until firm, at least 4 hours.

Almond Brittle*
makes about 2 cups

1 cup sugar
1/2 cup light corn syrup
1/4 cup water
3/4 teaspoon salt
1 stick of unsalted butter, cut into 1 inch pieces
2 cups slivered almonds
1/2 teaspoon baking soda

Generously oil a large baking sheet.

Combine the sugar, corn syrup, water, and salt in a 4 quart saucepan and bring to a boil over medium-high heat, stirring to dissolve the sugar. Insert a candy thermometer in the pan, add the butter, and bring back to a boil, then cook until the mixture reaches 300F.  Remove from the heat and immediately stir in the almonds and then the baking soda, working quickly but combining them thoroughly.

Pour the mixture out onto the oiled baking sheet, spreading it to a 1/4 inch thick layer.  Allow to cool completely before smashing to bits. 🙂

*recipes taken nearly word for word from Jeni’s book.

almond brittle ice cream005

Blackberry Jam Tart – I get pie with a little help from my friends…

Blackberry Jam and Toasted Almond Tart

Blackberry Tart with Cornmeal Crust

This tart was made because I bought three packages of fresh blackberries at 99 cents a pack (usually $3) and after we had some for a snack, I realized they would probably mold by the next day, and I would have wasted them.  So, looking up blackberry recipes on Martha Stewart Living online, I found a wonderful recipe that calls for a cornmeal crust, a jar of jam and some blackberries.  Perfect.  And I JUST happened to have the most perfect jar of blackberry jam in my pantry, made by my friends in Seattle, who have an entire acre, basically, of wild blackberry bushes beside their house.  I think jams and preserves are one of those treats that should be enjoyed in season.  It’s so much more satisfying to get a jar from the literal fruits of someone’s labor, than to just go pick up any ol’ flavor you want at the grocery store.  I think eating this way is another way of naturally limiting one’s sugar intake.  My friend, Brynn’s dad, makes this blackberry hybrid batch of jam each spring/early summer, and sometimes, there’s no fruit and we’re all sad, and sometimes there’s an abundance and I get one, coveted jar.  This stuff is the most amazing jam I’ve ever eaten.  So we wait, excitedly, all year for it.  Tell me that’s not better for the soul than having exactly the flavor you want, any time of the year?  Cook seasonally, bake seasonally, and natural moderation will follow.

My cousin, Kathleen, and her daughter, Hannah, stopped by earlier this week to pick up the disc from a senior session I did for Hannah.  Hannah’s boyfriend was with them, too, and when I asked if they’d like a piece of the berry tart I’d just made that afternoon, this precious boy’s eyes lit up and he just said, “uhhhh.”  All it takes is one in your group to say “yes” for you to feel comfortable to take a piece, as well!  They all stayed and ate and chatted and kept Matt and me company as we started prep for our dinner.  I was in my little piece of heaven.  Just wish it happened more often.  I don’t always have a piece of pie or tart or cookies, but I ALWAYS have coffee.  Always. So stop by any time.  You might get pie, if you’re lucky!

A Piece of Blackberry Jam Tart

Blackberry Tart with Blackberry Jam, Toasted Almonds and a Cornmeal Crust

Blackberry Jam Tart*

For the crust:  (I didn’t have enough butter, so I just halved the recipe. It makes two crusts, anyway, so it worked out!  I’ll post the full, two-crust recipe. This recipe also uses a food processor, which is easier, but you don’t burn as many calories and you have a food processor to clean up. Sometimes I’d rather pull a muscle than have to clean gadgets)

2 cups AP flour
1/2 cup cornmeal
1 tsp salt
1 tsp sugar
2 sticks unsalted butter, cold, cut into small pieces
1/4 to 1/2 cup ice water

Place the flour, cornmeal, salt and sugar in a bowl and whisk until combined.  Add the butter and cut with a pastry cutter until the mixture resembles coarse sand.  Add a few tablespoons of water and continue cutting it into the mixture until the dough holds together when pressed between your fingers.  Knead it inside the bowl about 10 times until it all holds together in a ball.  Divide the dough in half and wrap in plastic wrap and press into a nice disc.  Refrigerate for at least one hour, up to one day before using.

For the Tart:

AP flour, for surface rolling
half a jar (about one cup) of blackberry jam
12 ounces fresh blackberries (about 3 cups)
1/4 cup toasted, sliced almonds

Preheat oven to 375 degrees.  Roll out the crust into an 11 inch round (about 1/4 inch thick) on a floured surface.  Press dough into the bottom and up the sides of a 10 inch springform pan.  Trim the edges to come 1 inch up the sides using a paring knife.  Use the trimmings to patch up any thin areas or holes in the crust bottom.  Refrigerate for 30 minutes.

Prick the tart shell all over with a fork.  Bake until golden brown, about 25 minutes. Immediately spread jam into the tart shell, top with blackberries, sprinkle with almonds and bake for 10 minutes more.  Serve warm.

*adapted from Martha Stewart Living

Blackberry Tart

Coconut Cream Cheese Pound Cake

ccc-1
This picture is of the cake resting on my toy kitchen that I had as a child.  Mom and I looked up pics of me and my cousin, Tracy, playing with this kitchen when I was three and she was five.  We were both wearing frilly dresses and prancing around the room with spoons in hand, creating recipes out of air and pretending it was delicious.  Ah, nostalgia 🙂 Doesn’t seem that long ago…
It’s funny how you can also be nostalgic about something that wasn’t even your personal memory.  My mom made this cake for my older brother and it was his favorite, but it became part of my food nostalgia anyway.  I think that’s another wonderful thing about food – others’ enjoyment of it can create memories for you, whether you took part or not.  I like remembering foods my brothers’ liked.  Matt loved cherry cheesecake, Chad was more of a savory guy and really had a thing for mustard.  I love both!  And I love that when I went home for a speedy trip this week to visit my mom, that we made this cake together and remembered good times.  Olive sat on the stove while Mom narrated my work to her as I made the cake.  Mom used to make it while I would sit on the counter and talk to her and now she plays with my daughter while I make it.  Life just doesn’t get sweeter than that.
ccc-2
Coconut Cream Cheese Pound Cake
1/2 cup butter
1/2 cup shortening
1 8-oz pkg. cream cheese
3 cups sugar
1 tsp coconut flavor
1/2 tsp. vanilla extract
6 eggs
3 cups flour
a pinch of salt
1/2 tsp baking powder
1 cup bakers coconut
Preheat oven to only 325 degrees.  Grease and flour a 10″ tube pan or bundt pan.  Cream butter, shortening and cream cheese together in a large bowl.  Gradually add the sugar, beating at medium speed until light and fluffy.  Stir in coconut flavoring and vanilla.  Add the eggs one at a time, beating well after each addition.  Combine the flour, salt and baking powder and add to batter.  Stir just until blended.  Fold in the coconut.  Pour the batter into a prepared tube pan or bundt pan.  Bake for 1 hour and 15 minutes, or until a tester inserted in the center comes out clean.  Cool in the pan on a wire rack for 10-15 minutes.  Remove cake from the pan and allow it to cool completely on a wire rack before cutting.
This cake is dense and rich.  Don’t worry too much about the sugar content.  It’s not an iced cake, anyway!  Just imagine the sugar you wouldn’t bat an eye at putting into the frosting of a regular cake and instead, put it into the batter 🙂 And if you haven’t gotten the hint that weekends are for feasting and not for guilt, I fear you never will!  Happy Eating!
ccc-3

Strawberry Banana Split Crepes

crepes

I’ve posted a lot of recipes lately that have strawberries, but there is a good reason – they’re in season!  When you’re at the store and strawberries are $1.30 for a pound, instead of $4 – that’s your sign that they are in season!  Now, I’m not kidding myself into believing that they aren’t grown in hot houses, BUT at least it’s the season for them, and in my mind, that makes me feel like they taste better.

I wanted to make a strawberry crepe, so I looked up a simple crepe recipe, and where it called for 1/2 cup of water, I added a 1/2 cup of strawberry puree instead, plus a bit more water to thin it out.  My strawberry puree was made-up, too, as was the strawberry-vanilla bean whipped cream!

You need to make your crepe batter the night before you use it, so make this batter tonight and have crepes in the morning while the weekend is still here!  This recipe looks like a sugar bomb, but it actually wasn’t.  The crepes have zero sugar except the strawberry puree, which only has 3 tbs and it’s also used to sweeten the whipped cream. So if you don’t add the chocolate sauce, this is really low sugar!  And it definitely doesn’t taste like you held back!

bsplit crepes

Strawberry Crepes

3/4 cup whole milk
1 cup flour
2 eggs
1/2 cup strawberry puree (recipe follows)
2 tbs water
3 tbs melted butter

Put all the ingredients into a bowl or a large, tall cup and with your immersion blender, blend for 15-20 seconds until fully mixed.  If you don’t have an immersion blender, use a regular blender for the same time.  Transfer to a container and chill for one hour, up to 48 hours (I just did this step before I went to bed and used it the next morning.)

In a 10″ non-stick, shallow skillet, heat teaspoon of butter over medium high heat, or just spray with non stick spray, but you want your pan to be pretty hot.  Add a quarter cup of batter to the pan and swirl around till it’s spread as thin as possible. THE FIRST CREPE IS ALWAYS CRAP.  Just throw it away.  Now, you’re ready to begin.  By 1/4 cup scoops, (I used a ladle) swirl your batter in the pan very quickly and let it set for at least 1 to 2 minutes before flipping.  If your pan is hotter than mine, you may need to alter your time.  With a wide spatula (I used a fish spatula), slide under the crepe and flip over.  The other side won’t take as long to cook.  Keep finished crepes covered in a towel so they will stay warm and pliable.  This batter made about 8-10 crepes for me, but if you’re really skilled at swirling your batter, you could squeeze 15 crepes out of this amount.  I am not skilled and my crepes are always thicker than they should be, but they’re still delicious!

Fill the crepe with sliced bananas, a drizzle of left over strawberry puree, and a dollop of whipped cream.  Add more strawberries and whipped cream on top, and if you’re feeling the entire banana split thing, drizzle in chocolate syrup (I used Torani chocolate syrup.)  Or even some toasted pecans!  Have fun – it’s the weekend!

Strawberry Puree

1 lb of fresh strawberries, hulled and halved
3 tbs sugar
1 vanilla bean, split and scraped of its seeds. If you don’t have a vanilla bean, wait, and add some vanilla paste or vanilla extract later when you’re blending)
1/4 cup water

Place all the ingredients into a medium saucepan and cook over medium low heat till bubbly.  Cook for about 15 minutes until the strawberries begin to break down.  Remove the vanilla bean and transfer to a blender or a tall cup with your immersion blender and blend, with an extra 1/2 cup of water till fully blended and no chunks remain.  Add the vanilla bean paste or vanilla extract (about 1 tsp) if you want and blend again.

Strawberry Vanilla Bean Whipped Cream

1 cup heavy cream
1 tsp vanilla bean paste
1/4 cup strawberry puree

Place all ingredients into a bowl and whip until soft peaks form.  (I used my immersion blender, duh)

Strawberries in Balsamic Caramel – Rethinking desserts

7G9A1673

Since Olive started eating from the table, I’ve been 10x more mindful of what I serve for lunch and dinner.  I have re-thought the structure of a meal from the way we sit at the table to the kinds of  things we have for dessert.  Dessert is certainly not something that I grew up eating every night.  I’m not sure any of us did.  I think there are a couple reasons for this.  For one, American versions of desserts are really sweet and really indulgent, for the most part.  And usually really big.  So naturally, we don’t think of desserts as something you should have every night, which is inherently a good thing, but it’s caused us to view things like fruits in nearly the same category as vegetables: something we HAVE to eat, or are too expensive to eat, or aren’t very exciting to eat.  I think most people would feel slightly jipped if someone suggested strawberries for a dessert out at a restaurant.  Strawberries?  That’s it?  Where’s the colossal strawberry cheesecake with the dulce de leche syrup and giant mount of whipped cream?

You see the problem.  Besides dark chocolate, fruit has been the only sweet Olive has consumed on a regular basis.  She’s geared to think fruits are the sweetest things in the world.  Her favorite sweet is a banana. A friend of ours from Mexico City once said in the most endearing, non-native to America-way, “What could be sweeter than a banana?!”  That statement struck me because I instantly thought of a myriad of things we eat on a daily basis that are, in fact, much sweeter than a banana and have loads more sugar (cereal, fruit snacks, bottled juice, packaged cookies, even sweetened yogurts can have up to 21 grams of sugar per serving).  So I want to retrain my mind to accept fruits as a dessert by themselves.  And the types of colossal sugar bombs we typically think of as desserts, I want to think of as rare treats, instead of the normal dessert option.  This is a challenge for me.  I feel cheated when I get that sugar craving in the afternoon and the only thing in my house is either fruit or dark chocolate and what I really want is a piece of cake or a brownie or something reserved for a feastal weekend meal instead of a boring ol’ Monday afternoon.  It’s hard to have discipline with dessert, but I feel that if it can be accomplished, a natural limit on sugar will take place in my life and a greater joy will be present when I do indulge in the Super Desserts that all good blog posts are made of.

For today, simple strawberries-coated in a balsamic caramel sauce.  Simple, incredibly flavorful and a wonderful way to liven up your tastebuds at the end of the meal.  When I made this last week, we were out on the front porch and Olive was walking in circles around the bushes and each time she passed me, she got this giggly fit and opened her mouth for another bite.  Like a little, tasty game.  Food is fun and sharing food is even better.  Remember that this week as you prepare meals for your family!

Strawberries in Vinegar*

serves 6

1.5 lbs medium sized strawberries, hulled and halved lengthwise
3/4 cup sugar (I know, I just talked about sugar bombs.  However, this is making a caramel and coating the strawberries.  You don’t consume all the glaze!)
1/3 cup red wine vinegar
1/4 cup boiling water

Put the sugar into a wide saucepan and place the pan over low to medium heat.  You will start to see darker patches of caramel starting to appear.  Stir to make an even, dark caramel.  Carefully pour in the boiling water using a metal ladle.  The caramel will bubble dramatically, so be careful to not get too close.  Let the caramel cool a bit before pouring in the vinegar because boiling vinegar will singe your nostril hairs right off.
Pour in the vinegar and mix well.  Cool the caramel in the fridge for at least 20 minutes.  It will become thick.
Put the strawberries into a bowl, then pour over the vinegar caramel.  Marinate in the fridge for one hour before serving.
These are wonderful, eaten with a simple glass of rose.  However, if you wanted to make a more indulgent dessert, I think these would be killer on a strawberry shortcake with homemade vanilla bean whipped cream.  Mmmmmm…

7G9A1675

*recipe adapted from Ferran Adria’s book, titled (not coincidentally) The Family Meal.  🙂 This book was an inspiration for the title of my blog because I really couldn’t think of a better way to title it.  His book is filled with the recipes his staff would share together before dinner service at elBulli in northern Spain (formerly the best restaurant in the world, which is now, sadly closed).  I’d highly recommend this incredibly simple, straight-forward book and its wonderful layout with pictures of each step of the cooking process.