Potatoes That Taste Better Than The Chicken

Roasted Chicken and Potatoes
Fall is around the corner, my friends. The beginnings of fallish things are happening from the wonderful cooler temperatures and crisp mornings to the not-so-wonderful appearance of Christmas decorations ALREADY. I’m not one to start up the Christmas music until the day after Thanksgiving and I’m not one to drink a pumpkin spiced latte until it can actually do its job of warming me up because I’m cold from natural causes (as in, I didn’t sit in my car with my AC on full blast to get the same effect. That’s cheating AND rushing the perfect moment, which I feel, should come about authentically.) My friend Libby is rolling her eyes at me because she LOVES rushing fall and pretending it’s cold outside. In fact, she already had a pumpkin spiced latte! 🙂 I’m fine with seasonal enthusiasts. Honestly – whatever makes you happy! But as for me and my household, we won’t decorate for Christmas until Thanksgiving is over. 🙂

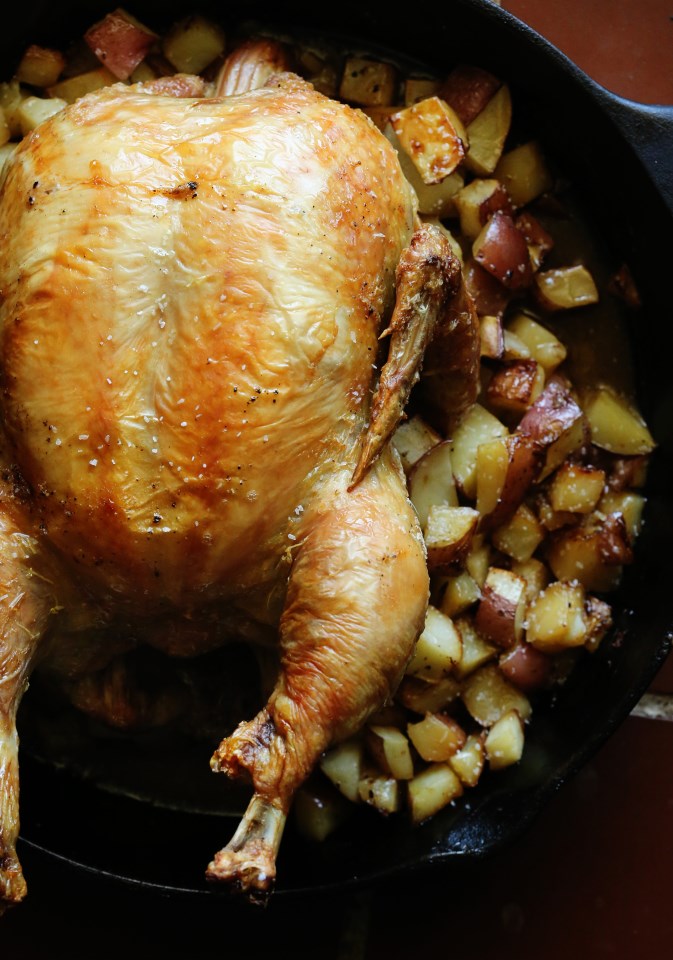
Another thing that makes me happy is starting to think about fall dinners. I love the braising and stewing and the simmering of heavy, warm spices on the stove. One meal that gets me to thinking about the warmth of the winter is this simple and yet divine dish: roasted chicken on top of potatoes. We made this recipe a loooong time ago by Jean-Georges Vongerichten. His recipe was so delicious, we’ve done it a few dozen times since and have varied and simplified and it’s always delicious and always perfect. I never mess this recipe up and it’s always so amazingly delicious. And let’s not ignore why: the potatoes are cooked in schmaltz. You’d also be delicious if you were roasted in chicken fat.

I also love this recipe because it is one of those dishes that everyone can agree on. Add a salad or some braised greens and you’ve got yourself a complete meal!

Potatoes Cooked in Chicken Fat Chicken Potatoes

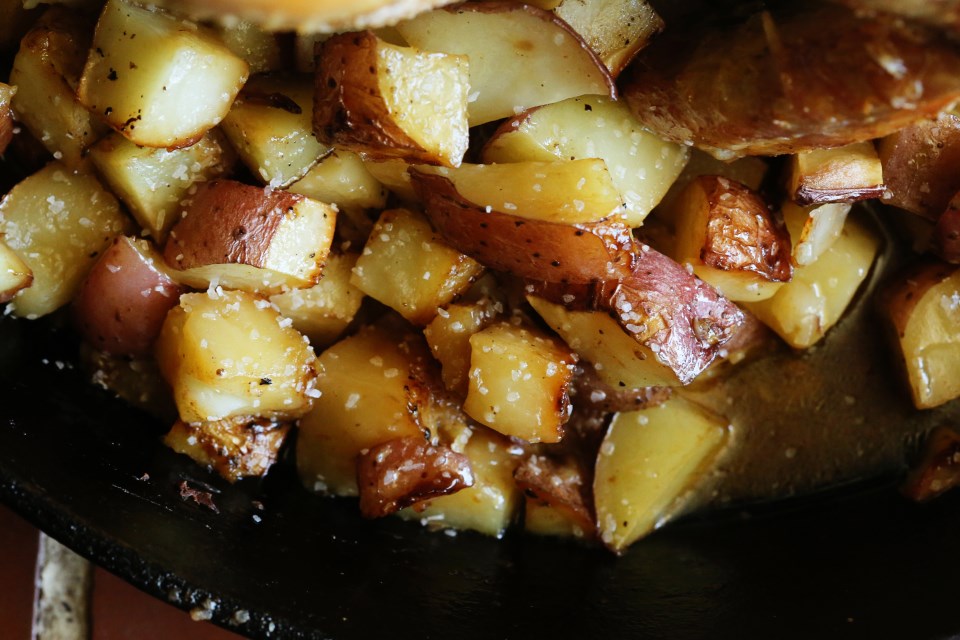
Potatoes Taste Better Than the Chicken*

1 whole chicken, about 3 lbs
2 pounds potatoes, peeled and cut into 1″ pieces
coarsely ground salt and pepper
butter to coat the pan and chicken
1 head of garlic, sliced in half
sprigs of thyme, rosemary, whatever you have

Preheat oven to 450 degrees. Butter a large cast iron skillet and place the cut potatoes in a single layer. Sprinkle them with salt and pepper and drizzle with olive oil. Pat your chicken dry and season with salt and pepper. Rub with butter and then stick the halved garlic head into the chicken cavity and add whatever herbs you like. Place the chicken on one of its sides on top of the potatoes.

Roast for 20 minutes. Turn the chicken onto its other side and roast another 20. Then, turn the chicken breast-side up and continue roasting until juices run clear and an instant-read thermometer says at least 165F, about 15-20 minutes more. Let the chicken rest for 10 minutes and carve on top of the potatoes and serve them along with the chicken. Beautiful.

*adapted from Jean-Georges Vongerichten

Advertisement

Cheesy Cornmeal Waffles with Spicy Honey

Smoked Gruyere Cornmeal Waffles with Spicy Honey Smoked Gruyere Cornmeal Waffles
Parks and Recreation was one of our favorite shows of all time.  We were sad to see it end a few weeks ago and had to cook something special for the finale.  I debated quite a lot about what to cook.  I could’ve done a plain hamburger inspired by the episode where Ron and Chris battle it out in a food war. We thought about doing bacon wrapped shrimp served with all the bacon and eggs the store had to offer, but I figured that might be a tad wasteful. And so we settled on waffles, as Leslie Knope would’ve wanted.  I decided to do a savory waffle with a side of bacon and plenty of melted butter and Mike’s Hot Honey on top.  Mike’s makes some amazingly spicy and delicious honey that we love putting on our pizza crusts and it’s really good on so many things like buffalo wings or smoked sausages, but it was especially good on top of this cheesy waffle!

Smoked Gruyere Cornmeal Waffles and Spicy Honey


Cheesy Cornmeal Waffles with Hot Honey

  • Servings: about 8 Belgian waffles
  • Print


  • 1 cup of self rising flour
  • 1 cup of all purpose cornmeal
  • 2 teaspoons of baking powder
  • 1/2 teaspoon of salt
  • 1 tablespoon of sugar
  • 1/2 cup grated cheddar cheese
  • 2 scallions, sliced thin
  • 1/2 tsp smoked paprika (optional)
  • 1/8 tsp cayenne (optional)
  • eggs
  • 1 cup buttermilk
  • 1/3 cup water
  • 1/4 cup of canola oil

Get your waffle iron heating up.  In a large bowl, mix the dry ingredients along with the cheese and scallions.  In a separate bowl, whisk the eggs, buttermilk, water and oil until well blended.  Add the wet ingredients to the dry and beat with a fork until no dry parts remain.  Cook in a waffle iron and keep warm in a 200 degree oven until you’re finished cooking all the waffles.  Serve with hot honey, regular syrup, sweet bbq sauce, or anything you can think of. Hey, why not a fried egg on top?! And make sure you have plenty of crispy bacon alongside.  Enjoy!


Parchment Baked Fish with Bruschetta and Pine Nuts

parchment steamed tilapia with bruschetta
A totally simple weeknight dinner recipe for you using the bruschetta recipe from Monday!  We bake, roast, and pan fry fish a LOT around here.  I buy the bags of frozen fillets and throughout the week, when I “don’t have anything to cook” I can generally reach in, grab three fillets and thaw them out in about 30 minutes to use alongside rice, roasted potatoes, soup, etc.  Olive thankfully loves all fish and so it’s a meal that is never stressful for me.  What’s even easier is just placing the fillets on some parchment paper (foil also works) with some oil and seasonings, wrap it up and let them bake!  I did this last week and it always feels like I went to a lot of trouble, is healthier than my usual pan-fry standard preparation, and the fish is always steamed perfectly.

Get creative with the ingredients you put in with the fish – the possibilities are endless!

steamed fish with bruschetta
Parchment Baked Fish with Bruschetta and Pine Nuts
serves 4

4 tilapia or cod fillets (really, any type of fish will work)
1 TBS butter or olive oil
3 TBS prepared bruschetta 
1 TBS toasted pine nuts
salt and pepper and a squeeze of lemon

Preheat your oven to 400F.  Tear off four squares of parchment paper or foil.  Place the butter in the center of each square and place a fish fillet on top of the butter.  Season the fillet with salt and pepper.  Top with bruschetta and pine nuts and squeeze a lemon over the top of all of it.  Fold the sides up and together and crimp to close.  Place packages on a rimmed baking sheet and bake together for 20 minutes.

You can add just about anything to the fish that you have in your fridge – olive tapenade, green beans, corn relish, fresh herbs and sour cream – honestly, just have fun!

Chicken Avocado Taquitos with Red Pepper Soup

chicken taquitos with green chili
These recipes jumped off the screen last Monday when I was looking for something quick, nutritious and slightly comforting to make for my family.  Both recipes come from the great world of Pinterest and they paired together like old friends.  The first was baked chicken taquitos and I improvised from the original recipe a bit and added avocado (because it improves nearly everything) and green chili powder instead of cayenne.  Both additions worked well and I’ll definitely make this recipe again!

The second recipe comes from a dear friend and fellow food blogger, Becky McGrew of Apronclad.com!  She made this roasted red pepper soup a while back and I have kept it in the back of my head as yet another wonderful soup to introduce new flavors to our little two-year old, Olive.  The soup made a wonderful dip for the taquitos and was obviously wonderful on its own as a starter/side dish for the meal.  It has some Italian herbs in it, which are awesome, but I think next time to match up a little better with the Mexican theme, I think I’d omit the basil and thyme and add in Mexican oregano and cilantro to finish.  Whatever you do, just make this soup.  It’s outstanding!  I didn’t mess with the recipe at all, so just go on over to Becky’s blog and get the recipe there, plus very nice step-by-step instructions!

chicken taquitos

Baked Chicken Avocado Taquitos*

2 boneless skinless chicken breasts, pounded to ½ inch thickness
½ teaspoon garlic salt
1 teaspoon green chili powder
½ teaspoon onion powder
1 teaspoon cumin
8 6-inch flour tortillas
1 cup shredded mexican blend or cheddar cheese
1 large, ripe avocado
Preheat oven to 450. Line a baking sheet with nonstick foil and spray heavily with cooking spray.

In a small bowl whisk together garlic salt, green chili powder, onion powder and cumin. Rub seasoning into both sides of chicken breasts. Spray a large pan or skillet with cooking spray and cook chicken over medium heat about 8-10 minutes or until cooked through. Chop chicken up into small cubes. Divide chicken evenly among all tortillas, spreading the chicken into a strip down the middle of each tortilla. Top chicken with about 2 tablespoons of shredded cheese and a few pieces of avocado. Tightly roll each tortilla into a taquito. Place end side down on prepared baking sheet. Spray taquitos heavily with cooking spray. Bake 10-15 minutes until tortilla edges begin to brown/blacken and cheese is melty. We dipped ours into the soup and also our favorite – Mexican crema!  Seriously, so much more flavor than sour cream!

*adapted from Creme de la Crumb

Roasted Salmon with Lima Bean Risotto

lima bean risotto and salmon
This week is really busy already! Hence, being behind in my posting! The Palmer house is bustling with preparations for the first annual Carpenter’s Banquet this Friday.  We are cooking for about 250 people, and my friends, that is a LOT of food.  I am amazed by how much it really is.  Forty heads of lettuce for the salads, forty butternut squash, fifty eggs for the bread pudding, two gallons of salted caramel for the bread pudding.  Two gallons?!  Of caramel?  It just adds up.  Anything multiplied by 250 is going to be insane and I will be the first to say that I’m super glad I’m not a caterer!  I think it’s going to be an amazing event and all the proceeds from ticket sales and the silent auction will go directly to Carpenter’s Church for their supportive housing project.  It’s nice to be a part of something so good.

Tonight, we also shot the second show for our 24 Frames segment, and I’m super excited that Matt got to be a part of this episode!  It is about our very regular pizza nights and Matt’s perfect pizza crust!  I can’t wait to see what Paul and Daniel do after the first episode turned out surprisingly wonderful, considering I was in it. 🙂

Tonight I give you a simple dish that is packed with flavor.  It’s a riff off of yet another Tyler Florence recipe from his wonderful family cookbook, Start Fresh.  The recipe originally called for peas, but I had lima beans and I think it worked great!  I loved this dish because it was really simple to make and had a protein, a starch and a vegetable in just two dishes!  And it felt super comforting without being too heavy.  We’ve got a few chilly nights left in this season, I’m afraid, but with dishes like this, it won’t be so bad to stay in and cook!

salmon and lima bean risotto - great for toddlers


Roasted Salmon with Lima Bean Risotto
serves 4 or 6-8 child servings

2 tbs olive oil
1 pound salmon fillet, bones removed and cut into 4 portions
4 cups low sodium chicken or vegetable broth
1 cup lima beans
1 cup Arborio rice
1 tbs unsalted butter
1/2 cup grated Parmesan cheese

Preheat the over to 400F.

Season the salmon portions with salt and pepper. In a large ovenproof skillet, heat the oil over medium-high heat.  Add the salmon pieces and cook without turning until browned on the bottom, 2 to 3 minutes.  Transfer the pan to the oven and cook until the salmon just flakes when tested with a fork, about ten minutes.

In a large saucepan, bring the broth to a boil over medium heat.  Add the lima beans, reduce heat, and cook until bright green, about 2 minutes.  Scoop out the beans into a bowl.  Transfer half of the beans to a blender and puree until smooth.  Set aside.  Keep the broth warm on the stove.

In a large saucepan, toast the rice over medium heat, stirring often, until the rice has a nutty aroma, 3 to 5 minutes.  Add the broth, one cup at a time, stirring and waiting until each addition is almost absorbed before adding more.  Continue until most of the liquid has been absorbed.

Before all the liquid has been absorbed, stir in both the pureed and whole beans, butter, and cheese.  Serve the salmon fillets on top of the risotto, or flake the salmon into bite size pieces and serve risotto on the side, like I did for Ollie’s plate in the pic above! Enjoy!