Homemade Sweet, White Sandwich Bread

Two Loaves of Sweet, White Sandwich Bread Sandwich Bread
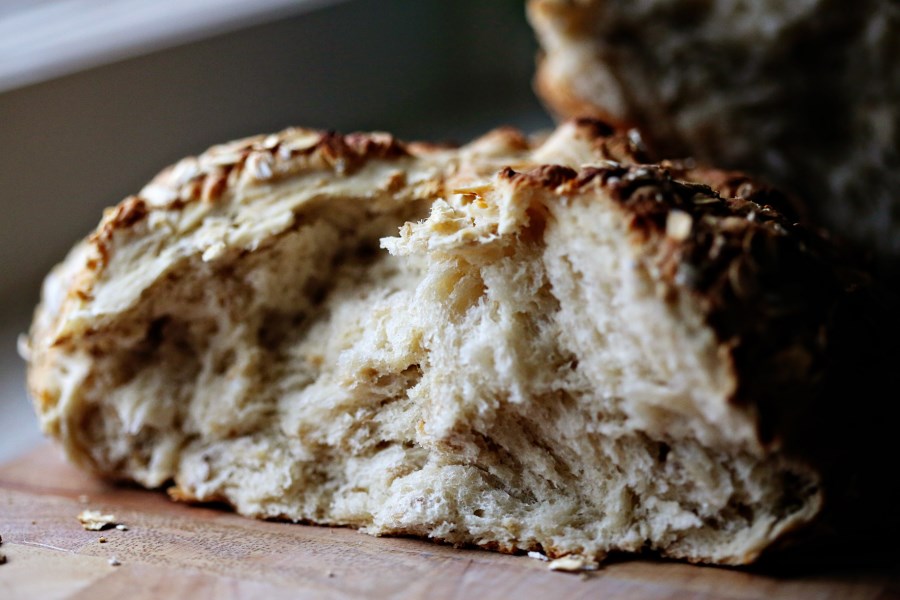
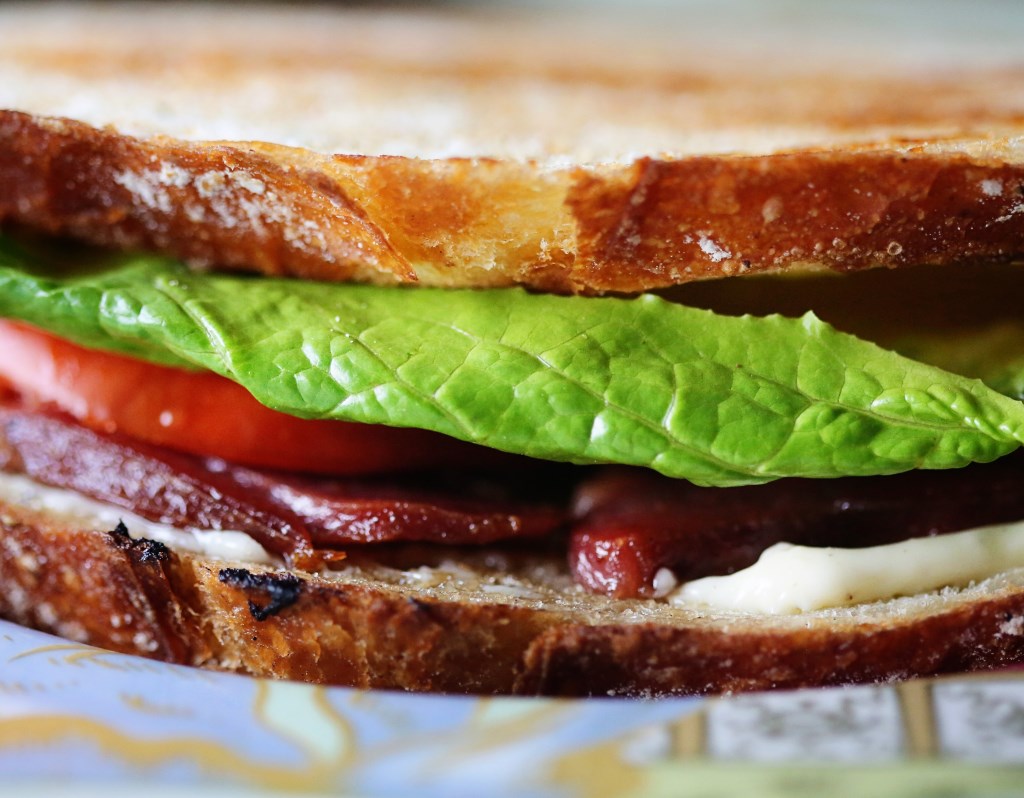
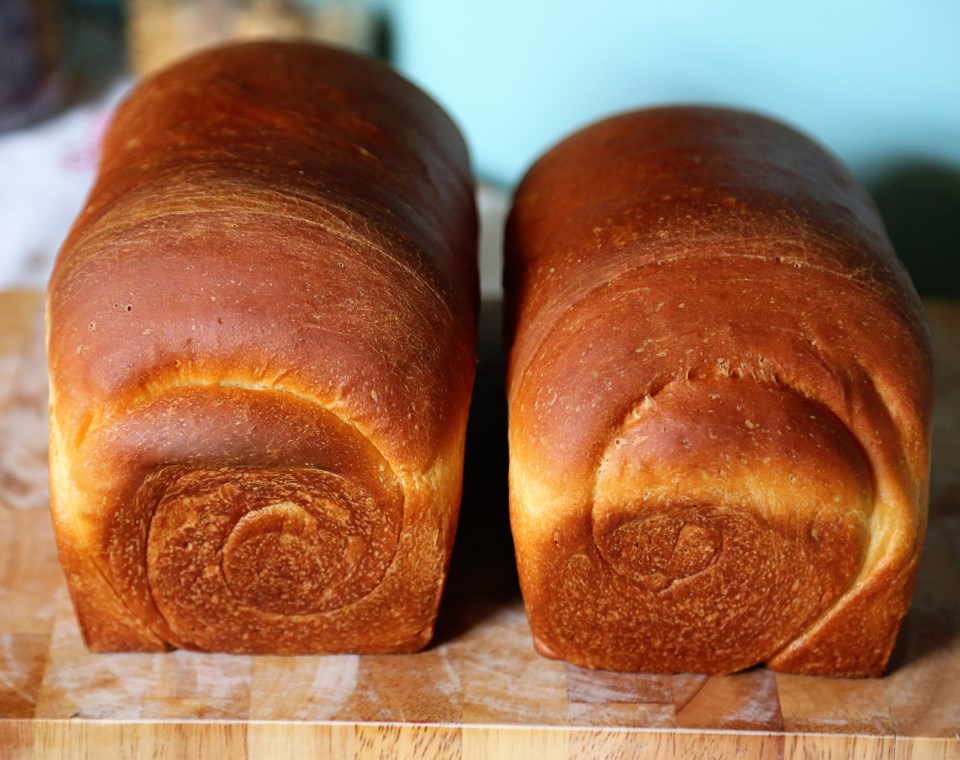
This is home.  To smell this bread baking is to realize that everything is going to be alright. One of the blessings of being married to The Bread Man is that he bakes stuff like this.  He started baking this bread a few months ago. The recipe makes two loaves at a time and we can blaze through both in a week.  Perhaps we shouldn’t and in a better world, I’d give a loaf away.  But it makes the perfect toast in the morning, the perfect grilled cheese sandwich at lunch, the perfect cinnamon toast for a snack in the afternoon and the perfect toast with jam for dessert after dinner.  No, we don’t do all those things in one day.  I’m just telling you that you will NEVER tire of this bread.  It stays fresh for so long AND, unlike most homemade breads, this stuff doesn’t get mold for more than a week – on the counter!  It’s perfect.  Sweet, smooth, silky inner texture and a perfectly crisp crust when toasted – not too thick, not too thin.  Your kids won’t even tear off the crust.

Homemade Sandwich Bread
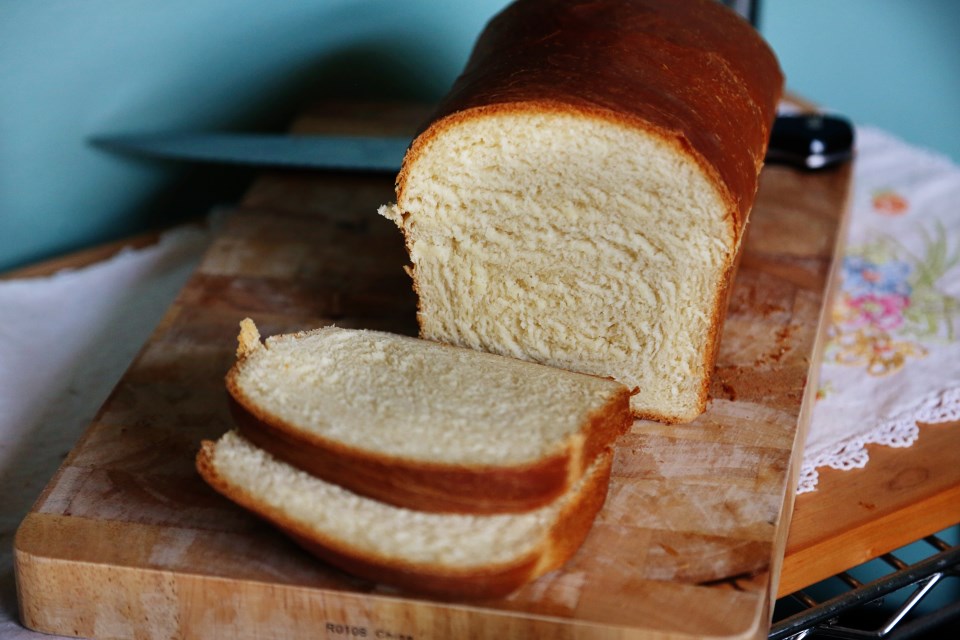
You can see my lack of restraint that in the thirty seconds it took me to cut the slice to put the slices in the toaster, I bit the corner of that cinnamon/sugar slice.  I could NOT help it.  You’ll see why.  This bread is what’s good about being a kid, again.  This bread sings of wholesome goodness and peace and harmony.

1375973_10152292138695169_2128879586_n
I may be going too far.  Just try it out. And start it the night before you want it because I don’t want you to get all fussy when you see that it has to rise in your fridge for 8 hours.  Suck it up – it’s worth it.

Sandwich Loaf

Homemade Sandwich Bread*
makes two, 8″ loaves

9 grams (1 tbs) instant yeast
425 grams (1 3/4 cups, plus 2 tbs) lukewarm whole milk
794 grams (6 1/4 cups) unbleached bread flour
14 grams (2 tsp) salt
78 grams (5 1/2 tbs) sugar
85 grams (6 tbs) vegetable oil or melted, unsalted butter
1 egg (50 grams)

Do Ahead:

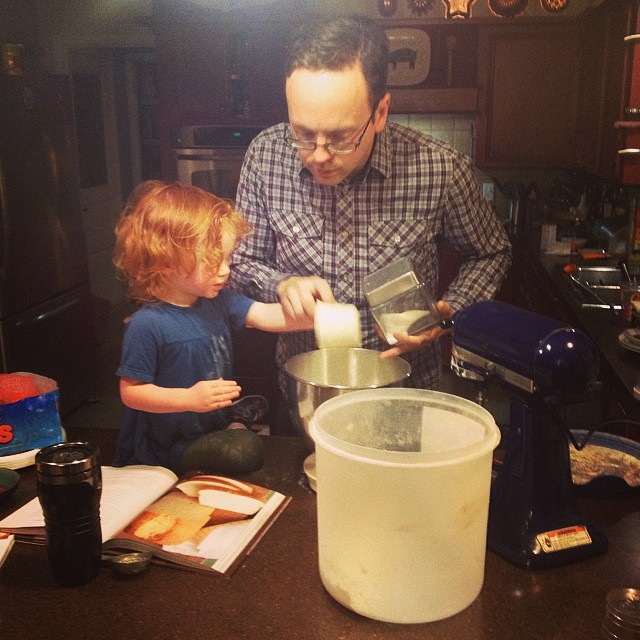
Whisk the yeast into the lukewarm milk until dissolved.  Set aside for 1 to 5 minutes.  Combine the flour, salt, sugar, oil, and egg in a mixing bowl, then pour in the milk mixture.  If using a mixer, use the paddle attachment and mix on the lowest speed for 2 minutes.  If mixing by hand (go you) use a large spoon and stir for about 2 minutes.  The dough should be coarse and slightly sticky.

Switch to the dough hook and mix on medium-low speed for 4 to 5 minutes, or knead by hand on a lightly floured work surface for 4 to 5 minutes, until the dough is soft, supple, and tacky but not sticky.

Whichever mixing method you use, knead the dough by hand for 1 minute, then form it into a ball. Place the dough in a clean, lightly oiled bowl, cover the bowl tightly with plastic wrap, and refrigerate overnight or for up to 4 days. (You can bake the dough in batches over different days if you want and portion the dough into two or more oiled bowls at this stage.)

On Baking Day:

Remove the dough from the refrigerator about 2 1/2 hours before you plan to bake and divide it in half; each piece should weigh about 25 ounces (709 g) which is perfect for 4 1/2 x 8 inch loaf pans.  For a 5 x 9 inch pan, use 28 to 32 ounces of dough.  Shape into sandwich loaves (read method below), then place them in greased loaf pans to rise. Mist the dough with spray oil and cover the pans loosely with plastic wrap or a towel; then let the dough rise at room temperature for about 2 1/2 hours or longer, until it domes about 1 inch above the rims of the pans.

About 15 minutes before baking, preheat the oven to 350F.

Bake for 20 minutes, then rotate the pans and bake for another 20 to 30 minutes.  The bread is done when the top is a rich, golden brown, the sides are firm and the loaf sounds hollow if tapped on the bottom and the internal temperature is at least 185F in the center.

Remove from the pans and cool on a wire rack for at least 1 hour before slicing and serving.  I DID exercise restraint, here.  If you cut into them too early, you’ll have gummy bread.  Don’t say I didn’t warn you.

* from Peter Reinhart’s Artisan Breads Every Day – we love him


Shaping the Sandwich Loaves for baking:

To shape a sandwich loaf, flatten the dough into a 5 by 8 inch rectangle.  Working from the 5 inch side of the dough, roll up the length of the dough (like a fat cinnamon roll).  Pinch the final seam closed using your fingertips or the back edge of your hand.  Gently rock the loaf to even it out.  Don’t taper the ends; keep the top surface of the loaf even.  Place the loaf in a greased pan, seam side down, cover, and proof.

Advertisement

Homemade Challah – a Family Guest Post

challah

Guest post today from Matt Palmer, a.k.a, The Bread Man.  He will be talking about Challah and I think this may be my second favorite bread he makes, next to his plain country bread.  It’s an indulgent bread made with lots of eggs and sugar and it is amazing with jam or turned into French toast (you better believe that’ll be a future post!) He has flavored the bread with orange zest, honey, vanilla, plain sugar – they have all turned out wonderful.  I can’t remember a time he did this recipe and it flopped, and he’s made it a half dozen times!  I’ll let him talk about it:

A new bakery opened in town a while ago and I was excited to check it out, because I had heard they had “fresh baked bread.” You’d think that would be common (or even implied) for bakeries, but it seems “bakery” has become synonymous with “cakery” these days. When we visited, I found they indeed did have fresh baked bread: banana bread, corn bread, and other technically-classified-as-bread baked items I can’t remember. I like banana bread, but I think it’s a little misleading to just call it “bread.” Bread is flour, water, salt, and yeast – “the staff of life.” Banana bread is not “bread,” it’s “banana bread.” It’s like how Elvis is Elvis, and Elvis Costello is Elvis Costello.

That’s not to say all enriched doughs are inferior – a good brioche is almost as much a work of art as a great baguette. My favorite enriched bread to make though, is challah. It’s easy to work with, fun to braid in all sorts of different ways, and the color is amazing, with a creamy yellow crumb and a rich brown crust.
Challah is traditionally a Jewish Sabbath bread, and I think it’s a great weekend activity. You can have a great loaf of bread in just a few hours on Saturday and turn the leftovers into French toast for Sunday brunch.
I followed the recipe from Peter Reinhart and will post pretty much directly from Michael Ruhlman’s blog when he did the hard work and wrote out the recipe for me.
challah fresh out of the oven
Challah
Makes 2 large loaves or 4 small ones
2 ½ cups/510 grams lukewarm water about 95 degrees F
1 ½ tablespoons/14 grams instant yeast
8–10 egg yolks or 170 grams depending on weight of yolks
5 tablespoons/71 grams vegetable oil
6 tablespoons/85 grams sugar
1 tablespoon/21 grams vanilla extract (optional)
7 ½ cups/964 grams unbleached bread flour
2 ½ teaspoons/19 grams salt or 4 teaspoons/20 grams coarse kosher salt
1 egg white for egg wash
2 tablespoons/30 grams water for egg wash
2 tablespoons/20 grams sesame or poppy seeds for garnish
  • Combine the water and the yeast in a mixing bowl or the bowl of a 5-quart mixer and whisk together to dissolve.  Add the egg yolks, oil, sugar, and vanilla, if using, and whisk together to break up then add the flour and salt.
  • Using the paddle attachment, mix the dough for 2 minutes on the lowest speed.  Let the dough rest for 5 minutes.
  • Switch to the dough hook and mix on medium low for 4 minutes.
  • Use a floured bowl scraper or floured hands to transfer the dough to a lightly floured surface, sprinkle the top lightly with flour and knead by hand for a couple of minutes until the dough is soft and supple.  It should be tacky but not sticky.
  • Place the dough in a lightly oiled bowl, or divide the dough in half or in as many portions as you plan to bake,  and place in oiled bowls.  Cover and immediately place in the refrigerator.  The dough should rest at least overnight and can be kept refrigerated for up to 4 days.

On Baking Day:

  • Remove the dough from the fridge approximately 2 hours before you plan to bake.  Transfer it to a lightly floured surface and cut it into the desired number of braids you want to use or shape into loaves, or dinner rolls.
  • If you are braiding, flatten each piece with your hand, then roll into cigar shaped lengths.  Roll each piece once, then return to the first piece to roll it into a rope approximately 10 to 14 inches/25-36 centimeters long.  Make sure it will fit on your baking sheet!
    braiding challah
    shaping challah
  • Roll each piece to the same length then braid.  Place the loaves on sheet pans lined with parchment paper.
  • Make the egg wash and brush each loaf with the wash.   Reserve the rest of the wash in the fridge, and let the loaves rise uncovered for about an hour. They will not have risen much at this point.  Brush the loaves again with the egg wash and sprinkle with poppy seeds or sesame seeds or a combination of both.
  • Let the loaves rise for another hour until they increase to about 1 ½ times their size.

rising challah

  • 15 minutes before baking, pre-heat the oven to 350 degrees F./177 degrees C. or 300 degrees F./149 degrees C. for convection.
  • Bake for 20 minutes, then rotate the pan and bake for another 15 to 30 minutes, until the loaves sound hollow when thumped on the bottom and the internal temp is around 190 degrees F./88 degrees C. in the center.  If you used a whole egg wash, the crust will get darker than with the egg white wash, so don’t be fooled into thinking the bread is done until it passes the thump and temperature test.
  • Cool on a wire rack for at least 45 minutes before slicing and serving.

English Muffins – Family Guest Post

English Muffins from Scratch
The guy that inspires me to do everything better in my life wrote this post today.  He is known affectionately by several of our friends as “The Bread Man” and rightfully so.  After deciding to cook through The Bread Baker’s Apprentice a few years back, he’s baked bread nearly every week since then.  All Matt wants to do in life is to enjoy the process.  It is a rare talent that I do not possess.  I care much more about the outcome than he does and every day I learn from him how to live in the moment, just a little bit better than the day before.  Without any more rambling, here’s Matt’s take on English Muffins…of which I ate six…

Homemade English Muffins

When we go out for dinner and Alisa asks me what I’m in the mood for the answer is frequently (when it’s not pizza) “barbecue or Asian,” so I guess it’s no surprise that I like David Chang so much. He’s become famous for smoky east-meets-west combinations like his bacon dashi. On his excellent series Mind of a Chef he made equally reverent visits to a top Japanese katsuobushi producer and Allan Benton’s Tennessee smokehouse, did an impressive tour of Tokyo ramen shops and drank an equally impressive amount of Kentucky bourbon.

He’s also no-nonsense about flavor, and every dish of his we’ve made has been great. The Brussels sprouts recipe from Momofuku made a believer out of my dad, a lifelong Brussels sprouts hater. From the simple (has ginger scallion sauce made an appearance on this blog yet?) to the complex – and some of his recipes can get mind-numbingly complex – many of his recipes have become household favorites for us.
What does this have to do with English muffins? This recipe actually comes from the Momofuku cookbook, and as a bread lover and general fan of everything Chang does, I’ve been wanting to try it for a while. I actually made this on a recent Sunday night, perhaps fueled by the return of Downton Abbey, and had to laugh when I realized I was cooking English muffins out of an Asian cookbook at midnight.
These are fun to make – the dough is very delicate, and there’s something really satisfying about laying them into a pan that barely seems warm and turning them gently until they seem somehow sturdier, then start to pick up the first hints of the golden brown color we associate with English muffins. As with every other recipe from this book, they were delicious, and as with every other bread recipe I’ve tried I feel like I could spend years trying to master it.
This recipe is actually from Chang’s chef, Milkbar genius, Christina Tossi.  Here’s a link to the chef herself making these, step by step.  There’s really no way to improve this recipe and we followed it to the letter.  Also, I don’t want to write out 16 steps.
English Muffins

Literal Banana Bread

Banana Oat Bread
We always have bananas around here.  I realize my last post was about bananas and I apologize for the redundancy.  They are the most logical, good-in-a-pinch snack or breakfast for a little one.  I cut them up and put them in oatmeal most mornings, so one day when I had a lot of ripe ones and it was cloudy out, I thought that I’d do a literal banana bread and mix banana into the dough and add a lot of oatmeal to kinda make a bread version of my daily breakfast.  I really loved how rustic it turned out.  It was really great warmed with butter and sprinkled with cinnamon – as most things are.  I always think of how I could improve something the second it comes out of the oven.  With this, I think thick slices dipped in batter and turned into banana French toast would be amazing.

Banana Oat Loaf

Banana Oat Bread*
makes two loaves

3 cups whole wheat flour
2 tsp salt
1/2 oz yeast
1/2 stick butter, softened
generous 1 1/4 cups water
2 large bananas, chopped
1 bowl of oatmeal, muesli or granola

Put the flour, salt, yeast and butter into a bowl.  Slowly add water to the bowl and mix carefully by hand until the dough becomes elastic.  Knead the dough for 5 minutes, then cover the bowl and set aside to rest for two hours.

Divide the dough into two, then add a chopped banana to each, using your hands to mash the banana into the mixture.  This makes the dough crazy sticky, so add enough oatmeal to each to regain the original texture.

Line a baking sheet with parchment or a silpat.  Roll each dough into a ball, then press into the bowl of oats, so that the dough becomes completely coated.  Place the loaves on a baking sheet and let rise for 1-2 hours.

Preheat the oven to 400F.  Using a knife, deeply score the top of each ball into 8 sections.  Bake the loaves for 25-30 minutes, then transfer to a wire rack to cool.

*adapted from the amazing book, 100 Great Breads by Paul Hollywood.  

The Homegrown B.L.T. with a recipe for amazing mayo!

The perfect BLT

Every year we look forward to this.  An entirely home-grown (or made) BLT!  When we are fortunate enough to have a tomato crop, as we were this summer, the homemade BLT is the first thing in our minds to make.  So when the tomatoes started looking like this:
image_1

…we knew it was time to assemble the ultimate sandwich.  Matt cures pork belly and then smokes it in our electric smoker, I made the mayo, Matt made the bread and we grew the tomatoes, but sadly had no lettuce this year.  So other than the lettuce, this was entirely from scratch!  And what a good feeling.  I think this is kind of like remembering how good the food was on vacation – most of the goodness came from the setting or the mood, or the fact that you didn’t have to cook.  Similarly with this sandwich, the ingredients are certainly wonderful, but part of the joy is knowing that we worked for each component (minus the lettuce).  We thoroughly enjoyed this sandwich and this moment and Olive deconstructed hers, discarded the impostor (lettuce) and ate the rest.  She’s adoring these tomatoes, and I absolutely get giddy knowing that she likes tomatoes and that her first taste of tomatoes (besides tomato sauces) was out of our yard!  She won’t remember, but I know we will.

For the recipes, I will post our mayo recipe and method, which is super easy and totally worth it for the huge flavor you get.  I’ve posted Matt’s bread before, which is the bread we used for this (plus an addition of rosemary) and for the tomatoes, well, you’re probably too late to grow them yourself, but if you know someone who has an abundance, beg one off them and grab some good, thick-cut bacon and have yourself a BLT party!

open faced BLT

Mayo (made with an immersion blender -might be my most used kitchen tool, next to my knife)

2 egg yolks
1.5 cups light oil like canola.  I used a blend of canola and olive oil
1 TBS lemon juice
1 tsp white vinegar
1 tsp dijon mustard (or even dry would work)
Salt, pepper and a dash of cayenne and paprika for me!

Place the egg yolks in the bottom of a tall, wide cup (immersion blenders come with their own).  Place all the other ingredients on top of the egg yolks and stick your immersion blender all the way down to the bottom.  Turn it on the lower setting and start graaaaaaaaadddddddduuuuualllllly pulling the immersion blender up toward the surface of the oil.  As you pull up, the oil will slowly become incorporated into the egg yolk/spice mixture and in about 45 seconds, you will have perfect mayo!  It will keep two weeks in the fridge and I recommend slathering both sides of your bread and searing it on a griddle before assembling your sandwich.  Hey, if you only eat a proper BLT once a year, make it a good one.

image