Apple Pie Roses

apple pie roses
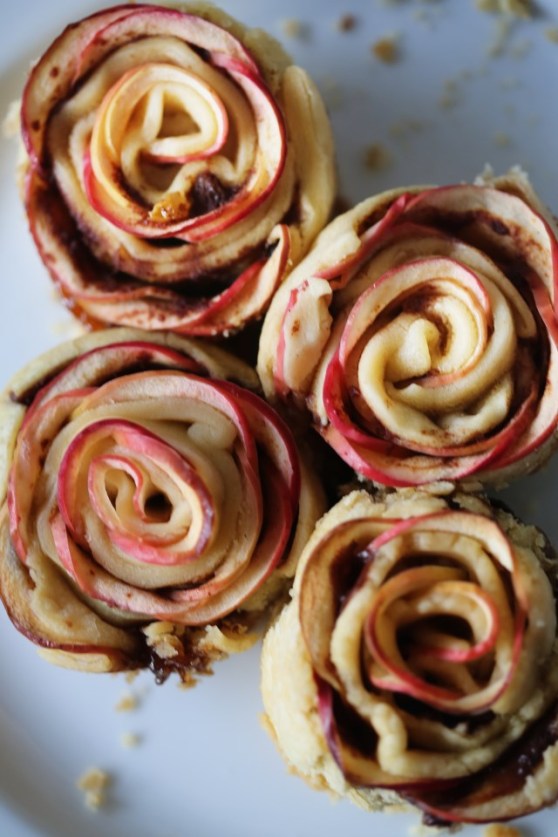
So I saw this really fun video circulating on Facebook a few weeks ago and like everyone else, it gave me the confidence to try it out myself! These little roses are so much fun to make and they are so beautiful! I thought they’d make an excellent special occasion type dessert. I did the recipe exactly like the video said and I was pleased with the process but not really the results. I mean, they’re okay, but they are definitely prettier than they are tasty. And I honestly think that’s the point. It was a super fun and easy “cooking craft” to do with Olive and so I’ll give it points for that because not every baking recipe is truly kid-accessible. But I decided to alter the recipe to be as delicious as it is beautiful. Here’s a couple problems the original recipe has:

1. The bake time is long and the thin apple slices burn on top, so we cover them during part of baking.
2.They stick like dadgum superglue to the muffin pan and get ripped apart when you take them out, therefore…
3. I fixed that by removing them from the pan while they were still super hot, but…
4. There’s the problem with eating super-baked tiny shreds of apple peel. It gives it that rose look, however…
5. The apple peel feels like tough strings in your mouth. Not really two adjectives you want for your baked goods.
6. The apples snap in half from the original recipe, so I fixed that by soaking them in hot lemon water instead of cold.
7. They just fall flat, taste-wise, so I added a bit of scrumptiousness into the filling along with the apple slices by adding cinnamon roll type flavors.
8. Also, I’m a pie crust junkie, so I switched to pie crust instead of puff pastry and it was indeed more delicious, but…
9. The falling apartness was magnified with the pie crust, so you fix that once and for all by…
10. Using greased muffin liners to bake these babies in. Voila. Most of the problems solved.

So my suggestion for the final round of 100% deliciousness is to peel the apples. How to fix the “but they don’t look like a rose, anymore!” problem? Add a couple drops of red food coloring to the warm water while the apples soak, OR pomegranate or cranberry juice and BOOM! Red roses. I didn’t do this for my final pics because everyone in my house was getting rather sick of eating these tiny apple roses, BUT I did color some apple slices in pomegranate juice and they were BEAUTIFUL. So I’ll try them like that again and make a special Christmas rose wreath edition of this recipe for those who care. Which I think might be 5 people, total. In any case, I present to you:
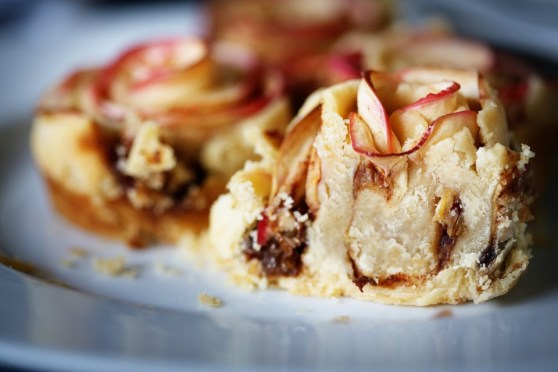
apple roses Apple Rose

Apple Pie Roses

Ingredients:
1 box frozen pie crust, softened in the fridge (Yeah, yeah, I always make pie crust, but these don’t need that extra effort. It’s effort enough as it is and the store-bought crust tasted just great.)
1 apple, peeled (or not – up to you), and sliced into VERY THIN half moons
Hot water and the juice from 1/2 a lemon

For the filling:
1/4 cup dark brown sugar
1/8 tsp allspice
1/8 tsp nutmeg
1 tsp cinnamon
1 tsp vanilla
squeeze of the other half of the lemon
2 TBS melted butter
1/2 cup chopped golden raisins, softened for a few minutes in boiling water
melted butter for brushing the tops

Cut and soak your apple slices in boiling water and lemon while you do everything else. I let mine soak for nearly an hour but I don’t think that’s necessary.

Preheat your oven to 375F. Combine the filling ingredients in a bowl and set aside. Roll out your pie crust and cut into 2.5″ x 6″ strips. Mine were NOT perfectly cut. It doesn’t matter. Spoon about a teaspoon of the filling on the strips of dough and spread it around. Drain and layer the apple slices, slightly overlapping, along the top half of the dough. Fold the other half up over the apples and pinch at the ends to secure, and then roll up into a rose. Refer to the lovely video if you need help!

Place the roses into greased muffin cups (this is important). Brush the tops of the roses with melted butter and sprinkle with sugar. Bake, covered with foil, for 30 minutes. Then uncover and bake for another 20-30 minutes, watching to make sure the edges don’t burn.
IMG_7289

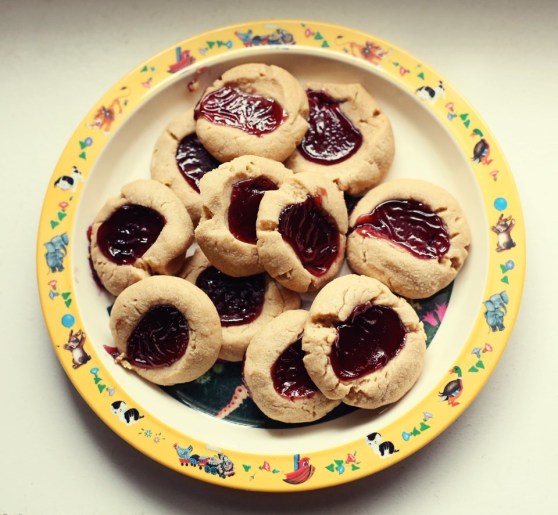
Peanut Butter and Jelly Thumbprint Cookies

Peanut Butter and Jelly Thumbprint Cookies3
Hello there! This is a delightful little cookie that takes no time at all to make and is so much fun for little helpers! I had this idea a while back whenever I saw powdered peanut butter in the grocery store and have wanted to try it out. It took a little tweaking, but I loved the texture of the cookie itself. One word of advice: don’t use jelly! I know, I know, it’s a riff off of peanut butter jelly sandwiches, but use something a little thicker like a jam or preserve. I used grape jelly because it’s iconic and it really ran out of the cookies more than I would have liked. This did not stop them from being utterly addicting; it just kept them from looking super pretty.

Thumbprint cookies have always been a favorite of mine and this version is so fun and really makes you feel like a kid again. With Thanksgiving and Christmas around the corner, I think this would be a great recipe to have for a cookie exchange! Drizzle it with a bit of white or dark chocolate to make it even more fancy! Enjoy!

Peanut Butter and Jelly Thumbprint Cookies2

Peanut Butter and Jelly Thumbprint Cookies


makes about 2 dozen

1 cup salted butter, softened
½ cup confectioners’ (powdered) sugar, plus ¼ cup more for dusting
2 teaspoons pure vanilla extract
¼ tsp salt
1 1/4 cups all purpose flour
1 cup peanut butter powder

about 1/2 cup fruit preserves or jam

Preheat oven to 325°F. Line a baking sheet with parchment paper.

In the bowl of a stand mixer fitted with paddle attachment, blend butter and sugar until fluffy and light, 2 minutes. Add vanilla and salt, scraping down bowl as needed. Pick up the baby, who has been crying at your knee for the past ten minutes and hold her while you try to measure out peanut butter powder. Let her sneeze into it. Do everything with one arm tied behind your back. Switch to low and gently mix in flour and peanut butter powder, just until combined.

Roll tablespoonfuls of dough into 1-inch balls. Create some interest by making some pea-sized and some into the shape of a carrot. Pretend to eat them, but then actually do. Place dough balls on parchment lined baking sheets. Press down the center of each ball with your thumb, making a slight depression, or a hole clean through to where you can see the bottom of the baking sheet.

Fill cookie centers with a teaspoonful of preserves and be sure to lick the spoon between each cookie. Makes it better. Bake 12-15 minutes or until golden brown and puffy, but take care not to over-bake. Let cool a few minutes on baking sheet, then transfer to finish cooling on wire rack.

When cookies are completely cooled, eat seven or eight with a glass of milk while singing every song you know in your best cat voice. Cookies can be kept in airtight container at room temp for a few days. Emphasis on “can.”

*recipe adapted from Chew Out Loud

Peanut Butter and Jelly Thumbprint Cookies

Dark Chocolate Cherry Pie Biscuits

Black Cherry Chocolate Biscuits
Dark chocolate and cherry – a pretty perfect desert combination. I regularly make dark chocolate oatmeal for Olive and myself and I will stir in dried cherries almost every time. There’s just something special about the tart zinginess of the cherries combined with the rich, deep earthy heft of dark chocolate. I’m just full of adjectives tonight. This baking project was a fun one – Olive and I were watching Tangled on a Sunday afternoon and I decided to bake something fun. A while back, Joy the Baker had this really fun baking competition and one of the challenges were these amazing apple pie biscuits. I remembered the recipe seeming like it wouldn’t work because it was too sloppy and wet, but they turned out incredible. (And there’s wonderful step-by-step instructions for how to do her biscuits, which you can apply to this recipe as well.) Fast forward to my version of this recipe and I felt the same way all over again – that there would be too much juice from the cherries for this recipe to work the same. And honestly, there was a bit more juice than with the apple version, but nothing a little draining didn’t fix. These were fun, decadent and great for breakfast during the week!

They also look so white because I had recently bought expensive, pasture-raised eggs made by chickens with PhDs and I didn’t want to waste one on making an egg wash for a few biscuits. So I brushed them with heavy cream.  Not as pretty, but it saved an egg from not getting to fulfill its destiny of becoming a fried egg on my toast the next morning.

Dark Chocolate Cherry Almond Biscuits Cherry Chocolate Biscuits

Dark Chocolate Cherry Pie Biscuits*

For the cherry filling:
2 cups fresh, pitted cherries, roughly chopped
2 tablespoons unsalted butter
2 tablespoons packed brown sugar
1/8 teaspoon almond extract
squeeze of lemon

For the dough:
2 cups self-rising flour
1/4 cup cold, unsalted butter, cut into small cubes
2 tablespoons granulated sugar
2/3 to 3/4 cup cold buttermilk

Preheat your oven to 425F. Line a baking sheet with parchment and set aside.

In a skillet over medium heat, melt the butter and brown sugar until they are all incorporated and bubbling and then stir in the cherries. Mash them around (I use a drink muddler) and let the mixture cook for about 5 minutes. Stir in the extract and a squeeze of half a lemon and add a pinch of salt. Stir around and let it cook for one more minute. Drain off all but about 2-3 tablespoons of liquid (cherries give off more liquid than the original recipe’s apples, but you don’t want NO juice) and set the mixture aside to cool while you make the dough.

To make the dough, mix the flour and butter together with your hands or a pastry blender until the butter is broken up into small pea-sized bits. Stir in the sugar and then make a well in the center of your dough. Add the buttermilk and with a fork, stir together until combined. The dough should be soft and moist, so use a bit more buttermilk if needed.

Use all-purpose flour to dust your work surface. I ignored this step in the original recipe and the bottoms of my biscuits tasted sour because they were in dusted with self-rising and there’s baking powder in self-rising flour so DON’T BE LAZY LIKE ME and just get out the all purpose to dust. It isn’t that difficult.

Spoon the dough onto your floured surface and gently pat it into a small rectangle. Dust the top with a little extra flour and roll out into a rectangle about 7 x 10 inches. Arrange the cherries over half the long side of the dough and carefully fold the other half of the dough over the filling, crimping along the edges to seal in most of the filling. It doesn’t have to be perfect and it will be messy. If you have cracks, just gently pinch them closed and carry on. You want to have about a 6 x 8 inch rectangle when it’s all said and done, so just pat it into submission. Cut into 12 squares and place on prepared cookie sheet about 2 inches apart. Brush the biscuits with a beaten egg that was not raised by monks and sprinkle with sugar and cinnamon if desired (I just used sugar since cinnamon didn’t fit in with the flavor profile I was going for.)

Bake for 12-14 minutes, or until golden brown and serve right away. The sugar topping will melt if you store these in a plastic bag on your counter throughout the week, so it’s best to eat these the same day or store in an air-tight container.

*adapted from Joy the Baker

Dark Chocolate Mousse Parfaits with Cherry Almond Syrup

Chocolate Cherry Almond Parfaits
Last week I bought lots and lots of cherries. Whenever I see that they are $2 pound, I get a little crazy. Olive loves them and will stand at the kitchen sink eating them until…well I don’t know how long she’d stand there because I’ve always intervened.  I should wait and see how long it goes on next time just for fun.

But the new wears off (slightly) and I need to use up the forgotten ones at the bottom of the colander for something.  Enter: cherry almond syrup. I layered dark chocolate mousse with the fresh made, chunky cherry almond syrup and it was so perfect. I also used the syrup on sourdough waffles and I’m still thinking about those perfect, crispy little things. It’s fun to make a “loose jam” like this syrup out of any fruit you find yourself needing to use up. It’s about to be apricot season and I can’t wait to make this with those! Or plums! Ah, stone-fruits.  You have my heart.  Dark Chocolate Cherry Parfaits

Cherry Almond Syrup

I used this recipe for the chocolate mousse and used 80% Lindt instead of semi-sweet chips.  Totally intense chocolate, but so perfect (for me.)

2 cups pitted cherries, chopped
1/4 cup brown sugar
2 TBS water
1/8th teaspoon almond extract

In a medium saucepan, bring the cherries, sugar and water to a boil and then reduce to a simmer and let it cook for about 2 minutes.  Remove from heat and stir in the almond extract.  Serve on top of ice cream, on waffles, pancakes, or in this tasty little layered parfait with dark chocolate mousse like I did.

Dark Chocolate Mousse with Cherry Almond Syrup

Chewy Molasses Cookies

Chewy Ginger Molasses Cookies Ginger Molasses Cookies
These cookies are like the feeling you get when you step out into a sunbeam with your bare feet and feel the warmth coming off the floor. You were previously a little cold and uncomfortable and now you’re warm and happy.  All that, my friends, in a cookie.  I made these a couple weeks ago when friends were coming to visit.  Paired with coffee and with the help of a red headed jabber-mouth, we had a very lovely afternoon together.  And because there was company, the redhead got three cookies before lunch.  So interesting how she didn’t want to eat her lunch that day…

There will be two original ideas from these cookies coming to you in time for Valentine’s Day.  The base recipe is from The New Best Recipe cookbook and like everything in that cookbook, it’s flawless.  Enjoy and make sure you have a friend over to help you enjoy them.

Ginger Cookies

Chewy Molasses Cookies

11 1/4 ounces (2 1/4 cups) all purpose flour (use Gold Medal – it has lower protein than most which will make a softer cookie)
1 teaspoon baking soda
1 1/2 teaspoons ground cinnamon
1 1/2 teaspoons ground ginger
1/2 teaspoon ground cloves
1/4 teaspoon allspice
1/4 teaspoon ground black pepper
1/4 teaspoon salt
1 1/2 sticks butter, softened (12 tablespoons)
1/3 cup (2 1/3 ounces) dark brown sugar
1/3 cup granulated sugar, plus more for rolling
1 large egg yolk
1 teaspoon vanilla
1/2 cup light or dark molasses

Adjust the oven rack to the middle position and heat the oven to 375 degrees.  Line a large baking sheet with parchment paper or spray with nonstick spray.

Whisk the flour, baking soda, spices, pepper, and salt in a medium bowl until thoroughly combined; set aside.

Beat the butter with the brown sugar and the 1/3 cup granulated sugar at medium-high until light and fluffy, about 3 minutes.  Reduce the speed to medium-low and add the yolk and vanilla; increase the speed to medium and beat until incorporated, about 20 seconds.  Reduce the speed to medium-low and add the molasses; beat until fully incorporated, about 20 seconds, scraping down the sides of the bowl as you go.  Reduce the speed to the lowest setting and add the flour mixture and beat until just combined.  The dough will be very soft.

With a tablespoon measure, scoop out the dough and with wet hands, roll the dough into balls, then roll in the granulated sugar.  Place on the baking sheet 2 inches apart.  Bake until the cookies are browned and still puffy, the edges have begun to set, and the centers are still soft (the cookies will look raw between the cracks), about 11 minutes, rotating the sheet from front to back halfway through baking time.  Don’t overbake!

Cool the cookies on the baking sheet for 5 minutes, then let them cool on a wire rack to room temp.  Eat post haste.  

Double Dark Chocolate Waffles

Double Dark Chocolate Waffles
The chocolate cravings have gone overboard.  I really blame it in all seriousness on pregnancy.  When I’m not pregnant, chocolate is good and fine, about on par with every other sweet. Not pregnant,  I don’t think about it outside of seeing it, I don’t dream up ways of using it to its maximum potential in breakfast foods, and I don’t think that it’s “needed” to get from 8 a.m. to 8 p.m. successfully.  When pregnant…well, all those things suddenly become priorities.  Like on Labor Day, I got up and looked up a basic buttermilk waffle recipe and then thought of the maximum way I could choco-fy it.  And I did.  Yes, I’ve had a similar waffle recipe on this blog before, BUT it wasn’t as good.  These waffles are fluffier, less dense, and the chocolate chips remain melty like a fresh-baked chocolate chip cookie during your entire breakfast.  So.  I’m not sorry for seeming repetitive.  If you’re pregnant, I’ll understand if I get a thank-you note in the mail later this week.
Double Chocolate Buttermilk Waffles
I topped these in three different ways and they were all good: melted butter and powdered sugar – easy, and the most cookie-like experience.  Butter with maple syrup: most waffle-like experience, but I’ve always felt that syrup on a chocolate anything is too much.  Turns out, it’s not.  And three: fresh raspberries all over the suckers.  Chocolate dipped fruit, anyone?  They were all good.  Dress it up, dress it down, this will be your new craving.

Double Chocolate Waffles
Double Dark Chocolate Waffles
makes about 12 Belgian-style waffles

2 cups AP flour
2 tablespoons brown sugar
2 tablespoons Dutch-process cocoa powder
2 teaspoons baking powder
1 teaspoon baking soda
1/2 teaspoon salt
2 cups buttermilk
1/3 cup vegetable oil
2 large eggs, lightly beaten
1 teaspoon vanilla extract
1 cup dark chocolate chips

Heat your waffle iron.  In a large bowl, combine the dry ingredients with a whisk until fully incorporated.  In a smaller bowl, whip up the wet ingredients.  Gently whisk the wet into the dry until just combined.  Fold in the chocolate chips.  Cook waffles to the waffle-iron’s suggested time (mine has a handy little light that goes off when they’re done) and keep in a 200 degree oven while you cook the rest to keep them nice and warm and crisp on the outside.  Serve with powdered sugar and melted butter, or whatever.  It really doesn’t matter – it’s all good.

Lemon Panna Cotta and Gingerbread with Blueberries and Thyme

Lemon Panna Cotta with Gingerbread and Thyme
When we were in Nashville last week, we had the joy of eating at Catbird Seat – an intimate restaurant with a unique seating that allows its guests to watch the chefs prepare each plate.  This restaurant combines the nuttiness of molecular gastronomy and the comfort of Southern cuisine.  It’s impressive without being too fussy.  The food was amazing and we left very satisfied!  We were served things like grilled morel mushrooms stuffed with chicken liver pate (my favorite),
photo 1
a yeast soup filled with smoked croutons and potatoes (tasted exactly like a loaded baked potato),
photo 2
and the dish that inspired today’s post: a lemon cornmeal cake with goat’s milk panna cotta and blueberries with thyme and marjoram.  Here’s a pic of the dish from the restaurant:

This was one dish that I knew I could conceivably recreate at home without any fancy equipment.  Watching them assemble this was mezmerizing and I took a few guesses as to what each component was before the chef handed me the plate.  Perks of being able to talk to the chef while they’re plating 🙂  When I got home, I dreamed up my own version.  I love lemon and thyme together, so I knew I’d keep that aspect of the dish.  Instead of putting lemon in the cake like they did, I infused the panna cotta with lemon and then made a gingerbread for the base because I love the flavors of gingerbread and figured it’d go well with everything.  And it did!  I happened upon some really great blueberries that actually TASTE like blueberries and the combination of all the flavors is delicate but powerful and the panna cotta is so smooth, it risks falling completely apart if moved too much.  I loved how this turned out and it really wasn’t that hard to make the components and assemble.  Next time you’re at a restaurant and love a dish – try to recreate it at home!  It’s a good way to learn to be creative in the kitchen!

Lemon Panna Cotta with Gingerbread

Lemon Panna Cotta with Gingerbread

For the panna cotta (to be done a day ahead)*:

1 cup whole milk, divided
2 tsp. unflavored gelatin
2 1/2 cups heavy whipping cream
1/2 cup sugar
Zest from two lemons, plus a wedge of the lemon
1 tsp vanilla bean paste (or one vanilla bean, scraped)

Pour 1/2 cup milk into a medium bowl; sprinkle gelatin over. Let sit until gelatin softens, about 15 minutes.
Meanwhile, combine cream, sugar, lemon zest and wedge, and remaining 1/2 cup milk in a large saucepan. Scrape vanilla seeds from bean into saucepan; add bean (or add your vanilla bean paste). Bring to a simmer over medium heat, whisking until sugar dissolves. Remove from heat; cover and let steep for 10 minutes.
Bring cream mixture back to a simmer. Add gelatin mixture and stir until dissolved. Strain. Divide among eight 3/4-cup ramekins. Chill uncovered until panna cotta is set, at least 6 hours.  *adapted from Bon Appetit

For the gingerbread (to make a thin version like mine):

2¼ cups sifted (9 ounces) unbleached all-purpose flour, plus more for dusting the pan
½ teaspoon baking soda
½ teaspoon salt
2 teaspoons ground ginger
1 teaspoon ground cinnamon
½ teaspoon ground cloves
½ teaspoon freshly grated nutmeg
½ teaspoon ground allspice
1 teaspoon Dutch-processed cocoa
8 tablespoons (1 stick) unsalted butter, melted and cooled to room temperature
¾ cup mild or light molasses
¾ cup (5¼ ounces) sugar
½ cup buttermilk
½ cup milk
1 large egg

Adjust an oven rack to the middle position and heat the oven to 350 degrees. Line a large, rimmed sheet pan with parchment paper and spray with nonstick spray.

Whisk together the flour, baking, soda, salt, ginger, cinnamon, cloves, nutmeg, allspice and coca in a medium bowl.

Beat butter, molasses, sugar, buttermilk, milk , and egg in a large bowl with an electric mixer on low speed. Add the dry ingredients and beat on medium speed until the batter is smooth and thick, about 1 minutes, scraping down the sides of the bowl with a rubber spatula as needed. Do not overmix. Scrape the batter into the prepared pan and smooth the surface.

Bake until the top springs back when lightly touched and the edges have pulled away from the pan sides, about 20 minutes. Set the pan on a wire rack and cool for at least 10 minutes. Serve warm or at room temperature.

Gingerbread can be wrapped in plastic, then foil, and refrigerated up to 5 days.

*if you want to make a regular pan of this, simply bake in a 9×13″ pan and bake for 35-40 minutes.   Adapted from The New Best Recipe.

Brown Butter Honey Ice Cream in Milk Toast Bowls

Japenese Milk Bread Bowl with Brown Butter Ice Cream
This recipe is insane.  What’s more insane than each component is the sum of its parts.  Matt saw a recipe for Japanese Brick Toast a few weeks ago and I had seen a similar recipe on Pinterest that looked downright heavenly.  He said in Japan they put ice cream with buttery toasted sweet bread as a dessert (…which is doubtful – I’ve seen Japanese people.  They don’t look like they eat ice cream in bread bowls).  Why has no one thought of doing a bread bowl for ICE CREAM?!  It’s genius.  The bread soaks up the melted ice cream and you’re left with this spongy cake-like texture when you get to eating the bread part.  This dessert demands to be shared.  Because if you don’t share it, you’ll feel like a dadgum glutton.  I mean, LOOK at that thing!

For the ice cream, we look no further than Jenni’s Splendid Ice Creams.  I posted about her Brown Butter Almond Brittle ice cream last year.  I’m a broken record when it comes to browned butter.  I can’t help it.  We began making ice cream out of her book about four years ago and haven’t even wasted our time with a different method.  She’s perfected the texture of homemade ice cream, in my opinion.  So for this recipe, I used her browned butter ice cream base and added honey and vanilla bean paste.  It was perfect in our little ice cream bowl.  The bread deserves a post of its own and don’t you worry – we’ll blog about it, soon.  Matt loves it too much and loved the process too much to only make it once.  He can’t wait to try it, again.  For now, enjoy a truly amazing bowl of browned butter ice cream:

Milk Toast with Brown Butter Ice Cream, Bananas and Honey

Browned Butter and Honey Ice Cream

for the base:
2 cups whole milk
1 tablespoon plus 1 teaspoon cornstarch
1.5 oz (3 tbs) softened cream cheese
1/8 tsp fine sea salt (I use kosher)
3/4 lb unsalted butter
1 1/4 cups heavy cream
2/3 cup sugar
2 tbs light corn syrup
1 tbs vanilla bean paste

Raw honey to fold into the ice cream


Mix about 2 tbs of the milk with the cornstarch in a small bowl to make a smooth slurry.  Whisk the cream cheese and salt in a large bowl until smooth.  Fill a large bowl with ice and water.

Melt the butter over medium heat in a 4 quart saucepan.  Bring to a boil and let bubble until the foam starts to subside and the butter is a rich dark brown (not black!).  Remove from the heat and let stand until the butter solids settle to the bottom of the pan, about 5 minutes.

Pour the clear butter oil into a storage container (once it solidifies you can use it as you normally would for cooking so it’s not a waste!) As you get closer to the butter solids in the bottom of the pan, use a teaspoon to remove as much liquid butter as you can.  You should have about 1 tablespoon of brown butter solids and a little bit of melted fat in the bottom of the pan (it’s impossible to remove all the fat).

Add the remaining milk, cream, sugar, vanilla bean paste and corn syrup to the butter solids, bring to a rolling boil over medium-high heat and boil for 4 minutes.  Remove from the heat and gradually whisk in the cornstarch slurry (you’ll need to stir it up again as it will settle and solidify some).  Bring the mixture back to a boil over medium high heat and cook, stirring with a heatproof spatula or whisk, until slightly thickened, about 1 minute.  Remove from the heat.

Gradually whisk the hot milk mixture into the cream cheese mixture until smooth.  Pour the mixture into a 1 gallon Ziploc freezer bag and submerge the sealed bag in the ice bath.  Let stand, adding more ice as necessary, until cold, about 30 minutes.

Pour the ice cream base into the frozen canister of your ice cream maker and spin until thick and creamy.  Pack the ice cream into a storage container, folding in drizzles of raw honey as you go.  Press a sheet of parchment directly against the surface of the ice cream (this is important to avoid freezer burn and maintain a good consistency) and seal with an airtight lid.  Freeze until firm, at least 4 hours.

Layer ice cream with sliced bananas and serve in boring porcelain bowls, or sweet bread bowls.  It’s up to you.  🙂  (recipe for bread bowls coming soon!)


Chilled Strawberry Soup

Chilled Strawberry Soup
I ran across this interesting recipe last week and wanted desperately to try it.  A chilled strawberry soup!  What could be more summery or fun?

The original recipe called for Riesling and a garnish of black pepper and olive oil and next time I do it, I really want to try that version.  Since I would be serving it to Olive and wouldn’t be cooking the alcohol out, I decided to alter the 1/2 cup of Riesling for lime juice and I think the results were so refreshing.  Some might call this a smoothie, and it basically is, but it’s thinner and if you go the adult version route, it would certainly be more elevated than a smoothie.  Olive loved this different snack and I loved it for breakfast this morning!  I garnished the soup with a bit of chocolate mint from my plant out back.  Did you know there was such a thing as chocolate mint?!  I didn’t but was intrigued and I think there is a subtle smooth difference between it and basic sweet mint (which has the quintessential “gum” flavor).  I thought mint and hints of chocolate would be great on a strawberry soup and it was – next time I may even add some dark chocolate shavings as a garnish!

Enjoy!  It’s a hot one out there, today!

Chilled Strawberry Soup
makes about 3 cups

3 cups strawberries, hulled
1 cup plain Greek yogurt
Juice from two large limes (about 1/2 cup)
1/3 cup raw honey
Garnish: mint, chocolate, cracked pepper

Put all ingredients except the garnish in a blender or food processor and blend for about a minute, scraping down the sides.  If you want to go the extra mile, strain the soup through a fine mesh sieve to remove the seeds. Chill for at least an hour and garnish as you wish!  (I didn’t chill ours at all and it was great).

Triple Layer Coconut Cake

Thomas Keller's Coconut Cake
Amazingly dense, rich, saturated with coconut flavor with a light, fluffy, creamy frosting that only compliments and doesn’t overpower the rich, dense and super-moist cake.  Yes, of course, this was the best coconut cake we’ve ever had.  And why, is that? Because it’s Thomas Keller’s recipe, and as anyone who has ever heard of or seen one of his cookbooks will know, everything he touches is gold.  This recipe, however, is not found in any of his cookbooks, but was featured in an article on Saveur magazine online.  It was a recipe that took him back to his childhood, to having a cake very similar to this in a small town diner.  We had this recipe bookmarked for months and finally gave it a go.  While you can tell from the pictures that my layering techniques leave something to be desired, the flavors were amazing.  Spot on.  I even took it to a picnic in 80 degree weather and it held up (barely).  This cake needs to be chilled the adequate time recommended, for sure.  Even with my missteps and imperfect execution, it was one of the best cakes I’ve had in years.

Go forth!  Be bold!  Make this cake!  We changed nothing – this is just one of those “I made it, so can you” kind of posts,  so I’ll simply copy the recipe for you, here!  Happy Weekend!

Keller's Coconut Cake

Triple Layer Coconut Cake

FOR THE CAKE:
Unsalted butter, for greasing
2 cups flour
1 cup desiccated coconut
1 tsp. baking powder
1 tsp. kosher salt
1½ cups sugar
eggs, separated
1¼ cup mayonnaise
¾ cup coconut milk
½ cup, plus 1 tbsp. buttermilk
2 tsp. coconut extract
2 tsp. vanilla extract

FOR THE MERINGUE:
6 egg whites
1⅔ cups sugar
3 cups sweetened shredded coconut

INSTRUCTIONS

Make the cake: Heat oven to 325°. Grease three 9″ cake pans with butter and line with parchment paper; set aside. Whisk flour, desiccated coconut, baking powder, and salt in a bowl; set aside. Place sugar and egg yolks in the bowl of a stand mixer fitted with a paddle attachment; mix until fluffy. Add mayonnaise, coconut milk, buttermilk, coconut and vanilla extracts; mix until combined. With the motor running, slowly add dry ingredients until batter forms; transfer batter to a bowl and set aside. Clean stand mixer bowl and add egg whites; replace paddle with whisk attachment. Whip whites until soft peaks form; fold into cake batter. Divide batter between prepared pans, smoothing tops with a rubber spatula; drop pans lightly on a counter to expel large air bubbles. Bake until a toothpick inserted in middle comes out clean, about 25 minutes. Let cakes cool for 20 minutes in pans; invert onto wire racks and let cool.Make the meringue: Using an electric hand mixer, beat egg whites in a bowl until medium-stiff peaks form, 5–7 minutes; set aside. Bring sugar and ¼ cup water to a boil in a 2-qt. sauce pan fitted with a candy thermometer; cook, without stirring, until temperature reaches 250°, 4–5 minutes. With the mixer on low, slowly drizzle hot syrup into egg whites until combined. Increase speed to high; beat until meringue forms stiff peaks, about 3 minutes more.

Assemble the cake: Place one cake layer on a cake stand and spread 3 cups meringue over cake; sprinkle with ¼ cup coconut. Repeat with second layer. Place remaining layer on top; cover top and sides with remaining meringue and cover outside of cake with remaining coconut, pressing lightly to adhere. Chill cake 30 minutes to firm meringue; serve chilled or at room temperature.

copied from Saveur 
Coconut Cake