Cooking Basics – Salted Caramel Sauce

Salted Caramel Sauce

This week is so busy with all the prep for our fundraiser dinner for Carpenter’s Church!  So, instead of an involved recipe, I decided to give you a simple kitchen basic that I have made about fifteen times in the past twenty-four hours as a topping for the banana bread pudding I’m doing for the dinner tomorrow.

Okay, okay, so maybe this isn’t the most basic kitchen skill to have.  It’s not exactly on par with the humble chicken stock. HOWEVER! It tastes outstanding and you have the ingredients in your house right now.  You could make a batch for ice cream, for brownies, as a topping for a cake or as a totally amazing sweet fondue for bread/fruit/a spoon.  You don’t need a reason.  You could jar this up and give it away as gifts at Christmas or any time.  You could make a few batches and keep them all to yourself – the only thing I know for sure is that if you try this recipe, you WILL be back for more…

Salted Caramel Sauce
makes about a cup

1 cup white sugar
1/4 cup water
1/2 cup warmed heavy cream (warm it in the microwave for a minute)
2 tablespoons unsalted butter
1 tablespoon vanilla bean paste (or extract)
3/4 teaspoon kosher salt

In a large saucepan over medium heat, add the sugar and water and stir with a spatula to fully incorporate.  Put a lid on the pot and let it come up to a simmer.  Have you ever read recipes that tell you to brush the sides of your pan with a wet basting brush to keep sugar crystals from forming while making caramel?  No more!  That’s tedious and I don’t like getting my fingers that close to boiling sugar.  The lid creates condensation that drips down and keeps all the sugar in place, instead of creeping up the sides like it will if the lid’s off.

Swirling occasionally while cooking, check for the color.  When it develops a nice golden amber color, remove it from the heat and stir in the heavy cream and vanilla.  This will bubble furiously, but just whisk, whisk, whisk until it calms down.  Add the butter and whisk to incorporate.  Then, add the salt and stir until dissolved.  Let it cool and taste test for salt level.  Store in jars on the counter for a week or in the fridge for a month.


Advertisement

Candied Apple Pie – a family recipe

slice of candied apple pie

My brother in law, Justin, is pretty amazing with a pie plate.  He’s been known to ship his cherry pies across the country just because someone requested it.  I tasted one the first year he was married to my sister in law, Julie, because he mailed one to us in Tulsa for Thanksgiving since he and Julie couldn’t come and were stuck working in Atlanta.  It was amazing and it made me doubly glad he married into the family. 🙂  He is a man of many talents and you’d never expect this hunter/carpenter/plumber/electrician type guy to be a whiz with baking, but he is!  And he loves it and you can tell.  There’s a pride in what he bakes that can literally be tasted.  Matt and I feel so fortunate that we have two more enthusiastic hands in the kitchen around the holidays in Justin and Julie.  We’re a family centered around the table with forks in hand!

This recipes was one he made over the Christmas break.  He first made a candied cherry pie and followed that up with this candied apple pie, which was so beautiful and rustic, I had to take pics and then, I had to have the recipe after I tasted it – amazing.  I know pie season is over and New Years Resolutions are done, but if you have room in your heart for one more pie this winter, make it this one.

candied apple pie

Candied Apple Pie
makes one, 10″ pie

For the crust:

2 1/2 cups flour
2 sticks of butter, very cold and in small cubes
1 tsp salt
1 tsp sugar
1/4 cup ice water, more or less as needed

In a stand mixer, add the first cup and a half of flour, the salt and sugar, and gradually beat in the butter by small handfuls until each addition is pretty well incorporated.  When all the butter has been added, add the last cup of flour and mix slowly to combine.  Add tablespoons of water until the dough just comes together when pressed between your fingers.  Wrap the dough in a plastic bag (I use a bread bag) and flatten out into a disc and let chill for at least 30 minutes.  When ready for the pie, take it out of the fridge and let it warm up a bit on a lightly floured counter space for about ten minutes, and then divide the dough, not exactly in half, but let one half be a bit bigger than the other.  You’ll use the slightly smaller half for the top of the pie.

For the Filling and Assembly:
3-5 lbs Granny Smith apples (or any firm, tart apple), cored, peeled, halved and sliced thin
1 cup brown sugar
1 stick of butter (8 tbs)
1 cup granulated sugar, plus extra for sprinkling
1 tablespoon cinnamon
1 egg white

In a 10″ cast iron skillet melt the butter and add the brown sugar. Stir until brown sugar is dissolved.  Set aside.

Peel and slice the apples (this little gadget is worth buying!). In a large mixing bowl,  stir 1 cup granulated sugar with the cinnamon and mix in the apples. Set aside.

Roll out the bigger of the two pie crusts and lay into the skillet, on top of your brown sugar/butter mixture.  Fill crust with apple mixture.  Roll out the smaller crust over the top and crimp edges and and trim any excess. Cut several single blade-width vent slots. Baste top with lightly whipped egg white then sprinkle with white sugar. Cook at 350 degrees for one hour.

Serve right out of the pan with ice cream or wait a bit for it to cool and the caramel in the bottom will be extra gooey.  It’s up to you.  If the bottom seems to be sticking and won’t come out, simply warm the skillet on a burner over low heat until the caramel melts and you can remove a slice.

Enjoy!

skilled apple pie

Stroopwafels – Your New Coffee Lid

stroop008
My friend, Libby, and I first saw stroopwafel cookies at an outdoor market in the center of Haarlem, Holland.  We were having an “off” day from our Let’s Start Talking mission trip and decided to explore the town’s morning market.  I think it must have been the very first time in my life that I explored and ventured off so far away from home and with zero adult supervision.  We were technically adults as sophomores in college (are you done laughing, yet?) – I say “technically” because someone trusted us to go across the globe to teach English to non-native speakers, but in all other manners of speaking, we were babies.

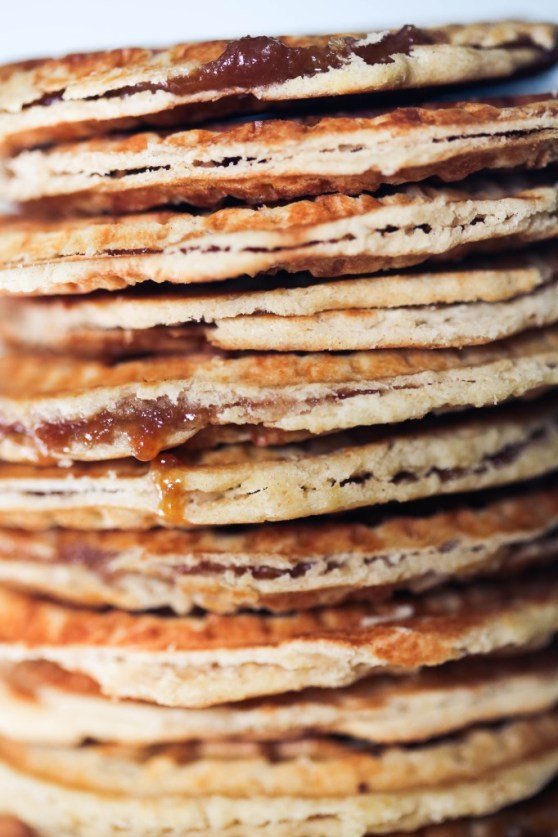
While walking the streets of Haarlem (or trying our best to ride our bikes without getting killed after not being on a bike since the 90s) we discovered so many things we didn’t know existed.  Crazy street performers that came alive at the sound of a coin dropping into their hats, a sweet, old lady flipping tiny pancakes over with a spear in her honeycomb-style pan (ebilskivers), and probably the best of all – the Stroopwafel  (pronounced “strope”) – two waffle cookies sandwiched together with soft caramel. We smelled them from down the street – the air was cloaked in butterscotch.  We followed our noses to a little stand in the center of the street where a man was making salad-plate-sized waffles, pressing them with a hand-held grid patterned iron, and spreading each waffle with a thick caramel sauce before sandwiching them together and handing them to us, gooey and oozing out the sides.  They were warm, soft and crispy around the edges and we took one bite and with wide eyes, didn’t say another word until we were done eating.  It was one of those magical food memories that has cemented that time and space in my brain, forever.  A part of my heart will always be with my friend, Libby, on the streets of Haarlem, eating stroopwafels and wondering how we got so lucky.  Eleven years later in our toddler-run worlds of rushing around and enjoying quick cups of coffee in the wee hours of the morning, I like to go back to that place where nothing else in the world existed except our adventure.

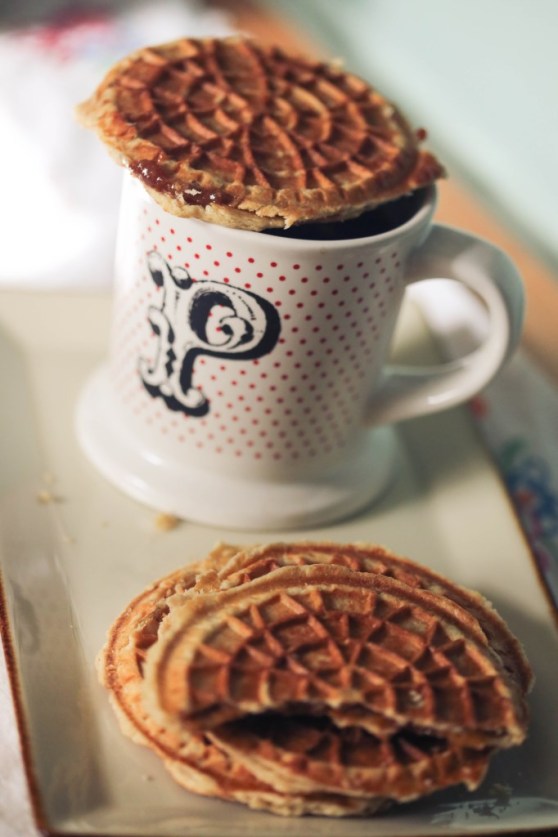
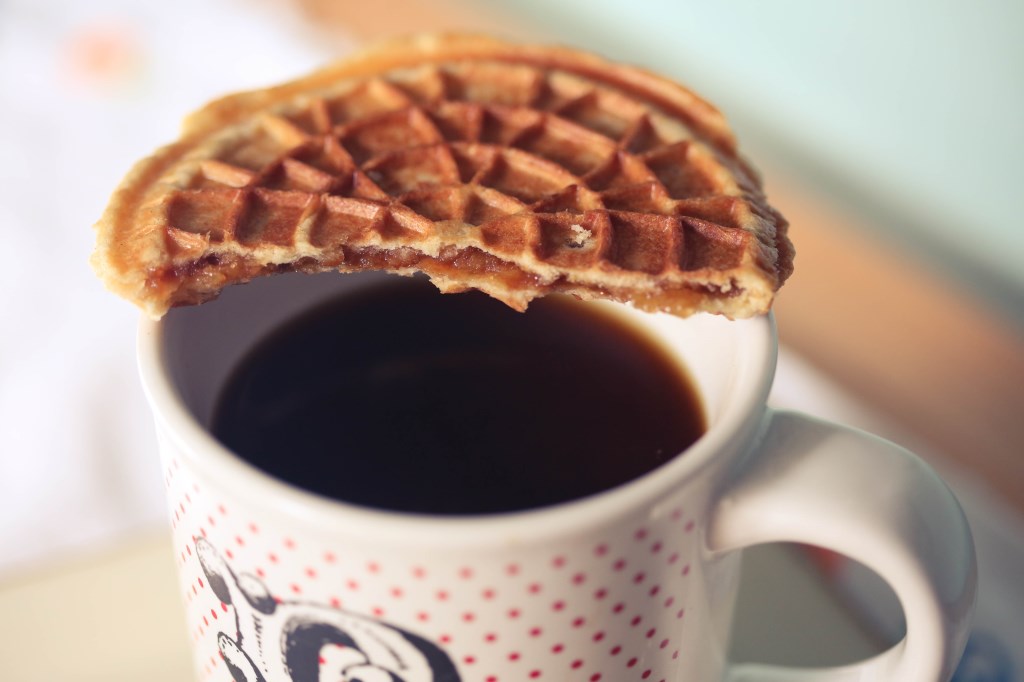
When we got back from Holland, we started to see reproductions of these cookies in grocery stores.  A poor man’s stroopwafel, but better than nothing.  I don’t think most people know that you’re supposed to place the cookie on top of your coffee after you pour it, so that the room temp caramel softens with the heat and when bitten into, oozes out just a bit.  The ones we got in the market were obviously over-sized to sell to American tourists, but the true size is a perfect fit for the top of a coffee mug.

stroop005

I wanted to make my own for years, but had never attempted it till last weekend.  I found a basic stroopwafel recipe online and had some leftover butterscotch sauce in the fridge and it worked perfectly.  I recommend making the butterscotch because I think that salty note is just amazing with the sweetness of the cookie.  I also doubled the cinnamon the original recipe called for and was quite happy with the results.  If you’re not in the mood to make your own caramel or butterscotch, I thought the other night, while I was supposed to be sleeping, that those sheets of caramel sold in grocery stores for caramel apples would work perfectly because they’re already flattened out!  You really need a pizzelle iron to make these and if you don’t have one, I would suspect that you could be pretty successful if you have a handheld bacon press and just pressed them out on a griddle.  They don’t take long to cook at high heat (about one minute) and you have to split them in half before they cool down, so get ready to suck it up and act like a woman (I didn’t miss-type).   As I will say over and over again on this blog: nothing in this life worth having comes easy.

And homemade stroopwafels are definitely worth having.  Libby, my dear – can’t wait to have coffee with you, again in a couple weeks.  Of course, you’re always there, in my head, during my morning cup.  Always.

stroop004

Stroopwafels*
makes about 15-20

4 cups all-purpose flour
1 tsp. ground cinnamon
1/2 cup white sugar
1 cup unsalted butter
2 large eggs
1 (.25 ounce) package active dry yeast
1/2 cup warm water

For the filling:
Confession: I honestly don’t remember how I made the caramel/butterscotch in my fridge. It was a few weeks old and I’d gone on vacation since then, so I honestly don’t remember.  It was mighty fine, though.  I will share this link with you, though, because I’ve made this exact recipe many times and it’s pretty fail-proof.  You don’t be disappointed and it only takes about 15 minutes.  Or buy caramel apple sheets from the store.  But this will taste better.

Preheat pizzelle iron, or griddle, if you don’t have a pizzelle, and heat up the bacon press if you’re using that.
Dissolve the yeast in the warm water.
Cut the butter into the flour either by hand (I did this whole recipe by hand and got a bit of muscle build from doing what Kitchen-Aid does 10x better but hey, I’m stubborn.)  Mix in the sugar, cinnamon, eggs and yeast mixture. Mix well (use your mixer with a paddle attachment unless you, too, want to build your muscles) and set aside to rise for 30 to 60 minutes. It might not double or even rise very much, but as long as you had it in a semi-warm place for that hour, it’ll be fine.  Mine didn’t rise much.  Roll dough into 15ish small balls (about a ping pong ball size), squeeze each ball into the preheated pizzelle iron and bake for about 30 seconds to a minute. Cut the wafels in two and spread with the filling.  Eat immediately or let it it come to room temp and enjoy them as lids to hot coffee.

And please, whatever you do, don’t eat these alone.  I think I shared these with about 5 different people.  That’s the key to happiness, I’ve found 🙂

*adapted from Diana’s Desserts

stroop006