Roasted Butternut Squash with Brown Butter

Every time someone asks me how to cook any vegetable, my answer will 99% of the time be: roast it.  Olive oil, salt, pepper, done.  That’s all you need.  I have discovered a new, refreshed love for so many vegetables by simply roasting them.  Butternut squash is one that benefits from this cooking method more than most.  As King of the Squash (a term I deemed it worthy) the butternut squash is more dense, less watery and has a deeper flavor than most squash.  In the winter months, it’s the most perfect side dish for any meal, and since it can be pureed beautifully or left in small chunks, it is the perfect baby food for babies just starting out with solids, or graduating into finger foods.

I found the easiest way to cut up a butternut squash for this recipe is by cutting it into cross sections:

bns2

Once you scoop out all the seeds, begin cutting off the rind.  The rind so tough, no amount of cooking will really make it edible. I mean, it is edible, but it wouldn’t be enjoyable.

bns3

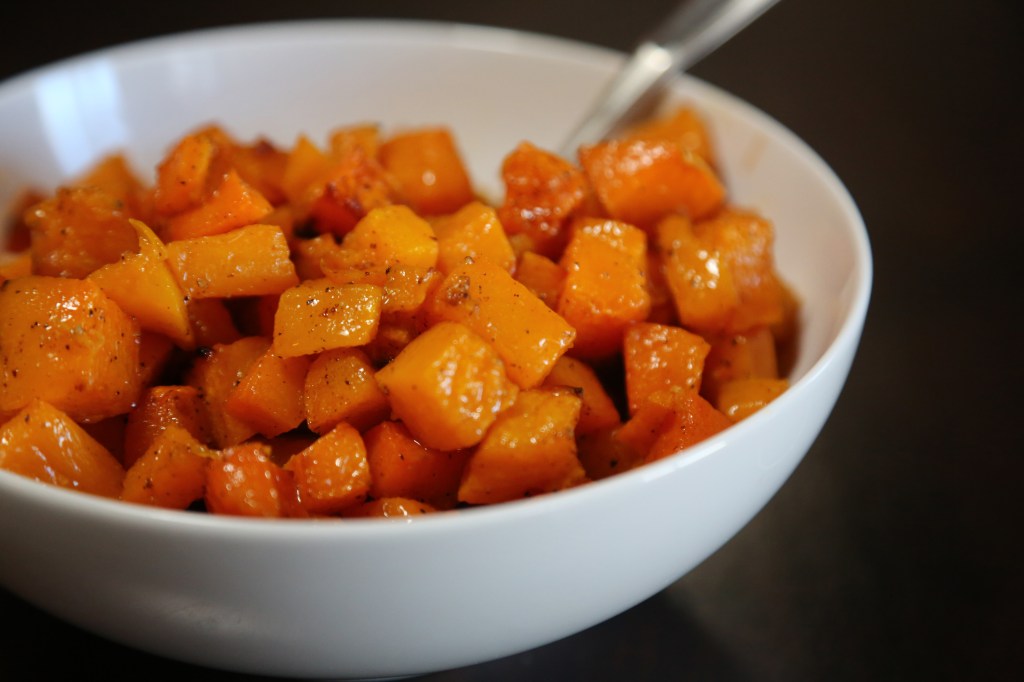
Once you get all the rind off, cube up the squash into about 1/2″ cubes.  It’s important to keep your cubes all the same size because when things are varying sizes, they cook at varying times, and it makes everything more difficult when trying to get dinner on the table to wait for a 1/3 of your squash to continue cooking.  So.  Be consistent in your chopping!

Now comes the easy part.  Spread out all the squash on a large, rimmed baking sheet and toss 2 tablespoons of oil till completely coated, and sprinkle with kosher salt and pepper.  Roast at 400 for 45 min to an hour.  I want to add that your baking sheet needs to be big enough so that your squash isn’t completely crowded and piled on top of each other.  I’ve roasted it that way and the squash just steams and you don’t get those nice, charred bits that add to the texture and depth of flavor of this dish.

bns4

So you want to bake it kind of past the point where you think you should.  I always wait till a few edge pieces look a little burnt.

When they’re out of the oven, immediately put them in a bowl to keep warm.  They’ll cool off pretty quick on the pan.  Now for the magic.  Take a tablespoon of butter (be generous, verging on two tablespoons) and put it on the stove on medium heat in a stainless steel pan.  Let the butter melt and swirl it around until the foam subsides.  Then, when it starts to smell rich and nutty and there are butter solids forming at the bottom of the pan (this is why you use stainless – you can’t see this happening in a black, non-stick pan) remove the butter from the heat, pour over your bowl of squash and sprinkle with cinnamon, Chinese 5 Spice, pumpkin pie spice – whatever strikes your mood!  My go-to is Vietnamese Cinnamon.

Let me tell you – this is magical stuff with the addition of the browned butter.  I deeply believe that butter in moderation like this is not only fine, but life-giving.  The richness of browned butter could make anyone feel like a king at the table.  Cooking for your family is all about making them feel loved, warmed and nurtured.  If you wanted to get creative, throw a sage leaf in with the butter while it’s browning. (By the way, that makes an amazing ravioli sauce)  And yes, I realize I’m putting a recipe that has browned butter under the category of “healthy meals.”  I’ll rant about that in another post, but let me just say that I think there’s a lot more to eating healthfully than counting calories.  And 1-2 tablespoons of fat (okay 3 counting the olive oil) is about a tablespoon of fat per serving.  We’re not going to kill anyone with those ratios. And we’ll have happy eaters!

bns1

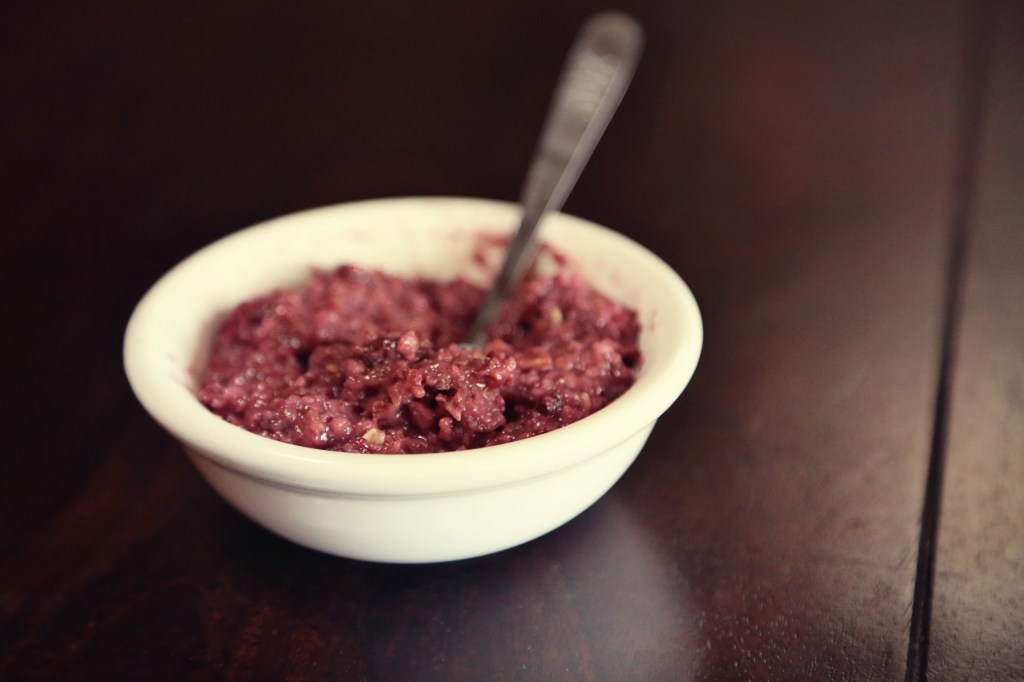
When I cook for Olive, I don’t ever hold back on spices except for salt and extremely hot spice (and even then, I salt, just less than what I’d prefer, and I let her have a bit of something spicy to see if she likes it.)  She happily ate these little nuggets the entire time we ate.  So that meant a happy, quiet baby for nearly an hour of eating.  Is THAT motivation enough to make this for your baby?  If you have a baby who isn’t eating chunks yet, simply take about a half cup of the squash into a bowl, add a bit of low sodium chicken broth or water and puree with an immersion blender.  Add a bit more cinnamon or butter and you have an amazing puree for your little 4-6 month old!

Enjoy!  And don’t forget to let me know how it turns out.  I know I just basically wrote out the recipe, but I hate blogs who do that and then don’t put a straight-forward version down below for me to copy/paste.  So!

Roasted Butternut Squash with Browned Butter

1 butternut squash, 2-3 lbs
2 tablespoons olive oil
Kosher salt and fresh ground pepper to taste
1-2 tablespoons unsalted butter
Cinnamon or whatever spice you think sounds good!

Preheat your oven to 400.
Slice the butternut squash into 1″ cross sections.  Scoop out the seeds (I use a metal measuring spoon – they have sharper edges for scraping) and cut into 1/2″ cubes.
Arrange the squash on a large, rimmed baking sheet.  Drizzle with olive oil until thoroughly coated and then sprinkle with salt and pepper.
Roast in the oven until some pieces begin to brown, about an hour.  Check the cooking at 30 minutes and stir the squash around to ensure even baking.  I know my oven has hot spots and I assume yours does, too.
Once the squash is done roasting, place it in a bowl to keep warm.
In a small saute pan, heat butter over medium heat until foam subsides and brown bits start to form on the bottom of the pan.  You’ll want to swirl the pan a few times and really watch.  There’s a HUGE difference between browned butter and burnt butter and you don’t want the latter.  I think the whole process takes about 5 minutes, but it will vary so once you smell that intoxicating nuttiness, you’re done.
Pour butter over squash and adjust seasoning as you like.

Enjoy!  Serves 4 as a side dish.  Or package it all up into freezable portions for baby, if you can part with it.

Swiss Chard Salad worthy of lunch and dinner!

Last week, every meal I made came out of my current favorite  cookbook, The Bonne Femme Cookbook by Wini Moranville.  This book claims that these recipes are what French wives and mothers cook every day.  They aren’t difficult, they don’t require tons of prep, and they use ingredients that are in season and available nearly everywhere.  And any book about France will tell you that the majority of French mothers work outside the home!  Most of the meals I made last week took no longer than 30 minutes.  They tasted rich, but weren’t over the top, they had variety in flavors, ingredients and yet weren’t expensive.  They were all full flavor and I still lost two pounds at the end of the week and honestly, didn’t expect to because the meals had been so satisfying.  (how sad that we expect healthy food to be miserable)

This simple Swiss chard recipe was one I made last Monday.  I told Matt, “If we want to have it again, I’ll write a post about it” and not only did we have it again the next day for lunch, I wanted to have it a third time, but held back only because I had other meals planned.  It was that good.

There are two types of Swiss chard you can buy (there may be more, but these two are available at local grocery stores here in Lubbock, TX) – there’s rainbow chard which has beautiful red, pink and yellow stalks, and then there’s this variety, White Stalk Chard:

swisschard1


I found that this type isn’t bitter at all, which as most of you know, greens in general tend to have a bitter bite to them.  Many find that appealing, but despite my best efforts to get past the bitterness, I tend to add more and more bacon to greens that are TOO bitter, and that’s a bit counter productive to a week of trying to eat well.

So now you know what to look for to build this lovely meal.  The original recipe called for blue cheese instead of Parmesan, but I had parm on hand, so that’s what I used and I really loved the way the nuttiness of it went with the apples and chicken.  I think any cheese would be fantastic.

Swiss Chard with Roasted Chicken, Apples, Pistachios and Parmesan

1 1/4 pounds boneless, skinless chicken breast halves
Salt and freshly ground black pepper to taste
2 tablespoons extra virgin olive oil, plus extra for brushing the chicken
4 ounces Swiss chard leaves, coarsely shredded (I didn’t use the center stalk – just took the green)
1 large, tart red apple, such as a Braeburn (this is what I bought) peeled, cored and diced
1/4 cup diced Parmesan cheese (or any crumbly cheese)
3 tablespoons coarsely chopped pistachios
1 1/2 tablespoons balsamic vinegar

Preheat the oven to 350F
Season the chicken breasts with salt and pepper and brush them lightly with olive oil.  Place the chicken breasts in a shallow baking dish and bake until the internal temp registers 170F on an instant read thermometer, about 20 minutes (we use the ThermaPen and it’s awesome and quick.) Transfer the chicken to a cutting board to rest for 5 minutes or so.
Meanwhile, combine the Swiss chard, apple, cheese and pistachios in a large bowl.  Whisk together the olive oil, balsamic vinegar and salt and pepper in a small bowl.
Cut your chicken breasts into bite sized pieces, or shred it using two forks.  Add the chicken to the chard mixture and toss to combine; the chard leaves will soften a bit from the heat of the chicken, but this adds to the comfort of the meal, in my opinion.  Add the vinaigrette and toss again to combine.  Divide the salad among four shallow bowls and serve.

swisschard


The Weekend Feast

Matt and I got into the habit a few years ago of eating simply during the week and more “festally” (to feast) on the weekend.  Several reasons for this.  For one, we needed to lose about a hundred pounds between the two of us (and we did – yay) and several chefs we follow had been talking of other cultures living their lives this way and we couldn’t help but notice they were cultures withOUT a major weight problem, as a whole.  One of our favorite chefs, Rick Bayless, speaks of this way of eating and living in his book, Fiesta at Rick’s and of the art of the Mexican fiesta:

“…remember that nutritionists craft simple messages for maximum impact.  If they’ve deemed a food deleterious, it won’t likely creep onto the beneficial list…even sometimes, even on special occasions. Yet that’s exactly where it should be. Because, if we eat a wide variety of good food–fresh stuff in reasonable portions–there’s a perfect time for everything. For the simple pleasure of a fall apple and for the over-the-top chocolate fudge cake.”

It started to make sense to us that this would be a much easier way to maintain a desired, healthy weight than with the old, tried and not-so-true method of crash dieting, buying late night gym memberships, falling off the diet wagon, overeating, repeat.  I came across an amazing book called Supper of the Lamb, in which author Robert Farrar Capon devoted an entire chapter to eating “festally” (to feast) verses eating ferially (simply, meagerly.)  I could really quote this entire book, as it’s rich with language about cooking, eating and food that sums up nearly everything I have come to believe.  And he is an Episcopal priest, so he says things much more eloquently than I.  About festal verses ferial eating, he says:

“Both the ferial and the festal cuisine, therefore, must be seen as styles of unabashed eating.  Neither attempts to do anything to food other than render it delectable.  Their distinction is grounded, not in sordid dietetic tricks, but in a choice between honest frugality or generous expense…Let us fast, then — whenever we see fit, and as strenuously as we should.  But having gotten that exercise out of the way, let us eat.  Festally, first of all, for life without occasions is not worth living.  But ferially, too, for life is so much more than occasions, and its grand ordinariness must never go unsavored.”

You may begin to seeing a trend with this blog, as I continue to publish weekly recipes.  Mondays will almost always be something healthy and light to get you in the right mindset for your week.  Fridays will almost always be something more indulgent.  I want to stress, however, that eating with a festal attitude does not mean becoming gluttonous a couple days a week.  We’ve made that mistake and that, I fear, is another American frame of mind that things have to be BIG and ALL YOU CAN EAT in order to be “fun” or a party type atmosphere.   I believe it was a French woman, in the book, French Kids Eat Everything who said, “Oh no, a small piece [of cake], please.  If it’s too big, I won’t enjoy it”  We may laugh at this prim response, but have you SEEN the French?  They don’t exactly have an obesity epidemic and they are known for their indulgent recipes.  That, I realize, is an entirely different blog post.

Without further rambling, may I present to you, your weekend indulgence!  To be enjoyed with coffee, a friend and WITHOUT a SHRED of guilt.  Just make sure you don’t eat too many, or you might find yourself not enjoying them, anymore…

chocomering

Dark Chocolate Meringue Cookies with Espresso Ganache Filling

For the Meringue Cookies*:

  • 6 large egg whites, room temperature
  • 1/8 teaspoon cream of tartar
  • 3/4 cup Baker’s Sugar (superfine sugar – regular will do fine, too)
  • 3/4 cup nut flour (I used almond flour, but you could use any)
  • pinch of salt
  • 1/3 cup Dutch process cocoa powder

Preheat the oven to 225°F and line two baking sheets with parchment paper.
Place the egg whites and cream of tartar in the bowl of a stand mixer and beat on medium speed until fine bubbles form. Increase the speed to medium-high and whip until soft peaks form.
Slowly add the sugar and whip until the meringue holds stiff peaks.
In a small bowl, whisk together the nut flour, salt, and cocoa powder. Sprinkle over the meringue and mix for 30 seconds on low speed.
Remove from the mixer and use a spatula to finish folding the ingredients together until you have a smooth, thick, evenly mixed batter.
Using a piping bag or small spatula, spread the batter onto the parchment, spreading to about 2″ circles. Leave about 1″ between the circles.  If you’re feeling extra festal and someone is coming to share these cookies who is an avid fan of salt, try sprinkling the tops of the cookies before they bake in this cool espresso fusion salt.  I think even a sprinkle of kosher salt would add to it and a sprinkle of salt always helps balance out the richness of any dish.

Bake the discs in the oven for at least 60 minutes. You can then turn off the oven, crack the oven door open, and leave the discs to dry in the oven for a few hours, or up to overnight.  This is what I did and they peeled off the parchment paper just fine.
While your cookies are still cooking and/or drying out, get on with making your ganache filling.  I just made up a ganache recipe that I thought sounded good.  Here were the ingredients:

Espresso Ganache

Heat the heavy cream over medium heat until it comes to a boil.  Place your chocolate chips in a large glass bowl and pour the boiling cream over the chips.  Let it sit there for about 5 minutes, then gradually stir with a spatula in the center of the bowl.  It will appear like the milk won’t ever fully incorporate into the chocolate.  Then, like magic, the center starts to darken into a black silky texture and you just keep stirring and folding and little by little the chocolate mixes beautifully with the cream and you’re left with the most wonderful, glossy texture.  This is one of my favorite things to get to experience in the kitchen.
At this point, you have a beautiful ganache.  If you wanted, you could let it chill and make yourself some righteous truffles.  However, for filling cookies and having a nice texture that won’t leak out everywhere, I chose to add some cinnamon, espresso powder and powdered sugar to thicken the chocolate up a bit, and to make the filling sweeter than the cookie, and add depth to the chocolate flavor (with the espresso powder) which I think is a nice balance.  So, add the cinnamon and powdered sugar and stir with your spatula, folding it in on itself until fully incorporated.  You’ve ruined your glossy texture, but it’s okay.  Once it comes up more to room temp, you’ve got a wonderful texture to spread onto the cookies.
Spread and sandwich the cookies together.

Makes 12-ish sandwiched cookies.

Tune in Monday for a great recipe to kick off your week of eating clean, simple and deliciously!

*recipe adapted from King Arthur Flour

Fruit Cobblers – cooking for baby

cherrybowl

One of my favorite things to make for Olive is various fruity “cobblers.”  During the winter months in this part of the country, the fruit that is in season is apples, pears, oranges, primarily.  I try my best to cook fresh produce that’s in season.  The biggest reason is obviously, freshness and quality.  But another BIG factor is price.  You think it’s too expensive to eat healthy?  That’s probably because you’re trying to buy berries in December, or fresh corn in February.  Fruits and vegetables in season just taste better, too.  The apples and pears this time of year are awesome.  And we’ve eaten plenty of them!  But it starts to get old and pretty soon I start eyeing those hot-house blueberries, tempted to pay the $4.99 just to have something different.

That’s where frozen fruit comes in to save the day.  Fruits that have been frozen are usually picked at the peak of ripeness and flash frozen.  This means really great, concentrated flavor.  So during the winter, if you’re planning on cooking the fruit anyway, buy frozen.  I really try to offer Olive something new every couple days, but the girl is well-versed in apples and pears.  So to branch out, I buy frozen bags of raspberries, blueberries, blackberries, mango, and I mix them with oatmeal or yogurts for a naturally sweetened treat.

Olive is not a fan of plain oatmeal.  But tell me, who is?!  So here’s what I do with the frozen fruit and this makes at least six- 2 ounce portions of baby food in one whack:

Fruit “Cobbler” 

One bag of frozen fruit (in this picture, I used black cherries)
2 tbs salted butter
1/2 cup rolled oats (I used Quaker Old Fashioned)
cinnamon
1/2tsp lemon juice

Empty the bag of frozen fruit into a large skillet.  I use my non-stick fry pan that’s about 10″ in diameter.  Turn the heat to medium and put the salted butter in with the fruit and let it all come up to a simmer.  I use salted butter in most things I make for Olive because I don’t add extra salt.  I find that it gives enough flavor while going easy on the salt intake.  I add a few dashes of cinnamon while it’s bubbling away, but really, you could add any spice you want – nutmeg, clove, orange peel.  Whatever you think would be good!  For that cobbler effect, a few squeezes of lemon juice really brings out the flavor of the fruit.  When the fruit has bubbled for a while and is thickening up a bit, I add about a half cup of oatmeal.  If it looks too thick, I add in some water.  Too thin, more oatmeal. But it’s rarely too thin. I don’t really let the oats cook, because I find that once they sit in the fruit and juices from the fruit and lemon, that they absorb and have the right consistency when you warm it up to serve after at least a day in the fridge or freezer.

I then transfer the mixture to a tall container and pulse it a few times with my immersion blender.  The immersion blender has made making baby food a breeze with minuscule clean up.  Then, I just transfer to 2 oz. containers and save one or two for the fridge and put the rest in the freezer.  Buying those cute little plastic baby food containers is fine, and I have a few sets of them and use them all the time (they’re great for taking in your purse to a restaurant!)  but I’ve found the easiest thing is to use a tin-foil muffin tin that can be found at any grocery store for about a dollar, and they are conveniently 2 ounce portions.  I just freeze the food in those, then pop them out, put them into a ziplock bag and done!

I’ve made this recipe with blackberries, raspberries, blueberry banana (the best ever that I may or may not have eaten myself), black cherry, mango, pear and apple.  I’m addicted to the simplicity, the variety and knowing that Olive is getting good stuff and trying something new.  I have also cooked down fruit and mixed it in with plain, full fat yogurt.  She loves it all, so far!

olive-ten-months

As you can see, she is serious when it comes to eating.

cherry cobbler

The Family Meal

Hi. I’m Alisa. The one on the right.

 paris-00524

I want to have this blog because there is literally nothing else that I do that inspires me like cooking for my family, thinking about recipes, reading cookbooks, watching documentaries about chefs, and eating weekend kitchen creations with my husband, Matt .  I am a photographer, and I love working with couples and weddings and especially love when they choose a good bakery to make their cake, but honestly I don’t stay up late thinking about photography. I think about food or cooking, or eating with my friends and family.  I had a little girl, Olive, in March of 2012 and since she started eating solid food at 6 months, I have found myself in the kitchen at the beginning of each week, excitedly coming up with stuff to blend up and freeze into little, multi-colored cubed portions of goodness that will keep her hair red and her cheeks rosy.  Hopefully.

ten-00012

 Eating with my new family is very important to me, and I want to start from the very beginning with Olive in the kitchen.  I plan on teaching her as soon as she can pull a stool up to the counter how to navigate the kitchen and make basic meals and follow simple recipes.  I think there is so much more than just cooking that can be learned in the kitchen.  Patience, timing, cleanliness, manual dexterity, care, concern, etc.  Our culture is governed by fast food and 10 minute lunch breaks and more foods in grocery stores that can live on the shelf than can live in the ground or on a tree or in a barn yard.   I want to do it better – I want to get back to the heart of sitting around a dinner table in laughter, or peace or even chaos, and spend more time there in the evenings than in front of the TV, or with my face illuminated by the glow of my phone.  I know no better way to accomplish this than to set the example for Olive.  If I don’t take time with my dinner, why should she?  If I snack randomly throughout the day, why can’t she?  If I am distracted by my phone during dinner, why can’t she play with her toys at dinner?  Teaching her will undoubtedly teach me in the process, and it’s already begun.

This blog will offer recipes for the family, blended up versions for babies and toddlers and advice for your cooking endeavors at home.  I plan on exploring these things along the way, as well, and tell of my successes and failures so that we can all learn together.

7G9A8488

(don’t worry, none of my recipes include mulch)