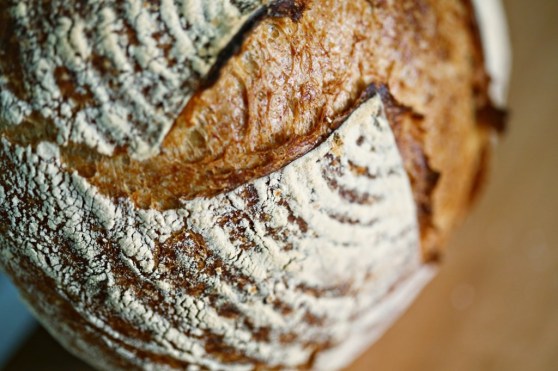
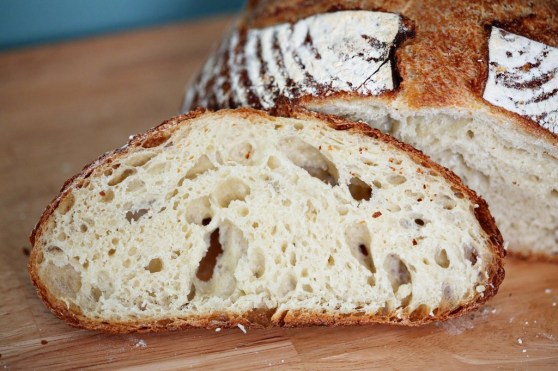
Alisa: I wanted Matt to write about the bread that he’s made countless times in the past seven years. He started on a quest to learn to bake at the same time he wanted to become more likable at his office (to improve his performance review, which, the only thing that was negative was, “Matt’s kind of intimidating”) and so the two tasks naturally went hand in hand. After one year of bringing bread in to the office every Friday, not surprisingly, there wasn’t a negative comment on his next review 🙂 Bread is the great equalizer. This loaf, in particular, is beautiful in its simplicity, flavor, crusty exterior and soft, spongy interior. Frankly, it’s the perfect loaf. I think life has a lot of challenges, but if you could say that you could turn out a loaf of bread like this (given a day’s notice) any time it was needed, well, I’d consider that success.
Matt: I like making things from scratch. I enjoy learning how things work, and with cooking you usually end up with something better than what you can get at the store – and it’s cheaper, better for you, and you even get a night’s entertainment out of it. So I guess it was just a matter of time before I got into baking. I’ve been making bread pretty regularly for a few years now, and I’ve certainly gotten better, but I’m still an amateur. Bread is one of those things that you could devote your life to (think Jiro Dreams of Sushi) and still find things to improve on.
Bread21 oz bread flour (or AP flour if you prefer)14 oz water (66%, for the bread nerds out there)1 tsp instant/rapid rise yeast2 tsp saltMix up the dry ingredients (you are using a scale, aren’t you?) and then add the water. Mix until the flour is all hydrated then cover it and set it aside for twenty minutes. (Or I could just say autolyse. See, you should become a baker, we have our own secret language.)Stretch the dough out and fold it back up in thirds like you would a letter. Turn the dough 90 degrees and repeat, then put it seam side down in an oiled bowl. Wait ten minutes, then repeat. After three of these stretch-and-fold sessions your dough is probably developed. Put the dough back in the bowl and cover it and place it in the fridge overnight, or for up to 2-3 days (you might use less yeast if you know you’re going to wait several days to bake).About two hours before you want to bake, take the dough out and let it warm up on the counter for a bit. Press it out into a circle (gently, we’re not making pie), then gather each side up to form a ball. Roll the ball in small circles on the counter to develop surface tension. This is a lot easier to understand when you see it, so you might want to watch a video.Put the dough (now a boule, if you want to talk the talk) into a bowl lined with a floured towel. I use a basket called a banneton, which I flour directly, and it leaves little rings of flour on the loaf.Leave the dough covered, on the counter to rise. This will probably take about an hour and a half, but you can tell if a loaf is still rising by poking it gently – if it springs back quickly, leave it to rise some more. If the indention stays, you’re ready to bake.About a half hour before baking, preheat your oven to 450, with your baking stone, Dutch oven, or preferred baking device inside. You can bake on a sheet pan, and if that’s your plan you don’t need to preheat for very long. I recommend a Lodge cast iron combo cooker, which gives you the added heat while also trapping steam, and you can put dough into it without getting second degree burns, which is tough to do in a normal Dutch oven.When the dough is ready, remove your preheated Dutch oven and flip the bowl over to put the dough into the pan. Make a couple of cuts in the loaf so it doesn’t rupture when it rises in the oven (this is called scoring), then put the lid on the Dutch oven and return it to the oven for thirty minutes.Remove the lid from the Dutch oven and bake another 30 minutes.Remove the loaf from the oven (the interior of the loaf should be around 200 degrees, if you want to make sure it’s done) and put it on a rack to cool. Lean in close and I bet you can hear the loaf “sing.” It’s tempting to cut into it right away, but I promise it’s better if you let it sit and finish cooking – think of it like resting a steak.


Matt, you have a talent for writing, as well! Very interesting post and beautiful bread.
Yay! So glad to have this recipe and instruction from Matt in writing now! I will definitely give this a try….just not every week. 😉 Still mourning the Fridays that were.
Glad you had a featured blog on your bread making. Your bread is so good and so beautiful! The smell is amazing. You are very talented Matt! I don’t know how it could be any better:)
Great site you have here.. It’s difficult
to find high-quality writing like yours these days. I seriously appreciate people like you!
Take care!!