Sweet Soy Glazed Chicken

Honey Soy Glazed Chicken Legs

Happy Wednesday.  I got to spend today baking in the kitchen with one of my favorite people in the world, Becky McGrew.  We baked something truly decadent and crazy rich, but that will be a post for another day. 🙂  Today is more practical.  At the beginning of the week, I have such gusto for cooking my meals.  I go to the store on Sunday nights and buy my grocery list for meals to get me through at least Wednesday night (I don’t like to buy more than that, lest things go bad in the fridge, waiting to be cooked.)  Thursday morning is usually winding down and trying to find a use for my many leftovers.  It’s good to have a few recipes you can always rely on to be great and interesting in the middle of the week.  Recipes that aren’t hard, aren’t boring and make you feel glad you didn’t just give up and go out to dinner.

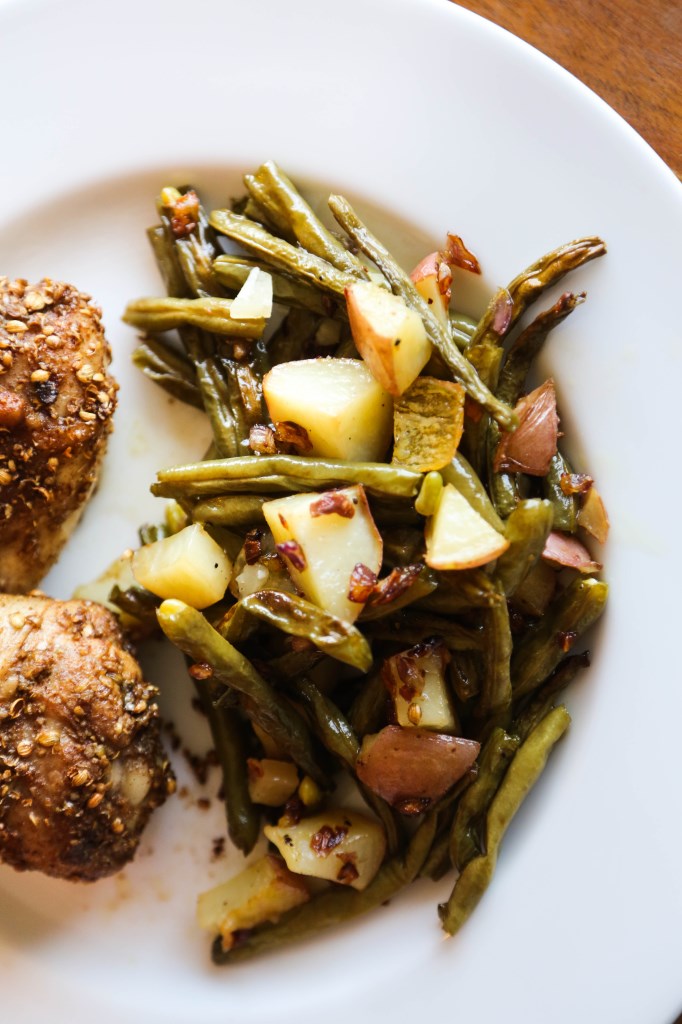
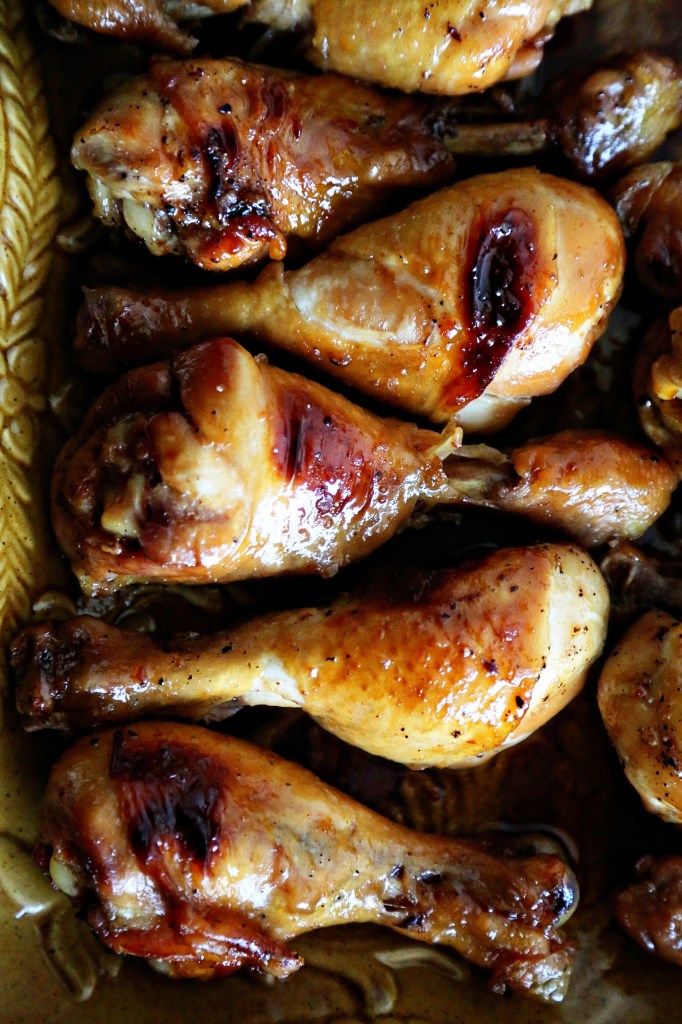
This is a perfect mid-week meal because it gets you over the hump in the week and gives you amazing leftovers.  Such a rich, sweet and savory glaze on this chicken pairs perfect with a few light sides like stir-fried snap peas or roasted brussels sprouts with fish sauce vinaigrette.

Honey Soy Glazed Chicken*

12 chicken legs (or other parts, but I’d definitely use chicken on the bone)
kosher salt and freshly ground pepper
2 tablespoons neutral oil (not olive)
2 tablespoons ketchup
1/2 cup soy sauce
1 cup honey
2 to 3 cloves garlic, minced

Preheat oven to 400ºF. Wash and dry and lightly salt and pepper the chicken and place in a 9X13-inch pan.

Combine remaining ingredients and pour over chicken. Toss chicken in the sauce and then arrange, skin-side down in the baking pan. Place in the oven for 30 minutes. Remove pan, turn chicken over, and return to the oven for another 30 minutes. Remove pan and turn chicken over once more. Turn the oven down to 375ºF and bake for an additional 15 minutes.  My chicken didn’t get as glazed as the original recipe appears, so I took matters into my own hands and placed the chicken on a serving platter and tented it with foil to keep warm and then put the sauce on the stove in a medium saucepan and let it reduce by half until really syrupy.  BEST DECISION EVER.  I then took a ladle of the syrup and added it to rice as an accompaniment.  BEST DECISION EVER.  I think you could add the reduced soy glaze to just about anything and it would be…the best decision ever.  Totally delictable, dresses up any sad chicken, any sad side dish.  Would be great tossed with roasted broccoli for a stir-fry.  Geez, the possibilities are endless.  Enjoy!

*recipe adapted from Alaxandra Cooks

Rosemary Crusted Pork Chop with Coconut Milk Braised Carrots

Rosemary Pork and Carrots006

This is a good meal for many reasons.  The pork chops were actually a good thickness, and lean, and were buy one pack, get another pack for free (4 really thick chops in each package.  I get ridiculously excited for discounts in the meat department.)   I bought a 5 pound bag of carrots two weeks ago, and so I am currently looking for different ways to prepare them, and found a stunningly simple and flavorful way on one of my favorite blogs, French Foodie Baby.  Say what you will about my French obsession, but those people KNOW their food, and from a very loving depth that centers around family and love of pure ingredients.  Helene, from FFB, is one of the best writers in the myriad of food blogs out there. I literally exhale with relaxation when I read her posts.  She challenges me and inspires me and makes me want to be better at being thoughtful about what I put on the plate for my family.

The braised carrots in coconut milk was from her blog and I just took the concept and did it in a much bigger batch on my stove so that I’d have leftover finger foods for Olive for the week.  And so I could use up the never ending bag of carrots.  I swear that thing is multiplying.

I don’t know much, but I do know that pork and rosemary are best friends.  So when I saw that Helene put rosemary in with her coconut milk to braise the carrots, I thought: instant pan sauce!  And it turned out wonderful!  The extra sauce from the carrots made an amazing garnish for a thick, crispy, rosemary-infused pork chop!  I was happy with this meal and wanted to share its simplicity and comfort-food qualities with you today!

Rosemary Pork and Carrots002


Rosemary Pork and Carrots005

Rosemary Crusted Pork Chop with Coconut Milk Braised Carrots
serves 4-6

4 boneless pork chops, thick cut, if you can find them (the ones I found were about an inch thick)
1/4 cup flour
Salt and pepper – about a half teaspoon of each
2 tbs chopped fresh rosemary – I would think dried would be fine, but it wouldn’t be as aromatic
4 tbs butter or olive oil for pan frying the chops

For the carrots:
1 lb carrots, peeled and chopped into half inch rounds
1 can of coconut milk
2 cloves of garlic, crushed but left mostly in tact
two sprigs of fresh rosemary
salt and pepper to taste

Get the carrots on the stove to braise first, as they take the longest.  In a deep skillet, heat the coconut milk over medium heat along with the cloves of crushed garlic and the rosemary sprigs.  Add in the carrots and let it simmer on the stove until the carrots are tender, about 20 minutes.  I put a lid on halfway through as to not lose too much moisture.  When the carrots are done, remove the pan from the heat and set aside.

For the chops: pat them dry with paper towels and season both sides with salt and pepper.  Put the flour and rosemary and a few dashes more of salt and pepper in a bowl and toss well to combine.  Coat each side of the chops in the flour mixture and set aside.  Heat the butter or olive oil in a non-stick skillet over medium heat until shimmering (or bubbling if using butter) and add in the chops, cooking about 5-6 minutes per side.  If they are browning too quickly, reduce the heat after you get a good sear/crust on each side of the chop.  If your chops are really thick, you may need to transfer them to a preheated oven to finish cooking.  I had to do this for one of the chops because it was way bigger than the rest and wouldn’t cook through without burning the crust.  At any rate, you need a meat thermometer for this because we no longer have to cook our pork to death to be safe.  Some farmer told me that no one’s gotten sick from pork in years, but everyone is still cooking it like they could.  A pink center is fine – I made sure mine got up to 150-160 and called it good, regardless of how the centers looked.

Place the chops on plates and for the sauce garnish, move the carrots to a bowl, reserving about a 1/2 cup of the coconut milk in the pan.  Taste for salt and season as necessary.  Remove the rosemary sprigs and the cloves of garlic and spoon the sauce over each chop and serve alongside the carrots.  If you don’t cook the chops too much, they will be soft enough for a baby to chew, given she has at least 3 molars, which mine does.  She loved the carrots (she’s 15 months old) and ate a few pieces of pork and called it good.  And lately, that has to be good enough for me!  For smaller babies, the carrots would be IDEAL pureed or just left in tact for finger foods.  They are so soft, sweet and a little salty – perfect! I would have blended up the pork with some coconut milk back in the 6-9 month days for Olive.

Enjoy!

Coriander Crusted Chicken

Corriander Chicken004


This Monday meal is a really unique spin on some old standards.  We all get tired of chicken because it’s nearly always in the weekly rotation.  Adding a spice you may not be used to is the best way to make something boring like chicken seem new, again!  This week that spice is coriander.  The seed of the cilantro plant, it has a tutti-fruity flavor and is commonly used in Indian cuisine.  It’s got a wonderful sweet/spicy appeal that makes it ideal for roasted chicken.  We first ran across this spice mix from acclaimed chef, Michael Symon, who combined coriander, cinnamon, cumin and Srirracha for the most unbelievable wings you’ll ever taste.  We’ve  brought those chicken wings to football parties, church potlucks and small get-togethers with friends and they are always gone first.

For this simple meal, I took a few of the spices from Symon’s original wing recipe and tossed the chicken legs in with them, plus some olive oil and roasted it.  Perfection!  They’d be even better if you put them in the rub the night before you were going to cook them.  We simply served the chicken with a side of Srirracha for a dipping sauce instead of making the wing sauce recipe.

Corriander Chicken005

For the side, I did a simple roasted green bean/potato dish tossed with diced, caramelized purple onions.  Such a simple addition and it made the vegetables totally awesome.  Oh, and for my gluten/dairy avoiding friends, this meal is entirely safe for you!  FYI, just to keep things honest, Olive only ate the potatoes out of this dish.  She’s decided this week and last to boycott meats and most vegetables.  It’s been super fun…

Corriander Chicken007


Coriander Chicken with Roasted Vegetables
serves 4

1 lb chicken legs, thighs, wings – just make sure they’re still on the bone.  Yes, this can be done with boneless, but you’ll need to adjust the cooking time
2 tbs coriander seeds, crushed
1 tsp ground cumin
1 tsp cinnamon
1/2 tsp salt
1/4 cup olive oil

For the vegetables:
2 medium sized potatoes
1/2 lb fresh green beans, ends snipped
2 tbs olive oil
salt and pepper to taste
1/2 red onion, diced
3 tbs olive oil

For the chicken: Preheat your oven to 450F.  Combine the coriander seeds, cumin, cinnamon, salt and olive oil in a gallon sized Ziploc bag.  Add the chicken legs and smush and toss and move them around inside the bag to coat all the pieces evenly.  Sometimes I open up the bag and have to move some of the top pieces down to the bottom cause the bottom pieces are spice-hogs.  Leave the bag in the fridge for 30 minutes while you prep all the rest of the vegetables for the meal.

Wash and cube up the potatoes into about 1/2″ cubes.  Snap the ends off your green beans and wash them and pat them dry.  Toss the potatoes and green beans together with the 2 tbs of olive oil and spread them out on a greased, rimmed baking sheet.  Season with a good sprinkling of kosher salt and freshly ground pepper and set pan aside.  Take your chicken out of the fridge and arrange the pieces on a greased, foil-lined, rimmed baking sheet.  Place the chicken in the oven and set the timer for 30 minutes.  Put the potatoes and green beans in the oven on the lower rack beneath the chicken and get on with your onions.  In a medium saucepan, heat the remaining 3 tbs of olive oil over medium heat and cook the onions till they are golden, usually 10-15 minutes.

Check the potatoes and green beans when the timer for the chicken goes off.  If they haven’t turned golden and slightly crispy, leave them in there.  Check the temp of the chicken with a probe thermometer.  If it’s 165, they are done and you can remove them from the oven.  They may take longer depending on the size of chicken pieces you used and the temp of your oven (all ovens lie just a little bit).  If your vegetables aren’t quite done when the chicken is, just tent the chicken with foil so they’ll keep warm.  The beauty of the vegetables is that if they get done faster than the chicken, they can easily be warmed in the microwave.  When the vegetables are done roasting, toss them in with the caramelized onions in a bowl and season to taste with salt and pepper.

Corriander Chicken002


Turkey Meatball Stroganoff

turkeystroganoff003

For your Monday family meal, I am presenting something truly comforting, low in fat and wonderfully flavorful.  Coming, again, from Tyler Florence’s book, Start Fresh, this recipe appears at the back of the book where a few dishes are listed that the whole family can enjoy and be modified for any stage eater.  If I were feeding this to 9 month old Olive, I would smash up a meatball into tiny pieces (they are really soft, anyway) and I would take some of the sauce and pulse it a few times with a few noodles.  I’d even have taken a bit of everything for 6 month old Olive and blended it all up with some extra sauce!  I was never too worried about feeding her a huge variety at an early age.  For 15 month old Olive, this meal is a free-for-all.  I’m really strict when it comes to what and when she eats, but as for how, I still cringe, but I do let her eat with her hands, smash things in her face and even try and “smell” everything (which results in food up the nose).  I know I have a lot of guidelines, so I try my best to not stress too much about the mess.  I still won’t dump a scoop of spaghetti onto her try and leave her to it.  I have boundaries, you know.  🙂  But I think WHAT she eats and the way we treat mealtimes is more important than having to hose down the high chair.  (I’m preaching to myself.  This is a life lesson for me and my need to control things too much!)

turkeystroganoff002

Turkey Meatball Stroganoff*
Serves 4 to 6

1 slice multigrain bread (I used rye) or about 1/2 cup plain breadcrumbs
1.5lbs ground turkey
2 tbs whole milk
1/2 cup yellow onion, minced
1/2 tsp caraway seeds, crushed (just dump some in a plastic bag and roll over them with a rolling pin if you don’t have a mortar and pestle)
Pinch of kosher salt
2 tbs extra virgin olive oil
1 garlic clove, chopped
6 ounces sliced mushrooms (any kind)
1 sprig fresh thyme
1 tbs AP flour
1.5 cups low sodium chicken stock
2 tbs sour cream or unsweetened yogurt (I used the latter cause that’s what I had on hand!)
2 tsp Dijon mustard
8 ounces cooked egg noodles (I like the extra wide for baby hands to grasp!)
2 tbs chopped fresh parsley

Chop or pulse the bread in your food processor (or with a knife) until very small and crumbly.  In a large bowl, mix the turkey together with the bread, milk, onion, caraway seeds, and salt until combined (err on the side of too wet and add more milk if it seems dry).  Shape the turkey mixture into about fifteen 2-inch meatballs.

In a large skillet, heat the oil over medium heat until shimmering.  Add the meatballs and cook, turning often, until browned, 5 to 7 minutes (I have to use a meat thermometer for turkey and make sure I get the centers up to 160).  Transfer the meatballs to a plate.

Add the garlic to the same skillet and cook over medium heat for a minute or two.  Add the mushrooms and thyme and continue to cook, turning often, until the mushrooms are golden.  Sprinkle the flour over the mushrooms and stir to coat.  Stir in the chicken stock and cook, stirring, until the sauce has thickened, 5 to 7 minutes.

Whisk in the sour cream and mustard until smooth, then return the meatballs to the pan.  Turn to coat with the sauce.

Spoon the meatballs and sauce over the noodles and serve garnished with parsley.  I didn’t think this recipe made enough sauce, just FYI, so I think next time, I’d double the parts for the sauce.  Word to the wise!  I like leftover sauce and for the noodles to be absolutely coated!

*recipe adapted from Start Fresh

The Ultimate Meatball and Taking Food to a Friend

meatball and marinara

We’ve been on the receiving end of food donations twice in our life and both times, we were touched by others’ thoughtfulness, great recipes and the comfort that was passed to us through the dishes they made.  It takes a bit of humbling to bring food to someone who can’t cook for themselves, or simply don’t want to or don’t have the time.  You worry if they’ll like what you made.  You worry if they will critique the preparation or that you brought store-bought cookies instead of homemade.  If I could only convince you that anything you bring is wonderful and welcome, I would.  If they can’t eat it right away or they have duplicates, they can freeze what you brought!  To worry too much about what to bring, or to worry the recipient about what you brought, shifts the focus off the deserving and on to you.  Keep the focus where it belongs, ask if they have any requests or food allergies, and get cooking!  Homemade is always nice, but I will admit, I did not turn away store-bought cookies, chocolate or coffee! 🙂

My wonderful, life-long friend, Summer, had her second baby almost two weeks ago.  A beautiful, darling girl!  I immediately began to think of what I would bring for Summer and Phil to eat.  Summer is my food buddy.  I trust her cooking as much as my own.  Her sense of taste is far beyond most people, almost to a fault.  We used to live together in college, and I think one of our first food-bonding moments was throwing chicken patties off the balcony of our apartment because they were just so disgusting.  They were pre-cooked, breaded chicken patties and they tasted like…gray.  Or sweat.  It wasn’t good.  We both were actually offended.  How could you screw up a breaded piece of chicken, and worse, sell it to poor college students?! In our act of defiance against badly cooked food, we became unofficial food critics in our own right.  We were each other’s taste-testers. A favorite game throughout our friendship is Guess the Ingredient! in which we excitedly wait while the other tastes and see if they guess right.  I love that no matter what time of day, I can text Summer a description of something I made or want to make, and she will react with an appropriate amount of shock, enthusiasm and awe.

We joke that Summer always says her FAVORITE thing in the ENTIRE world is whatever I last cooked for her.  True to the accusation, I asked if she had any requests for what I could bring for them, and she requested the last meal I made for her, which was the BEST meatball recipe I’ve ever run across.  It’s tough to get a meatball right.  They can be too dry or too mealy or rubbery from being over cooked, or simply too greasy.  This recipe is perfect.  And even more perfect, it came to me via fashion designer, Michael Kors in his appearance on Martha Stewart Living.  So they’re both delicious AND fashionable.  Win-win.

The secret ingredient to these meatballs is the water.  Smooshing all these ingredients together, especially with the water, is not for the faint of heart.  My mother would die a thousand deaths before making this recipe.  She has a thing with texture.  However, I like playing with my food, so it’s rather enjoyable for me.  The meat mixture is very delicate, so be gentle as you turn them while cooking.  I usually use two spatulas to help me turn them without smashing them apart.  Getting a good crust on each side is key.  Then, there will still be a slight crust, even after they’ve stewed in the sauce for a while.  Oh, and serving this with spaghetti is up to you. It’s not tradition – the Italians eat their meatballs in a bowl with crusty bread.  But, the recipe makes enough sauce that even after we finish up the meatballs, I have plenty of sauce left to toss with noodles the next day.  Olive absolutely adores these.  She ate two, 3 inch meatballs by herself before slowing down.  They are so soft, you could easily smash it up for a little one.  And they get better the next day!

meatball

Frankie’s Meatballs in Rao’s Marinara Sauce

  • 1 pound lean ground beef
  • 1 pound ground pork
  • 1 1/2 cloves garlic
  • 2 large eggs
  • 1 cup freshly grated Pecorino Romano cheese
  • 1 1/2 tablespoons chopped fresh Italian parsley
  • Coarse salt and freshly ground pepper
  • 2 cups plain dry bread crumbs
  • 2 cups water, room temperature
  • 1 cup olive oil
  1. In a large bowl, combine beef and pork using your hands. Mince 1/2 clove garlic and add to meat mixture along with the eggs, cheese, and parsley; season with salt and pepper. Continue mixing with your hand until well combined. Add bread crumbs and mix well. Add water, 1 cup at a time, and continue mixing until mixture is quite moist.
  2. Shape mixture into 2 1/2-to-3-inch balls. Heat oil in a large skillet over medium-high heat. Smash remaining clove of garlic with the back of a knife and add to skillet. Cook until lightly browned and fragrant, 1 to 2 minutes; remove with a slotted spoon and discard. Working in batches, add meatballs to skillet. Cook until browned and cooked through, turning, about 10 minutes. Drain on paper towels and serve immediately.
  3. Meanwhile, bring marinara sauce to a boil in a large nonreactive saucepan. Reduce heat to a simmer and add meatball. Let meatballs cook in sauce about 20 minutes; serve immediately with pasta, if desired.

Rao’s Marinara Sauce
Makes 7 cups

  • Four 28-ounce cans whole tomatoes with basil, preferably San Marzano
  • 1/2 cup olive oil
  • 6 tablespoons minced onion
  • 4 cloves garlic, peeled and minced
  • Coarse salt and freshly ground pepper
  • 12 leaves fresh basil, torn (optional)
  • Pinch of dried oregano
  1. Remove tomatoes from can and place in a large bowl, reserving juices. Crush tomatoes using your hands; remove and discard the hard core from stem end, and any skin and tough membrane; set aside. (Wear an apron and keep your hand submerged as you crush.  This is messy business, but kind of therapeutic  .)
  2. Place oil in a large, nonreactive saucepan over medium-low heat. Add onion, and cook until soft and just beginning to brown, about 3 minutes. Stir in garlic, and cook until softened, about 30 seconds. Stir in tomatoes and reserved juices; season with salt. Increase heat and bring to a boil. Immediately reduce heat to low and simmer until slightly thickened, about 1 hour.
  3. Stir in basil, if using, oregano, and season with pepper; continue cooking 1 minute more. Remove from heat and serve.

*Recipes taken directly from Martha Stewart Living.  They can not be improved upon.

frankie's meatsauce