Summer Corn Chowder – perfect for a rainy day

Corn Chowder and Cornbread

I hope you’re getting rain.  We got a little bit last night and it’s threatening to rain, today.  The clouds are hanging low and the wind is a cool 65 and I feel for a minute that it could be late September instead of the middle of July.  I live for cold weather and I’m still a little perplexed by why I live here, in the desert.  I grew up around here – maybe that’s it.  We long for things unfamiliar or for the relief we feel on the rare occasions we get a break from our usual reality.  I hear people in Seattle long for the beach.  I bet they don’t long for the desert, though!

Another comforting thing about food is the ability to transport myself into a feeling or a mood simply by the dish I prepare.  Caprese salad makes me long for summer nights, spice cakes make me wish for Christmas, chocolate chip cookies make me think of home.  A warm bowl of chowder with a thick slice of cornbread and a cold slab of butter puts me in the mood for a cloudy day and cooler temps.  So, in the middle of the heat of the summer, on this cooler week with cloudy days and threatening rain, let’s make a memory with a warm bowl of corn chowder and pray the rain stays a while.

Summer Corn Chowder and the Perfect Cornbread*
serves 6

4 teaspoons bacon, cut into 1/4-inch dice
1 small onion, cut into 1/4-inch dice (1 cup)
2 ribs celery,cut into 1/2-inch dice (3/4 cup)
8 sprigs thyme
Salt and freshly ground pepper
3 cups homemade or low-sodium canned chicken stock
3 ears yellow corn, kernels removed (about 2 1/2 cups)
5 ounces small fingerling potatoes, cut into 1/2-inch-thick slices
1 poblano chile, seeded and cut into 1/2-inch dice
1 1/2 cups half-and-half

Place bacon in small stockpot over medium-high heat. Cook, stirring occasionally, until bacon is deep golden brown and all the fat has been rendered, about 4 minutes. Remove bacon with slotted spoon, transfer to paper towel, and set aside. Discard all but 2 tablespoons of bacon fat.

Add onions, celery, thyme, and salt and pepper to taste to stockpot; cook over medium-low heat until translucent, about 8 minutes. Add stock; bring to a boil. Reduce heat to medium; simmer 15 minutes.

Add corn, potatoes, and chile; cook until potatoes are tender, 10-20 minutes. Remove and discard thyme. Add half-and-half, and simmer until soup is hot. Adjust seasoning with salt and pepper, and garnish with the reserved crisp bacon pieces.

*recipe adapted from Martha Stewart Living

Cornbread


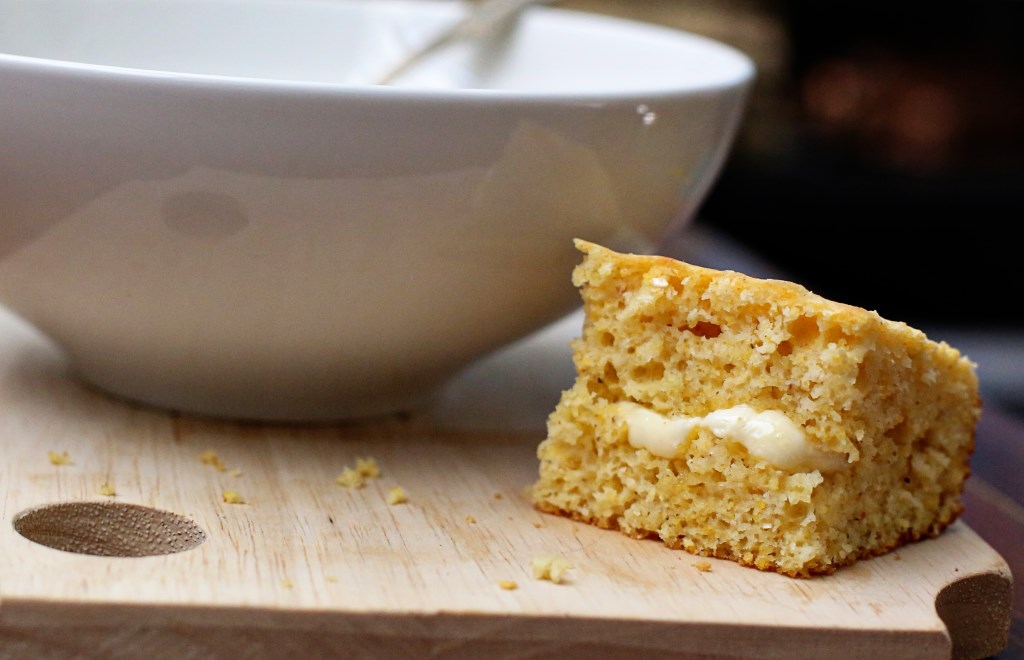
We only make one cornbread recipe, anymore.  The New Best Recipe is a wonderful encyclopedia of how to make every recipe basically, perfect.  We love this book and it never steers us wrong.  It’s quite bulky, but all the recipes are tested extensively and done in a myriad of ways, and they give a background as to why the recipes work.  It’s very trust-worthy and a definite go-to in times of need of a solid recipe!  Their Golden Northern Cornbread is our go-to cornbread recipe.  It’s light, fluffy, moist and slightly sweet.  Holds together beautifully to be a base for your bowl of soup, or just on the side with some cold butter.

The Best Golden Cornbread
makes 9 servings

2 tbs unsalted butter, melted, plus more for greasing the pan
1 cup (5 ounces) yellow cornmeal, preferably stone-ground
1 cup (5 ounces) AP flour
2 tsp baking powder
1/2 tsp baking soda
4 tsp sugar
1/2 tsp salt
2 large eggs
2/3 cup buttermilk
2/3 cup milk

Adjust an oven rack to the center position and heat the oven to 425 degrees.  Grease a 9 inch square baking pan with butter.

Whisk the cornmeal, flour, baking powder, baking soda, sugar and salt together in a large bowl.  Push the dry ingredients up the sides of the bowl to make a well.

Crack the eggs into the well and stir lightly with a wooden spoon, then add the buttermilk and milk.  Stir the wet and dry ingredients quickly until almost combined.  Add the melted butter and stir until the ingredients are just combined.

Pour the batter into the greased pan (we actually love to use our cast-iron skillet for this recipe). Bake until the top of the cornbread is golden brown and lightly cracked and the edges have pulled away from the sides of the pan, about 25 minutes.

Transfer the pan to a wire rack to cool slightly, 10 minutes.  Cut and serve warm!


Black Plum and Blackberry Galette

black plum galette
I’m in love with this pie.  It’s a galette – a free-form pie that is usually very rustic and can be sweet or savory, or even resemble a thin pancake in some regions of France.  I love it because it eliminates the pressure to make a pretty pie crust.  So many people struggle with pie crust, and when the edges crack, it can make even the most tempered person lose their cool.  But the galette solves all that.  You simply roll out your dough, fill it up and fold the edges over.  If you add an egg wash and some crunchy sugar sprinkled over the dough, no one in the world will care that it isn’t in a pie plate!  We enjoyed plums and a few blackberries in this pie because they were ripe and in season and cheap!  I really don’t buy fruit if it isn’t on sale.  I just figure that sale price tells me what’s in abundance and that’s an easy way to know what’s in season!

I served this over the course of a few days to a few different friends.  I love that one dish can unite so many.  I believe five different friends, total, shared this pie at different times over the weekend.  This is my very favorite thing about cooking and sharing meals.  And yes, a plum galette and a cup of coffee is a meal 🙂 I think people stay longer and open up quicker and are more at ease if you have something to offer them to eat and drink.  I’m not always good about doing this, especially for the most frequent friends.  And how awful to treat the frequent friends less special!  It’s hard for those of us who can’t be trusted with baked goods in the house, to have them in the house during the week.  But, maybe you could consider it a bit of a social challenge for yourself to bake this pie and then see how many different friends you can get to share it with you.  🙂

plum galette

Plum and Blackberry Galette*

2 1/2 cups plus 2 tablespoons all-purpose flour (spooned and leveled), plus more for rolling
1 cup (2 sticks) cold unsalted butter, cut into pieces
5 tablespoons plus 1 teaspoon sugar
1 teaspoon salt
1/2 cup ice water
1/4 cup whole, skin-on almonds, toasted
5 to 6 plums, halved, pitted, and sliced 1/4 inch thick (keep slices together if possible – this was hard for me because my plums were cling and didn’t come away from the pit very easy.  I just sliced them as best I could – still pretty)
1 to 2 tablespoons heavy cream

In a food processor, combine 2 1/2 cups flour, butter, 1 teaspoon sugar, and salt; pulse until mixture resembles coarse meal. Sprinkle with 1/4 cup ice water. Pulse until dough is crumbly but holds together when squeezed (if necessary, add up to 1/4 cup remaining ice water, 1 tablespoon at a time). Don’t overmix! Remove dough from processor and shape into a disk; wrap in plastic and refrigerate 1 hour. Meanwhile, wipe bowl of food processor clean and add almonds, 3 tablespoons sugar, and 2 tablespoons flour; pulse until ground to a coarse meal.

Preheat oven to 350 degrees. On a floured surface, roll out dough to 1/4-inch thickness. Transfer to a parchment-lined baking sheet; sprinkle almond mixture over dough (this is necessary for absorbing the juices from the fruit so your crust won’t be a soggy mess.  Plus, it tastes great.)  With a spatula, transfer plums to dough; press lightly to fan out, leaving a 2-inch border. Fold edge of dough over fruit. Refrigerate 20 minutes (this is so your butter doesn’t leak out). Brush crust with cream (I used an egg); sprinkle galette with 2 tablespoons sugar (I used super crunchy sugar!)  Bake until crust is golden and underside is cooked through, about 70 minutes.

*I made this from Martha Stewart’s Pies and Tarts cookbook, which, is a book I could look at for hours on end, reading it like a novel.  That’s one way to get better at cooking, by the way – read cookbooks like they’re novels 🙂

Apricot Pine Nut Cakelettes

Apricot Pinenut Cakelettes004


I used to have a huge apricot tree in my front yard.  It was so wonderful throughout the seasons to see the blossoms appear in spring and the fruit appear around June and the leaves turn shockingly golden in October.  It was one of my favorite things about our house and it introduced me to jamming and gave me a passion for it.  Because of that tree, I learned to make apricot preserves and the first two years we had fruit, I canned nearly 100 jars of apricot jam variants. Vietnamese Cinnamon, Chinese 5 Spice, Bourbon Brown Sugar, Rosemary, Vanilla Bean (the best version) and even Crushed Red Pepper Apricot!  I gave them away as gifts and really just reveled in the sudden surge of domestic satisfaction I was getting from the process of gathering, cleaning, cooking and canning a resource from my own yard.  I felt like such a good steward of those little golden gifts!

new-00001


apricot018

To make a sweet story a bit sad, that tree fell victim to the terrible drought our area has been suffering the past three years.  The second year into the drought, the fruit on our tree was tiny but packed with flavor.  It was the last year it would bear fruit.  We had to chop it down last summer and I will admit, I mourned the loss of that tree for months.  We’ve tried planting replacement apricot trees twice, now, and borers got the second one (and the first – it was a borer/drought combo) and the second replacement got hit by two late frosts and never recovered (although I won’t call it officially gone till next spring).

So maybe it’s not meant to be?  Maybe the lesson learned is to make good use of what you have while you have it.  Revel in the gifts you’re getting now, because soon, they may not be available to you.  If you have a fruit tree and don’t have time to make anything from it, first, call me and I’ll come pick up every piece from your yard (I know there’s no fruit on trees in this area, yet – still, the sentiment always applies) and second, if nothing else, just eat from it!

This recipe is a wonderful, easy recipe that can be used with fresh, canned or even dried apricots (or any fruit, really).  I used dried apricots that I reconstituted in a bit of water, first, because I couldn’t find canned, as the recipe called for.  They turned out wonderful and they lasted for a week!  The cake part is a wonderful cake recipe and one that I plan on using for other purposes in the future.  It calls for buttermilk, and I happily used some raw buttermilk from our local dairy, Pereira Pastures.  They are suffering from the drought too, and could use your support if you are from this area and feel like making a donation and getting some amazing milk in the process!

Apricot Pinenut Cakelettes001


Apricot Pine Nut Cakelettes*
makes six cakes

1/4 cup pine nuts, toasted
6 tablespoons unsalted butter, divided
1/4 cup plus 1/3 cup packed light brown sugar
1 tablespoon water
8.5 ounces apricot halves, sliced
1 1/3 cups AP flour
1 1/2 teaspoons baking powder
1/4 teaspoon salt
1/3 cup sugar
1 large egg
1 teaspoon vanilla extract
1/2 cup buttermilk

Preheat oven to 350F. Butter six 6-oz ramekins and place them on a baking sheet with a shallow rim.

Divide the pine nuts evenly among the ramekins.

In a medium-sized saucepan, melt 2 tablespoons of the butter over medium-low heat.  Add 1/4 cup brown sugar and the water and cook, stirring, until the sugar is dissolved.  Add the apricots and stir gently until coated.  Divide the apricots and syrup evenly among the cups.

In a small bowl, stir together the flour, baking powder, and salt.  In the bowl of an electric mixer, or by hand, beat the remaining 4 tbs butter, 1/3 cup brown sugar, and the granulated sugar on medium speed until well blended.  Beat in the egg and the vanilla until combined.  With the mixer on low speed, mix half of the dry ingredients into the batter until just combined.  Mix in the buttermilk until combined.  Mix in the remaining dry ingredients until combined.  Divide the batter evenly among the ramekins and smooth the tops.

Bake until a toothpick inserted comes out clean, about 30 minutes (mine took more like 45).  Transfer the ramekins to a wire rack and cook for 10 minutes.  Run a knife around the edges of the ramekins to loosen the cakes.  Invert the cakes onto individual dessert plates and serve warm with fresh whipped cream, or a drizzle of amber agave nectar, like I’m currently obsessed with.  🙂

* recipe from the Bonne Femme Cookbook!

Apricot Pinenut Cakelettes006

Bread: Guest post from Matt Palmer, a.k.a. The Bread Man

Alisa: I wanted Matt to write about the bread that he’s made countless times in the past seven years.  He started on a quest to learn to bake at the same time he wanted to become more likable at his office (to improve his performance review, which, the only thing that was negative was, “Matt’s kind of intimidating”) and so the two tasks naturally went hand in hand.  After one year of bringing bread in to the office every Friday, not surprisingly, there wasn’t a negative comment on his next review 🙂  Bread is the great equalizer.  This loaf, in particular, is beautiful in its simplicity, flavor, crusty exterior and soft, spongy interior.  Frankly, it’s the perfect loaf.  I think life has a lot of challenges, but if you could say that you could turn out a loaf of bread like this (given a day’s notice) any time it was needed, well, I’d consider that success.

Country loaf close up

Matt: I like making things from scratch. I enjoy learning how things work, and with cooking you usually end up with something better than what you can get at the store – and it’s cheaper, better for you, and you even get a night’s entertainment out of it. So I guess it was just a matter of time before I got into baking. I’ve been making bread pretty regularly for a few years now, and I’ve certainly gotten better, but I’m still an amateur. Bread is one of those things that you could devote your life to (think Jiro Dreams of Sushi) and still find things to improve on.

That’s part of why I love it, but if that sounds disheartening to you, the good news is that even the poorest homemade loaf is better than anything you can get at the store. With a little bit of practice you can make bread better than you can get anywhere (unless you happen to live in San Francisco, New York, or a country that still cares about good bread). It’s kinda like chocolate chip cookies – the best bread you can buy where I live is essentially the bread equivalent of Chips Ahoy. Maybe you live somewhere with a bakery that sells something other than cupcakes, but unless the guy behind the counter looks like this, I’m guessing the bread there is still a Soft Batch at best. I’m sure the worst batch of homemade chocolate chip cookies that came out of your mom’s oven blows either of those away. The bread that will soon come from your oven is the same – once you’ve tried it, you’ll be hooked.
 Plain bread
Bread
21 oz bread flour (or AP flour if you prefer)
14 oz water (66%, for the bread nerds out there)
1 tsp instant/rapid rise yeast
2 tsp salt
Mix up the dry ingredients (you are using a scale, aren’t you?) and then add the water. Mix until the flour is all hydrated then cover it and set it aside for twenty minutes. (Or I could just say autolyse. See, you should become a baker, we have our own secret language.)
Stretch the dough out and fold it back up in thirds like you would a letter. Turn the dough 90 degrees and repeat, then put it seam side down in an oiled bowl. Wait ten minutes, then repeat. After three of these stretch-and-fold sessions your dough is probably developed. Put the dough back in the bowl and cover it and place it in the fridge overnight, or for up to 2-3 days (you might use less yeast if you know you’re going to wait several days to bake).
About two hours before you want to bake, take the dough out and let it warm up on the counter for a bit. Press it out into a circle (gently, we’re not making pie), then gather each side up to form a ball. Roll the ball in small circles on the counter to develop surface tension. This is a lot easier to understand when you see it, so you might want to watch a video.
Put the dough (now a boule, if you want to talk the talk) into a bowl lined with a floured towel. I use a basket called a banneton, which I flour directly, and it leaves little rings of flour on the loaf.
Leave the dough covered, on the counter to rise. This will probably take about an hour and a half, but you can tell if a loaf is still rising by poking it gently – if it springs back quickly, leave it to rise some more. If the indention stays, you’re ready to bake.
About a half hour before baking, preheat your oven to 450, with your baking stone, Dutch oven, or preferred baking device inside. You can bake on a sheet pan, and if that’s your plan you don’t need to preheat for very long. I recommend a Lodge cast iron combo cooker, which gives you the added heat while also trapping steam, and you can put dough into it without getting second degree burns, which is tough to do in a normal Dutch oven.
When the dough is ready, remove your preheated Dutch oven and flip the bowl over to put the dough into the pan. Make a couple of cuts in the loaf so it doesn’t rupture when it rises in the oven (this is called scoring), then put the lid on the Dutch oven and return it to the oven for thirty minutes.
Remove the lid from the Dutch oven and bake another 30 minutes.
Remove the loaf from the oven (the interior of the loaf should be around 200 degrees, if you want to make sure it’s done) and put it on a rack to cool. Lean in close and I bet you can hear the loaf “sing.” It’s tempting to cut into it right away, but I promise it’s better if you let it sit and finish cooking – think of it like resting a steak.
plain country bread loaf