Soft-Scrambled Eggs

Soft Scrambled Eggs

Everyone wants to be known for something.  We all strive to be important in some way and to matter to more than just ourselves.  Some of us get little snippets of fame from the jobs we do or the opinions we have or maybe from how cute our red-headed children happen to be.  Most of this attention is fleeting – it can last a day, an online minute or maybe as much as a year before the new wears off.  A good friend once put it so well, regarding our need for others’ acceptance: “You’re only as good as your last performance.”  This is a shockingly true statement that I would venture most of us, at one time or another in our lives, have felt.

Over the last year, I’ve worked through the book, The Divine Conspiracy.  It has flipped my world upside down.  Or maybe, finally, right-side up.  I’d recommend it to anyone searching for something they can’t quite put their finger on. One of the main points early on in the book is that we have this need to matter and to be unique and special because we were specifically designed to be that way.  We were designed by an infinitely unique and powerful creator who made us to be just like Him.  So, it’s not bad to strive to be noticed.  It’s just futile to strive for the approval of our peers – of anyone but the One who created us to be His unique treasures in the first place.  And as we all know, most of our days are spent in search of approval, recognition or acceptance from people online.  People we never see and from a strange sea of online crowds who are simply going about their day trying to be noticed, too.  It’s futile.  At times, I want to unplug from it all and just be important to my family and my very small circle of friends with whom I physically see on a regular basis.  It would be so much simpler to be special and to matter to just 20 people instead of trying to impress 200.

How on earth is this post going to be about scrambled eggs?!  Well, through my first year as a new mother, I really picked up the baton of cooking for my family.  I have embraced it with the foreknowledge that the recipes I cook now will be the stories and the comfort food Olive talks about when she’s in college, missing home cooked meals.  This is how I have come to matter (in my eyes) to my world.  I cook.  I provide food for Matt and Olive and occasionally friends and when I am lucky, family as well.  I usually cook new things, new recipes, Pinterest inspirations, but there are a few dishes that I can make whether I’m sleepy or not, paying attention to measurements or holding a kid on my hip.  Soft scrambled eggs is one of these recipes.  They are actually more of a skill than you might think.  But with a little extra effort and attention, these eggs will blow your mind.  We’ve all had the over-cooked rubbery eggs on breakfast buffets the world over.  These, by contrast, are super creamy, soft, flavorful (not sulfury) and are mind-blowing on top of a piece of buttered toast.  It’s the ultimate comfort breakfast food.  I have had people remark about these eggs like, “What on earth did you put in these?!  Cheese?  Cream?”  Nope.  Salt and Pepper!  And a tablespoon of butter.  That’s it.

I’ll be really detailed in the recipe so that you, too, can learn to do these right.  They just require a little more whisking and a little less heat than you’re probably used to. I hope they become part of your weekly recipe repertoire and I hope that you really enjoy at least one recipe you make on a regular basis.  It could be chocolate chip cookies or banana pancakes or even a simple roasted chicken.  But if you find something that you enjoy doing and you do it enough times to do it well, you will be an instant local-celebrity in the eyes of the people sitting around your table. And that, for me, is becoming more than enough. It’s good to matter to at least a few people in this life and I can think of no more worthwhile group of people than family.

Soft Scrambled Eggs with Pesto

Soft Scrambled Eggs
4 eggs serves two people

4 large eggs
about a teaspoon of kosher salt
fresh cracked pepper
1 tbs of unsalted butter.  If you use a butter substitute, I can’t help you

First, get your butter in a medium saucepan (like a good pan for soup) and turn on the heat to 3 or 4.  Seems low, but this is one of the tricks.  My stove’s lucky number is 4.  Yours might be hotter so adjust as you see fit.

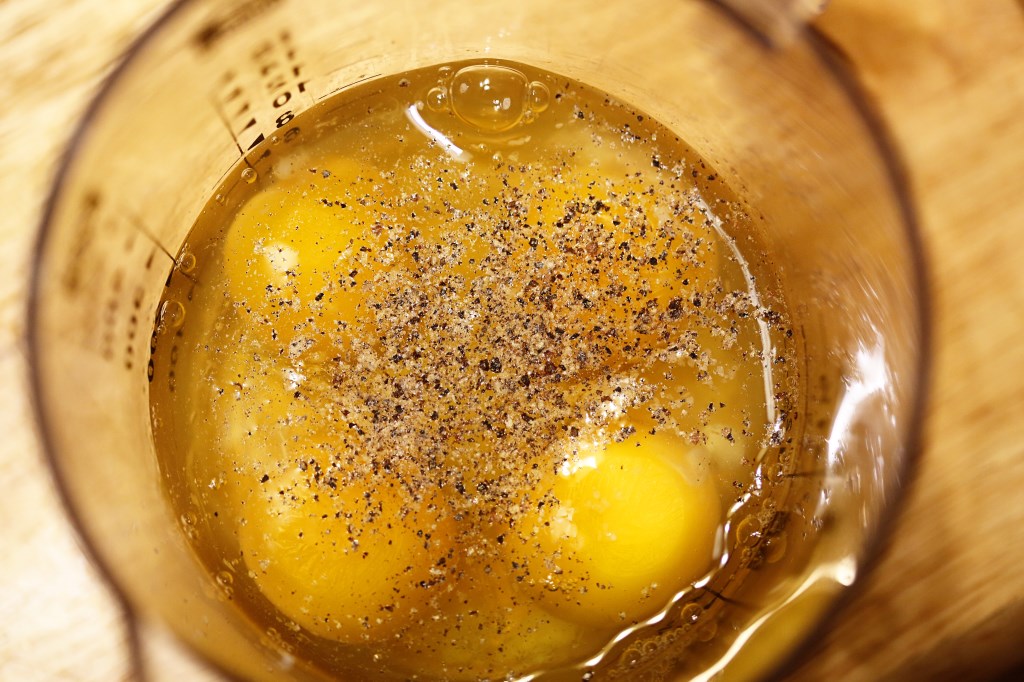
While the butter is melting, crack the eggs into a big measuring cup and season with the salt and pepper like this:
seasoned eggs

Then, whisk whisk whisk until they are forming bubbles.  Like this:
well beaten eggs

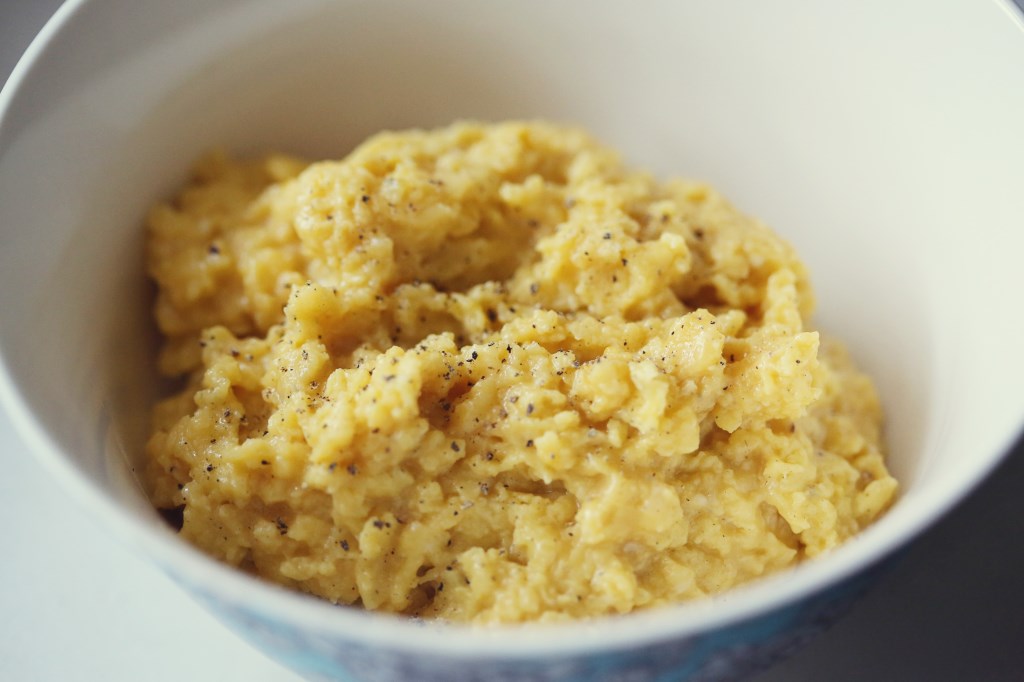
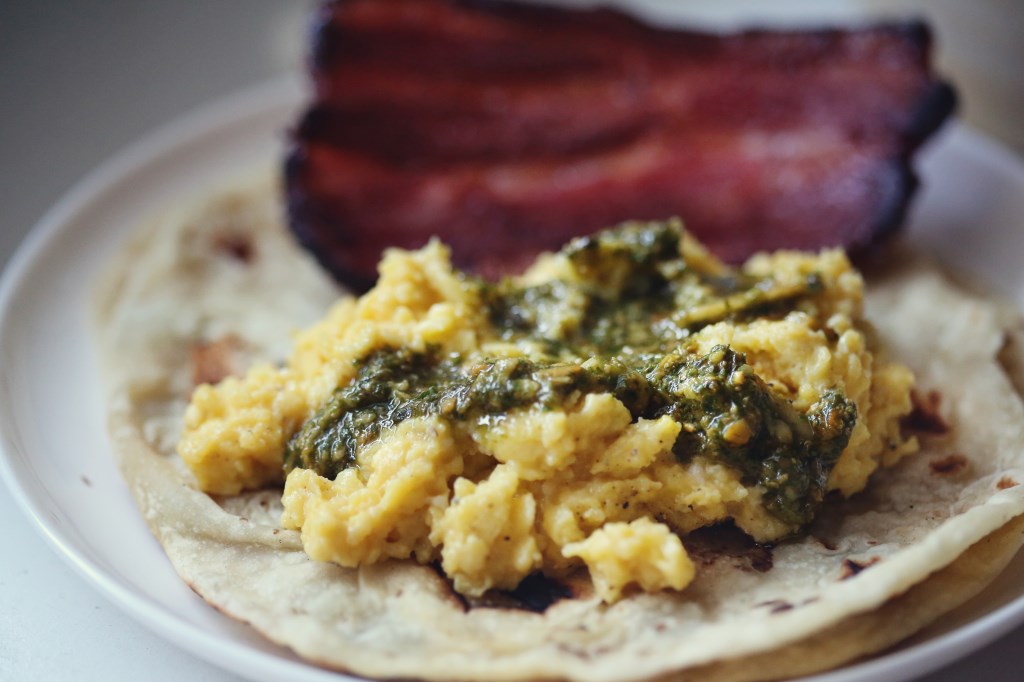
By this point, your butter should nearly be on its way to getting frothy in the hot pan.  Pour in your eggs and start whisking.  I use a flat whisk (you can kinda see it in the pic) and it’s so excellent for getting into the edges of the pan.  Whisk almost constantly, occasionally lifting the pan away from the heat and scraping the bottom and sides of the pan, fully incorporating the eggs as they cook so that you maintain a very small curd, like cottage cheese sized bits of egg.  Continue doing this; on the heat, off the heat, on the heat, off the heat, until your eggs are nearly looking done, and more on the side of creamy, but no traces of whites remain.  Your eggs will look underdone to you if you’ve never done this method before.  But trust me, if the whites are all gone and you have a super creamy consistency, you are ready to eat.  Get the eggs out of the pan immediately into a bowl and serve at once.  This morning I put some leftover pesto, which became my own green eggs and ham and it was a breakfast fit for a king.  Or a toddler. 🙂

The pesto WILL be a future blog post.  It’s the best I’ve ever had and it came from an Italian grandmother so you know it has to be legit.

soft scrambled eggs and pesto in a homemade tortilla

Advertisement

Dark Chocolate Chip-Pecan Pancakes

Chocolate Chocolate Chip Pancake stack

I opened up this recipe this week with the intention of pinning it to my Pinterest recipe board.  Then I went to my recipe board and discovered that I’d pinned this exact recipe four times over the last 2 years.  My subconscious must really want these pancakes.  I decided, no more pining for a pin!  I made these bad boys this morning for breakfast, right when the clouds rolled in and it started raining.  We enjoyed the rest of our coffee on the front porch while watching the rain and I’d be lying if I said it wasn’t the perfect way to spend the morning.

These pancakes are intense, rich, but not too sweet.  I accidentally left out the melted butter from the batter (believe me that I would never do that intentionally) and they turned out just fine!   Matt had pancake syrup on his and I had creme fraiche sweetened with a bit of honey on mine and I will proudly say that my way was the best.  But his way photographed better 🙂 Whatever you decide to put on top of these pancakes, be it whipped cream, syrup, powdered sugar, yogurt, it’s going to be the right decision.  The baby girl loved them, too and called them “panpays”, which was nearly the cutest thing I’d heard all week.

Enjoy your weekend!  Hope you find time to make these desert-like pancakes at some point!

Chocolate Chocolate Chip Pancakes

Chocolate Pecan Pancakes*
makes about 10 pancakes

  • 1 cup all-purpose flour
  • 1/3 cup granulated sugar
  • 1/3 cup Dutch-process cocoa powder
  • 1 1/2 teaspoons baking powder
  • 1/4 teaspoon salt
  • 1 cup milk
  • 1 large egg
  • 4 tablespoons unsalted butter, melted
  • 1 teaspoon vanilla extract
  • 1/2 cup mini chocolate chips
  • 1/4 cup chopped pecans
  • 4 tablespoons vegetable oilPreheat oven to 225 degrees. In a large mixing bowl, whisk together flour, granulated sugar, cocoa, baking powder, and salt. In another bowl, whisk together milk, egg, melted butter, and vanilla; pour over flour mixture, whisking to combine. Fold in chocolate chips and pecans; let batter stand until slightly thickened, 5 to 10 minutes.

    In a large nonstick skillet, heat 1 tablespoon oil over medium heat until a water droplet sizzles; swirl to coat bottom of pan with oil. Reduce heat to medium-low. Spoon four small mounds (1 heaping tablespoon each) of batter into skillet. Cook until bubbles appear in center, 3 to 4 minutes. With a thin spatula, flip pancakes; continue cooking until set, 3 to 4 minutes more.

    Transfer to a baking sheet; cover loosely with foil; place in oven to keep warm. Repeat with remaining oil and batter in three more batches (adjust heat as necessary to avoid overbrowning).

    Stack ’em up and enjoy, topped with anything you’d like!

*recipe adapted from Martha Stewart Living

Stack of Chocolate Pancakes

Champagne Mangoes and a Glorious Mango Curd

mango curd macaron dish

When we were in Mexico City last year with our friends, Cali and Alex, we were introduced to the ultimate mango.  Small, lemon yellow and sweeter than a peach.  Cali showed us that there was a specific mango fork that you need to peel it properly, and then she went on to show the proper way to peel and dice up these golden nuggets of wonder. She is my unofficial mango-expert.  I will forever associate her with this wonderful fruit and every time I peel one, I always think, “Is this how Cali would do it?”   I had never experienced a mango like the ones in Mexico, before, and when we got back home, I was on the look out.  I was so excited to see one that looked very similar at the grocery store called Champagne mangoes, and the next time Cali came over, I had her confirm its validity.  We had a winner!  So now, whenever I see that they are in abundance at the store, I get a half dozen.  The last time I did, I let them go too long before eating them, and faced the fear of letting them go bad.

So, I decided that I wanted to make a mango curd.  I looked up a recipe and it called for 15 ounces of mango and that’s exactly how much I had.  The recipe turned out so well, I filled macarons with it and also filled citrus cupcakes with the curd and topped them in coconut cream cheese frosting.  Epic win for the cupcakes, epic fail on the macarons.  The macarons tasted great, but the cookie itself didn’t turn out very well.  They all went hollow!  I have made macaron cookies before and the best I can describe them is that they are the croissant of cookies.  Every batch is different, every recipe is different and their success depends on so many factors, it’s a little maddening. The quality of the ingredients, the humidity in your kitchen, the exact temp of your oven, etc, etc, etc.  I surprised myself and didn’t FREAK OUT when the first batch of cookies EXPLODED, the second batch was pretty perfect, and the third batch baked like the first.  A true testament to how baking is a fickle beast.  They at least looked pretty:

mango curd macarons

The cupcakes, on the other hand, were a no-brainer.  I took a basic yellow cake recipe and added in Fiori di Sicilia, then made a cream cheese frosting, added a bit of coconut extract and topped each with toasted coconut after filling the cupcakes with the mango curd.  Such a wonderful combination, that I wanted to share those recipes with you, today, but mainly, this mango curd is the winner.  A week later, I still had some in a jar so they were put on some buttermilk pancakes this morning with fresh blueberries and slices of Champagne mangoes, of course.

mango curd cupcakes

mango cupcakes

Champagne Mango Curd*

Makes 1 to 1.5 cups

15-ounces ripe mango, peeled, pitted, cut into 1/2-inch pieces (It took 5 Champagne mangoes)
1/3 cup sugar
3 tablespoons fresh lime juice
Pinch of salt
4 large egg yolks
1/4 cup (1/2 stick) unsalted butter, cut into small pieces

Puree mango, sugar, lime juice and salt in processor, scraping down sides of work bowl occasionally. Add yolks; puree 15 seconds longer. Strain through sieve set over large metal bowl, pressing on solids with back of spatula to release as much puree as possible. Discard solids in sieve.

Set metal bowl over saucepan of simmering water (do not allow bottom of bowl to touch water); whisk puree until thickened and thermometer registers 170°F., about 10 minutes. Remove from over water. Whisk in butter 1 piece at a time. Cover and refrigerate overnight.

*taken from Smitten Kitchen, who took it from Bon Appetit

Citrus Cupcakes*

1 stick unsalted butter, softened
2 cups all-purpose flour
1 tablespoon baking powder
1/2 teaspoon fine salt
1 1/2 cups granulated sugar
3 large eggs, room temperature
1 cup whole milk
1 teaspoon Fiori di Sicilia, or 1/2 tsp orange extract + 1/2 tsp vanilla

Preheat oven to 350 degrees. Butter and flour 12-16 muffin tins, or just line with cupcake liners and spray those with non-stick spray.  Whisk together flour, baking powder, and salt. Beat together butter and granulated sugar with a mixer on medium speed until combined, 1 to 2 minutes. Add eggs and beat well, scraping down sides of bowl as necessary. Reduce speed to low and gradually add flour mixture, beating until combined. Add milk and extracts and beat until just combined.
Divide batter among cups; smooth tops with an offset spatula. Bake until golden and a toothpick inserted into centers comes out clean, 25-30 minutes. Let cakes cool in pans on wire racks 15 minutes. Turn out cakes onto racks to cool completely before filling.

*adapted from Martha Stewart Living

Coconut Frosting*

1 stick unsalted butter, softened
4 ounces cream cheese, room temperature
5 cups confectioner’s sugar
1/4 teaspoon fine salt
1/4 cup whole milk
1/2 teaspoon pure vanilla extract
1/4 tsp coconut extract

1/2 cup coconut, toasted, for topping cupcakes

Beat together butter and cream cheese with a mixer on medium-high speed until pale and creamy, about 1 minute. Reduce speed to medium. Add confectioner’s sugar, 1 cup at a time, beating well after each addition. Add salt, milk, and vanilla, coconut extract and beat until fluffy, about 3 minutes. If not using immediately, cover surface of frosting with plastic wrap. Frosting can be refrigerated in an airtight container up to 1 week. Before using, bring to room temperature, then beat on low speed until smooth.

*adapted from Martha Stewart Living

To Assemble:

I used the large tip from my piping bag to cut out the centers of my cupcakes and I really went pretty much to the bottom of each cupcake with the cut.  The curd is pretty runny out of the piping bag, so I had to hold it up in the air between fillings.  I inserted the tip of the piping bag and slowly squeezed until the sides of the cupcake bulged a bit.  I like filling.  Then, I just smoothed the frosting on top of each cupcake and sprinkled with toasted coconut.

mango cupcake with coconut frosting

Food Memories: Chicken n’ Noodles

food-7

Many of us have memories of being little and watching our moms or dads or grandmas cook or bake for the family.  The first memory that comes to mind for me is watching my mom cut out biscuits with an old green chili can she had cut the top and bottom off of (it’s the perfect biscuit size!) and then slap each side of the biscuit in vegetable oil, then slide the disc in line with the others to fill up an entire pizza pan.  There is something methodically calming about watching someone cook.  I always felt like I was helping, even if I never touched anything.  I felt involved, because mom let me stand there or sit on the counter across from her and talk to her while she worked.  I will always be thankful that she let me hang around the kitchen.  She was always so busy doing a thousand things for our family that it was the one moment when things were somewhat calm and we could just be together and I could count on it every night because I (thankfully) had a mom that cooked dinner 6 out of the 7 days of the week.  You really can’t replace that kind of experience with anything else.  Those memories stick.

My dear friend, Louise Shoemaker, shared a memory and a meal with me last week that seemed so fitting for my blog and for what I love about cooking for my family and eating together.  She is one of the best writers I know, (she was my 10th grade English teacher – how lucky I am to still be friends with her!) so I asked her to write a little blurb about the recipe and the memory that went along with it.  My favorite part about this recipe was consulting her every 5 minutes to make sure I was doing things right.  She had driven up to Lubbock for the day and ate this meal with us!  I’d never made noodles from scratch, and technically, neither had she, but she’d watched her mother so much that she knew.  Here is what she had to say about the chicken noodle soup that made a permanent home in her memory:

RGBBounce
L
ouise and her Mother

It’s funny that a food memory starts with a sharp, clear visual. The bright yellow Pyrex bowl and the red-handled Daisy egg beater swirling the rich gold of fresh yolks. I’ll never forget the 50’s color scheme of the kitchen: pink walls, turquoise cabinet doors, chocolate brown trim. I can still see the white enamel-on-steel kitchen table and my mom in her long, slim dress with the apron tied smartly and the scarf pulled back over her careful bobby-pin curls. It’s as clear in my eye today as it was in those days 50-some years ago.

It must have been a Wednesday. Two days until payday and five mouths to feed on a budget stretched to the last nickel. So, a plump (cheap!) boiling hen, a dozen eggs, a pile of flour, a splash of water, and we knew we’d make it till Friday.

Chicken’n Noodles: made-from-scratch pasta boiled in rich, fresh stock, with chunks of chicken so tender it fell off the bone. A silky thickened sauce, glistening with a bit of butter, and thick, rustic slabs of slightly chewy noodles curling on a plate. YUMM!

The aroma of that meal is the smell of childhood, and it takes me right back there to that kitchen watching my mom pour the beaten eggs into the crater of the flour volcano and mix and knead and roll the dough out to a four-foot circle. I can see her boning a mountain of chicken, dropping heaping handfuls of raw noodles into bubbling broth. Cooking this meal was a production, an infrequent event. I’ve savored the memory of Chicken and Noodles for decades. It was amazing to re-create it with Alisa. And Olive.

I like to think of them cooking together for years to come, Olive sharing with her mother an experience so rich and elemental and, in today’s environment, rare. You’re a lucky (impossibly adorable) munchkin, Ollie! And your mama is pretty awesome, too!

food-6

I am giving you the recipe I did – I only added a few things to the stock, the rest, I followed Louise’s mom’s story-like recipe as best I could.  With pointers from Louise along the way…

Chicken’n Noodles

For the stock:
1 chicken, cut into pieces (8 pieces, bone still in: wings, breasts, legs, thighs)
Water
Salt
1 onion, chopped into quarters
3 carrots, chopped into thirds
2 bay leaves
3 sprigs of thyme

Put the chicken pieces into a large stock pot and cover with water until covered by about 2 inches.  Add a couple tablespoons of salt along with the onion, carrot, bay leaves and thyme.  Bring to a boil, skimming any foam off the top as it comes.  Reduce to a simmer and maintain a simmer (I left my burner on about a 3-4) for 1 and a half to 2 hours.
Remove the chicken from the pan and let it cool.  Then, remove skin, bones and any fat that remains.  Chop or hand-shred the chicken and set aside in a bowl in the fridge while you make the noodles.  Skim the stock of as much fat as you can, but don’t fuss too much.  Remove the carrots, onion and herbs and discard so you’re left with a (mostly) clear broth.  Keep the broth at a simmer with the lid on while you make the noodles.

For the noodles:

3 eggs
a big ol’ mound of flour (maybe 4-6  cups)
salt
elbow grease

Pour a mound of flour on a clean work space and create a hole in the center, volcano-style.  Make it deep enough so that when added, the eggs don’t spill over the side. Leave flour on the floor of the volcano so you can’t see your counter.  Crack the eggs into the hole and with your hand or a fork, whip up the eggs, incorporating flour as you go from the sides.  You won’t use all the flour, of course.  Keep incorporating flour to the eggs, stirring all the while, until you are left with a ball of dough that isn’t very sticky anymore.  Knead the ball for a good 10 minutes until you’re left with a very smooth ball of dough.  Trade off with a friend if you get tired:

food-1 food-2

Clean your hands and insert your finger into the center of the dough.  If it comes back super sticky, add more flour and knead some more.  Cover your dough with a towel and let it rest for 10 minutes.

food-3

Clean off your work space and if you’ve worked clean, you can save most of the flour you didn’t use.

Roll out the dough on a lightly floured surface till it’s an 1/8th of an inch thin.  Or thinner.  You may need to let the dough rest a few times throughout this process because it will start to shrink back up.  Once you get it thin enough, cut it into whatever shapes you like.  I chose squares because I have a kiddo that needs everything cut up, anyway.  Louise remembers her mom cutting looooooooong, thick strips, which would be wonderful, too.  You could even get cute and cut out little shapes from tiny cookie cutters.  Once you get all the dough cut, make sure each piece is coated in flour and bring at least a cup more flour with you to the stove to boil and put this dish together.

Making it Into Soup:

Get your stock to a rolling boil.  Dump your noodles in a handful at a time until they’re all in the pot, stirring as you go so they don’t stick.  This is the vague portion of our program.  Once the noodles are al dente, add the chicken back in and bring it back up to a simmer over medium-low heat.  While stirring, add a sprinkling of flour – maybe 1/4 cup – and stir until fully incorporated.  Keep adding flour till a good consistency is reached.  You’re wanting an opaque sauce that’s neither soupy nor gravy – somewhere in the middle.  If it coats the back of a spoon, it’s probably ready.  Adjust the seasoning with salt until it sings of chicken goodness.  Ladle up, top with a good sprinkle of freshly ground black pepper and enjoy.  We had ours with a wonderful Chardonnay and some crusty challah bread with butter.  Really – it does NOT get better than that.  The baby went crazy for this soup, too, and ate her entire bowl, plus some of ours.

food-5

food-4

The Battle of the Quiches

Quiche

My friend, Summer, hates quiche.  The very word gives her mock dry heaves.  We’ve all had a traumatic experience with some kind of food; whether it be an ingredient (dill for me, pomegranate juice for Matt) or an entire meal ruined by getting sick later in the evening, it’s hard to come back to good terms with the food after the trauma.  I’m not sure why Summer hates quiche, but according to her, the description she gives is of a “rubbery filling, soggy crust, gross texture” and what comes to mind, for me, is the mini-quiches you find at baby showers the world over, or the frozen pie-sized quiches that could double as semi-wet Frisbees.  Either way, it’s not a huge shock that a lot of people have a bad connotation when they hear the word.

Thomas Keller is here to save the day, once again.

He sees the problem with the American version/view of quiche, as well:

“Why didn’t the French quiche ever really translate to America? American culinary culture embraced it, then trashed it without ever knowing what it was…I think it was a mechanical problem, not having the right tool–a ring mold about two inches high.  When the modern quiche took off here in the 1970s, that wasn’t widely available.  Instead, a pie pan was commonly substituted for the two-inch ring mold.  And then came the premade pie shell.  Who would want to eat quiche made in that? A quiche has to have a specific thickness or you cannot cook it properly: It must be two inches high, in a crust thick enough to remain crisp, and not become soggy, during cooking.  Custard in a pie shell invariably overcooks (if you cooked it slowly enough, the crust would become soggy).” — Thomas Keller, Bouchon Cookbook, page 86

We’ve made Keller’s quiche several times.  The foundation is a good crust and so we go back to the crust I will rely on for the rest of my life – the same crust used in my strawberry pie a few posts ago.  It’s perfect, it flakes, it is sturdy without being tough, and it tastes like butter because that’s the only fat used.  Why look elsewhere?  The key is to completely bake the crust first, with plenty of overhang so that it doesn’t shrink while baking.  And I’m sorry you’ll have to buy a special tool to make it, but a 2 inch ring mold is necessary.  Not expensive and if you want to really make this recipe correctly, you need one.

We decided for this post, that we’d compare a store-bought quiche with Keller’s quiche.  I didn’t buy the most disgusting one I could find, either.  I actually bought probably the best a grocery store has to offer.  An in-house made quiche Florentine (bacon/cheese) baked in a pre-made pie shell (assuming.)  It was set in a metal pie tin with holes poked all in the bottom.  I appreciated that effort, because at least someone is acknowledging that quiche shells go soggy.  Didn’t quite work, though.  Here they are, back to back:

Battle of the Quiches

Store bought on the left, Keller on the right.
You can’t tell much, texture-wise, so I’ll tell you.  And again, I’m fairly impressed with the grocery store made quiche.  It’s about as good as a pre-made, American pie version gets.  However, the crust was really wet and soggy on the bottom. Couldn’t exactly pick it up without it sagging, whereas the Keller quiche’s crust is very crispy and fully cooked on the bottom (you can tell by the color and how it even stands away from the plate a bit.)  The Keller quiche has almost a half inch more custard and the store bought quiche’s crust tasted like sand.  Honestly.  Sand held together by water.  It really wasn’t good.  Now, the store-bought quiche’s filling was fine, taste-wise.  It had bacon – how can that not be at least decent?  (I could imagine a frozen mini-version would find a way) but anyway, it was a good effort, but the crust was awful and it was wet, just like you don’t want it to be.  It also had that over cooked texture – kind of rubbery- that eggs get if cooked too long.  I swear to you, I am not making this up, after a few days and microwaving the leftover Keller quiche, it STILL had a smooth, silky, custard-like texture.  Almost creme brulee texture.  It’s so darn good.

Fun experiment and I would say that if you’re interested in doing something for the sake of the experiment and doing things properly, buy yourself a ring mold and get after it.  And remember – a Keller quiche takes two days.  So if this is for Sunday brunch, start it on Saturday afternoon.

Roquefort and Leek Quiche

I also want to add, for the sake of The Family Meal, that Olive ate on both quiches with  much enthusiasm.  Yes, even those big chunks of Roquefort.  She leaned forward and said, “mmmmm!” to both.  Eggs are awesome.  Oh, and she also said, “Quiche” perfectly.  I think because “quiche” sounds like her version of the word “cheese”.  Whatever works, Ollie.

For the crust:

2 cups AP flour, plus extra for rolling out
1 tsp kosher salt
8 ounces chilled, unsalted butter, cut into 1/4″ pieces
1/4 cup ice water

Place 1 cup of the flour and the salt in the bowl of a heavy-duty mixer fitted with a paddle attachment.  Turn the mixer to low and add the butter a small handful at a time.  When all the butter has been added, increase the speed to medium and mix until the butter is completely blended with the flour.  Reduce the speed, add the remaining flour, and mix just to combine.  Add the water and mix until incorporated.  The dough will come around the paddle and should feel smooth, not sticky, to the touch.
Remove the dough from the mixer and check to be certain that there are no visible pieces of butter remaining.  Pat the dough into a 7-8″ disk and wrap in plastic wrap.  Refrigerate for at least 1 hour, up to a day.

Lightly brush the inside of a 9×2″ ring mold with canola oil (or cooking spray works) and place it on a parchment-lined baking sheet.
Place the dough on a floured work space and rub all sides with flour.  Roll out the dough into about a 14″ diameter circle.  Lift the dough into the ring, centering it carefully and pressing it gently against the sides and bottom edges of the ring.  Trim any dough that extends more than an inch outside the ring.  Carefully check for crack in your dough and patch any cracks with your trimmed dough (I DIDN’T DO THIS AND OUR QUICHE LEAKED ALL OVER THE PLACE)
Refrigerate your dough for 10 minutes to resolidify your butter (if you don’t do this, the butter will drain out of your dough as it bakes.  Done it; learn from my mistakes)
Line the bottom of your crust with parchment and fill with pie weights (our pie weights are dry beans – a whole pound of them.  We just keep them for use in pies).  Bake shell in a preheated 375F oven for 35-45 minutes, or until the edges of the dough are lightly browned.  Carefully remove the parchment and the weights.  Check the dough for cracks and patch with reserved dough trimmings (DO THIS STEP) Return the shell to the oven for another 15-20 minutes, or until the bottom is rich golden brown.  Remove from oven and let the shell cool completely on the baking sheet.

Basic Quiche Batter

2 cups milk
2 cups heavy cream
6 large eggs
1 tbs kosher salt
1/4 tsp ground pepper
A few gratings of fresh nutmeg, or 1/8 tsp of ground nutmeg

Combine the milk and cream in a large saucepan over medium heat and heat until a skin begins to form on the surface of the milk.  Remove from the heat and let cool for 15 minutes before continuing.  If you have an immersion blender, add the rest of your ingredients to the saucepan and blend for about a minute to fully aerate the batter and make it light and foamy.  Pour the batter into your quiche shell (which is still on your lined, rimmed baking sheet – this thing inevitably will leak a tish.)
At this point, if you’d like to add ingredients, go for it.  Be creative.  We did his blue cheese and leek version and it was awesome.  You simply add these ingredients (about a cup of each ingredient, chopped fine and cooked properly) to the quiche batter as you’re pouring it into the shell.  Try crumbled, cooked bacon and cheddar cheese, or caramelized onion and grated swiss.  The options are endless.
Bake for 1 1/2 to 1 3/4 hours, or until the top of the quiche is browned and the custard is set when the pan is jiggled.  Remove and let cool to room temp on a cooling rack.  Refrigerate until chilled, at least one day, up to 3 days.  Once the quiche is thoroughly chilled, scrape away the excess crust from the top edge of the quiche.  Set the quiche down and carefully lift off the ring.  Preheat the oven to 375F.  Line a baking sheet with parchment.  Using a serrated knife, carefully cut the quiche into 8 pieces.  Place the pieces on a baking sheet and reheat for 15 minutes, or until hot throughout.  Serve immediately.

Quiche shell