Red Velvet Cake – a family recipe

Red Velvet
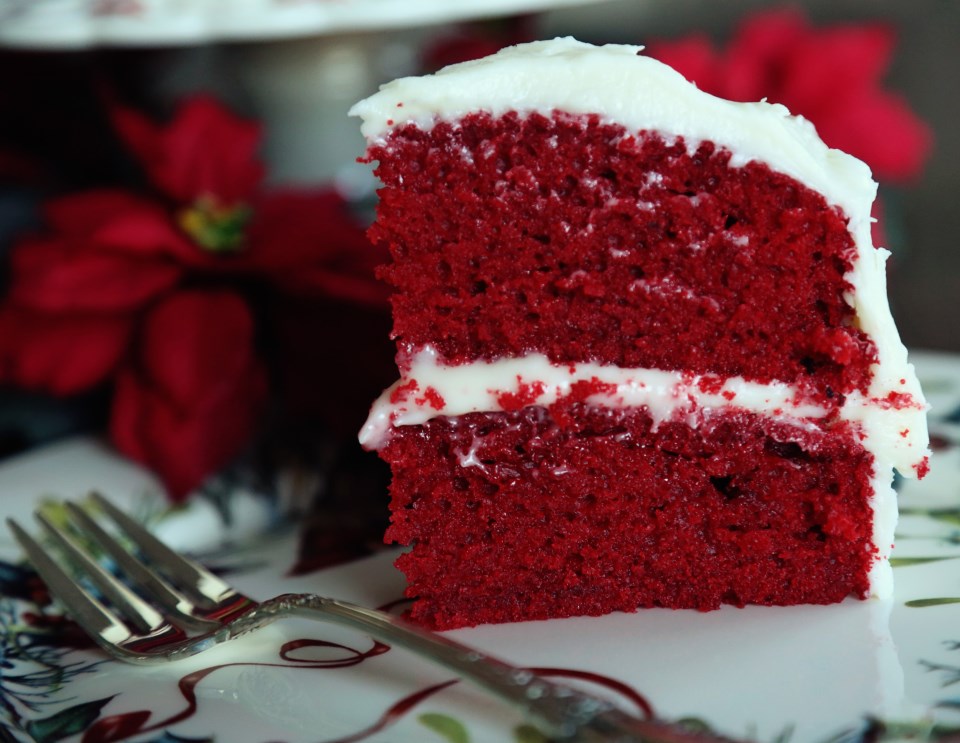
This is the best red velvet cake I’ve ever tasted.  In general, I am not a fan of cream cheese frosting.  I feel it overwhelms a cake’s delicate flavors and just makes everything taste like cream cheese.  But on a red velvet cake, it’s the only conceivable option.  In fact, I get rather annoyed when bakeries sell red velvet cupcakes with a generic butter cream frosting.  Who are they kidding?  I feel lucky that I ran across this recipe and even MORE lucky that this recipe originates within my own family!  My sweet mother-in-law, Peggy, is the owner of this amazing cake recipe and the first time I had it, I was rather astonished with how perfect it was.  I guess it was one of those instances where I didn’t know what I was missing until I had something  better.  I didn’t know that all this time, I’d been having sub-par red velvet cakes, but when I tasted hers, I knew instantly this was the only recipe I’d ever use for red velvet, ever again!

You may be a little squeamish about using SO MUCH food coloring in this cake, but my thoughts on that are: 1. How often do you eat red velvet cake, anyway? and 2. You only need a small piece of this two-layer, rich cake to feel happy, anyway, and 3. get over it – it’s red velvet cake.  It’s supposed to be red!  If you still can’t take it, I’m pretty sure that someone out there has invented an organic red food coloring made out of beets – just ask Google and let me know how that goes.

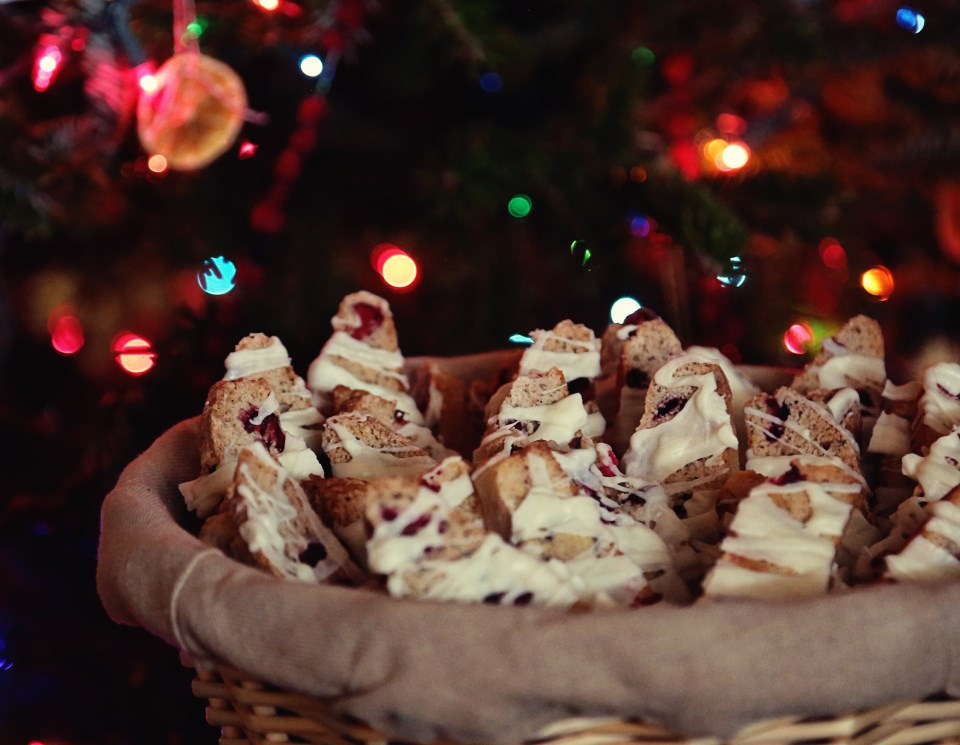
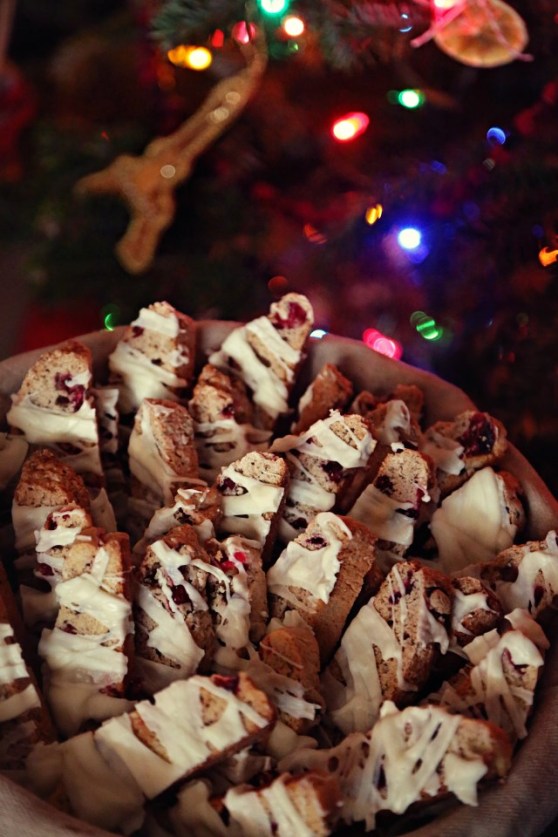
My mother-in-law made this on Christmas Eve and I couldn’t help but feel, in that icy cold weather in northern Oklahoma with a fire going in the background, that this cake was extremely wintery and Christmassy.  We enjoyed it with a cup of coffee and the view of the woods covered in a thick layer of ice outside our window.  An experience to remember!  Merry Belated Christmas Cake to you all, and to all, a good night –

slice of red velvet cake
Red Velvet Cake*
makes a 9″-2 layer cake

2 1/2 cups AP flour
1 1/2 cups sugar
2 tsp cocoa powder
1 tsp salt
1 tsp baking soda
1 1/2 cups vegetable oil
1 cup whole milk
2 eggs
1 tsp vanilla
1 tablespoon + 1 tsp white vinegar
1 ounce red food coloring

Preheat oven to 350F.  Spray two, 9″ round baking pans with non stick spray and then line the bottoms with parchment paper.

In a small bowl, add the vinegar to the milk and set aside to curdle.  In a medium bowl, combine dry ingredients with a whisk until fully blended.  In a large mixing bowl, whisk all the wet ingredients except the food coloring until completely incorporated.  Gently fold in the dry ingredients until just combined, then add red food coloring until desired color.  For full-on red velvet awesomeness, add the entire bottle.  Don’t worry, you’re not eating the whole cake by yourself (I don’t think.)

Pour batter into pans and bake for 30-35 minutes until a toothpick inserted in the center comes out clean.  Remove from oven and let cool in the pan for 5 minutes, and then turn out on a cooling rack and let it cool COMPLETELY before assembling with the icing.

Cream Cheese Icing

16 ounces confectioners’ sugar
1 stick softened butter
1 – 8oz package of cream cheese, room temp
1 tsp vanilla extract

Cream butter and cream cheese and vanilla together until fluffy.  Add confectioner’s sugar in batches until thick and creamy.  Place one round of cake on a serving tray and spread a thick layer of icing on top.  Then, add the second layer and finish icing the whole cake and let it set, if you can, for at least an hour before cutting and serving.

*I’ve never actually seen Peggy make this cake, but I’ve eaten it several times.  Some of the info is my interpretation from her recipe card that was pretty concise.  The cake instructions literally said, “mix all the ingredients together and bake it for 30 min at 350.  So I added some more detailed instructions 🙂 The part about lining the bottoms of the pans with parchment is all me because I’ve learned the hard way, one too many times with my cakes getting stuck to the bottoms of pans.  But Peg, if you see anything that needs changed, let me know!  

Red Velvet Cake

Banana Chocolate Bread

Banana Bread with Dark Chocolate
We are experts at wasting bananas.  I blame it on the Redhead.  She always says she wants one, takes one or two bites, and then plays with the peel and leaves the rest.  She sometimes takes a bite out of the SIDE of the entire banana, then is done.  I usually cut up the bananas beforehand, but I feel like I’m always a bit of a chump when she asks me for “a big one!” and I give her a whole banana and the situation mentioned above happens every single time.  So, I very often turn left-over bananas into smoothies with a bit of plain yogurt, but by the time I’ve been played twice, I give up offering her bananas, and at least three turn brown before the week is over.

Enter banana bread.  This recipe called for exactly three, old, brown bananas!  I wanted to use up our produce and stuff in the fridge before we left town for Christmas travels because I hate wasting food, and banana bread helped use up those old bananas, my yogurt that was about to go bad, a couple eggs and some milk.  We enjoyed this bread going down the road to Tulsa for snacks and breakfast and it was one of the best banana bread recipes I’ve used.  Obviously, as it came from Cooks Illustrated’s awesome cookbook, The New Best Recipe.  I always feel safe using their recipes.  They had a variation for adding chocolate to their banana bread, and as you may have seen on this blog, I won’t pass up an opportunity to use chocolate in a baked good.

Banana Chocolate Bread

Banana Chocolate Bread
makes one 9″ loaf

2 cups (10 ounces) AP flour, plus more for dusting the pan
10 tablespoons sugar
3/4 teaspoon baking soda
1/2 teaspoon salt
2 1/2 ounces bittersweet chocolate, chopped very fine
3 very ripe, large bananas, mashed well (about 1 1/2 cups)
1/4 cup plain yogurt
2 large eggs, lightly beaten
6 tablespoons unsalted butter, melted and cooled a bit
1 teaspoon vanilla extract

Adjust oven rack to the lower-middle position and heat the oven to 350 degrees.  Grease the bottom and sides of a 9 x 5″ loaf pan; dust with flour, tapping out excess.

Whisk the flour, sugar, baking soda, salt and chocolate together in a large bowl; set aside.

Mix the mashed bananas, yogurt, eggs, butter, and vanilla with a whisk in a medium bowl.  Lightly fold the banana mixture into the dry ingredients with a rubber spatula until just combined and the batter looks thick and chunky.  Scrape the batter into the prepared loaf pan.

Bake until the loaf is golden brown and a toothpick inserted in the center comes out clean, about an hour.  Cool in the pan for 5 minutes, then transfer to a wire rack.  Bread can be wrapped with plastic wrap and stored at room temp for up to 3 days.

Chocolate Banana Bread

Cranberry Rosemary Biscotti

rosemary cranberry biscotti
As I type, I’m eating one of these merry little cookies.  The tart bite of the cranberry and the floral spring of the rosemary, combined with the sugary sweetness of white chocolate just tastes and looks like Christmas to me. More than the joy of eating these cookies is the tradition of making them.  I think holiday traditions are as comforting as coming in to a warm house from the cold.  Traditions are the glue that holds the holiday season together, no matter how hectic and scared we may get that Amazon Prime really won’t come in two days…

I’ve been doing too much, lately.  I got in over my head with a few embroidery projects because 1. I’m still new to the craft, but 2. I enjoy it so much that, 3. I think I am better than I really am, so 4. It takes me much longer to complete a project in real life than it does in my head.  I also feel that with a baby in the mix and a couple precious hours in the day to get things done, that I should have scaled back.  Baked less, bought fewer presents, gotten take-out a little more often.  But I felt compelled to keep the ship afloat and do everything I wanted to do, even if there was no time.

Amidst this feeling of being on a slowly sinking ship, I still hauled my tail into the kitchen yesterday morning and got the dough for this biscotti mixed up.  I don’t think I’ve ever made the same version of this recipe twice, but that stops this year.  I’ve finally found a combination of recipes that works and that tastes good.  I’ve tried everything you can imagine from a no-butter, all egg white recipe (sad) to a recipe that called for oil (weird) and switching between fresh cranberries or dried.  I don’t know why I tried so many variants when I knew in my heart that cookies need and deserve to be made with butter.  And after using dried cranberries every year, I tried fresh this year and I really love it.  It distinguishes the cranberry from what could have been any ol’ dried fruit.  Fresh cranberries tint the dough slightly swirly pink and with the flecks of green rosemary, these cookies just make me feel the season that much more.  Baking brings me closer to peace.  Being in the kitchen is a calm that I don’t feel anywhere else.  And so, even though Christmas seemed to come exactly 5.5 seconds after Thanksgiving this year, I found a pocket of time to keep the tradition going and bake my holiday anchor, also known as: Cranberry Rosemary Bisotti.

cranberry rosemary

Cranberry Rosemary Biscotti
makes about 2 dozen cookies

2 cups AP flour
1 1/2 teaspoons baking powder
3/4 cup sugar
1/2 cup  unsalted butter, room temp
1 teaspoon grated lemon zest
2 tablespoons chopped fresh rosemary
1/4 teaspoon salt
2 large eggs
1 1/2 cups fresh cranberries, cut in half
6 ounces white chocolate chips

Preheat the oven to 350F.  Line two baking sheets with parchment paper, or use a silpat.  Whisk the flour and baking powder in a medium bowl. Using an electric mixer, beat the sugar, butter, lemon zest, and salt in a large bowl till fluffy. Beat in the eggs 1 at a time. Add the flour mixture and beat just until blended. Stir in the rosemary and cranberries with a rubber spatula gently, until well incorporated.

Form the dough into two logs, side by side on a baking sheet.  Shape into long, flat strips, about 10″x 3″ by about 1/2″ high.  Bake for 30 minutes until firm and then let cool about 20 minutes before cutting.

Cut the logs into 1/2″ strips and arrange the slices on the baking sheets and bake for 30 minutes, flipping over once during baking.  Let the cookies cool completely on a rack before drizzling with white chocolate.

Melt the white chocolate chips in a microwave safe bowl at 30 second increments, stirring after each time, until just melted.  With a spatula, dunk into the chocolate and fling it around the kitchen with wild abandon.  Or, just drizzle it over the biscotti until completely used up and everything is a huge mess.  Let it dry before storing in an air tight container for about 2 weeks.  These cookies keep a while, so they’re great for gifts!

Ollie and her biscotti

Chocolate Covered Espresso Brownies

Chocolate Covered Espresso Brownies

I was paid $25 to make this recipe.  Well, technically,  I was paid about $12.50, because Matt was paid the other half to make a loaf of his awesome bread.  Why?  Because an old co worker from his previous job had a Christmas party to go to and a twenty-five dollar limit to spend on a gift.  So he contacted us and said, “Make a couple things.”  The fun thing about these office party gift-exchanges is that the person whose gift got the most steals, or trades in the game, wins $100.

Gary won.  🙂 So I guess you could say these are $75 brownies.  Or $37.50.   Or probably less, because as I well know, it was most certainly Matt’s bread that won the contest.  Hey, Matt – guess what?  You won 1st place for your bread.  Only this time, instead of a $6 check like at the fair, some other guy got $100.  That’s better, right? 😉

The brownies were indeed, great.  I followed a recipe from Fat Witch Brownies (a most awesome brownie book) for an espresso brownie, and then I thought, “What could make this more show-worthy for a gift exchange?”  Covering it in a rich chocolate ganache!  Then, with some sprinkles of cocoa nibs, these brownies become a huge version of a chocolate-covered espresso bean, which in my opinion, is the ultimate adult candy.  They’re like one big “congratulations” for getting older.

And so are these brownies!  Enjoy!

Dark Chocolate Covered Espresso Brownies

Chocolate Covered Espresso Brownies*
worth $37.50

7 tablespoons unsalted butter
1/2 cup bittersweet chocolate chips
2 large eggs
3/4 cup granulated sugar
1 teaspoon vanilla extract
2 tablespoons instant espresso powder
1 tablespoon hot water
1 cup AP flour
1/2 teaspoon salt
1 recipe dark chocolate ganache (see below)
cocoa nibs or crushed up coffee beans for sprinkling

Grease a 9×9″ baking dish with butter.  Dust with flour.  Or use that awesome flour spray.  Preheat oven to 350F.

Melt butter and chocolate in a microwave safe bowl at 30 second increments, stirring with a rubber spatula after each time, until smooth and melted.

Cream the eggs, sugar, and vanilla in a large bowl until smooth, then add the cooled chocolate mixture and continue beating until incorporated.

In a small dish, mix the espresso powder with the hot water until dissolved.  Add it to the chocolate mixture and continue to beat until well combined.

Measure the flour and salt and then sift together directly into the batter.  Mix the batter gently until well combined.

Spread the batter evenly in the prepared pan and bake for 25 minutes or until a toothpick inserted in the center comes out clean.

Remove from the oven and cool on a rack for 1 hour.  Make your ganache while the brownies cool.  After they cool, cut them into 16 squares and gently remove and place on a drying rack, or on sheets of waxed or parchment paper.

Dark Chocolate Ganache*
makes 1 cup of goodness from the heavens

1/2 cup bittersweet chocolate chips
1/2 cup heavy cream

Over medium heat, place the heavy cream in a saucepan and bring to a boil.  Remove the saucepan from the heat immediately after it has just started to boil.  Pour the hot cream over the chocolate chips and let them sit for a minute.  Then, with a rubber spatula, gently begin mixing the chocolate in tiny circles in the center of the bowl.  You will think it will never incorporate.  Keep mixing.  You will think your cream wasn’t hot enough.  Keep mixing.  Chocolate demands patience.  Then, just like magic, the chocolate will deepen its color instantly and you will only have a few more stirs, incorporating the sides and scooping down to the bottom of the bowl, to end up with one, big, glossy, gorgeous bowl of thick, dark chocolate ganache.  Take this and spread over the tops and sides of your cut brownies and sprinkle the tops of your brownies with the nibs or crushed beans and let it cool till the ganache firms up.

*both recipes adapted only very slightly from Fat Witch Brownies.  Go buy this book for someone for Christmas.

EAT! ENJOY!

Flourless Double Chocolate Cookies

Double Chocolate Flourless Cookies
I’m going to post about chocolate, again on Saturday, most likely.  Because a friend from Matt’s old job just paid us $25 to bake him something for their company Christmas party.  We thought it would be last Friday, so I made these flourless chocolate cookies.  You can win any gift exchange or White Elephant situation with chocolate.  Unfortunately (but fortunately) the party was cancelled due to ice and so I had to make a different chocolate indulgence today.  It was hard, but I got through it.

These cold days beckon rich, dark, warm chocolate.  One of my favorite things in the cooking world is the moment when you’re stirring hot cream into chocolate chips and you think it’s never going to melt the chocolate, but then suddenly, a rich pool of blackness forms in the center of the bowl and in about ten more seconds, the whole bowl is transformed into ganache.  This happened, today, as I was making the ganache to go on top of my little brownie creation (to be posted this weekend!) and I found myself grinning like an idiot.  Transforming something good into something even better is one of the perks of working with chocolate.  It never fails to please.

Like these little cookie gems!  Flourless, fudgy, dense, chewy and melty bits of chocolate throughout.  My one and only friend with celiac disease will be so happy 🙂 You’re welcome, Heather.  I can’t imagine a world without flour, but if I had to, these cookies would be repeat visitors to my kitchen, for sure.

Flourless Chocolate Cookies

Flourless Double Chocolate Cookies*

makes about 2 dozen
2 1/4 cups confectioners’ sugar
1/4 teaspoon salt
1 teaspoon espresso powder, optional but good
1 cup Dutch process cocoa powder
3 large egg whites
2 teaspoons vanilla extract

Preheat the oven to 350°F. Lightly grease two baking sheets. Stir together all of the ingredients till smooth. This is hard.  The batter gets so gluey, you will be certain you have made a mistake.  You haven’t.  Just keep stirring.  If I could do it over, again, I’d use a stand mixer. Scrape the bottom and sides of the bowl, and stir again till smooth.
Drop the batter-like dough onto the prepared baking sheets by heaping tablespoons.
Bake the cookies for 8 minutes; they should spread, although mine didn’t much, become somewhat shiny, and develop faintly crackly tops.

Remove the cookies from the oven, and allow them to cool on the pan.

*recipe from King Arthur Flour

S’mores Pie

S'mores Pie

I had a wonderful Thanksgiving and I hope you did, too!  I got to spend it with my whole family!  Both my brothers came down with their children and with them and my parents, there were 16 of us bedding down in our old childhood home! I got to see my grandmother and my sweet Aunt Mary, too!  I really don’t think I’ve seen that much family in one weekend in several years. It was good for the soul and I don’t feel like I even overate as much as I usually do, which enabled me to enjoy the heck out of this pie I created on Friday night.

S’mores pie!  When we showed Olive s’mores for the first time this summer, we made them with dark chocolate.  I loved the balance the dark chocolate gave to the super sweet marshmallow and graham cracker.  So when thinking of a pie to make for Thanksgiving, I thought of doing the darkest chocolate pie I knew how to do and topping it with my favorite meringue and then torch the heck out of the top.

Best.  Chocolate Pie. Ever.

Seriously, if you want to win some kind of chocolate pie award, this is your pie.  Make it with a traditional crust and serve it with soft whipped cream and that is all you’ll need for ultimate bragging rights.  I nearly skipped out on the meringue, but I wanted that dramatic torched effect so I went with it.  I think if I were to do this pie over, I would give it more s’moresy flavor by just dumping a bunch of marshmallows on top and burning them to a crisp.  Because I’m that s’mores gal – the one who likes to eat slightly sweet bits of char instead of marshmallows.  I’d say most people aren’t like this or don’t have a coal deficiency or whatever, so I erred on the side of not-too-burnt.  The results were great and I will definitely make this pie again at Christmas!

torching the smores pie helping torch the pie
My nephew, Landon, helped me torch it!

aerial s'mores pie

S’mores Pie

2 eggs, beaten
1-5 ounce can of evaporated milk
1 cup white sugar
1/4 cup brown sugar
2 TBS cocoa powder
1 TBS instant coffee granules
3.5 ounces dark chocolate, chopped
1/4 cup butter
2 TBS corn meal
For the crust:
1 and a half packages of graham crackers, crushed fine (12 large)
2 TBS sugar
4 TBS butter, melted
2 TBS water
pinch of salt
Preheat oven to 350 degrees.  Combine the crushed graham crackers, sugar, salt and butter until it’s well combined.  If it doesn’t hold together when you press it between your fingers, add the tablespoons of water.  Press into a 9″ pie plate and set aside.
Combine the eggs, evaporated milk and sugars until smooth.  Put the cocoa powder and instant coffee in a small cup and add a tablespoon of water and whip it into a paste.  Whisk this paste into the egg/milk mixture.  Melt the dark chocolate and butter together in a microwave at 30 second increments, stirring after each time until completely smooth and glossy.  Add the chocolate and butter to the egg mixture and then whisk in the corn meal until smooth.
Pour into the pie shell and place your pie on a rimmed baking sheet and bake for 45 minutes to an hour, until the middle doesn’t jiggle anymore.  Let the pie come to room temp before making the meringue!
For the meringue:
5 egg whites, room temp (room temp is important)
1 cup of sugar
1/3 cup water
Place the sugar and water in a small saucepan and bring to a gentle boil till the temp reaches 250 on a candy thermometer.  While it’s boiling, put the egg whites in a mixer at medium speed and beat with a pinch of salt until soft peaks form.  When the sugar is up to temp, remove from heat and while the mixer is going on medium, drizzle the syrup in a very thin stream until completely incorporated and then increase speed to high and whip until the bowl cools down.  This takes a while so be patient.
Assemble!
Dump ALL the meringue on top of your ROOM TEMP pie and with a blow torch (such a great addition to any kitchen) or a dainty creme brulee torch (not as fun) torch the meringue until evenly browned.  If you have neither, you can brown it in the oven under the broiler but you have to be VIGILANT as to not burn the meringue.  A broiler works scary fast.

Lemon Cream Crepe Cake with Pomegranate Seeds

crepe cake with lemon buttercream and pomegranate seeds 2Crepe Cake with fuilltine and lemon buttercream

So yesterday, I got myself all in a fluster about crepe cakes – talked too much about it and had to go make one.  Tough plight.  I had some pomegranate seeds from a spectacular sale at the grocery store this week – two HUGE ones for $3, and thought they’d be so pretty on top of a cake.  I sweetened up Alton Brown’s crepe batter and made a lemon zest butter cream that went perfectly with the delicate crepes and tart pomegranate seeds.  I think this would be such a wonderful addition to a Christmas party spread – it’s so bright and happy!  Those flecks of brown in the butter cream are a baker’s pantry staple called feuilletine, a ginger-snappy flavored crisp that is used for crunch in various confections at Momofuku Milk Bar.  I remember it being a huge mess to make, and we had about 4 cups of it, just sitting there, unused, so I decided to add it in the cake for crunch and I really loved the addition!  This step can be left out OR you could crumble up actual ginger snaps and I think that would be fabulous!

This cake is for a frosting lover.  The buttercream makes a lot and I used all of it. Think: very slender, ladylike slices and you won’t be overwhelmed.  Plus some black coffee or tea and you’ll have yourself an amazing bridal brunch/wedding shower/baby shower show stopper!
Crepe Cake with Lemon Buttercream and Pomegranate Seeds Crepe Cake with Lemon Buttercream, topped with Pomegranate Seeds

Vanilla Crepe Cake with Lemon Butter cream and Pomegranate Seeds
makes about a 20 layer cake

2 large eggs
3/4 cup milk
1/2 cup water
1 tbs vanilla extract
1 cup flour
2 tbs sugar
3 tablespoons melted butter
Butter, for coating the pan

1 cup ginger snaps, crushed fine
1 cup pomegranate seeds from one large pomegranate

In a large cup, place all ingredients except the butter and blend with an immersion blender for a full minute, making sure all the flour is incorporated.  Then drizzle in the melted butter. Place the crepe batter in the refrigerator for 1 hour.

Heat a small non-stick pan over medium high. Add butter to coat. Pour 1/4 cup of batter into the center of the pan and swirl to spread evenly. This takes a bit of practice and your crepes might look like mine and have tiny fingers coming off the sides.  They’ll taste the same, promise. Cook the first side for about a minute until edges brown and you can run your spatula around the edges to loosen.  Slide your spatula under the crepe and flip over.  Cook for another 10 seconds and set aside in a stack to cool for assembly.

For the Butter cream:

1 cup butter, softened
3 1/2 cups confectioners’ sugar
1 lemon – zest and juice
1 teaspoon vanilla bean paste or extract
1/4 teaspoon kosher salt

1 cup butter, softened
3 3/4 cups confectioners’ sugar
1 lemon, juice and zest of
1 teaspoon vanilla extract
1/8 teaspoon salt

Combine butter, sugar and salt and beat till well combined and fluffy, about 2 minutes.  Add lemon juice, zest and vanilla and continue to beat for another 3 to 5 minutes.

Assemble!
Place a crepe on a cake stand on top of a dot of buttercream to hold it in place.  Spread about an 1/8th of a cup of frosting on the crepe, evenly spreading.  If using, sprinkle with crumbled cookies and top with another crepe and repeat the process until you’re left with one crepe.  Top with remaining buttercream and coat the top of the buttercream evenly with pomegranate seeds.  Freeze, uncovered, for about 30 minutes for ease of slicing!  Wrap before storing in the fridge, but the buttercream will keep the cake quite moist.  ENJOY!

vanilla crepe cake

Happy Halloween!

hallow010


These cute little pumpkin tarts took about 30 minutes.  I had leftover pie crust in the fridge, and I only had enough to make three of these little guys.  But that’s all we needed, anyway!  Today was fun – lots of fall-ish events, the festival at the church, trick-or-treating at our friends house, having a greasy bacon cheese burger at Spanky’s – okay, so that last part wasn’t necessarily fall, but I associate that place with football season!

These little tarts could be made with any shape cookie cutter and of course, after tonight, jack-o-lanterns will be out! So use a leaf or circle and cut out some cute shapes – whatever you do, these are seriously fun and delicious!
hallow014 hallow011 hallow013

Pumpkin Tarts

half a recipe of pie crust (or just store bought – one circle)
1/2 cup pure pumpkin puree
3 tbs brown sugar
1/2 tsp pumpkin pie spice

Mix the puree with the sugar and spice and set aside.  Roll out your dough, cut into shapes and run your finger dipped in water around the edge of the bottom layer.  Place one to two tablespoons of filling on the bottom layer (will depend how big your shapes are).  Slightly roll out the top layer a little more than the bottom, cut out designs that you wish, and place on top of the filled bottom layer, pressing down the edges.  Brush melted butter on the tops of the tarts and sprinkle with coarse sugar, or any kind of sprinkles!  Bake at 400 for 20 minutes, or until golden brown around the edges.

hallow012 hallow017


Sweet Potato Pie with Butter Rum Sauce

7G9A3567

Last weekend we were invited to our friends’ house for a dinner party.  The theme was Cajun and so Matt made a humongous pot of gumbo, which has been many meals this week and is very good, and I made this sweet potato pie that was obliterated by the end of the night and I sadly didn’t have any leftovers for breakfast.  I’m actually glad it got gobbled up because that’s instant portion control. I shared one slice of this pie with Olive, she ate most of it, and I enjoyed every bit.   I had a lady at church last night say, “I’d love to live in your house so that I could eat your food, but then I’d be 7,000 pounds.”  I’m not exactly sure this blog is conveying the truth if that’s the overall sentiment!   I’m also not sure I’m conveying properly the amounts of these foods I DON’T eat.  I made three batches of The Cinnamon Rolls over the course of two weeks and I think overall, I ate two whole cinnamon rolls, maybe three.  But it wasn’t a couple each batch, or “the whole pan” like a lot of people swear they’d eat if they made it themselves at home.  I don’t think people give themselves enough credit.  Of course you wouldn’t eat the whole pan.  How on earth would that be enjoyable to have a stomach ache because of something you baked?  Maybe that’s the whole problem with portion control with indulgent foods.  People get a feeling like they need to “eat the whole thing” to pretend like it never happened, to remove it from sight and further temptation.  They feel “bad” eating it in the first place and so why not eat it badly?!  Whatever the reason, it’s a wrong mindset.  And one I hope to never impose on Olive-that rich foods are somehow bad and we should feel guilty or gain 7,000 pounds for eating them on a weekly basis.

During the week, we eat simply.  Bowls full of beans, rice, sauteed chard and potatoes and steamed fish, beet pasta, roasted carrots, butternut squash soup-that was this week.  These do not make the most riveting blog posts, nor do I always remember to take pictures of “regular” meals.  Perhaps I should!  Maybe it would help balance out peoples’ fear of the occasional pie or butter sauce.  My hope for myself and anyone who loves to cook is that we find a good balance and that we effectively remove all GUILT from eating.  Find a way.  Whether that’s eating smaller portions or just meals made from fresh, good ingredients that couldn’t live in a box if they tried.  Maybe if that was the norm, and eating at home was what we did 6 days out of the week, than a crazy good, gooey brownie on the weekend or a night out at a restaurant would seem like the treat it is, instead of the impending portion of guilt that it’s come to be.

7G9A3572

This pie was light and fluffy almost like a souffle.  It wasn’t overly sweet and so it went AMAZINGLY well with the butter rum sauce I decided to make at the last minute.   I think it would be perfect without the sauce, but it was the gilding of the lily for a festive occasion like a dinner get-together.   I also adore the website I adapted this from – The Gumbo Pages!  That is the best website name, possibly ever.  And the recipe was clearly from someone who never had to write it down.  A lot of “approximate” measurements and “about this much” kinda talk.  I love the nature of a recipe like that.  And I love that this recipe came from someone with the nickname “Pie Man.”  Honestly, how can you go wrong with that combination?

7G9A3576

Sweet Potato Pie with Butter Rum Sauce
makes one, 9″ pie

3 cups cooked, peeled and mashed sweet potatoes (about 3 medium potatoes)
2 eggs
2 tablespoons melted butter
1/4 teaspoon cinnamon
1/8 teaspoon nutmeg
1/2 cup cream
1/2 teaspoon lemon juice
2 teaspoons vanilla
dash of salt
1/2 cup sugar

Boil the potatoes whole in plenty of water (covering them by about two inches) for about 30 minutes, until tender all the way through.  Peel them after they’ve cooled a bit and give them a rough dice.  Mix the potatoes in a stand mixer with the paddle attachment until they are smooth and very few lumps remain.  Mix the eggs with the cream and spices, lemon juice and vanilla until smooth and gradually mix it into the potatoes.  Add the salt and sugar and let the mixture blend on medium for about 5 minutes. Pour filling into UNbaked 9″ pie shell, bake for 40-45 minutes at 350-325.  Serve with butter rum sauce or whipped cream!

Butter Rum Sauce

1 stick of butter
1/3 cup heavy cream
1/2 cup sugar
a few pinches of kosher salt to taste
2 tbs rum

Let the butter melt with the cream and sugar and stir until the sugar is completely dissolved.  Add salt until it tastes right to you – let it take some of the sweetness away and give it some depth.  Add the rum and mix well and serve!

Mexican Chocolate and Horchata Risotto

Horchata Risotto
I really can’t think of a better day to make this dish than today.  It’s cold, cloudy and all I want to do is eat complex carbs, sprinkle cinnamon on them and then take a nap.  The other day, I found a recipe in my cute little French non-diet diet book for a simple chocolate rice pudding.  I started improvising and adding cinnamon.  Then more cinnamon.  Then some cream, then more vanilla.  It started tasting exactly like horchata, my favorite Mexican beverage, and I was happy.  I even thought, “Why ruin this horchata by adding the chocolate the recipe calls for?”  So I ladled out half of the rice pudding and added the chocolate to the other half.  Woah.  Insanely good.  The intense cinnamon and vanilla, mixed with the dark chocolate was a revelation.  Such a depth of flavor you wouldn’t really expect from something as seemingly bland as a rice pudding.  It was amazing.  And with just a little extra cream to loosen up the consistency, it was exactly the way risotto should be, only sweet!  Dessert risotto – you heard it here first, folks.  I think it should be a “thing” if it isn’t already.  It’s going to be a “thing” in this house, at least!

Mexican Chocolate Risotto

Horchata/Mexican Chocolate Risotto
serves 4 as a dessert

2 cups milk
1/4 cup sugar
Pinch of salt
1 cup Arborio rice (this is risotto rice that plumps up and absorbs a lot of moisture.  I’d really recommend not using any other kind)
1 tsp vanilla bean paste
1 tbs cinnamon
– then, for Mexican Chocolate, stir in 3 ounces dark chocolate chips (the darker the better – I used 70%)

Pour the milk, sugar and salt into a saucepan and bring to a boil over medium heat.  Add the rice and cook for 20 minutes, stirring occasionally, until the milk is absorbed.  You may need to add  a few more splashes of milk or cream to keep the rice creamy.  It may take more time and more milk in order for the rice to not be crunchy anymore.

Stir in the vanilla and cinnamon and taste.  Revel.  Feel happy.  Then, when you’re ready, add in the chocolate to the entire batch or just half, like I did.  Stir until fully melted and incorporated.  Sprinkle with extra cinnamon and a sprinkle of cayenne if you dare.  Serve with a warm cup of hot chocolate and be sure you’re wearing fuzzy slippers.

Enjoy.