Rustic Vichyssoise (potato and leek soup)

Vichyssoise 2
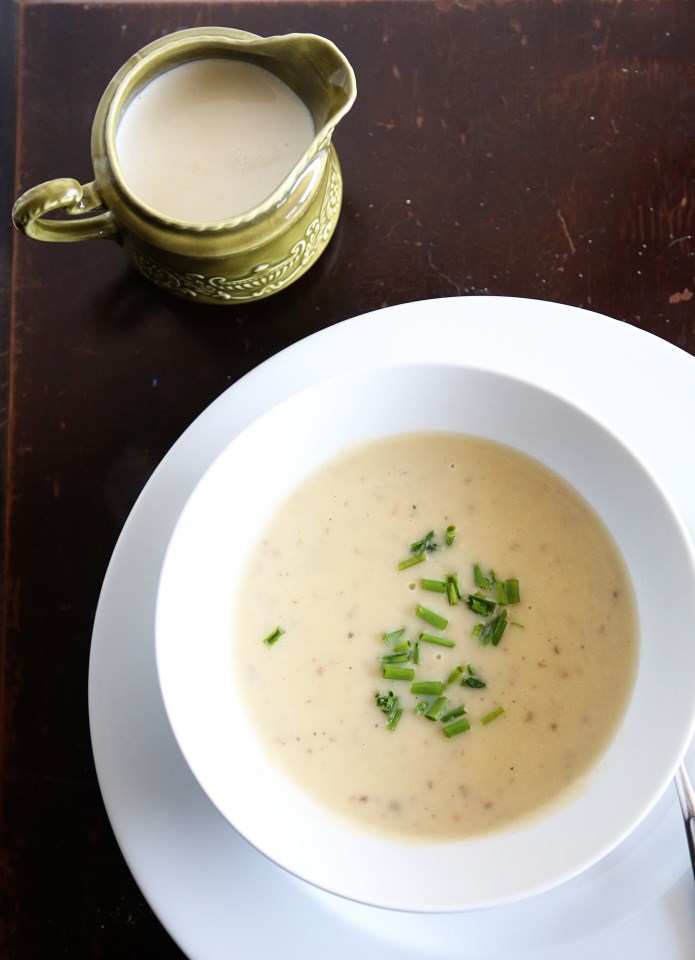
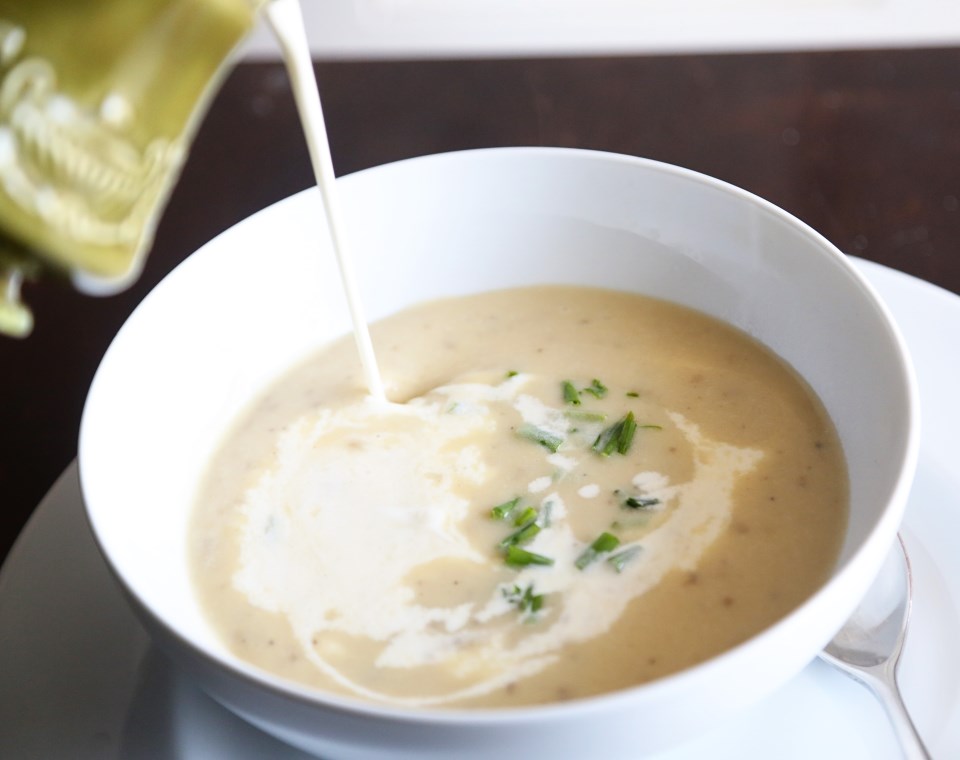
Too hot outside for another soup recipe?  What if I told you it was a cold soup?  Would that change your mind or keep you further away?  We are okay with gazpacho so why not potato and leek?  Maybe if it had a fancy French name?  Vichyssoise (pronounced vishy-swah) is a silky potato soup, cooled down with cream and it might just become your new favorite soup.

A French chef at the Ritz in the 1950s, Louis Diat, was credited with this soup’s [cold] invention.  He said as a boy, he and his brother would cool off the potato and leek soup his grandmother would make, by pouring milk or cream into the hot soup.  He loved the experience so much, he wanted to create a soup for his patrons at the Ritz similar to the soup he had as a boy.

I haven’t quite gotten behind the cold version, yet.  I think the silky potato soup is amazing hot and it has so much depth.  For a dish that has so few ingredients, it tastes like it has a dozen. The potato/leek combination is rather magical in and of itself.  Matt loves the cold version (chill the soup first, then add cream, or you’ll just end up with lukewarm soup if you add cream to hot soup) I love it hot, Olive loves it somewhere in between and once again, this is a great way to provide vegetables for a great little eater who is otherwise distracted by the experience of being two 🙂

I, of course, defaulted to my favorite French cookbook for the recipe – Winnie never steers me wrong!

Vichyssoise 1
Rustic Vichyssoise* (rustic because I forgot to peel the potatoes first)

2 TBS unsalted butter
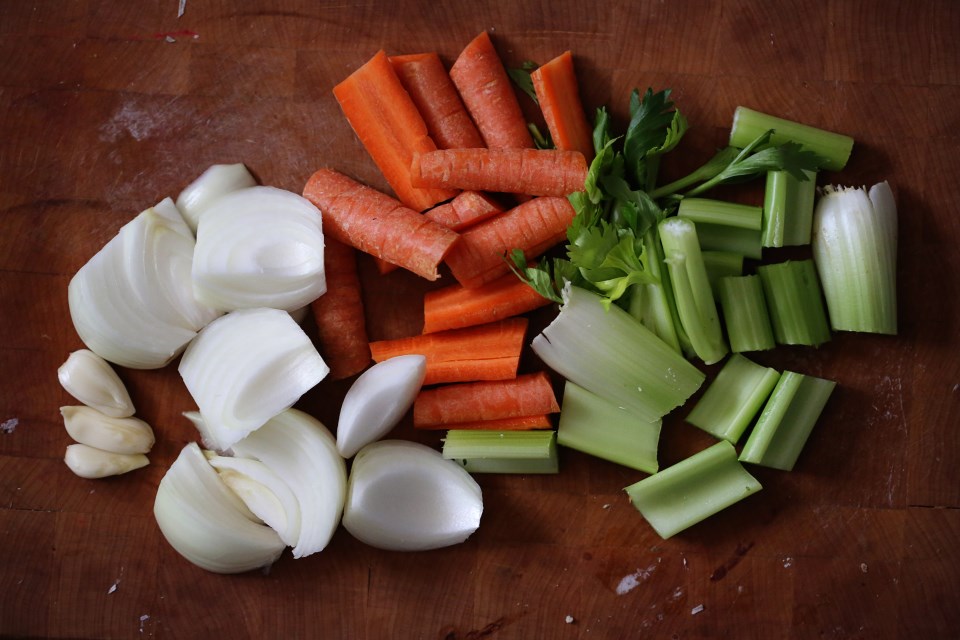
2 medium-size leeks (or one Texas size – white and pale green parts only, halved lengthwise, rinsed and chopped, about 1 cup)
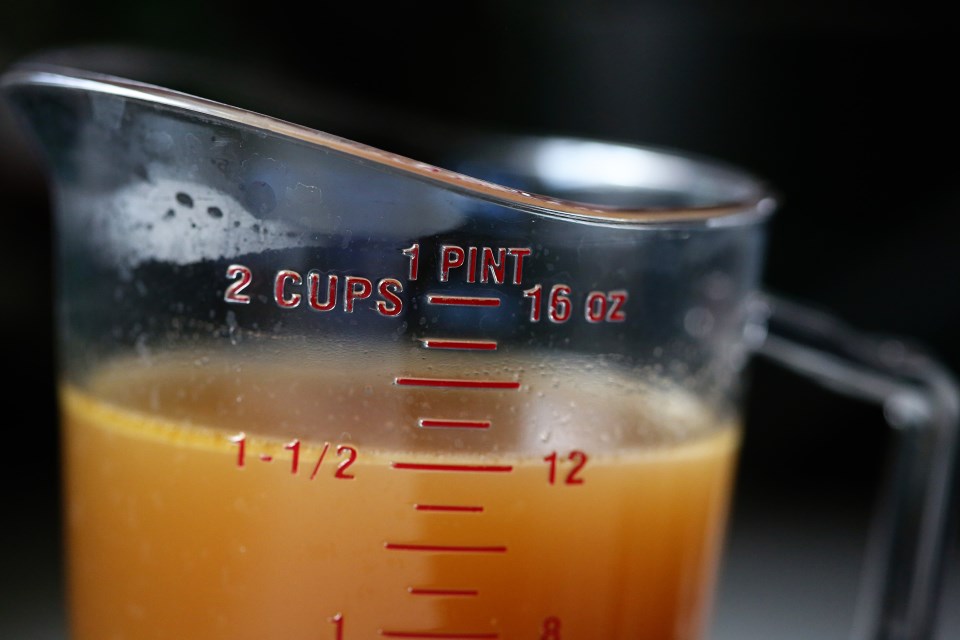
6 cups low-sodium chicken broth (I had beef broth on hand and it turned out great)
1.5 lbs yellow or white potatoes, peeled and roughly chopped(or unpeeled if you forget and want to call it rustic :))
Salt and fresh ground pepper to taste
1 TBS heavy cream
1/4 cup snipped fresh chives for garnish

Melt the butter in a 4 quart saucepan over medium heat.  Add the leeks and cook, stirring, until tender but not brown, 4 to 5 minutes.  Pour in the broth slowly and then add the potatoes and salt and pepper.  Bring to a boil.  Reduce the heat, cover the pan, and cook at an active simmer until the potatoes are tender, about 30 minutes.

Blend in the pot with an immersion blender until no chunks of potato remain (or, working in batches, puree in a blender).  Stir in the cream and season with extra salt and pepper, if needed.  Garnish with fresh chives and add extra cream to your liking.  For making traditional Vichyssoise, chill the soup for a few hours and then add about 1/4 cup cold cream or half and half to each serving.  Re-season as needed.

*slightly adapted from the Bonne Femme Cookbook

Basil Risotto – Herbs are Vegetables, Too

Basil Risotto
Leafy greens.  For most Americans, this isn’t the most appealing set of words.  However, most of us might just think LETTUCE or  SPINACH or KALE and think, “How on earth am I supposed to eat several cups of that a week?!  Lettuce not forget about herbs (please forgive that pun, I really had no other choice.)  They are brimming with nutrients! It’s such an easy and flavorful way to add more vitamins and fiber to your diet and your recipes.  I always tend to forget that things like basil, thyme, oregano, mint – these are quite leafy and quite green, too!  Sure, you can’t eat as much of them as you can kale in one sitting, but a mild basil goes amazingly well with spinach and can really add a lot of interest to a dish.  Basil is full of beta-carotene, Vitamin A, K and its leaves are rich with essential oils known for being anti-inflammatory.  And lucky you, the summertime is a time when basil grows like a weed!  

I realize that lettuces, spinach, cabbages, etc, are sometimes challenging for little ones (and me) to eat.  But I’ve fully gotten Olive acclimated to the flavors of pesto and I consider that a small victory.  It’s green, so it opens the door for other vegetables to eventually be accepted as well.  For this creamy, bright risotto, I made a pureed basil (not really pesto as I didn’t have Parmesan or pine nuts on hand) with just basil, garlic and garlic oil and stirred it into my risotto in the last minute of cooking.  Garnished with a chiffonade of fresh basil and we had lunch!  Olive loved it and I loved that while it seemed like comfort food, it was actually quite healthy and nutritious for us both.  Not a lot of butter and oil – just good chicken stock (which is amazing for your health on its own), basil, onion and rice!

I encourage you to think of herbs as a choice for getting more vegetables into your diet.  And what better herb to start with than basil?

Pesto Risotto
Basil Risotto

serves 6-8 as a meal

2 cups arborio rice
2 TBS butter
5-6 cups good chicken stock (low sodium if store-bought or just use water and season later)
1/2 cup chopped onion
1 large garlic clove
2 cups packed basil leaves
4 TBS olive oil (I used garlic oil)
2 garlic cloves
salt and pepper to taste

In a large cup with an immersion blender or in a food processor, blend the basil leaves, olive oil, garlic and about a half tsp salt and pepper.  Taste and adjust seasoning to your liking.  You can full out make a regular pesto if you want, but this is what I had on hand and it worked great.  If you make a full batch of pesto, only stir in about 1/4th of a cup into your risotto.

In a large saucepan, heat the chicken stock to a simmer.

In a large, deep skillet over medium heat, melt the butter until it starts to bubble and then saute the onion and garlic until soft, stirring to not let the garlic burn.  Stir in the rice and stir to fully coat in the butter and onion.  Begin adding 1/2 cups of stock to the pan, stirring pretty regularly to ensure the rice doesn’t stick to the bottom of the pan.  When the liquid cooks off, add another 1/2 cup and keep this process up until you’re down to about a cup of stock and have been cooking it for at least 20 minutes.  Near the end, taste the rice – you don’t want it crunchy, but you don’t want it mushy either.  Think of it like pasta – a nice bite to it is key.  Stir in another half cup of stock if you think it could use it and then add in the basil paste.  Remove pan from the heat and serve immediately.  Garnish with fresh basil or a grating of fresh Parmesan and cracked pepper.

Cooking Basics: Basil Pesto

Basil Pesto Ingredients
This is an important recipe to have memorized.  If you know the basic formula, you can make a pesto with just about any green/oil/nut/hard cheese.  It’s a great way to dress up a simple pasta salad, a plain filet of fish, or even boiled potatoes for a spin on potato salad.  When it’s a pasta-only kinda day around here, pesto somehow makes me feel better about not trying harder to dish out variety.  I think, “At least Olive is eating something green and different on top of her pasta.”  While that may be the dinner equivalent to justifying nutella as a “healthy” snack, I’m sticking with calling pesto healthy.  In moderation.  The stuff is mostly olive oil.  But I think if it’s used as a garnish, it’s just fine  and a little goes a long way, anyway!
Pesto

So here is your Cooking Basic for the week –

Basil Pesto
makes about a cup and a half

3 cups packed fresh basil leaves
1/2 cup toasted pine nuts
1/2 cup grated Parmesan cheese
4 cloves of garlic
1/2 cup olive oil
salt and pepper to taste

Put everything except the oil in a food processor and turn it on.  While it’s whirring around, gradually drizzle in the olive oil through the open chute of the processor lid.  Let it process for about 30 seconds and then open and taste for salt and pepper.  I end up putting about a teaspoon of kosher salt and a few grinds of fresh cracked pepper to mine.  Pesto will keep on the counter for about a week or in the fridge for 2-3 weeks.  The top of the pesto will turn brown, but it can simply be scraped off before use.  Pressing a sheet of plastic wrap on its surface helps with the oxidization, too.

Basil Pesto Tortellini

Cooking Basics – Salted Caramel Sauce

Salted Caramel Sauce

This week is so busy with all the prep for our fundraiser dinner for Carpenter’s Church!  So, instead of an involved recipe, I decided to give you a simple kitchen basic that I have made about fifteen times in the past twenty-four hours as a topping for the banana bread pudding I’m doing for the dinner tomorrow.

Okay, okay, so maybe this isn’t the most basic kitchen skill to have.  It’s not exactly on par with the humble chicken stock. HOWEVER! It tastes outstanding and you have the ingredients in your house right now.  You could make a batch for ice cream, for brownies, as a topping for a cake or as a totally amazing sweet fondue for bread/fruit/a spoon.  You don’t need a reason.  You could jar this up and give it away as gifts at Christmas or any time.  You could make a few batches and keep them all to yourself – the only thing I know for sure is that if you try this recipe, you WILL be back for more…

Salted Caramel Sauce
makes about a cup

1 cup white sugar
1/4 cup water
1/2 cup warmed heavy cream (warm it in the microwave for a minute)
2 tablespoons unsalted butter
1 tablespoon vanilla bean paste (or extract)
3/4 teaspoon kosher salt

In a large saucepan over medium heat, add the sugar and water and stir with a spatula to fully incorporate.  Put a lid on the pot and let it come up to a simmer.  Have you ever read recipes that tell you to brush the sides of your pan with a wet basting brush to keep sugar crystals from forming while making caramel?  No more!  That’s tedious and I don’t like getting my fingers that close to boiling sugar.  The lid creates condensation that drips down and keeps all the sugar in place, instead of creeping up the sides like it will if the lid’s off.

Swirling occasionally while cooking, check for the color.  When it develops a nice golden amber color, remove it from the heat and stir in the heavy cream and vanilla.  This will bubble furiously, but just whisk, whisk, whisk until it calms down.  Add the butter and whisk to incorporate.  Then, add the salt and stir until dissolved.  Let it cool and taste test for salt level.  Store in jars on the counter for a week or in the fridge for a month.


Cooking Basics: Homemade Chicken Stock

dark chicken stock
Homemade chicken stock-not as difficult as it sounds, although it takes some forethought.  Next time you roast a chicken or make chicken wings or anything like that, clean and bag up those bones and throw them in the freezer!  The more bones you have, the better and richer your stock will be.  I made today’s batch with just one bird – all bones including the neck.  It wasn’t perfectly clean (meaning there was still some skin/meat on the bones) but with just a little extra straining and skimming, it turned into amazing stock and made more than a gallon!

Step one: get a large stock pot, add vegetable oil to the bottom, get it smoking over medium high heat (like a 7 out of 10) and roast the bones for about 10-25 minutes until deep brown, stirring to ensure it doesn’t just burn:
brown and roast the bones
While the bones are roasting, chop carrots, celery and onion:
roughly chop the vegetables
After the bones are really good and roasted, add in the vegetables. You’ll notice I didn’t peel the carrots.  Keep it simple – you won’t be eating these vegetables – they’re just for flavor!  A rough chop should do it.  I threw in three garlic cloves, too, just for fun.
roast the vegetables and bones together
Let the vegetables roast with the bones until the carrots begin to soften.
create your herb packet
Make a bouquet garni (a little herb packet).  Don’t have cheesecloth?  Use a coffee filter!  I added thyme, bay leaves and peppercorns.  Tie it all up with string and throw it into the pot along with enough water to cover everything by about 4 inches:
tie up the packet in twine
Let it simmer for a long time.  Bring the whole pot to a boil and then reduce it to a simmer and let it sit there all day.  Four or five hours.  When it’s done, strain out all the vegetables and anything that escaped your herb packet.
strain and strain and strain again
Strain again.  And again.  And again.  I got crazy and strained through a coffee filter.  This took way too long…
strain
Be smart like my husband and chill the stock in the fridge and the fat will rise to the top and solidify and you can just scrape it off.  Genius.  That’s why I keep him around.
Homemade Chicken Stock
Voila – beautiful chicken stock!  And very very little sodium.  I didn’t salt this stock so all the salt you add to your soups can be YOUR doing and not hidden somewhere in the stock!  Like I said, this batch made over a gallon and I used it for soups, pan sauces, pasta dishes, risotto, etc.  You can freeze in large muffin tins that hold a cup each and take out a cup each time you need it!  Ours doesn’t last that long, but if you don’t cook with stock really frequently, you might want to freeze it, as most stocks will last about two weeks before getting funky.

Basics – Roasted Garlic

garlic cloves in oil
There are few smells better than roasting garlic.  The top 5, according to me, of most heavenly, coma-inducing kitchen smells are:

1. Bread baking
2. Garlic roasting
3. Onions cooking in butter
4. Browning butter
5. Bacon sizzling in the pan

We have plenty of days where our house smells like baking bread, but I don’t have that smell of garlic roasting near enough.  Roasting garlic turns the garlic into an almost caramelized, savory paste that softens the intensity of raw garlic, mellows out the flavor and makes it perfect for dressings, soups, pasta dishes, breads, and that doesn’t even include the wonderful uses of the garlic oil that is produced from the roasting process.  Garlic oil=liquid gold.

So today, in the first of my series on cooking basics, I’ll show you my process for roasting a head of garlic and then below, a simple recipe for garlic aioli that can be used on sandwiches as an amazing spread alternative to mayo!

First, lop off the top of a head of garlic and place in a large piece of tin foil.  Put that little package in a small dish to catch leaking oil.  Generously salt and pepper the cut tops and drizzle with about four tablespoons of oil.
ready for roasting
Next, place both cut-side down, crimp the foil together to form a tent and place in a 400F oven for about 30 minutes.  Your garlic should look like this when it’s done:

roasted garlic
I checked mine about half-way through to make sure I wasn’t cooking it too fast.  Let the head of garlic cool to where you can handle it and then just pick it up and squeeze, popping out all the cloves.  You’ll end up with this:
roasted garlic cloves in oil
Place the cloves in a jar and fill up with oil to cover the cloves.  This allows your oil to become infused with garlic-goodness and it keeps the garlic cloves from drying out.  Store on the counter to use for anything you can think of!  We use the oil to make a quick aioli to spread on burgers, sandwiches, or as a dip for roasted potatoes – heaven!

garlic in oil

Garlic Aioli

1 large egg
1 tablespoon lemon juice
1/2 teaspoon salt
1/4 teaspoon fresh ground pepper
1/2 cup garlic infused oil

Place the egg, lemon juice, salt and pepper in the bottom of a tall immersion cup.  Add the oil and submerge your immersion blender to the very bottom of the cup.  Turn the immersion blender on and slowly lift as you blend.  The oil will combine with the rest of the ingredients and by the time you get to the top, you should have a smooth consistency.  If you are using a basic blender or food processor, add the ingredients except for the oil.  Turn on the blender and then slowly stream the oil until all the oil is added.  Adjust the seasoning with salt and pepper and keep in an airtight container in the fridge for up to two weeks.  But it probably won’t last that long!