Coffee Infused Tres Leches Cake

manyleches005


There are three things that make a dessert experience truly great:
1. The occasion
2. The company who helps you eat it
3. The number of leches involved

This particular dessert experience was one I will always remember.  My friend, Becky came into town for a few short days and because of her husband’s nomadic ways, they have traveled far away from Lubbock, I fear, never to return.  I cherish the times she comes back into town and actually spends some good, quality time over at our house.  I shot Becky and Trevor’s wedding four years ago and we became fast friends, immediately glued together by our love of food and cooking.  I was elated when she said she’s spend the better part of the day with me, so the first question we naturally discussed was, “What are we going to bake?!”

Becky is one of those people who knows how to cook.  It’s in her soul – she was taught from a very early age how to work her way around a kitchen, learning from her father and grandmother.  Becky’s happy place is in the kitchen, and so naturally, we both had a zen-like afternoon baking together.  We shared stories, we complained about bad food and we ATE our creation with gusto and silent, head-nodding approval between bites.  It was perfect.

We decided to do Rick Bayless’ Coffee Infused Tres Leches Cake that I’d recently seen on his show, Mexico, One Plate at a Time.  Rick Bayless is one of those safe names in the cooking world.  If the recipe is from his show, or from one of his many restaurants, or amazing cookbooks, you can rest assured the recipe will work, and will become one of your favorites to return to again and again.  This has happened to me many times and this cake happily joins the ranks.

This cake is intense.  It should be paired with a strong cup of black coffee and nothing else.  The addition of the coffee in the milk mixture is pure genius.  It cuts the richness just right and adds depth where there might just be a generic sweetness.  It has this incredibly creamy texture with hints of cinnamon and coffee.  It’s the best tres leches cake I’ve ever had.  (And I grew up around here – I’ve had plenty.)  It made me think of the wonderful flavors of horchata, and I think next time I make this, I’ll replace horchata for the heavy cream.

manyleches006

Coffee Tres Leches Cake*
serves 6

For the cake:
1 cup all purpose flour
¾ cup sugar
1 ½ teaspoons baking powder
Salt
4 eggs at room temperature
¼ cup vegetable oil
¼ teaspoon vanilla extract, preferably Mexican
½ teaspoon cream of tartar

For the milk mixture:
1 cup heavy cream
1 12-ounce can evaporated milk
1 14-ounce can sweetened condensed milk
½ cup freshly brewed espresso or strongly brewed coffee
1 teaspoon vanilla extract, preferably Mexican
¼ teaspoon cinnamon
1 cup sugar
5 egg whites at room temperature
½ teaspoon cream of tartar
extra cinnamon for dusting (or cocoa powder – or espresso powder would be good, too!)

Heat the oven to 350 degrees. Line a muffin pan that makes 6 large muffins with muffin papers. Or, I don’t have a huge muffin pan, so I used little ramekins and lined the bottom of each with parchment.  Just do it and you won’t be sad, scraping your cake off the bottom of the dish.
Place the flour, 6 tablespoons of the sugar, the baking powder and a pinch of salt in a large bowl and whisk to combine. Separate the eggs, dropping the whites into the bowl of a mixer and the yolks into a medium bowl.  Add the oil, vanilla and 2 tablespoons of water to the yolks and mix well. Beat the egg whites with the cream of tartar until they start to thicken and form soft peaks.  Gradually add the remaining 6 tablespoons of sugar and continue to beat until stiff peaks form.
Add 1/3 of the flour mixture to the egg yolks and mix well. Gently fold in 1/3 of the beaten egg whites. Repeat, alternating the flour mixture and egg whites until everything is thoroughly combined.  Scoop the fluffy batter into the prepared muffin tins, place in the hot oven and bake until the tops spring back when touched, 20 to 22 minutes. Allow to cool slightly, then take the individual cakes out of the dishes and invert them into a deep 13×9 inch baking dish.

Combine the heavy cream, evaporated milk, condensed milk, coffee, vanilla, cinnamon and a pinch of salt in a bowl and mix well. Slowly pour the mixture over the cakes, soaking them thoroughly. Cover with plastic wrap and refrigerate for 1 hour to allow the milks to be absorbed into the cakes.  It actually took longer than that for mine to absorb.  We spooned the mixture over the cakes and poked extra holes in them so they’d soak up more milk.  In the end, I still had some leftover, so don’t worry about that.

Combine the sugar with 1/3 cup water in a small (2-quart) saucepan and bring to a boil over high heat, swirling the pan gently until all the sugar is dissolved.  Dip a brush in water and use it to clean the sides of the pan so no sugar crystals remain.  (This is an important step in keeping the syrup from recrystallizing.) Lower the heat to medium and boil the syrup until it reaches soft ball stage (about 240 degrees).
While the syrup is boiling, beat the egg whites with the cream of tartar and a pinch of salt until the whites form soft peaks.  Drizzle in the hot sugar syrup very slowly while the mixer is running.  Continue to beat until the bottom of the bowl is cool.  This takes forever, so do what Becky does and place ice packs on the outside of your bowl.  Or peas.
To serve, place each soaked cake on a plate, decorate with a big dollop of meringue, toasting the peaks with a kitchen torch.  Sprinkle with the cinnamon or cocoa and eat with great gusto!

*only slightly adapted from the original recipe

manyleches003 manyleches007 manyleches009


Thank you for that afternoon, Becky.  It will sustain me for months to come.  Until next time!  XOXO

Happy 4th of July Weekend!

photo

It’s strange when a holiday falls in the middle of the week.  People have to go back to work the next day, so it’s this little blip in the week that makes you WANT the full, extended weekend, but few actually get it.  I figure since people might be celebrating all weekend, a recipe for a few burger-accompaniments would be in order.  I might even post, again, tomorrow with what we cook, tonight.  Maybe I’ll post on Sunday, too, with what happens on Saturday.  I love a good excuse to celebrate the summer all weekend long.  We really don’t need an excuse, but when festivities are high and people are cooking and grilling, it’s a wonderful time to try out new recipes and make the old, beloved standards.

We’ve been Top Chef fans since its debut seven years ago.  We developed a love-hate relationship with Spike during his season and bought his cookbook and now that relationship is all love.  He really understands how to do comfort food and takes nostalgia (burgers, shakes) to a new level.  So he is the go-to for summer time recipes!  I highly recommend his cookbook, The Good Stuff Cookbook and especially his recipe for the Good Stuff sauce that we now have to have on every burger we grill!  It’s a perfect blend of sweet, tangy and savory and it is perfect for burger toppings or a dip for fries!

goodstuff002

Good Stuff burger sauce*
makes about 2 cups

2 cups homemade or Hellman’s mayonnaise
2 tbs ketchup
2 tbs molasses
2 tbs rice vinegar
1 tsp salt

Add all ingredients to a food processor or blender (or in a cup with an immersion blender) and puree until smooth.  The sauce can be refrigerated in an airtight container for up to 1 week.

*taken directly from The Good Stuff cookbook

We also are addicted, lately to caramelized onions.  There’s really nothing difficult about making them, and they completely improve everything they touch.  I’ve added them to omelets, sandwiches, wraps, burgers, stir-fry, beans, rice dishes – EVERYTHING!  Here is my simple method:

Caramelized Onions
makes 2 cups – can easily be scaled down

6 white onions, halved and then sliced thin
2 tablespoons neutral oil like Canola
Kosher salt

Heat the oil in a 12″ cast iron pan till it shimmers.  Dump all the onions in at once and let it sit there for a few minutes.  Then, gradually start flipping and stirring the onions around till they all get coated with the oil.  Your pan will be VERY full if you used all 6 onions.  Turn the heat down to medium low and cook, stirring occasionally for at least 30 minutes.  You want a deep, rich brown color on all the onions.  They will greatly reduce in size till you’re left with about 2 cups of onions.  We keep ours in the fridge and scoop out portions for everything under the sun, but most recently, they were an AMAZING topping to our burgers this weekend, complete with smoked gouda, pickles and the Good Stuff sauce.  Oh, heavens…

The last recipe I’ll impart is a very classic deviled egg recipe that includes a good amount of olive oil and the result is the most silky texture to the filling and the perfect balance of acid and richness from the egg yolks.  The recipe is adapted from the Serious Eats site, which, if you haven’t become addicted or receive their weekly emails, you will and you must.  So many great recipes come from their extensive research and trial and error!

goodstuff004

Deviled Eggs
makes about 18

1 dozen large eggs, not too fresh
2 tablespoons mayonnaise, preferably home made
1 tablespoon dijon mustard
Up to 1 tablespoon white wine vinegar
1/2 teaspoon Frank’s Red Hot sauce
2 tbs extra virgin olive oil
Kosher salt
Freshly ground black pepper
3 tablespoons thinly sliced chives
Crushed red pepper or hot paprika

Place eggs in a large saucepan and cover with 2 quarts cold water. Place over high heat, bring to a boil, cover, remove from heat, and let stand ten minutes. Drain eggs and peel under cool running water. Slice each egg in half lengthwise.

Place all of the yolks in the bowl of a food processor. Select 16 of the best looking egg white halves and set aside. Reserve the remaining 8 for another use. Add mayonnaise, mustard, half of vinegar, and hot sauce to food processor and process until smooth, scraping down sides of bowl as necessary.

With machine running, slowly drizzle in 2 tablespoons of olive oil. Season mixture to taste with salt and remaining vinegar (if desired). Transfer to zipper-lock bag. Filling and egg white halves can be stored in the refrigerator up to overnight before filling and serving.

Cut off corner of ziplock bag and pipe filling mixture into egg whites, overstuffing each hole. Drizzle with extra olive oil, sprinkle with black pepper, chives, crushed red pepper, and sea salt. Serve immediately.

Rosemary Crusted Pork Chop with Coconut Milk Braised Carrots

Rosemary Pork and Carrots006

This is a good meal for many reasons.  The pork chops were actually a good thickness, and lean, and were buy one pack, get another pack for free (4 really thick chops in each package.  I get ridiculously excited for discounts in the meat department.)   I bought a 5 pound bag of carrots two weeks ago, and so I am currently looking for different ways to prepare them, and found a stunningly simple and flavorful way on one of my favorite blogs, French Foodie Baby.  Say what you will about my French obsession, but those people KNOW their food, and from a very loving depth that centers around family and love of pure ingredients.  Helene, from FFB, is one of the best writers in the myriad of food blogs out there. I literally exhale with relaxation when I read her posts.  She challenges me and inspires me and makes me want to be better at being thoughtful about what I put on the plate for my family.

The braised carrots in coconut milk was from her blog and I just took the concept and did it in a much bigger batch on my stove so that I’d have leftover finger foods for Olive for the week.  And so I could use up the never ending bag of carrots.  I swear that thing is multiplying.

I don’t know much, but I do know that pork and rosemary are best friends.  So when I saw that Helene put rosemary in with her coconut milk to braise the carrots, I thought: instant pan sauce!  And it turned out wonderful!  The extra sauce from the carrots made an amazing garnish for a thick, crispy, rosemary-infused pork chop!  I was happy with this meal and wanted to share its simplicity and comfort-food qualities with you today!

Rosemary Pork and Carrots002


Rosemary Pork and Carrots005

Rosemary Crusted Pork Chop with Coconut Milk Braised Carrots
serves 4-6

4 boneless pork chops, thick cut, if you can find them (the ones I found were about an inch thick)
1/4 cup flour
Salt and pepper – about a half teaspoon of each
2 tbs chopped fresh rosemary – I would think dried would be fine, but it wouldn’t be as aromatic
4 tbs butter or olive oil for pan frying the chops

For the carrots:
1 lb carrots, peeled and chopped into half inch rounds
1 can of coconut milk
2 cloves of garlic, crushed but left mostly in tact
two sprigs of fresh rosemary
salt and pepper to taste

Get the carrots on the stove to braise first, as they take the longest.  In a deep skillet, heat the coconut milk over medium heat along with the cloves of crushed garlic and the rosemary sprigs.  Add in the carrots and let it simmer on the stove until the carrots are tender, about 20 minutes.  I put a lid on halfway through as to not lose too much moisture.  When the carrots are done, remove the pan from the heat and set aside.

For the chops: pat them dry with paper towels and season both sides with salt and pepper.  Put the flour and rosemary and a few dashes more of salt and pepper in a bowl and toss well to combine.  Coat each side of the chops in the flour mixture and set aside.  Heat the butter or olive oil in a non-stick skillet over medium heat until shimmering (or bubbling if using butter) and add in the chops, cooking about 5-6 minutes per side.  If they are browning too quickly, reduce the heat after you get a good sear/crust on each side of the chop.  If your chops are really thick, you may need to transfer them to a preheated oven to finish cooking.  I had to do this for one of the chops because it was way bigger than the rest and wouldn’t cook through without burning the crust.  At any rate, you need a meat thermometer for this because we no longer have to cook our pork to death to be safe.  Some farmer told me that no one’s gotten sick from pork in years, but everyone is still cooking it like they could.  A pink center is fine – I made sure mine got up to 150-160 and called it good, regardless of how the centers looked.

Place the chops on plates and for the sauce garnish, move the carrots to a bowl, reserving about a 1/2 cup of the coconut milk in the pan.  Taste for salt and season as necessary.  Remove the rosemary sprigs and the cloves of garlic and spoon the sauce over each chop and serve alongside the carrots.  If you don’t cook the chops too much, they will be soft enough for a baby to chew, given she has at least 3 molars, which mine does.  She loved the carrots (she’s 15 months old) and ate a few pieces of pork and called it good.  And lately, that has to be good enough for me!  For smaller babies, the carrots would be IDEAL pureed or just left in tact for finger foods.  They are so soft, sweet and a little salty – perfect! I would have blended up the pork with some coconut milk back in the 6-9 month days for Olive.

Enjoy!

Turkey Meatball Stroganoff

turkeystroganoff003

For your Monday family meal, I am presenting something truly comforting, low in fat and wonderfully flavorful.  Coming, again, from Tyler Florence’s book, Start Fresh, this recipe appears at the back of the book where a few dishes are listed that the whole family can enjoy and be modified for any stage eater.  If I were feeding this to 9 month old Olive, I would smash up a meatball into tiny pieces (they are really soft, anyway) and I would take some of the sauce and pulse it a few times with a few noodles.  I’d even have taken a bit of everything for 6 month old Olive and blended it all up with some extra sauce!  I was never too worried about feeding her a huge variety at an early age.  For 15 month old Olive, this meal is a free-for-all.  I’m really strict when it comes to what and when she eats, but as for how, I still cringe, but I do let her eat with her hands, smash things in her face and even try and “smell” everything (which results in food up the nose).  I know I have a lot of guidelines, so I try my best to not stress too much about the mess.  I still won’t dump a scoop of spaghetti onto her try and leave her to it.  I have boundaries, you know.  🙂  But I think WHAT she eats and the way we treat mealtimes is more important than having to hose down the high chair.  (I’m preaching to myself.  This is a life lesson for me and my need to control things too much!)

turkeystroganoff002

Turkey Meatball Stroganoff*
Serves 4 to 6

1 slice multigrain bread (I used rye) or about 1/2 cup plain breadcrumbs
1.5lbs ground turkey
2 tbs whole milk
1/2 cup yellow onion, minced
1/2 tsp caraway seeds, crushed (just dump some in a plastic bag and roll over them with a rolling pin if you don’t have a mortar and pestle)
Pinch of kosher salt
2 tbs extra virgin olive oil
1 garlic clove, chopped
6 ounces sliced mushrooms (any kind)
1 sprig fresh thyme
1 tbs AP flour
1.5 cups low sodium chicken stock
2 tbs sour cream or unsweetened yogurt (I used the latter cause that’s what I had on hand!)
2 tsp Dijon mustard
8 ounces cooked egg noodles (I like the extra wide for baby hands to grasp!)
2 tbs chopped fresh parsley

Chop or pulse the bread in your food processor (or with a knife) until very small and crumbly.  In a large bowl, mix the turkey together with the bread, milk, onion, caraway seeds, and salt until combined (err on the side of too wet and add more milk if it seems dry).  Shape the turkey mixture into about fifteen 2-inch meatballs.

In a large skillet, heat the oil over medium heat until shimmering.  Add the meatballs and cook, turning often, until browned, 5 to 7 minutes (I have to use a meat thermometer for turkey and make sure I get the centers up to 160).  Transfer the meatballs to a plate.

Add the garlic to the same skillet and cook over medium heat for a minute or two.  Add the mushrooms and thyme and continue to cook, turning often, until the mushrooms are golden.  Sprinkle the flour over the mushrooms and stir to coat.  Stir in the chicken stock and cook, stirring, until the sauce has thickened, 5 to 7 minutes.

Whisk in the sour cream and mustard until smooth, then return the meatballs to the pan.  Turn to coat with the sauce.

Spoon the meatballs and sauce over the noodles and serve garnished with parsley.  I didn’t think this recipe made enough sauce, just FYI, so I think next time, I’d double the parts for the sauce.  Word to the wise!  I like leftover sauce and for the noodles to be absolutely coated!

*recipe adapted from Start Fresh

Food Memories: Chicken n’ Noodles

food-7

Many of us have memories of being little and watching our moms or dads or grandmas cook or bake for the family.  The first memory that comes to mind for me is watching my mom cut out biscuits with an old green chili can she had cut the top and bottom off of (it’s the perfect biscuit size!) and then slap each side of the biscuit in vegetable oil, then slide the disc in line with the others to fill up an entire pizza pan.  There is something methodically calming about watching someone cook.  I always felt like I was helping, even if I never touched anything.  I felt involved, because mom let me stand there or sit on the counter across from her and talk to her while she worked.  I will always be thankful that she let me hang around the kitchen.  She was always so busy doing a thousand things for our family that it was the one moment when things were somewhat calm and we could just be together and I could count on it every night because I (thankfully) had a mom that cooked dinner 6 out of the 7 days of the week.  You really can’t replace that kind of experience with anything else.  Those memories stick.

My dear friend, Louise Shoemaker, shared a memory and a meal with me last week that seemed so fitting for my blog and for what I love about cooking for my family and eating together.  She is one of the best writers I know, (she was my 10th grade English teacher – how lucky I am to still be friends with her!) so I asked her to write a little blurb about the recipe and the memory that went along with it.  My favorite part about this recipe was consulting her every 5 minutes to make sure I was doing things right.  She had driven up to Lubbock for the day and ate this meal with us!  I’d never made noodles from scratch, and technically, neither had she, but she’d watched her mother so much that she knew.  Here is what she had to say about the chicken noodle soup that made a permanent home in her memory:

RGBBounce
L
ouise and her Mother

It’s funny that a food memory starts with a sharp, clear visual. The bright yellow Pyrex bowl and the red-handled Daisy egg beater swirling the rich gold of fresh yolks. I’ll never forget the 50’s color scheme of the kitchen: pink walls, turquoise cabinet doors, chocolate brown trim. I can still see the white enamel-on-steel kitchen table and my mom in her long, slim dress with the apron tied smartly and the scarf pulled back over her careful bobby-pin curls. It’s as clear in my eye today as it was in those days 50-some years ago.

It must have been a Wednesday. Two days until payday and five mouths to feed on a budget stretched to the last nickel. So, a plump (cheap!) boiling hen, a dozen eggs, a pile of flour, a splash of water, and we knew we’d make it till Friday.

Chicken’n Noodles: made-from-scratch pasta boiled in rich, fresh stock, with chunks of chicken so tender it fell off the bone. A silky thickened sauce, glistening with a bit of butter, and thick, rustic slabs of slightly chewy noodles curling on a plate. YUMM!

The aroma of that meal is the smell of childhood, and it takes me right back there to that kitchen watching my mom pour the beaten eggs into the crater of the flour volcano and mix and knead and roll the dough out to a four-foot circle. I can see her boning a mountain of chicken, dropping heaping handfuls of raw noodles into bubbling broth. Cooking this meal was a production, an infrequent event. I’ve savored the memory of Chicken and Noodles for decades. It was amazing to re-create it with Alisa. And Olive.

I like to think of them cooking together for years to come, Olive sharing with her mother an experience so rich and elemental and, in today’s environment, rare. You’re a lucky (impossibly adorable) munchkin, Ollie! And your mama is pretty awesome, too!

food-6

I am giving you the recipe I did – I only added a few things to the stock, the rest, I followed Louise’s mom’s story-like recipe as best I could.  With pointers from Louise along the way…

Chicken’n Noodles

For the stock:
1 chicken, cut into pieces (8 pieces, bone still in: wings, breasts, legs, thighs)
Water
Salt
1 onion, chopped into quarters
3 carrots, chopped into thirds
2 bay leaves
3 sprigs of thyme

Put the chicken pieces into a large stock pot and cover with water until covered by about 2 inches.  Add a couple tablespoons of salt along with the onion, carrot, bay leaves and thyme.  Bring to a boil, skimming any foam off the top as it comes.  Reduce to a simmer and maintain a simmer (I left my burner on about a 3-4) for 1 and a half to 2 hours.
Remove the chicken from the pan and let it cool.  Then, remove skin, bones and any fat that remains.  Chop or hand-shred the chicken and set aside in a bowl in the fridge while you make the noodles.  Skim the stock of as much fat as you can, but don’t fuss too much.  Remove the carrots, onion and herbs and discard so you’re left with a (mostly) clear broth.  Keep the broth at a simmer with the lid on while you make the noodles.

For the noodles:

3 eggs
a big ol’ mound of flour (maybe 4-6  cups)
salt
elbow grease

Pour a mound of flour on a clean work space and create a hole in the center, volcano-style.  Make it deep enough so that when added, the eggs don’t spill over the side. Leave flour on the floor of the volcano so you can’t see your counter.  Crack the eggs into the hole and with your hand or a fork, whip up the eggs, incorporating flour as you go from the sides.  You won’t use all the flour, of course.  Keep incorporating flour to the eggs, stirring all the while, until you are left with a ball of dough that isn’t very sticky anymore.  Knead the ball for a good 10 minutes until you’re left with a very smooth ball of dough.  Trade off with a friend if you get tired:

food-1 food-2

Clean your hands and insert your finger into the center of the dough.  If it comes back super sticky, add more flour and knead some more.  Cover your dough with a towel and let it rest for 10 minutes.

food-3

Clean off your work space and if you’ve worked clean, you can save most of the flour you didn’t use.

Roll out the dough on a lightly floured surface till it’s an 1/8th of an inch thin.  Or thinner.  You may need to let the dough rest a few times throughout this process because it will start to shrink back up.  Once you get it thin enough, cut it into whatever shapes you like.  I chose squares because I have a kiddo that needs everything cut up, anyway.  Louise remembers her mom cutting looooooooong, thick strips, which would be wonderful, too.  You could even get cute and cut out little shapes from tiny cookie cutters.  Once you get all the dough cut, make sure each piece is coated in flour and bring at least a cup more flour with you to the stove to boil and put this dish together.

Making it Into Soup:

Get your stock to a rolling boil.  Dump your noodles in a handful at a time until they’re all in the pot, stirring as you go so they don’t stick.  This is the vague portion of our program.  Once the noodles are al dente, add the chicken back in and bring it back up to a simmer over medium-low heat.  While stirring, add a sprinkling of flour – maybe 1/4 cup – and stir until fully incorporated.  Keep adding flour till a good consistency is reached.  You’re wanting an opaque sauce that’s neither soupy nor gravy – somewhere in the middle.  If it coats the back of a spoon, it’s probably ready.  Adjust the seasoning with salt until it sings of chicken goodness.  Ladle up, top with a good sprinkle of freshly ground black pepper and enjoy.  We had ours with a wonderful Chardonnay and some crusty challah bread with butter.  Really – it does NOT get better than that.  The baby went crazy for this soup, too, and ate her entire bowl, plus some of ours.

food-5

food-4

Pizza Night!

sun dried tomato, mozz and basil


We do pizza night nearly once a week.  It’s kind of a weekend thing because Matt makes the dough the night before and we think up a new topping combination we haven’t tried, yet while flipping through magazines and cookbooks.  It’s even better to have friends over, make individual pizzas and let everyone top their own.  Matt has the crust down to an art.  It’s perfect every time and trust me, he’s tried at least a half dozen different recipes and ways of doing the crust.  He finally got the texture he was searching for: chewy, crispy, even in the very center under all the toppings and sauce, and great flavor.  It’s honestly lacking nothing.  And it makes us bitter when we go out for pizza, thinking, “Why didn’t we just make our own?”

We have Jim Lahey to thank, the pizza guru himself.  His book, My Pizza, is forever bookmarked on the crust and sauces recipes.  The recipe isn’t the only trick, though!  We have a stone that we start heating up as soon as we begin prepping.  We heat it as high as the oven will go – ours is 500 – and let it heat for at least 30 minutes.  Then, right when we’re about to cook, we switch it to the high broil setting so that it cooks the top as fast as the stone cooks the bottom.  I don’t trust my pizza peel skills, so I let Matt put them in the oven.  (Self admitted wimp when it comes to this and frying things.  I’m scared of lunging heat particles.)

You need never buy pizza sauce again in your life.  If you do, you’re probably sacrificing flavor, money and freshness.  The only thing it won’t save is time.  But really, it doesn’t take that long and you get to squish tomatoes between your fingers.  Always a bonus.

The topping combinations we came up with this week:

Sun Dried Tomato, Goat Cheese and Basil
sun dried tomato

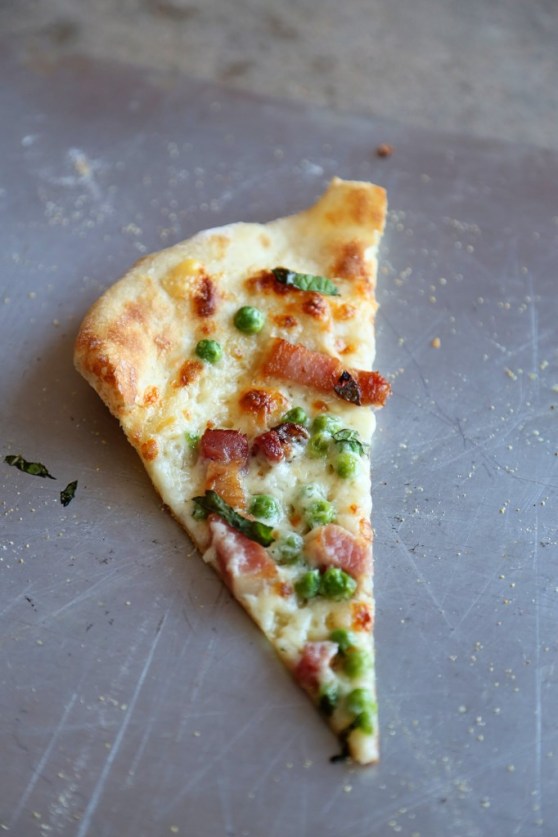
Pea, Bacon and Mint with Bechemel Sauce (alfredo, basically)
pea, bacon, mint

Mexican Chorizo, Purple Potato, Queso Fresco and Fresh Corn (this was my idea and my favorite of the three, but chorizo is cheating because it makes everything delicious like bacon or butter.  Three cheers for lymph nodes and salivary glands and such – I’m at least comforted that they don’t try to hide these ingredients from the list)

purple potato, chorizo, roasted corn and queso fresco


The best part of pizza night is that there’s no limit to your topping choices!  We’ve done so many from buffalo chicken to dried cherries and sausage (a fav) and even Thai chicken.  Get creative and get a pizza stone!

Pizza Dough:

500 grams all purpose flour
350 grams water
1/4 tsp active dry yeast
2 tsp fine sea salt

In a medium bowl, thoroughly blend the flour, yeast, and salt.  Add the water and with a wooden spoon or your hands, mix thoroughly.

Cover the bowl with plastic wrap or a kitchen towel and allow it to rise at room temp for 18 hours or until it has more than doubled.  it will take longer in a chilly room and less time in a very warm one.

Flour a work surface and scrape the dough out of the bowl.  Divide it into 4 equal parts and shape them:  For each portion, start with the right side of the dough and pull it toward the center; then do the same with the left, then the top, then the bottom.  The order doesn’t actually matter; what you want is four folds. Shape each portion into a round and turn seam side down.  Mold the dough into a neat circular mound.  The mounds should not be sticky; if they are, dust with more flour.

If you don’t intend to use the dough right away, wrap the balls individually in plastic and refrigerate for up to 3 days.  Return to room temp by leaving them out on the counter, covered in a damp cloth for 2 to 3 hours before needed.

Shape each ball into about an 8-9″ round (about 1/4″ thick).  Put on a pizza peel (we have a wooden one and we dust it with cornmeal so that the dough slides off easily once topped) and top with a thin layer of desired sauce. We’ve used plain olive oil, pesto, bechemel, marinara, buffalo sauce, homemade ranch dressing, etc – possibilities are endless and should correspond with your toppings!  One tip if you’re using a fresh mozzarella that might be watery is to sprinkle the top of the cheese with a little corn meal.  It absorbs the extra moisture!  Top your pizza as desired – maybe don’t go crazy because the weight makes it hard to get off the peel.  If you’re using fresh herbs, put them on once your pizza comes out, unless you just want that charred effect.  We cook our pizzas at a preheated 500F oven for exactly 5 minutes.  Right before we put the pizzas in, we turn our oven to broil.  Some of this may be trial and error depending on how your oven cooks (oh, for a wood-burning stove!) but that’s part of the fun of cooking – figure out what works!

Marinara Sauce that we use every time:

1 – 28oz. can whole tomatoes.  We like San Marzano
2 tablespoons olive oil
1/4 tsp salt
2 tbs red wine vinegar

Combine all ingredients and crush tomatoes with your hands, removing the tough stem ends of the tomatoes.  Mix well.  That’s it!  🙂


The Ultimate Meatball and Taking Food to a Friend

meatball and marinara

We’ve been on the receiving end of food donations twice in our life and both times, we were touched by others’ thoughtfulness, great recipes and the comfort that was passed to us through the dishes they made.  It takes a bit of humbling to bring food to someone who can’t cook for themselves, or simply don’t want to or don’t have the time.  You worry if they’ll like what you made.  You worry if they will critique the preparation or that you brought store-bought cookies instead of homemade.  If I could only convince you that anything you bring is wonderful and welcome, I would.  If they can’t eat it right away or they have duplicates, they can freeze what you brought!  To worry too much about what to bring, or to worry the recipient about what you brought, shifts the focus off the deserving and on to you.  Keep the focus where it belongs, ask if they have any requests or food allergies, and get cooking!  Homemade is always nice, but I will admit, I did not turn away store-bought cookies, chocolate or coffee! 🙂

My wonderful, life-long friend, Summer, had her second baby almost two weeks ago.  A beautiful, darling girl!  I immediately began to think of what I would bring for Summer and Phil to eat.  Summer is my food buddy.  I trust her cooking as much as my own.  Her sense of taste is far beyond most people, almost to a fault.  We used to live together in college, and I think one of our first food-bonding moments was throwing chicken patties off the balcony of our apartment because they were just so disgusting.  They were pre-cooked, breaded chicken patties and they tasted like…gray.  Or sweat.  It wasn’t good.  We both were actually offended.  How could you screw up a breaded piece of chicken, and worse, sell it to poor college students?! In our act of defiance against badly cooked food, we became unofficial food critics in our own right.  We were each other’s taste-testers. A favorite game throughout our friendship is Guess the Ingredient! in which we excitedly wait while the other tastes and see if they guess right.  I love that no matter what time of day, I can text Summer a description of something I made or want to make, and she will react with an appropriate amount of shock, enthusiasm and awe.

We joke that Summer always says her FAVORITE thing in the ENTIRE world is whatever I last cooked for her.  True to the accusation, I asked if she had any requests for what I could bring for them, and she requested the last meal I made for her, which was the BEST meatball recipe I’ve ever run across.  It’s tough to get a meatball right.  They can be too dry or too mealy or rubbery from being over cooked, or simply too greasy.  This recipe is perfect.  And even more perfect, it came to me via fashion designer, Michael Kors in his appearance on Martha Stewart Living.  So they’re both delicious AND fashionable.  Win-win.

The secret ingredient to these meatballs is the water.  Smooshing all these ingredients together, especially with the water, is not for the faint of heart.  My mother would die a thousand deaths before making this recipe.  She has a thing with texture.  However, I like playing with my food, so it’s rather enjoyable for me.  The meat mixture is very delicate, so be gentle as you turn them while cooking.  I usually use two spatulas to help me turn them without smashing them apart.  Getting a good crust on each side is key.  Then, there will still be a slight crust, even after they’ve stewed in the sauce for a while.  Oh, and serving this with spaghetti is up to you. It’s not tradition – the Italians eat their meatballs in a bowl with crusty bread.  But, the recipe makes enough sauce that even after we finish up the meatballs, I have plenty of sauce left to toss with noodles the next day.  Olive absolutely adores these.  She ate two, 3 inch meatballs by herself before slowing down.  They are so soft, you could easily smash it up for a little one.  And they get better the next day!

meatball

Frankie’s Meatballs in Rao’s Marinara Sauce

  • 1 pound lean ground beef
  • 1 pound ground pork
  • 1 1/2 cloves garlic
  • 2 large eggs
  • 1 cup freshly grated Pecorino Romano cheese
  • 1 1/2 tablespoons chopped fresh Italian parsley
  • Coarse salt and freshly ground pepper
  • 2 cups plain dry bread crumbs
  • 2 cups water, room temperature
  • 1 cup olive oil
  1. In a large bowl, combine beef and pork using your hands. Mince 1/2 clove garlic and add to meat mixture along with the eggs, cheese, and parsley; season with salt and pepper. Continue mixing with your hand until well combined. Add bread crumbs and mix well. Add water, 1 cup at a time, and continue mixing until mixture is quite moist.
  2. Shape mixture into 2 1/2-to-3-inch balls. Heat oil in a large skillet over medium-high heat. Smash remaining clove of garlic with the back of a knife and add to skillet. Cook until lightly browned and fragrant, 1 to 2 minutes; remove with a slotted spoon and discard. Working in batches, add meatballs to skillet. Cook until browned and cooked through, turning, about 10 minutes. Drain on paper towels and serve immediately.
  3. Meanwhile, bring marinara sauce to a boil in a large nonreactive saucepan. Reduce heat to a simmer and add meatball. Let meatballs cook in sauce about 20 minutes; serve immediately with pasta, if desired.

Rao’s Marinara Sauce
Makes 7 cups

  • Four 28-ounce cans whole tomatoes with basil, preferably San Marzano
  • 1/2 cup olive oil
  • 6 tablespoons minced onion
  • 4 cloves garlic, peeled and minced
  • Coarse salt and freshly ground pepper
  • 12 leaves fresh basil, torn (optional)
  • Pinch of dried oregano
  1. Remove tomatoes from can and place in a large bowl, reserving juices. Crush tomatoes using your hands; remove and discard the hard core from stem end, and any skin and tough membrane; set aside. (Wear an apron and keep your hand submerged as you crush.  This is messy business, but kind of therapeutic  .)
  2. Place oil in a large, nonreactive saucepan over medium-low heat. Add onion, and cook until soft and just beginning to brown, about 3 minutes. Stir in garlic, and cook until softened, about 30 seconds. Stir in tomatoes and reserved juices; season with salt. Increase heat and bring to a boil. Immediately reduce heat to low and simmer until slightly thickened, about 1 hour.
  3. Stir in basil, if using, oregano, and season with pepper; continue cooking 1 minute more. Remove from heat and serve.

*Recipes taken directly from Martha Stewart Living.  They can not be improved upon.

frankie's meatsauce

Grown-Up Sticky Buns

sticky buns

I decided to tackle a Pinterest recipe yesterday.  It had been sitting there on my Recipes board, looking amazing, yet going unmade and uneaten. (Also known as every pin on Pinterest)

The Butterscotch Spiral Coffee Cake was intriguing and beautiful and I loved how the original baker created one gigantic cinnamon roll effect.  I loved it so much that I didn’t do it that way.  I knew without a doubt, that mine would not look the same, I’d cut it wrong, placing it wrong, and get frustrated and end up drinking the whiskey instead of adding it to the caramel sauce.  So I decided I’d make a crowded pan of cinnamon rolls, call them sticky buns, and be happy!

I had a really great time making this recipe.  Matt is usually the one who bakes, but when I do, I really enjoy kneading the dough, working with it to form it into something pretty.  I love clearing off a huge space on our counter to roll out the dough.  Makes me think of my mom making biscuits.  There’s something so wonderful about baking that instantly connects you to bakers from centuries past, who had flour on their bellies from leaning against the counter too far, and a happy heart from their necessary taste-testing.

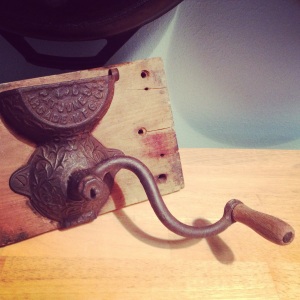
I used my antique coffee grinder

photo

to grind the cardamom pods because we have a spice grinder, but it’s forever known as Cumin Grinder because once you grind cumin seeds, congratulations, you now have an exclusive cumin grinder.  If you grind anything else, it will have a faint whiff of cumin, or B.O.  (also known as cumin).  I don’t know why we eat a spice that smells like B.O.  I’ll chalk it up to things that taste delicious but smell horrible.  Like cheese.  Oh, cheese, you stinky wonder…

The caramel sauce called for a teaspoon of whiskey.  My first thought was, “that’s not enough – just one teaspoon?” but when I gave Matt a taste, wanting him to identify the mystery ingredient, it took him a half second to shout, “You put whiskey in the caramel?!” Yes, and not just any whiskey, but his Laphroaig 10 Year Smoke Bomb whiskey.  (Not its official name) And even though there was only one teaspoon, it was obvious!  I also added a generous sprinkling of kosher salt, because I feel strongly that when something calls for brown sugar, butter AND corn syrup, you’ve GOT to add a bit of salt.  Everything sweet needs balance and caramel is definitely one of those things!  I also forgot to add butterscotch chips, like she did, but they were still amazing.  The dough has so much flavor, that you almost don’t need the extra sweetness.  However, I think adding the chips would be a great addition.

My crowded cinnamon roll approach kinda worked and kinda didn’t.  When they baked they BURST up out of the pan in a sprawling fashion.  No fuss – I just smooshed them back down before inverting them on a plate.

butterscotch sticky buns

If you want to do the gigantic cinnamon roll swirl like the super cool blogger/baker lady did, go for it!  I know my weaknesses and copying a recipe word for word is one of them.  If you make it look different, you won’t be sad when it does.  (Make sense?)

These are AWESOME, by the way.  Like Monkey Bread for grown-ups.  Sweet, buttery, sticky and with a hint of smoke.  Pretty amazing.

7G9A2625

Grown-Up Sticky Buns*

For the Dough
2 1/2 to 2 3/4 cup AP flour
1/4 cup granulated sugar
2 1/4 teaspoons instant yeast
1/2 teaspoon kosher salt
1/2 teaspoon cardamom
1/8 teaspoon freshly grated nutmeg
1/8 teaspoon ground cinnamon
1/3 cup whole milk
1/4 cup (2-ounces) unsalted butter
1/4 cup water
2 extra large eggs
1 teaspoon pure vanilla extract
For the Butterscotch Glaze
1/2 cup firmly packed dark brown sugar
1/4 cup (2-ounces) unsalted butter
2 Tablespoons light corn syrup
1 teaspoon Scotch whisky
1/2 tsp kosher salt
For the Cinnamon-Butter Filling
1/2 teaspoon ground cinnamon
2 Tablespoons (1-ounce) unsalted butter, melted
1/3 cup butterscotch chips, chopped (I forgot this step)
7G9A2628
For the Dough
In the bowl of a stand mixer fitted with the paddle attachment, combine the 2 cups of flour, sugar, yeast, salt, cardamom, nutmeg, and cinnamon.  In a small saucepan over low heat, heat the milk and butter just until the butter melts.  Add the water and set aside until warm (120º F-130º F), about 1 minute.  Pour the milk mixture over the flour mixture and mix on low speed until combined.  Add the eggs one at a time, beating well after addition.  Add the vanilla. Add 1/2 cup more flour and continue to mix on low speed until smooth, about 30-45 seconds.  Add 2 tablespoons of additional flour and mix on medium speed until the dough is smooth, but slightly sticky.  Sprinkle the work surface with flour, and knead the dough gently until it is smooth and no longer sticky, adding an additional 1 to 2 tablespoons of flour if needed.  Place the dough in a large bowl and cover with plastic wrap.  Let the dough rise in a warm place until it has doubled in size, about an hour.
For the Butterscotch Glaze
Meanwhile, lightly coat a 9 x 2-inch round cake pan with non-stick spray.  In a small saucepan over low heat, combine the sugar, butter, and corn syrup and heat until the butter is completely melted.  Sprinkle in the salt, stir to dissolve and taste test.  Does it taste like butterscotch?  Good!  Not yet?  Add more salt!  Remove from the heat and stir in the whiskey.  Pour the mixture into the prepared pan and tilt the pan to cover the bottom evenly; set aside.
For the Cinnamon-Butter Filling
In a small bowl, stir together the butter and cinnamon. Don’t forget to chop up the butterscotch chips that you went to the store, specifically to buy.
Center a rack in the oven and preheat to 350º F. Gently de-gas the dough by pressing lightly.  On a lightly floured work surface, roll the dough into a 16 x 12-inch rectangle.  Using a pastry brush, spread the cinnamon-butter evenly over the dough.  Sprinkle the dough with the chopped chips. Roll the dough up, length-wise, and cut into 1″ rolls and place side by side. Loosely cover the pan with plastic wrap and let the cake rise in a warm place until it is almost doubled in size, about 30 minutes.
Bake the cake until the top is deep golden brown, about 35 minutes.  Check after 20 minutes to make sure the top is not browning too fast.  If so, cover the top loosely with a sheet of aluminum foil for the last 10-15 minutes to prevent over browning.  Transfer to a wire rack (remove the foil if used) and let cool for 10 minutes.
Gently tilt the pan and tap the side on a counter to release the sides of the cake.  Invert a serving platter on top of the cake, then invert the pan and the plate.  Leave the pan on the cake for 1 minute so the glaze transfers to the cake, then gently lift off the pan.  Using a rubber spatula, scrape out any glaze remaining in the pan and spread it over the warm surface of the coffee cake.  Serve the cake warm or at room temperature with a cup of coffee and a friend.  This is an adult dessert – enjoy being one and let the kids marvel at the mystery 🙂

*recipe adapted from The Galley Gourmet

7G9A2631

Pasta Carbonara – tried and true recipes

pasta carbonara bowl

I’m going back to some basics this week.  I’ve exhausted myself on trying something new nearly every single day for two months.  Time for some repeats!  I have made some form of pasta carbonara on a regular basis since Matt and I were first married, 8 years ago.  Carbonara is one of those dishes that you can nearly always make, even when you don’t think you have anything in the fridge for dinner.  (Hello, Monday dilemma)  Nearly everyone has some form of pasta on hand. Carbonara is traditionally made with spaghetti, but it can really be just fine with any kind of dried pasta you have on hand.  Also – most people have bacon either in the fridge or freezer.  The sauce for this dish comes from cheese and egg yolks – that’s it!  And if you’re wanting something extra tossed in, try frozen peas or corn or lima beans – any kind of random bag of frozen veg you have in the freezer that has been labeled “too little for a side dish, too much to throw away”

I love the comfort of this dish – I love the simplicity and I love that in about 25 minutes, I can have a dish on the table that makes everyone feel good.  The little darlin’ loved it, too.

pasta carbonara for lunch

carbonara

pasta carbonara

Good for little fingers is any kind of smaller pasta such as rigatoni, fusilli, macaroni, or these cute little corkscrew shapes (which I think are just un-trimmed macaroni)  really – whatever you think your toddler can grab or stab with a fork – go for it!

carbonara bowl

Pasta Carbonara
serves 2.5 (two big people and one little person) or 4 as a side dish

8 ounces dried pasta, cooked al dente (maybe cook a little longer for the baby if they don’t have more than 8 teeth, like mine)
4 strips of bacon, cut into 1 inch pieces
1 small onion, diced small
2 cloves of garlic, minced
1/2 cup frozen peas (or other vegetable of your choice)
1/2 cup grated parmesan cheese
2 egg yolks

1. Salt your pasta water.  I usually put about 1/4 cup of salt into a large pot of water (at least a half gallon of water.)  EEEEEEEK, SALT!  Here’s the thing: it flavors your pasta.  You don’t have to salt the dish upon completion because you salted along the way.  Just enough salt gets absorbed into the pasta and it’s perfect.  The noodles could be eaten on their own.  Try it next time.  And if you’re still worried, just look at how much sodium is in the powdered cheese on your blue box mac and cheese.

2. Bring the water to a rolling boil and cook the pasta till al dente, or a little over for the little mouths that will be eating.  Reserve a cup of pasta water and then drain your pasta, rinse and set aside.

3. Cook the bacon strips in a large skillet over medium heat until crispy.  Reserve on a paper towel and drain all but a tablespoon of the oil from the pan.  Toss in your onion and garlic and cook, stirring, until translucent.  Add in your frozen vegetables and pasta and a splash of the pasta water and stir until combined.

4. Remove the pan from the burner and while stirring constantly, add the egg yolks and cheese.  Stir stir stir stir as to not get scrambled eggs.  The heat from the pasta will cook your yolks and they will combine with the cheese to make a sauce.  If the pasta looks a bit too dry, add more of your reserved water and stir to combine.  Pasta water is starchy and salty and PERFECT for making a pasta sauce.

5. Fold in the bacon, garnish with more cheese, if desired, and serve with a crusty piece of buttered bread.

6. And a glass of Malbec for the big people.

Enjoy!

The Battle of the Quiches

Quiche

My friend, Summer, hates quiche.  The very word gives her mock dry heaves.  We’ve all had a traumatic experience with some kind of food; whether it be an ingredient (dill for me, pomegranate juice for Matt) or an entire meal ruined by getting sick later in the evening, it’s hard to come back to good terms with the food after the trauma.  I’m not sure why Summer hates quiche, but according to her, the description she gives is of a “rubbery filling, soggy crust, gross texture” and what comes to mind, for me, is the mini-quiches you find at baby showers the world over, or the frozen pie-sized quiches that could double as semi-wet Frisbees.  Either way, it’s not a huge shock that a lot of people have a bad connotation when they hear the word.

Thomas Keller is here to save the day, once again.

He sees the problem with the American version/view of quiche, as well:

“Why didn’t the French quiche ever really translate to America? American culinary culture embraced it, then trashed it without ever knowing what it was…I think it was a mechanical problem, not having the right tool–a ring mold about two inches high.  When the modern quiche took off here in the 1970s, that wasn’t widely available.  Instead, a pie pan was commonly substituted for the two-inch ring mold.  And then came the premade pie shell.  Who would want to eat quiche made in that? A quiche has to have a specific thickness or you cannot cook it properly: It must be two inches high, in a crust thick enough to remain crisp, and not become soggy, during cooking.  Custard in a pie shell invariably overcooks (if you cooked it slowly enough, the crust would become soggy).” — Thomas Keller, Bouchon Cookbook, page 86

We’ve made Keller’s quiche several times.  The foundation is a good crust and so we go back to the crust I will rely on for the rest of my life – the same crust used in my strawberry pie a few posts ago.  It’s perfect, it flakes, it is sturdy without being tough, and it tastes like butter because that’s the only fat used.  Why look elsewhere?  The key is to completely bake the crust first, with plenty of overhang so that it doesn’t shrink while baking.  And I’m sorry you’ll have to buy a special tool to make it, but a 2 inch ring mold is necessary.  Not expensive and if you want to really make this recipe correctly, you need one.

We decided for this post, that we’d compare a store-bought quiche with Keller’s quiche.  I didn’t buy the most disgusting one I could find, either.  I actually bought probably the best a grocery store has to offer.  An in-house made quiche Florentine (bacon/cheese) baked in a pre-made pie shell (assuming.)  It was set in a metal pie tin with holes poked all in the bottom.  I appreciated that effort, because at least someone is acknowledging that quiche shells go soggy.  Didn’t quite work, though.  Here they are, back to back:

Battle of the Quiches

Store bought on the left, Keller on the right.
You can’t tell much, texture-wise, so I’ll tell you.  And again, I’m fairly impressed with the grocery store made quiche.  It’s about as good as a pre-made, American pie version gets.  However, the crust was really wet and soggy on the bottom. Couldn’t exactly pick it up without it sagging, whereas the Keller quiche’s crust is very crispy and fully cooked on the bottom (you can tell by the color and how it even stands away from the plate a bit.)  The Keller quiche has almost a half inch more custard and the store bought quiche’s crust tasted like sand.  Honestly.  Sand held together by water.  It really wasn’t good.  Now, the store-bought quiche’s filling was fine, taste-wise.  It had bacon – how can that not be at least decent?  (I could imagine a frozen mini-version would find a way) but anyway, it was a good effort, but the crust was awful and it was wet, just like you don’t want it to be.  It also had that over cooked texture – kind of rubbery- that eggs get if cooked too long.  I swear to you, I am not making this up, after a few days and microwaving the leftover Keller quiche, it STILL had a smooth, silky, custard-like texture.  Almost creme brulee texture.  It’s so darn good.

Fun experiment and I would say that if you’re interested in doing something for the sake of the experiment and doing things properly, buy yourself a ring mold and get after it.  And remember – a Keller quiche takes two days.  So if this is for Sunday brunch, start it on Saturday afternoon.

Roquefort and Leek Quiche

I also want to add, for the sake of The Family Meal, that Olive ate on both quiches with  much enthusiasm.  Yes, even those big chunks of Roquefort.  She leaned forward and said, “mmmmm!” to both.  Eggs are awesome.  Oh, and she also said, “Quiche” perfectly.  I think because “quiche” sounds like her version of the word “cheese”.  Whatever works, Ollie.

For the crust:

2 cups AP flour, plus extra for rolling out
1 tsp kosher salt
8 ounces chilled, unsalted butter, cut into 1/4″ pieces
1/4 cup ice water

Place 1 cup of the flour and the salt in the bowl of a heavy-duty mixer fitted with a paddle attachment.  Turn the mixer to low and add the butter a small handful at a time.  When all the butter has been added, increase the speed to medium and mix until the butter is completely blended with the flour.  Reduce the speed, add the remaining flour, and mix just to combine.  Add the water and mix until incorporated.  The dough will come around the paddle and should feel smooth, not sticky, to the touch.
Remove the dough from the mixer and check to be certain that there are no visible pieces of butter remaining.  Pat the dough into a 7-8″ disk and wrap in plastic wrap.  Refrigerate for at least 1 hour, up to a day.

Lightly brush the inside of a 9×2″ ring mold with canola oil (or cooking spray works) and place it on a parchment-lined baking sheet.
Place the dough on a floured work space and rub all sides with flour.  Roll out the dough into about a 14″ diameter circle.  Lift the dough into the ring, centering it carefully and pressing it gently against the sides and bottom edges of the ring.  Trim any dough that extends more than an inch outside the ring.  Carefully check for crack in your dough and patch any cracks with your trimmed dough (I DIDN’T DO THIS AND OUR QUICHE LEAKED ALL OVER THE PLACE)
Refrigerate your dough for 10 minutes to resolidify your butter (if you don’t do this, the butter will drain out of your dough as it bakes.  Done it; learn from my mistakes)
Line the bottom of your crust with parchment and fill with pie weights (our pie weights are dry beans – a whole pound of them.  We just keep them for use in pies).  Bake shell in a preheated 375F oven for 35-45 minutes, or until the edges of the dough are lightly browned.  Carefully remove the parchment and the weights.  Check the dough for cracks and patch with reserved dough trimmings (DO THIS STEP) Return the shell to the oven for another 15-20 minutes, or until the bottom is rich golden brown.  Remove from oven and let the shell cool completely on the baking sheet.

Basic Quiche Batter

2 cups milk
2 cups heavy cream
6 large eggs
1 tbs kosher salt
1/4 tsp ground pepper
A few gratings of fresh nutmeg, or 1/8 tsp of ground nutmeg

Combine the milk and cream in a large saucepan over medium heat and heat until a skin begins to form on the surface of the milk.  Remove from the heat and let cool for 15 minutes before continuing.  If you have an immersion blender, add the rest of your ingredients to the saucepan and blend for about a minute to fully aerate the batter and make it light and foamy.  Pour the batter into your quiche shell (which is still on your lined, rimmed baking sheet – this thing inevitably will leak a tish.)
At this point, if you’d like to add ingredients, go for it.  Be creative.  We did his blue cheese and leek version and it was awesome.  You simply add these ingredients (about a cup of each ingredient, chopped fine and cooked properly) to the quiche batter as you’re pouring it into the shell.  Try crumbled, cooked bacon and cheddar cheese, or caramelized onion and grated swiss.  The options are endless.
Bake for 1 1/2 to 1 3/4 hours, or until the top of the quiche is browned and the custard is set when the pan is jiggled.  Remove and let cool to room temp on a cooling rack.  Refrigerate until chilled, at least one day, up to 3 days.  Once the quiche is thoroughly chilled, scrape away the excess crust from the top edge of the quiche.  Set the quiche down and carefully lift off the ring.  Preheat the oven to 375F.  Line a baking sheet with parchment.  Using a serrated knife, carefully cut the quiche into 8 pieces.  Place the pieces on a baking sheet and reheat for 15 minutes, or until hot throughout.  Serve immediately.

Quiche shell