Caesar Salad and Chilling Out

food-9

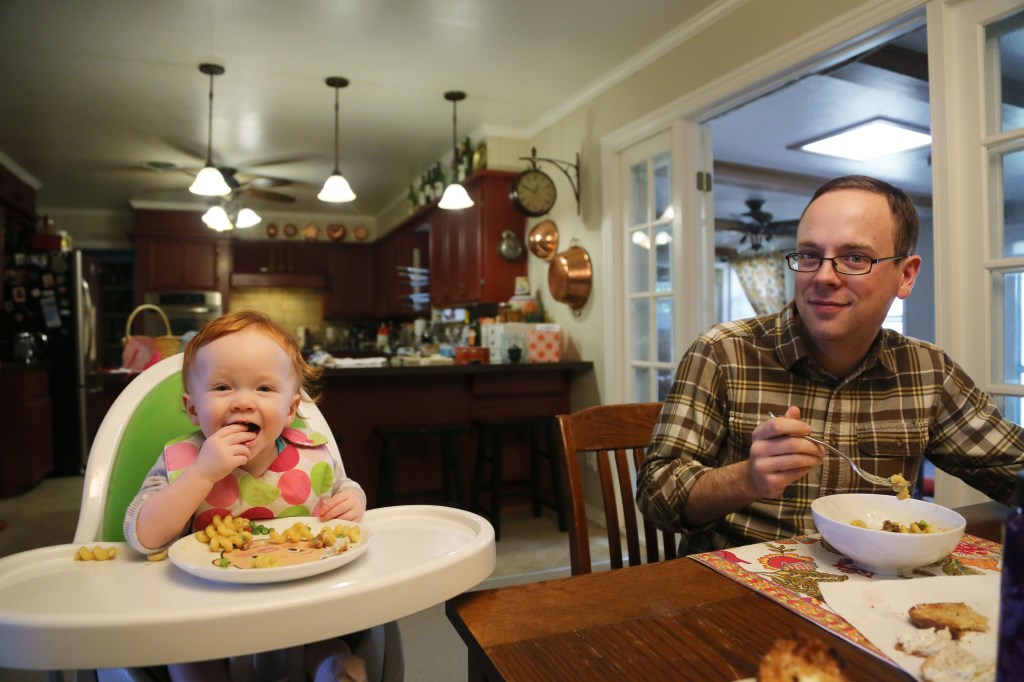
We’ve been trying to eat outside on our patio table more often as the weather warms up and the days get longer.  I want to enjoy myself in this zen-like way where I don’t care about a little extra mess, where Olive eats everything we serve and she isn’t wildly distracted by the dogs and the wind and the trees and the air and where I lean back in my chair, leisurely taking bites of my food and just enjoy the moment and the concept of taking a little longer than usual to eat dinner.  But instead, what has happened the few times we’ve done this, is I get all worked up and stressed trying to feed Olive and trying not to make a complete mess without her in the playful looking restraints of a high chair, and I end up trying to scarf down my food so that I can tend to whatever mess is going on, or try to block Olive from feeding all her food to Cash.

I do this to myself.  (For the record, this stress is only with food and dining – I am okay with a muddy kid or a messy house or whatever – but please, don’t put food in your hair and whatever you do, do NOT drop food from your tray!) I don’t enjoy the experience of something different and out of control, I let that ruin the experience for me.  Now, my sweet husband might just say, “Let’s not eat outside anymore if it bothers you so much!” (always trying to keep me from feeling anything but joy) but I think what I need, instead, is MORE dining experiences where not everything is micro-managed by my desires for things to look and go perfectly.

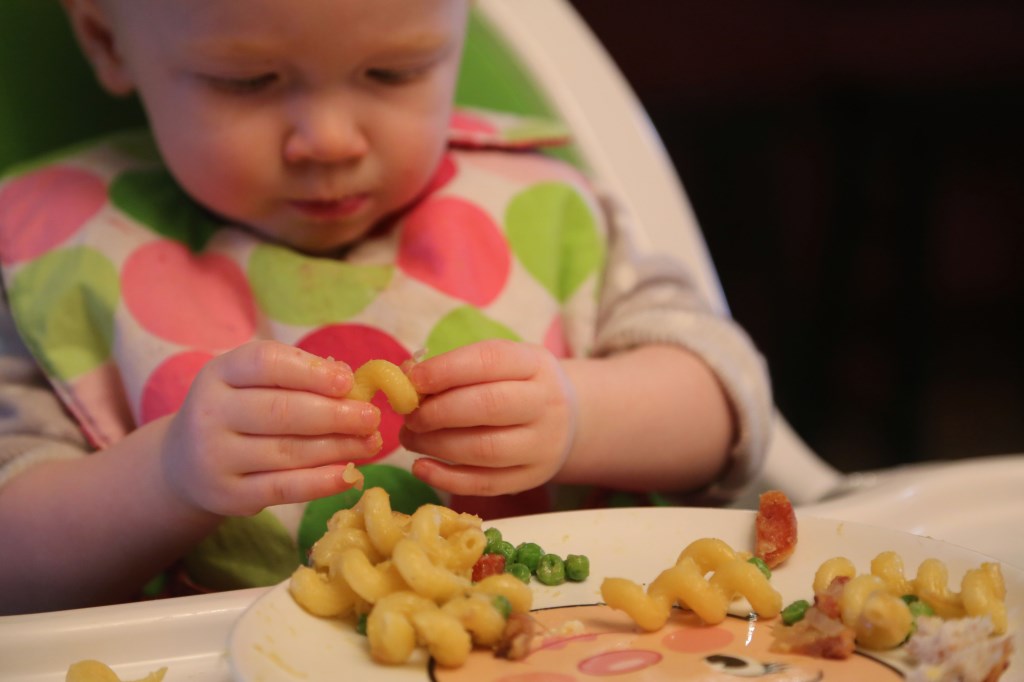
It happened again this Sunday – we had a picnic in the park with some people from our church group and we brought a tish bit of an ambitious lunch.  Matt had made all the components for this really great Vietnamese pork and noodle salad and everything was so delicious, but I instantly got down about: 1. the wind blowing lettuce and dirt in my face 2. my baby walking around the blanket and the park NOT eating and spitting things out that we tried to make her eat (God bless one of our friends who had the brains to bring a banana 3. just the overall lack of control I had over the components of my meal – it was messy and I needed a bowl and lots of napkins and NO wind, but I didn’t have those things and I became really negative and I am 100% sure I ruined the experience for Matt, who was trying his best to stay positive while eating beside a big rain cloud (me).

Whenever I struggle with sinful things in my life like jealousy or greed or pride or even the need for control (a sin, I believe), I try to do a bit of immersion therapy on myself and directly expose myself to the thing I can’t seem to handle as often as possible until I am over it.  It has worked in the past and I think I will try to apply it here.  I resolve to eat outside MORE often.  To let messiness happen MORE in situations where I’d like to appear perfect, and I resolve to look at my situations like Olive would – like an opportunity she’s never had before and quite possibly might never have again!

An opportunity you might never have, again, is enjoying a properly made Caesar dressing, because absolutely no restaurants make this dressing right, or from scratch.  This recipe is so flavorful and has just the right balance of tanginess from the lemon and anchovies and creaminess from the oil that it’s nearly like a beautiful, homemade mayonnaise  with a kick!  I see this salad happening a LOT during this hot summer ahead!

food-10

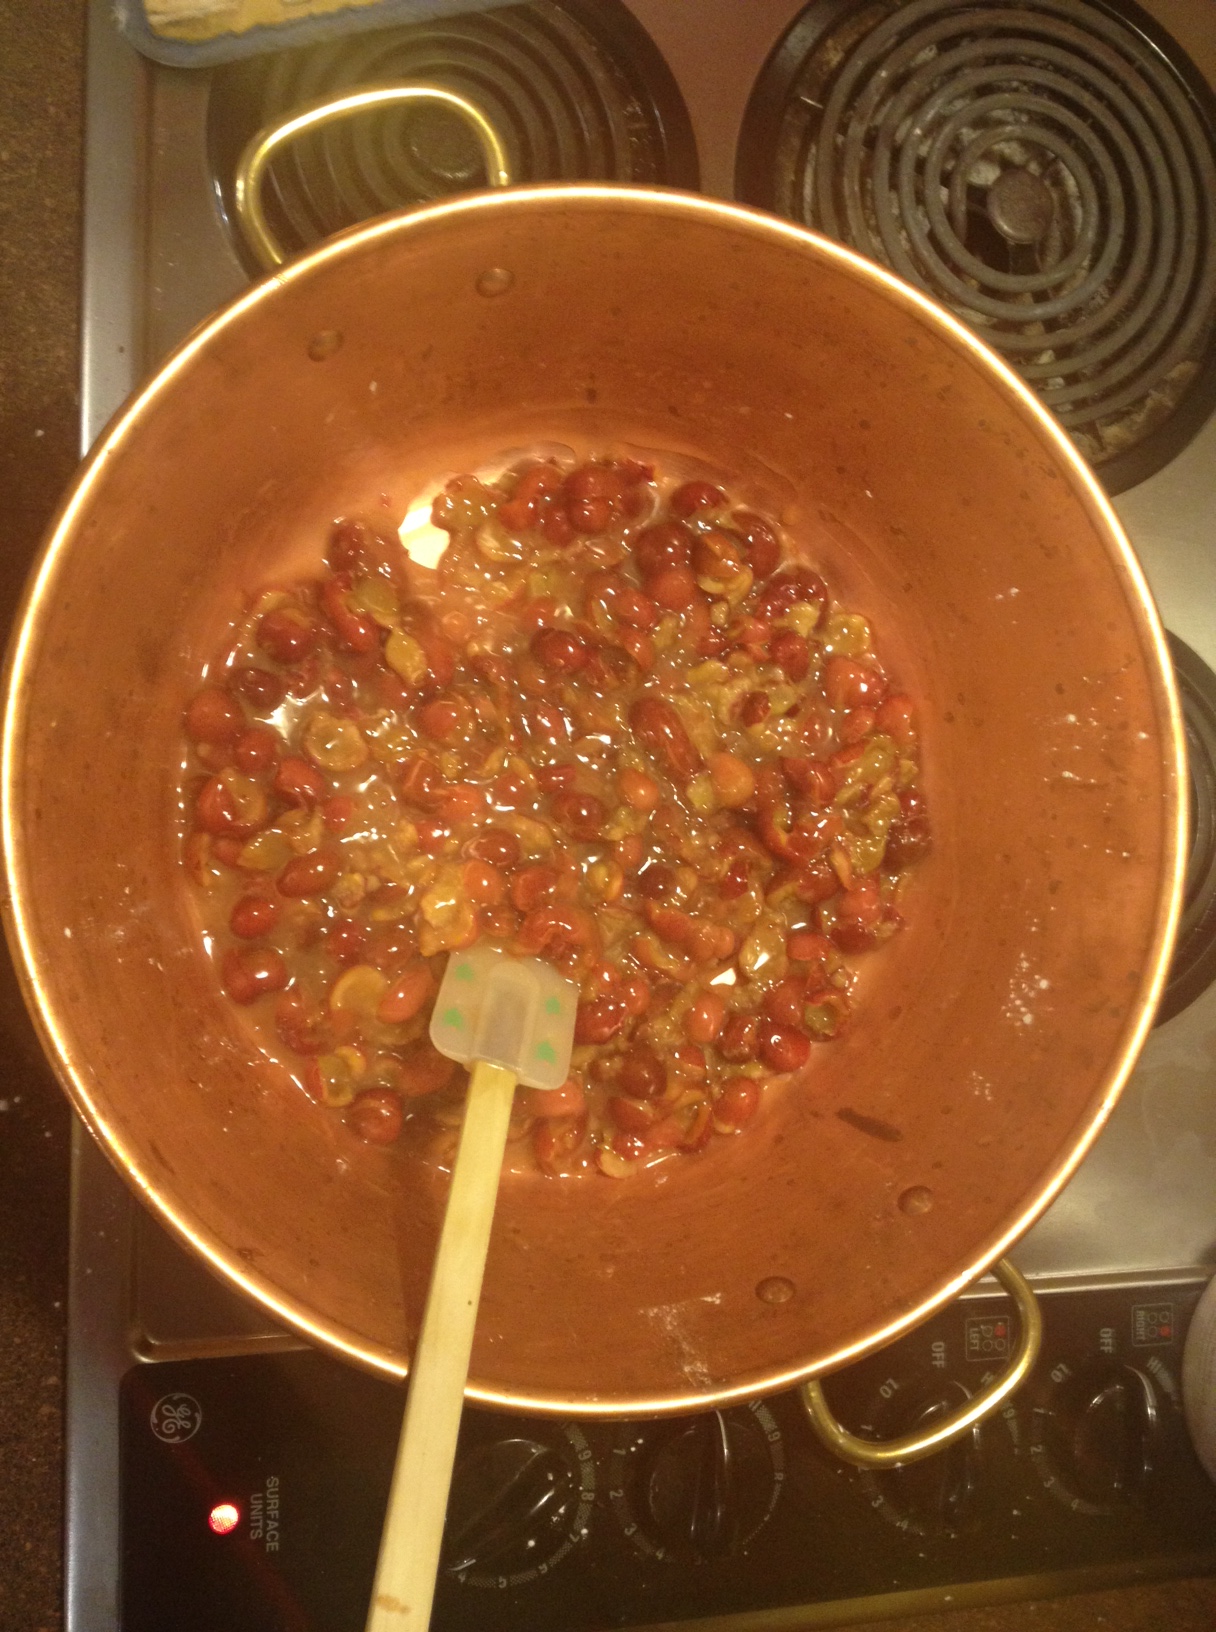
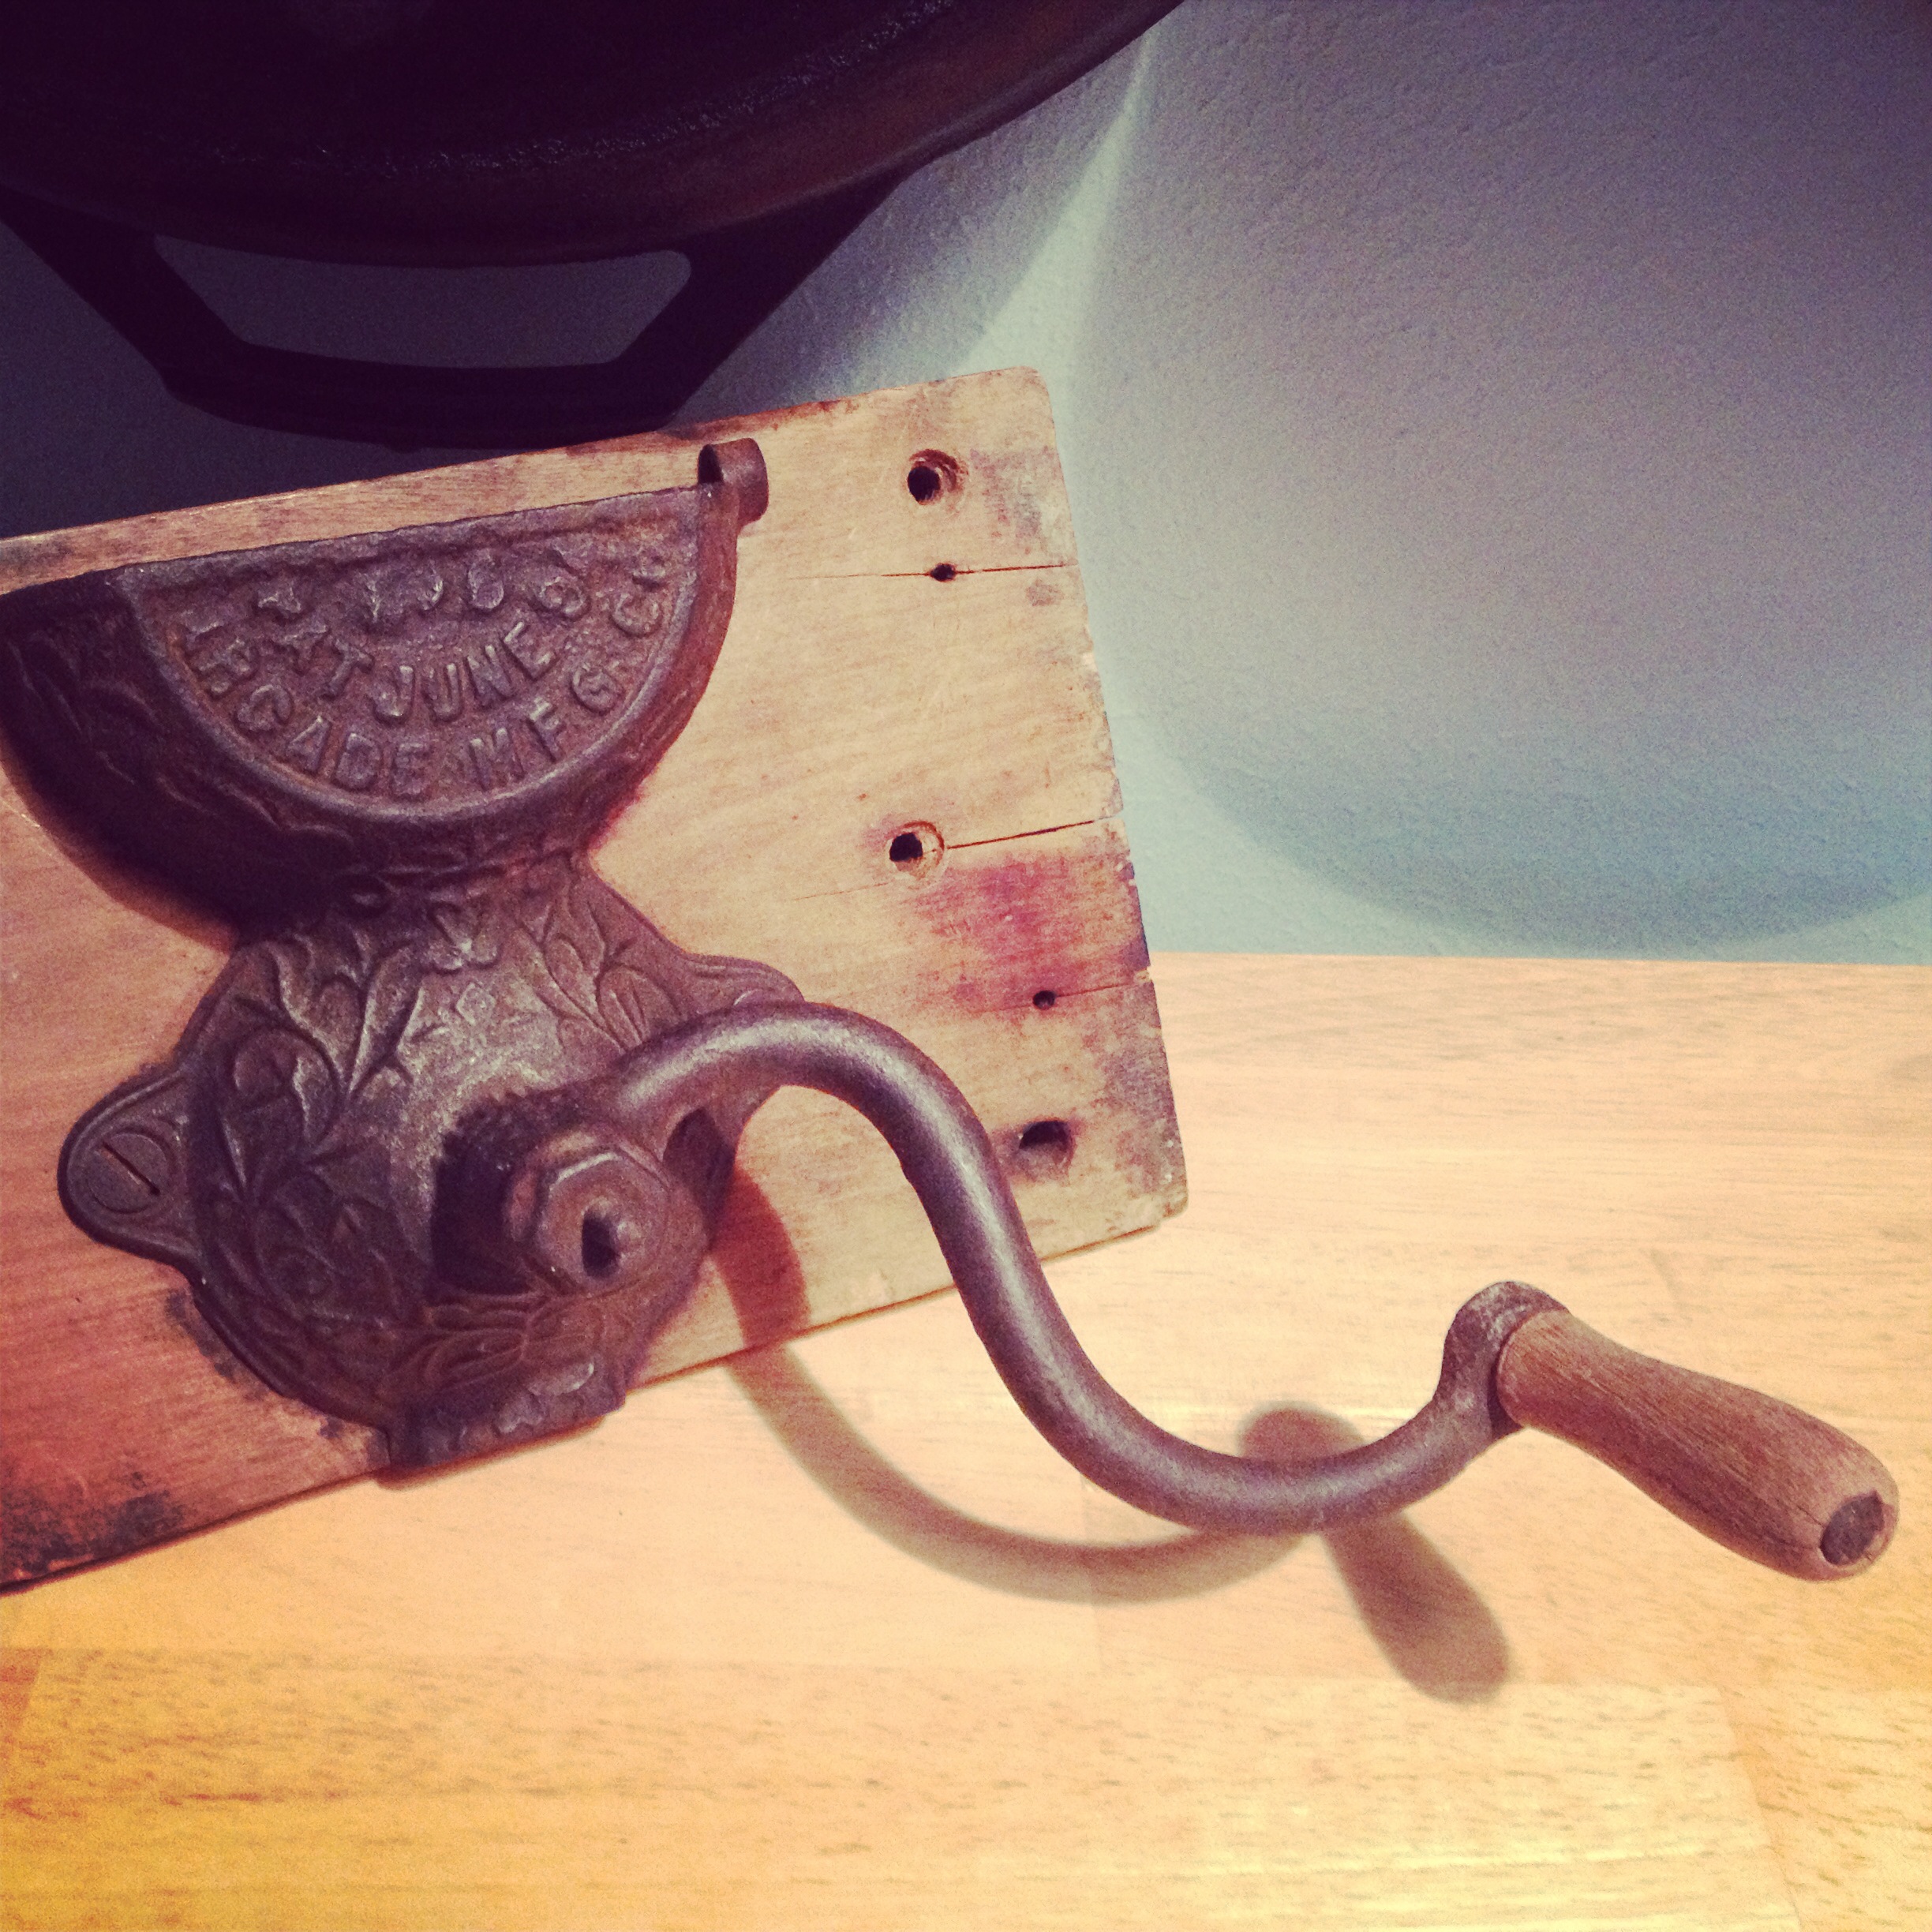
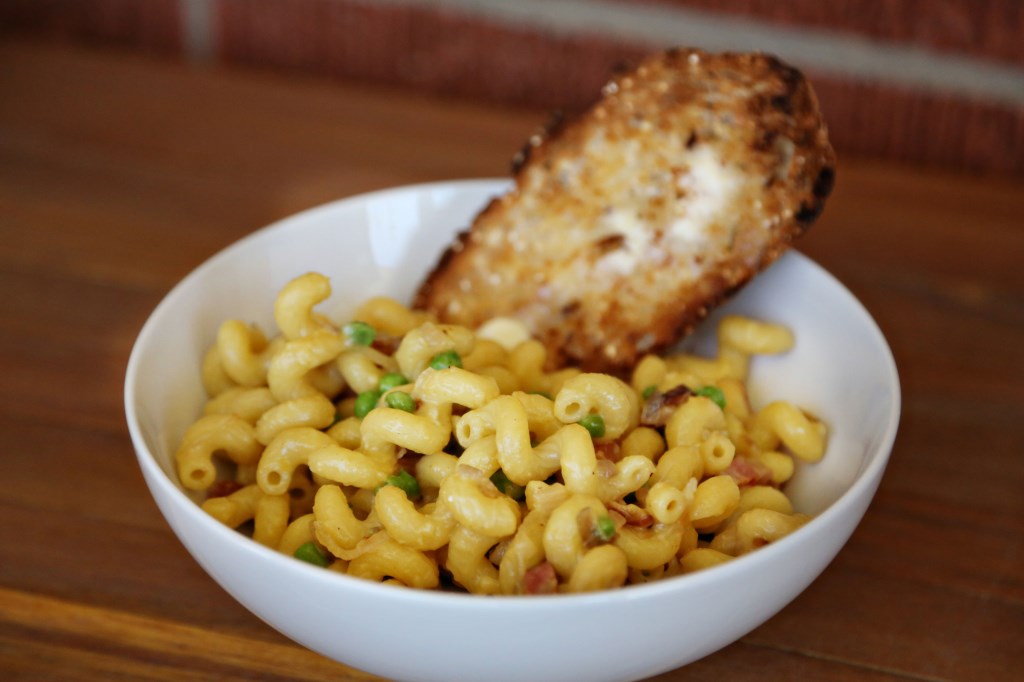
Just a little behind the scenes shot of how I usually take my food photos 🙂

food-11

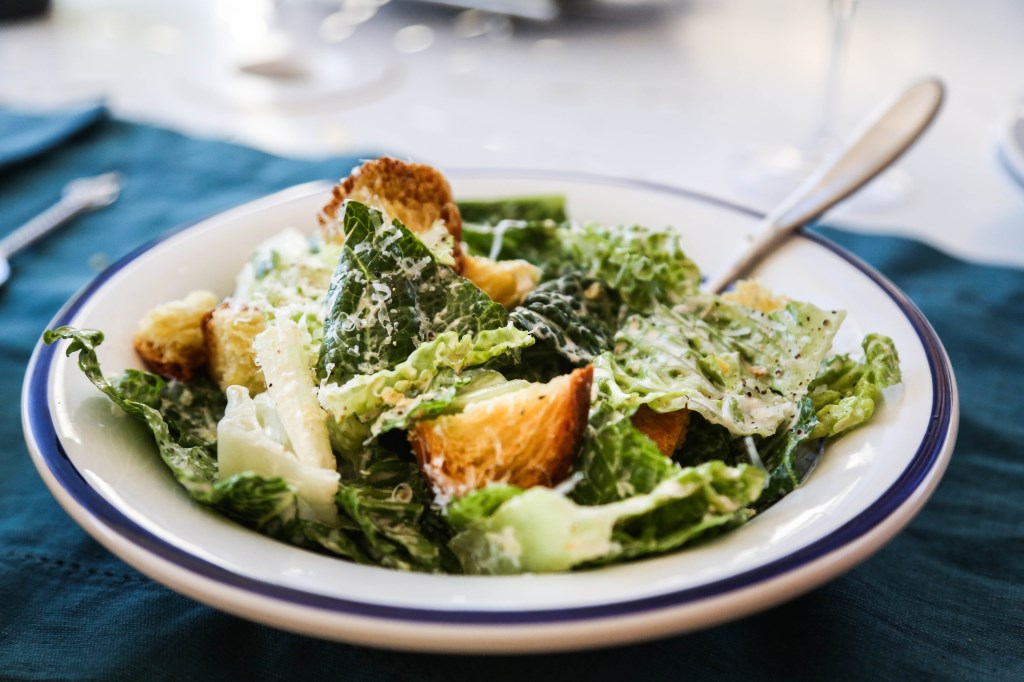
Caesar Salad with Homemade Croutons*
makes about a cup of dressing

4 tbs lemon juice, plus more to taste
1 clove of garlic, minced
salt to taste
black pepper to taste
1 large egg yolk
4 anchovies, plus more for garnish, if you like
1/2 cup canola oil
3 tbs bacon grease from 4 strips of cooked bacon, or melted butter that has been cooled
Torn up romaine lettuce
Parmesan cheese, freshly grated

Combine all the ingredients except the canola oil in a tall, wide cup and blend with an immersion blender and then slowly drizzle in the oil.  Taste and adjust for seasoning with salt and pepper and extra lemon juice.

Toss leftover cubed up bread on a baking sheet, brush with olive oil, and toast until golden brown.

Toss a couple tablespoons with the lettuce until nicely coated.  Top with croutons, cut up pieces of the bacon and extra Parmesan cheese.  And lots of cracked pepper!

*recipe adapted a lot from Ruhlman’s amazing sounding Chicken Fried Pork Belly Caesar.

Mini Cherry Pies with Brown Sugar Meringue

cherry meringue mini pies-23

I fulfilled a little dream, today.  I baked with my daughter.  And she even wore a mini-apron. In just a few more months, she’ll be able to stand beside me on her stool and really help.  Today, she got to sit on the counter, play with the rolling pin, say, “row, row, row” as she rolled the dough and even properly sneaked little bites of the raw dough to eat.  This girl knows how to live.  And I’m so happy that she’s teaching me how to live mine, all over again.

image_1 photo

I found cherries on sale for $2.97, regularly over $7!  Cherries are in season in May, so I really hope they stay cheap for a few more weeks!  I did a couple things with my purchase.  First, I put a few whole in a jar and covered them with bourbon.

cherry meringue mini pies-20

A great addition to cocktails in a few weeks, I’m sure!  Or a grown up ice cream Sunday.  Or, a merciful substitution for those horrid Maraschino circles of candy that call themselves cherries.

cherry meringue mini pies-19

For my second act, I overcooked a batch of cherry pie filling so much that it resembled bits of dried cherries, resting comfortably in glue.  (I’d left it on the stove to “simmer” while I went to see my friend in the hospital.  Um, don’t ask why I did that.)  Matt rescued my near-break down by going and getting me another pound at 10:00 last night, then helped me pit every last one of them so I could start over.  That’s true love.

So I had a vague vision of what I wanted to do.  I wanted to make mini pies, fill them with tart cherry filling and use a brown sugar meringue that I’ve used before and wanted to make again because it’s close to perfection and is SO SWEET that it can really only be paired with something tart.  So these little devils are a combination of three recipes: Martha Stewart’s hand pie dough, My Baking Addiction’s cherry pie filling and Cindy Pawlcyn’s brown sugar meringue that she uses on her mile high lemon meringue pie at her amazing restaurant, Mustards Grill in Napa Valley (we went! we ate! we went into a food coma!)

The results were pretty great.  I think next time, I’d use my tried and true pie crust recipe and just add lemon zest to it.  Other than that, this recipe is a winner!  Especially for this super hot weekend that reminds us all too well that we live in the desert and it is officially summer.

cherry meringue mini pies-1

Mini Cherry Pies with Brown Sugar Meringue
makes two dozen

For the Crust

3 cups AP flour
1/4 tsp baking soda
1 tsp baking powder
1/2 tsp salt
2 tsp lemon zest (this microplane works best!)
1 stick of butter (1/2 cup, room temp)
1 cup sugar
1 large egg
3 oz. cream cheese at room temp
2 tbs buttermilk
1 tsp vanilla extract

In a medium bowl, whisk together the flour, baking soda, baking powder, salt and zest.

With an electric mixer on high speed (I used my stand mixer with the paddle attachment), beat butter and sugar until pale and fluffy, about 5 minutes.  Add the egg and beat until just combined.  Add cream cheese, buttermilk, and vanilla; beat until well combined.  Add reserved flour mixture, and beat until smooth.  Form dough into a ball and cover with plastic wrap and flatten into a disc.  Refrigerate 1 hour, up to overnight or freeze up to 1 month.

Let the dough come up to room temp and then roll out into a circle about 1/4 inch thick.  Cut out 4″ rounds and press them into a standard muffin tin, making sure to patch up any holes that form.  This dough is kind of crackly, so don’t fret.  It patches up pretty easily.  Prick the bottom of each pie with a fork and bake in a preheated 375 degree oven for 15 minutes, or until golden brown.  Some of the bottoms of the pies will puff up, but when they’ve cooled just press the puffed up centers down a bit before filling.  I wasn’t about to cut 24 parchment rounds and fill each cup with pie weights.  I’m not THAT dedicated to perfection.

For the Filling

5 to 6 cups fresh, pitted cherries
1/2 cup water
2 tbs lemon juice (fresh!)
2/3 cup sugar
4 tbs constarch
1/2 tsp almond extract

In a saucepan over medium heat, combine the cherries, water, lemon juice, sugar and cornstarch.  Bring to a boil; reduce heat to low and cook, stirring frequently, for about 10 minutes.  Stir in the almond extract and cool slightly before using.

image

I really love using my copper jam pot – (pardon the iPhone pic) The copper heats up almost instantly, as do the sides, so it cooks jam more evenly.  There are lovely, affordable ones here!

For the Meringue:

3/4 cup egg whites (about 6 large)
1/4 teaspoon cream of tartar
1 1/2 cups firmly packed brown sugar

Place the egg whites and cream of tartar in an electric mixer fitted with the whip attachment. Place the brown sugar in a medium, heavy saucepan with high sides (that sugar will boil up and scare the meringue right out of you if you have a small pan), add water to cover, attach a candy thermometer to the pan, and turn the heat on high. When the sugar is at about 240 degrees, start whipping the whites on high speed (they should be foamy and starting to thicken before you add the sugar). When the sugar is at the high soft-ball stage (245 degrees), remove the thermometer from the sugar and, with the mixer still running, carefully avoiding the whip, pour the sugar into the egg whites in a thin stream. When steam starts to come off the whites, add the sugar more quickly. When all sugar has been added, continue whipping until firm but soft peaks form.

Assemble!

Fill each pie shell with the filling.  Then top each with a generous dollop of meringue (you’ll have leftover meringue) and then get a torch and torch those suckers.  I don’t like toasting meringue in my oven because I inevitably scorch them and that makes me feel like a failure and I try to avoid that feeling whenever possible.  It’s all about setting yourself up to succeed in the kitchen that will keep you coming back.

I think these are best served with iced coffee because that’s what you need on a 100 degree day like today!

cherry meringue mini pies-6


Little fingers are very curious 🙂


cherry meringue mini pies-8


cherry meringue mini pies-17


JOY!

Food Memories: Chicken n’ Noodles

food-7

Many of us have memories of being little and watching our moms or dads or grandmas cook or bake for the family.  The first memory that comes to mind for me is watching my mom cut out biscuits with an old green chili can she had cut the top and bottom off of (it’s the perfect biscuit size!) and then slap each side of the biscuit in vegetable oil, then slide the disc in line with the others to fill up an entire pizza pan.  There is something methodically calming about watching someone cook.  I always felt like I was helping, even if I never touched anything.  I felt involved, because mom let me stand there or sit on the counter across from her and talk to her while she worked.  I will always be thankful that she let me hang around the kitchen.  She was always so busy doing a thousand things for our family that it was the one moment when things were somewhat calm and we could just be together and I could count on it every night because I (thankfully) had a mom that cooked dinner 6 out of the 7 days of the week.  You really can’t replace that kind of experience with anything else.  Those memories stick.

My dear friend, Louise Shoemaker, shared a memory and a meal with me last week that seemed so fitting for my blog and for what I love about cooking for my family and eating together.  She is one of the best writers I know, (she was my 10th grade English teacher – how lucky I am to still be friends with her!) so I asked her to write a little blurb about the recipe and the memory that went along with it.  My favorite part about this recipe was consulting her every 5 minutes to make sure I was doing things right.  She had driven up to Lubbock for the day and ate this meal with us!  I’d never made noodles from scratch, and technically, neither had she, but she’d watched her mother so much that she knew.  Here is what she had to say about the chicken noodle soup that made a permanent home in her memory:

RGBBounce
L
ouise and her Mother

It’s funny that a food memory starts with a sharp, clear visual. The bright yellow Pyrex bowl and the red-handled Daisy egg beater swirling the rich gold of fresh yolks. I’ll never forget the 50’s color scheme of the kitchen: pink walls, turquoise cabinet doors, chocolate brown trim. I can still see the white enamel-on-steel kitchen table and my mom in her long, slim dress with the apron tied smartly and the scarf pulled back over her careful bobby-pin curls. It’s as clear in my eye today as it was in those days 50-some years ago.

It must have been a Wednesday. Two days until payday and five mouths to feed on a budget stretched to the last nickel. So, a plump (cheap!) boiling hen, a dozen eggs, a pile of flour, a splash of water, and we knew we’d make it till Friday.

Chicken’n Noodles: made-from-scratch pasta boiled in rich, fresh stock, with chunks of chicken so tender it fell off the bone. A silky thickened sauce, glistening with a bit of butter, and thick, rustic slabs of slightly chewy noodles curling on a plate. YUMM!

The aroma of that meal is the smell of childhood, and it takes me right back there to that kitchen watching my mom pour the beaten eggs into the crater of the flour volcano and mix and knead and roll the dough out to a four-foot circle. I can see her boning a mountain of chicken, dropping heaping handfuls of raw noodles into bubbling broth. Cooking this meal was a production, an infrequent event. I’ve savored the memory of Chicken and Noodles for decades. It was amazing to re-create it with Alisa. And Olive.

I like to think of them cooking together for years to come, Olive sharing with her mother an experience so rich and elemental and, in today’s environment, rare. You’re a lucky (impossibly adorable) munchkin, Ollie! And your mama is pretty awesome, too!

food-6

I am giving you the recipe I did – I only added a few things to the stock, the rest, I followed Louise’s mom’s story-like recipe as best I could.  With pointers from Louise along the way…

Chicken’n Noodles

For the stock:
1 chicken, cut into pieces (8 pieces, bone still in: wings, breasts, legs, thighs)
Water
Salt
1 onion, chopped into quarters
3 carrots, chopped into thirds
2 bay leaves
3 sprigs of thyme

Put the chicken pieces into a large stock pot and cover with water until covered by about 2 inches.  Add a couple tablespoons of salt along with the onion, carrot, bay leaves and thyme.  Bring to a boil, skimming any foam off the top as it comes.  Reduce to a simmer and maintain a simmer (I left my burner on about a 3-4) for 1 and a half to 2 hours.
Remove the chicken from the pan and let it cool.  Then, remove skin, bones and any fat that remains.  Chop or hand-shred the chicken and set aside in a bowl in the fridge while you make the noodles.  Skim the stock of as much fat as you can, but don’t fuss too much.  Remove the carrots, onion and herbs and discard so you’re left with a (mostly) clear broth.  Keep the broth at a simmer with the lid on while you make the noodles.

For the noodles:

3 eggs
a big ol’ mound of flour (maybe 4-6  cups)
salt
elbow grease

Pour a mound of flour on a clean work space and create a hole in the center, volcano-style.  Make it deep enough so that when added, the eggs don’t spill over the side. Leave flour on the floor of the volcano so you can’t see your counter.  Crack the eggs into the hole and with your hand or a fork, whip up the eggs, incorporating flour as you go from the sides.  You won’t use all the flour, of course.  Keep incorporating flour to the eggs, stirring all the while, until you are left with a ball of dough that isn’t very sticky anymore.  Knead the ball for a good 10 minutes until you’re left with a very smooth ball of dough.  Trade off with a friend if you get tired:

food-1 food-2

Clean your hands and insert your finger into the center of the dough.  If it comes back super sticky, add more flour and knead some more.  Cover your dough with a towel and let it rest for 10 minutes.

food-3

Clean off your work space and if you’ve worked clean, you can save most of the flour you didn’t use.

Roll out the dough on a lightly floured surface till it’s an 1/8th of an inch thin.  Or thinner.  You may need to let the dough rest a few times throughout this process because it will start to shrink back up.  Once you get it thin enough, cut it into whatever shapes you like.  I chose squares because I have a kiddo that needs everything cut up, anyway.  Louise remembers her mom cutting looooooooong, thick strips, which would be wonderful, too.  You could even get cute and cut out little shapes from tiny cookie cutters.  Once you get all the dough cut, make sure each piece is coated in flour and bring at least a cup more flour with you to the stove to boil and put this dish together.

Making it Into Soup:

Get your stock to a rolling boil.  Dump your noodles in a handful at a time until they’re all in the pot, stirring as you go so they don’t stick.  This is the vague portion of our program.  Once the noodles are al dente, add the chicken back in and bring it back up to a simmer over medium-low heat.  While stirring, add a sprinkling of flour – maybe 1/4 cup – and stir until fully incorporated.  Keep adding flour till a good consistency is reached.  You’re wanting an opaque sauce that’s neither soupy nor gravy – somewhere in the middle.  If it coats the back of a spoon, it’s probably ready.  Adjust the seasoning with salt until it sings of chicken goodness.  Ladle up, top with a good sprinkle of freshly ground black pepper and enjoy.  We had ours with a wonderful Chardonnay and some crusty challah bread with butter.  Really – it does NOT get better than that.  The baby went crazy for this soup, too, and ate her entire bowl, plus some of ours.

food-5

food-4

Coconut Cream Cheese Pound Cake

ccc-1
This picture is of the cake resting on my toy kitchen that I had as a child.  Mom and I looked up pics of me and my cousin, Tracy, playing with this kitchen when I was three and she was five.  We were both wearing frilly dresses and prancing around the room with spoons in hand, creating recipes out of air and pretending it was delicious.  Ah, nostalgia 🙂 Doesn’t seem that long ago…
It’s funny how you can also be nostalgic about something that wasn’t even your personal memory.  My mom made this cake for my older brother and it was his favorite, but it became part of my food nostalgia anyway.  I think that’s another wonderful thing about food – others’ enjoyment of it can create memories for you, whether you took part or not.  I like remembering foods my brothers’ liked.  Matt loved cherry cheesecake, Chad was more of a savory guy and really had a thing for mustard.  I love both!  And I love that when I went home for a speedy trip this week to visit my mom, that we made this cake together and remembered good times.  Olive sat on the stove while Mom narrated my work to her as I made the cake.  Mom used to make it while I would sit on the counter and talk to her and now she plays with my daughter while I make it.  Life just doesn’t get sweeter than that.
ccc-2
Coconut Cream Cheese Pound Cake
1/2 cup butter
1/2 cup shortening
1 8-oz pkg. cream cheese
3 cups sugar
1 tsp coconut flavor
1/2 tsp. vanilla extract
6 eggs
3 cups flour
a pinch of salt
1/2 tsp baking powder
1 cup bakers coconut
Preheat oven to only 325 degrees.  Grease and flour a 10″ tube pan or bundt pan.  Cream butter, shortening and cream cheese together in a large bowl.  Gradually add the sugar, beating at medium speed until light and fluffy.  Stir in coconut flavoring and vanilla.  Add the eggs one at a time, beating well after each addition.  Combine the flour, salt and baking powder and add to batter.  Stir just until blended.  Fold in the coconut.  Pour the batter into a prepared tube pan or bundt pan.  Bake for 1 hour and 15 minutes, or until a tester inserted in the center comes out clean.  Cool in the pan on a wire rack for 10-15 minutes.  Remove cake from the pan and allow it to cool completely on a wire rack before cutting.
This cake is dense and rich.  Don’t worry too much about the sugar content.  It’s not an iced cake, anyway!  Just imagine the sugar you wouldn’t bat an eye at putting into the frosting of a regular cake and instead, put it into the batter 🙂 And if you haven’t gotten the hint that weekends are for feasting and not for guilt, I fear you never will!  Happy Eating!
ccc-3

Thai Basil Whatever

thai basil


I wanted to share with you a recipe I’ve been making for years.  Matt and I cooked a lot of Thai food in the first few years we were married.   Matt had a version of this dish while living in Nashville at a place that served Chinese food, but had Thai posters all over their walls.  So Matt asked one day if they would make him some Thai food and the guy excitedly made a chopped chicken dish with Thai basil and hot Thai chilies.  Matt was hooked.  We love the flavors of fish sauce, soy sauce, the heat of peppers and the sweetness of basil that this dish brings.  It’s a wonderful mix of sweet/sour/spicy.  Over the years, we’ve lost the original recipe we first referenced and so this is legitimately a Palmer original.

Again – don’t be afraid of fish sauce.  It’s completely essential to the flavor balance of this dish.  If you can’t find Thai basil, regular Italian basil works just fine.  I’ve used ground pork, chicken and turkey, as well as hand chopped chicken thighs (so good), but my go-to is ground turkey.  Don’t leave off the fried egg!

Thai Basil Turkey 
serves 4

1lb ground chicken, turkey or pork
3 tbs peanut oil or canola oil
1 medium white onion, chopped fine
6 cloves garlic, chopped
4 or 5 seeded jalapenos, diced (or Thai chilies, or whatever kind of pepper/heat level you want)
1 tbs fish sauce
1 tbs soy sauce
1/2 cup chopped fresh basil leaves

This recipe goes quicker if you use a large wok over really high heat.  If you don’t have a wok, use the largest stainless steal skillet, or cast iron skillet you have.  Heat the oil over medium high heat till it shimmers.  Add in the onion and stir a few times till they soften.  Working quickly, stir in the garlic and cook until fragrant, about 30 seconds.  Add in your ground meat and jalapenos and stir until meat is cooked through.  If you want more heat, stir in your chilies closer to the end of cooking.  When the meat has cooked through, toss in the fish and soy sauce and stir to coat.  Remove the pan from heat, stir in the chopped basil and cover to keep warm.  In a non-stick skillet, fry a couple eggs in peanut oil, and a splash of soy sauce and serve on top.

I typically serve this over about a half cup of rice.  I’m not going to tell you how to cook rice.


Grown-Up Sticky Buns

sticky buns

I decided to tackle a Pinterest recipe yesterday.  It had been sitting there on my Recipes board, looking amazing, yet going unmade and uneaten. (Also known as every pin on Pinterest)

The Butterscotch Spiral Coffee Cake was intriguing and beautiful and I loved how the original baker created one gigantic cinnamon roll effect.  I loved it so much that I didn’t do it that way.  I knew without a doubt, that mine would not look the same, I’d cut it wrong, placing it wrong, and get frustrated and end up drinking the whiskey instead of adding it to the caramel sauce.  So I decided I’d make a crowded pan of cinnamon rolls, call them sticky buns, and be happy!

I had a really great time making this recipe.  Matt is usually the one who bakes, but when I do, I really enjoy kneading the dough, working with it to form it into something pretty.  I love clearing off a huge space on our counter to roll out the dough.  Makes me think of my mom making biscuits.  There’s something so wonderful about baking that instantly connects you to bakers from centuries past, who had flour on their bellies from leaning against the counter too far, and a happy heart from their necessary taste-testing.

I used my antique coffee grinder

photo

to grind the cardamom pods because we have a spice grinder, but it’s forever known as Cumin Grinder because once you grind cumin seeds, congratulations, you now have an exclusive cumin grinder.  If you grind anything else, it will have a faint whiff of cumin, or B.O.  (also known as cumin).  I don’t know why we eat a spice that smells like B.O.  I’ll chalk it up to things that taste delicious but smell horrible.  Like cheese.  Oh, cheese, you stinky wonder…

The caramel sauce called for a teaspoon of whiskey.  My first thought was, “that’s not enough – just one teaspoon?” but when I gave Matt a taste, wanting him to identify the mystery ingredient, it took him a half second to shout, “You put whiskey in the caramel?!” Yes, and not just any whiskey, but his Laphroaig 10 Year Smoke Bomb whiskey.  (Not its official name) And even though there was only one teaspoon, it was obvious!  I also added a generous sprinkling of kosher salt, because I feel strongly that when something calls for brown sugar, butter AND corn syrup, you’ve GOT to add a bit of salt.  Everything sweet needs balance and caramel is definitely one of those things!  I also forgot to add butterscotch chips, like she did, but they were still amazing.  The dough has so much flavor, that you almost don’t need the extra sweetness.  However, I think adding the chips would be a great addition.

My crowded cinnamon roll approach kinda worked and kinda didn’t.  When they baked they BURST up out of the pan in a sprawling fashion.  No fuss – I just smooshed them back down before inverting them on a plate.

butterscotch sticky buns

If you want to do the gigantic cinnamon roll swirl like the super cool blogger/baker lady did, go for it!  I know my weaknesses and copying a recipe word for word is one of them.  If you make it look different, you won’t be sad when it does.  (Make sense?)

These are AWESOME, by the way.  Like Monkey Bread for grown-ups.  Sweet, buttery, sticky and with a hint of smoke.  Pretty amazing.

7G9A2625

Grown-Up Sticky Buns*

For the Dough
2 1/2 to 2 3/4 cup AP flour
1/4 cup granulated sugar
2 1/4 teaspoons instant yeast
1/2 teaspoon kosher salt
1/2 teaspoon cardamom
1/8 teaspoon freshly grated nutmeg
1/8 teaspoon ground cinnamon
1/3 cup whole milk
1/4 cup (2-ounces) unsalted butter
1/4 cup water
2 extra large eggs
1 teaspoon pure vanilla extract
For the Butterscotch Glaze
1/2 cup firmly packed dark brown sugar
1/4 cup (2-ounces) unsalted butter
2 Tablespoons light corn syrup
1 teaspoon Scotch whisky
1/2 tsp kosher salt
For the Cinnamon-Butter Filling
1/2 teaspoon ground cinnamon
2 Tablespoons (1-ounce) unsalted butter, melted
1/3 cup butterscotch chips, chopped (I forgot this step)
7G9A2628
For the Dough
In the bowl of a stand mixer fitted with the paddle attachment, combine the 2 cups of flour, sugar, yeast, salt, cardamom, nutmeg, and cinnamon.  In a small saucepan over low heat, heat the milk and butter just until the butter melts.  Add the water and set aside until warm (120º F-130º F), about 1 minute.  Pour the milk mixture over the flour mixture and mix on low speed until combined.  Add the eggs one at a time, beating well after addition.  Add the vanilla. Add 1/2 cup more flour and continue to mix on low speed until smooth, about 30-45 seconds.  Add 2 tablespoons of additional flour and mix on medium speed until the dough is smooth, but slightly sticky.  Sprinkle the work surface with flour, and knead the dough gently until it is smooth and no longer sticky, adding an additional 1 to 2 tablespoons of flour if needed.  Place the dough in a large bowl and cover with plastic wrap.  Let the dough rise in a warm place until it has doubled in size, about an hour.
For the Butterscotch Glaze
Meanwhile, lightly coat a 9 x 2-inch round cake pan with non-stick spray.  In a small saucepan over low heat, combine the sugar, butter, and corn syrup and heat until the butter is completely melted.  Sprinkle in the salt, stir to dissolve and taste test.  Does it taste like butterscotch?  Good!  Not yet?  Add more salt!  Remove from the heat and stir in the whiskey.  Pour the mixture into the prepared pan and tilt the pan to cover the bottom evenly; set aside.
For the Cinnamon-Butter Filling
In a small bowl, stir together the butter and cinnamon. Don’t forget to chop up the butterscotch chips that you went to the store, specifically to buy.
Center a rack in the oven and preheat to 350º F. Gently de-gas the dough by pressing lightly.  On a lightly floured work surface, roll the dough into a 16 x 12-inch rectangle.  Using a pastry brush, spread the cinnamon-butter evenly over the dough.  Sprinkle the dough with the chopped chips. Roll the dough up, length-wise, and cut into 1″ rolls and place side by side. Loosely cover the pan with plastic wrap and let the cake rise in a warm place until it is almost doubled in size, about 30 minutes.
Bake the cake until the top is deep golden brown, about 35 minutes.  Check after 20 minutes to make sure the top is not browning too fast.  If so, cover the top loosely with a sheet of aluminum foil for the last 10-15 minutes to prevent over browning.  Transfer to a wire rack (remove the foil if used) and let cool for 10 minutes.
Gently tilt the pan and tap the side on a counter to release the sides of the cake.  Invert a serving platter on top of the cake, then invert the pan and the plate.  Leave the pan on the cake for 1 minute so the glaze transfers to the cake, then gently lift off the pan.  Using a rubber spatula, scrape out any glaze remaining in the pan and spread it over the warm surface of the coffee cake.  Serve the cake warm or at room temperature with a cup of coffee and a friend.  This is an adult dessert – enjoy being one and let the kids marvel at the mystery 🙂

*recipe adapted from The Galley Gourmet

7G9A2631

Pasta Carbonara – tried and true recipes

pasta carbonara bowl

I’m going back to some basics this week.  I’ve exhausted myself on trying something new nearly every single day for two months.  Time for some repeats!  I have made some form of pasta carbonara on a regular basis since Matt and I were first married, 8 years ago.  Carbonara is one of those dishes that you can nearly always make, even when you don’t think you have anything in the fridge for dinner.  (Hello, Monday dilemma)  Nearly everyone has some form of pasta on hand. Carbonara is traditionally made with spaghetti, but it can really be just fine with any kind of dried pasta you have on hand.  Also – most people have bacon either in the fridge or freezer.  The sauce for this dish comes from cheese and egg yolks – that’s it!  And if you’re wanting something extra tossed in, try frozen peas or corn or lima beans – any kind of random bag of frozen veg you have in the freezer that has been labeled “too little for a side dish, too much to throw away”

I love the comfort of this dish – I love the simplicity and I love that in about 25 minutes, I can have a dish on the table that makes everyone feel good.  The little darlin’ loved it, too.

pasta carbonara for lunch

carbonara

pasta carbonara

Good for little fingers is any kind of smaller pasta such as rigatoni, fusilli, macaroni, or these cute little corkscrew shapes (which I think are just un-trimmed macaroni)  really – whatever you think your toddler can grab or stab with a fork – go for it!

carbonara bowl

Pasta Carbonara
serves 2.5 (two big people and one little person) or 4 as a side dish

8 ounces dried pasta, cooked al dente (maybe cook a little longer for the baby if they don’t have more than 8 teeth, like mine)
4 strips of bacon, cut into 1 inch pieces
1 small onion, diced small
2 cloves of garlic, minced
1/2 cup frozen peas (or other vegetable of your choice)
1/2 cup grated parmesan cheese
2 egg yolks

1. Salt your pasta water.  I usually put about 1/4 cup of salt into a large pot of water (at least a half gallon of water.)  EEEEEEEK, SALT!  Here’s the thing: it flavors your pasta.  You don’t have to salt the dish upon completion because you salted along the way.  Just enough salt gets absorbed into the pasta and it’s perfect.  The noodles could be eaten on their own.  Try it next time.  And if you’re still worried, just look at how much sodium is in the powdered cheese on your blue box mac and cheese.

2. Bring the water to a rolling boil and cook the pasta till al dente, or a little over for the little mouths that will be eating.  Reserve a cup of pasta water and then drain your pasta, rinse and set aside.

3. Cook the bacon strips in a large skillet over medium heat until crispy.  Reserve on a paper towel and drain all but a tablespoon of the oil from the pan.  Toss in your onion and garlic and cook, stirring, until translucent.  Add in your frozen vegetables and pasta and a splash of the pasta water and stir until combined.

4. Remove the pan from the burner and while stirring constantly, add the egg yolks and cheese.  Stir stir stir stir as to not get scrambled eggs.  The heat from the pasta will cook your yolks and they will combine with the cheese to make a sauce.  If the pasta looks a bit too dry, add more of your reserved water and stir to combine.  Pasta water is starchy and salty and PERFECT for making a pasta sauce.

5. Fold in the bacon, garnish with more cheese, if desired, and serve with a crusty piece of buttered bread.

6. And a glass of Malbec for the big people.

Enjoy!

Strawberry Banana Split Crepes

crepes

I’ve posted a lot of recipes lately that have strawberries, but there is a good reason – they’re in season!  When you’re at the store and strawberries are $1.30 for a pound, instead of $4 – that’s your sign that they are in season!  Now, I’m not kidding myself into believing that they aren’t grown in hot houses, BUT at least it’s the season for them, and in my mind, that makes me feel like they taste better.

I wanted to make a strawberry crepe, so I looked up a simple crepe recipe, and where it called for 1/2 cup of water, I added a 1/2 cup of strawberry puree instead, plus a bit more water to thin it out.  My strawberry puree was made-up, too, as was the strawberry-vanilla bean whipped cream!

You need to make your crepe batter the night before you use it, so make this batter tonight and have crepes in the morning while the weekend is still here!  This recipe looks like a sugar bomb, but it actually wasn’t.  The crepes have zero sugar except the strawberry puree, which only has 3 tbs and it’s also used to sweeten the whipped cream. So if you don’t add the chocolate sauce, this is really low sugar!  And it definitely doesn’t taste like you held back!

bsplit crepes

Strawberry Crepes

3/4 cup whole milk
1 cup flour
2 eggs
1/2 cup strawberry puree (recipe follows)
2 tbs water
3 tbs melted butter

Put all the ingredients into a bowl or a large, tall cup and with your immersion blender, blend for 15-20 seconds until fully mixed.  If you don’t have an immersion blender, use a regular blender for the same time.  Transfer to a container and chill for one hour, up to 48 hours (I just did this step before I went to bed and used it the next morning.)

In a 10″ non-stick, shallow skillet, heat teaspoon of butter over medium high heat, or just spray with non stick spray, but you want your pan to be pretty hot.  Add a quarter cup of batter to the pan and swirl around till it’s spread as thin as possible. THE FIRST CREPE IS ALWAYS CRAP.  Just throw it away.  Now, you’re ready to begin.  By 1/4 cup scoops, (I used a ladle) swirl your batter in the pan very quickly and let it set for at least 1 to 2 minutes before flipping.  If your pan is hotter than mine, you may need to alter your time.  With a wide spatula (I used a fish spatula), slide under the crepe and flip over.  The other side won’t take as long to cook.  Keep finished crepes covered in a towel so they will stay warm and pliable.  This batter made about 8-10 crepes for me, but if you’re really skilled at swirling your batter, you could squeeze 15 crepes out of this amount.  I am not skilled and my crepes are always thicker than they should be, but they’re still delicious!

Fill the crepe with sliced bananas, a drizzle of left over strawberry puree, and a dollop of whipped cream.  Add more strawberries and whipped cream on top, and if you’re feeling the entire banana split thing, drizzle in chocolate syrup (I used Torani chocolate syrup.)  Or even some toasted pecans!  Have fun – it’s the weekend!

Strawberry Puree

1 lb of fresh strawberries, hulled and halved
3 tbs sugar
1 vanilla bean, split and scraped of its seeds. If you don’t have a vanilla bean, wait, and add some vanilla paste or vanilla extract later when you’re blending)
1/4 cup water

Place all the ingredients into a medium saucepan and cook over medium low heat till bubbly.  Cook for about 15 minutes until the strawberries begin to break down.  Remove the vanilla bean and transfer to a blender or a tall cup with your immersion blender and blend, with an extra 1/2 cup of water till fully blended and no chunks remain.  Add the vanilla bean paste or vanilla extract (about 1 tsp) if you want and blend again.

Strawberry Vanilla Bean Whipped Cream

1 cup heavy cream
1 tsp vanilla bean paste
1/4 cup strawberry puree

Place all ingredients into a bowl and whip until soft peaks form.  (I used my immersion blender, duh)

The Creme Brulee of Lemon Bars

7G9A1687

I’ve stuck to this recipe for a few years now.  I love lemon desserts and my only complaint is that something claiming to be a lemon dessert isn’t ever lemony enough.  I want a ZINGER of a lemon shock.  I know this may cause several of you to stop reading, but given the choice between a GOOD lemon bar and a brownie, I’d choose the lemon bar.  Not every time.  Like I said, it’d have to be good.  Not too eggy, just enough curd, just enough crust, big time lemon flavor and another thing: don’t dust your lemon bars with confectioners’ sugar.  I’ll give you a few reasons:

1. Lemon bars usually have at least two cups of sugar.  So..there’s enough sugar.  Why would you dust something with more sugar that is already shockingly sweet? (I’m not complaining – lemon and sugar need each other)

2. I don’t like inhaling powdered sugar with each bite.  It kind of ruins the whole eating experience to have to hack on powder.

So that’s really only two reasons.  With the right recipe, you don’t need a dusting of sugar to cover up the weird, sometimes sticky top of a lemon bar.  This recipe is so wonderful because the top gets crunchy like a creme brulee.  I’m not sure why.  Maybe because I mix up the filling while the crust is baking, so by the time the crust is ready for the filling, the filling has sat and separated a bit.  I whip it up really good, too, so maybe it’s the airy texture?  Or maybe the key is to let them cool completely before cutting and don’t cover them up if you’re not serving them right away, lest the top get soft.  That way you get that good crunch on the top, the velvety curd in the middle and the buttery crumble of the crust all together.  This is adapted from Paula Deen’s recipe, and to me, it’s the perfect lemon bar recipe.  The only one you need.

Creme Brulee Lemon Bars

Crust
2 cups all-purpose flour
1 cup confectioners’ sugar, plus more for dusting
2 tbs lemon zest (just zest the lemons you will use for the filling)
pinch of salt
2 sticks butter, at room temperature, plus more for greasing

Filling
4 eggs
2 cups granulated sugar
6 tablespoons all-purpose flour
6 tablespoons fresh lemon juice

Preheat the oven to 350F.  Grease a 9x13x2″ pan.  Cover the bottom in parchment paper and let it hang off the sides (just along the long edge) so that you can remove it for cutting better.)
Make the crust by combining flour, confectioners’ sugar, zest and salt in a large bowl.  Cut in the butter to make a crumbly mixture.  Press the mixture into the prepared pan.  You may need to dip your fingers into a little flour or confectioners’ sugar to keep the dough from sticking to your fingers.  Bake for 15-20 minutes.

Meanwhile, to make the filling, mix the eggs, granulated sugar, flour, and lemon juice.  Pour this over the baked crust and bake for 25 minutes longer.  Don’t sprinkle with confectioners’ sugar. Run a knife around the edges to loosen the bars, and then carefully, by the parchment overhang, lift the entire pan of bars out of the pan and transfer to a cutting board to cut.  I like to cut off the very edge of the bars so that each one will be perfectly smooth, cut, squared edges (obsessive) but that’s really up to you.  No one said you couldn’t eat the trimmings and no one would have to know they ever existed.

The Battle of the Quiches

Quiche

My friend, Summer, hates quiche.  The very word gives her mock dry heaves.  We’ve all had a traumatic experience with some kind of food; whether it be an ingredient (dill for me, pomegranate juice for Matt) or an entire meal ruined by getting sick later in the evening, it’s hard to come back to good terms with the food after the trauma.  I’m not sure why Summer hates quiche, but according to her, the description she gives is of a “rubbery filling, soggy crust, gross texture” and what comes to mind, for me, is the mini-quiches you find at baby showers the world over, or the frozen pie-sized quiches that could double as semi-wet Frisbees.  Either way, it’s not a huge shock that a lot of people have a bad connotation when they hear the word.

Thomas Keller is here to save the day, once again.

He sees the problem with the American version/view of quiche, as well:

“Why didn’t the French quiche ever really translate to America? American culinary culture embraced it, then trashed it without ever knowing what it was…I think it was a mechanical problem, not having the right tool–a ring mold about two inches high.  When the modern quiche took off here in the 1970s, that wasn’t widely available.  Instead, a pie pan was commonly substituted for the two-inch ring mold.  And then came the premade pie shell.  Who would want to eat quiche made in that? A quiche has to have a specific thickness or you cannot cook it properly: It must be two inches high, in a crust thick enough to remain crisp, and not become soggy, during cooking.  Custard in a pie shell invariably overcooks (if you cooked it slowly enough, the crust would become soggy).” — Thomas Keller, Bouchon Cookbook, page 86

We’ve made Keller’s quiche several times.  The foundation is a good crust and so we go back to the crust I will rely on for the rest of my life – the same crust used in my strawberry pie a few posts ago.  It’s perfect, it flakes, it is sturdy without being tough, and it tastes like butter because that’s the only fat used.  Why look elsewhere?  The key is to completely bake the crust first, with plenty of overhang so that it doesn’t shrink while baking.  And I’m sorry you’ll have to buy a special tool to make it, but a 2 inch ring mold is necessary.  Not expensive and if you want to really make this recipe correctly, you need one.

We decided for this post, that we’d compare a store-bought quiche with Keller’s quiche.  I didn’t buy the most disgusting one I could find, either.  I actually bought probably the best a grocery store has to offer.  An in-house made quiche Florentine (bacon/cheese) baked in a pre-made pie shell (assuming.)  It was set in a metal pie tin with holes poked all in the bottom.  I appreciated that effort, because at least someone is acknowledging that quiche shells go soggy.  Didn’t quite work, though.  Here they are, back to back:

Battle of the Quiches

Store bought on the left, Keller on the right.
You can’t tell much, texture-wise, so I’ll tell you.  And again, I’m fairly impressed with the grocery store made quiche.  It’s about as good as a pre-made, American pie version gets.  However, the crust was really wet and soggy on the bottom. Couldn’t exactly pick it up without it sagging, whereas the Keller quiche’s crust is very crispy and fully cooked on the bottom (you can tell by the color and how it even stands away from the plate a bit.)  The Keller quiche has almost a half inch more custard and the store bought quiche’s crust tasted like sand.  Honestly.  Sand held together by water.  It really wasn’t good.  Now, the store-bought quiche’s filling was fine, taste-wise.  It had bacon – how can that not be at least decent?  (I could imagine a frozen mini-version would find a way) but anyway, it was a good effort, but the crust was awful and it was wet, just like you don’t want it to be.  It also had that over cooked texture – kind of rubbery- that eggs get if cooked too long.  I swear to you, I am not making this up, after a few days and microwaving the leftover Keller quiche, it STILL had a smooth, silky, custard-like texture.  Almost creme brulee texture.  It’s so darn good.

Fun experiment and I would say that if you’re interested in doing something for the sake of the experiment and doing things properly, buy yourself a ring mold and get after it.  And remember – a Keller quiche takes two days.  So if this is for Sunday brunch, start it on Saturday afternoon.

Roquefort and Leek Quiche

I also want to add, for the sake of The Family Meal, that Olive ate on both quiches with  much enthusiasm.  Yes, even those big chunks of Roquefort.  She leaned forward and said, “mmmmm!” to both.  Eggs are awesome.  Oh, and she also said, “Quiche” perfectly.  I think because “quiche” sounds like her version of the word “cheese”.  Whatever works, Ollie.

For the crust:

2 cups AP flour, plus extra for rolling out
1 tsp kosher salt
8 ounces chilled, unsalted butter, cut into 1/4″ pieces
1/4 cup ice water

Place 1 cup of the flour and the salt in the bowl of a heavy-duty mixer fitted with a paddle attachment.  Turn the mixer to low and add the butter a small handful at a time.  When all the butter has been added, increase the speed to medium and mix until the butter is completely blended with the flour.  Reduce the speed, add the remaining flour, and mix just to combine.  Add the water and mix until incorporated.  The dough will come around the paddle and should feel smooth, not sticky, to the touch.
Remove the dough from the mixer and check to be certain that there are no visible pieces of butter remaining.  Pat the dough into a 7-8″ disk and wrap in plastic wrap.  Refrigerate for at least 1 hour, up to a day.

Lightly brush the inside of a 9×2″ ring mold with canola oil (or cooking spray works) and place it on a parchment-lined baking sheet.
Place the dough on a floured work space and rub all sides with flour.  Roll out the dough into about a 14″ diameter circle.  Lift the dough into the ring, centering it carefully and pressing it gently against the sides and bottom edges of the ring.  Trim any dough that extends more than an inch outside the ring.  Carefully check for crack in your dough and patch any cracks with your trimmed dough (I DIDN’T DO THIS AND OUR QUICHE LEAKED ALL OVER THE PLACE)
Refrigerate your dough for 10 minutes to resolidify your butter (if you don’t do this, the butter will drain out of your dough as it bakes.  Done it; learn from my mistakes)
Line the bottom of your crust with parchment and fill with pie weights (our pie weights are dry beans – a whole pound of them.  We just keep them for use in pies).  Bake shell in a preheated 375F oven for 35-45 minutes, or until the edges of the dough are lightly browned.  Carefully remove the parchment and the weights.  Check the dough for cracks and patch with reserved dough trimmings (DO THIS STEP) Return the shell to the oven for another 15-20 minutes, or until the bottom is rich golden brown.  Remove from oven and let the shell cool completely on the baking sheet.

Basic Quiche Batter

2 cups milk
2 cups heavy cream
6 large eggs
1 tbs kosher salt
1/4 tsp ground pepper
A few gratings of fresh nutmeg, or 1/8 tsp of ground nutmeg

Combine the milk and cream in a large saucepan over medium heat and heat until a skin begins to form on the surface of the milk.  Remove from the heat and let cool for 15 minutes before continuing.  If you have an immersion blender, add the rest of your ingredients to the saucepan and blend for about a minute to fully aerate the batter and make it light and foamy.  Pour the batter into your quiche shell (which is still on your lined, rimmed baking sheet – this thing inevitably will leak a tish.)
At this point, if you’d like to add ingredients, go for it.  Be creative.  We did his blue cheese and leek version and it was awesome.  You simply add these ingredients (about a cup of each ingredient, chopped fine and cooked properly) to the quiche batter as you’re pouring it into the shell.  Try crumbled, cooked bacon and cheddar cheese, or caramelized onion and grated swiss.  The options are endless.
Bake for 1 1/2 to 1 3/4 hours, or until the top of the quiche is browned and the custard is set when the pan is jiggled.  Remove and let cool to room temp on a cooling rack.  Refrigerate until chilled, at least one day, up to 3 days.  Once the quiche is thoroughly chilled, scrape away the excess crust from the top edge of the quiche.  Set the quiche down and carefully lift off the ring.  Preheat the oven to 375F.  Line a baking sheet with parchment.  Using a serrated knife, carefully cut the quiche into 8 pieces.  Place the pieces on a baking sheet and reheat for 15 minutes, or until hot throughout.  Serve immediately.

Quiche shell