Coriander Crusted Chicken

Corriander Chicken004


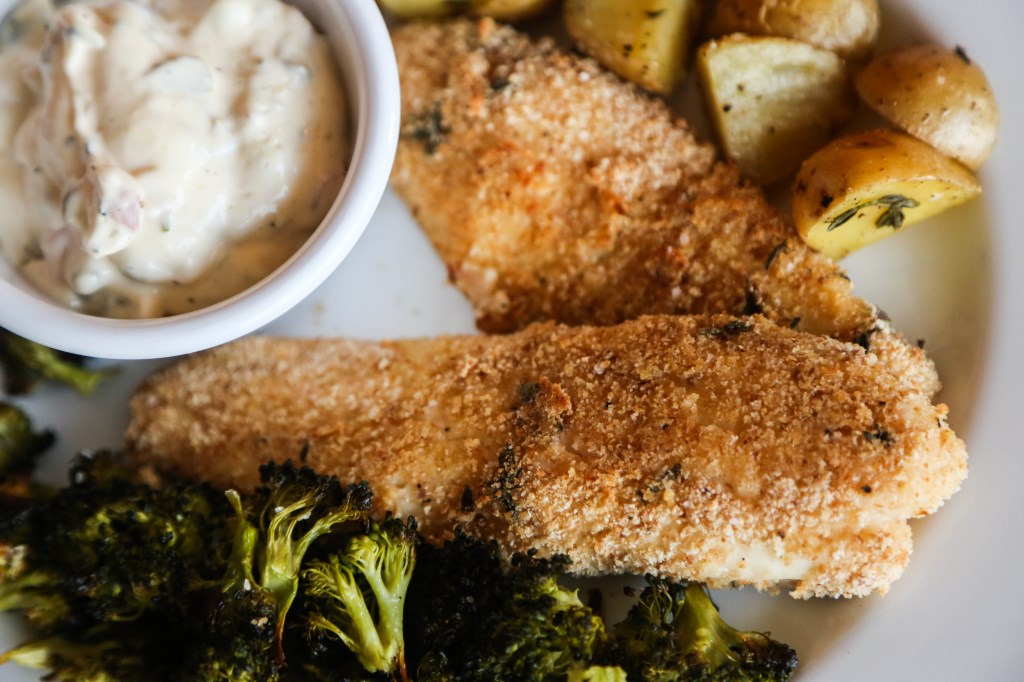
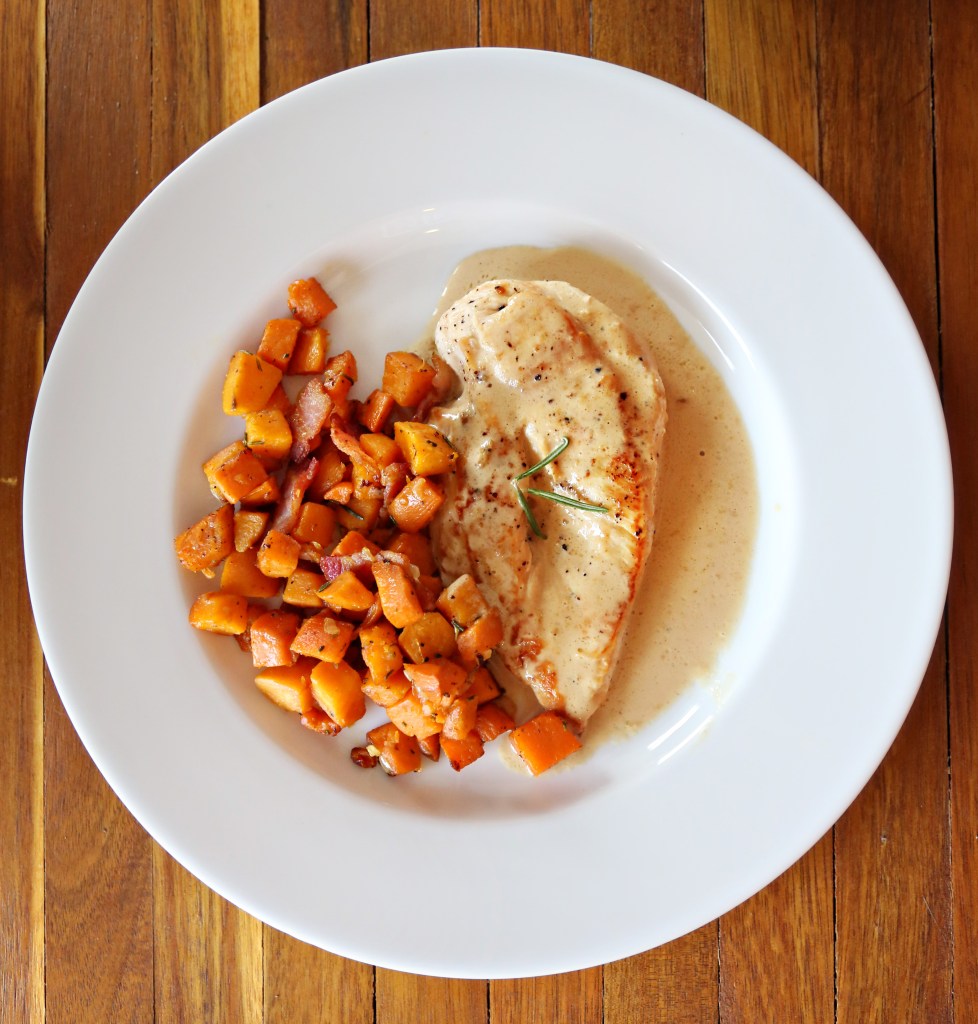
This Monday meal is a really unique spin on some old standards.  We all get tired of chicken because it’s nearly always in the weekly rotation.  Adding a spice you may not be used to is the best way to make something boring like chicken seem new, again!  This week that spice is coriander.  The seed of the cilantro plant, it has a tutti-fruity flavor and is commonly used in Indian cuisine.  It’s got a wonderful sweet/spicy appeal that makes it ideal for roasted chicken.  We first ran across this spice mix from acclaimed chef, Michael Symon, who combined coriander, cinnamon, cumin and Srirracha for the most unbelievable wings you’ll ever taste.  We’ve  brought those chicken wings to football parties, church potlucks and small get-togethers with friends and they are always gone first.

For this simple meal, I took a few of the spices from Symon’s original wing recipe and tossed the chicken legs in with them, plus some olive oil and roasted it.  Perfection!  They’d be even better if you put them in the rub the night before you were going to cook them.  We simply served the chicken with a side of Srirracha for a dipping sauce instead of making the wing sauce recipe.

Corriander Chicken005

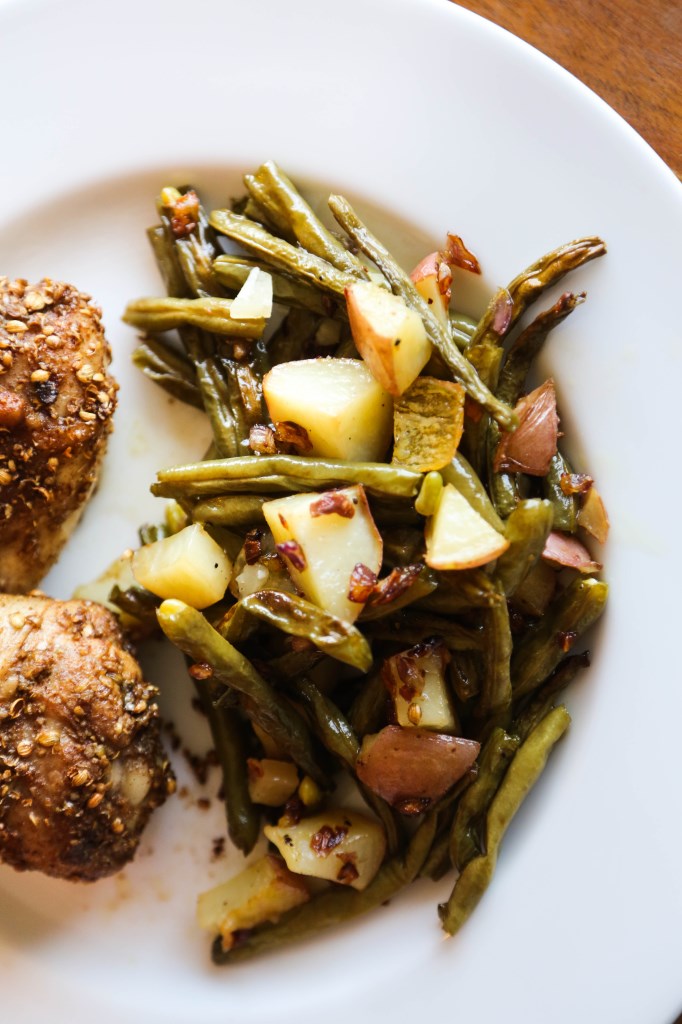
For the side, I did a simple roasted green bean/potato dish tossed with diced, caramelized purple onions.  Such a simple addition and it made the vegetables totally awesome.  Oh, and for my gluten/dairy avoiding friends, this meal is entirely safe for you!  FYI, just to keep things honest, Olive only ate the potatoes out of this dish.  She’s decided this week and last to boycott meats and most vegetables.  It’s been super fun…

Corriander Chicken007


Coriander Chicken with Roasted Vegetables
serves 4

1 lb chicken legs, thighs, wings – just make sure they’re still on the bone.  Yes, this can be done with boneless, but you’ll need to adjust the cooking time
2 tbs coriander seeds, crushed
1 tsp ground cumin
1 tsp cinnamon
1/2 tsp salt
1/4 cup olive oil

For the vegetables:
2 medium sized potatoes
1/2 lb fresh green beans, ends snipped
2 tbs olive oil
salt and pepper to taste
1/2 red onion, diced
3 tbs olive oil

For the chicken: Preheat your oven to 450F.  Combine the coriander seeds, cumin, cinnamon, salt and olive oil in a gallon sized Ziploc bag.  Add the chicken legs and smush and toss and move them around inside the bag to coat all the pieces evenly.  Sometimes I open up the bag and have to move some of the top pieces down to the bottom cause the bottom pieces are spice-hogs.  Leave the bag in the fridge for 30 minutes while you prep all the rest of the vegetables for the meal.

Wash and cube up the potatoes into about 1/2″ cubes.  Snap the ends off your green beans and wash them and pat them dry.  Toss the potatoes and green beans together with the 2 tbs of olive oil and spread them out on a greased, rimmed baking sheet.  Season with a good sprinkling of kosher salt and freshly ground pepper and set pan aside.  Take your chicken out of the fridge and arrange the pieces on a greased, foil-lined, rimmed baking sheet.  Place the chicken in the oven and set the timer for 30 minutes.  Put the potatoes and green beans in the oven on the lower rack beneath the chicken and get on with your onions.  In a medium saucepan, heat the remaining 3 tbs of olive oil over medium heat and cook the onions till they are golden, usually 10-15 minutes.

Check the potatoes and green beans when the timer for the chicken goes off.  If they haven’t turned golden and slightly crispy, leave them in there.  Check the temp of the chicken with a probe thermometer.  If it’s 165, they are done and you can remove them from the oven.  They may take longer depending on the size of chicken pieces you used and the temp of your oven (all ovens lie just a little bit).  If your vegetables aren’t quite done when the chicken is, just tent the chicken with foil so they’ll keep warm.  The beauty of the vegetables is that if they get done faster than the chicken, they can easily be warmed in the microwave.  When the vegetables are done roasting, toss them in with the caramelized onions in a bowl and season to taste with salt and pepper.

Corriander Chicken002


Caramelized Onion Dip

pan fried onion dip

Every summer, certain things tend to become a trend.  We nearly always have an official corn dish, a certain way we assemble a burger from the grill, a particular drink we make over and over, or a particular ice cream flavor we bring to parties. It’s so much fun looking forward to the hot summer months by way of what we’ll be cooking.  It really helps utilize what’s in season (think: guacamole, caprese salad from REAL tomatoes and backyard basil, etc) and this summer, I think I’ve found the official dip/spread!

This dip would be amazing as a burger spread, a dip for tortilla chips, crackers, etc.  A wonderful topping for baked potatoes, a dip for fries – the options are endless.  I’ve always been a fan of the tubs of French Onion dip in the grocery stores, but this homemade version blows any of the store bought options out of the water.  It has a sweet smokiness from the caramelized onions, a super creaminess from the addition of the cream cheese and my addition, a tablespoon of red wine vinegar, really makes the flavors come alive and gives it a bite that cuts through all the richness.  It’s perfect.  I also decided to spin all the ingredients in my food processor a few times because I liked the idea of the onions being finely chopped instead of left in long slivers.  I think for me, it’s a more pleasing texture as a dip.

However you decide to make it, just promise me you’ll try this one at your next BBQ.

onion dip


Caramelized Onion Dip*
makes about 2 cups

2 large yellow onions
4 tablespoons unsalted butter
1/4 cup vegetable oil
1/4 teaspoon ground cayenne pepper
1 tbs red wine vinegar (really, any vinegar you have on hand will do just fine!)
1 teaspoon kosher salt
1/2 teaspoon freshly ground black pepper
4 ounces cream cheese, room temperature
1/2 cup sour cream
1/2 cup good mayonnaise (we use Hellman’s original)

Cut up the onions into very thin slices.  Place in a large skillet with the butter, vegetable oil, salt and cayenne and let it cook over medium low heat until the onions turn golden, and caramelize, about 30 minutes.  You really want to err on the side of TOO caramelized instead of not enough.  The flavors get so intense as the onions break down.  Let the onions cool and set aside.

Add the vinegar, salt and pepper, cream cheese, sour cream and mayo to your food processor and pulse a few times to combine.  Then add the onions and pulse until fully incorporated.  If you don’t have a food processor, just dice your onions before you cook them, and then take all the ingredients to a bowl or mixer and mix until smooth.

Adjust the seasonings and serve with…anything!

*recipe adapted from this site, who took the recipe from The Barefoot Contessa cookbook.


Fish Sticks and Sticking to Your Guns

fish and taters001

The method is working.  We have a few food rules when it comes to feeding Olive and ourselves.  All these thoughts are fueled by the game-changing book, “French Kids Eat Everything“.  I highly recommend it if you find yourself stressed that your kid eats a limited selection of foods.  Babies don’t know snacking exists.  They learn it soon enough from peers and tv and observing adults who randomly nibble throughout the day, but in the formative first couple years of life where you have most of the control over what your baby consumes, you can show them a different way.  And maybe even learn to eat better, yourself!  Olive gets one snack a day. Yes, she’s 15 months old (almost) and only snacks once a day. (And it’s a good one! Something fun and really tasty. Usually a piece of fruit or some dark chocolate and bread with milk.  You gotta make it something they look forward to.)  It’s in between lunch and dinner, because that’s the longest stretch without food.  We also have to emulate this discipline for her.  How would it be fair to snack in front of her without including her?  And if I want her to be hungry enough at a meal to be willing to try something new, well darn it, she needs to not have eaten a snack an hour before dinner!  Makes sense to me and it seems so obvious, yet so few do it.  We should all eat this way!  Hunger is a discipline that too few of us experience. And the discipline is learned before the age of two.  It can be learned if started after two, but it’s just so much harder (think: excessive whining).

We’ve even pushed dinner back to 7:30 the past few nights and she has eaten EVERYTHING.  Whereas before, I was serving dinner at 6:30 and it was a fight to get her to eat for 10 minutes straight (she’d had her snack just two hours before and had drank milk in between, so, consequently, she was only mildly interested in dinner.)  Eating an hour later has been a transformation –  she ate marvelously and ate everything from fish to broccoli to berries to a nice piece of Manchego (the King of Cheese).  So, it’s working!   The next day, she ate like a bird and acted like bananas were the devil (a  former favorite). Even if she has days like that, I try to remind myself that she will not starve and that maybe she’ll eat more at the next meal (this is SO hard.)  This structure of eating has made my days better, too.  I don’t have to constantly find something for her to eat.  Other than her snack, we’re all eating at the same time.  This will get harder as she gains the ability to ask for things and tell me she’s hungry.  I’ll tackle that problem when it gets here.  Hopefully between now and then, she’ll form the habit of knowing when food is served and being willing to wait till we can all sit at the table together for the family meal.  Also, because she eats so much quantity at each meal, she’s often not even that hungry until about 30 minutes before the next meal. So waiting for the meal is as simple as distracting her with playing in another room with Matt, or just including her in the cooking process like holding the herbs, or a peeled carrot, or whatever.  She sits on the counter a lot 🙂

The recipes today come from two cookbooks.  The fish recipe came from Tyler Florence’s book, Start Fresh, which is an absolutely wonderful book filled with recipes I would be just as happy eating as I would serving them to a toothless baby or toddler.  Toward the end of the book, there are recipes for the whole family to share.  My wonderful friend, Becky, sent this cookbook to me as a gift to me and Olive, and she put sticky notes all throughout the book with comments she made about which recipes looked good, which she wanted to try, etc.  It made me miss her so much and long for my genius-in-the-kitchen friend to be beside me, cooking and enjoying these recipes with me.  I’d recommend doing that to any cookbook you buy for someone – it just made it seem like she was here with me as I looked through it.

The tartar sauce recipe comes from the Bonne Femme cookbook and I swear to you, this is THE best tartar sauce I’ve ever had.  It puts every other tartar sauce to shame.  Makes them seem like a joke.  Like mayo with pickles.  This has tang and zip and crunch and so much flavor, I really will never feel satisfied eating any other tartar sauce, ever again.  (Dramatic, much?)  I’ve made two batches since last week and turned the latest batch into a potato salad.  Amazing.  You can’t go wrong with these recipes and I feel that this would even be an acceptable meal for a kid who does not like everything.  Surely on this plate, any kid could find SOMETHING they were happy to eat!

fish and taters004

Oven Baked Fish Sticks with Roasted Potatoes
serves 4

1/2 cup buttermilk
1 lb cod or tilapia fillets, cut into 1 inch wide fingers
1 cup panko breadcrumbs (I ran out of panko and used plain and it worked fine)
2 tsp fresh thyme leaves
Salt and freshly ground pepper
1 lb assorted baby potatoes, scrubbed and quartered
2 tbs olive oil

Preheat the oven to 400F.  Line two rimmed baking sheet with parchment paper.

Pour buttermilk into a large bowl.  Add the fish pieces and turn to coat.  In another bowl, stir together the panko, thyme, and salt and pepper to taste.  Dredge each fish finger in the breadcrumbs to coat completely and arrange on a baking sheet.

Combine the potatoes (and broccoli pieces, or asparagus or green beans – whatever other green veg you want!) in a bowl and drizle with the oil.  Toss to coat thoroughly, then arrange the vegetables on the other baking sheet.  Bake the fish and vegetables, turning once, until the fish fingers are golden, about 15 minutes.  The potatoes may need longer.  If so, simply take the fish out when they’re done and tent with foil to stay warm.

Serve fish (and potatoes, really) with tartar sauce!

fish and taters012

fish and taters005

Tartar Sauce
makes about a cup

3/4 cup high-quality mayonnaise (we think, aside from homemade, that Hellmans REAL mayo is the best.  No low-fat or miracle whip crap.)
2 tablespoons chopped cornichons (small sour French pickles)
1 small shallot or 1 scallion (white part and some tender green tops), minced (about 2 tablespoons)
1 tablespoon finely chopped fresh parsley or fresh parsley and chives
2 teaspoons Dijon mustard
2 teaspoons capers, drained and chopped
2 teaspoons white wine vinegar or fresh lemon juice
2 teaspoons finely chopped fresh tarragon or chervil
Salt and freshly ground black pepper to taste

In a bowl, gently fold the mayonnaise, cornichons, shallot, parsley, mustard, capers, vinegar, and tarragon together (don’t mix too vigorously, or your sauce will be too smooth). Season with salt and pepper. Cover and refrigerate for at least 1 hour, and preferably 2 hours, before serving. Store, covered, in the refrigerator for up to 1 week.

fish and taters008

Potatoes Gratin

food-12

This is such a beautifully simple dish.  It’s also quite rich and begs that you throw away your fear of dairy, potatoes and butter and embrace how amazing those ingredients, in combination, can truly be.  This is not the potatoes gratin you are used to where rather thick slices of potato are all stacked on top of each other in a huge dish, covered in cheese.  This recipe actually has no cheese.  I know I’d had the dehydrated versions of potatoes gratin out of the box, and possibly something similar at a buffet, but I’d never tried making it myself until we read the book, Must Have Been Something I Ate, by Jeffrey Steingarten. (This book will change you.)

The section of his book that this recipe comes from is entitled “There is a God in Heaven”, (I love a person as emphatic about food as I am)  with the quote beneath the section headline, “But as luck would have it, there is a God in Heaven.  Medical researchers now know that not all saturated fats are the same, and that cocoa butter does not raise our cholesterol.”  And in that section is an entire chapter dedicated to Gratin Dauphinois (the French created this dish, of course), or Potatoes Gratin.  Gratin, coming from the word “gratter”, meaning, “to scrape”  referring to the crispy bits of cream that get glued to the sides of the pan and scrape off and crunch so amazingly well.  Say no more.

We have eaten this dish as a meal, before, but it goes best as an accompaniment to a really great steak and a really fresh salad or other light side.  Also, don’t make the mistake of serving a rich dessert  after eating these potatoes.  I’m all for indulgence and you will never, ever find me saying that you should avoid entire food groups or ingredients altogether (bring on the corn, cheese, gluten, you name the poison) but I am also not dumb enough to serve a rich dessert after a dish this heavy.  You’d sink all the way to the bottom of the playa lake.  Everything in balance!

food-15

Potatoes Gratin*
serves 6-8 as a side

4 tbs butter, softened to room temp
1 cup whole milk
1 large garlic clove, peeled and lightly crushed
1/2 tsp freshly ground pepper
3/4 tsp salt
1/8 tsp freshly ground nutmeg
1.5 lbs baking potatoes
1.5 cups heavy cream

Preheat your oven to 425F. Place the milk, garlic clove, pepper, salt and nutmeg in a small saucepan, stir, bring to a boil and then remove from the heat.
Meanwhile, liberally butter the bottom and sides of a 9×13″ baking dish, using about half the butter.  Peel the potatoes, rinse them, and pat them dry.  Then, slice them 1/8th of an inch thick, discarding the smallest slices (This is easier with a mandoline) The cooking times really depend on this thickness, so don’t go too much thicker.  Under no circumstances should you wash the potatoes after they have been sliced — the surface starch is absolutely indispensable.

Evenly arrange the potatoes in the buttered dish in ONE LAYER of overlapping slices.  You will undoubtedly have some slices left over.  Don’t try to cram them in.  Bring the milk to a boil again and pour it over the potatoes, removing the garlic.  Cover the pan with a sheet of foil and bake in the middle of the oven for about 15 minutes, until most of the milk has been absorbed.  Meanwhile, bring the cream to a boil and remove from heat.  When the potatoes are ready, remove and discard the foil.  Bring the cream back to a boil and pour it over the potatoes, dotting the surface with the remaining butter.

Bake, uncovered, for another 20 to 25 minutes, until the potatoes have turned golden brown, spotted with darker, crisp areas.  You may need to rotate the dish halfway through cooking to ensure an even browning. We love thyme leaves in this dish and will sprinkle some on when the dish is nearly done baking.  Let the gratin settle for 10 minutes.  Then eat immediately – taste and texture suffer with each passing minute.  Cut into 6 to 8 rectangles and serve with a wide, metal slotted spatula.

*most of the text taken directly from Jeffrey Steingarten’s book.  Go get it!

food-14

Creamy Rice with Peas and Asparagus

pea asparagus rice

There is a beautiful quarterly cookbook/magazine called Canal House cooking.  It is founded by two friends who meet together every day to talk about what they had for dinner the night before, and then they get cooking.  They decided to start writing down their recipes and what resulted was this beautiful magazine book.  I like to try recipes out that are in season, and so I am currently going through their Spring issue.  And even though there aren’t a  lot of fresh peas in our produce bins, I know that they are currently in season somewhere out there in lands where it rains, so I felt this was still an appropriate recipe for an overcast May day.  Asparagus is also in season, so I added some chopped up that I had roasted a few nights before and it was a really excellent addition.  Canal House calls this dish Risi E Bisi  (rice and peas) and it’s just that simple.

This is an excellent dish for little ones.  The comfort of soft rice and cheese and the addition of greens and a dab of butter makes this dish all-inclusive. For smaller, toothless ones, this would be so simple to pulse a few times with an immersion blender!  Olive still doesn’t like asparagus, but I think I’ve only given it to her 5 times.  I’m going to try at least 15 more times before I determine that she does not, in fact, love asparagus.  I challenge any  mom out there to do the same!  Case in point: I had nearly determined that Olive didn’t like peas until I hadn’t given them to her for a week or so, and then tried again and she gobbled them up.  I realized that familiarity equals good for a child.  So if you make a wide variety of vegetables simply familiar to a child, the enthusiasm will soon follow.  I believe this with all my heart, even on days where Olive spits out anything green.  One day she won’t, and I’ll be glad I didn’t let her under-developed, under-exposed palate determine her food preferences!

green rice

Creamy Rice with Peas and Asparagus
serves 6

2 tbs extra virgin olive oil
4 tbs butter
1 onion, finely chopped
2 cups fresh peas (you could also use frozen, as I did and it turned out great)
salt
6 cups hot chicken or vegetable stock
1 1/2 cups arborio rice, or other short grain rice.  I didn’t have any on hand, so I used plain long grain white and it was just fine.
1/2 cup freshly grated parmigiano-reggiano
pepper to taste
1 bunch asparagus, roasted at 400 with olive oil, salt and pepper until tender

Heat the olive oil and 2 tbs of the butter together in a heavy medium pot over medium heat.  Add the onions and cook until soft and golden, 5-10 minutes.  Add the peas and season with salt.  Cook for a minute or two, then add 1 cup of the hot stock.

Cover the pot, reduce the heat to medium-low, and simmer the peas until they begin to soften, about 5 minutes.

Stir in the rice and 4 cups of the remaining hot stock. Cover the pot and adjust the heat to maintain a gentle boil.  Cook the rice, stirring occasionally, until tender, about 20 minutes.

Remove the pot from the heat and moisten the rice and peas (if needed and too thick) with the remaining cup of stock (I didn’t do this step – my rice didn’t absorb as much as arborio would have) Stir in the remaining 2 tbs of butter and half of the cheese.  Fold in the chopped, roasted asparagus if you want.  Season with salt and pepper and serve sprinkled with remaining cheese.

Cooking from a Food Memory

Chicken Brian

The first time I went down to Tulsa, Oklahoma to meet Matt in person, we ate this dish together with his family at a restaurant called Carrabba’s.  (We met via instant messenger, after a dear friend of mine, who was talking to both of us at the same time said, “Here, you guys talk to each other, you’re telling me about the same band” (Jurassic 5) and after talking that day, we talked every day, increasing in hours logged (we had only land lines way back in 2003 and ran through multiple calling cards each week.)  6 months later we were engaged, and a year after that, we got married.  We’ve been eating good meals together ever since. Aww)

Matt ordered the Chicken Bryan and we both marveled at the melty goat cheese and sun dried tomato mix that was tangy and sweet.  A revelation!  Since that day, I’ve tried to recreate it multiple times, but I never can quite replicate it.  (Not enough butter?)

This week, I tried again and I’m slowly getting closer.  It’s such a good dish, and as I look at their online menu, it says they drizzle a basil lemon butter sauce on top.  Ah.  That might help. Will try again next time!  I happily used up the rest of my goat cheese and even made a mini portion on a bread and butter China plate for Olive, just so she’d feel fancy, too.  (I think it worked, as she made some of the chicken into a hat near the end of the meal.)

As a side, I made the creamed spinach and basil recipe from a few weeks ago, and put a scoop inside squares of puff pastry, baked it, and although they didn’t stay together in the neat little pouches I folded, they were still amazingly good and a perfect side for this dish.

spinach puffs 2

Chicken with Sun Dried Tomatoes, Goat Cheese and Basil
serves 4 to 6

1 lb chicken tenderloins
Salt and pepper
4 tbs olive oil
1/2 cup sun dried tomatoes, sliced in half
8-12 basil leaves
1 shallot, diced small (1/4 cup – you can use an onion if that’s what you have on hand)
1/4 cup white wine or chicken stock
4 oz goat cheese

Pat the chicken dry with paper towels and season each side with kosher salt and pepper.  Heat olive oil (go two tablespoons at a time) over medium heat until shimmering and cook the chicken strips in batches, not over crowding the pan, or they won’t get a good sear.  Chicken strips don’t take long to cook, maybe 1-2 minutes per side. Let the strips sit on a plate, covered in foil to keep warm until ready to plate.  In your empty skillet, add the diced shallot and saute until golden.  Then, add in a splash of wine or chicken stock, scraping up the browned chicken bits and then add a tablespoon of butter to make a pan sauce.  Set your sauce off the burner so it won’t continue to reduce.

Put your chopped sun dried tomatoes in a saucepan with a quarter cup of water and let it simmer to re-hydrate a bit.  Assemble the chicken, two strips per plate, with a sprinkling of sun dried tomatoes, a basil leaf or two, and a slice of goat cheese.  Place the plates under the broiler until the cheese melts.  Drizzle your reserved sauce over the cheese and serve!

Pasta Carbonara – tried and true recipes

pasta carbonara bowl

I’m going back to some basics this week.  I’ve exhausted myself on trying something new nearly every single day for two months.  Time for some repeats!  I have made some form of pasta carbonara on a regular basis since Matt and I were first married, 8 years ago.  Carbonara is one of those dishes that you can nearly always make, even when you don’t think you have anything in the fridge for dinner.  (Hello, Monday dilemma)  Nearly everyone has some form of pasta on hand. Carbonara is traditionally made with spaghetti, but it can really be just fine with any kind of dried pasta you have on hand.  Also – most people have bacon either in the fridge or freezer.  The sauce for this dish comes from cheese and egg yolks – that’s it!  And if you’re wanting something extra tossed in, try frozen peas or corn or lima beans – any kind of random bag of frozen veg you have in the freezer that has been labeled “too little for a side dish, too much to throw away”

I love the comfort of this dish – I love the simplicity and I love that in about 25 minutes, I can have a dish on the table that makes everyone feel good.  The little darlin’ loved it, too.

pasta carbonara for lunch

carbonara

pasta carbonara

Good for little fingers is any kind of smaller pasta such as rigatoni, fusilli, macaroni, or these cute little corkscrew shapes (which I think are just un-trimmed macaroni)  really – whatever you think your toddler can grab or stab with a fork – go for it!

carbonara bowl

Pasta Carbonara
serves 2.5 (two big people and one little person) or 4 as a side dish

8 ounces dried pasta, cooked al dente (maybe cook a little longer for the baby if they don’t have more than 8 teeth, like mine)
4 strips of bacon, cut into 1 inch pieces
1 small onion, diced small
2 cloves of garlic, minced
1/2 cup frozen peas (or other vegetable of your choice)
1/2 cup grated parmesan cheese
2 egg yolks

1. Salt your pasta water.  I usually put about 1/4 cup of salt into a large pot of water (at least a half gallon of water.)  EEEEEEEK, SALT!  Here’s the thing: it flavors your pasta.  You don’t have to salt the dish upon completion because you salted along the way.  Just enough salt gets absorbed into the pasta and it’s perfect.  The noodles could be eaten on their own.  Try it next time.  And if you’re still worried, just look at how much sodium is in the powdered cheese on your blue box mac and cheese.

2. Bring the water to a rolling boil and cook the pasta till al dente, or a little over for the little mouths that will be eating.  Reserve a cup of pasta water and then drain your pasta, rinse and set aside.

3. Cook the bacon strips in a large skillet over medium heat until crispy.  Reserve on a paper towel and drain all but a tablespoon of the oil from the pan.  Toss in your onion and garlic and cook, stirring, until translucent.  Add in your frozen vegetables and pasta and a splash of the pasta water and stir until combined.

4. Remove the pan from the burner and while stirring constantly, add the egg yolks and cheese.  Stir stir stir stir as to not get scrambled eggs.  The heat from the pasta will cook your yolks and they will combine with the cheese to make a sauce.  If the pasta looks a bit too dry, add more of your reserved water and stir to combine.  Pasta water is starchy and salty and PERFECT for making a pasta sauce.

5. Fold in the bacon, garnish with more cheese, if desired, and serve with a crusty piece of buttered bread.

6. And a glass of Malbec for the big people.

Enjoy!

Homemade Goat Cheese

pure goat cheese

Good Monday Morning to you all!  I’ve been meaning to blog about homemade goat cheese for several weeks, now.  I stumbled upon this process because I’d bought a quart of goat’s milk when Olive was starting to wean and I read or heard or saw somewhere that goat’s milk digests easier than cow’s milk, so I figured I’d give it a shot.  I naturally tasted it before I gave it to her.  It tasted like liquid goat cheese.  I wouldn’t personally want to drink that, but I let her try it in the name of not pushing my personal tastes onto my child.  She wouldn’t take more than one sip.  Actually cried (this was around 9 months) so I bought a quart of whole cow’s milk instead and we haven’t looked back.  So I turned the goat’s milk into a nice, creamy 4 ounce log of goat cheese with garlic and herbs.  It was delicious.

I guess I’ll take this time to tell you that I don’t believe in eating something just because it has health benefits.  Eating grass straight from the yard is probably beneficial in some way, but that doesn’t mean I’m going to do it.  I believe things should have flavor, seasoning, and should taste wonderful in addition to however many antioxidants they might have.  So this, I suppose, ties in to the way I have always cooked for Olive.  I haven’t ever given her something without seasoning.  From 6 months, whatever she’s eaten has been seasoned with something (yes, less salt than I’d prefer, don’t worry.) And now that she’s eating from the table, it’s game ON.  Welcome to the wonderful world of food, Ollie.  We have chocolate!

Making goat cheese is easier than making bread, but the two go together quite nicely.  I don’t personally think that it’s easier or cheaper than buying goat cheese at the store.  I think a quart of goat’s milk is comparable to a cheap log of goat cheese.  However, it’s fun to do stuff from scratch, it’s creamier, tastier and gives you a sense of self satisfaction that you did something the old way.  Isn’t that reason enough to at least give it a try?


DIY Goat Cheese – adapted from Serious Eats
makes one, 4 oz log of goat cheese

1 quart of full fat goat’s milk (I bought this brand)
1/4 cup freshly squeezed lemon juice (from one large lemon, maybe two)
1/2 clove freshly grated garlic
a few pinches of salt
Herbs – whatever sounds good to you (rosemary, chives, herbs de Provence, non herbs like honey, chopped dried fruits, etc.  Possibilities are endless.  If you use something sweet, omit the garlic)

Fill a medium saucepan with goat’s milk.  Heat gradually until it reaches 180F.  Watch closely.  It shouldn’t take more than 15 minutes.  A candy thermometer works nice in this situation, but I used a probe meat thermometer the second time because it was more accurate (pictured here was my first attempt.)
cooking goat milk

Once it hits the magical temperature, remove from heat and stir in lemon juice. Let stand until milk starts to curdle, about 20 seconds. Don’t expect curdles, like cottage cheese curdles. Slight clumping will occur, but nothing too drastic. You can add a few extra droplets if nothing is actually happening.

Line a colander with a thin, flour sack kitchen towel.  Or lots and lots of layers of cheese cloth that you probably don’t have on hand.  Most of you have a thin kitchen towel that you can almost see through. As long as there aren’t holes, use it.  It’s efficient, it works great and just remember to wash it quickly and don’t throw it in the used-towel bin for a week all wadded up in a sweaty goat cheese smelling ball.  Like I did.

Set your lined colander over a deep bowl and ladle in the milk.  It will seem like it’s all seeping through, but don’t fret. Tie up the ends of the towel and suspend over the bowl and let it drain for about 2 hours.
straining goats milk

Transfer the cheese to a bowl and mix in seasonings to taste.  The first time I did it, I added the grated garlic, salt and about a teaspoon of herbs de Provence.  The second time, I roasted my garlic and added in olive oil.  SO GOOD. This time, I left out the garlic and stirred in some raw honey and a little salt and used it in a salad recipe from the Bonne Femme cookbook.  Amazing results.  Have fun with it!

After you mix in your flavors, if you want to be able to cut it or have some sort of shape, wrap it up in plastic wrap and leave in the fridge for a couple hours to let it firm up.  (see below) then you can cut it for bread or whatever you like.

goat cheese with baguette and raw honey


With just bread and extra honey it’s basically a dessert!

goat cheese honey salad


On top of baguette slices, broiled and then drizzled with extra honey.  Set on top of a mixed greens salad with toasted pine nuts and a sherry vinaigrette.  An excellent lunch!

Asparagus Tart – Roasting is still the best way to eat vegetables

asparagus tart 3

I know I said I’d write about what got the most requests on my question last week, but I haven’t had time to do a good job with the requests I got, so that will come at a later post.  The top requests were for kale.  Honestly, I’m a bit stumped.  What, exactly, is the mystery?  Put it in stuff?  Ha!  That would be my suggestion.  Stir it into soups, toss it in salads and wilt it a bit with warm roasted chicken or hot bacon.  However, I don’t want to be flippant, so I will look up some good uses for kale, the sad-replacement-for-chips, and get back to you.  The other suggestion that intrigued me was for proper hash browns.  My friend, Maria, said that she had tried them several times and hadn’t gotten that good, diner-esque texture to them.  Honestly, I haven’t, either.  So I am interested to look up ways to cook hash browns well and that will most definitely be a post, as it will be a learning process for me, as well.

Today I wanted to simply give you an awesome recipe that we had last night for dinner, as our “starter” dish.  A beautiful use of asparagus (hey, Tracey, you asked for asparagus recipes, too!) and a lovely and exciting way to serve them that feels indulgent (bet you’ve never used that word in association with asparagus) and fun for children, and even doable for one-year-olds learning to eat bigger chunks of food.  Olive ate about 6 bits of this tart and then she was done. I consider that a success.

Having a box of frozen puff pastry in your freezer at all times is a good move.  This stuff can make you look like a fabulous cook in about 20 minutes.  You can top it with anything and bake and have great appetizers, desserts, or a crust for a savory tart, like this one.

Also, I wanted to mention my deep love and perhaps borderline obsession with using up leftovers.  My goal at the end of most weeks is for my fridge to be empty, save condiments and milk.  It’s good to think of ways to use up your leftovers and I know no better way than to use eggs to achieve almost-better-than-the original-meal leftovers.  This morning, I took leftover pieces of the asparagus tart and fried an egg and put it on top.  Lots of fresh ground pepper and a few drops of hot sauce.  So good.

breakfast2

Asparagus Tart

serves 4

1 sheet of puff pastry, thawed
1 bundle of fresh asparagus, ends snipped and cut in half, length-wise (I found that this helped them cook faster than the original recipe)
Olive oil to coat the asparagus – 2 tbs
Freshly ground pepper and kosher salt
2 oz shredded Manchego cheese – Parmesan or Swiss would also work

Preheat the oven to 400F.  On a greased, rimmed baking sheet, roll out your puff pastry to about 9×13″ rectangle.  Poke all over the bottom with a fork and bake for 15 minutes, until golden.  Toss your asparagus in olive oil. When the pastry comes out, it will have shrunk.  It’s okay, I swear.  Cover the tart in the shredded cheese and lay your asparagus spears side by side, touching, and alternating head to toe (this just makes more asparagus fit and it looks prettier.)

asparagus tart 1


Sprinkle the top of the tart with salt and pepper.  If you have leftover asparagus spears, just place them, cut side down, on the baking sheet around the tart.  They turned out to be gloriously crispy when they came out.  Bake for 25 minutes until the asparagus is nicely wilted and slightly browned.  Let cool slightly, cut with a sharp knife into squares and serve!

In the morning, heat leftovers in a 350F oven and fry an egg to place on top.  Enjoy with a cup of coffee and try not to think about the fact that it’s only Wednesday.

asparagus tart 2

breakfast

*original recipe from Martha Stewart Living

Chicken Saute with Sweet Potatoes and Rosemary

sweetchick3


march2013-00008

My little eater is back.  She had a week of not wanting to eat much at all and being rather scared of texture and new things, but we are officially back in the game.  It’s a relief, really.  I spend the majority of my days figuring out what to cook next.  I will clean up from breakfast and think about what I need to do for lunch.  After Olive’s afternoon snack, I clean up and think of what I need to start for dinner.  I really love it (thank goodness), but when you spend that much time preparing food, you naturally want everyone at the table to consume it.

Our food structure in the day is this:  Breakfast (usually oatmeal with some kind of fruit and milk), Lunch, snack around 3:30-4, Dinner, a little milk at bedtime.  That’s the only times Olive eats.  She doesn’t snack on anything between breakfast and lunch, or between lunch and 4 or between 4 and 7ish.  I really think that when you’re trying your best to get your children to eat a variety of good foods, it’s just shooting yourself in the foot if you let them snack around the clock.  In my (very short) experience so far, when Olive is hungry at meal times, there is rarely a fight over what is served.  She is rarely picky.  I think if she’d had a snack an hour before sitting down, it would be a lot easier for her to reject something new (tonight was roasted beets, pan fried fish and a tomato/bell pepper sauce).  And it’s happened before when she’s had a TON of milk before a meal.  Won’t eat.  Personally, I can’t handle going to the trouble of  cooking and having someone at the table refuse it and then beg for a snack 30 minutes after dinner is over.  The master chef, Fernand Pointe said, “Hunger is the best sauce” and I really love that imagery.  A sauce is a finishing touch – usually the part of the dish that makes it a little indulgent, a little special.  If you are hungry for a meal, everything is just a little more delicious than if you were merely eating because it was mealtime.  I’m not afraid of Olive being hungry.  I think it’s one of the very first lessons in delayed gratification that desperately needs to be instilled at an early age.  So many life lessons are learned by cooking and eating together, and this in my opinion, is one of the most basic.  Wait.  And how wonderful that you have at least 3 times a day to reiterate that important rule.  You wait to be served.  You wait on others before you start eating.  You wait and ask before getting down from the table.  You wait while others are talking before you talk.  It’s beautiful to me how sharing food can teach so much, and not only to children, but to adults as well.

This simple meal comes, once again, from Wini Moranville’s book, The Bonne Femme Cookbook.  A simple chicken dish and the sweet potatoes are an excellent finger food for little eaters.  I choose a baked tomato dish from the book as an extra side for this meal.  Everyone at the table enjoyed it all.  Olive liked the baked tomatoes the least and the chicken the most (but she tried everything) 🙂

sweetchick2

Chicken Saute with Sweet Potatoes and Rosemary
serves 4

2 slices thick-cut bacon
Vegetable oil
2 1/2 tbs unsalted butter
2 to 3 large sweet potatoes, peeled and cut into 1/2″ dice (4 cups)
Salt and pepper to taste
1 large shallot, sliced (about 1/4 cup)
1 tbs chopped fresh rosemary
4 boneless, skinless chicken breast halves
1/2 cup low sodium chicken broth
1/4 cup Calvados (apple brandy – can be found at most liquor stores) or 1/4 cup apple juice and 1/4 cup dry white wine
1/2 cup heavy cream

Preheat the oven to 300F.
Cook the bacon in an ovenproof skillet over medium heat until crisp; remove with a slotted spoon and drain on paper towels.  Measure the drippings from the skillet and add enough vetetable oil to equal 1 1/2 tablespoons.  Reduce the heat to medium and melt 1 1/2 tablespoons of the butter with the drippings and oil.  Add the sweet potatoes and salt and pepper.  Cook the potatoes, stirring occasionally, until browned and softened, about 15 minutes; add the shallot and rosemary to the pan after 5 minutes.  Transfer the skillet to the oven to keep warm.

Meanwhile, place the chicken breasts, one at a time, between two sheets of plastic wrap and pound to 1/4 inch thickness.  Season both sides with salt and pepper.

In another large skillet, melt the remaining 1 tablespoon of butter over medium high heat.  Add the chicken in batches and cook, turning once, until no longer pink inside, 6-8 minutes.  Transfer the chicken to a large platter and cover with foil to keep warm.

Remove the pan from the heat and add the chicken broth and Calvados, taking care not to let the liquid splatter.  Stir with a whisk to loosen any browned bits from the bottom of the pan.  Return the pan to the heat, bring to a boil, and boil until the liquid is reduced to 1/3 cup – this should take about 2 minutes, depending on the heat and your pan size; it will take closer to 4 minutes if you’ve substituted apple juice and wine for the Calvados.  Whisk in the cream and cook to a desired consistency.  Adjust salt and pepper to taste.

Crumble the bacon and stir it into the sweet potatoes.  Arrange the chicken on four dinner plates, arrange the potatoes around the chicken, spoon the sauce over the chicken and serve with Tomatoes au Four (recipe below).

Tomatoes au Four

Tomatoes au Four
makes 4 to 8 servings

4 medium-sized ripe tomatoes, cored, halved and seeded
1/2 cup panko bread crumbs
1 small shallot, finely minced (about 2 tbs)
1 large garlic clove, minced
2 tablespoons finely chopped fresh parsley
1 teaspoon snipped fresh thyme, or 1/4 tsp dried thyme, crushed
Salt and pepper to taste
2 tbs extra virgin olive oil

Preheat the oven to 400F. Lightly oil a baking dish large enough to hold the tomatoes without too much crowding.  Place the tomatoes, cut sides up, in the baking dish.

In a small bowl, combine the bread crumbs, shallow, garlic, parsley, thyme and salt and pepper.  Stir in the olive oil.  Spoon this mixture evenly over the tomatoes.

Bake until the tomatoes are hot and the bread crumbs are lightly browned, about 15 minutes.