Coconut Cream Cheese Pound Cake

ccc-1
This picture is of the cake resting on my toy kitchen that I had as a child.  Mom and I looked up pics of me and my cousin, Tracy, playing with this kitchen when I was three and she was five.  We were both wearing frilly dresses and prancing around the room with spoons in hand, creating recipes out of air and pretending it was delicious.  Ah, nostalgia 🙂 Doesn’t seem that long ago…
It’s funny how you can also be nostalgic about something that wasn’t even your personal memory.  My mom made this cake for my older brother and it was his favorite, but it became part of my food nostalgia anyway.  I think that’s another wonderful thing about food – others’ enjoyment of it can create memories for you, whether you took part or not.  I like remembering foods my brothers’ liked.  Matt loved cherry cheesecake, Chad was more of a savory guy and really had a thing for mustard.  I love both!  And I love that when I went home for a speedy trip this week to visit my mom, that we made this cake together and remembered good times.  Olive sat on the stove while Mom narrated my work to her as I made the cake.  Mom used to make it while I would sit on the counter and talk to her and now she plays with my daughter while I make it.  Life just doesn’t get sweeter than that.
ccc-2
Coconut Cream Cheese Pound Cake
1/2 cup butter
1/2 cup shortening
1 8-oz pkg. cream cheese
3 cups sugar
1 tsp coconut flavor
1/2 tsp. vanilla extract
6 eggs
3 cups flour
a pinch of salt
1/2 tsp baking powder
1 cup bakers coconut
Preheat oven to only 325 degrees.  Grease and flour a 10″ tube pan or bundt pan.  Cream butter, shortening and cream cheese together in a large bowl.  Gradually add the sugar, beating at medium speed until light and fluffy.  Stir in coconut flavoring and vanilla.  Add the eggs one at a time, beating well after each addition.  Combine the flour, salt and baking powder and add to batter.  Stir just until blended.  Fold in the coconut.  Pour the batter into a prepared tube pan or bundt pan.  Bake for 1 hour and 15 minutes, or until a tester inserted in the center comes out clean.  Cool in the pan on a wire rack for 10-15 minutes.  Remove cake from the pan and allow it to cool completely on a wire rack before cutting.
This cake is dense and rich.  Don’t worry too much about the sugar content.  It’s not an iced cake, anyway!  Just imagine the sugar you wouldn’t bat an eye at putting into the frosting of a regular cake and instead, put it into the batter 🙂 And if you haven’t gotten the hint that weekends are for feasting and not for guilt, I fear you never will!  Happy Eating!
ccc-3

Grown-Up Sticky Buns

sticky buns

I decided to tackle a Pinterest recipe yesterday.  It had been sitting there on my Recipes board, looking amazing, yet going unmade and uneaten. (Also known as every pin on Pinterest)

The Butterscotch Spiral Coffee Cake was intriguing and beautiful and I loved how the original baker created one gigantic cinnamon roll effect.  I loved it so much that I didn’t do it that way.  I knew without a doubt, that mine would not look the same, I’d cut it wrong, placing it wrong, and get frustrated and end up drinking the whiskey instead of adding it to the caramel sauce.  So I decided I’d make a crowded pan of cinnamon rolls, call them sticky buns, and be happy!

I had a really great time making this recipe.  Matt is usually the one who bakes, but when I do, I really enjoy kneading the dough, working with it to form it into something pretty.  I love clearing off a huge space on our counter to roll out the dough.  Makes me think of my mom making biscuits.  There’s something so wonderful about baking that instantly connects you to bakers from centuries past, who had flour on their bellies from leaning against the counter too far, and a happy heart from their necessary taste-testing.

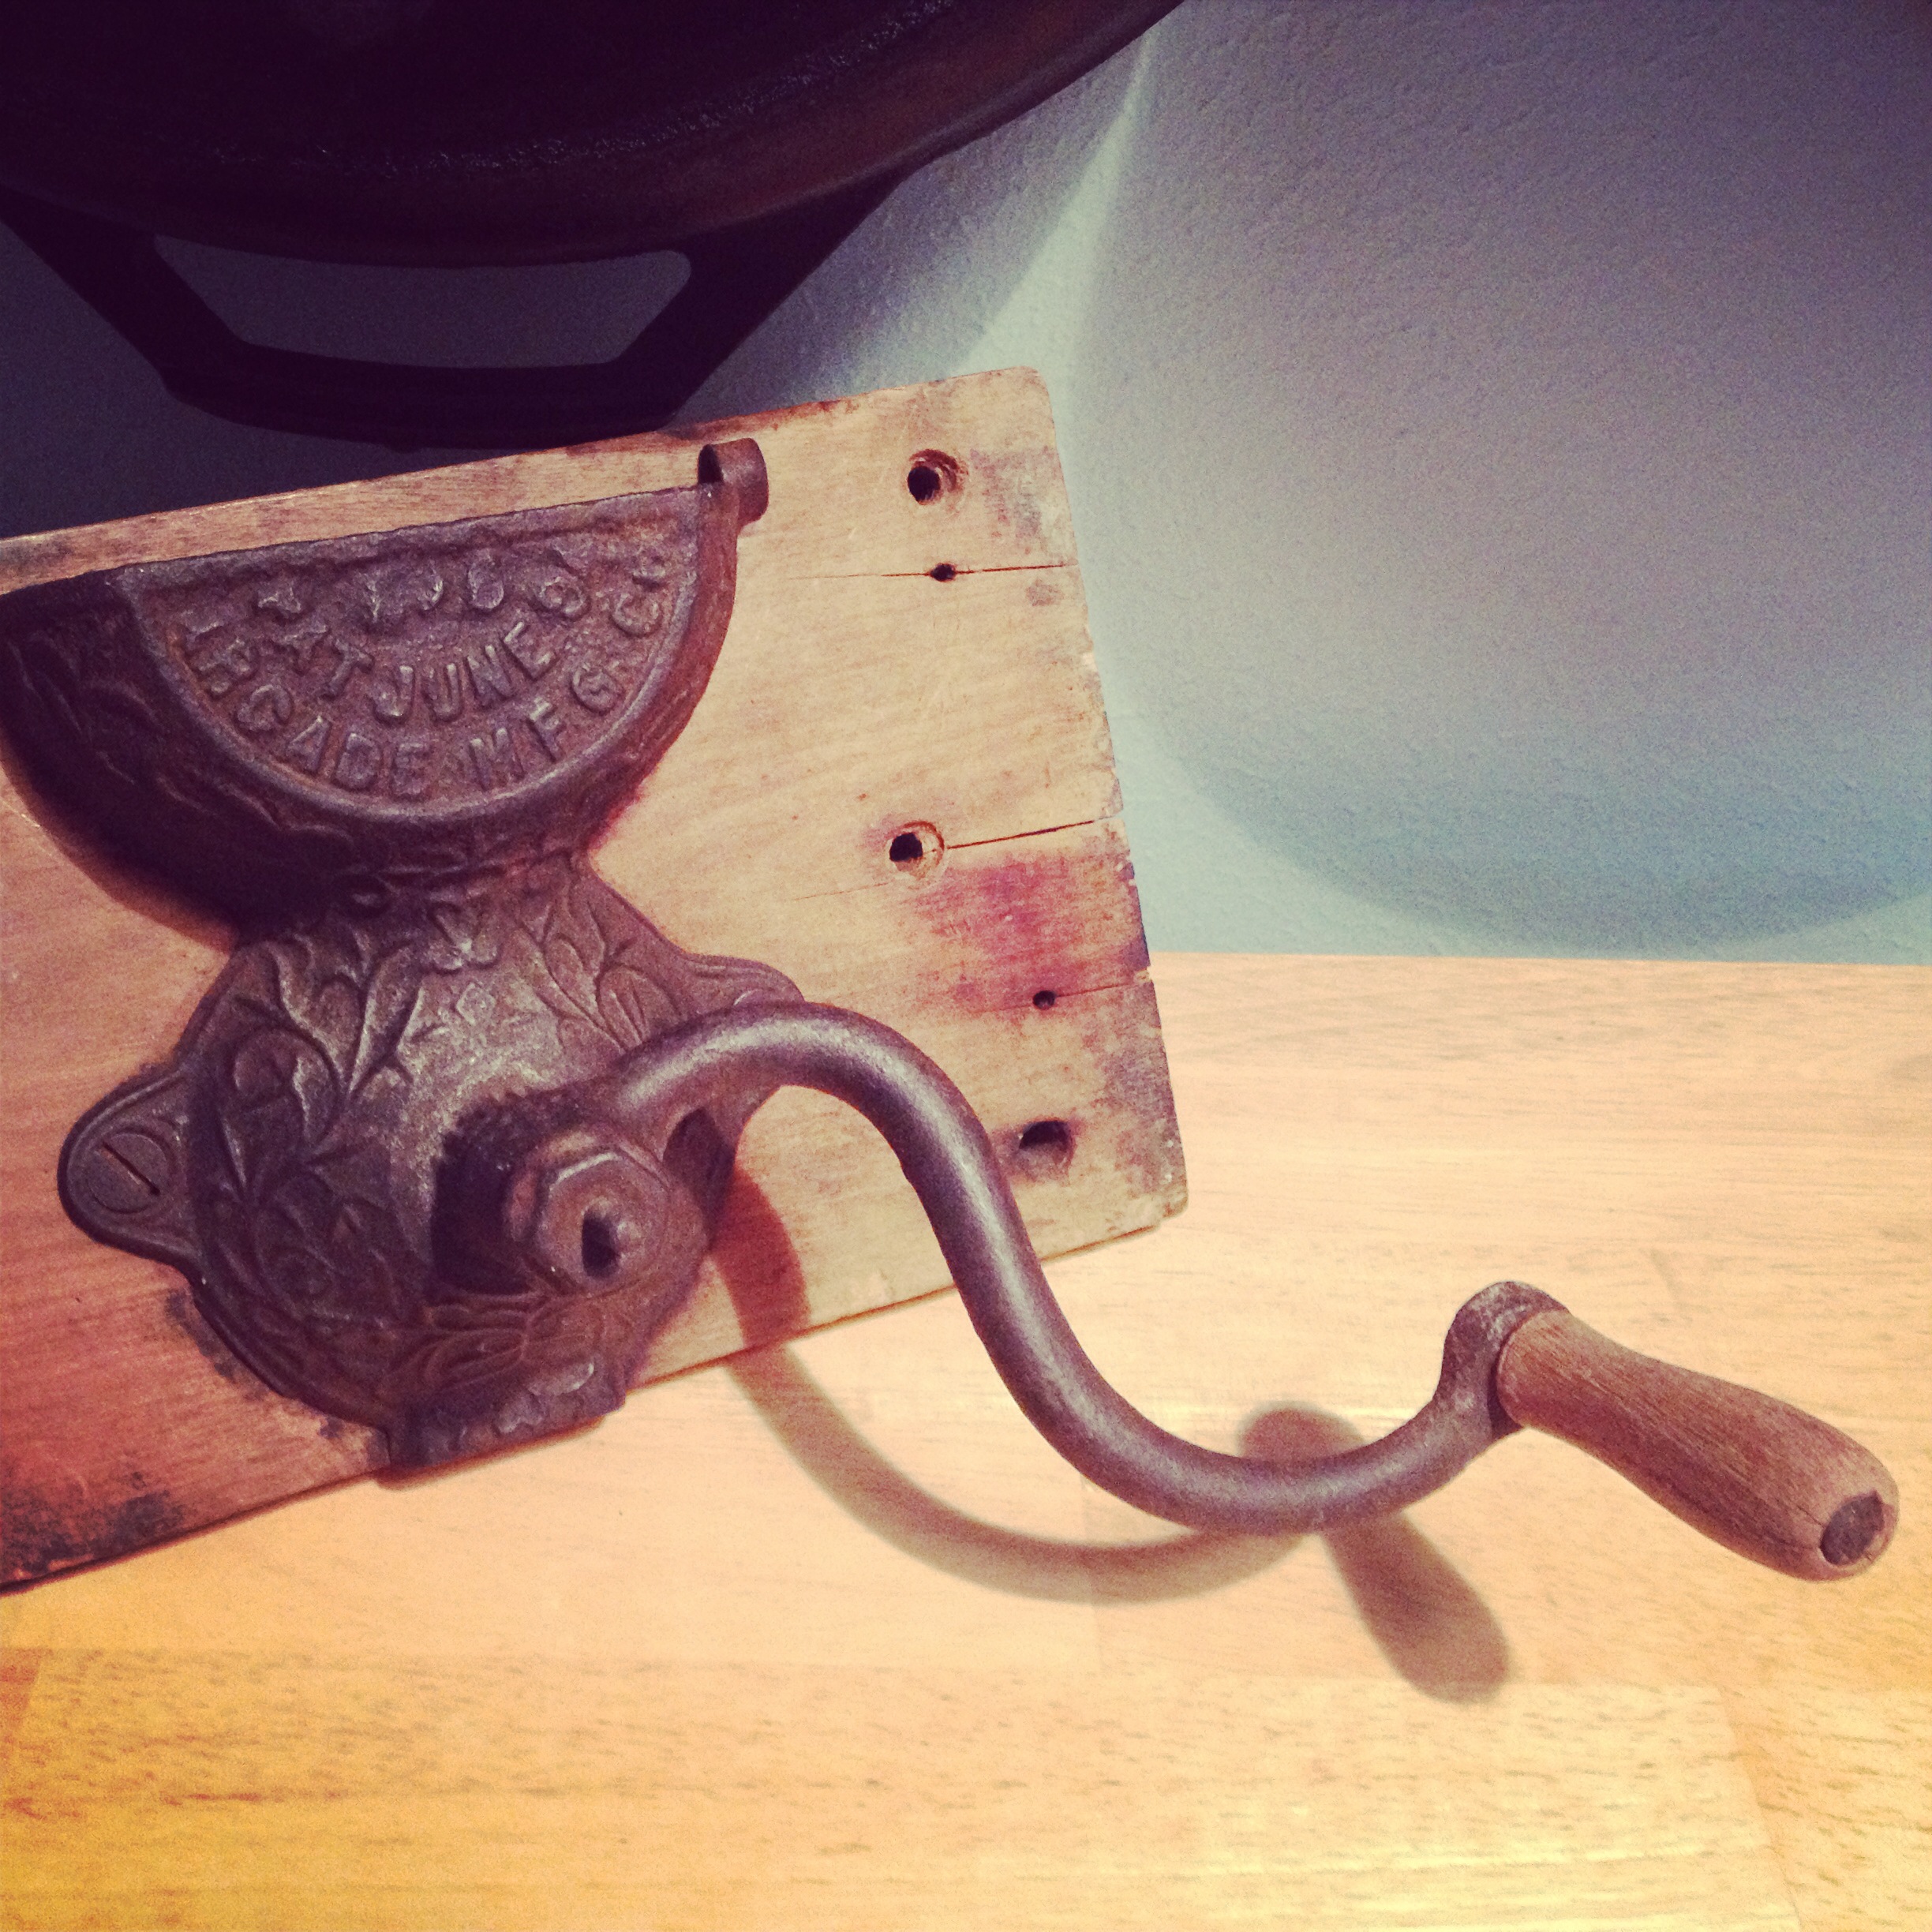
I used my antique coffee grinder

photo

to grind the cardamom pods because we have a spice grinder, but it’s forever known as Cumin Grinder because once you grind cumin seeds, congratulations, you now have an exclusive cumin grinder.  If you grind anything else, it will have a faint whiff of cumin, or B.O.  (also known as cumin).  I don’t know why we eat a spice that smells like B.O.  I’ll chalk it up to things that taste delicious but smell horrible.  Like cheese.  Oh, cheese, you stinky wonder…

The caramel sauce called for a teaspoon of whiskey.  My first thought was, “that’s not enough – just one teaspoon?” but when I gave Matt a taste, wanting him to identify the mystery ingredient, it took him a half second to shout, “You put whiskey in the caramel?!” Yes, and not just any whiskey, but his Laphroaig 10 Year Smoke Bomb whiskey.  (Not its official name) And even though there was only one teaspoon, it was obvious!  I also added a generous sprinkling of kosher salt, because I feel strongly that when something calls for brown sugar, butter AND corn syrup, you’ve GOT to add a bit of salt.  Everything sweet needs balance and caramel is definitely one of those things!  I also forgot to add butterscotch chips, like she did, but they were still amazing.  The dough has so much flavor, that you almost don’t need the extra sweetness.  However, I think adding the chips would be a great addition.

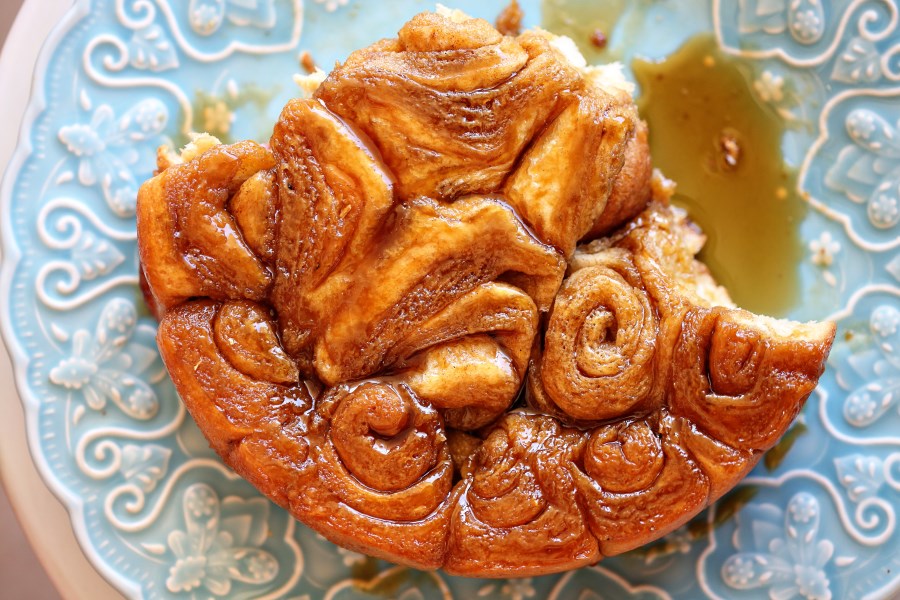
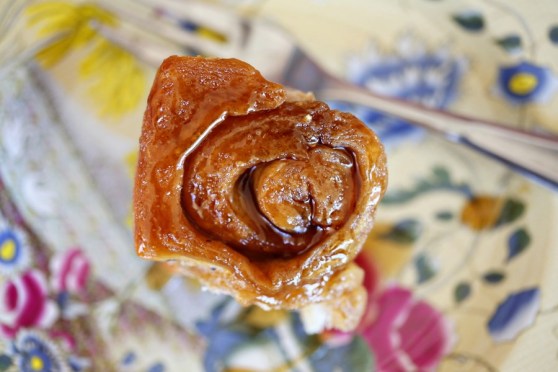
My crowded cinnamon roll approach kinda worked and kinda didn’t.  When they baked they BURST up out of the pan in a sprawling fashion.  No fuss – I just smooshed them back down before inverting them on a plate.

butterscotch sticky buns

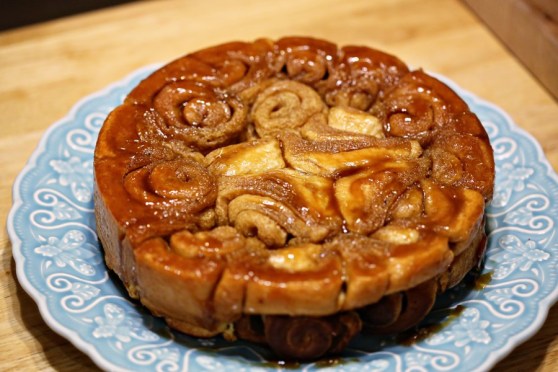
If you want to do the gigantic cinnamon roll swirl like the super cool blogger/baker lady did, go for it!  I know my weaknesses and copying a recipe word for word is one of them.  If you make it look different, you won’t be sad when it does.  (Make sense?)

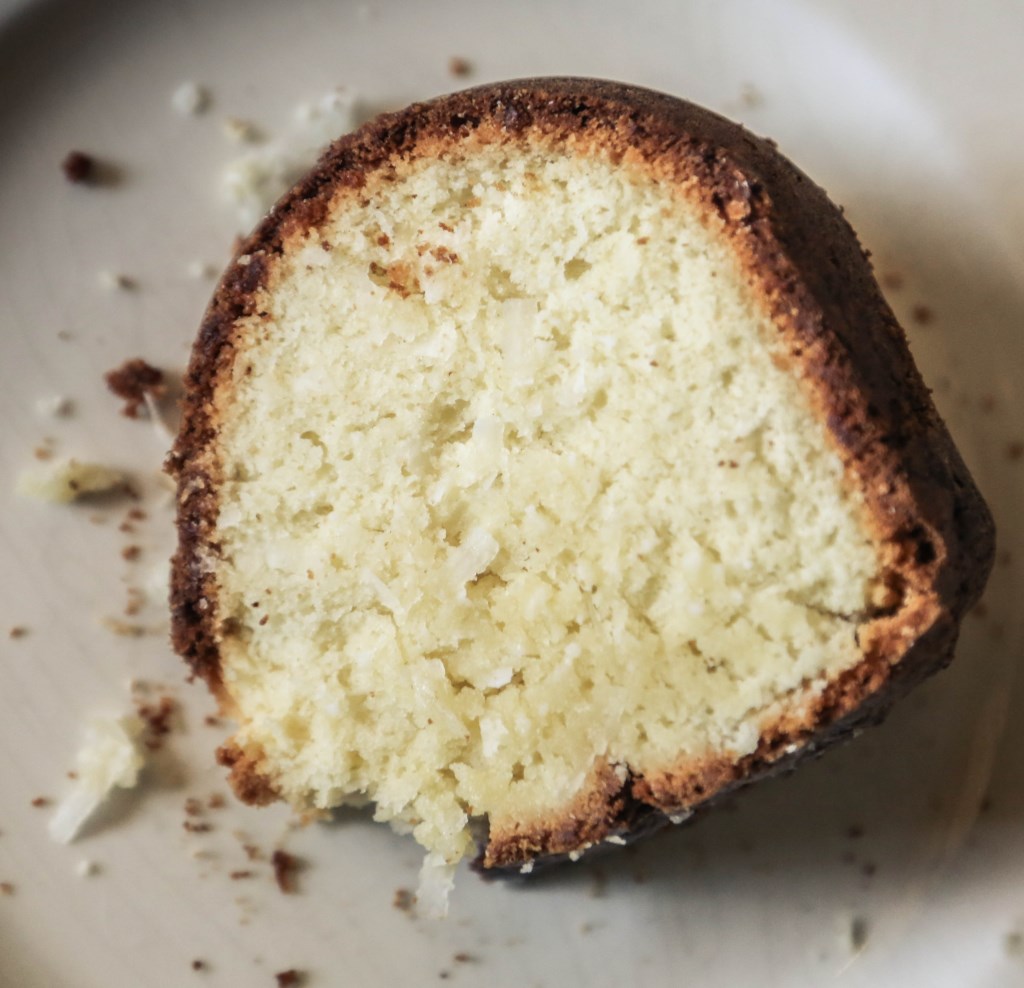
These are AWESOME, by the way.  Like Monkey Bread for grown-ups.  Sweet, buttery, sticky and with a hint of smoke.  Pretty amazing.

7G9A2625

Grown-Up Sticky Buns*

For the Dough
2 1/2 to 2 3/4 cup AP flour
1/4 cup granulated sugar
2 1/4 teaspoons instant yeast
1/2 teaspoon kosher salt
1/2 teaspoon cardamom
1/8 teaspoon freshly grated nutmeg
1/8 teaspoon ground cinnamon
1/3 cup whole milk
1/4 cup (2-ounces) unsalted butter
1/4 cup water
2 extra large eggs
1 teaspoon pure vanilla extract
For the Butterscotch Glaze
1/2 cup firmly packed dark brown sugar
1/4 cup (2-ounces) unsalted butter
2 Tablespoons light corn syrup
1 teaspoon Scotch whisky
1/2 tsp kosher salt
For the Cinnamon-Butter Filling
1/2 teaspoon ground cinnamon
2 Tablespoons (1-ounce) unsalted butter, melted
1/3 cup butterscotch chips, chopped (I forgot this step)
7G9A2628
For the Dough
In the bowl of a stand mixer fitted with the paddle attachment, combine the 2 cups of flour, sugar, yeast, salt, cardamom, nutmeg, and cinnamon.  In a small saucepan over low heat, heat the milk and butter just until the butter melts.  Add the water and set aside until warm (120º F-130º F), about 1 minute.  Pour the milk mixture over the flour mixture and mix on low speed until combined.  Add the eggs one at a time, beating well after addition.  Add the vanilla. Add 1/2 cup more flour and continue to mix on low speed until smooth, about 30-45 seconds.  Add 2 tablespoons of additional flour and mix on medium speed until the dough is smooth, but slightly sticky.  Sprinkle the work surface with flour, and knead the dough gently until it is smooth and no longer sticky, adding an additional 1 to 2 tablespoons of flour if needed.  Place the dough in a large bowl and cover with plastic wrap.  Let the dough rise in a warm place until it has doubled in size, about an hour.
For the Butterscotch Glaze
Meanwhile, lightly coat a 9 x 2-inch round cake pan with non-stick spray.  In a small saucepan over low heat, combine the sugar, butter, and corn syrup and heat until the butter is completely melted.  Sprinkle in the salt, stir to dissolve and taste test.  Does it taste like butterscotch?  Good!  Not yet?  Add more salt!  Remove from the heat and stir in the whiskey.  Pour the mixture into the prepared pan and tilt the pan to cover the bottom evenly; set aside.
For the Cinnamon-Butter Filling
In a small bowl, stir together the butter and cinnamon. Don’t forget to chop up the butterscotch chips that you went to the store, specifically to buy.
Center a rack in the oven and preheat to 350º F. Gently de-gas the dough by pressing lightly.  On a lightly floured work surface, roll the dough into a 16 x 12-inch rectangle.  Using a pastry brush, spread the cinnamon-butter evenly over the dough.  Sprinkle the dough with the chopped chips. Roll the dough up, length-wise, and cut into 1″ rolls and place side by side. Loosely cover the pan with plastic wrap and let the cake rise in a warm place until it is almost doubled in size, about 30 minutes.
Bake the cake until the top is deep golden brown, about 35 minutes.  Check after 20 minutes to make sure the top is not browning too fast.  If so, cover the top loosely with a sheet of aluminum foil for the last 10-15 minutes to prevent over browning.  Transfer to a wire rack (remove the foil if used) and let cool for 10 minutes.
Gently tilt the pan and tap the side on a counter to release the sides of the cake.  Invert a serving platter on top of the cake, then invert the pan and the plate.  Leave the pan on the cake for 1 minute so the glaze transfers to the cake, then gently lift off the pan.  Using a rubber spatula, scrape out any glaze remaining in the pan and spread it over the warm surface of the coffee cake.  Serve the cake warm or at room temperature with a cup of coffee and a friend.  This is an adult dessert – enjoy being one and let the kids marvel at the mystery 🙂

*recipe adapted from The Galley Gourmet

7G9A2631

Strawberry Banana Split Crepes

crepes

I’ve posted a lot of recipes lately that have strawberries, but there is a good reason – they’re in season!  When you’re at the store and strawberries are $1.30 for a pound, instead of $4 – that’s your sign that they are in season!  Now, I’m not kidding myself into believing that they aren’t grown in hot houses, BUT at least it’s the season for them, and in my mind, that makes me feel like they taste better.

I wanted to make a strawberry crepe, so I looked up a simple crepe recipe, and where it called for 1/2 cup of water, I added a 1/2 cup of strawberry puree instead, plus a bit more water to thin it out.  My strawberry puree was made-up, too, as was the strawberry-vanilla bean whipped cream!

You need to make your crepe batter the night before you use it, so make this batter tonight and have crepes in the morning while the weekend is still here!  This recipe looks like a sugar bomb, but it actually wasn’t.  The crepes have zero sugar except the strawberry puree, which only has 3 tbs and it’s also used to sweeten the whipped cream. So if you don’t add the chocolate sauce, this is really low sugar!  And it definitely doesn’t taste like you held back!

bsplit crepes

Strawberry Crepes

3/4 cup whole milk
1 cup flour
2 eggs
1/2 cup strawberry puree (recipe follows)
2 tbs water
3 tbs melted butter

Put all the ingredients into a bowl or a large, tall cup and with your immersion blender, blend for 15-20 seconds until fully mixed.  If you don’t have an immersion blender, use a regular blender for the same time.  Transfer to a container and chill for one hour, up to 48 hours (I just did this step before I went to bed and used it the next morning.)

In a 10″ non-stick, shallow skillet, heat teaspoon of butter over medium high heat, or just spray with non stick spray, but you want your pan to be pretty hot.  Add a quarter cup of batter to the pan and swirl around till it’s spread as thin as possible. THE FIRST CREPE IS ALWAYS CRAP.  Just throw it away.  Now, you’re ready to begin.  By 1/4 cup scoops, (I used a ladle) swirl your batter in the pan very quickly and let it set for at least 1 to 2 minutes before flipping.  If your pan is hotter than mine, you may need to alter your time.  With a wide spatula (I used a fish spatula), slide under the crepe and flip over.  The other side won’t take as long to cook.  Keep finished crepes covered in a towel so they will stay warm and pliable.  This batter made about 8-10 crepes for me, but if you’re really skilled at swirling your batter, you could squeeze 15 crepes out of this amount.  I am not skilled and my crepes are always thicker than they should be, but they’re still delicious!

Fill the crepe with sliced bananas, a drizzle of left over strawberry puree, and a dollop of whipped cream.  Add more strawberries and whipped cream on top, and if you’re feeling the entire banana split thing, drizzle in chocolate syrup (I used Torani chocolate syrup.)  Or even some toasted pecans!  Have fun – it’s the weekend!

Strawberry Puree

1 lb of fresh strawberries, hulled and halved
3 tbs sugar
1 vanilla bean, split and scraped of its seeds. If you don’t have a vanilla bean, wait, and add some vanilla paste or vanilla extract later when you’re blending)
1/4 cup water

Place all the ingredients into a medium saucepan and cook over medium low heat till bubbly.  Cook for about 15 minutes until the strawberries begin to break down.  Remove the vanilla bean and transfer to a blender or a tall cup with your immersion blender and blend, with an extra 1/2 cup of water till fully blended and no chunks remain.  Add the vanilla bean paste or vanilla extract (about 1 tsp) if you want and blend again.

Strawberry Vanilla Bean Whipped Cream

1 cup heavy cream
1 tsp vanilla bean paste
1/4 cup strawberry puree

Place all ingredients into a bowl and whip until soft peaks form.  (I used my immersion blender, duh)

Strawberries in Balsamic Caramel – Rethinking desserts

7G9A1673

Since Olive started eating from the table, I’ve been 10x more mindful of what I serve for lunch and dinner.  I have re-thought the structure of a meal from the way we sit at the table to the kinds of  things we have for dessert.  Dessert is certainly not something that I grew up eating every night.  I’m not sure any of us did.  I think there are a couple reasons for this.  For one, American versions of desserts are really sweet and really indulgent, for the most part.  And usually really big.  So naturally, we don’t think of desserts as something you should have every night, which is inherently a good thing, but it’s caused us to view things like fruits in nearly the same category as vegetables: something we HAVE to eat, or are too expensive to eat, or aren’t very exciting to eat.  I think most people would feel slightly jipped if someone suggested strawberries for a dessert out at a restaurant.  Strawberries?  That’s it?  Where’s the colossal strawberry cheesecake with the dulce de leche syrup and giant mount of whipped cream?

You see the problem.  Besides dark chocolate, fruit has been the only sweet Olive has consumed on a regular basis.  She’s geared to think fruits are the sweetest things in the world.  Her favorite sweet is a banana. A friend of ours from Mexico City once said in the most endearing, non-native to America-way, “What could be sweeter than a banana?!”  That statement struck me because I instantly thought of a myriad of things we eat on a daily basis that are, in fact, much sweeter than a banana and have loads more sugar (cereal, fruit snacks, bottled juice, packaged cookies, even sweetened yogurts can have up to 21 grams of sugar per serving).  So I want to retrain my mind to accept fruits as a dessert by themselves.  And the types of colossal sugar bombs we typically think of as desserts, I want to think of as rare treats, instead of the normal dessert option.  This is a challenge for me.  I feel cheated when I get that sugar craving in the afternoon and the only thing in my house is either fruit or dark chocolate and what I really want is a piece of cake or a brownie or something reserved for a feastal weekend meal instead of a boring ol’ Monday afternoon.  It’s hard to have discipline with dessert, but I feel that if it can be accomplished, a natural limit on sugar will take place in my life and a greater joy will be present when I do indulge in the Super Desserts that all good blog posts are made of.

For today, simple strawberries-coated in a balsamic caramel sauce.  Simple, incredibly flavorful and a wonderful way to liven up your tastebuds at the end of the meal.  When I made this last week, we were out on the front porch and Olive was walking in circles around the bushes and each time she passed me, she got this giggly fit and opened her mouth for another bite.  Like a little, tasty game.  Food is fun and sharing food is even better.  Remember that this week as you prepare meals for your family!

Strawberries in Vinegar*

serves 6

1.5 lbs medium sized strawberries, hulled and halved lengthwise
3/4 cup sugar (I know, I just talked about sugar bombs.  However, this is making a caramel and coating the strawberries.  You don’t consume all the glaze!)
1/3 cup red wine vinegar
1/4 cup boiling water

Put the sugar into a wide saucepan and place the pan over low to medium heat.  You will start to see darker patches of caramel starting to appear.  Stir to make an even, dark caramel.  Carefully pour in the boiling water using a metal ladle.  The caramel will bubble dramatically, so be careful to not get too close.  Let the caramel cool a bit before pouring in the vinegar because boiling vinegar will singe your nostril hairs right off.
Pour in the vinegar and mix well.  Cool the caramel in the fridge for at least 20 minutes.  It will become thick.
Put the strawberries into a bowl, then pour over the vinegar caramel.  Marinate in the fridge for one hour before serving.
These are wonderful, eaten with a simple glass of rose.  However, if you wanted to make a more indulgent dessert, I think these would be killer on a strawberry shortcake with homemade vanilla bean whipped cream.  Mmmmmm…

7G9A1675

*recipe adapted from Ferran Adria’s book, titled (not coincidentally) The Family Meal.  🙂 This book was an inspiration for the title of my blog because I really couldn’t think of a better way to title it.  His book is filled with the recipes his staff would share together before dinner service at elBulli in northern Spain (formerly the best restaurant in the world, which is now, sadly closed).  I’d highly recommend this incredibly simple, straight-forward book and its wonderful layout with pictures of each step of the cooking process.

Corn Cookies

momofuku corn cookies

momofuku corn cookies 3

This is one of the best cookies I’ve ever had in my entire life.  Crispy on the outside, chewy and soft in the middle.  Sweet, salty, and incredibly buttery.  It uses a mystery ingredient: corn powder. All you do (and believe me, slackers, this ingredient is worth whatever effort you don’t want to put forth) is buy a bag of freeze dried corn off Amazon and pulse it in your blender or food processor till it looks like powder.  Then, you’ll have enough for a few batches of these amazing cookies.  The corn powder adds to the incredible butter flavor and if you don’t tell anyone, they won’t be able to pick out the secret ingredient.  They’ll just sit and marvel that they are enjoying the greatest cookie (that doesn’t include chocolate) of their life.

This recipe is from the wonderful Momofuku Milk Bar cookbook.  Matt made Olive’s first birth-day (made it when we came home from the hospital with her) cake from this book, my birthday cake and the Crack Pie that we’ve made a few times and won a smallish award (in a contest created by us) for best non-fruit pie at our Pie Bake-Off.  Christina Tosi is undoubtedly a genius, as Momofuku  Milk Bar’s creative pastry chef.  It’s only her hummingbird-like brain that could come up with such nostalgic, creative, sugar-rush kind of desserts.  She is a child at heart, which shows so evidently throughout this cookbook.

Word of caution: if you like to get in and out of the kitchen quick, this book isn’t for you.  (the cookies were easy enough but the rest…) My birthday cake had Matt in the kitchen for two days and involved around 5 different recipes for one cake alone.  However, it was the best cake ever.  I don’t need to reiterate that good things are worth the hard work, but I will.  To quote Bob Kelso, “Nothing in this world worth having comes easy.”

And every recipe from Momofuku Milk Bar is worth having.

momofuku corn cookies 2

Corn Cookies
yield: 13-15 cookies

*225 g butter, at room temp (2 sticks)
300 g sugar (1.5 cups)
1 egg
225 g flour (1 1/3 cups)
45 g corn flour (1/4 cup – if you don’t have corn flour, which I didn’t, mix 1/4 flour and 4 tsp corn powder)
65 g freeze dried corn powder (2/3 cup)
3 g baking powder (3/4 tsp
1.5 g baking soda (1/4 tsp)
6 g kosher salt (1.5 tsp)

1. Combine the butter and sugar in the bowl of a stand mixer fitted with the paddle attachment and cream together on medium for 2 to 3 minutes.  Scrape down the sides of the bowl, add the egg, and beat for 7 to 8 minutes (this is important.  This long mixing process is what gives the cookies their amazing texture)

2. Reduce the mixer speed to low and add the flour, corn flour, corn powder, baking powder, baking soda, and salt.  Mix just until the dough comes together, no longer than 1 minutes.  Scrape down the sides of the bowl.

3. Using a 1/3 cup measuring scoop, portion out the dough onto a parchment-lined sheet pan.  Pat the tops of the cookie dough domes flat.  Wrap the sheet pan tightly in plastic wrap and refrigerate for at least one hour.  Do NOT baking your cookies from room temp – they WILL NOT bake properly.

4. Heat oven to 350F.

5. Arrange the chilled dough a minimum of 4 inches apart on parchment or silpat-lined sheet pans.  Bake for 18 minutes (Mine looked perfect in exactly 18 min. They know their stuff) The cookies will puff, crackle, and spread.  After 18 minutes, they should be faintly browned on the edges yet still bright yellow in the center; give them an extra minute if not.

6. Cool the cookies completely ON the sheet pans before transferring to a plate or your mouth (yeah right, you know you’ll eat a warm one and you SHOULD).  At room temp, the cookies will keep fresh in an air-tight container for 5 days.  But I really doubt they’ll last that long.

*I think measuring your flour, corn flour and corn powder by weight is really important.  Reason:  I first did it by volume and measured out 1 1/3 cups.  Then, to double check, I weighed the flour I’d measured and it was only something like 210 grams.  That’s enough of a difference to matter in the final result.  Just FYI!

momofuku corn cookies 5

The Creme Brulee of Lemon Bars

7G9A1687

I’ve stuck to this recipe for a few years now.  I love lemon desserts and my only complaint is that something claiming to be a lemon dessert isn’t ever lemony enough.  I want a ZINGER of a lemon shock.  I know this may cause several of you to stop reading, but given the choice between a GOOD lemon bar and a brownie, I’d choose the lemon bar.  Not every time.  Like I said, it’d have to be good.  Not too eggy, just enough curd, just enough crust, big time lemon flavor and another thing: don’t dust your lemon bars with confectioners’ sugar.  I’ll give you a few reasons:

1. Lemon bars usually have at least two cups of sugar.  So..there’s enough sugar.  Why would you dust something with more sugar that is already shockingly sweet? (I’m not complaining – lemon and sugar need each other)

2. I don’t like inhaling powdered sugar with each bite.  It kind of ruins the whole eating experience to have to hack on powder.

So that’s really only two reasons.  With the right recipe, you don’t need a dusting of sugar to cover up the weird, sometimes sticky top of a lemon bar.  This recipe is so wonderful because the top gets crunchy like a creme brulee.  I’m not sure why.  Maybe because I mix up the filling while the crust is baking, so by the time the crust is ready for the filling, the filling has sat and separated a bit.  I whip it up really good, too, so maybe it’s the airy texture?  Or maybe the key is to let them cool completely before cutting and don’t cover them up if you’re not serving them right away, lest the top get soft.  That way you get that good crunch on the top, the velvety curd in the middle and the buttery crumble of the crust all together.  This is adapted from Paula Deen’s recipe, and to me, it’s the perfect lemon bar recipe.  The only one you need.

Creme Brulee Lemon Bars

Crust
2 cups all-purpose flour
1 cup confectioners’ sugar, plus more for dusting
2 tbs lemon zest (just zest the lemons you will use for the filling)
pinch of salt
2 sticks butter, at room temperature, plus more for greasing

Filling
4 eggs
2 cups granulated sugar
6 tablespoons all-purpose flour
6 tablespoons fresh lemon juice

Preheat the oven to 350F.  Grease a 9x13x2″ pan.  Cover the bottom in parchment paper and let it hang off the sides (just along the long edge) so that you can remove it for cutting better.)
Make the crust by combining flour, confectioners’ sugar, zest and salt in a large bowl.  Cut in the butter to make a crumbly mixture.  Press the mixture into the prepared pan.  You may need to dip your fingers into a little flour or confectioners’ sugar to keep the dough from sticking to your fingers.  Bake for 15-20 minutes.

Meanwhile, to make the filling, mix the eggs, granulated sugar, flour, and lemon juice.  Pour this over the baked crust and bake for 25 minutes longer.  Don’t sprinkle with confectioners’ sugar. Run a knife around the edges to loosen the bars, and then carefully, by the parchment overhang, lift the entire pan of bars out of the pan and transfer to a cutting board to cut.  I like to cut off the very edge of the bars so that each one will be perfectly smooth, cut, squared edges (obsessive) but that’s really up to you.  No one said you couldn’t eat the trimmings and no one would have to know they ever existed.

Cappuccino Chocolate Cake

cappcake3

Some things get better with time: wine, cheese, beards…this cake.  I made it on Sunday afternoon and we had a piece and it was extremely good, but we wrapped it up and let it sit in the fridge for a few days and THEN it was something to behold.  The layers meld into one another after a couple days in the fridge.  The whipped cream softens the layers of chocolate cake and it transforms into a Swiss Cake Roll/Tirimisu kinda thing and it’s amazing.  Good news: it’s a really great cake if you eat it instantly.  Greater news: it only gets better from there.

The recipe comes from Fran Bigelow’s wonderful book, Pure Chocolate.  I learned how to make truffles from this book with much sweat, tears and good results.  Fran is the expert when it comes to chocolate and none of her recipes have steered me wrong.  Her truffles and chocolate tempering require huge amounts of patience.  They simply can’t be rushed.  And when I have about 2 days, I want to try her recipe for dark chocolate brandied apricot torte.  But I didn’t have that much time and saw that this cake took only a couple hours. It delivered rich chocolate and creamy coffee flavors and honestly, what is better than that combination?  This is the perfect party cake or good to have in your fridge (since it lasts all week) to whip out with a cup of coffee when a friend stops by.  Given that friends still stop by in your neck of the woods.  Oh, to live in Mayberry…

cappcake


Cappuccino Chocolate Cake
serves 10-12

6 ounces bittersweet chocolate (70% is preferable), finely chopped
6 large eggs, separated
1/2 cup plus 1 tbs sugar
3 tablespoons brewed cooled espresso
Cappuccino Whipped Cream (recipe below)
dark cocoa powder for dusting

With a rack positioned in the middle of the oven, preheat to 325F.

Lightly butter a 9×13″ or quarter sheet pan and line with parchment paper.  Lightly butter the parchment paper.

In a glass bowl set over a sauce pan of barely simmering water (I prefer this to a double boiler, as my DB always heats too quickly and scorches the chocolate = sad Alisa) and melt the chocolate.  Remove when nearly melted and continue stirring until smooth.  Set aside.

In a mixer fitted with the whisk attachment or using a hand mixer, combine the egg yolks and half the sugar and whip on medium high speed.  Once combined, scrape the sides of the bowl and increase the speed to high.  Continue whipping until the mixture becomes thick, pale yellow in color, and the sugar has dissolved, 5 to 6 minutes.

Clean the whisk and in another clean bowl, begin whipping the egg whites on medium high speed, increasing the speed until frothy.  Slowly add the remaining sugar and continue whipping until the peaks are stiff but not dry.

Pour the cooled coffee into the melted chocolate all at once and quickly stir together to prevent seizing.  If it does thicken and start to separate, don’t worry.  Constant stirring will make it smooth and creamy.

Lighten the chocolate mixture by folding in one-third of the yolks.  Then add the lightened chocolate mixture to the remaining yolks and gently fold.  The mixture will become light and airy with large air bubbles where some traces of yolk remain.  That’s okay and kind of pretty, anyway.

Lighten the yolk mixture by quickly folding in one-quarter of the whites, then gently fold in the remaining whites in 3 parts, trying not to over mix and lose the volume.

Pour the glossy dark chocolate batter into the prepared pan, smoothing the top.  The pan will be more than three-quarters full.  Bake for 20-25 minutes, until the top is slightly domed in the center and dry to the touch.  A tester inserted will come out dry and clean with a few crumbs.  Let cool in the pan at room temp.  The layer will pull away from the sides of the pan as it cools.

Have ready the Cappuccino Whipped Cream filling in the fridge.  Remove the cooled cake by running a thin bladed knife around the edges of the pan.  Place the bottom of the baking sheet lined with parchment over the cake and invert.  Peel the parchment paper off.

Using a ruler and the tip of a paring knife, mark the cake into 3 equal sections across the width.  Cut the cake with a serrated blade to make 3 layers about 4 inches wide each.

Place one chilled cake layer on a serving plate.  With a metal spatula, spread one third of the filling over the layer, generously overlapping the edges.  Repeat with second layer and a layer of filling. (The layers should be equal in height to each other.)  Top with the last chilled cake layer.  Be careful not to overwork the cream and frost the top and sides.  Refrigerate at least 4 to 6 hours to set the cake an meld the flavors.  Before serving, dust with cocoa powder.  Can be stored in the fridge for up to 2 days (or a week, if you’re us)

Variation: to make this child-friendly(er): just omit the espresso from the whipped cream.

Cappuccino Whipped Cream
makes 3 1/2 cups

1/4 cup plus 2 tbs sugar
3 tbs brewed espresso
2 cups heavy cream, chilled

In a stand mixer fit with the whisk attachment, whisk together the sugar and coffee until frothy.  The sugar will begin to dissolve.  Add the cream and whisk until thoroughly combined and soft peaks form.  Take care not to over whip the cream as it may begin to lose its creamy texture.  Store in the fridge till ready to use.

cappcake2

Deep Dish Strawberry Pie

Strawberry Pie

Yesterday was Pi day, and there’s really no reason to need an excuse to make a pie, but I took the excuse and ran with it.  Spring is creeping in on us.  Warmer days and cool breezes in the evening and there’s this smell in the air that smells like Easter and wet grass and being a kid again, all rolled into one, deep inhale.  I love the longer days and the way the sunlight stretches across the grass until nearly 8 p.m.  On the days when it isn’t blowing 50 mph in this town, and it’s not yet 100+ degrees, it’s nearly sinful to stay inside and miss it.  These perfect days are fleeting.

I had 5 lbs of strawberries on my counter top yesterday and decided to use part of them for a pie.  I knew exactly the two books to consult: Sweety Pies and Bouchon.  Bouchon has the perfect, and I mean PERFECT pie crust recipe.  It’s actually the crust recipe for a deep dish quiche, but I use it for pies and it’s perfect.  It rolls out and stays together so well, you can pick the entire thing up once it’s rolled out and move it like a towel.  It’s flaky and tastes like butter, because that’s all the fat that’s used!  I have gone down the road of lard crusts and half butter/half crisco, and none have held up as well as this recipe.  So, if you’re struggling with your pie crust at this juncture in your life, struggle no more.  As always, Keller, or in this case, his pastry chef, has done the dirty work for us.

For the filling, I consulted the amazing and funny book, Sweety Pies: An Uncommon Collection of Womanish Observations.  Every recipe has a story and a unique woman behind it. I strongly recommend buying this book.  Every pie I’ve tried from it has been wonderful and the stories are hilarious and make you wish you were a Southern woman with a fiercely defended pie recipe to make all your other Southern friends jealous.  To be honest, though, the crust recipes included don’t hold up for me (cracked, crumbled, cried-I’m sure it was my fault), so that is why I use the crust from Bouchon.  Because I hate failing with a recipe that’s supposed to be a comfort.

This pie is more like a cobbler.  The recipe even says to just put the crust on top.  But I’m a crust-gal and it’s my favorite part, especially if it’s a good crust.  The crust recipe makes just enough for a deep dish pie plate plus a little extra.  I used the little extra to cut out hearts for the top.  You’d probably have enough to do a lattice top, or even a thin shell for the top, especially if you didn’t use such a deep pan.  The filling is quite syrupy, so I’d suggest serving it in bowls with vanilla ice cream.

Strawberry Pie 3

Strawberry Pie 4

Strawberry Pie

For the crust:

2 cups AP flour, plus extra for rolling out
1 tsp kosher salt
8 ounces chilled, unsalted butter, cut into 1/4″ pieces
1/4 cup ice water

Place 1 cup of the flour and the salt in the bowl of a heavy-duty mixer fitted with a paddle attachment.  Turn the mixer to low and add the butter a small handful at a time.  When all the butter has been added, increase the speed to medium and mix until the butter is completely blended with the flour.  Reduce the speed, add the remaining flour, and mix just to combine.  Add the water and mix until incorporated.  The dough will come around the paddle and should feel smooth, not sticky, to the touch.
Remove the dough from the mixer and check to be certain that there are no visible pieces of butter remaining.  Pat the dough into a 7-8″ disk and wrap in plastic wrap.  Refrigerate for at least 1 hour, up to a day.

For the filling:

3/4 cup sugar, plus more for sprinkling
1/4 cup AP flour
1/8 tsp salt
1/8 tsp cinnamon
1/8 tsp ground cloves
6 cups hulled and halved, fresh strawberries
2 tbs unsalted butter, cut into small pieces
1 egg, beaten

Preheat the oven to 375 degrees.
Roll out your pie crust to about a 12″ circle.  Fit into the pie plate and trim off the excess and roll up into a ball and let rest.
In a large bowl, combine the sugar, flour, salt, cinnamon, and cloves and mix thoroughly.  Add the strawberries and toss gently until well combined.  Let stand for 15 minutes, then toss again and spoon into a 9″ deep dish pie plate.  Dot the filling with the butter.  Roll out the excess of your dough and cut into hearts and arrange on top of the filling.  I folded the edges of my crust over because the filling didn’t come up all the way to the surface of my dish, and connected the edges a bit with the tips of the hearts.  Do what you like – be creative!  Brush the crust with the beaten egg and sprinkle with coarse sugar if you like!
Place the pie on the center rack of the oven and bake until the pastry is golden – 30-45 minutes.  I tented my pie with foil so that the bottom of my crust would be cooked through but the top wouldn’t burn, and I probably left the pie in there for a total of one hour, the last 20 minutes with it tented.
Let cool completely and serve in bowls with scoops of vanilla ice cream.  Use the juice from the pie as a syrup on your ice cream.  Be happy.

Strawberry Pie 5

That lovely, crunchy sugar is from King Arthur Flour.  I love that company and all the fun things you can get for your baking adventures!

Strawberry Pie 2

A First Birthday Cake

olive-00171

Exactly one year ago, this pic was taken.  Olive was just 6 days old and we were home, out on our porch, having a glass of wine and marveling at this red headed little girl in our arms.  Matt made a birth DAY cake that we had when we got home from the hospital with friends and family to celebrate her actual birth and the only thing that changed this year was the cake and the size of the red head.

482407_10151518156698265_1304279150_n

We’ve had such a wonderful year with Olive.  It’s been amazing to watch her discover things, develop likes and dislikes (kitties, peas – respectively) and one of the most enjoyable activities in my life this year has been showing her food.  It’s crazy to realize that these little creatures don’t know what ANYTHING is.  They don’t know a peach from a mango from a pear from a plate of spaghetti.  They don’t know how garlic smells while roasting or the magic that is mire poix sizzling away in butter.  It’s our JOY to get to show them!  For

“…no matter what they think, we know: We are the ones who have tasted and seen how gracious it all is.” 

In this spirit of education, Matt and I contemplated what we wanted Olive to try for her first birthday.  She’d had many fruits so I considered a lemon layer cake, strawberry shortcake, something with banana cream.  Matt really wanted her to have chocolate for the first time and REALLY GOOD chocolate, at that.  So we combined forces and created a Neapolitan-esque cake with a flourless chocolate cake as the base, a white chocolate mousse in the middle and topped with a thick, strawberry whipped cream.  The chocolate cake is by far the best chocolate “cake” I’ve ever had.  Taken from the brilliant Dave Lebovitz, it’s nearly like a truffle center, or the best fudge of your life.  The white chocolate mousse was taken from Annie’s Eats, which I’d used on a cake for Matt for Valentine’s day this year, which he was crazy about.  And then the strawberry whipped cream was just a last minute sort of creation by me for Olive.  Because she loves strawberries and I figured if she didn’t like the rest, she’d at least like a third of her cake and we wouldn’t look like complete fools when it came show time.

Olive's Birthday Cake

For the bottom layer, Matt baked it in a 9″ round cake pan.  We had a hard time getting the cake out (panic moment) and so I crumbled it all up and pressed it tightly into a spring form pan.  Then I lined the pan with a couple layers of acetate strips, stacked on top of each other and taped on the outside, to get that tall form for piping in the other two layers.  All you do is pipe in the white chocolate mousse on top of the chocolate cake, let it sit in the fridge while you make the whipped cream, and then pipe in the whipped cream and wrap plastic wrap across the top of the tube so it doesn’t dry out and let it sit in the fridge over night, or for an hour in the freezer.  This makes it much easier to cut.

Chocolate Cake (Orbit Cake)

14 tablespoons unsalted butter, cut into 1/4″ cubes, plus more for the pan
10 ounces 62% semisweet chocolate, finely chopped (our FAVORITE dark chocolate, which we exclusively used for this cake, is Lindt’s 70% dark chocolate bars.  Heaven.)
5 large eggs
1 cup granulated sugar

Position rack in the middle of the oven and preheat to 350F. Lightly butter a 9×2″ round cake pan and line the bottom with parchment paper (if you do this easy step, you won’t have to mush it all into a spring-form pan like I did.)
Place the butter and chocolate in a glass bowl and microwave at 30 second increments, stirring after each, until the chocolate is completely  melted, glassy, and incorporated with the butter.
In a large bowl, whisk together the eggs and sugar.  Gradually whisk in the melted chocolate mixture and continue whisking until thoroughly combined.
Pour batter into the prepared pan.  Place the pan in a larger roasting pan, and cover the top of the cake pan with foil.  Add enough hot water to the baking pan to come halfway up the sides of the cake pan and bake for 1 hour and 15 minutes to 1 hour and 30 minutes until the cake has set.  To test, touch the center of the cake lightly with your finger: the surface will be slightly tacky, but your fingers should come away clean.
Carefully remove the cake pan from the water bath and place on a cooling rack to cool completely.
Cover the pan with plastic wrap and refrigerate for at least 2 hours – up to 3 days.
To assemble with the mousse, run a knife around the edges of the cake to loosen the sides.  Invert onto a serving plate, wrap in the acetate strips (or wax paper – tape doesn’t stick to parchment) and get on with making the next step.

White Chocolate Mousse

1 1/2 tsp powdered gelatin
2 tbs water
12 oz white chocolate chips (don’t use almond bark – it won’t taste right)
3 cups heavy cream

Sprinkle the gelatin over the water in a small bowl and let stand at least 5 minutes to soften.  Place the white chocolate in a medium bowl.  Bring 1 cup of the cream to a boil in a small saucepan.  Remove the pan from the heat, add the gelatin mixture and stir until dissolved.  Pour the hot cream mixture over the white chocolate and let stand about 1 minute.  Whisk until the mixture is smooth.  Cool to room temperature, about 5-8 minutes, stirring occasionally.

In the clean bowl of a stand mixer fitted with the whisk attachment, whip the remaining 2 cups of cream at medium speed until it begins to thicken.  Increase the speed to high and whip until soft peaks form when the whisk is lifted.  Using a whisk, mix one-third of the whipped cream to the white chocolate mixture to lighten it.  Fold in the remaining whipped cream gently with a rubber spatula until no streaks remain.  Spoon the white chocolate mousse into the pan over the chocolate cake.  Smooth the top with an offset spatula.

Strawberry Whipped Cream

1 jar of strawberry jam – the fancier the better
3 cups heavy cream

Scrap the jar of jam into a small saucepan over low heat and add about 1/4 cup of water.  Heat it just enough so that it incorporates with the water and you break up any lumps with a whisk and the jam is smooth.  Transfer it to a bowl and let it cool about 30 minutes, stirring occasionally to help it cool.
In a stand mixer with a whisk attachment, stir the cream on medium for a while until it starts to thicken.  Then whip on medium high while you gently let the jam stream into the edge of the bowl, careful to not hit the whisk in the middle, until completely incorporated.  Whip until a little firmer than soft peaks.  At this point, I added a little red food coloring (just a few drops) to make it more pink and folded it in with a spatula until fully incorporated. Do what you will with that.  I just wanted it to be pink to truly look Neapolitan. Transfer cream to a piping bag fitted with a large star tip and pipe, pipe, pipe until you can’t pipe any more.  Have fun with it.  Make zigzags and peaks and star flowers – whatever you want.  Just fill in all the gaps and sprinkle the top with extra crunchy sugar for effect.

serves at least 20

Snow Ice Cream

Snow Ice Cream

It snowed more today than it has in years, and nearly all of my Facebook feed filled up with my friends excitedly making snowmen, snow angels and snow ice cream!  I rhetorically asked Matt, “You’ve had snow ice cream, right?” And he said no!  I must have had it a dozen times growing up.  He even grew up in a place that got more snow than me!  Bent on fixing this incredible flaw, I strapped on my rain boots and went out gathering snow.  If you’ve never made snow ice cream before – stick to the tall drifts.  If there are no drifts, be careful scooping.  Dirt, stuff from trees, dog “things” can be lurking – stick to the tippy top of the snow.  I’ve also heard that you shouldn’t eat the first snow fall of the year.  If it never snows where you are and you have an opportunity – throw caution to the wind, my friends.

Snow Ice Cream – kinda fancy

8 cups of fresh snow
1 can sweetened condensed milk
2 tsp of vanilla bean paste (that’s vanilla bean flecks in my ice cream, not dirt!)
1 tsp almond extract

Clothe yourself in cute rain boots, gloves and if you have a metal bowl, bring that and a two cup measure.  Scoop up 8 cups of snow into your bowl, watching for sticks, poo, yellow snow, etc.  March in place at your door step to get all the snow off your boots.  Maybe even do a little dance.  Once warmly inside, drizzle a can of sweetened condensed milk all over the snow.  Mix well, smashing the clods of snow against the side of the bowl until it’s all worked throughout.  Mix in your vanilla paste and almond extract (use regular vanilla extract in equal amounts if you don’t have the paste.  The paste is fun – buy some.)
Serve immediately to lucky children and husbands alike.

Snow Ice Cream 2