Apple Crisp: Food Memories

Fall Apple Crisp
I’ve done a few posts on food memories from my own family and ones from friends and I love those posts more than any other. They are more than just recipes – they are links to the past and to feelings that can’t be accessed any other way. Food is such a tie to our heritage, to our families and to the love we felt when we first experienced those memorable dishes. I never tweak these recipes because it’s my job to post about and honor the memory, not the recipe itself. My dear friend, Becky, had this picture of her grandmother’s hand written recipe on her Instagram account and when I saw it, I knew I had to make it.

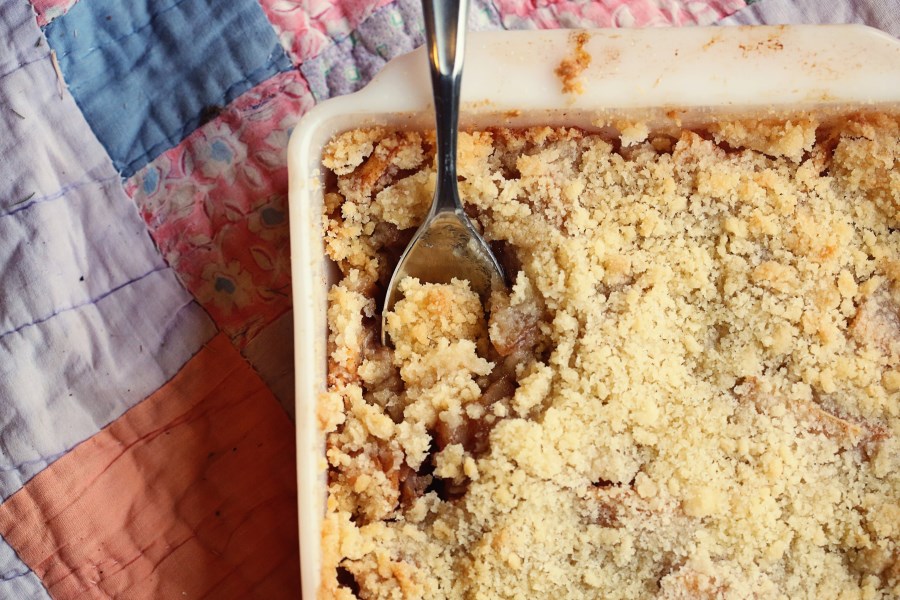
Last year, Becky invited me over to look through her grandmother’s things before they had an estate sale in the wake of her passing. I had the honor of taking home a patchwork quilt she had made. Not only do my girls play on it outside nearly every day, but I used it as a backdrop for the photos I took of the final dish. I hope it makes this post that much more meaningful for my friend.

The recipe itself is completely delicious and comforting and full of the essence of the fall season! I love that it calls for “oleo” – a sure sign the baker lived through the 50s 🙂 So this was the only tweak I made by using butter instead. I also topped the apple crisp with cinnamon horchata ice cream because I was all out of whipping cream. I’m sure if Nana could have tasted the ice cream, she wouldn’t mind the substitution.

recipe
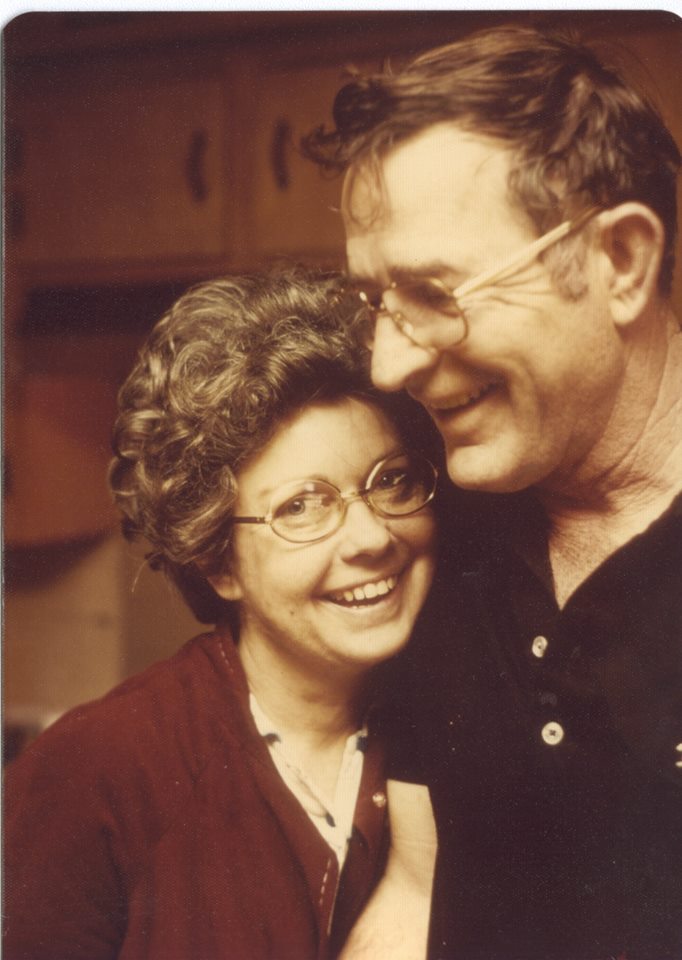
I asked Becky to share a few thoughts about her Nana and this recipe. She also provided this amazing picture and it makes me wish I’d known her. She looked so joyful.

12087400_10207282108429358_1362057034_n
My Nana (Oma Lee) was the 5th of 6 kids born in 1926 to a generous, kind-hearted family. They took in the homeless, cared for the sick, fed the hungry. They also laughed more than most.

For a couple of years while I was in college, I got to live with her and got to know her on a deeper level. She was a counselor to me, a friend, comic relief, an adult when I acted like a child. We watched Miss America pageants and Hallmark movies together and ate dilly bars from DQ.

Nana shared an apple “pie” recipe with me during that time, and it’s the only apple pie I’ve ever made, because its kinda fool proof (I need that) and darn tasty.

I made it for her once and she went on and on about how delicious it was. When I reminded her it was one of her recipes, she laughed for the longest time then said in a straight voice, “well that’s why it’s so good”. Man, I miss her.

Apple Crisp 2

Apple Crisp

6 cups peeled, sliced apples
1/3 cup sugar
1 teaspoon cinnamon
1/2 teaspoon salt
2 tablespoons melted butter
For the streusel topping:
3/4 cup sugar
1/2 cup flour
1/3 cup butter

Whipped topping or ice cream to garnish

Preheat the oven to 375F. Mix together apples, sugar, cinnamon, salt and melted butter.  Place in a greased 8″ square baking dish. Set aside.

Combine the 3/4 cup sugar and flour and then cut in the butter until the texture is fine crumbles. Sprinkle over the apples. Bake for about 45 minutes, or until apples are tender*. Serve warm with dollops of whipped topping (or ice cream!)

*Becky advised that I brown the apple crisp for a few minutes under the broiler because it doesn’t really get brown during baking.

Buffalo Chicken Tacos with Blue Cheese Celery Pico

Buffalo Chicken Taco
Buffalo sauce and blue cheese always make me think of football season. Maybe because this combination, for me, is rooted in the Superbowl array of gastronomical craziness or the fact that I see buffalo wings as “dude food” and one of my husband’s favorite flavor combinations. Whatever the reason, buffalo chicken and blue cheese is pretty darn delicious and these tacos make a more dinner-friendly version than the messy buffalo wing, fifteen-napkins-needed standard. (Guess who is Type A in our relationship?)

These tacos are AMAZING. Frying strips of boneless chicken thighs makes for extra tender pieces. We tossed the fried chicken in our standard tangy buffalo sauce, then topped them with some crunchy blue cheese celery pico and blue cheese sour cream. We did a non-buffalo version for our little girl and it was still delicious! I highly recommend this recipe for the fall season of football game get-togethers!

Buffalo Chicken Tacos buffalo chicken tacos with blue cheese cream and pico Fried Chicken Taco with Pico

Buffalo Chicken Strips We used this exact recipe, but we used boneless chicken thighs and cut them into strips before marinating and breading. I’ll post the recipe below in case you don’t want to click 🙂

  • 2 tablespoons paprika
  • 2 tablespoons freshly ground black pepper
  • 2 teaspoons garlic powder
  • 2 teaspoons dried oregano
  • 1/2 teaspoon cayenne pepper
  • 1 cup buttermilk
  • 1 large egg
  • Kosher salt
  • 3 1/2 pounds bone-in, skin-on breasts, legs, drumsticks, and/or wings (We used boneless thighs cut into strips here)
  • 1 1⁄2 cups all-purpose flour
  • 1⁄2 cup cornstarch
  • 1 teaspoon baking powder
  • 4 cups vegetable shortening or peanut oil

    Combine the paprika, black pepper, garlic powder, oregano, and cayenne in a small bowl and mix thoroughly with a fork.

    Whisk the buttermilk, egg, 1 tablespoon salt, and 2 tablespoons of the spice mixture in a large bowl. Add the chicken pieces and toss and turn to coat. Transfer the contents of the bowl to a gallon-sized zipper-lock freezer bag and refrigerate for at least 4 hours, and up to overnight, flipping the bag occasionally to redistribute the contents and coat the chicken evenly.

    Whisk together the flour, cornstarch, baking powder, 2 teaspoons salt, and the remaining spice mixture in a large bowl. Add 3 tablespoons of the marinade from the zipper-lock bag and work it into the flour with your fingertips. Remove one piece of chicken from the bag, allowing excess buttermilk to drip off, drop the chicken into the flour mixture, and toss to coat. Continue adding chicken pieces to the flour mixture one at a time until they are all in the bowl. Toss the chicken until every piece is thoroughly coated, pressing with your hands to get the flour to adhere in a thick layer.

    Adjust an oven rack to the middle position and preheat the oven to 350°F. Heat the shortening or oil to 425°F in a 12-inch straight-sided cast-iron chicken fryer or a large wok over medium-high heat. Adjust the heat as necessary to maintain the temperature, being careful not to let the fat get any hotter.

    One piece at a time, transfer the coated chicken to a fine-mesh strainer and shake to remove excess flour. Transfer to a wire rack set on a rimmed baking sheet. Once all the chicken pieces are coated, place skin side down in the pan. The temperature should drop to 300°F; adjust the heat to maintain the temperature at 300°F for the duration of the cooking. Fry the chicken until it’s a deep golden brown on the first side, about 6 minutes; do not move the chicken or start checking for doneness until it has fried for at least 3 minutes, or you may knock off the coating. Care- fully flip the chicken pieces with tongs and cook until the second side is golden brown, about 4 minutes longer.

    Transfer the chicken to a clean wire rack set on a rimmed baking sheet and place in the oven. Cook until an instant-read thermometer inserted into the thickest part of the breast registers 150°F and the legs register 165°F, 5 to 10 minutes; remove the chicken pieces to a second rack or a paper-towel-lined plate as they reach their final temperature. Season with salt and serve—or, for extra-crunchy fried chicken, go to step

    Place the plate of cooked chicken in the refrigerator for at least 1 hour, and up to overnight. When ready to serve, reheat the oil to 400°F. Add the chicken pieces and cook, flipping them once halfway through cooking, until completely crisp, about 5 minutes. Transfer to a wire rack set on a rimmed baking sheet to drain, then serve immediately.

    *taken from Serious Eats

For the Celery Pico:

2 stalks celery, sliced
1 jalapeno, diced
1/4 cup diced tomato
1/4 diced white onion
1/2 cup blue cheese crumbles
squeeze of lime
pinch or two of celery salt
salt and pepper to taste

Combine all these things and adjust seasoning to taste!

For the Buffalo Sauce:
One bottle of Frank’s Red Hot
1 stick of butter
Salt to taste
1 tsp worchestershire sauce
1/2 tsp garlic powder

Combine the hot sauce and butter in a sauce pan and bring to a boil. Reduce to a simmer and adjust seasoning to taste.

Blue Cheese Sour Cream

Kinda self explanatory. Just take a half cup of sour cream and add in 1/2 cup blue cheese dressing and 1/4 cup fresh blue cheese crumbles. Adjust to taste with salt and pepper and lemon juice.


Crusty Country French Toast

Crusty Country French Toast
Everyone needs a good French toast recipe in their pocket. Especially if you are a home baker (or are married to one) and always have a stale butt-end of a loaf of bread on your counter. Matt makes bread all the time and it’s this really amazing, crusty, rustic sourdough that we plow through, typically, with only the tiniest bit on the end that dries out brick-tough that we give to our dog. But occasionally, he will make two loaves and I will have a bit more than I can use in a week. I wanted to have a French toast recipe that I didn’t have to look up – one that was easy to memorize – for just such occasions. I wanted it to work with a bread as crusty as a non-enriched loaf can get. (Enriched refers to added sugar, oil or butter that makes bread soft like sandwich bread, and makes bread less apt to get rock hard when it goes stale.) Matt just uses his sourdough starter, flour, salt and water. It makes an amazingly chewy, crusty bread, but it’s not exactly conducive to a pb&j for a little person.

This recipe will work with bread that is really tough and even soft bread like challah (the ultimate French toast bread). The difference is the soak time. If you’re using really soft, not-so-stale bread, just leave it in the mixture for less time. I left this bread in the mix for almost an hour, flipping them over after thirty minutes. I got up early to feed a baby, then she went blissfully back to sleep, so I had an hour 🙂 So the French toast had that sought-after custardy interior that is very easily obtained by using a softer loaf. Whatever bread you have, this recipe will work. Tuck it away for the weekend and try to memorize it – it’s worth it.

Country Bread French Toast Country Bread French Toast with Bananas

Crusty Country French Toast

8 thick slices of stale bread
4 large eggs
1/2 cup milk
1/2 cup heavy cream (you can honestly use whatever milk you have, but the richer the better, obviously)
1 tablespoon vanilla bean paste (or regular vanilla extract – I like vanilla)
1/2 teaspoon kosher salt (1/4 tsp table salt)
2 tablespoons brown sugar
1/8th of a teaspoon of almond extract

A few tablespoons of butter for frying

Preheat your oven to 200F.

Arrange the slices of bread in a 13×9″ dish and squeeze them in or cut them up into smaller pieces if you have to (or work in two batches if you have a smaller dish). Combine all the other ingredients in a large bowl and whip up till very well incorporated. Pour mixture over the bread and let the bread soak it up for 10-30 minutes per side, depending on the staleness of your bread. If you’re using a soft bread like Texas toast, just let it soak a few minutes per side until it oozes out if you poke it. For a rustic loaf that’s near crouton-consistency, let the slices soak for a good thirty minutes per side. If you have lots of leftover mixture (the thickness of your bread will determine this), you can save it in a sealed container for a week and use it again next weekend. Or just makes lots of batches and freeze the leftovers to pop in the toaster on another day!

In a non-stick skillet over medium high heat, melt a tablespoon of butter and work in batches, frying the toast until golden on each side, about 3-5 minutes per side. Keep the toast in a single layer in your oven to keep warm until you’re done cooking the rest. Serve with melted butter and your favorite topping. Shown below with my homemade peach preserves – hooray for summer! 🙂

Crusty French Toast

Potatoes That Taste Better Than The Chicken

Roasted Chicken and Potatoes
Fall is around the corner, my friends. The beginnings of fallish things are happening from the wonderful cooler temperatures and crisp mornings to the not-so-wonderful appearance of Christmas decorations ALREADY. I’m not one to start up the Christmas music until the day after Thanksgiving and I’m not one to drink a pumpkin spiced latte until it can actually do its job of warming me up because I’m cold from natural causes (as in, I didn’t sit in my car with my AC on full blast to get the same effect. That’s cheating AND rushing the perfect moment, which I feel, should come about authentically.) My friend Libby is rolling her eyes at me because she LOVES rushing fall and pretending it’s cold outside. In fact, she already had a pumpkin spiced latte! 🙂 I’m fine with seasonal enthusiasts. Honestly – whatever makes you happy! But as for me and my household, we won’t decorate for Christmas until Thanksgiving is over. 🙂

Another thing that makes me happy is starting to think about fall dinners. I love the braising and stewing and the simmering of heavy, warm spices on the stove. One meal that gets me to thinking about the warmth of the winter is this simple and yet divine dish: roasted chicken on top of potatoes. We made this recipe a loooong time ago by Jean-Georges Vongerichten. His recipe was so delicious, we’ve done it a few dozen times since and have varied and simplified and it’s always delicious and always perfect. I never mess this recipe up and it’s always so amazingly delicious. And let’s not ignore why: the potatoes are cooked in schmaltz. You’d also be delicious if you were roasted in chicken fat.

I also love this recipe because it is one of those dishes that everyone can agree on. Add a salad or some braised greens and you’ve got yourself a complete meal!

Potatoes Cooked in Chicken Fat Chicken Potatoes

Potatoes Taste Better Than the Chicken*

1 whole chicken, about 3 lbs
2 pounds potatoes, peeled and cut into 1″ pieces
coarsely ground salt and pepper
butter to coat the pan and chicken
1 head of garlic, sliced in half
sprigs of thyme, rosemary, whatever you have

Preheat oven to 450 degrees. Butter a large cast iron skillet and place the cut potatoes in a single layer. Sprinkle them with salt and pepper and drizzle with olive oil. Pat your chicken dry and season with salt and pepper. Rub with butter and then stick the halved garlic head into the chicken cavity and add whatever herbs you like. Place the chicken on one of its sides on top of the potatoes.

Roast for 20 minutes. Turn the chicken onto its other side and roast another 20. Then, turn the chicken breast-side up and continue roasting until juices run clear and an instant-read thermometer says at least 165F, about 15-20 minutes more. Let the chicken rest for 10 minutes and carve on top of the potatoes and serve them along with the chicken. Beautiful.

*adapted from Jean-Georges Vongerichten

Curried Corn Fritters

Curry Corn Fritter
Last week I posted a recipe for Curried Cream Corn and today I want to share with you what to do with the leftovers! In our house, we still have leftovers on a regular basis. With just two adults and one three year old who eats like a bird, we don’t usually use up side dishes in one meal. I transform a side dish into probably four different things by the time the week is over. I might start off with simple roasted corn at the beginning of the week and by the time it’s gone, it’s become part of a chicken wrap, a hash, an omelette, a souffle or perhaps just made into baby food.

With this curried cream corn, however, the flavors stack up perfectly to become a tasty little fritter. This is another recipe where I just eyeballed the amounts, but I think it’s pretty fool proof and I do have amount approximations for you to follow. Serve these fritters with a bit of sour cream and a side salad for a light(ish) Meatless Monday!

Curry Corn Fritters

Curried Corn Fritters

  • Servings: about 12 fritters
  • Print

2 cup of leftover curried cream corn
1 cup flour
1 egg
chopped chives
1/2 tsp kosher salt and fresh ground pepper
ooo, jalapenoes would be good!

In a large bowl, combine your creamed corn, flour, salt and pepper, egg and chives (and whatever else you think sounds good!) and whisk to combine. You may need more flour depending on how much liquid your curried cream corn still had remaining. You may have cooked off more than I did, so depending on how liquidy it is, add a bit more flour so that your mixture resembles thick cake batter. If it is dry, thin it out with a little milk.

Heat olive oil in a nonstick skillet over medium high heat until it shimmers and drop the fritter batter by tablespoons and let them fry about 2 minutes per side, or until dark brown on both sides. Remove and let them drain on a paper-towel lined baking sheet and keep them warm in a 200 degree oven until you’re ready to serve.

Curried Cream Corn

Curry Cream Corn
Every summer we come up with a corn dish to bring to cookouts and to utilize the crazy cheap ears of corn available from about May through August. As this summer is coming to a close, I wanted to share a recipe that is summery and yet has the warmth in flavor of the fall season just around the corner. As the weather cools, I start thinking of slow simmering stews and soups and braised meats and one really great way to shake the flavors of your kitchen up a bit is to introduce Asian and Indian flavors into your meals. We often use coconut milk when making rice to accompany a Thai dish and sometimes we throw curry powder into a soup to give it that depth of flavor we love in Indian cuisine. For this creamed corn, we combined all three: a curry, coconut milk, Southern creamed corn dish that delivers in flavor and comfort.

This recipe won’t necessarily be “printer friendly” as it’s a “little of this and a little of that” type of recipe. I honestly don’t recall the ratios, but we adjusted and tasted along the way and that’s part of the fun in cooking, in my opinion. Use your own preferences to guide you! We have some lemongrass growing in the backyard (I was so surprised it did well, but it’s BEAUTIFUL – highly recommend you plant some!) and so that’s thrown in there, too. This is not one cuisine or another, it’s just a bunch of flavors we all love! I hope you will love it, too!

Curried Cream Corn

Curried Cream Corn

3 or 4 ears of corn
1 large, sweet yellow onion, chopped (about a cup)
2 tablespoons coconut oil
1 can full fat coconut milk
1 tablespoon sweet curry powder
1 stalk of lemongrass, split in two and bruised with the butt of your knife to release the flavors and oils
2 kafir lime leaves
fresh cilantro and basil, about a cup total, chopped
squeeze of lime

Slice the corn kernels from the cobs (use a serrated knife to make this easier and be careful!)
In a large skillet, heat the coconut oil until shimmering. Toss in the onion and cook until soft and starting to brown.
Add enough coconut milk to cover the corn – this may be the entire can (shake the can really well before opening!) or it may just be half. It kind of depends on how big your corn cobs were. We don’t want the corn to be positively swimming, but just enough liquid to cover the kernels.
Let the corn and coconut milk come to a boil and then add in the curry powder, lemongrass and lime leaves. You can find kafir lime leaves at most Asian supermarkets in the refrigerator section. They like to keep them cold. If you can’t find it, it’s not going to ruin anything, but it adds such a bright, interesting flavor!
Reduce the heat and let the corn and coconut milk and spices simmer for a while, adjusting the seasoning with salt and pepper as you like. When the liquid has reduced just a bit, stir in the chopped cilantro and basil and adjust the seasoning again to your taste with a squeeze of lime and salt.

I’ve got a great use for leftover creamed corn coming up later this week, so stay tuned!


Dark Chocolate Cherry Pie Biscuits

Black Cherry Chocolate Biscuits
Dark chocolate and cherry – a pretty perfect desert combination. I regularly make dark chocolate oatmeal for Olive and myself and I will stir in dried cherries almost every time. There’s just something special about the tart zinginess of the cherries combined with the rich, deep earthy heft of dark chocolate. I’m just full of adjectives tonight. This baking project was a fun one – Olive and I were watching Tangled on a Sunday afternoon and I decided to bake something fun. A while back, Joy the Baker had this really fun baking competition and one of the challenges were these amazing apple pie biscuits. I remembered the recipe seeming like it wouldn’t work because it was too sloppy and wet, but they turned out incredible. (And there’s wonderful step-by-step instructions for how to do her biscuits, which you can apply to this recipe as well.) Fast forward to my version of this recipe and I felt the same way all over again – that there would be too much juice from the cherries for this recipe to work the same. And honestly, there was a bit more juice than with the apple version, but nothing a little draining didn’t fix. These were fun, decadent and great for breakfast during the week!

They also look so white because I had recently bought expensive, pasture-raised eggs made by chickens with PhDs and I didn’t want to waste one on making an egg wash for a few biscuits. So I brushed them with heavy cream.  Not as pretty, but it saved an egg from not getting to fulfill its destiny of becoming a fried egg on my toast the next morning.

Dark Chocolate Cherry Almond Biscuits Cherry Chocolate Biscuits

Dark Chocolate Cherry Pie Biscuits*

For the cherry filling:
2 cups fresh, pitted cherries, roughly chopped
2 tablespoons unsalted butter
2 tablespoons packed brown sugar
1/8 teaspoon almond extract
squeeze of lemon

For the dough:
2 cups self-rising flour
1/4 cup cold, unsalted butter, cut into small cubes
2 tablespoons granulated sugar
2/3 to 3/4 cup cold buttermilk

Preheat your oven to 425F. Line a baking sheet with parchment and set aside.

In a skillet over medium heat, melt the butter and brown sugar until they are all incorporated and bubbling and then stir in the cherries. Mash them around (I use a drink muddler) and let the mixture cook for about 5 minutes. Stir in the extract and a squeeze of half a lemon and add a pinch of salt. Stir around and let it cook for one more minute. Drain off all but about 2-3 tablespoons of liquid (cherries give off more liquid than the original recipe’s apples, but you don’t want NO juice) and set the mixture aside to cool while you make the dough.

To make the dough, mix the flour and butter together with your hands or a pastry blender until the butter is broken up into small pea-sized bits. Stir in the sugar and then make a well in the center of your dough. Add the buttermilk and with a fork, stir together until combined. The dough should be soft and moist, so use a bit more buttermilk if needed.

Use all-purpose flour to dust your work surface. I ignored this step in the original recipe and the bottoms of my biscuits tasted sour because they were in dusted with self-rising and there’s baking powder in self-rising flour so DON’T BE LAZY LIKE ME and just get out the all purpose to dust. It isn’t that difficult.

Spoon the dough onto your floured surface and gently pat it into a small rectangle. Dust the top with a little extra flour and roll out into a rectangle about 7 x 10 inches. Arrange the cherries over half the long side of the dough and carefully fold the other half of the dough over the filling, crimping along the edges to seal in most of the filling. It doesn’t have to be perfect and it will be messy. If you have cracks, just gently pinch them closed and carry on. You want to have about a 6 x 8 inch rectangle when it’s all said and done, so just pat it into submission. Cut into 12 squares and place on prepared cookie sheet about 2 inches apart. Brush the biscuits with a beaten egg that was not raised by monks and sprinkle with sugar and cinnamon if desired (I just used sugar since cinnamon didn’t fit in with the flavor profile I was going for.)

Bake for 12-14 minutes, or until golden brown and serve right away. The sugar topping will melt if you store these in a plastic bag on your counter throughout the week, so it’s best to eat these the same day or store in an air-tight container.

*adapted from Joy the Baker

Roasted Corn and Summer Peach Salad

Grilled Peach and Corn Salad
PEACHES! They are in season and quickly going out of season. They are at their ultimate awesome peak right now. Even peaches at the grocery store have amazing flavor. And they are about a dollar a pound, so there’s no reason you shouldn’t go out and buy a few pounds and make some jam (recipe to come!) or peach pie filling, or start throwing them in everything you can from grilled chicken tacos (we did that) or this amazing peach and roasted corn salad.

A robot wrote this recipe. Seriously. You know that computer named Watson that beat Ken Jennings in Jeopardy! a few years ago? Well, he is apparently pretty handy in the kitchen and “thought” up this salad recipe. I’m not entirely sure how I feel about that because I think recipes should come from the soul and well, a computer is a bit lacking in that area. But for whatever it’s worth, this salad and the dressing in particular were pretty amazing. We only altered it a bit and I added a step of roasting the peaches. This salad would go so well as a side for lots of recipes like my coriander chicken or any BBQ dish and would be awesome to bring to a picnic or potluck.
roasted corn and peach salad

Roasted Corn and Summer Peach Salad*

4 ears of corn
1 tablespoon plus ¼ cup olive oil
Kosher salt
¾ teaspoon chili powder
½ teaspoon coriander seeds
½ teaspoon cumin seeds
3 tablespoons fresh lemon juice
½ teaspoon chopped fresh rosemary
Freshly ground black pepper
2 peaches, sliced into ½”-thick wedges
1 TBS butter
1 small shallot, thinly sliced
1 cup chopped fresh basil leaves
4 ounces Cotija cheese, crumbled (about ½ cup)

Prepare grill or skillet for medium-high heat. Brush corn with a total of 1 Tbsp. oil; season with salt and sprinkle with chili powder. Grill or roast in skillet, turning occasionally, until tender and lightly charred in spots, 6–8 minutes. Transfer to a cutting board and let cool, then cut kernels from cobs. Wipe the skillet clean and add a tablespoon of butter to the pan, keeping it at medium high (or if you’re using a grill, prepare this on a piece of tin foil.) Once the butter is melted and bubbling, add in the peach slices and let them sear for a couple of minutes, then remove from heat and set aside.
Meanwhile, toast coriander and cumin seeds in a dry small skillet over medium heat, tossing, until fragrant, about 3 minutes. Let cool, then chop with a knife or coarsely grind in a spice mill. Whisk with lemon juice, rosemary, and remaining ¼ cup oil in a medium bowl; season with salt and pepper. Add corn kernels, peaches, shallot, basil and cheese and toss to combine.


*adapted from Bon Appetit

Coconut Quinoa with Seared Sausage and Peaches

Peaches, Sausage and Coconut Oil Quinoa
This is a healthy, filling and tasty meal that is easy to throw together in thirty minutes. It’s nearing the end of peach season and it’s with sadness that we say goodbye to one of the best years I’ve witnessed for this magical fruit. There was something truly special about the peaches on our tiny tree in the backyard. Matt brought one in to me a couple weeks ago and when I tasted it, the first thing I said was, “This tastes like a Jolly Rancher!” The summer peach is like the summer tomato – neither fruit can be reproduced in full effect and glory throughout the rest of the year. So we ate our modest harvest directly from the tree while standing in the yard and I cooked up the rest in a couple different meals.

The quinoa is nearly the show-stealer for this meal, though. Our good friend posted a quick tip on her Facebook feed a few weeks ago, mentioning that she loved to stir coconut oil into her quinoa at the end of cooking and top it with avocado. We tried that exact recipe and swooned. I made it again as quickly as possible and created this meal. The coconut quinoa and the sweet spice of the sausage and peaches paired perfectly together and tasted like summer. There’s not much time left to make meals like this, so hop to it!

Sausage, Peaches and Quinoa

Coconut Quinoa with Grilled Sausage and Peaches

  • Servings: 4
  • Difficulty: easy
  • Print

1 cup pearl quinoa
2 cups water
2 TBS extra virgin coconut oil
salt and pepper to taste
2 cooked sausage links (to serve 4)
1 TBS unsalted butter
1-2 ripe summer peaches, sliced

Rinse the quinoa for about a minute under cold running water. This may seem unnecessary to you, as it did to me the first time, but it’s the difference between good tasting quinoa and extremely bitter tasting quinoa. How ’bout I write “quinoa” one more time?

In a medium saucepan, bring the water to a boil and add in the quinoa and lower to a simmer and cover. Cook for about 20 minutes until water is absorbed. Or just follow the package instructions! When it’s done, stir in the coconut oil and salt and pepper and adjust seasoning to taste. If you want to go vegetarian, simply substitute avocado for the sausage and serve with seared peaches. For the sausage, add a tablespoon of butter into a clean skillet and sear the sausage until browned on both sides. Remove the sausage and add the peaches and saute until warmed through. Serve on top of quinoa along with the sausage.


Carrots and Celery: A Colorful Spin on Steak House Sides

Steak, Roasted Carrots and Celery Salad
Summer hasn’t felt very summery until these past two weeks. The rains finally stopped and the heat finally reached into the upper 90’s and it’s starting to feel like Lubbock, again. We weren’t sure what to do with all that rain and all that…not watering our lawns, so we sorta forgot how. I was so used to my garden looking like Swamp Thing that I honestly forgot to keep watering about a week after it quit raining so heavily. Then when things started to wilt, I realized that everything might be thirsty. So I’m back in the swing of watering every other day and I’m enjoying seeing things grow. However, if we had to survive off of what I have growing in my garden, we’d have all died a few weeks ago. I want to be better and grow enough to sustain us year round, but I’m not there, yet. I grew up in a family of farmers but I am not one of them.

We benefit from families of farmers in this town, however, and one of those families is Holy Cow Beef, a family that produces amazing beef products right here in Lubbock, TX. They run an honest, humane, grass-fed beef corporation and their products are extremely high-quality. We bought a New York strip from them, among other cuts, when they were at the Lubbock Downtown Farmer’s Market last weekend and happily made this weeknight meal for our family last week. Matt seared the steak in butter on the stove and finished it in the oven – a favorite and classic way we like to cook a steak. The three of us ate dinner from just one portion!  I roasted orange and purple carrots along with parsnips and served that and the beef along with a blue cheese celery salad. Yes, this plate was served to our three-year-old (no short-order cooking around here) and here’s how it went:

“I only like the orange carrots.”
“I will only eat one celery.”
“More meat, please.”

So I’d highly recommend if you’re in this area, to stop by the farmer’s market on Saturdays and check out what Holy Cow Beef has to offer! We’ve been eating less meat in general, and so buying high quality products from local producers helps us value the days we do have meat a little more. Quality over quantity is a good idea, especially if you, like me, are a carnivore.


Blue Cheese Celery Salad
I wanted to share the recipe for the blue cheese and celery salad with you, today. It was so refreshing and different as a side for the steak. I think it would make an amazing topping for a burger, a different dish during football season, or as a side for BBQ!

Blue Cheese Celery Salad*
serves 4

¼ cup mayonnaise
4 cups celery, cut into ⅛-inch-thick half moons (about 8 stalks)
¼ cup fresh orange juice
1½ teaspoons kosher salt
3 tablespoons chile oil
¼ cup celery leaves
3 tablespoons finely chopped chives
½ cup (2 ounces) crumbled blue cheese

Spread the mayonnaise among 4 plates. In a medium mixing bowl, toss the celery with the orange juice and season generously with salt. Drizzle with the chile oil (you could also use olive oil and crushed red pepper), then toss in the celery leaves. Scatter the dressed celery on top of the mayonnaise, then top with the chives and lots of blue cheese, and serve.

*adapted from Tasting Table


Roasted Carrots
And instead of the classic fries or a baked potato that you typically see alongside a steak, I did a colorful trio of roasted carrots. I simply peeled and sliced three of each orange and purple carrots and parsnips and coated them in olive oil and sprinkled with salt and pepper and then roasted them at 400 until soft when pierced with a knife. Then I browned one tablespoon of butter and tossed them right before serving.


Blue Cheese Celery Salad with Seared Steak