Chocolate Mousse

15ollie012

French Kids Eat Everything was the second book I read in my brainwashing of French food culture (the first was Bringing Up Bebe) and it was the best one in the trend of “the French know what you’re doing wrong”, in my opinion.  In the book, the author, Karen Le Billon, describes her struggle raising her two little girls on the streets of Paris, trying to fit in to a food culture so different from our own.  She noticed toddlers sitting in restaurants for an hour meal without making a peep and eating the entire time.  She never saw public temper tantrums in grocery stores over a product not bought, even if desired (kids know they can’t have snacks unless it’s 4 p.m. and even then, most are not used to packaged food aisle-fare).  She wanted to know how the French managed to raise children who ate peacefully and in turn, made having a meal together actually appear fun for the adults, as well!

There are a lot of great take-away tips in this book and one of them is to make the 4p.m. snack (or 3ish, in our case) really good – something a child won’t mind waiting for.  The French have an appointed time for snacks in the afternoon because between noon and 8 is a long time to wait for food (although they expect adults to wait!  Snacks only apply to children – dang it).  So I’ve been trying to find fun things to make and at the back of the book, there are some real recipes found in the daycare systems in Paris, as well as in every day homes.  One of those recipes is for a simple chocolate mousse.  I had procured some amazingly fresh eggs from my dear friend, Katrina, and I thought there would be no more honorable way to consume them than to eat them raw.

I just lost some readers.

Seriously, though, eating eggs from a reliable source, from happy chickens whose eggs are only a few days old – you would more likely get eaten by a goat than get sick from eggs like this.  I’ve never been one to shy away from a raw egg in cookie dough, even with the old eggs from the store, but for a recipe that calls for 6 whole eggs, I don’t think I would have been too comfortable eating them if I didn’t know how old they really were.  And I knew, in this case, because Katrina gathered them from the hen house a day before I took them home.  You all should hook up with a friend who has chickens.  They can never eat as many eggs as they end up getting!  And if you have chickens, this type of recipe is great for using up excess eggs!

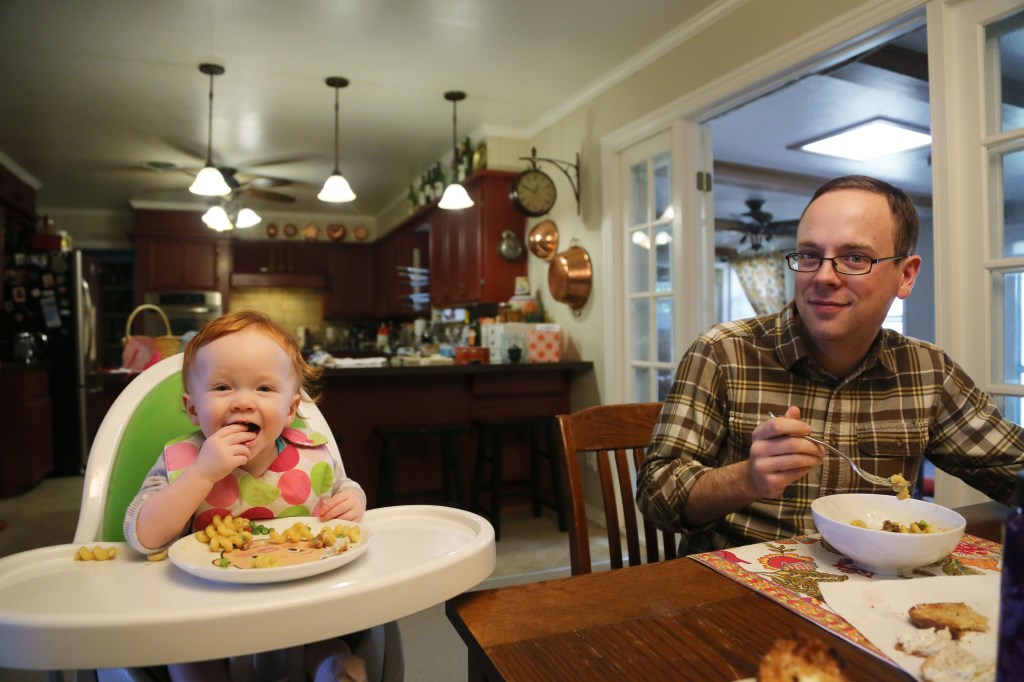
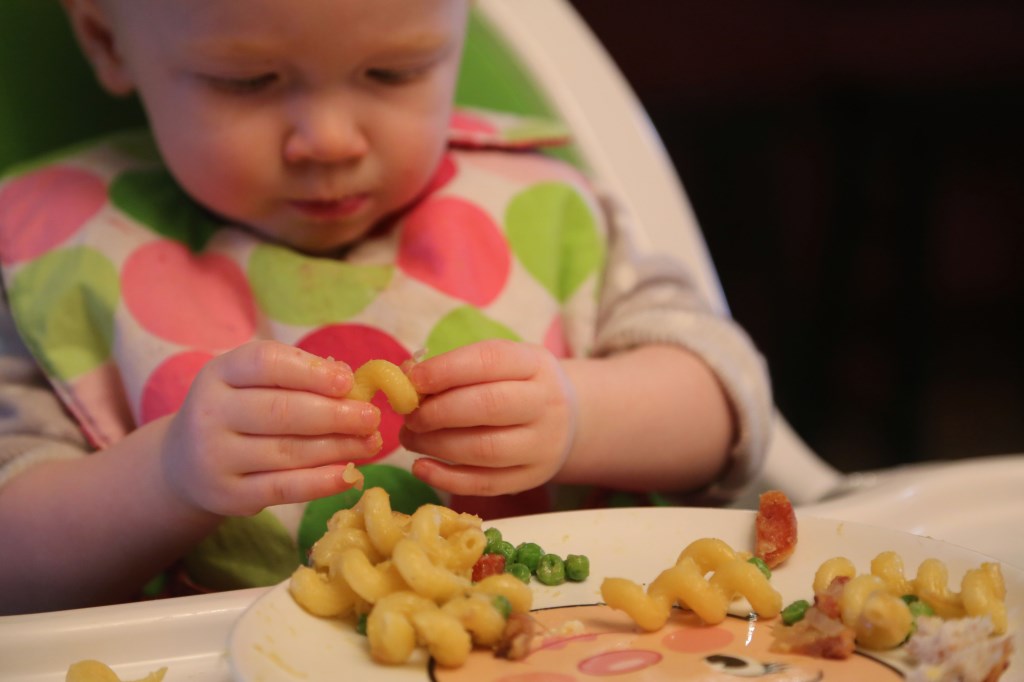
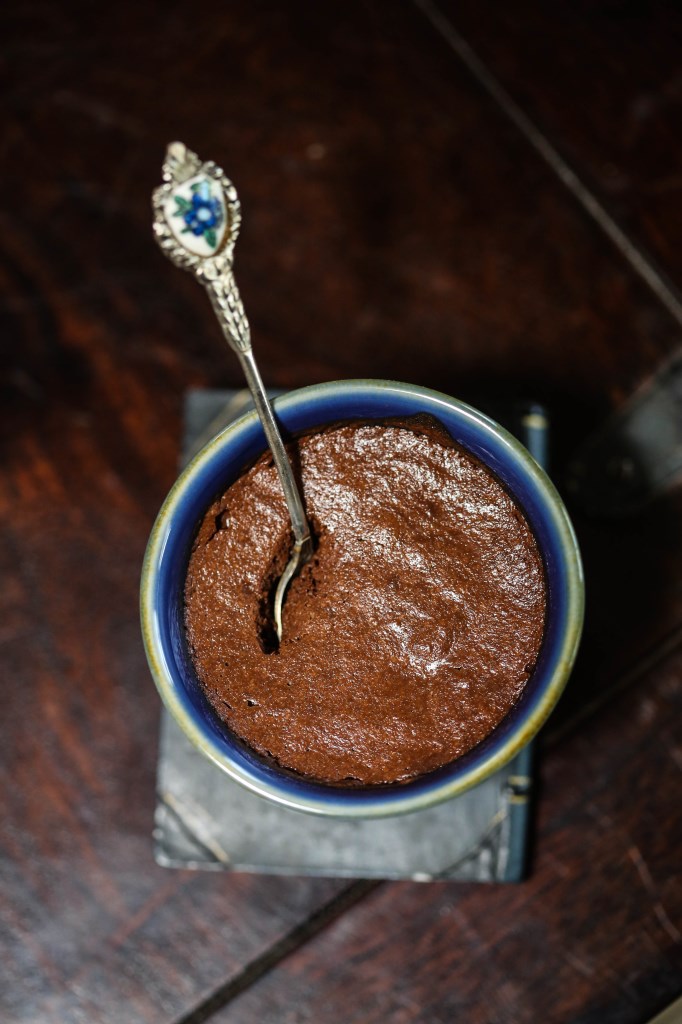
This mousse is light, fluffy and has an amazing texture and flavor with the added zing of orange zest.  You must eat it very very cold or the texture gets a little too loose.  But straight from the fridge, they are amazing and Olive enjoyed it a LOT, and I exercised my patience with messy eating and happily took pictures of the chocolate chaos.

15ollie013 15ollie010

chocolate mousse001

Chocolate Mousse
Serves 6

1/2 pound semi-sweet Baker’s chocolate (I actually used Ghirardelli 60% chips)
4 teaspoons butter (oh, just use two tablespoons)
6 eggs, whites and yolks separated
Zest of half an orange (I also think a 1/4 tsp almond extract would be awesome!)
Pinch of salt

Melt the chocolate and butter in a double boiler on the stove over low heat.  Quick method: melt in the microwave on 30 second increments, stirring gently until melted and smooth.  When the chocolate is melted and cooled a bit, add in the egg yolks and orange zest and stir well. Set aside.

In a stand mixer with the whisk attachment (or in a large metal bowl with metal whisk, by hand, if you know what you’re made of) beat the egg whites until they reach stiff peaks (adding a pinch of salt at the start will help them stiffen).

Gently fold one-third of the egg whites into the chocolate mixture.  Mix gently, then fold in the other half, mixing very gently.  Spoon the mousse into little serving dishes and chill for 2 to 3 hours or over night until firm.

chocolate mousse002

Brown Butter Almond Brittle Ice Cream

almond brittle ice cream002

I promise you that this is the best ice cream you will ever make at home.  We stumbled on Jeni’s Splendid Ice Creams at Home a couple years ago and I believe the first recipes I made from this book were the Kona Stout  and the Roasted Strawberry and Buttermilk for Matt’s company picnic.  Both flavors got such rave reviews, that when I went to buy this book for my friend, Anna’s birthday, a week later, Barnes and Noble told us that they’d recently sold the rest of their copies – all to Matt’s co-workers, it turned out 🙂  I think the way Jeni makes ice cream is a revelation.  She combines a bit of cornstarch into the base and then adds just one and a half ounces of cream cheese per quart recipe, and the texture and consistency turns out amazing.  Perfectly creamy, freezes well, and her flavors are never too sweet – always a perfect balance.  The recipes in this book range from really unique (gouda and vodka plumped cranberries) to traditional (vanilla bean) to genius (sweet potato with torched marshmallows – gotta try this one, next).

Summer time is the perfect time to buy this book and try out a new recipe at each and every opportunity you get.  Our little ice cream maker will get a work out during these hot months to come!  But we have faith that it feels it is finally getting to do what it was created to do, thanks to Jeni’s Splendid ice creams and our not-so-splendid hundred degree days!

This week, I made three flavors out of this book:  Brown Butter Almond Brittle, Roasted Pistachio and Bourbon Butter Pecan.  All amazing.  The Almond Brittle was the most requested at our church get-together last night, and the most consumed (although I adore the pistachio), so I’ve written out the recipe for you here today.  It calls for almost a pound of butter.  ACTUALLY you only use a tablespoon of that pound of butter.  The solids that settle to the bottom of the pan after you brown butter is what gets mixed into the base and it creates a divinely nutty, roasted flavor in the ice cream base.  Yet another way brown butter makes the world a better place.

almond brittle ice cream004

Brown Butter Almond Brittle Ice Cream*
makes about 1 quart

for the base:
2 cups whole milk
1 tablespoon plus 1 teaspoon cornstarch
1.5 oz (3 tbs) softened cream cheese
1/8 tsp fine sea salt (I use kosher)
3/4 lb unsalted butter
1 1/4 cups heavy cream
2/3 cup sugar
2 tbs light corn syrup

1 cup crushed Almond Brittle (recipe below)

Mix about 2 tbs of the milk with the cornstarch in a small bowl to make a smooth slurry.  Whisk the cream cheese and salt in a large bowl until smooth.  Fill a large bowl with ice and water.

Melt the butter over medium heat in a 4 quart saucepan.  Bring to a boil and let bubble until the foam starts to subside and the butter is a rich dark brown (not black!).  Remove from the heat and let stand until the butter solids settle to the bottom of the pan, about 5 minutes.

Pour the clear butter oil into a storage container (once it solidifies you can use it as you normally would for cooking so it’s not a waste!) As you get closer to the butter solids in the bottom of the pan, use a teaspoon to remove as much liquid butter as you can.  You should have about 1 tablespoon of brown butter solids and a little bit of melted fat in the bottom of the pan (it’s impossible to remove all the fat).

Add the remaining milk, cream, sugar and corn syrup to the butter solids, bring to a rolling boil over medium-high heat and boil for 4 minutes.  Remove from the heat and gradually whisk in the cornstarch slurry (you’ll need to stir it up again as it will settle and solidify some).  Bring the mixture back to a boil over medium high heat and cook, stirring with a heatproof spatula or whisk, until slightly thickened, about 1 minute.  Remove from the heat.

Gradually whisk the hot milk mixture into the cream cheese mixture until smooth.  Pour the mixture into a 1 gallon Ziploc freezer bag and submerge the sealed bag in the ice bath.  Let stand, adding more ice as necessary, until cold, about 30 minutes.

Pour the ice cream base into the frozen canister of your ice cream maker and spin until thick and creamy.  Pack the ice cream into a storage container, folding in the chopped almond brittle as you go.  Press a sheet of parchment directly against the surface of the ice cream (this is important to avoid freezer burn and maintain a good consistency) and seal with an airtight lid.  Freeze until firm, at least 4 hours.

Almond Brittle*
makes about 2 cups

1 cup sugar
1/2 cup light corn syrup
1/4 cup water
3/4 teaspoon salt
1 stick of unsalted butter, cut into 1 inch pieces
2 cups slivered almonds
1/2 teaspoon baking soda

Generously oil a large baking sheet.

Combine the sugar, corn syrup, water, and salt in a 4 quart saucepan and bring to a boil over medium-high heat, stirring to dissolve the sugar. Insert a candy thermometer in the pan, add the butter, and bring back to a boil, then cook until the mixture reaches 300F.  Remove from the heat and immediately stir in the almonds and then the baking soda, working quickly but combining them thoroughly.

Pour the mixture out onto the oiled baking sheet, spreading it to a 1/4 inch thick layer.  Allow to cool completely before smashing to bits. 🙂

*recipes taken nearly word for word from Jeni’s book.

almond brittle ice cream005

Caramelized Onion Dip

pan fried onion dip

Every summer, certain things tend to become a trend.  We nearly always have an official corn dish, a certain way we assemble a burger from the grill, a particular drink we make over and over, or a particular ice cream flavor we bring to parties. It’s so much fun looking forward to the hot summer months by way of what we’ll be cooking.  It really helps utilize what’s in season (think: guacamole, caprese salad from REAL tomatoes and backyard basil, etc) and this summer, I think I’ve found the official dip/spread!

This dip would be amazing as a burger spread, a dip for tortilla chips, crackers, etc.  A wonderful topping for baked potatoes, a dip for fries – the options are endless.  I’ve always been a fan of the tubs of French Onion dip in the grocery stores, but this homemade version blows any of the store bought options out of the water.  It has a sweet smokiness from the caramelized onions, a super creaminess from the addition of the cream cheese and my addition, a tablespoon of red wine vinegar, really makes the flavors come alive and gives it a bite that cuts through all the richness.  It’s perfect.  I also decided to spin all the ingredients in my food processor a few times because I liked the idea of the onions being finely chopped instead of left in long slivers.  I think for me, it’s a more pleasing texture as a dip.

However you decide to make it, just promise me you’ll try this one at your next BBQ.

onion dip


Caramelized Onion Dip*
makes about 2 cups

2 large yellow onions
4 tablespoons unsalted butter
1/4 cup vegetable oil
1/4 teaspoon ground cayenne pepper
1 tbs red wine vinegar (really, any vinegar you have on hand will do just fine!)
1 teaspoon kosher salt
1/2 teaspoon freshly ground black pepper
4 ounces cream cheese, room temperature
1/2 cup sour cream
1/2 cup good mayonnaise (we use Hellman’s original)

Cut up the onions into very thin slices.  Place in a large skillet with the butter, vegetable oil, salt and cayenne and let it cook over medium low heat until the onions turn golden, and caramelize, about 30 minutes.  You really want to err on the side of TOO caramelized instead of not enough.  The flavors get so intense as the onions break down.  Let the onions cool and set aside.

Add the vinegar, salt and pepper, cream cheese, sour cream and mayo to your food processor and pulse a few times to combine.  Then add the onions and pulse until fully incorporated.  If you don’t have a food processor, just dice your onions before you cook them, and then take all the ingredients to a bowl or mixer and mix until smooth.

Adjust the seasonings and serve with…anything!

*recipe adapted from this site, who took the recipe from The Barefoot Contessa cookbook.


Champagne Mangoes and a Glorious Mango Curd

mango curd macaron dish

When we were in Mexico City last year with our friends, Cali and Alex, we were introduced to the ultimate mango.  Small, lemon yellow and sweeter than a peach.  Cali showed us that there was a specific mango fork that you need to peel it properly, and then she went on to show the proper way to peel and dice up these golden nuggets of wonder. She is my unofficial mango-expert.  I will forever associate her with this wonderful fruit and every time I peel one, I always think, “Is this how Cali would do it?”   I had never experienced a mango like the ones in Mexico, before, and when we got back home, I was on the look out.  I was so excited to see one that looked very similar at the grocery store called Champagne mangoes, and the next time Cali came over, I had her confirm its validity.  We had a winner!  So now, whenever I see that they are in abundance at the store, I get a half dozen.  The last time I did, I let them go too long before eating them, and faced the fear of letting them go bad.

So, I decided that I wanted to make a mango curd.  I looked up a recipe and it called for 15 ounces of mango and that’s exactly how much I had.  The recipe turned out so well, I filled macarons with it and also filled citrus cupcakes with the curd and topped them in coconut cream cheese frosting.  Epic win for the cupcakes, epic fail on the macarons.  The macarons tasted great, but the cookie itself didn’t turn out very well.  They all went hollow!  I have made macaron cookies before and the best I can describe them is that they are the croissant of cookies.  Every batch is different, every recipe is different and their success depends on so many factors, it’s a little maddening. The quality of the ingredients, the humidity in your kitchen, the exact temp of your oven, etc, etc, etc.  I surprised myself and didn’t FREAK OUT when the first batch of cookies EXPLODED, the second batch was pretty perfect, and the third batch baked like the first.  A true testament to how baking is a fickle beast.  They at least looked pretty:

mango curd macarons

The cupcakes, on the other hand, were a no-brainer.  I took a basic yellow cake recipe and added in Fiori di Sicilia, then made a cream cheese frosting, added a bit of coconut extract and topped each with toasted coconut after filling the cupcakes with the mango curd.  Such a wonderful combination, that I wanted to share those recipes with you, today, but mainly, this mango curd is the winner.  A week later, I still had some in a jar so they were put on some buttermilk pancakes this morning with fresh blueberries and slices of Champagne mangoes, of course.

mango curd cupcakes

mango cupcakes

Champagne Mango Curd*

Makes 1 to 1.5 cups

15-ounces ripe mango, peeled, pitted, cut into 1/2-inch pieces (It took 5 Champagne mangoes)
1/3 cup sugar
3 tablespoons fresh lime juice
Pinch of salt
4 large egg yolks
1/4 cup (1/2 stick) unsalted butter, cut into small pieces

Puree mango, sugar, lime juice and salt in processor, scraping down sides of work bowl occasionally. Add yolks; puree 15 seconds longer. Strain through sieve set over large metal bowl, pressing on solids with back of spatula to release as much puree as possible. Discard solids in sieve.

Set metal bowl over saucepan of simmering water (do not allow bottom of bowl to touch water); whisk puree until thickened and thermometer registers 170°F., about 10 minutes. Remove from over water. Whisk in butter 1 piece at a time. Cover and refrigerate overnight.

*taken from Smitten Kitchen, who took it from Bon Appetit

Citrus Cupcakes*

1 stick unsalted butter, softened
2 cups all-purpose flour
1 tablespoon baking powder
1/2 teaspoon fine salt
1 1/2 cups granulated sugar
3 large eggs, room temperature
1 cup whole milk
1 teaspoon Fiori di Sicilia, or 1/2 tsp orange extract + 1/2 tsp vanilla

Preheat oven to 350 degrees. Butter and flour 12-16 muffin tins, or just line with cupcake liners and spray those with non-stick spray.  Whisk together flour, baking powder, and salt. Beat together butter and granulated sugar with a mixer on medium speed until combined, 1 to 2 minutes. Add eggs and beat well, scraping down sides of bowl as necessary. Reduce speed to low and gradually add flour mixture, beating until combined. Add milk and extracts and beat until just combined.
Divide batter among cups; smooth tops with an offset spatula. Bake until golden and a toothpick inserted into centers comes out clean, 25-30 minutes. Let cakes cool in pans on wire racks 15 minutes. Turn out cakes onto racks to cool completely before filling.

*adapted from Martha Stewart Living

Coconut Frosting*

1 stick unsalted butter, softened
4 ounces cream cheese, room temperature
5 cups confectioner’s sugar
1/4 teaspoon fine salt
1/4 cup whole milk
1/2 teaspoon pure vanilla extract
1/4 tsp coconut extract

1/2 cup coconut, toasted, for topping cupcakes

Beat together butter and cream cheese with a mixer on medium-high speed until pale and creamy, about 1 minute. Reduce speed to medium. Add confectioner’s sugar, 1 cup at a time, beating well after each addition. Add salt, milk, and vanilla, coconut extract and beat until fluffy, about 3 minutes. If not using immediately, cover surface of frosting with plastic wrap. Frosting can be refrigerated in an airtight container up to 1 week. Before using, bring to room temperature, then beat on low speed until smooth.

*adapted from Martha Stewart Living

To Assemble:

I used the large tip from my piping bag to cut out the centers of my cupcakes and I really went pretty much to the bottom of each cupcake with the cut.  The curd is pretty runny out of the piping bag, so I had to hold it up in the air between fillings.  I inserted the tip of the piping bag and slowly squeezed until the sides of the cupcake bulged a bit.  I like filling.  Then, I just smoothed the frosting on top of each cupcake and sprinkled with toasted coconut.

mango cupcake with coconut frosting

Food Memories: Durango Cake

durango004

When I polled the Facebook audience a few weeks ago on peoples’ favorite food memories, I was absolutely thrilled with all the responses.  So many unique stories and some that felt as familiar as my own childhood.  From broccoli rice casserole to stewed cabbage.  From Eastern New Mexico to Ireland – so many people had one thing in common: good memories made from a meal and shared with family.  I made it my unofficial mission to tackle a few stand-out comments that included recipes I might actually be able to make.  I got to share the first food memory  with the author herself.  This week, sadly, the author of today’s food memory, my friend from high school, Kelli Morrison,  lives in Oklahoma and can’t partake directly in the cake recipe she so graciously shared with me.  But I have a feeling she’s made it so many times that she won’t feel like she’s missing out TOO much.

This is a glorified Texas sheet cake.  For those who have made and love Texas sheet cake, you will love this cake.  I think the true magic is the icing.  It gets crunchy around the edges and the cake itself is so fluffy and perfectly moist that it truly is the best chocolate cake I’ve ever had.  I think next time, I will add some cinnamon to the cake batter because I love cinnamon and chocolate together, and I think I may make these into cupcakes so that each cake can have icing completely surrounding it!  I may even make a double batch of icing just to make sure I have enough.  I’m telling you, this icing is ridiculously good…

durango002

Here’s what Kelli had to say about her memory of this truly wonderful cake:

Ok, so it’s a cake that was always made in a pan that could be easily traveled with, because we always were taking it places! It all started when my dad was moonlighting as a farm land real estate agent and the gentleman he worked for offered up his RV for us to use on summer vacation. So we took it to Durango for a week. At the last minute, my mom invites my recently widowed grandmother (on my dad’s side) to come with us (like, invites her the night before we’re leaving at the crack of dawn). Grandmother has no money to contribute toward the trip, but stays up that evening and packs her bags and makes this chocolate dream cake. Total hit. The next summer, we end up doing the same trip in the same RV up to our favorite lake for fishing and my brother requests the same cake that grandma brought to Durango last year. Even though grandma didn’t go the second year, my mom got the recipe and made one for the trip. From then on, it was, as my brother put it, “that good ‘ol Durango Cake.” We have made it frequently ever since, and it is always requested for birthdays, church socials, pot luck, holidays-it’s a staple in the Stroud family and among our church friends who have become so familiar with it over the years.
It has a deep, rich chocolate-on-chocolate flavor, with a thin chocolate glaze that is cooked and poured over the top while the cake is still warm (one reason it has to be IN a pan, not on a pedestal). Once the glaze cools, it creates a very thin sheet of icing that looks like broken glass when you cut into it-not thick like frosting. Because the glaze is so runny when you pour it, it usually runs all over the cake and spills over the side, so a side or corner piece is very desirable because the outside edge is covered in glaze as well.
I have been known to take a slice in each hand and scarf it like it’s going out of style just before bed, and then wake up in the morning, put another slice in a bowl, break it up into bite-sized pieces and pour milk over it and eat it like cereal. I know. I’m obsessed. But seriously, this cake is phenomenal.

durango003

Durango Cake

Cake:
2 cups flour
2 cups sugar
1 stick butter
1/2 cup oil
1 cup water
4 tbs baking cocoa
1/2 cup buttermilk
2 eggs
1 tsp baking soda
1/2 tsp salt
1 tsp vanilla extract
Cooking spray for dish

Glaze:
1 stick butter
2 tbs baking cocoa
2 tbs milk
2 cups powdered confectioners sugar
1 tsp vanilla

Preheat oven to 350.

For cake:
In a large bowl using an electric mixer (I did everything by hand), blend flour and sugar well.

In a medium saucepan heat 1 stick of butter, oil, water and cocoa until almost boiling.  Set aside.
In third container (I use a 1 cup glass measure), combine buttermilk, eggs, soda, salt, and vanilla. Whip with a fork until well mixed.
Pour heated mixture into flour mixture and blend. While mixing, add buttermilk mixture and mix well until color is even.

Pour into sprayed or greased 9×13 casserole dish (I use a Pyrex). Bake at 350 for 30-35 minutes.

Allow to cool slightly. While it’s cooling, bring all ingredients for the glaze to a boil in a saucepan on the stove. It is okay if there are several tiny lumps of sugar that don’t dissolve. Remove from heat. Pour the glaze over the top of the cake, ensuring that the whole top of the cake gets covered (you may have to use a spatula to spread it a bit). Some glaze will run down and fill up the edges where the cake has pulled away from the pan. Cover upon cooling.

Note from Kelli: if you have large quantities of vanilla ice cream, it is perfectly acceptable to eat this cake while it is still warm. Otherwise, allow it to cool before serving. It is also acceptable to put fresh sweetened fruit atop this cake when serving. Strawberries, cherries, or especially peaches are quite delicious.

Blackberry Jam Tart – I get pie with a little help from my friends…

Blackberry Jam and Toasted Almond Tart

Blackberry Tart with Cornmeal Crust

This tart was made because I bought three packages of fresh blackberries at 99 cents a pack (usually $3) and after we had some for a snack, I realized they would probably mold by the next day, and I would have wasted them.  So, looking up blackberry recipes on Martha Stewart Living online, I found a wonderful recipe that calls for a cornmeal crust, a jar of jam and some blackberries.  Perfect.  And I JUST happened to have the most perfect jar of blackberry jam in my pantry, made by my friends in Seattle, who have an entire acre, basically, of wild blackberry bushes beside their house.  I think jams and preserves are one of those treats that should be enjoyed in season.  It’s so much more satisfying to get a jar from the literal fruits of someone’s labor, than to just go pick up any ol’ flavor you want at the grocery store.  I think eating this way is another way of naturally limiting one’s sugar intake.  My friend, Brynn’s dad, makes this blackberry hybrid batch of jam each spring/early summer, and sometimes, there’s no fruit and we’re all sad, and sometimes there’s an abundance and I get one, coveted jar.  This stuff is the most amazing jam I’ve ever eaten.  So we wait, excitedly, all year for it.  Tell me that’s not better for the soul than having exactly the flavor you want, any time of the year?  Cook seasonally, bake seasonally, and natural moderation will follow.

My cousin, Kathleen, and her daughter, Hannah, stopped by earlier this week to pick up the disc from a senior session I did for Hannah.  Hannah’s boyfriend was with them, too, and when I asked if they’d like a piece of the berry tart I’d just made that afternoon, this precious boy’s eyes lit up and he just said, “uhhhh.”  All it takes is one in your group to say “yes” for you to feel comfortable to take a piece, as well!  They all stayed and ate and chatted and kept Matt and me company as we started prep for our dinner.  I was in my little piece of heaven.  Just wish it happened more often.  I don’t always have a piece of pie or tart or cookies, but I ALWAYS have coffee.  Always. So stop by any time.  You might get pie, if you’re lucky!

A Piece of Blackberry Jam Tart

Blackberry Tart with Blackberry Jam, Toasted Almonds and a Cornmeal Crust

Blackberry Jam Tart*

For the crust:  (I didn’t have enough butter, so I just halved the recipe. It makes two crusts, anyway, so it worked out!  I’ll post the full, two-crust recipe. This recipe also uses a food processor, which is easier, but you don’t burn as many calories and you have a food processor to clean up. Sometimes I’d rather pull a muscle than have to clean gadgets)

2 cups AP flour
1/2 cup cornmeal
1 tsp salt
1 tsp sugar
2 sticks unsalted butter, cold, cut into small pieces
1/4 to 1/2 cup ice water

Place the flour, cornmeal, salt and sugar in a bowl and whisk until combined.  Add the butter and cut with a pastry cutter until the mixture resembles coarse sand.  Add a few tablespoons of water and continue cutting it into the mixture until the dough holds together when pressed between your fingers.  Knead it inside the bowl about 10 times until it all holds together in a ball.  Divide the dough in half and wrap in plastic wrap and press into a nice disc.  Refrigerate for at least one hour, up to one day before using.

For the Tart:

AP flour, for surface rolling
half a jar (about one cup) of blackberry jam
12 ounces fresh blackberries (about 3 cups)
1/4 cup toasted, sliced almonds

Preheat oven to 375 degrees.  Roll out the crust into an 11 inch round (about 1/4 inch thick) on a floured surface.  Press dough into the bottom and up the sides of a 10 inch springform pan.  Trim the edges to come 1 inch up the sides using a paring knife.  Use the trimmings to patch up any thin areas or holes in the crust bottom.  Refrigerate for 30 minutes.

Prick the tart shell all over with a fork.  Bake until golden brown, about 25 minutes. Immediately spread jam into the tart shell, top with blackberries, sprinkle with almonds and bake for 10 minutes more.  Serve warm.

*adapted from Martha Stewart Living

Blackberry Tart

Coconut Cream Cheese Pound Cake

ccc-1
This picture is of the cake resting on my toy kitchen that I had as a child.  Mom and I looked up pics of me and my cousin, Tracy, playing with this kitchen when I was three and she was five.  We were both wearing frilly dresses and prancing around the room with spoons in hand, creating recipes out of air and pretending it was delicious.  Ah, nostalgia 🙂 Doesn’t seem that long ago…
It’s funny how you can also be nostalgic about something that wasn’t even your personal memory.  My mom made this cake for my older brother and it was his favorite, but it became part of my food nostalgia anyway.  I think that’s another wonderful thing about food – others’ enjoyment of it can create memories for you, whether you took part or not.  I like remembering foods my brothers’ liked.  Matt loved cherry cheesecake, Chad was more of a savory guy and really had a thing for mustard.  I love both!  And I love that when I went home for a speedy trip this week to visit my mom, that we made this cake together and remembered good times.  Olive sat on the stove while Mom narrated my work to her as I made the cake.  Mom used to make it while I would sit on the counter and talk to her and now she plays with my daughter while I make it.  Life just doesn’t get sweeter than that.
ccc-2
Coconut Cream Cheese Pound Cake
1/2 cup butter
1/2 cup shortening
1 8-oz pkg. cream cheese
3 cups sugar
1 tsp coconut flavor
1/2 tsp. vanilla extract
6 eggs
3 cups flour
a pinch of salt
1/2 tsp baking powder
1 cup bakers coconut
Preheat oven to only 325 degrees.  Grease and flour a 10″ tube pan or bundt pan.  Cream butter, shortening and cream cheese together in a large bowl.  Gradually add the sugar, beating at medium speed until light and fluffy.  Stir in coconut flavoring and vanilla.  Add the eggs one at a time, beating well after each addition.  Combine the flour, salt and baking powder and add to batter.  Stir just until blended.  Fold in the coconut.  Pour the batter into a prepared tube pan or bundt pan.  Bake for 1 hour and 15 minutes, or until a tester inserted in the center comes out clean.  Cool in the pan on a wire rack for 10-15 minutes.  Remove cake from the pan and allow it to cool completely on a wire rack before cutting.
This cake is dense and rich.  Don’t worry too much about the sugar content.  It’s not an iced cake, anyway!  Just imagine the sugar you wouldn’t bat an eye at putting into the frosting of a regular cake and instead, put it into the batter 🙂 And if you haven’t gotten the hint that weekends are for feasting and not for guilt, I fear you never will!  Happy Eating!
ccc-3

Grown-Up Sticky Buns

sticky buns

I decided to tackle a Pinterest recipe yesterday.  It had been sitting there on my Recipes board, looking amazing, yet going unmade and uneaten. (Also known as every pin on Pinterest)

The Butterscotch Spiral Coffee Cake was intriguing and beautiful and I loved how the original baker created one gigantic cinnamon roll effect.  I loved it so much that I didn’t do it that way.  I knew without a doubt, that mine would not look the same, I’d cut it wrong, placing it wrong, and get frustrated and end up drinking the whiskey instead of adding it to the caramel sauce.  So I decided I’d make a crowded pan of cinnamon rolls, call them sticky buns, and be happy!

I had a really great time making this recipe.  Matt is usually the one who bakes, but when I do, I really enjoy kneading the dough, working with it to form it into something pretty.  I love clearing off a huge space on our counter to roll out the dough.  Makes me think of my mom making biscuits.  There’s something so wonderful about baking that instantly connects you to bakers from centuries past, who had flour on their bellies from leaning against the counter too far, and a happy heart from their necessary taste-testing.

I used my antique coffee grinder

photo

to grind the cardamom pods because we have a spice grinder, but it’s forever known as Cumin Grinder because once you grind cumin seeds, congratulations, you now have an exclusive cumin grinder.  If you grind anything else, it will have a faint whiff of cumin, or B.O.  (also known as cumin).  I don’t know why we eat a spice that smells like B.O.  I’ll chalk it up to things that taste delicious but smell horrible.  Like cheese.  Oh, cheese, you stinky wonder…

The caramel sauce called for a teaspoon of whiskey.  My first thought was, “that’s not enough – just one teaspoon?” but when I gave Matt a taste, wanting him to identify the mystery ingredient, it took him a half second to shout, “You put whiskey in the caramel?!” Yes, and not just any whiskey, but his Laphroaig 10 Year Smoke Bomb whiskey.  (Not its official name) And even though there was only one teaspoon, it was obvious!  I also added a generous sprinkling of kosher salt, because I feel strongly that when something calls for brown sugar, butter AND corn syrup, you’ve GOT to add a bit of salt.  Everything sweet needs balance and caramel is definitely one of those things!  I also forgot to add butterscotch chips, like she did, but they were still amazing.  The dough has so much flavor, that you almost don’t need the extra sweetness.  However, I think adding the chips would be a great addition.

My crowded cinnamon roll approach kinda worked and kinda didn’t.  When they baked they BURST up out of the pan in a sprawling fashion.  No fuss – I just smooshed them back down before inverting them on a plate.

butterscotch sticky buns

If you want to do the gigantic cinnamon roll swirl like the super cool blogger/baker lady did, go for it!  I know my weaknesses and copying a recipe word for word is one of them.  If you make it look different, you won’t be sad when it does.  (Make sense?)

These are AWESOME, by the way.  Like Monkey Bread for grown-ups.  Sweet, buttery, sticky and with a hint of smoke.  Pretty amazing.

7G9A2625

Grown-Up Sticky Buns*

For the Dough
2 1/2 to 2 3/4 cup AP flour
1/4 cup granulated sugar
2 1/4 teaspoons instant yeast
1/2 teaspoon kosher salt
1/2 teaspoon cardamom
1/8 teaspoon freshly grated nutmeg
1/8 teaspoon ground cinnamon
1/3 cup whole milk
1/4 cup (2-ounces) unsalted butter
1/4 cup water
2 extra large eggs
1 teaspoon pure vanilla extract
For the Butterscotch Glaze
1/2 cup firmly packed dark brown sugar
1/4 cup (2-ounces) unsalted butter
2 Tablespoons light corn syrup
1 teaspoon Scotch whisky
1/2 tsp kosher salt
For the Cinnamon-Butter Filling
1/2 teaspoon ground cinnamon
2 Tablespoons (1-ounce) unsalted butter, melted
1/3 cup butterscotch chips, chopped (I forgot this step)
7G9A2628
For the Dough
In the bowl of a stand mixer fitted with the paddle attachment, combine the 2 cups of flour, sugar, yeast, salt, cardamom, nutmeg, and cinnamon.  In a small saucepan over low heat, heat the milk and butter just until the butter melts.  Add the water and set aside until warm (120º F-130º F), about 1 minute.  Pour the milk mixture over the flour mixture and mix on low speed until combined.  Add the eggs one at a time, beating well after addition.  Add the vanilla. Add 1/2 cup more flour and continue to mix on low speed until smooth, about 30-45 seconds.  Add 2 tablespoons of additional flour and mix on medium speed until the dough is smooth, but slightly sticky.  Sprinkle the work surface with flour, and knead the dough gently until it is smooth and no longer sticky, adding an additional 1 to 2 tablespoons of flour if needed.  Place the dough in a large bowl and cover with plastic wrap.  Let the dough rise in a warm place until it has doubled in size, about an hour.
For the Butterscotch Glaze
Meanwhile, lightly coat a 9 x 2-inch round cake pan with non-stick spray.  In a small saucepan over low heat, combine the sugar, butter, and corn syrup and heat until the butter is completely melted.  Sprinkle in the salt, stir to dissolve and taste test.  Does it taste like butterscotch?  Good!  Not yet?  Add more salt!  Remove from the heat and stir in the whiskey.  Pour the mixture into the prepared pan and tilt the pan to cover the bottom evenly; set aside.
For the Cinnamon-Butter Filling
In a small bowl, stir together the butter and cinnamon. Don’t forget to chop up the butterscotch chips that you went to the store, specifically to buy.
Center a rack in the oven and preheat to 350º F. Gently de-gas the dough by pressing lightly.  On a lightly floured work surface, roll the dough into a 16 x 12-inch rectangle.  Using a pastry brush, spread the cinnamon-butter evenly over the dough.  Sprinkle the dough with the chopped chips. Roll the dough up, length-wise, and cut into 1″ rolls and place side by side. Loosely cover the pan with plastic wrap and let the cake rise in a warm place until it is almost doubled in size, about 30 minutes.
Bake the cake until the top is deep golden brown, about 35 minutes.  Check after 20 minutes to make sure the top is not browning too fast.  If so, cover the top loosely with a sheet of aluminum foil for the last 10-15 minutes to prevent over browning.  Transfer to a wire rack (remove the foil if used) and let cool for 10 minutes.
Gently tilt the pan and tap the side on a counter to release the sides of the cake.  Invert a serving platter on top of the cake, then invert the pan and the plate.  Leave the pan on the cake for 1 minute so the glaze transfers to the cake, then gently lift off the pan.  Using a rubber spatula, scrape out any glaze remaining in the pan and spread it over the warm surface of the coffee cake.  Serve the cake warm or at room temperature with a cup of coffee and a friend.  This is an adult dessert – enjoy being one and let the kids marvel at the mystery 🙂

*recipe adapted from The Galley Gourmet

7G9A2631

Pasta Carbonara – tried and true recipes

pasta carbonara bowl

I’m going back to some basics this week.  I’ve exhausted myself on trying something new nearly every single day for two months.  Time for some repeats!  I have made some form of pasta carbonara on a regular basis since Matt and I were first married, 8 years ago.  Carbonara is one of those dishes that you can nearly always make, even when you don’t think you have anything in the fridge for dinner.  (Hello, Monday dilemma)  Nearly everyone has some form of pasta on hand. Carbonara is traditionally made with spaghetti, but it can really be just fine with any kind of dried pasta you have on hand.  Also – most people have bacon either in the fridge or freezer.  The sauce for this dish comes from cheese and egg yolks – that’s it!  And if you’re wanting something extra tossed in, try frozen peas or corn or lima beans – any kind of random bag of frozen veg you have in the freezer that has been labeled “too little for a side dish, too much to throw away”

I love the comfort of this dish – I love the simplicity and I love that in about 25 minutes, I can have a dish on the table that makes everyone feel good.  The little darlin’ loved it, too.

pasta carbonara for lunch

carbonara

pasta carbonara

Good for little fingers is any kind of smaller pasta such as rigatoni, fusilli, macaroni, or these cute little corkscrew shapes (which I think are just un-trimmed macaroni)  really – whatever you think your toddler can grab or stab with a fork – go for it!

carbonara bowl

Pasta Carbonara
serves 2.5 (two big people and one little person) or 4 as a side dish

8 ounces dried pasta, cooked al dente (maybe cook a little longer for the baby if they don’t have more than 8 teeth, like mine)
4 strips of bacon, cut into 1 inch pieces
1 small onion, diced small
2 cloves of garlic, minced
1/2 cup frozen peas (or other vegetable of your choice)
1/2 cup grated parmesan cheese
2 egg yolks

1. Salt your pasta water.  I usually put about 1/4 cup of salt into a large pot of water (at least a half gallon of water.)  EEEEEEEK, SALT!  Here’s the thing: it flavors your pasta.  You don’t have to salt the dish upon completion because you salted along the way.  Just enough salt gets absorbed into the pasta and it’s perfect.  The noodles could be eaten on their own.  Try it next time.  And if you’re still worried, just look at how much sodium is in the powdered cheese on your blue box mac and cheese.

2. Bring the water to a rolling boil and cook the pasta till al dente, or a little over for the little mouths that will be eating.  Reserve a cup of pasta water and then drain your pasta, rinse and set aside.

3. Cook the bacon strips in a large skillet over medium heat until crispy.  Reserve on a paper towel and drain all but a tablespoon of the oil from the pan.  Toss in your onion and garlic and cook, stirring, until translucent.  Add in your frozen vegetables and pasta and a splash of the pasta water and stir until combined.

4. Remove the pan from the burner and while stirring constantly, add the egg yolks and cheese.  Stir stir stir stir as to not get scrambled eggs.  The heat from the pasta will cook your yolks and they will combine with the cheese to make a sauce.  If the pasta looks a bit too dry, add more of your reserved water and stir to combine.  Pasta water is starchy and salty and PERFECT for making a pasta sauce.

5. Fold in the bacon, garnish with more cheese, if desired, and serve with a crusty piece of buttered bread.

6. And a glass of Malbec for the big people.

Enjoy!

Strawberry Banana Split Crepes

crepes

I’ve posted a lot of recipes lately that have strawberries, but there is a good reason – they’re in season!  When you’re at the store and strawberries are $1.30 for a pound, instead of $4 – that’s your sign that they are in season!  Now, I’m not kidding myself into believing that they aren’t grown in hot houses, BUT at least it’s the season for them, and in my mind, that makes me feel like they taste better.

I wanted to make a strawberry crepe, so I looked up a simple crepe recipe, and where it called for 1/2 cup of water, I added a 1/2 cup of strawberry puree instead, plus a bit more water to thin it out.  My strawberry puree was made-up, too, as was the strawberry-vanilla bean whipped cream!

You need to make your crepe batter the night before you use it, so make this batter tonight and have crepes in the morning while the weekend is still here!  This recipe looks like a sugar bomb, but it actually wasn’t.  The crepes have zero sugar except the strawberry puree, which only has 3 tbs and it’s also used to sweeten the whipped cream. So if you don’t add the chocolate sauce, this is really low sugar!  And it definitely doesn’t taste like you held back!

bsplit crepes

Strawberry Crepes

3/4 cup whole milk
1 cup flour
2 eggs
1/2 cup strawberry puree (recipe follows)
2 tbs water
3 tbs melted butter

Put all the ingredients into a bowl or a large, tall cup and with your immersion blender, blend for 15-20 seconds until fully mixed.  If you don’t have an immersion blender, use a regular blender for the same time.  Transfer to a container and chill for one hour, up to 48 hours (I just did this step before I went to bed and used it the next morning.)

In a 10″ non-stick, shallow skillet, heat teaspoon of butter over medium high heat, or just spray with non stick spray, but you want your pan to be pretty hot.  Add a quarter cup of batter to the pan and swirl around till it’s spread as thin as possible. THE FIRST CREPE IS ALWAYS CRAP.  Just throw it away.  Now, you’re ready to begin.  By 1/4 cup scoops, (I used a ladle) swirl your batter in the pan very quickly and let it set for at least 1 to 2 minutes before flipping.  If your pan is hotter than mine, you may need to alter your time.  With a wide spatula (I used a fish spatula), slide under the crepe and flip over.  The other side won’t take as long to cook.  Keep finished crepes covered in a towel so they will stay warm and pliable.  This batter made about 8-10 crepes for me, but if you’re really skilled at swirling your batter, you could squeeze 15 crepes out of this amount.  I am not skilled and my crepes are always thicker than they should be, but they’re still delicious!

Fill the crepe with sliced bananas, a drizzle of left over strawberry puree, and a dollop of whipped cream.  Add more strawberries and whipped cream on top, and if you’re feeling the entire banana split thing, drizzle in chocolate syrup (I used Torani chocolate syrup.)  Or even some toasted pecans!  Have fun – it’s the weekend!

Strawberry Puree

1 lb of fresh strawberries, hulled and halved
3 tbs sugar
1 vanilla bean, split and scraped of its seeds. If you don’t have a vanilla bean, wait, and add some vanilla paste or vanilla extract later when you’re blending)
1/4 cup water

Place all the ingredients into a medium saucepan and cook over medium low heat till bubbly.  Cook for about 15 minutes until the strawberries begin to break down.  Remove the vanilla bean and transfer to a blender or a tall cup with your immersion blender and blend, with an extra 1/2 cup of water till fully blended and no chunks remain.  Add the vanilla bean paste or vanilla extract (about 1 tsp) if you want and blend again.

Strawberry Vanilla Bean Whipped Cream

1 cup heavy cream
1 tsp vanilla bean paste
1/4 cup strawberry puree

Place all ingredients into a bowl and whip until soft peaks form.  (I used my immersion blender, duh)