Banana Caramel Cream Pavlova

Bananas Foster Pavlova
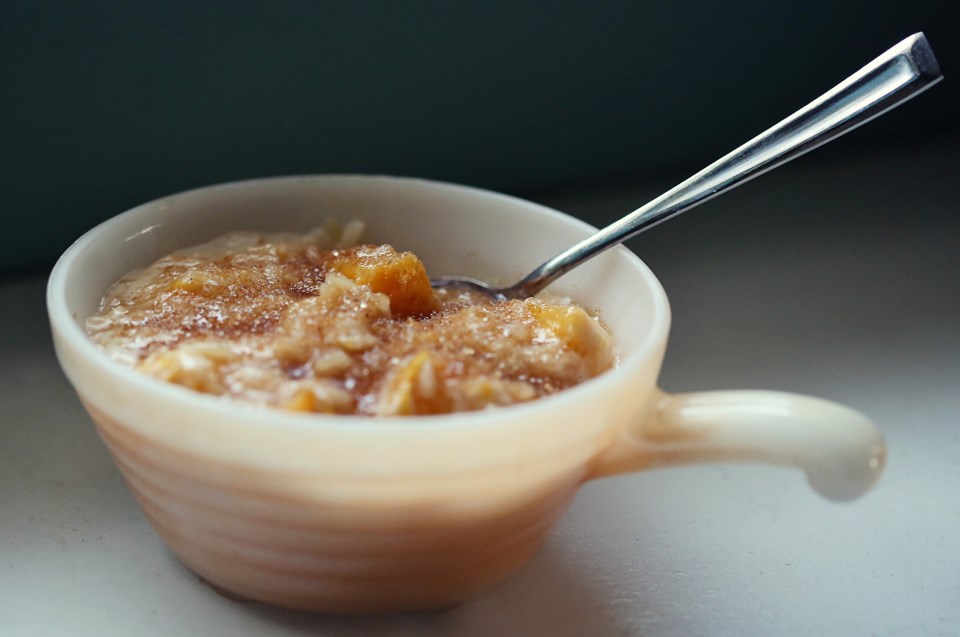
This seems like a Sunday afternoon dessert.  Ethereal, light, comforting and sweet.  For many during the season of Lent, Sunday is a break from their chosen 40 day fast.  We had to break our fast this morning as we had family in town and went to church and then they had to get a quick lunch and get on the road.  So we had brunch out at our favorite place, Crafthouse.  Does it count if we didn’t pay for the meal? 🙂 Anyway, we are dedicated to our no-eating-out fast and will continue throughout the weeks and will not plan on breaking the fast on Sundays.

One of my plans for Lent is to plan meals that are more exciting than going out to eat – things we look forward to more than going to a restaurant!  This fancy-schmancy dessert could make anyone feel as if they were at a posh little bistro having dessert and coffee!  I’ve done a pavlova on this blog before, and I love how versatile they can be.  A few weeks ago I bought this yogurt in a moment of weakness.  I always buy plain yogurt and add my own sugar because flavored yogurts have SO MUCH SUGAR.  However, I couldn’t resist the flavor description: honey salted caramel?! After we tasted it, Matt suggested it would be awesome on a pavlova and that we could add bananas and have it be a shockingly all-white dessert.  Cloud like, from the Greek Gods themselves.  I added vanilla bean to my pavlova and torched raw sugar on top of the bananas and with the combination of the salted caramel tanginess of the yogurt, it made an incredible dessert!  It makes me want to try lots of different combinations with various yogurt flavors!  I’ll post my pavlova recipe for you, here, again and you can do whatever toppings you can dream up!

Vanilla Bean Pavlovas
makes 12-15 small meringues

1 1/2 teaspoons vanilla bean paste
1/2 teaspoon cream of tartar
1 1/2 Tbsp cornstarch
1 1/2 cups granulated sugar
5-6 (about 6 oz) large egg whites, room temperature
Pinch salt

Place rack in the middle of the oven and preheat the oven to 275°. Line a large baking sheet with parchment paper.  Stir the cornstarch into the sugar in a small bowl.

In a large bowl of a heavy-duty mixer, fitted with whisk attachment, whip egg whites, cream of tartar and salt, starting on low, increasing to medium speed until soft peaks start to become visible, approximately 2 to 3 minutes.

Increase speed to medium-high, slowly and gradually sprinkling in the sugar-cornstarch mixture. A few minutes after these dry ingredients are added, slowly pour in the vanilla.  Increase speed a bit and whip until meringue is glossy, and stiff peaks form when the whisk is lifted, 4 to 5 minutes.

Pipe or spoon the meringue into 8-10 large round mounds that are 3 inches wide on the parchment-lined baking sheet.  With the back of a spoon, create an indentation in the middle of the mound for holding the filling once meringue is baked.

Place baking sheet in the oven. Reduce oven temperature to 250°F. Bake for 50-60 minutes, or until the meringues are crisp, dry to the touch on the outside, and white — not tan-colored or cracked. The interiors should have a marshmallow-like consistency. Check on meringues at least once during the baking time. If they appear to be taking on color or cracking, reduce temperature 25 degrees, and turn pan around.

Gently lift from the baking sheet and cool on a wire rack. Will keep in a tightly sealed container at room temperature for a week.

Ginger Scallion Sauce and Taking a Fast from Fast Food

Ginger Scallion Sauce
It’s Ash Wednesday and for many, that means a time of choosing to fast from one vice or another in order to devote the time previously taken by the vice to thinking about God or praying for focus or simply remembering Christ’s sacrifice.  It doesn’t even have to be a vice, necessarily, but something that you do or perhaps over indulge on a daily or weekly basis, that if you gave it up, it would create a bit of a hole or an inconvenience in your day and force you to remember why you are fasting from it in the first place.  Many give up certain foods: sugar, coffee, sodas, fried foods.  Some give up distractions like apps on their cell phones or Facebook or watching tv.

Matt suggested that we give up eating out at restaurants for Lent this year.  This obviously involves my participation more than his, as I will be doing the majority of the cooking.  But I know that for both of us, we lean on the ability to go get something fast and easy too often.  I cook a LOT, but I use dining out as a “break” or a “reward” for cooking all week.  I use it when I just “don’t wanna” and sometimes when I just feel plain burned out on thinking up another meal to cook at home. I thought it was a good thing to give up, though, and so I agreed.  He will no doubt cook more often during this time, too.  Today is the first day of Lent and today’s recipe is from our lunch today.

I don’t believe you have to be Catholic to participate in the season of Lent.  I believe any tradition that helps us refocus on the sacrifice and life of Christ is a worthwhile endeavor.  Borrowing from other religious cultures can enhance our own or refresh the way we see things and shed new light on old habits.  Someone questioned how we “do” Lent regarding what we give up and asked if it’s just “another resolution” or if we really pray or do what we’re supposed to do in the absence of the thing we’re giving up.  I have never thought of Lent as “just another resolution” and fully intend on dining out at restaurants once the 40 days are over.  But for these next six weeks, I plan on remembering a few things in the absence of the convenience of dining out and every time I feel tempted:

1. It’s a privilege to eat out – even fast food, not just nice restaurants.
2. Not everyone has the joy of owning a house or a kitchen to cook in.  We do.
3. When I don’t feel like cooking over the next 40 days, I will think of my new friends at Carpenter’s Church who only WISH they had a nice kitchen, but instead have to rely on the kindness of soup kitchens downtown to get a hot meal.
4. Not everyone can afford good produce at the grocery store.  We can and I plan on utilizing that honor.
5. Dining out is a break from reality.  So many people in the world never get a break from their harsh realities.  They have no choice.

This morning I taught my little cooking class at Carpenter’s and our class ended and we finished cleaning up about 10 till noon.  Typically, I would have called up Matt and said, “We’ll just come pick you up, I don’t feel like cooking again.”  But I called him up instead and said, “I gotta run home and cook – lunch will be a little later today.”  I had been to the store yesterday and bought all the items needed (a privilege)  for one of our favorite garnishes for Asian type dishes, Ginger Scallion Sauce.  We love to put it on just about anything, and today, I tossed it along with some sticky rice and leftover pork we cooked on Sunday, and some pineapple (and a fried egg, of course).  A really fresh, tasty meal and it only took me 30 minutes, start to finish.

You don’t have to give up something for Lent in order to be “good” or “right.”  It’s not about that.  However, in order to be more disciplined in life, there really is no other way than to TRY.  Think you’re not disciplined enough to give something up for 40 days?  Well… have you tried?

Sticky Rice with Broiled Pork and Pineapple


Ginger Scallion Sauce
makes about 3 cups

Momofuku Ginger Scallion Sauce
Look how lazy I am.  But there you have it – we don’t alter it so I figured I’d just show you the page out of the book!  Everything in the Momofuku cookbook is good, from what we’ve tried, so far.  David Chang is one of our biggest celebrity chef crushes and we think he can do no wrong.  Pick up this book today! And the Momofuku Milk Bar cookbook while you’re at it!


Glazed Pork Chops with Home Fries and a Fried Egg – The Ultimate Breakfast for Dinner

brunch-pork chops, home fries and a fried egg
We made this brunch meal a few weeks ago and it has stuck with me as one of the most satisfying meals I’ve had in a long time.  A salty/sweet glazed pork chop with home fries and a fried egg – the perfect brunch!  The pork recipe comes from Serious Eats and we followed it to the letter.  So I will give you my home fries recipe, here, and let you follow the Serious Eats link to make the rest.   This was just as good as any brunch you might get on Sunday at a nicer restaurant and best of all – it only took about 30 minutes!  Serious Eats is one of our favorite sites for recipes.  There are certain, very popular sites (don’t want to drop names but it starts with a M and ends with an artha Stewart dot com)  that don’t have reliable recipes.  You can tell when a recipe has just been thought up but not tested thoroughly.  Not so at Serious Eats.  You can bet that each recipe has been done a few times and you can rely on the promised outcome!

That’s another thing I love about writing this blog and reading most food blogs – the author is posting things she has literally tried at home!  So even if something goes wrong here or there, you can ask questions in the comments and be a part of the unofficial test group in helping to refine the recipe!  And I hope you all who read my blog will tell me when you hit road bumps.  I’m learning every day how to be better at this craft and it’s not helping me one bit if you stay silent when a recipe goes wrong for you!

Happy cooking and when in doubt, fry up some potatoes…

Pork Chops with Home Fries and a Fried Egg

Seasoned Home Fries
makes two servings (plus 1/2 for the little tater tot at your table)

1 large baking potato
2 tablespoons olive oil
1/2 tsp seasoned salt
1/4 tsp fresh cracked pepper

Scrub the potato and dice evenly into 1/2″ square dice.  The more evenly you chop, the more evenly your potatoes will cook!  Heat a large saucepan filled with water over high heat till boiling.  Drop the potatoes and cook until partially cooked – still a little firm, but getting softer on the outside when pierced with a fork.  Remove the potatoes and spread out on a cookie sheet lined with paper towels and pat the potatoes dry.

Heat the olive oil in a non-stick skillet over medium high heat until it shimmers.  Season the potatoes with season salt and pepper and toss in the skillet.  Let them brown evenly on each side and then remove from heat, adjust seasoning as you wish and serve with pork chops and a fried egg!

brunch


Cooking Basics – Salted Caramel Sauce

Salted Caramel Sauce

This week is so busy with all the prep for our fundraiser dinner for Carpenter’s Church!  So, instead of an involved recipe, I decided to give you a simple kitchen basic that I have made about fifteen times in the past twenty-four hours as a topping for the banana bread pudding I’m doing for the dinner tomorrow.

Okay, okay, so maybe this isn’t the most basic kitchen skill to have.  It’s not exactly on par with the humble chicken stock. HOWEVER! It tastes outstanding and you have the ingredients in your house right now.  You could make a batch for ice cream, for brownies, as a topping for a cake or as a totally amazing sweet fondue for bread/fruit/a spoon.  You don’t need a reason.  You could jar this up and give it away as gifts at Christmas or any time.  You could make a few batches and keep them all to yourself – the only thing I know for sure is that if you try this recipe, you WILL be back for more…

Salted Caramel Sauce
makes about a cup

1 cup white sugar
1/4 cup water
1/2 cup warmed heavy cream (warm it in the microwave for a minute)
2 tablespoons unsalted butter
1 tablespoon vanilla bean paste (or extract)
3/4 teaspoon kosher salt

In a large saucepan over medium heat, add the sugar and water and stir with a spatula to fully incorporate.  Put a lid on the pot and let it come up to a simmer.  Have you ever read recipes that tell you to brush the sides of your pan with a wet basting brush to keep sugar crystals from forming while making caramel?  No more!  That’s tedious and I don’t like getting my fingers that close to boiling sugar.  The lid creates condensation that drips down and keeps all the sugar in place, instead of creeping up the sides like it will if the lid’s off.

Swirling occasionally while cooking, check for the color.  When it develops a nice golden amber color, remove it from the heat and stir in the heavy cream and vanilla.  This will bubble furiously, but just whisk, whisk, whisk until it calms down.  Add the butter and whisk to incorporate.  Then, add the salt and stir until dissolved.  Let it cool and taste test for salt level.  Store in jars on the counter for a week or in the fridge for a month.


Roasted Salmon with Lima Bean Risotto

lima bean risotto and salmon
This week is really busy already! Hence, being behind in my posting! The Palmer house is bustling with preparations for the first annual Carpenter’s Banquet this Friday.  We are cooking for about 250 people, and my friends, that is a LOT of food.  I am amazed by how much it really is.  Forty heads of lettuce for the salads, forty butternut squash, fifty eggs for the bread pudding, two gallons of salted caramel for the bread pudding.  Two gallons?!  Of caramel?  It just adds up.  Anything multiplied by 250 is going to be insane and I will be the first to say that I’m super glad I’m not a caterer!  I think it’s going to be an amazing event and all the proceeds from ticket sales and the silent auction will go directly to Carpenter’s Church for their supportive housing project.  It’s nice to be a part of something so good.

Tonight, we also shot the second show for our 24 Frames segment, and I’m super excited that Matt got to be a part of this episode!  It is about our very regular pizza nights and Matt’s perfect pizza crust!  I can’t wait to see what Paul and Daniel do after the first episode turned out surprisingly wonderful, considering I was in it. 🙂

Tonight I give you a simple dish that is packed with flavor.  It’s a riff off of yet another Tyler Florence recipe from his wonderful family cookbook, Start Fresh.  The recipe originally called for peas, but I had lima beans and I think it worked great!  I loved this dish because it was really simple to make and had a protein, a starch and a vegetable in just two dishes!  And it felt super comforting without being too heavy.  We’ve got a few chilly nights left in this season, I’m afraid, but with dishes like this, it won’t be so bad to stay in and cook!

salmon and lima bean risotto - great for toddlers


Roasted Salmon with Lima Bean Risotto
serves 4 or 6-8 child servings

2 tbs olive oil
1 pound salmon fillet, bones removed and cut into 4 portions
4 cups low sodium chicken or vegetable broth
1 cup lima beans
1 cup Arborio rice
1 tbs unsalted butter
1/2 cup grated Parmesan cheese

Preheat the over to 400F.

Season the salmon portions with salt and pepper. In a large ovenproof skillet, heat the oil over medium-high heat.  Add the salmon pieces and cook without turning until browned on the bottom, 2 to 3 minutes.  Transfer the pan to the oven and cook until the salmon just flakes when tested with a fork, about ten minutes.

In a large saucepan, bring the broth to a boil over medium heat.  Add the lima beans, reduce heat, and cook until bright green, about 2 minutes.  Scoop out the beans into a bowl.  Transfer half of the beans to a blender and puree until smooth.  Set aside.  Keep the broth warm on the stove.

In a large saucepan, toast the rice over medium heat, stirring often, until the rice has a nutty aroma, 3 to 5 minutes.  Add the broth, one cup at a time, stirring and waiting until each addition is almost absorbed before adding more.  Continue until most of the liquid has been absorbed.

Before all the liquid has been absorbed, stir in both the pureed and whole beans, butter, and cheese.  Serve the salmon fillets on top of the risotto, or flake the salmon into bite size pieces and serve risotto on the side, like I did for Ollie’s plate in the pic above! Enjoy!

Challah French Toast with Caramelized Bananas and Toasted Almonds

Challah French Toast with Caramelized Bananas
So when Matt made Challah a couple weekends ago, the leftover loaf sat on our counter among other homemade rolls he made.  We ate the rolls, but the Challah just sat there, threatening to mold.  So I stuck it in the fridge to prolong its life and waited for the weekend.  Saturday rolled around and I turned that almost-moldy bread into amazing French toast.  Cinnamon, vanilla bean, a touch of almond extract made the batter extra decadent.  I pan fried some bananas and almond slices in a touch of butter and agave nectar and sprinkled them on top.  It was so good and once again, I got the satisfaction of knowing I didn’t let Matt’s bread go to waste!  

Happy Weekend!  
Challah French Toast
batter makes enough for about 8-10 slices of thick toast

4 eggs
2/3 cup milk
1 tsp cinnamon
1 tsp vanilla bean paste or extract
1/4 tsp almond extract
8-10 thick slices of bread – any bread will do, but dense, enriched bread works best
2 bananas, sliced
1/4 cup sliced almonds
Butter for pan
Syrup of your choice – I chose dark amber agave nectar

*Give yourself a 30 minute head start so the bread can soak! Heat your oven to 200F.  

Whisk the eggs, milk, cinnamon and extracts together and pour into a 9×13″ pan.  Arrange the bread till it fills the pan and let it soak on one side for 15 minutes, then flip and let it soak for another 15 minutes, pressing down to soak up more batter.  

Heat a large non-stick skillet or griddle over medium heat and add butter.  When butter starts to bubble, add the slices of bread (work in batches) and cook till golden brown on each side, about 5 minutes per side.  As they finish, put them on a baking sheet and place in the oven to keep warm while you finish the rest.

When you’re done with the toast, wipe the skillet out with a few paper towels and over medium high heat, toast the almonds until brown and fragrant.  Remove and add one tablespoon of butter, a swirl of syrup and the bananas and cook until golden on each side, about 1-2 minutes per side.  Top the toast with almonds and bananas and syrup and serve!


Healthy Weeknight Dinner – White Beans with Crispy Kale

White Beans with Kale, Onion and Bacon
Yet another beautifully simple dish inspired by Tyler Florence’s book, Start Fresh (I very loosely followed the recipe).  I’d recommend this book to anyone who likes cooking, but especially those who are cooking for babies or toddlers and desiring to show them a variety of foods at an early age.  I was talking to a friend just last night who said that because of the picky way she ate when she was little, she has such a hard time trying new foods as an adult.  Consequently, she is sure she hates cauliflower but is going to try it for the first time this week.  Hooray!  There are many ways to enjoy new vegetables and one of the best ways is by roasting them. So simple, so fresh and brings out a whole host of flavors you won’t get by steaming or boiling.

This recipe calls for kale, onion and bacon to roast together in the oven.  The kale gets super crispy and the bacon adds enough fat to take the dish to comfort-food level.  If I were feeding this to a baby, I’d simply take a bit of each component and blend it up with a little water or stock!  It’s totally easy to let the babies eat what you eat – just cook good food for YOU and blend it or mash it up for THEM!  This is the essence of Start Fresh and if you want an all-inclusive book for babies through toddler years and older, this is the book for you!

White Beans and Kale with Bacon

White Beans with Kale, Shallot and Bacon*
serves 4 to 6

1 large bunch of kale leaves, ribs removed and cut into 1-inch pieces
2 small shallots, cut into strips
3 slices thick cut bacon, cut into 1-inch pieces
3 tablespoons pine nuts
2 cans white beans, drained and rinsed
2 tbs olive oil
1 clove garlic
1 cup chicken stock
Salt and pepper to taste

On a baking sheet, arrange the kale, bacon, shallot and pine nuts and bake at 350F until the bacon is crisp, about 25 minutes.  Stir a few times as it bakes to ensure nothing burns and the bacon cooks evenly.  In a medium saucepan, heat the olive oil and crush the clove of garlic and add to the oil and when it begins to sizzle and turn brown, add the beans and stir to combine, add the stock and reduce the heat to low and let the beans simmer.  Salt and pepper the beans to taste and discard the garlic clove.  Serve the beans with the kale mixture on top and enjoy!

*inspired by a recipe from Start Fresh.  He made a risotto and I used beans 🙂  Work with what you have!

Peachy Rice – a warming breakfast

7G9A8761
This lovely little bowl of sunshine was a great switch-up in our regular oatmeal routine last week.  Out of Tyler Florence’s wonderful book, Start Fresh, this was in the 9-12 month section as a breakfast or snack option. This is simply an amazing cookbook.  Given to me by my dear friend and fellow foodie, Becky, I have made several recipes from the book and will post a few more favorites before the week is over! This one was an easy and delicious start – Roasted peaches, apple juice, coconut milk, rice and brown sugar?!  Okay, okay, maybe a bit too much sugar to start every day, but for sure a wonderful afternoon snack and really, not THAT much sugar if you leave out the apple juice and substitute water!  We loved it, Olive loved it, and even my dad, who was stopping through on his way to a doctor’s appointment, loved it!  I’d highly recommend it as a new option for the mornings!  If you use brown or basmati rice, it’d be even healthier!

7G9A8756

Peachy Rice*
serves 4 adults or 6-8 baby portions

1 tbs unsalted butter
3 ripe peaches, cut into chunks
1 cup long-grain white rice (I used Asian sticky rice)
2 cups apple juice or water ( I used half water, half juice)
1/2 cup whole milk
1 cup coconut milk
1/2 tsp cinnamon
1 tsp vanilla extract
pinch of salt
2 tablespoons brown sugar

In a large saucepan, melt the butter over medium heat until bubbling.  Add the peaches and cook until they have released some of their juices, about 5 minutes.

Add the rice and stir until well coated.  Add the apple juice, milk, coconut milk, cinnamon stick, vanilla and salt and bring to a boil.  Reduce heat to medium, cover, and cook until the rice is tender and most of the liquid has been absorbed, about 20 minutes.

Fold in the sugar, and stir until well blended.  Serve warm!

*adapted from Start Fresh

Happy Valentine’s Day – Smokey Whiskey Truffles

Whiskey Truffles
So.  Valentine’s Day. Pink hearts and flowers and chocolate.  I do enjoy the cheerfulness of it all – the happy colors and the excuse to make everything heart-shaped.  I think next year it will be even more fun for celebrating with my little red-head as she’ll be close to three years old and will actually know what’s going on.  However, this holiday seems to be only geared toward women, full of expectations and children, full of sugar rage.  Not much love for the guys.  Guys seem to have all the pressure to pick out a gift that’s not TOO cliche, but also not too far off the expected path, because then we’d feel sad we didn’t get flowers.  I’m sorry, men.  I really am.

I love that chocolate is associated with Valentine’s, because there’s not much Matt likes more than chocolate, except maybe coffee and smokey things like bacon and…whiskey.  I skipped the bacon and went for the whiskey for his Valentine’s treat this year.  Dark chocolate ganache infused with Laphroaig whiskey and coated in a super thin shell of even darker chocolate.  For those who may not know, Laphroaig tastes like a campfire smells.  It could seriously make someone suspect of smoking because it’s THAT smokey.  For some strange reason, Matt loves it, and even though he might not initially approve of me putting his whiskey into anything except a glass, I think the results were good.  He took one bite and said, “They’re SO SMOKEY!” and that was a good thing 🙂

I was proud of the shell, too.  It’s quite hard to temper chocolate correctly so that it has a nice shine instead of dull streaks, and so that it’s perfectly, glassy thin, instead of thick and clumpy.  I’ve erred more on the side of thick and clumpy in the past than I’d like to admit.  I realized my success with these had a lot to do with the chocolate I used.  If you want to make a perfectly tempered chocolate shell, you can NOT use chocolate chips.  They’ve been coated in paraffin to make them not stick to each other in the bag and are already dull and streaky.  (chips are fine for the centers, though!) Pick a chocolate bar that is already shiny and has a good snap – that lets you know that it has been tempered properly already, so it will set you up for a better chance of success.  And if you don’t want to mess with the shell at all (and I wouldn’t blame you a bit) then simply roll the centers in cocoa powder or powdered sugar and call it a day!
Dark Chocolate Whiskey Truffles

Dark Chocolate Whiskey Truffles
makes about 2 dozen small truffles

For the centers:
10 oz dark chocolate chips (I used Ghirardelli 65%)
1/2 cup heavy cream
2 tablespoons unsalted butter at room temp
2 tablespoons whiskey (you can also use any liquor here – brandy or Kahlua would be great)

For the shell:
10 oz good quality dark chocolate (I used Lindt 70%), chopped fine

Place your chocolate chips in a medium bowl.  In a saucepan over medium heat, bring the heavy cream to a boil, then immediately take it off the heat and pour it over the chocolate.  Let this sit for about a minute and then, in the center of the bowl with a small spatula, begin stirring in tight circles until the chocolate melts and combines with the cream.  It takes longer than you think, but I promise – it will happen.  Keep stirring and don’t stop believin’.  Once the chocolate is completely melted, let it cool down a bit and then stir in the butter until completely incorporated.  Going one tablespoon at a time (depending on taste) stir in the whiskey.  Completely incorporate one tablespoon and then taste to see how you like it.  The whiskey really changes the viscosity of the chocolate, but don’t worry.  It just needs to be stirred a LOT.  Once you’ve got the level of flavor you want in the mixture, cover the bowl with plastic wrap and refrigerate until set – at least an hour.  When the chocolate has firmed up, using a teaspoon sized scoop, scoop out your centers and form into balls and place on a plate or cookie sheet and cover until ready to use.  I keep mine in the fridge until I’m ready to dip, but I let the centers set on the counter for about an hour before dipping so they wouldn’t bring down the temp of my tempered chocolate too fast.
Dark Chocolate Smokey Truffles

For tempering the chocolate:
In a double boiler, or a glass bowl set over a medium saucepan (this is my preferred way.  I feel the glass protects the chocolate from scorching better than a metal double boiler pan) slowly melt 2/3rds of your chocolate.  Stir constantly and bring the temp up to 115-118F.  Use an instant read thermometer to get the best reading.  Once the chocolate reaches 115, take it off the heat and add in the remaining 1/3 chopped chocolate, small amounts at a time and stir to melt.  Some pieces might not melt completely, but they will by the time you’re ready to dip.  And if they don’t, like mine didn’t, oh well.  Dip on!

As you are incorporating the remaining chopped chocolate, you’re wanting your chocolate to get down to 82F.  Once it gets down to 82, place the bowl back on your saucepan and bring the temp back up to 88-90F.  Once it reaches this range, you are ready to start dipping!  Your chocolate should be very liquidy and fall easily off the spatula in ribbons.  Dip the centers quickly and place on parchment to cool.  Don’t worry about being perfect – just dip!  Keep an eye on the temp of your chocolate.  If it drops below 88, your chocolate will start to get thicker.  No worries – just return the bowl to your saucepan and heat for about a minute.  Then keep dipping till you’re done!  I sprinkled cocoa nibs on top of the truffles before they dried and I love the extra bit of crunch it gives!

Dark Chocolate Truffles with Whiskey

Tempering chocolate requires a LOT of patience, most of the time I do not have.  But if you find yourself in a pretty zen-like state and you want to try it, I’d encourage you to.  It’s a nice process that yields really pretty results!  And if you have leftover tempered chocolate, do what I did and submerge gingersnaps in it 🙂

Homemade Challah – a Family Guest Post

challah

Guest post today from Matt Palmer, a.k.a, The Bread Man.  He will be talking about Challah and I think this may be my second favorite bread he makes, next to his plain country bread.  It’s an indulgent bread made with lots of eggs and sugar and it is amazing with jam or turned into French toast (you better believe that’ll be a future post!) He has flavored the bread with orange zest, honey, vanilla, plain sugar – they have all turned out wonderful.  I can’t remember a time he did this recipe and it flopped, and he’s made it a half dozen times!  I’ll let him talk about it:

A new bakery opened in town a while ago and I was excited to check it out, because I had heard they had “fresh baked bread.” You’d think that would be common (or even implied) for bakeries, but it seems “bakery” has become synonymous with “cakery” these days. When we visited, I found they indeed did have fresh baked bread: banana bread, corn bread, and other technically-classified-as-bread baked items I can’t remember. I like banana bread, but I think it’s a little misleading to just call it “bread.” Bread is flour, water, salt, and yeast – “the staff of life.” Banana bread is not “bread,” it’s “banana bread.” It’s like how Elvis is Elvis, and Elvis Costello is Elvis Costello.

That’s not to say all enriched doughs are inferior – a good brioche is almost as much a work of art as a great baguette. My favorite enriched bread to make though, is challah. It’s easy to work with, fun to braid in all sorts of different ways, and the color is amazing, with a creamy yellow crumb and a rich brown crust.
Challah is traditionally a Jewish Sabbath bread, and I think it’s a great weekend activity. You can have a great loaf of bread in just a few hours on Saturday and turn the leftovers into French toast for Sunday brunch.
I followed the recipe from Peter Reinhart and will post pretty much directly from Michael Ruhlman’s blog when he did the hard work and wrote out the recipe for me.
challah fresh out of the oven
Challah
Makes 2 large loaves or 4 small ones
2 ½ cups/510 grams lukewarm water about 95 degrees F
1 ½ tablespoons/14 grams instant yeast
8–10 egg yolks or 170 grams depending on weight of yolks
5 tablespoons/71 grams vegetable oil
6 tablespoons/85 grams sugar
1 tablespoon/21 grams vanilla extract (optional)
7 ½ cups/964 grams unbleached bread flour
2 ½ teaspoons/19 grams salt or 4 teaspoons/20 grams coarse kosher salt
1 egg white for egg wash
2 tablespoons/30 grams water for egg wash
2 tablespoons/20 grams sesame or poppy seeds for garnish
  • Combine the water and the yeast in a mixing bowl or the bowl of a 5-quart mixer and whisk together to dissolve.  Add the egg yolks, oil, sugar, and vanilla, if using, and whisk together to break up then add the flour and salt.
  • Using the paddle attachment, mix the dough for 2 minutes on the lowest speed.  Let the dough rest for 5 minutes.
  • Switch to the dough hook and mix on medium low for 4 minutes.
  • Use a floured bowl scraper or floured hands to transfer the dough to a lightly floured surface, sprinkle the top lightly with flour and knead by hand for a couple of minutes until the dough is soft and supple.  It should be tacky but not sticky.
  • Place the dough in a lightly oiled bowl, or divide the dough in half or in as many portions as you plan to bake,  and place in oiled bowls.  Cover and immediately place in the refrigerator.  The dough should rest at least overnight and can be kept refrigerated for up to 4 days.

On Baking Day:

  • Remove the dough from the fridge approximately 2 hours before you plan to bake.  Transfer it to a lightly floured surface and cut it into the desired number of braids you want to use or shape into loaves, or dinner rolls.
  • If you are braiding, flatten each piece with your hand, then roll into cigar shaped lengths.  Roll each piece once, then return to the first piece to roll it into a rope approximately 10 to 14 inches/25-36 centimeters long.  Make sure it will fit on your baking sheet!
    braiding challah
    shaping challah
  • Roll each piece to the same length then braid.  Place the loaves on sheet pans lined with parchment paper.
  • Make the egg wash and brush each loaf with the wash.   Reserve the rest of the wash in the fridge, and let the loaves rise uncovered for about an hour. They will not have risen much at this point.  Brush the loaves again with the egg wash and sprinkle with poppy seeds or sesame seeds or a combination of both.
  • Let the loaves rise for another hour until they increase to about 1 ½ times their size.

rising challah

  • 15 minutes before baking, pre-heat the oven to 350 degrees F./177 degrees C. or 300 degrees F./149 degrees C. for convection.
  • Bake for 20 minutes, then rotate the pan and bake for another 15 to 30 minutes, until the loaves sound hollow when thumped on the bottom and the internal temp is around 190 degrees F./88 degrees C. in the center.  If you used a whole egg wash, the crust will get darker than with the egg white wash, so don’t be fooled into thinking the bread is done until it passes the thump and temperature test.
  • Cool on a wire rack for at least 45 minutes before slicing and serving.