Coffee Can Bread

Coffee Can Brown BreadBoston Brown Bread Loaf

I love this bread.  It’s definitely a bread meant for soup, butter, honey, a fried egg on top – something it can soak up.  It’s dense, smells like gingerbread and it bakes in an old coffee can.  How much more nostalgic or delightful can this get? We first made this recipe to accompany homemade clam chowder.  Both recipes came out of arguably the best issue of Bon Appetit in years – the November 2012 issue.  That issue had several recipes we’ve made countless times, AND an interview with Nick Offerman, a.k.a Ron Swanson.  Best issue ever.

This is called Boston Brown Bread.  It’s a classic recipe in New England and is typically made to go with clam chowder.  I love that it makes two loaves. I can freeze one right out of the oven, or give it away.  I think this time, it will travel with us this weekend to go see our friends, Matt and Anna in Dallas, who JUST found out they are having a baby GIRL in January.  We are so excited to go spend some time with our culinary soul mates and best friends.

So, call your nearest neighbor who you might suspect keeps everything and ask if they have any old coffee cans you can use.  I did exactly that with my friend, Ann, and she delivered.  🙂 One more thing that makes me happy when I make this bread – I think of Ann!

Have a wonderful weekend and bake something memorable!
Sliced Boston Brown Bread with Butter
Coffee Can Bread
makes two loaves

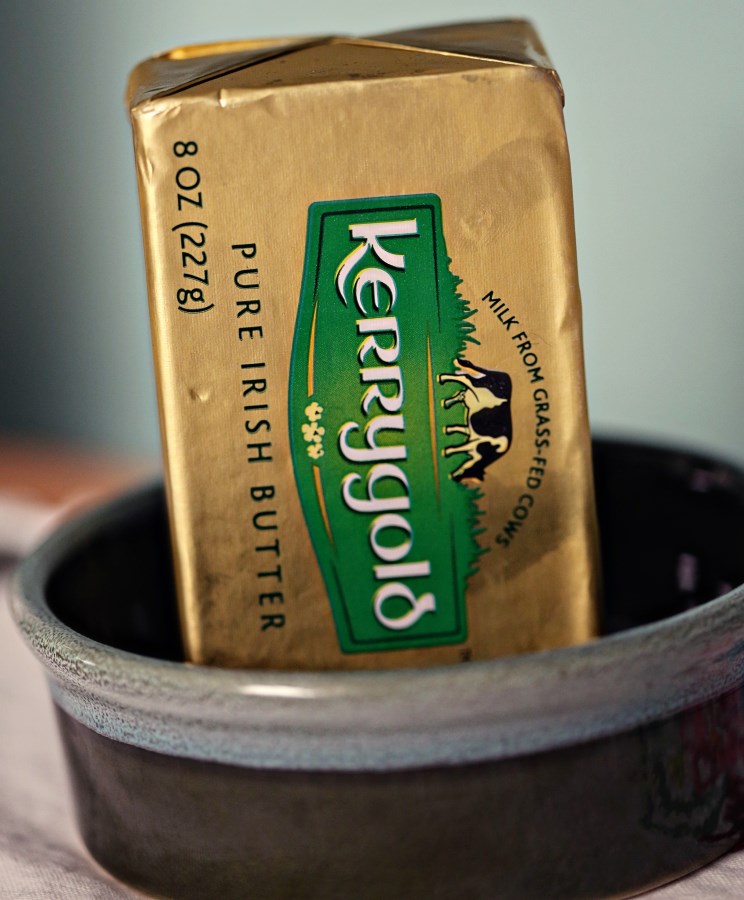
A few tablespoons of butter
2 cups whole milk
1/2 cup molasses
1/4 cup packed light brown sugar
1 tsp kosher salt
1 1/4 cups whole wheat flour
1 cup all-purpose flour
1 cup rye flour (this is the important one to not substitute – I think you could sub AP flour for the wheat and it would be just fine, but the rye imparts an important flavor to the bread)
1/3 cup cornmeal
1 tablespoon baking soda
1 tsp baking powder

2 – empty, clean coffee cans, 11-13 ounces

Preheat oven to 350F.  Cut two 6″ squares of foil.  Coat insides of the cans and one side of each piece of foil with butter.  Stir milk and brown sugar and salt in a small saucepan over low heat until sugar dissolves and mixture is just warmed (don’t boil).  Whisk whole wheat flour and the remaining ingredients in a large bowl.  Add milk mixture, whisking until smooth.  Divide batter between cans and smooth tops.  (note! if the cans still have a lip rim, simply take your can opener to the top and it will cut that lip right off).

Cover cans with foil, butter side down.  Secure foil with kitchen twine.  Place cans foil side up in a deep roasting pan or heavy, shallow pot.  Pour very hot water into pan to come about 2-3″ up the side of the cans.
Coffee Can Brown Bread out of the oven

Bake until a skewer inserted through the foil into the center of each loaf comes out clean, about 1.5 hours.  Transfer to a wire rack and let cool for 10 minutes.  Run a thin knife around the edges of the cans.  invert to release loaves onto a cooling rack.  Let cool for 20 minutes before slicing.  Serve with soft, salted butter and rejoice.

This is great salted butter.  We buy unsalted for baking, but for eating, salted is the way to go!
the only butter you need

Coffee Infused Tres Leches Cake

manyleches005


There are three things that make a dessert experience truly great:
1. The occasion
2. The company who helps you eat it
3. The number of leches involved

This particular dessert experience was one I will always remember.  My friend, Becky came into town for a few short days and because of her husband’s nomadic ways, they have traveled far away from Lubbock, I fear, never to return.  I cherish the times she comes back into town and actually spends some good, quality time over at our house.  I shot Becky and Trevor’s wedding four years ago and we became fast friends, immediately glued together by our love of food and cooking.  I was elated when she said she’s spend the better part of the day with me, so the first question we naturally discussed was, “What are we going to bake?!”

Becky is one of those people who knows how to cook.  It’s in her soul – she was taught from a very early age how to work her way around a kitchen, learning from her father and grandmother.  Becky’s happy place is in the kitchen, and so naturally, we both had a zen-like afternoon baking together.  We shared stories, we complained about bad food and we ATE our creation with gusto and silent, head-nodding approval between bites.  It was perfect.

We decided to do Rick Bayless’ Coffee Infused Tres Leches Cake that I’d recently seen on his show, Mexico, One Plate at a Time.  Rick Bayless is one of those safe names in the cooking world.  If the recipe is from his show, or from one of his many restaurants, or amazing cookbooks, you can rest assured the recipe will work, and will become one of your favorites to return to again and again.  This has happened to me many times and this cake happily joins the ranks.

This cake is intense.  It should be paired with a strong cup of black coffee and nothing else.  The addition of the coffee in the milk mixture is pure genius.  It cuts the richness just right and adds depth where there might just be a generic sweetness.  It has this incredibly creamy texture with hints of cinnamon and coffee.  It’s the best tres leches cake I’ve ever had.  (And I grew up around here – I’ve had plenty.)  It made me think of the wonderful flavors of horchata, and I think next time I make this, I’ll replace horchata for the heavy cream.

manyleches006

Coffee Tres Leches Cake*
serves 6

For the cake:
1 cup all purpose flour
¾ cup sugar
1 ½ teaspoons baking powder
Salt
4 eggs at room temperature
¼ cup vegetable oil
¼ teaspoon vanilla extract, preferably Mexican
½ teaspoon cream of tartar

For the milk mixture:
1 cup heavy cream
1 12-ounce can evaporated milk
1 14-ounce can sweetened condensed milk
½ cup freshly brewed espresso or strongly brewed coffee
1 teaspoon vanilla extract, preferably Mexican
¼ teaspoon cinnamon
1 cup sugar
5 egg whites at room temperature
½ teaspoon cream of tartar
extra cinnamon for dusting (or cocoa powder – or espresso powder would be good, too!)

Heat the oven to 350 degrees. Line a muffin pan that makes 6 large muffins with muffin papers. Or, I don’t have a huge muffin pan, so I used little ramekins and lined the bottom of each with parchment.  Just do it and you won’t be sad, scraping your cake off the bottom of the dish.
Place the flour, 6 tablespoons of the sugar, the baking powder and a pinch of salt in a large bowl and whisk to combine. Separate the eggs, dropping the whites into the bowl of a mixer and the yolks into a medium bowl.  Add the oil, vanilla and 2 tablespoons of water to the yolks and mix well. Beat the egg whites with the cream of tartar until they start to thicken and form soft peaks.  Gradually add the remaining 6 tablespoons of sugar and continue to beat until stiff peaks form.
Add 1/3 of the flour mixture to the egg yolks and mix well. Gently fold in 1/3 of the beaten egg whites. Repeat, alternating the flour mixture and egg whites until everything is thoroughly combined.  Scoop the fluffy batter into the prepared muffin tins, place in the hot oven and bake until the tops spring back when touched, 20 to 22 minutes. Allow to cool slightly, then take the individual cakes out of the dishes and invert them into a deep 13×9 inch baking dish.

Combine the heavy cream, evaporated milk, condensed milk, coffee, vanilla, cinnamon and a pinch of salt in a bowl and mix well. Slowly pour the mixture over the cakes, soaking them thoroughly. Cover with plastic wrap and refrigerate for 1 hour to allow the milks to be absorbed into the cakes.  It actually took longer than that for mine to absorb.  We spooned the mixture over the cakes and poked extra holes in them so they’d soak up more milk.  In the end, I still had some leftover, so don’t worry about that.

Combine the sugar with 1/3 cup water in a small (2-quart) saucepan and bring to a boil over high heat, swirling the pan gently until all the sugar is dissolved.  Dip a brush in water and use it to clean the sides of the pan so no sugar crystals remain.  (This is an important step in keeping the syrup from recrystallizing.) Lower the heat to medium and boil the syrup until it reaches soft ball stage (about 240 degrees).
While the syrup is boiling, beat the egg whites with the cream of tartar and a pinch of salt until the whites form soft peaks.  Drizzle in the hot sugar syrup very slowly while the mixer is running.  Continue to beat until the bottom of the bowl is cool.  This takes forever, so do what Becky does and place ice packs on the outside of your bowl.  Or peas.
To serve, place each soaked cake on a plate, decorate with a big dollop of meringue, toasting the peaks with a kitchen torch.  Sprinkle with the cinnamon or cocoa and eat with great gusto!

*only slightly adapted from the original recipe

manyleches003 manyleches007 manyleches009


Thank you for that afternoon, Becky.  It will sustain me for months to come.  Until next time!  XOXO

Stroopwafels – Your New Coffee Lid

stroop008
My friend, Libby, and I first saw stroopwafel cookies at an outdoor market in the center of Haarlem, Holland.  We were having an “off” day from our Let’s Start Talking mission trip and decided to explore the town’s morning market.  I think it must have been the very first time in my life that I explored and ventured off so far away from home and with zero adult supervision.  We were technically adults as sophomores in college (are you done laughing, yet?) – I say “technically” because someone trusted us to go across the globe to teach English to non-native speakers, but in all other manners of speaking, we were babies.

While walking the streets of Haarlem (or trying our best to ride our bikes without getting killed after not being on a bike since the 90s) we discovered so many things we didn’t know existed.  Crazy street performers that came alive at the sound of a coin dropping into their hats, a sweet, old lady flipping tiny pancakes over with a spear in her honeycomb-style pan (ebilskivers), and probably the best of all – the Stroopwafel  (pronounced “strope”) – two waffle cookies sandwiched together with soft caramel. We smelled them from down the street – the air was cloaked in butterscotch.  We followed our noses to a little stand in the center of the street where a man was making salad-plate-sized waffles, pressing them with a hand-held grid patterned iron, and spreading each waffle with a thick caramel sauce before sandwiching them together and handing them to us, gooey and oozing out the sides.  They were warm, soft and crispy around the edges and we took one bite and with wide eyes, didn’t say another word until we were done eating.  It was one of those magical food memories that has cemented that time and space in my brain, forever.  A part of my heart will always be with my friend, Libby, on the streets of Haarlem, eating stroopwafels and wondering how we got so lucky.  Eleven years later in our toddler-run worlds of rushing around and enjoying quick cups of coffee in the wee hours of the morning, I like to go back to that place where nothing else in the world existed except our adventure.

When we got back from Holland, we started to see reproductions of these cookies in grocery stores.  A poor man’s stroopwafel, but better than nothing.  I don’t think most people know that you’re supposed to place the cookie on top of your coffee after you pour it, so that the room temp caramel softens with the heat and when bitten into, oozes out just a bit.  The ones we got in the market were obviously over-sized to sell to American tourists, but the true size is a perfect fit for the top of a coffee mug.

stroop005

I wanted to make my own for years, but had never attempted it till last weekend.  I found a basic stroopwafel recipe online and had some leftover butterscotch sauce in the fridge and it worked perfectly.  I recommend making the butterscotch because I think that salty note is just amazing with the sweetness of the cookie.  I also doubled the cinnamon the original recipe called for and was quite happy with the results.  If you’re not in the mood to make your own caramel or butterscotch, I thought the other night, while I was supposed to be sleeping, that those sheets of caramel sold in grocery stores for caramel apples would work perfectly because they’re already flattened out!  You really need a pizzelle iron to make these and if you don’t have one, I would suspect that you could be pretty successful if you have a handheld bacon press and just pressed them out on a griddle.  They don’t take long to cook at high heat (about one minute) and you have to split them in half before they cool down, so get ready to suck it up and act like a woman (I didn’t miss-type).   As I will say over and over again on this blog: nothing in this life worth having comes easy.

And homemade stroopwafels are definitely worth having.  Libby, my dear – can’t wait to have coffee with you, again in a couple weeks.  Of course, you’re always there, in my head, during my morning cup.  Always.

stroop004

Stroopwafels*
makes about 15-20

4 cups all-purpose flour
1 tsp. ground cinnamon
1/2 cup white sugar
1 cup unsalted butter
2 large eggs
1 (.25 ounce) package active dry yeast
1/2 cup warm water

For the filling:
Confession: I honestly don’t remember how I made the caramel/butterscotch in my fridge. It was a few weeks old and I’d gone on vacation since then, so I honestly don’t remember.  It was mighty fine, though.  I will share this link with you, though, because I’ve made this exact recipe many times and it’s pretty fail-proof.  You don’t be disappointed and it only takes about 15 minutes.  Or buy caramel apple sheets from the store.  But this will taste better.

Preheat pizzelle iron, or griddle, if you don’t have a pizzelle, and heat up the bacon press if you’re using that.
Dissolve the yeast in the warm water.
Cut the butter into the flour either by hand (I did this whole recipe by hand and got a bit of muscle build from doing what Kitchen-Aid does 10x better but hey, I’m stubborn.)  Mix in the sugar, cinnamon, eggs and yeast mixture. Mix well (use your mixer with a paddle attachment unless you, too, want to build your muscles) and set aside to rise for 30 to 60 minutes. It might not double or even rise very much, but as long as you had it in a semi-warm place for that hour, it’ll be fine.  Mine didn’t rise much.  Roll dough into 15ish small balls (about a ping pong ball size), squeeze each ball into the preheated pizzelle iron and bake for about 30 seconds to a minute. Cut the wafels in two and spread with the filling.  Eat immediately or let it it come to room temp and enjoy them as lids to hot coffee.

And please, whatever you do, don’t eat these alone.  I think I shared these with about 5 different people.  That’s the key to happiness, I’ve found 🙂

*adapted from Diana’s Desserts

stroop006

Pavlovas with Black Cherry Syrup

Cherry Pavlova with Greek Yogurt


While we were on our trip last week, Matt and I stole away, left the kid with our friends, and had a little adventure in Seattle.  After a ferry ride and a crazy time trying to catch the bus in the midst of 300,000 people watching a parade downtown, we finally made it to Delancy – a pizza place that’s out of this world.  We seek out pizza in nearly every town we visit.  Okay, okay, we seek out FOOD in every town we visit, but more often than not, that will include a pizza joint.  Matt has been perfecting his pizza crust for the past few years and I can safely say after hundreds of pizzas made at home and hundreds we have tried out and about, Delancy is the best out and about and Matt’s is just as good – only it’s in our own kitchen.  Score one for Palmsey.  

This is beginning to sound like a pizza post, but it’s not.  I already did that a few months ago and the recipe hasn’t changed!  This is a post about how awesome Delancy was, and how you should go there, and when you do go there, go next door to get a drink because you’ll have an hour wait.  Next door is an extension of Delancy’s kitchen called Essex and they have wonderful appetizers and desserts.  One of which we ordered at the end of our perfect pizza experience – a pavlova with Greek yogurt and raspberries.  I’d had pavlova (baked meringue) with other fruits and it’s traditionally served with creme anglais or ice cream, but the Greek yogurt was such a wonderful way to cut the almost-too-sweet combination of a sugary meringue and raspberry syrup.  This desert was gone in about 5 seconds and went immediately on my list of recipes to recreate once I got home.

So here we are.  I got home on Tuesday and went shopping.  Raspberries were $3 for a half pint.  No thank you.  Cherries were $1.50 for a whole pound.  Sold.  I cooked the cherries down in a little brown sugar and let the juices bubble away and form a syrup and whipped up a little full-fat, plain Greek yogurt to place in the meringues once they were baked.  When Matt got home, I had two portions set out and while Olive napped, we ate.  Before dinner.  The joys of being an adult.  Matt even exclaimed, “This is EXACTLY RIGHT” which, if you know Matt, really means something.  I was proud of the recreation and I’ll definitely make it, again.  Maybe next time with apricot preserves…the options are really endless!

Pavlova with Black Cherry Syrup and Greek Yogurt


Pavlovas with Cherries and Yogurt*
makes 8-10 pavlovas, depending on size

1 1/2 teaspoons pure vanilla extract
1/2 teaspoon cream of tartar
1 1/2 Tbsp cornstarch
1 1/2 cups granulated sugar
5-6 (about 6 oz) large egg whites, room temperature
Pinch salt

Place rack in the middle of the oven and preheat the oven to 275°. Line a large baking sheet with parchment paper.  Stir the cornstarch into the sugar in a small bowl.

In a large bowl of a heavy-duty mixer, fitted with whisk attachment, whip egg whites, cream of tartar and salt, starting on low, increasing to medium speed until soft peaks start to become visible, approximately 2 to 3 minutes.

Increase speed to medium-high, slowly and gradually sprinkling in the sugar-cornstarch mixture. A few minutes after these dry ingredients are added, slowly pour in the vanilla.  Increase speed a bit and whip until meringue is glossy, and stiff peaks form when the whisk is lifted, 4 to 5 minutes.

Pipe or spoon the meringue into 8-10 large round mounds that are 3 inches wide on the parchment-lined baking sheet.  With the back of a spoon, create an indentation in the middle of the mound for holding the filling once meringue is baked.

Place baking sheet in the oven. Reduce oven temperature to 250°F. Bake for 50-60 minutes, or until the meringues are crisp, dry to the touch on the outside, and white — not tan-colored or cracked. The interiors should have a marshmallow-like consistency. Check on meringues at least once during the baking time. If they appear to be taking on color or cracking, reduce temperature 25 degrees, and turn pan around.

Gently lift from the baking sheet and cool on a wire rack. Will keep in a tightly sealed container at room temperature for a week.

*recipe adapted from Simply Recipes

Black Cherry Pavlova

Cherry Compote
makes about a cup

2 cups pitted cherries
1/4 cup brown sugar
Squeeze of lemon

Put the cherries and the brown sugar in a saucepan over medium heat and let it come to a simmer.  Let it cook for about 20 minutes, mashing the cherries a bit as you go.  When the syrup starts to thicken a bit, take it off the heat and squeeze a lemon over it all and stir it up until incorporated.  Let the sauce come to room temp before topping the pavlovas.  

To Assemble:

Take one meringue shell and place it on a plate.  Scoop out a generous 1/4 cup of full-fat Greek yogurt and place on top of the meringue.  Top the yogurt generously with the chunky cherry syrup and serve!  Modify as you wish with whipped cream, creme anglais, frozen yogurt – whatever you like!  And if you can’t make a fruity compote, I suppose warming up some preserves wouldn’t be too shabby 🙂


Oatmeal Cookies – Welcome Home

Oatmeal Cookie and Milk

We’re back from a two week vacation that spanned Moab, UT, to the northern most part of Washington, where from the top of a mountain, I could see Canada.  We drove all the way to Seattle in a rented RV with two of our best friends and our little redhead.  Once we were in Seattle, the worst case scenario happened to our traveling partners – a death in the family – and they had to drive the RV home early and we booked a flight for later in the week to come home on our own.  We sorely missed their company but had an amazing time with the friends we went to see – John and Courtney and their amazing children.  They graciously welcomed us into their home and gave up their beds and their schedules and the order of how they normally go about life and made us feel so welcome, we felt more honored than family!  I just feel so lucky to have such friends in my life.  Olive has such wonderful people to look up to and strive to become.

I will post a LOT of recipes in the coming days about our trip and mostly recipes INSPIRED by our trip.  Recipes that immediately come to mind will be: Raspberry Pavlova, Chocolate Cayenne Mousse, a traditional crab boil, the ultimate potato salad, and a traditional poutine, just to name a few.  I can’t wait to share these recipes with you.

But today is about coming home.  Coming home to familiarity, to the warmth of being in your own space with the view out the window you remember (let’s not talk about what our yard looks like after 2 weeks of neglect).  When I think about coming home, I think about oatmeal cookies.  They scream comfort and familiarity and nourishment.  And the recipe today is kind of perfect.  The original recipe card I had is from a generic set of cookie recipes that came in a funny little box that just says COOKIES.  Each card is a different recipe.  It’s a pretty fun jumbo-sized deck of cards for Olive to play with and I can imagine when she gets older, picking out a card for our weekend baking adventures.  I modified the recipe because it seemed extremely void of liquid.  The original recipe didn’t call for any egg, so if you want to leave it out, know that you’ll just have to work the dough a little more so that it holds together because it’s pretty crumbly.  Either modification is good, but the addition of the egg makes a softer fluffier cookie, which worked out really well for my gap-toothed toddler.

Enjoy being home.  Everything is fleeting.

Oatmeal Cookie

Oatmeal and Golden Raisin Cookies
makes 2 dozen cookies

1 1/4 cups AP flour
2/3 cup sugar
1 cup rolled oats
1 cup shredded coconut
1/2 cup golden raisins
1/2 cup unsalted butter
2 tbs light corn syrup
1 tsp baking soda
1 TBS boiling water
1 egg

Preheat the oven to 325F.  Line two large cookie sheets with parchment paper, or spray well with spray oil.

Sift the flour into a large bowl.  Stir in the sugar, oats, coconut, and raisins.  Make a well in the center.

In a small saucepan, melt the butter and syrup over low heat.  In a small bowl, dissolve the baking soda in boiling water; stir immediately into the butter.

Pour the butter mixture into the well in the flour mixture.  With a fork, mix thoroughly.  Mix in the egg until well incorporated.

Drop heaping tablespoons of the dough onto the cookie sheets about 2 inches apart.  Bake until lightly browned, 15-20 minutes.  Cool a few minutes on the sheet and then transfer to a wire rack to cool completely.

Serve with milk.

Oatmeal Cookies and Milk

Greek Yogurt and Almond Butter Cheesecake

yogurt cheesecake002
I made this cheesecake last weekend for the 4th of July festivities.  By festivities, I mean meals.  Olive has been consuming a lot of yogurt lately (plain, full fat awesome stuff sweetened with a little bit of honey) and I did one of those “I thought we were out” mistakes and bought a huge container to come home and realize we already had a huge container.  I hate wasting and so I have been putting Greek yogurt in a lot of stuff , lately.  This morning I made yogurt and oatmeal waffles (really good, I’ll post about those, soon) and when I ran across a recipe that called for 2 cups of yogurt in a cheesecake, I knew I’d found my way to not waste!  Oh, how humble of me to eat a cheesecake in order to not waste yogurt.  It’s a hard life.

This is the no-bake type of cheesecake I grew up eating.  I love the kind you bake and there’s a place for that (that place is anywhere) but for these super hot summer days, a lighter, fluffier, doesn’t-heat-up-your-kitchen dessert is the way to go.  And using those strawberries I almost ALWAYS let rot on my counter is a plus, too!  For the topping, I chopped up almost-bad strawberries, a few blueberries and mixed them up with a bit of honey and let it sit out while I made the cheesecake.  By the time everything was ready, the topping was perfect.

The addition of almond butter adds such a wonderful flavor.  I think if I make this again, I’d try using peanut butter, just to see what it would be like!  The original blogger of this recipe said that it was “healthy” and could be eaten for breakfast because it has yogurt and granola in the crust.  I think that’s a marvelous way to feel like taking a nap at about 10:30, so I wouldn’t recommend it (this is based on experience).  Just because something has granola and yogurt doesn’t make it healthy.  This is perhaps lighter than most cheesecakes, but it also has cream cheese and whipping cream, so you do the math.  Or don’t do math.  Just enjoy dessert and stop thinking about whether it’s healthy or not. Of course you shouldn’t eat it every day.  If you want to, then sure, obsess over calories.  If you only eat stuff like this on weekends, then by all means, go for the gold.

photo (1)
This little hand loved every bite.

yogurt cheesecake003

Greek Yogurt and Almond Butter Cheesecake*

For the Granola:
1 cup rolled or old-fashioned oats
1/4 cup finely shredded coconut
1/4 cup chopped cashews
1/8 tsp kosher salt
1 tbsp coconut oil (or butter would work fine – just make sure it’s soft and at room temp)
1/4 cup honey

Crust:
1 1/2 cups granola you just made
4 whole grain honey graham crackers
4 tbsp unsalted butter, melted

Cheesecake Filling:
8 oz cream cheese, room temp
3/4 cup + 1/4 cup sugar, divided
1 tsp vanilla extract
1/4 cup almond butter
2 cups plain greek yogurt – full fat, y’all
1/2 cup heavy whipping cream

Preheat oven to 350 degrees. In a mixing bowl, combine the oats, coconut, and nuts. In a measuring cup or separate bowl, whisk together the salt, coconut oil, and honey. Pour this mixture over the oats, and stir to completely coat the ingredients. Spread the mixture into an even layer on a baking sheet, and bake at 350 degrees for 12-15 minutes. Flip granola around with a spatula every 3-4 minutes to prevent burning and to get an even golden-brown crisp. After baking, set granola aside to cool.

Once the granola is cool to the touch, combine the granola and graham crackers in a food processor. Puree for 60-90 seconds, until a very fine and crumb-like texture. Pour in melted butter, and stir to combine evenly. Next, spread the crust mixture into the bottom of an 9-in round springform pan. Press down to compact into an even layer. Bake at 350 degrees for 3-4 minutes. (Do not let it burn!) Set aside to cool.

To make the filling, add the cream cheese and 3/4 of a cup of sugar to the bowl of a mixer fitted with the whisk attachment. Beat the cheese and sugar together until smooth and fluffy. Add the vanilla and almond butter, and beat until incorporated. Then, remove the bowl from the mixer, and fold in the Greek yogurt with a spatula. (Scrape the sides and bottom of the bowl!)

In a separate bowl, whisk the heavy cream with the remaining 1/4 cup of sugar until stiff peaks form. Fold the whipped cream into the cheesecake filling. Finally, pour the filling into the cooled granola crust, and spread into an even layer with a spatula. Cover with foil or plastic wrap, and freeze overnight.

To serve, run a paring knife around the edges of the cheesecake to loosen the sides from the pan. Then, unlatch the springform pan. Transfer the cheesecake to a cake stand or serving platter and garnish with fresh fruit.

*adapted from the adorable Mangoes and Palm Trees blog

Black Plum and Blackberry Galette

black plum galette
I’m in love with this pie.  It’s a galette – a free-form pie that is usually very rustic and can be sweet or savory, or even resemble a thin pancake in some regions of France.  I love it because it eliminates the pressure to make a pretty pie crust.  So many people struggle with pie crust, and when the edges crack, it can make even the most tempered person lose their cool.  But the galette solves all that.  You simply roll out your dough, fill it up and fold the edges over.  If you add an egg wash and some crunchy sugar sprinkled over the dough, no one in the world will care that it isn’t in a pie plate!  We enjoyed plums and a few blackberries in this pie because they were ripe and in season and cheap!  I really don’t buy fruit if it isn’t on sale.  I just figure that sale price tells me what’s in abundance and that’s an easy way to know what’s in season!

I served this over the course of a few days to a few different friends.  I love that one dish can unite so many.  I believe five different friends, total, shared this pie at different times over the weekend.  This is my very favorite thing about cooking and sharing meals.  And yes, a plum galette and a cup of coffee is a meal 🙂 I think people stay longer and open up quicker and are more at ease if you have something to offer them to eat and drink.  I’m not always good about doing this, especially for the most frequent friends.  And how awful to treat the frequent friends less special!  It’s hard for those of us who can’t be trusted with baked goods in the house, to have them in the house during the week.  But, maybe you could consider it a bit of a social challenge for yourself to bake this pie and then see how many different friends you can get to share it with you.  🙂

plum galette

Plum and Blackberry Galette*

2 1/2 cups plus 2 tablespoons all-purpose flour (spooned and leveled), plus more for rolling
1 cup (2 sticks) cold unsalted butter, cut into pieces
5 tablespoons plus 1 teaspoon sugar
1 teaspoon salt
1/2 cup ice water
1/4 cup whole, skin-on almonds, toasted
5 to 6 plums, halved, pitted, and sliced 1/4 inch thick (keep slices together if possible – this was hard for me because my plums were cling and didn’t come away from the pit very easy.  I just sliced them as best I could – still pretty)
1 to 2 tablespoons heavy cream

In a food processor, combine 2 1/2 cups flour, butter, 1 teaspoon sugar, and salt; pulse until mixture resembles coarse meal. Sprinkle with 1/4 cup ice water. Pulse until dough is crumbly but holds together when squeezed (if necessary, add up to 1/4 cup remaining ice water, 1 tablespoon at a time). Don’t overmix! Remove dough from processor and shape into a disk; wrap in plastic and refrigerate 1 hour. Meanwhile, wipe bowl of food processor clean and add almonds, 3 tablespoons sugar, and 2 tablespoons flour; pulse until ground to a coarse meal.

Preheat oven to 350 degrees. On a floured surface, roll out dough to 1/4-inch thickness. Transfer to a parchment-lined baking sheet; sprinkle almond mixture over dough (this is necessary for absorbing the juices from the fruit so your crust won’t be a soggy mess.  Plus, it tastes great.)  With a spatula, transfer plums to dough; press lightly to fan out, leaving a 2-inch border. Fold edge of dough over fruit. Refrigerate 20 minutes (this is so your butter doesn’t leak out). Brush crust with cream (I used an egg); sprinkle galette with 2 tablespoons sugar (I used super crunchy sugar!)  Bake until crust is golden and underside is cooked through, about 70 minutes.

*I made this from Martha Stewart’s Pies and Tarts cookbook, which, is a book I could look at for hours on end, reading it like a novel.  That’s one way to get better at cooking, by the way – read cookbooks like they’re novels 🙂

Happy 4th of July Weekend!

photo

It’s strange when a holiday falls in the middle of the week.  People have to go back to work the next day, so it’s this little blip in the week that makes you WANT the full, extended weekend, but few actually get it.  I figure since people might be celebrating all weekend, a recipe for a few burger-accompaniments would be in order.  I might even post, again, tomorrow with what we cook, tonight.  Maybe I’ll post on Sunday, too, with what happens on Saturday.  I love a good excuse to celebrate the summer all weekend long.  We really don’t need an excuse, but when festivities are high and people are cooking and grilling, it’s a wonderful time to try out new recipes and make the old, beloved standards.

We’ve been Top Chef fans since its debut seven years ago.  We developed a love-hate relationship with Spike during his season and bought his cookbook and now that relationship is all love.  He really understands how to do comfort food and takes nostalgia (burgers, shakes) to a new level.  So he is the go-to for summer time recipes!  I highly recommend his cookbook, The Good Stuff Cookbook and especially his recipe for the Good Stuff sauce that we now have to have on every burger we grill!  It’s a perfect blend of sweet, tangy and savory and it is perfect for burger toppings or a dip for fries!

goodstuff002

Good Stuff burger sauce*
makes about 2 cups

2 cups homemade or Hellman’s mayonnaise
2 tbs ketchup
2 tbs molasses
2 tbs rice vinegar
1 tsp salt

Add all ingredients to a food processor or blender (or in a cup with an immersion blender) and puree until smooth.  The sauce can be refrigerated in an airtight container for up to 1 week.

*taken directly from The Good Stuff cookbook

We also are addicted, lately to caramelized onions.  There’s really nothing difficult about making them, and they completely improve everything they touch.  I’ve added them to omelets, sandwiches, wraps, burgers, stir-fry, beans, rice dishes – EVERYTHING!  Here is my simple method:

Caramelized Onions
makes 2 cups – can easily be scaled down

6 white onions, halved and then sliced thin
2 tablespoons neutral oil like Canola
Kosher salt

Heat the oil in a 12″ cast iron pan till it shimmers.  Dump all the onions in at once and let it sit there for a few minutes.  Then, gradually start flipping and stirring the onions around till they all get coated with the oil.  Your pan will be VERY full if you used all 6 onions.  Turn the heat down to medium low and cook, stirring occasionally for at least 30 minutes.  You want a deep, rich brown color on all the onions.  They will greatly reduce in size till you’re left with about 2 cups of onions.  We keep ours in the fridge and scoop out portions for everything under the sun, but most recently, they were an AMAZING topping to our burgers this weekend, complete with smoked gouda, pickles and the Good Stuff sauce.  Oh, heavens…

The last recipe I’ll impart is a very classic deviled egg recipe that includes a good amount of olive oil and the result is the most silky texture to the filling and the perfect balance of acid and richness from the egg yolks.  The recipe is adapted from the Serious Eats site, which, if you haven’t become addicted or receive their weekly emails, you will and you must.  So many great recipes come from their extensive research and trial and error!

goodstuff004

Deviled Eggs
makes about 18

1 dozen large eggs, not too fresh
2 tablespoons mayonnaise, preferably home made
1 tablespoon dijon mustard
Up to 1 tablespoon white wine vinegar
1/2 teaspoon Frank’s Red Hot sauce
2 tbs extra virgin olive oil
Kosher salt
Freshly ground black pepper
3 tablespoons thinly sliced chives
Crushed red pepper or hot paprika

Place eggs in a large saucepan and cover with 2 quarts cold water. Place over high heat, bring to a boil, cover, remove from heat, and let stand ten minutes. Drain eggs and peel under cool running water. Slice each egg in half lengthwise.

Place all of the yolks in the bowl of a food processor. Select 16 of the best looking egg white halves and set aside. Reserve the remaining 8 for another use. Add mayonnaise, mustard, half of vinegar, and hot sauce to food processor and process until smooth, scraping down sides of bowl as necessary.

With machine running, slowly drizzle in 2 tablespoons of olive oil. Season mixture to taste with salt and remaining vinegar (if desired). Transfer to zipper-lock bag. Filling and egg white halves can be stored in the refrigerator up to overnight before filling and serving.

Cut off corner of ziplock bag and pipe filling mixture into egg whites, overstuffing each hole. Drizzle with extra olive oil, sprinkle with black pepper, chives, crushed red pepper, and sea salt. Serve immediately.

Dark Chocolate Chip-Pecan Pancakes

Chocolate Chocolate Chip Pancake stack

I opened up this recipe this week with the intention of pinning it to my Pinterest recipe board.  Then I went to my recipe board and discovered that I’d pinned this exact recipe four times over the last 2 years.  My subconscious must really want these pancakes.  I decided, no more pining for a pin!  I made these bad boys this morning for breakfast, right when the clouds rolled in and it started raining.  We enjoyed the rest of our coffee on the front porch while watching the rain and I’d be lying if I said it wasn’t the perfect way to spend the morning.

These pancakes are intense, rich, but not too sweet.  I accidentally left out the melted butter from the batter (believe me that I would never do that intentionally) and they turned out just fine!   Matt had pancake syrup on his and I had creme fraiche sweetened with a bit of honey on mine and I will proudly say that my way was the best.  But his way photographed better 🙂 Whatever you decide to put on top of these pancakes, be it whipped cream, syrup, powdered sugar, yogurt, it’s going to be the right decision.  The baby girl loved them, too and called them “panpays”, which was nearly the cutest thing I’d heard all week.

Enjoy your weekend!  Hope you find time to make these desert-like pancakes at some point!

Chocolate Chocolate Chip Pancakes

Chocolate Pecan Pancakes*
makes about 10 pancakes

  • 1 cup all-purpose flour
  • 1/3 cup granulated sugar
  • 1/3 cup Dutch-process cocoa powder
  • 1 1/2 teaspoons baking powder
  • 1/4 teaspoon salt
  • 1 cup milk
  • 1 large egg
  • 4 tablespoons unsalted butter, melted
  • 1 teaspoon vanilla extract
  • 1/2 cup mini chocolate chips
  • 1/4 cup chopped pecans
  • 4 tablespoons vegetable oilPreheat oven to 225 degrees. In a large mixing bowl, whisk together flour, granulated sugar, cocoa, baking powder, and salt. In another bowl, whisk together milk, egg, melted butter, and vanilla; pour over flour mixture, whisking to combine. Fold in chocolate chips and pecans; let batter stand until slightly thickened, 5 to 10 minutes.

    In a large nonstick skillet, heat 1 tablespoon oil over medium heat until a water droplet sizzles; swirl to coat bottom of pan with oil. Reduce heat to medium-low. Spoon four small mounds (1 heaping tablespoon each) of batter into skillet. Cook until bubbles appear in center, 3 to 4 minutes. With a thin spatula, flip pancakes; continue cooking until set, 3 to 4 minutes more.

    Transfer to a baking sheet; cover loosely with foil; place in oven to keep warm. Repeat with remaining oil and batter in three more batches (adjust heat as necessary to avoid overbrowning).

    Stack ’em up and enjoy, topped with anything you’d like!

*recipe adapted from Martha Stewart Living

Stack of Chocolate Pancakes

Apricot Pine Nut Cakelettes

Apricot Pinenut Cakelettes004


I used to have a huge apricot tree in my front yard.  It was so wonderful throughout the seasons to see the blossoms appear in spring and the fruit appear around June and the leaves turn shockingly golden in October.  It was one of my favorite things about our house and it introduced me to jamming and gave me a passion for it.  Because of that tree, I learned to make apricot preserves and the first two years we had fruit, I canned nearly 100 jars of apricot jam variants. Vietnamese Cinnamon, Chinese 5 Spice, Bourbon Brown Sugar, Rosemary, Vanilla Bean (the best version) and even Crushed Red Pepper Apricot!  I gave them away as gifts and really just reveled in the sudden surge of domestic satisfaction I was getting from the process of gathering, cleaning, cooking and canning a resource from my own yard.  I felt like such a good steward of those little golden gifts!

new-00001


apricot018

To make a sweet story a bit sad, that tree fell victim to the terrible drought our area has been suffering the past three years.  The second year into the drought, the fruit on our tree was tiny but packed with flavor.  It was the last year it would bear fruit.  We had to chop it down last summer and I will admit, I mourned the loss of that tree for months.  We’ve tried planting replacement apricot trees twice, now, and borers got the second one (and the first – it was a borer/drought combo) and the second replacement got hit by two late frosts and never recovered (although I won’t call it officially gone till next spring).

So maybe it’s not meant to be?  Maybe the lesson learned is to make good use of what you have while you have it.  Revel in the gifts you’re getting now, because soon, they may not be available to you.  If you have a fruit tree and don’t have time to make anything from it, first, call me and I’ll come pick up every piece from your yard (I know there’s no fruit on trees in this area, yet – still, the sentiment always applies) and second, if nothing else, just eat from it!

This recipe is a wonderful, easy recipe that can be used with fresh, canned or even dried apricots (or any fruit, really).  I used dried apricots that I reconstituted in a bit of water, first, because I couldn’t find canned, as the recipe called for.  They turned out wonderful and they lasted for a week!  The cake part is a wonderful cake recipe and one that I plan on using for other purposes in the future.  It calls for buttermilk, and I happily used some raw buttermilk from our local dairy, Pereira Pastures.  They are suffering from the drought too, and could use your support if you are from this area and feel like making a donation and getting some amazing milk in the process!

Apricot Pinenut Cakelettes001


Apricot Pine Nut Cakelettes*
makes six cakes

1/4 cup pine nuts, toasted
6 tablespoons unsalted butter, divided
1/4 cup plus 1/3 cup packed light brown sugar
1 tablespoon water
8.5 ounces apricot halves, sliced
1 1/3 cups AP flour
1 1/2 teaspoons baking powder
1/4 teaspoon salt
1/3 cup sugar
1 large egg
1 teaspoon vanilla extract
1/2 cup buttermilk

Preheat oven to 350F. Butter six 6-oz ramekins and place them on a baking sheet with a shallow rim.

Divide the pine nuts evenly among the ramekins.

In a medium-sized saucepan, melt 2 tablespoons of the butter over medium-low heat.  Add 1/4 cup brown sugar and the water and cook, stirring, until the sugar is dissolved.  Add the apricots and stir gently until coated.  Divide the apricots and syrup evenly among the cups.

In a small bowl, stir together the flour, baking powder, and salt.  In the bowl of an electric mixer, or by hand, beat the remaining 4 tbs butter, 1/3 cup brown sugar, and the granulated sugar on medium speed until well blended.  Beat in the egg and the vanilla until combined.  With the mixer on low speed, mix half of the dry ingredients into the batter until just combined.  Mix in the buttermilk until combined.  Mix in the remaining dry ingredients until combined.  Divide the batter evenly among the ramekins and smooth the tops.

Bake until a toothpick inserted comes out clean, about 30 minutes (mine took more like 45).  Transfer the ramekins to a wire rack and cook for 10 minutes.  Run a knife around the edges of the ramekins to loosen the cakes.  Invert the cakes onto individual dessert plates and serve warm with fresh whipped cream, or a drizzle of amber agave nectar, like I’m currently obsessed with.  🙂

* recipe from the Bonne Femme Cookbook!

Apricot Pinenut Cakelettes006