Zucchini Basil Soup with Stove Top Fritters

Zucchini Basil Soup
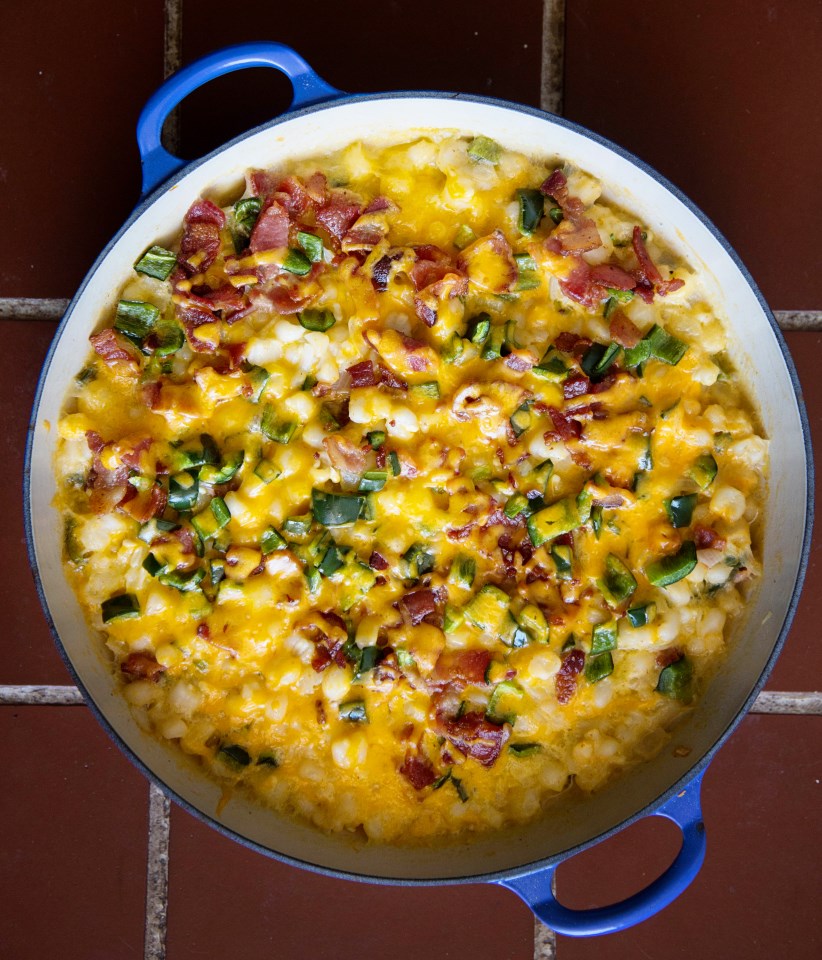
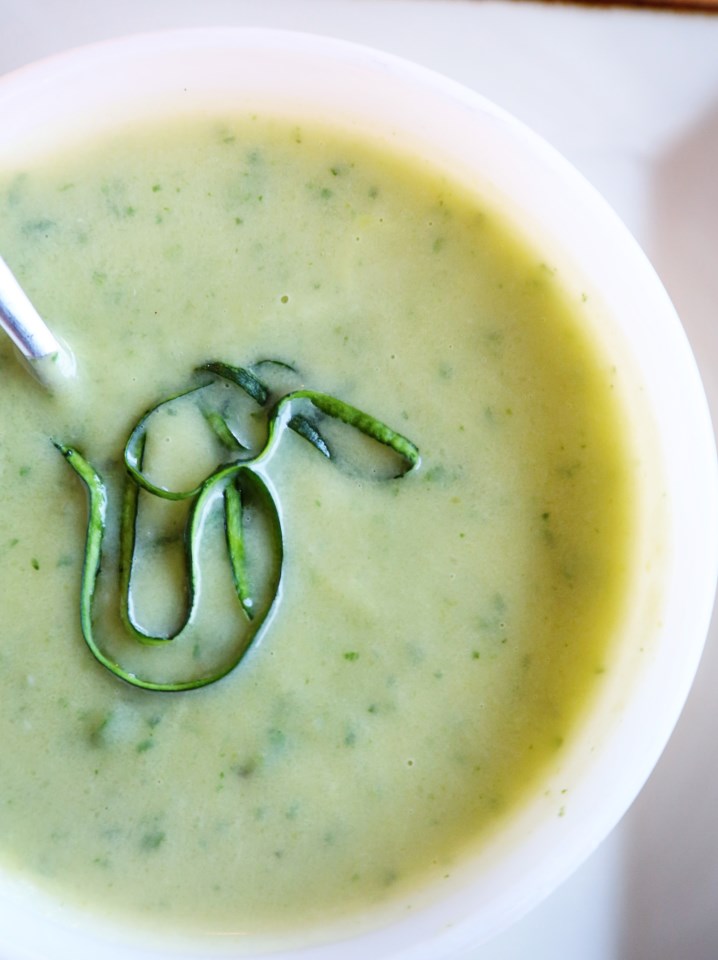
I’m happy to have resurrected this soup!  Matt and I made it a long time ago when we were still doing the 800 sq ft apartment thing and then again when a friend of ours invited her dad over and we needed to fix low sodium, low fat recipes since he had recently had heart surgery.   Matt’s father also has heart troubles, so it’s always refreshing to find healthy recipes to share that taste as decadent as a full-fat option.  This soup is so perfect for the coming zucchini-overload we all will have soon (as it’s the only vegetable that seems to have no trouble in our awful climate) and basil, the herb that’s also hard to kill.  It’s got all the depth of flavor of a soup that has been slowly cooked with butter and cream only – it has neither!  It isn’t even made with stock – just water!  So the sodium is only what you add for taste.  I bet in one batch, I added a little over a teaspoon of salt.  And it serves six!  Can you tell I’m excited about this soup?!
zucchini basil soup and stuffing fritters
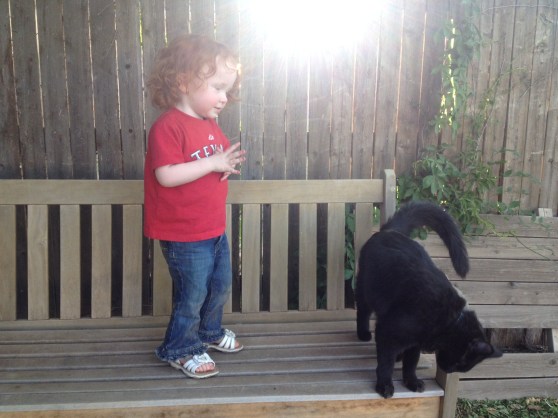
One other merit of soups from a mother of a toddler’s perspective, is that they are a perfect way to get more variety of vegetables and flavors into our newly opinionated children.  Olive has eaten zucchini, pesto, fresh basil from the garden, etc, before, but suddenly, she’s on a suspicious, won’t-try-anything-green bender.  Drives me batty because I KNOW she would like most things if she’d just try them.  Sound familiar?  What does NOT work is forcing, tricking, cajoling, pleading, prodding or manipulating your kids to eat.  They can smell your tricks a mile away and they’ve come prepared with an iron will.  This is pretty natural and resistance is futile.  But soups.  Olive has willingly eaten this soup twice in the past 4 days.  It’s green!  It’s got darker green chunks in it!  Why will she try it?  My guess is texture.  No chunks – pureed and easy to sip from a cup so she has full control.  When Olive doesn’t want to try something, I ask her to just smell it.  If she smells it, 99% of the time she’ll try a bite.  And I’ve learned to be happy with One Happy Bite, as much as it flies against my need to control the situation.

So.  If you have a child who is resisting new textures/colors/flavors, try soups.  I know it seems like a regression back to the baby food days, but if that’s what it takes to keep the flavors and colors changing on your child’s plate, I say it’s worth it.  Children get used to variety if variety is the norm.

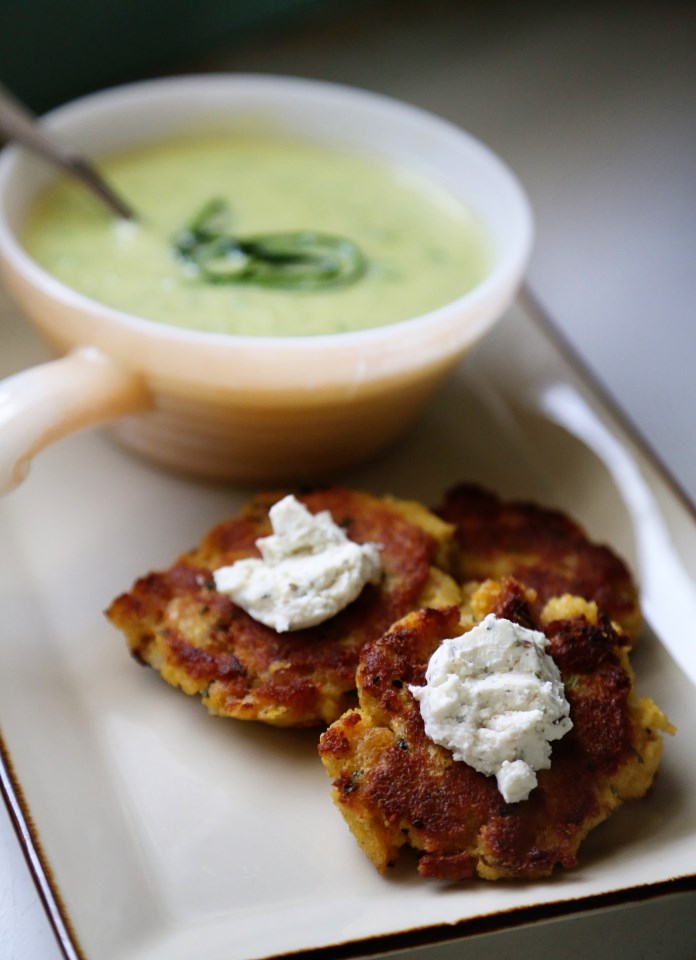
Without further babbling, here’s the recipe!  Also, I paired the soup with a not-so-saintly fritter made from leftover Stove Top Stuffing.  No kidding.  They were FABULOUS as a little crispy soup-companion!  I topped them with herbed goat cheese and they tasted downright fancy.  Happy Meatless Monday!

Zucchini Basil Soup with Stove Top Fritters
Zucchini Basil Soup with Stove Top Fritters*

serves 4-6

2 lbs zucchini, peeled, trimmed and cut crosswise into 2″ pieces
1 small onion, chopped (about 3/4 cup)
2 garlic cloves, chopped
1/4 cup olive oil
3 cups of water
1/3 cup packed basil leaves

Cook the onion and garlic in the olive oil over medium heat in a 3-4 quart stock pot until the onion starts to soften.  Add chopped zucchini and about a teaspoon of kosher salt and cook for about 5 minutes, stirring.  Cover with the water and let it come to a boil and cook for 15 minutes, until the zucchini is soft and easily pierced with a fork.

Add the basil and puree in two batches in a blender (watch out blending hot liquids and make sure it has a vent or you’ve got your hand firmly on that lid!) or, blend directly in the pot with an immersion blender, which is what I do.  Season to taste with salt and pepper and serve with fritters, toast, or as a starter for your three-course fancy-schmancy dinner! 🙂

*taken from Epicurious.com

Stuffing Fritters
Stove-Top Stuffing Fritters

2 cups leftover cornbread stuffing
1/4 cup water
1 large egg
olive oil for frying

In a medium bowl, combine the stuffing, water and egg and if the mixture won’t come together after a bit of stirring, add a little more water until you can form the stuffing into small patties.  I used a medium sized cookie scoop and it worked well.  Heat about 4 tablespoons of olive oil (or any vegetable oil) over medium-high heat and fry the fritters about 3-5 minutes per side until golden brown.  Drain on paper towels and keep the cooked fritters in a 250 degree oven until the rest are done and you’re ready to serve.  This will keep them crispy and warm!


Cooking Basics: Basil Pesto

Basil Pesto Ingredients
This is an important recipe to have memorized.  If you know the basic formula, you can make a pesto with just about any green/oil/nut/hard cheese.  It’s a great way to dress up a simple pasta salad, a plain filet of fish, or even boiled potatoes for a spin on potato salad.  When it’s a pasta-only kinda day around here, pesto somehow makes me feel better about not trying harder to dish out variety.  I think, “At least Olive is eating something green and different on top of her pasta.”  While that may be the dinner equivalent to justifying nutella as a “healthy” snack, I’m sticking with calling pesto healthy.  In moderation.  The stuff is mostly olive oil.  But I think if it’s used as a garnish, it’s just fine  and a little goes a long way, anyway!
Pesto

So here is your Cooking Basic for the week –

Basil Pesto
makes about a cup and a half

3 cups packed fresh basil leaves
1/2 cup toasted pine nuts
1/2 cup grated Parmesan cheese
4 cloves of garlic
1/2 cup olive oil
salt and pepper to taste

Put everything except the oil in a food processor and turn it on.  While it’s whirring around, gradually drizzle in the olive oil through the open chute of the processor lid.  Let it process for about 30 seconds and then open and taste for salt and pepper.  I end up putting about a teaspoon of kosher salt and a few grinds of fresh cracked pepper to mine.  Pesto will keep on the counter for about a week or in the fridge for 2-3 weeks.  The top of the pesto will turn brown, but it can simply be scraped off before use.  Pressing a sheet of plastic wrap on its surface helps with the oxidization, too.

Basil Pesto Tortellini

Life Happens – Fire Up the Grill

image_1
The past few weeks have been a game of “just make it through this day.”  My grandpa was very ill and had cancer surgery, then spent the next two weeks rapidly going downhill till his body finally gave up the fight last Friday.  We were in and out of the ICU waiting room for a couple weeks, then there all day Friday, then I went to my hometown of Portales, NM for a couple days this week for the funeral, then Matt left for two and half days on a business trip.  In the midst of those three weeks, Olive was sick for two of them, I was sick for one week, we had crazy awful dirt storms and everything around the house just started taking a back seat to our little survival game.  In hindsight, it went about as well as it could and my family grew closer than ever before.  Needless to say, I didn’t blog much and while I really don’t want to neglect my regular posts, sometimes life just takes over.

image_2
So last Saturday, the day after my grandpa passed away and we were in the short calm of the storm, we decided to have a “normal” dinner at home and thought it sounded super relaxing to just grill almost every part of the meal and eat outside.
image
Matt made a pot of BBQ baked beans from Rancho Gordo (we are part of a Bean of the Month club.  No joke) And they were smoky and full of good texture and went perfectly with all the grilled components of the meal.  We grilled a sirloin tri-tip steak and made a really unique green chili and tomato salsa with worchestershire sauce for the salt and it was perfect with the BBQ flavors and our grilled bread.  Yes, grilled bread – it was awesome.  Kind of a hillbilly bruschetta, if you will.

photo 3


photo 4

photo 5
 I’d highly recommend this grilled bread.   We took a loaf of sourdough bread, cut it in half, spread vegetable oil and kosher salt on the cut sides and let it grill till crispy.  THEN we mixed a clove of smashed garlic in with a half stick of butter and seasoned it with salt and spread that on slices of the grilled bread.  I swear to you, you will never want another bread for an outdoor BBQ as long as you live!

This whole meal was so therapeutic.  The weather was good, we all sat outside and enjoyed the smell of the grill, the breeze was actually gentle instead of tornado-like, and even the kid was transfixed by her surroundings long enough to just SIT and eat.  I think everyone needs to take a break from time to time.  A break from all the performing we find ourselves doing.  I feel like I perform with my photography, with this blog, with just about everything that is broadcast on social media.  And maybe in times where we find it very hard to STOP performing for everyone, life throws us an unavoidable circumstance that forces us to simplify and slow down.  Only God could restore my energy at a time like this.  Only God could bring families closer out of death.  And only God would design food to be so comforting and satisfying that one meal would have the ability to inflate my entire family’s sails just a little bit more than before the meal began.

There will be a steadier stream of posts coming, now.  I THINK most of the drama is at a standstill for now.  Thank you for being patient!


Rustic Tortellini Soup

Tortellini Soup
I love this recipe because it first evokes memories of eating at a very dear friend’s house, second, it is incredibly flavorful and hearty and third, it is SO very simple to throw together.  It also makes enough for 8-10 people!  AND it tastes better and better the longer it sits in your fridge!  The glories of a good soup.

I had this soup for the first time at our friend, Rod and Jill’s house.  Rod and Jill were our travel buddies on our awesome road trip to Seattle last summer and besides sharing a love of recreational vehicles, we share a love of food and cooking!  Jill made this soup on a fall afternoon and invited us over last minute to share it.  No one in their right mind turns down a free meal and we have even been known to cancel our plans if we receive a dinner invitation last-minute.  Yes, I think it’s that important to take someone up on their offer to share a meal with you.  Drop what you’re doing, don’t worry about the details and just say “when can we be there and what can we bring?” (although I’m of the belief that you should not bring a dish to a dinner invitation unless you ask first!  If they say “nothing” then by golly, bring nothing! If you must bring something, bring wine!)

We may be exiting out of soup season with the coming of warmer weather, but since this could basically double as a pasta dish, I think a nice, crisp salad and some bread would turn it into an amazing summer-patio meal as well!  The tomato/basil/celery flavors are certainly reminiscent of summer!  Whenever you make it, I know you’ll love it and keep it in your recipe arsenal for future use!

Tortellini and Sausage Soup

Rustic Tortellini Soup*
serves 8-10

1 lb ground sausage (I used Wright’s hot and spicy)
1 onion, chopped fine
2 celery stalks, chopped fine
2-14 oz. cans fire roasted tomatoes
2-14 oz. cans white beans (cannelini or great northern – drain one can and puree the other can in its juices)
1/2 cup red wine
2 cups beef broth
2 lbs tortellini (any flavor – I found mine in the refrigerator section near the cheese)
a small bunch of fresh basil

In a large skillet over medium-high heat, brown the sausage and then set aside to drain on paper towels.  Pour out all but a tablespoon of oil and saute the onion and celery until they begin to soften. Add the two cans of tomatoes (with juices) and the drained and pureed beans.  Stir to combine everything and then add the broth and wine and bring to a boil, tasting for salt, pepper and adjust your tastes with more wine if you want.  Add in several of the basil leaves and let the soup simmer for about 10 minutes.

Cook the tortellini to the package instructions and put about a 1/2 cup in each bowl and then top with the tomato/sausage soup.  Garnish with some chopped basil and a sprinkle of Parmesan cheese if you like.

*I would like to note that Jill’s recipe is better than mine.  I asked her via email if she knew it by heart and she said things like, “I think it was this much” and “I sometimes do this instead” and while I LOVED the way this version turned out, I have fonder memories of hers.  So this soup can be altered and flavored to your tastes!

Strawberry Shortcake

shortcake001
Happy Monday to you all!  In my head, we are having a glorious spring filled with the smell of honeysuckle and gentle breezes warming things to a moderate 70 degrees.  The reality is that we are in a dust bowl with winds around 50mph and gusts reaching into the 70mph zone.  Temps in the 90s already with occasional days of 30 dropped here and there to keep us nice and crazy.  I kind of forget why I’ve lived here so long.  Are the sunsets really THAT great?!

So the perfect spring in my head has lovely desserts enjoyed on front porch swings.  I can think of no prettier dessert than a strawberry shortcake.  I’m a bit picky when it comes to this dessert.  At the grocery store, they like to group items together so you’ll immediately think of a particular dish and buy every ingredient.  So, since strawberries are officially in season, you’ll see strawberries and angel food cakes set out next to each other in the produce section.

No.

Strawberry shortcake does not involve angel food cake.  Shortcake, shortbread – the “short” refers to the strands of gluten in the dough, making the final product dense and crumbly like a scone.  There’s not a lot to hold this bread together.  If you had long strands of gluten, it would make the bread chewy like bagels, pizza dough, etc.  So there’s your short lesson on shortbread.
shortcake006
For my ultimate strawberry shortcake, I took my mother’s biscuit recipe and replaced the buttermilk with heavy cream and added vanilla and a tablespoon of sugar.  I also used lard instead of shortening and I absolutely think it turned out to be the BEST base for the BEST strawberry shortcake I’ve ever had.  Matt, who really would never prefer a fruity dessert over say, a chocolate one, commented a FEW times on how good it was (he is not generous with his exclamations).  My dad, who got to share this dessert with us and who IS generous with exclamations, was reduced to a silent appreciation while he ate.  It will change your very nature, it’s so good.

I’m generous with dramatic statements.

So try it out – I’ll give you the quick recipe for every component but the shortcake was the star.  Take advantage of strawberry season and those glorious, $2 huge containers while you can.  And if they are beginning to look like they’re going to go bad, chop them up, drizzle some sugar and lemon juice on them and in a day you’ll have the perfect strawberry concoction to use for this recipe!
shortcake008
The Best Strawberry Shortcake

For the shortcake:

2 cups flour
1 TBS baking powder
1 TBS sugar
1/2 TBS salt
1/2 cup lard or shortening
1 cup heavy cream
1 TBS vanilla extract

Preheat oven to 425F.

In a large bowl, whisk together your dry ingredients and then cut the lard in with a fork or with your hands until it resembles coarse, crumbly sand.  Mix in the cream and vanilla until the dough holds together when pressed between two fingers.  If it’s still pretty crumbly, even after kneading it in the bowl a couple times, add a splash or two more.  By not weighing the flour, you may end up with more or less flour than I did.  I should have weighed it.  Apologies.
On a lightly floured surface, knead the dough a few times, form into a ball and roll out into about a 1/2″ disk and cut out rounds with a biscuit cutter.  Place on a greased cookie sheet and brush the tops of the biscuits with melted butter.  Sprinkle the tops with coarse sugar and bake for 20-25 minutes, or until golden brown.

To assemble: Cut a cake in half, pour plenty of strawberry/strawberry juice on top so it soaks into the cake.  Top with a generous dollop of strawberry whipped cream and drizzle more strawberry juice on top and serve.  Recipes for those other components below:

shortcake004
For the strawberry whipped cream:

1 cup heavy cream
2 tablespoons of strawberry juice (from your macerated strawberries)
1 or 2 strawberries from the same concoction

In a large cup with an immersion blender or in a stand mixer fitted with a whisk attachment, add the heavy cream, strawberries and juice and blend until thick and creamy.

shortcake003
For the strawberries:

1 lb strawberries, sliced thin
1/4 cup sugar
2 TBS lemon juice

In a large bowl, combine all the ingredients and let the strawberries sit at room temp for a couple hours or in the fridge over night.  Stir once – the strawberries will release juices and form a glorious syrup with the sugar and lemon juice.


Perini Ranch Poblano Hominy

hominy001
Back in 2011, we went with two of our best friends on a BBQ Tour of Texas.  It was just as awesome and delicious as it sounds.  Our very first stop was at Perini Ranch in Abilene, TX.  We got some amazing barbecue but this little side dish was a favorite at the table.  Hominy baked with bacon, poblano peppers, jalapenos and cheddar – how can you go wrong?  It’s savory and hearty and a perfect side dish to most anything.  It’s very filling and easy to whip up, serves a whole lotta people and I have the recipe for you!  Aren’t you lucky?!  🙂 We only slightly altered the original recipe – it’s pretty perfect how it is!

hominy002

Perini Ranch Poblano Hominy*
serves 10 to 12 as a side dish

1 cup chopped onion
4 (15 ounce) cans white hominy (drain and reserve liquid)
1/2 cup hominy liquid
1 tablespoon juice from pickled jalapenos
1/2 pound Cheddar cheese, grated
8 slices thick cut bacon, fried crisp and chopped (reserve drippings)
1 cup fresh seeded and chopped poblano pepper
1 or 2 pickled jalapenos, seeded and chopped (optional) 

Saute the onions in a little of the bacon drippings and set aside. Heat the hominy in a separate pan, stirring often. When heated thoroughly, add the hominy liquid and jalapeno juice, bring back to high temperature and add 3/4 of the cheese. When the cheese melts, add half the peppers and bacon and all the onion. Pour into a large baking pan (a 9×13″ works) and sprinkle with the remaining cheese, bacon and peppers. Bake at 325 degrees F until cheese on top melts, about 15 minutes.

*adapted from this copycat recipe

Chicken and Waffles with Molasses Butter

chicken_waffles010
Easter Sunday was a bit low-key for us this year.  I had a wedding to shoot on Saturday so we couldn’t go out of town to be with family and we didn’t have time to prepare the feast we normally do.  We typically like to have brunch-type foods when we know it’s going to be just us because breakfast is usually easy to throw together in less than an hour after church and, well, who doesn’t like breakfast for lunch?!

A few months ago I ran across a wonderful yeast waffle recipe that you mix up the night before and let it sit out on your counter to get all bubbly.  Sounds strange, but it imparts such an amazing sourdough, yeasty flavor to the waffles which helps balance the pure sugar you typically use to drown the waffle.  Matt and I have had a slight obsession with the Southern dish of chicken and waffles and every where we go where it’s on the menu, we always feel the dish falls a little short of the expectations in our mind.  The chicken should be juicy, super crispy, salty and flavorful on its own and the waffle shouldn’t be too heavy – it should be light, airy and buttery with just enough sweetness to give that perfect balance of flavors.  A lot of waffles are too heavy, too bland, too sweet or the chicken is an after-thought – dry or not seasoned.  So, taking matters into our own hands, we used the amazing recipe for Korean fried chicken that we did at the Super Bowl and paired it with a yeast waffle recipe and the combination was juuuuuust right.
chicken_waffles008
I added my own sentimental flair to the dish.  Growing up, I distinctly remember at family gatherings, often at Sunday lunches, my Pappaw would request molasses and then he’d take a large chunk of soft butter and whip the two together into a smooth paste for his biscuits.  I thought it was odd, but as far back as I can remember, there has never been a food strange enough that I wouldn’t try it.  I immediately began to imitate his method and loved the tangy sweetness of the molasses butter on my biscuits, too.

This Sunday as I was thinking about Easter and family, I had my Pappaw on my mind because just a few days ago, he underwent extremely intense cancer surgery and was, up until yesterday, still in pretty critical condition in ICU.  I thought about our family get-togethers when I was young and Pappaw’s love of biscuits, molasses and black coffee and thought for our brunch, what better accompaniment to our waffles, which beg for that salty/sweet balance, than his molasses butter?  It was an amazing addition to the waffles and it may be my new favorite topping instead of maple syrup.  Matt wasn’t convinced, but then again, he doesn’t have the memory to go along with it.  And food is so much more than just ingredients on a plate.  If you have a story or a face or a memory of light streaming in from the window across a little dinette set in your grandparents’ kitchen as you slather biscuits with creamy molasses, it’s bound to become your new favorite thing. 🙂

chicken_waffles006

Korean Fried Chicken Strips

Kosher salt
3/4 cups corn starch
1 teaspoon baking powder
2 pounds chicken strip tenders
2 quarts peanut oil or vegetable shortening
1/2 cup all-purpose flour
1/2 cup cold water
1/2 cup vodka

Combine 2 teaspoons kosher salt, 1/4 cup cornstarch, and 1/2 teaspoon baking powder in a large bowl and whisk until homogeneous. Add chicken strips and toss until every surface is coated. Transfer chicken to a wire rack set in a rimmed baking sheet, shaking vigorously as you go to get rid if excess coating. Transfer to refrigerator and let rest, uncovered, for at least 15 minutes and up to overnight.

When ready to fry, preheat oil to 350°F in a large wok, Dutch oven, or deep fryer.  We used a wok on the stove.

Combine remaining 1/2 cup cornstarch, 1/2 teaspoon baking powder, flour, and 2 teaspoons kosher salt in a large bowl and whisk until homogeneous. Add water and vodka and whisk until a smooth batter is formed, adding up to 2 tablespoons additional water if batter is too thick. It should have the consistency of thin paint and fall off of the whisk in thin ribbons that instantly disappear as they hit the surface of the batter in the bowl.

Add half of the chicken strips to the batter. Working one at a time, lift one strip and allow excess batter to drip off, using your finger to get rid of any large pockets or slicks of batter. Carefully lower chicken into hot oil. Repeat with remaining strips in the first batch. Fry, using a metal spider or slotted spatula to rotate and agitate strips as they cook until evenly golden brown and crisp all over, about 8 minutes. Transfer to a paper towel-lined plate and season immediately with kosher salt. Keep warm in a 175F oven while you fry the remaining chicken.

Yeast Waffles*

1 3/4 cups whole milk, at room temperature
1/2 cup unsalted butter, melted, plus more melted butter for the waffle iron
2 1/2 cups sifted all-purpose flour
1 tablespoon active dry yeast (from 2 envelopes)
2 large eggs, at room temperature
2 teaspoons agave nectar or honey
1 teaspoon salt

In a large bowl, combine the milk, 1/2 cup melted butter, flour, yeast, eggs, agave and salt and whisk until smooth. Cover with plastic wrap and let stand until the batter is very puffy, about 2 hours at room temperature (or refrigerate overnight, which is what we did since we wouldn’t be using it first thing in the morning).

Preheat the oven to 250°. Preheat a waffle iron and brush it with melted butter. Gently stir the batter to deflate it. For each batch, fill the waffle iron about two-thirds full (the batter will spread and rise); brush the waffle iron with melted butter as needed.

Cook the waffles until golden crisp.  Keep the waffles directly on your oven racks to keep warm and crispy until you’re done cooking them.  I find that using a traditional sized waffle iron works best than a Belgian waffle maker because sometimes the Belgian waffle irons are too deep for the batter to rise into every crevice. Also, from the two different yeast waffle recipes we’ve tried, I prefer cooking them from room temp if you leave the batter out on your counter, as opposed to keeping it in the fridge.  The batter seems lighter at room temp than cold, so you may want to test that out for yourself.  Both are delicious, but I felt the batter at room temp was thinner and more of that super crisp, light texture I wanted.

*from Food and Wine magazine but I think I prefer the recipe from Smitten Kitchen better.  They’re almost the same, but she uses a little less flour.

Molasses Butter

Dark Molasses
Unsalted Butter – room temp

Use equal parts butter and molasses and whip together until completely mixed.  Spread on waffles before topping with chicken strips.  I added a drizzle of maple syrup on the chicken and then salted it to make the salt stick better.

A Big Announcement and Some Serious Cravings

10252104_10152318906935169_5025961064537154717_n

So I’m happy to announce that we’re expecting a sweet little addition to our family in November!  I can’t imagine another baby in this house, but I am so excited to get to relive the squishy baby phase, again!  Nothing like it 🙂  I am also glad to finally announce it because this blog has been suffering from a lack of posts lately and it’s because NOTHING SOUNDS GOOD TO ME.  Truly.  I’ve not bought packaged snack foods in at least 5 years but lately, the ONLY thing that sounds good is potato chips, frozen egg rolls, bacon and eggs and popcorn.  Salt, salt, salt.  Sweets don’t go down too well and the thought of roasting a vegetable makes my stomach turn.  As a food and cooking lover, it’s been utter torture!  I peruse the pages of Tastespotting and Pinterest and say, “Ew, ew, ew, that looks gross, who would eat that?!”  I can not WAIT to get out of this trimester and into the next where I feel like cooking, again!

So for the next few posts, I’ll share some recipes and product reviews of things that make my crazy pregnant self happy and in a few weeks, I’ll get back to nice, wholesome, well-rounded meal posts.  For now, I give you a glowing product review of:

These chips!  They always sound like a good idea.  And remember:  I am NOT a chip-buyer unless there’s a specific need like an outdoor burger grilling party.  But these.  Super crunch, super flavorful and they are actually not loaded with preservatives, which makes me happy.  Just potatoes, oil and salt!  Win.

81cCbfjWnkL._SL1500_

These chips dipped into…
product_100_l

THIS DIP.  It’s seriously the most delicious dip, EVER.  Go buy it NOW.  I’m not 100% sure on the integrity of the ingredients but I do not care and I will not listen to you if you tell me it’s bad.

To complete the salt-fest post,  I will tell you my little recipe for the best topping for homemade popcorn.  I have never been so excited by something as I have been about popcorn, lately.  It’s so sad what’s become of me.

We use this little gadget and love it:

4153Z0G472L

Over medium heat, add 3-4 tablespoons of oil.  We love using coconut oil!  Add a half cup of kernels and a tsp of salt and start stirring continuously until the kernels start to pop.  Once the popping has nearly stopped, dump out into a big bowl and top with browned butter and dried Parmesan cheese and more salt.  And then more butter.  I think I browned about 4 tablespoons of butter for the batch.  It.  Was.  The.  Best.  Ever.

Stay tuned for more crave-worthy posts to come!  Like this amazing Southern curry my husband made yesterday.  To die for.  See you soon!


Palmiers for Palm Sunday

almond palmiers
Matt suggested I make Palmier cookies for Palm Sunday to take into our church class this morning.  I love word play and an excuse to make a cookie and I hadn’t tried making them before, so I figured I’d give it a shot!  Turns out – it’s the easiest cookie to make, looks refined and tastes amazing with a cup of coffee!  I’m a big fan of keeping a box or two of puff pastry in my freezer for various recipes, and now I have a new go-to cookie to make on the fly if someone is stopping by for coffee or just because!

Palmier

Palmiers
makes about 2 1/2 dozen cookies

1 box frozen puff pastry – sheets separated and thawed
1 cup of sugar
1/2 tsp almond extract

Spread a half cup of the sugar out on a clean surface evenly and lay both sheets of puff pastry out on top of the sugar.  With a rolling pin, roll the sheets a bit flatter in each direction until about an 1/8th of an inch thick. In a bowl with the remaining sugar, add the almond extract and stir with a fork until blended and the sugar resembles wet sand.  Spread the almond sugar over the surface of the puff pastry sheets.  From each end, start rolling up the pastry as you would a cinnamon roll.  It’s like rolling up a scroll!  When both sides almost meet in the middle, lay one side on top of the other, like shutting a book.  Press down slightly and lay on it’s side, cutting 1/4″ slices and placing the cookies on parchment lined baking sheets.
photo 1
(bad pic, but you get the visual)

It’s important to line your baking sheets with something because the sugar needs to caramelize to make these cookies what they are and you may have a hard time getting them off the sheets unless they are lined.

Bake cookies in a 450 degree oven for 6 minutes.  After 6 minutes, flip one and if it’s golden on the under side, flip them all and bake for another 5-6 minutes.  If they aren’t browned, yet, leave them in the oven for another 2-3 minutes.  You’re aiming for a good, golden caramelization on each side and each oven bakes different, so you may need to rotate your pans during the baking process.

Let the cookies cool completely before serving.  Have fun with the filling.  You could add lemon zest, orange zest, jam, vanilla – whatever you want to the sugar on the inside of the cookies.  Have fun with it!

Palmiers
riding in the car on the way to church this morning 🙂

The Ultimate Dark Chocolate Brownies

The Ultimate Brownie
Just look at them.  Super dense.  Fudgy.  Chewy.  Crisp around the very edges and topped with a square of caramel chocolate so it oozes out when it’s cut.  Simply put: the best brownies you will ever eat.

The Bread Man made these a few years ago when we decided to host a Brownie Battle and invite about 20 of our friends to all bring brownies to taste test and enter into the competition for the Golden Whisk.  Yes, there was a golden whisk trophy.  We are serious about our food battles.  Matt baked these brownies and topped his with dark chocolate toffee bars, which is his favorite combination.  They tied up with another contender for Best Traditional Brownie out of about 20 pans of brownies!  When I went to make them last week, I bought Ghiradelli bars – the individually wrapped ones.  And I bought sea salt caramel (as seen pictured) and sea salt soiree with almonds to place on top of the batter.  Check it out, sinking down into the glossy batter…
Ultimate Brownies
This recipe is super simple and I nearly have it memorized.  We’ve adapted it from a stunning UK recipe and put it in slightly easier steps and terms for everyone.  I hope you make these soon.  If for nothing else than to cry with happiness.  It’ll happen.  And be creative with the type of chocolate bars you put on top!  There’s so many to choose from!  I thought if I were in the mood, a dark chocolate mint bar on top would be good.  Or dark chocolate and strawberry!  The fun thing about going with the individually wrapped bars is that it’s instant perfect portioning for cutting!  Have fun and let me know how you like them!

The Ultimate Dark Chocolate Brownie

The Ultimate Dark Chocolate Brownies
makes about 16 depending on how to slice it 😉

8 oz unsalted butter
8 oz dark chocolate chips (I use Ghiradelli 60%)
10 oz superfine sugar (I used Baker’s Sugar)
2 tsp vanilla extract
4 eggs
pinch of salt
5 oz cake flour
Your favorite chocolate bars for topping (I used these two kinds)

Preheat your oven to 400F.

In a double boiler (or a medium saucepan over low heat filled a couple inches up with water with a big heatproof glass bowl setting on top) melt the butter and chocolate together and stir with a rubber spatula until completely incorporated.  Gently stream in the sugar and whisk constantly until fully incorporated and smooth.  Whisk in the vanilla.  In a separate bowl, crack your eggs and lightly whip them up with a pinch of salt.  Take the bowl off the double boiler (if you haven’t already) and whisk in the eggs until smooth and then add the flour in two batches, stirring well to smooth out as many lumps as possible.

Line a 9×13″ pan with foil and spray with cooking spray.  Pour the brownie batter in the pan and smooth out the surface.  Dot the entire surface with chocolate bars and bake for 20 minutes.  It’s not going to look done, but take that sucker OUT and let it cool COMPLETELY before cutting.  Restrain yourself.  Plan ahead.  Gently lift the foil out of the pan and place the sheet of brownies on a cutting board and cut into squares.  Enjoy your life more than you ever have before. You’re welcome.

Double Dark Chocolate Brownies