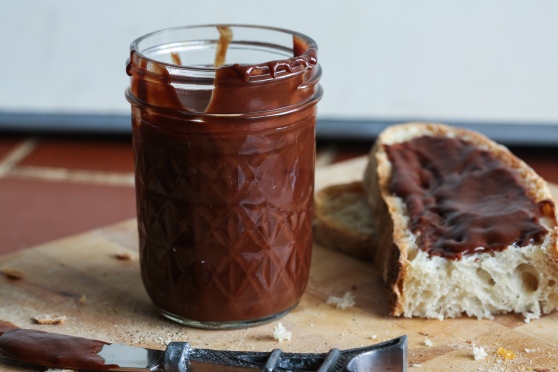
Chocolate Banana Butter

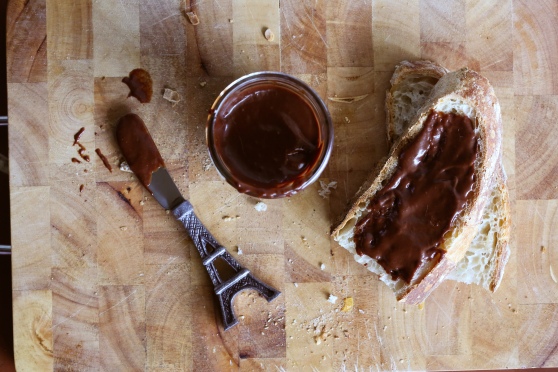
banana chocolate butter-1 banana chocolate butter-3We almost waste more bananas in this house than I can count. The girls always swear they want a WHOLE ONE ALL BY MYSELF! But then they each eat two bites and are done. I typically use the leftover bananas for muffins or oatmeal or smoothies, but I wanted to do something a bit more exciting this time because if you don’t shake up your routine from time to time, despair sets in.

I found a recipe for banana jam with just a tish bit of chocolate and it sounded okay but I didn’t really want banana jam. I wanted banana with lots of chocolate and a softened butter consistency. So I just did my own thang.  Plus, it’s easier than making jam. And if you really want to live on the edge, you don’t even have to sterilize your jam jars. GASP. Just keep it in the fridge and no one has to know…

banana chocolate butter-6
That’s little Ollie’s hand. So cute. She ate this shot. banana chocolate butter-4
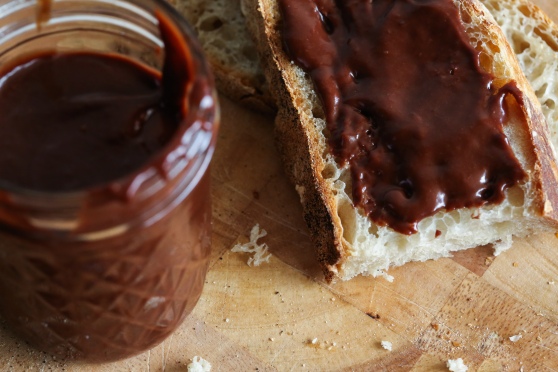
Chocolate Banana Butter


makes about 24 ounces

5 super ripe bananas, cut into chunks
8 tablespoons brown sugar
2 tablespoons water
8 ounces dark chocolate, broken into small pieces
3 tablespoons unsalted butter, softened
kosher salt to taste

In a large saucepan, combine the bananas, brown sugar and water over medium heat and bring to a boil. Mash up the bananas with a spatula and boil for about 2 minutes, stirring. Remove from heat and stir in the dark chocolate. Pour the banana chocolate mixture into a food processor and blend until completely smooth. Add the butter and blend again. Taste test – add a sprinkle of kosher salt and let it blend once more. Add more salt to your taste. I tend to like my sweets with a salty edge, so I probably added about a half teaspoon when it was all said and done. Pour into jars and store in the fridge. We have ours on bread. I’m not really sure what else you’d need in life than good bread and chocolate.

Triple Berry Pie

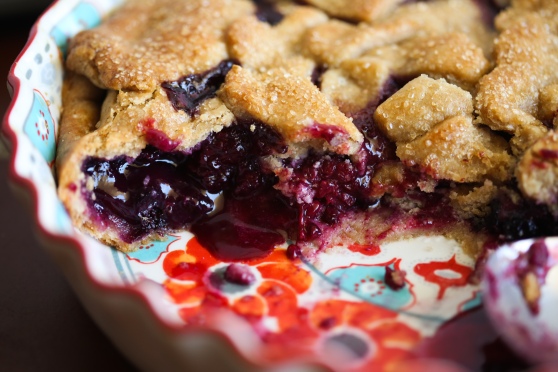
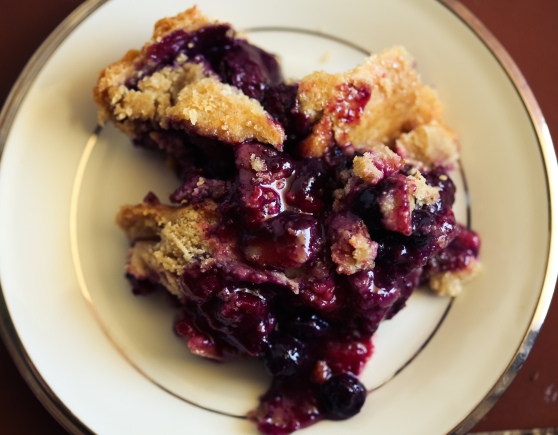
triple berry pie-1triple berry pie-2Last night I had an inspiring conversation with my friend, Ashley, where we spoke of our frustration with “keeping up appearances” with our photography, Facebook, Instagram, whatever it is that we somehow feel compelled to keep going in order to please our various audiences (mostly those audiences just include my oversized ego.)  I had said that this blog was suffering because while I have been cooking pretty much every meal over the last few months and some of those meals have been really good (like mozzarella stuffed rice balls rolled in panko and fried), I just haven’t felt like taking our meals’ pictures.  And then she said, “Do it because you enjoy the process…remember life before the internet?”

Remember life before the internet?

Well, I do, even though a lot of “kids these days” don’t. And what I remember is that we just…did things. All the time. And no one knew about it. No one saw it. We did crafts and went outside and ate burritos without ever documenting the occasion. And I seem to remember enjoying life before the ever present, all-encompassing documentation of all the things in life.  No one in their right mind would spend valuable money on film to take a picture of their cup of coffee…every day.

But I WOULD have liked to share recipes I really love. And I would’ve written the recipes down on cute little cards and maybe even take a photo and put it in a book or send it to a friend. That, I would have done and those are going to be the types of recipes I share on this blog.

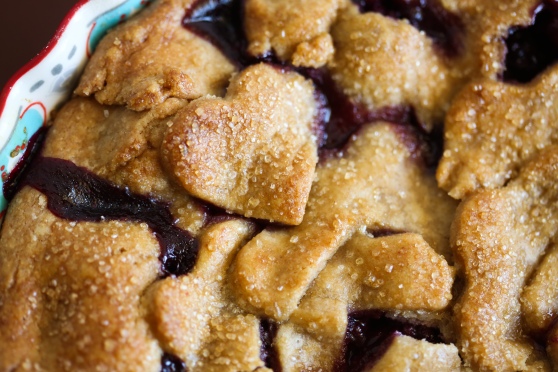
Like this pie. I had a brief moment of modern-woe yesterday in which I wished I had made it prettier so that I could’ve blogged about it. Shoot. It’s delicious – who needs it to be picture perfect?! I went all hodgepodge with the top crust instead of doing something perfectionist and I put lots of heart cut outs because I have little girls. So there you go. And I was super proud of the results. Perfect juice in this pie – not runny, not dry! No soggy crust – flaky throughout and super buttery and slightly grainy (in a good way).  I used a white whole wheat and added a bit of extra sugar for the crust and it gave the entire thing this hearty cornmeal-esque effect. Loved it. It’s perfect. And I think there was something to using all frozen fruits. So I can’t vouch for this if you use all fresh, although I bet you’d just have to adjust bake time. Whatever you do, try it. And take a picture to share with your friends if you want, but remember to just enjoy the process.

Thanks, Ashley. 🙂

triple berry pie-3

Eleanor waiting patiently while I did something utterly confusing to her… triple berry pie-4 triple berry pie-5 triple berry pie-6 triple berry pie-7

Triple Berry Pie

3 1/2 cups mixed frozen berries – I used blueberries, blackberries and raspberries
1 cup sugar
3 TBS flour (I used white whole wheat)
1/2 tsp cinnamon

2 sticks of butter (8 oz) cut into tiny cubes and reeeeally cold
2 cups white whole wheat flour
1 tsp salt
2 TBS sugar

Deep dish pie plate (if you don’t have a deep dish, you could easily make two small pies with this recipe)

For the crust, combine one cup of flour in a large mixing bowl and add the salt. With the paddle attachment and your mixer on medium, add all the cubes of butter in little increments until each addition stops beating against the side of the bowl. After all your butter is incorporated, add the second cup of flour and the two tablespoons of sugar and mix on low until well incorporated. Add a splash of icy cold water until the dough comes together. If it feels a bit too wet, add in a little more flour. I think I used about an extra 1/8th cup. Divide your dough into two portions with one being slightly bigger than the other and shape into discs, wrap in plastic wrap and refrigerate for at least 30 minutes. Roll out the bigger portion and line your pie plate and let it sit in the fridge while you mix up your filling.

Preheat the oven to 400F. Mix the fruit, sugar, 3 tablespoons of flour and cinnamon in a big bowl and let it sit for a few minutes, then stir to incorporate again. Pour the filling into your pie crust, top with whatever fancy shapes, basket weave, self portraits you want, brush with a beaten egg and sprinkle with sugar.

Place on a rimmed baking sheet and put on the center rack of your oven. REDUCE the heat to 350 and bake for 1 – 1.5 hours until the crust is golden brown and the filling is bubbling. It took mine a full hour and a half because of the frozen fruit, but if you’re using fresh, you may only need 45 minutes until it bubbles.

triple berry pie-10

Blueberry Muffin Oatmeal Cookies with Lemon Cream Glaze

blueberry oatmeal cookies002
My girls love to waste oatmeal. They pick their favorite jams to stir into a base that I so lovingly prepare with vanilla bean paste and butter and cinnamon. They seem excited. Then they eat two bites and say they’re all done. And so I eat a lot of oatmeal. And I really get tired of wasting it. I actually despise wasting food. We are a family who eats every bit of our leftovers if I can help it. So naturally I had to find a solution for the oatmeal leftovers (besides cooking something different for breakfast, which is obvious, but every time I think, “Today is the day. Today they will eat oatmeal.”)

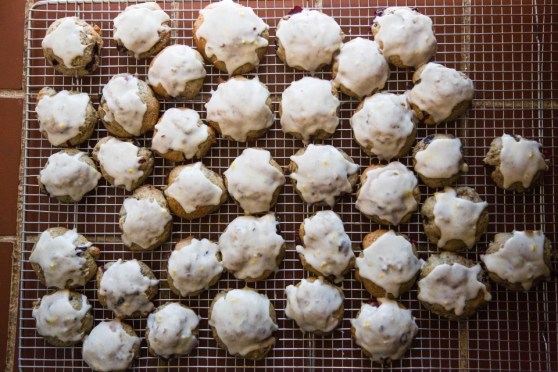
Enter: leftover oatmeal cookies! It had to be a thing, right?! It is! I did a quick search on how to use leftover cooked oatmeal and modified the recipe to include some awesome blueberry jam and iced them with a super tart lemon cream glaze. They were pretty delicious! They taste like mini muffin cookies and they were so easy. The variations are endless, too, which is what I like. Brown sugar cinnamon? Cherry chocolate? Lemon poppy seed? They’d all be awesome! For now, here’s the blueberry version! Enjoy!

blueberry oatmeal cookies001

Blueberry Muffin Oatmeal Cookies with Lemon Cream Glaze

makes about 3-4 dozen cookies

2 cups flour
1 tsp baking powder
1/4 tsp baking soda
1 tsp salt
1 tsp cinnamon
3/4 cup brown sugar
2/3 cup unsalted butter, softened
2 eggs
1 1/2 c. cooked oatmeal


First, make your oatmeal if you don’t truly have leftover oatmeal. I make one cup (which makes about 2 cups cooked) and I make mine with butter and two to three tablespoons of blueberry preserves. You could really flavor your oatmeal any way you like. The secret to good cookies is a little more flavor add-ins than you’d do for just eating oatmeal. Let the oatmeal cool to room temp before making the cookies.

Preheat the oven to 375F.

Sift the flour, baking powder and soda, salt and cinnamon together. Mix the brown sugar and butter together until creamy. Add the eggs, one at a time, alternating with the flour mixture.  Mix the cooked oatmeal until just combined.

Drop by the tablespoon full onto greased cookie sheets. Bake for 12-15 minutes until lightly browned. Let the cookies cool completely before adding the glaze.

Lemon Cream Glaze

2 cups powdered sugar
1/4 cup heavy cream
1 tablespoon vanilla bean paste
zest from 1 large lemon
juice from the same lemon
salt to taste (this is important)

Add the cream to your powdered sugar until it forms a nice paste. You may not use the entire quarter cup. Add the zest and lemon juice and vanilla and then if you think it needs to be thinner, add more cream. The consistency should be like thin pancake batter. Gradually add pinches of salt, stirring well after each pinch, tasting along the way until the flavors start to sing a little louder. Salt is something I add to all my icings and glazes and it makes such a difference!


New Mexican Posole

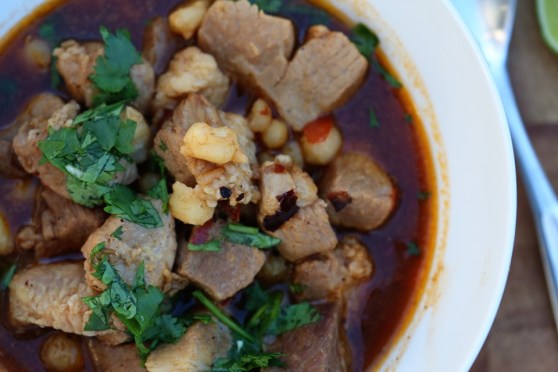
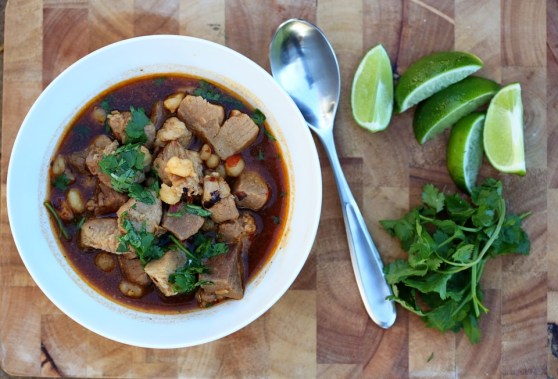
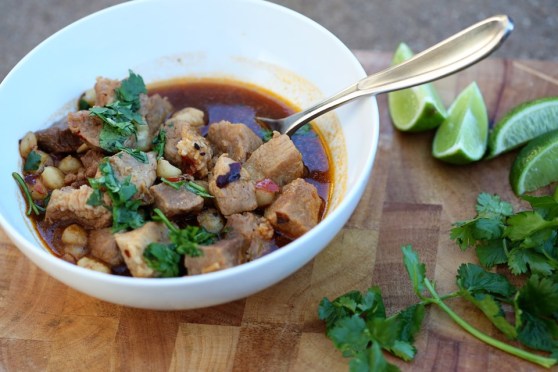
Pork PosolePork Posole from scratch
This is a beautiful recipe. We have made it several times over the past couple years and each time it surprises me how good it really is. The warmth of the spices and the rounded flavors from the fatty pork, combined with the brightness of the cilantro hit the spot every time. It’s home in a bowl. This weekend looks to be dark and rainy for a lot of us across the Texas/New Mexico/Oklahoma region and I can think of no better recipe to make for staying inside and taking comfort in being home than this one.  Serve it with tortillas or cornbread for extra comfort!

These past few weeks have been hard. One or more of us has been sick since the very beginning of March. We’ve had the flu, some weird pink eye thing, a cough that lasted three weeks, the stomach flu and double ear infections – twice. I’ve felt at times over these weeks that it doesn’t really matter what I cook – everyone is just going to either not be in the mood to eat, barf it up, or wish they just had a cracker, anyway. It’s so hard to keep going and to keep doing what you love when life starts throwing crap your way. It’s so easy to give up and get fast food every day. (And I did.) But then, you feel worse. And so you go through the cycle again and it just doesn’t get better until you step back and plan ahead and make a few meals a week that FEEL good and nurture your body AND your spirit. (That can include cookies.) You don’t have to do it every day – but a couple times a week, it’s worth the effort. And it pays off in really good leftovers. 🙂

I hope you are all well this week. And if you’re not, seriously, text me and let me know and I’ll bring you some soup.New Mexican Posole

Posole

New Mexican Posole

  • 1 ½ pounds hominy
  • 3 ounces dried red New Mexico chiles (about 10 large chiles)
  • 4 pounds pork shoulder, not too lean, cut in 2-inch chunks
  • Salt and pepper
  • 1 large yellow onion, peeled, halved and stuck with 2 cloves
  • 1 bay leaf
  • 1 tablespoon chopped garlic
  • 2 teaspoons cumin seeds, toasted until fragrant and coarsely ground
  • 2 cups finely diced white onion, soaked in ice water, for garnish
  • Lime wedges and cilantro for garnish

Drain hominy and put in large soup pot. Cover with water and bring to boil. Let simmer briskly for 30 minutes.

Toast dried chiles lightly in cast-iron skillet or stovetop grill, just until fragrant. Wearing gloves, slit chiles lengthwise with paring knife. Remove and discard stems and seeds. Put chiles in saucepan and cover with 4 cups water. Simmer 30 minutes and let cool. In blender, purée chiles to a smooth paste using some cooking water as necessary. Purée should be of milkshake consistency.

Season pork generously with salt and pepper. After posole has cooked 30 minutes, add pork shoulder, onion stuck with cloves, bay leaf, garlic and cumin. Add enough water to cover by 2 inches, then return to a brisk simmer. While adding water occasionally and tasting broth for salt, simmer for about 2 1/2 hours more, until meat is tender. Skim fat from surface of broth.

Stir in 1 cup chile purée and simmer for 10 minutes. Taste and correct seasoning. (At this point, posole can be cooled completely and reheated later. Refrigerate for up to 3 days.)

To serve, ladle posole, meat and broth into wide bowls. Pass bowls of diced onion, lime wedges, cilantro and oregano, and let guests garnish to taste.

*recipe adapted from the New York Times Cooking

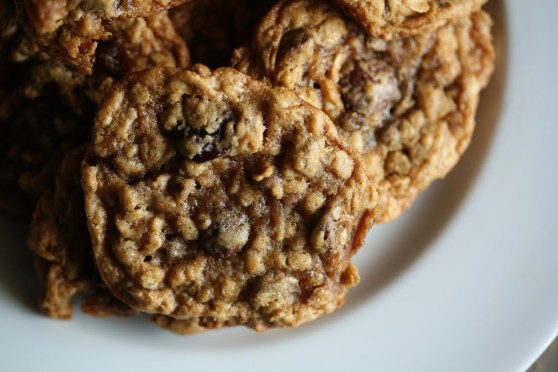
Cherry Chocolate Chip Oatmeal Cookies

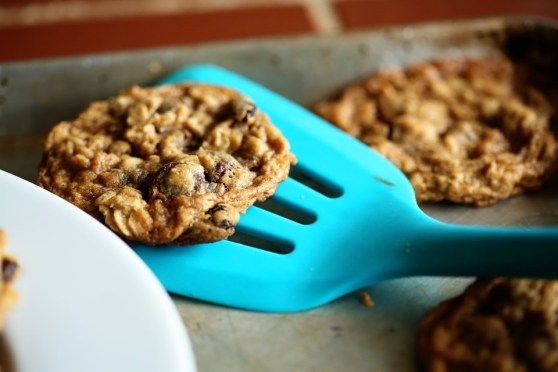
Cherry Chocolate Chip Oatmeal Cookies 2

Cherry Chocolate Chip Oatmeal Cookies
I’m sitting here after putting my “baby” down for a nap a few minutes ago (praying she’ll go longer than her usual 45 minutes) and Peg and Cat are singing loudly in the background as my very grown up four-year old gets out of taking a nap because I want her to be exhausted enough to go to sleep at nine instead of ten tonight.

I’m winging it this week – Matt is away on a company trip for three days and I’m a few hours in and feeling so, so tired. I have lots of coffee and a good sense of humor, so I’m sure I’ll be fine. But having help from 5:30-9 every night is vital to my sanity. There’s something about getting a fresh set of not-exhausted-yet hands to hold the babies or take them outside and swing them so I can cook dinner in peace. And he is kind of the best there is and the most helpful person on the planet, so it’s extra hard to be without him. So I’m going backwards with my usual routine – I’m cooking lunches this week and keeping dinners simple. Because the last thing I want to do after finally getting both girls in bed is to clean my dirty dishes. I plan on reading a book or doing half of a yoga routine. And while I don’t ever recommend eating your feelings because that’s a silly thing to say and they would probably taste like sauerkraut, anyway – just eat these cookies instead. All eating is emotional eating, after all.

It’s good to be back, friends 🙂

Cherry Chocolate Chip Oatmeal Cookies 3 Cherry Chocolate Chunk Oatmeal Cookies

Cherry Chocolate Chip Oatmeal Cookies

  • Servings: about 24 cookies
  • Print

1.5 cups packed brown sugar
1 cup softened, unsalted butter
1 teaspoon vanilla or vanilla bean paste
1 egg
2 cups rolled oats
1.5 cups all purpose flour
1 teaspoon baking soda
1/4 tsp salt
1 cup dark chocolate chips
1 cup chopped, dried cherriesHeat oven to 350°F. In large bowl, stir brown sugar and butter until blended. Stir in vanilla and egg until light and fluffy. Stir in oats, flour, baking soda and salt; stir in chocolate chips and cherries.
Onto ungreased cookie sheet, drop dough by rounded tablespoonfuls about 2 inches apart.
Bake 10 to 12 minutes or until golden brown. Cool slightly; remove from cookie sheet to wire rack.

Apple Pie Roses

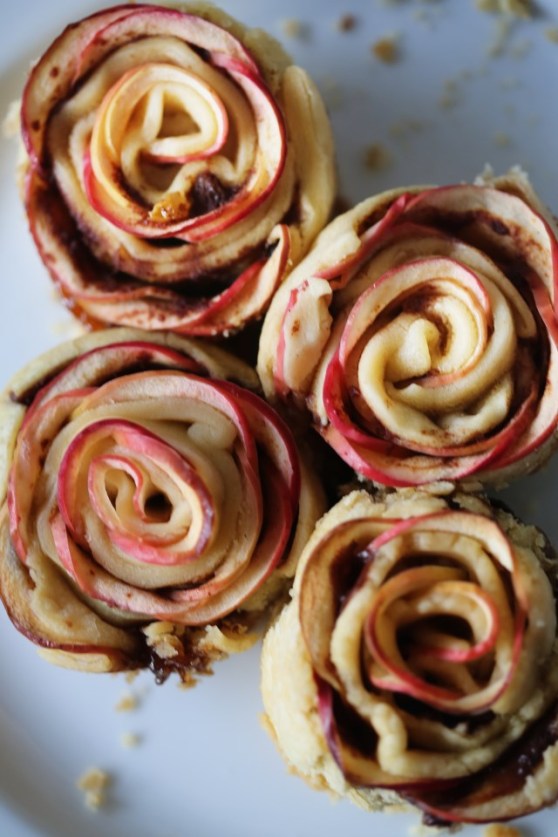
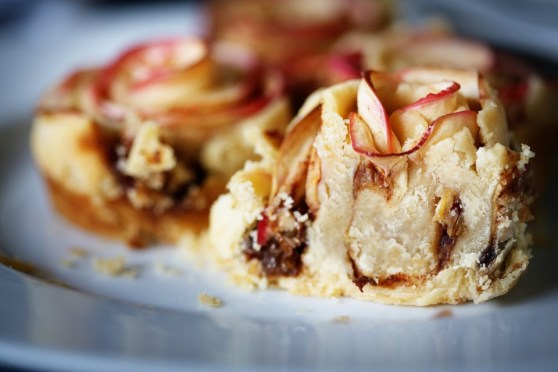
apple pie roses
So I saw this really fun video circulating on Facebook a few weeks ago and like everyone else, it gave me the confidence to try it out myself! These little roses are so much fun to make and they are so beautiful! I thought they’d make an excellent special occasion type dessert. I did the recipe exactly like the video said and I was pleased with the process but not really the results. I mean, they’re okay, but they are definitely prettier than they are tasty. And I honestly think that’s the point. It was a super fun and easy “cooking craft” to do with Olive and so I’ll give it points for that because not every baking recipe is truly kid-accessible. But I decided to alter the recipe to be as delicious as it is beautiful. Here’s a couple problems the original recipe has:

1. The bake time is long and the thin apple slices burn on top, so we cover them during part of baking.
2.They stick like dadgum superglue to the muffin pan and get ripped apart when you take them out, therefore…
3. I fixed that by removing them from the pan while they were still super hot, but…
4. There’s the problem with eating super-baked tiny shreds of apple peel. It gives it that rose look, however…
5. The apple peel feels like tough strings in your mouth. Not really two adjectives you want for your baked goods.
6. The apples snap in half from the original recipe, so I fixed that by soaking them in hot lemon water instead of cold.
7. They just fall flat, taste-wise, so I added a bit of scrumptiousness into the filling along with the apple slices by adding cinnamon roll type flavors.
8. Also, I’m a pie crust junkie, so I switched to pie crust instead of puff pastry and it was indeed more delicious, but…
9. The falling apartness was magnified with the pie crust, so you fix that once and for all by…
10. Using greased muffin liners to bake these babies in. Voila. Most of the problems solved.

So my suggestion for the final round of 100% deliciousness is to peel the apples. How to fix the “but they don’t look like a rose, anymore!” problem? Add a couple drops of red food coloring to the warm water while the apples soak, OR pomegranate or cranberry juice and BOOM! Red roses. I didn’t do this for my final pics because everyone in my house was getting rather sick of eating these tiny apple roses, BUT I did color some apple slices in pomegranate juice and they were BEAUTIFUL. So I’ll try them like that again and make a special Christmas rose wreath edition of this recipe for those who care. Which I think might be 5 people, total. In any case, I present to you:
apple roses Apple Rose

Apple Pie Roses

Ingredients:
1 box frozen pie crust, softened in the fridge (Yeah, yeah, I always make pie crust, but these don’t need that extra effort. It’s effort enough as it is and the store-bought crust tasted just great.)
1 apple, peeled (or not – up to you), and sliced into VERY THIN half moons
Hot water and the juice from 1/2 a lemon

For the filling:
1/4 cup dark brown sugar
1/8 tsp allspice
1/8 tsp nutmeg
1 tsp cinnamon
1 tsp vanilla
squeeze of the other half of the lemon
2 TBS melted butter
1/2 cup chopped golden raisins, softened for a few minutes in boiling water
melted butter for brushing the tops

Cut and soak your apple slices in boiling water and lemon while you do everything else. I let mine soak for nearly an hour but I don’t think that’s necessary.

Preheat your oven to 375F. Combine the filling ingredients in a bowl and set aside. Roll out your pie crust and cut into 2.5″ x 6″ strips. Mine were NOT perfectly cut. It doesn’t matter. Spoon about a teaspoon of the filling on the strips of dough and spread it around. Drain and layer the apple slices, slightly overlapping, along the top half of the dough. Fold the other half up over the apples and pinch at the ends to secure, and then roll up into a rose. Refer to the lovely video if you need help!

Place the roses into greased muffin cups (this is important). Brush the tops of the roses with melted butter and sprinkle with sugar. Bake, covered with foil, for 30 minutes. Then uncover and bake for another 20-30 minutes, watching to make sure the edges don’t burn.
IMG_7289

Peanut Butter and Jelly Thumbprint Cookies

Peanut Butter and Jelly Thumbprint Cookies3
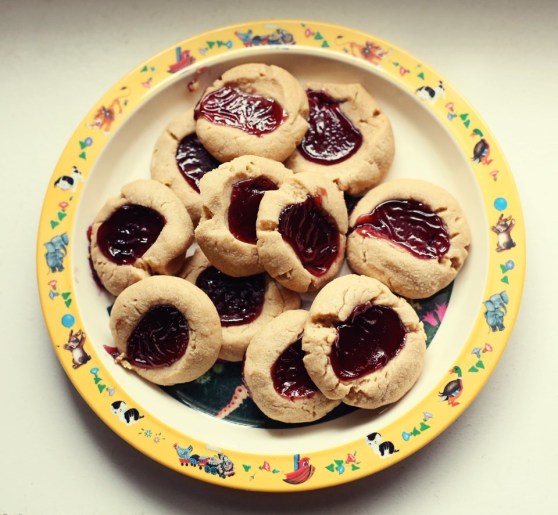
Hello there! This is a delightful little cookie that takes no time at all to make and is so much fun for little helpers! I had this idea a while back whenever I saw powdered peanut butter in the grocery store and have wanted to try it out. It took a little tweaking, but I loved the texture of the cookie itself. One word of advice: don’t use jelly! I know, I know, it’s a riff off of peanut butter jelly sandwiches, but use something a little thicker like a jam or preserve. I used grape jelly because it’s iconic and it really ran out of the cookies more than I would have liked. This did not stop them from being utterly addicting; it just kept them from looking super pretty.

Thumbprint cookies have always been a favorite of mine and this version is so fun and really makes you feel like a kid again. With Thanksgiving and Christmas around the corner, I think this would be a great recipe to have for a cookie exchange! Drizzle it with a bit of white or dark chocolate to make it even more fancy! Enjoy!

Peanut Butter and Jelly Thumbprint Cookies2

Peanut Butter and Jelly Thumbprint Cookies


makes about 2 dozen

1 cup salted butter, softened
½ cup confectioners’ (powdered) sugar, plus ¼ cup more for dusting
2 teaspoons pure vanilla extract
¼ tsp salt
1 1/4 cups all purpose flour
1 cup peanut butter powder

about 1/2 cup fruit preserves or jam

Preheat oven to 325°F. Line a baking sheet with parchment paper.

In the bowl of a stand mixer fitted with paddle attachment, blend butter and sugar until fluffy and light, 2 minutes. Add vanilla and salt, scraping down bowl as needed. Pick up the baby, who has been crying at your knee for the past ten minutes and hold her while you try to measure out peanut butter powder. Let her sneeze into it. Do everything with one arm tied behind your back. Switch to low and gently mix in flour and peanut butter powder, just until combined.

Roll tablespoonfuls of dough into 1-inch balls. Create some interest by making some pea-sized and some into the shape of a carrot. Pretend to eat them, but then actually do. Place dough balls on parchment lined baking sheets. Press down the center of each ball with your thumb, making a slight depression, or a hole clean through to where you can see the bottom of the baking sheet.

Fill cookie centers with a teaspoonful of preserves and be sure to lick the spoon between each cookie. Makes it better. Bake 12-15 minutes or until golden brown and puffy, but take care not to over-bake. Let cool a few minutes on baking sheet, then transfer to finish cooling on wire rack.

When cookies are completely cooled, eat seven or eight with a glass of milk while singing every song you know in your best cat voice. Cookies can be kept in airtight container at room temp for a few days. Emphasis on “can.”

*recipe adapted from Chew Out Loud

Peanut Butter and Jelly Thumbprint Cookies

Chicken in a Biskit Fried Chicken on a Biscuit

fried chicken and cream biscuits with maple butter
You read that right. Buttermilk-brined chicken thighs, breaded in ground up Chicken in a Biskit crackers and fried. Served on top of a fluffy cream biscuit and finished off with a spread of salted maple butter.
I make no apologies. For any of it. It was one of the best little chicken sandwiches I’ve ever had. And it really wasn’t that difficult! We had the idea a while back and thought it was too good of a play on words to not do it. So we did it! Matt put the chicken thighs in the brine the night before but the meal itself took less than an hour from start to finish. And a made a side of carrot “fries” to go along with everything.
Have you ever had Chicken in a Biskit crackers? If you haven’t, you should try them. Oddly addicting. They have a sweet/savory flavor combo that I’ve tasted in other crackers, but this one, in my opinion, was the first of its kind and remains the best. It’s an old cracker (well, not literally, but the brand is old!) I can remember these crackers as a kid and I honestly hadn’t bought a box since, but for this little project, it’s well worth it.

Start this the night before you want to eat it so that you can get your chicken in the brine. The rest doesn’t take that long – about an hour from baking the biscuits through frying the chicken.  Enjoy and let me know if you love it as much as we did!

Chicken in a Biskit Fried Chicken and Biscuits with Maple Butter

Chicken in a Biskit Fried Chicken on a Biscuit

  • Servings: 6-8 sandwiches
  • Print


For the Biscuits* (taken from Smitten Kitchen – which looks a lot like the scone recipe I use from America’s Test Kitchen – both are awesome and yield similar results):
3 tablespoons (45 grams) melted butter
2 cups (250 grams) all-purpose flour, plus more for dusting the surface
1 tablespoon (15 grams) baking powder
1/2 teaspoon salt
1 tablespoon (15 grams) sugar (optional)
1 1/2 cups (355 ml) heavy cream

Preheat the oven to 425°F. Line a baking sheet with parchment paper. Melt butter in a small pot or microwave dish, and set aside. Sift two cups flour, the baking powder, salt and (if using) sugar into a large bowl. Fold in 1 1/4 cups cream. If the dough is not soft or easily handled, fold in the remaining 1/4 cup cream, little by little. (I ended up using two additional tablespoons, or half the unused cream.)

Turn dough onto a floured surface, mound it into a ball and, using your hands, press it to a thickness of about 3/4 inch. Cut into rounds, 2 1/2 inches in diameter. Gather dough scraps and continue to make rounds. Dip the top of each round in melted butter and arrange on the baking sheet. Bake until golden, 12 to 15 minutes.

chicken in a biskit fried chicken on a cream biscuit

For the Chicken:

1 pound boneless, skinless chicken thighs; trimmed and cut in half
Buttermilk brine (we use Serious Eat’s Southern Fried Chicken for nearly every fried chicken recipe we do):
2 tablespoons paprika
2 tablespoons freshly ground black pepper
2 teaspoons garlic powder
2 teaspoons dried oregano
1/2 teaspoon cayenne pepper
1 cup buttermilk
1 large egg

For the Dredge:
1 cup flour
1 egg + 1/4 cup buttermilk
1 box Chicken in a Biskit crackers, pulsed fine in a food processor

vegetable oil for frying
Combine the paprika, black pepper, garlic powder, oregano, and cayenne in a small bowl and mix thoroughly with a fork.Whisk the buttermilk, egg, 1 tablespoon salt, and 2 tablespoons of the spice mixture in a large bowl. Add the chicken pieces and toss and turn to coat. Transfer the contents of the bowl to a gallon-sized zipper-lock freezer bag and refrigerate for at least 4 hours, and up to overnight, flipping the bag occasionally to redistribute the contents and coat the chicken evenly.

Take the chicken out and pat dry with paper towels. Dip the thighs in the flour first, then the egg/buttermilk mixture, then the cracker crumbs. I double dipped each piece to get lots of crunch (so dip once more in the egg and then the crackers.) Set aside till you’re done with all the pieces before frying.

Preheat your oven to 200F. (Your oven should still be hot from the biscuits! You’ll keep your fried chicken pieces in the oven to stay warm and crispy while you finish setting your table or wiping kids’ butts or whatever it is you have to do while you try to make dinner.)

Heat about an inch of oil in a skillet over medium high heat until it’s shimmering. Fry each piece of chicken for about 4-5 minutes per side, until the chicken is golden brown and registers 170F on an instant-read thermometer. If you’re thinking you’re about to burn the breading, transfer the chicken pieces to a baking sheet and finish cooking in the oven.

maple butter

For the Maple Butter:
4 tablespoons unsalted butter, room temp
1/4 teaspoon salt
2 tablespoons pure maple syrup

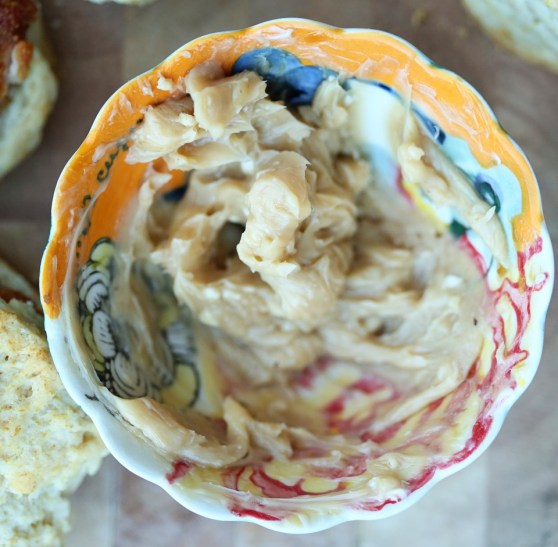
Combine all ingredients until thoroughly incorporated. Spread on biscuits and top with chicken pieces. We also doctored the sandwiches up with a bit of mustard, hot sauce and candied jalapenos, but just the chicken, biscuit and butter are enough.

Lamb Burgers with Cucumber and Mint

Lamb Burgers
Burgers are a favorite dinner item in this house. I can put nearly anything on a burger and my three year old will eat it. She may pick it off after a bite or two, but it’s almost like the word “burger” justifies just about anything included. I couldn’t quite sell her on having the tangy mint and cilantro lime yogurt on top, but I figure as long as she is willing to try something that looks like this, we are doing good.

I don’t really cook with lamb all that often. It’s not on my carnivore radar, but it really is deeply flavorful and lean at the same time. Because of it’s low fat percentage, I added an egg to the meat mixture, kind of reminiscent of a meatball recipe. We topped the burgers with cool slices of cucumber, lots of chopped mint and cilantro and the zesty yogurt sauce and called it a success. I think bits of feta incorporated into the patties would’ve been even better – there’s always room for creativity and error in creating a burger and that’s why it’s one of the most enjoyable dinners to make around here. Not to mention everyone can top them in their own way, so a particular palette doesn’t get ridiculed.

lamb burgers with mint, sour cream and cucumber

Lamb Burgers with Cucumber and Mint

1 pound ground lamb
1/2 sweet onion, diced fine (about 1/2 cup)
1 egg
1/2 cup chopped cilantro and mint, divided
1/2 cup full fat plain yogurt or sour cream
1 tablespoon lime juice
salt and pepper to taste
1/2 cucumber, sliced
buttered onion rolls

In a medium bowl, combine the lamb, onion, egg and half the cilantro and mint. Add a teaspoon of salt and pepper and mix well to combine. Form into somewhat loose patties and cook on a buttered grill or griddle about 2 minutes per side and an instant read thermometer reads at least 160F.

Combine the yogurt, lime juice and other half of the cilantro and mint and season with salt and pepper to taste. Serve on top of burgers with sliced cucumbers on buttered onion rolls.


Rustic Tomato Galette

rustic tomato pie

Deep Dish Tomato Pie
Deep Dish Rustic Tomato Pie
There’s no better time than the middle of October to post about a beautiful, summery tomato pie. 😛 In my defense, my tomato plants were late bloomers and didn’t really start ripening until the end of September. But I can see this amazing pie going either way: an homage to the bright, sweet, summertime flavors, or being comforting and warming with a depth of rich tomato flavor fitting for the colder months. I can not vouch for this recipe if you use tomatoes from the grocery store, but I would imagine it wouldn’t be half bad, considering the bake time and the way the tomatoes almost go sun-dried in flavor on the top layer. If you do that, make sure the tomatoes you buy are pretty soft and ripe and maybe just stick to Roma tomatoes to be safe.

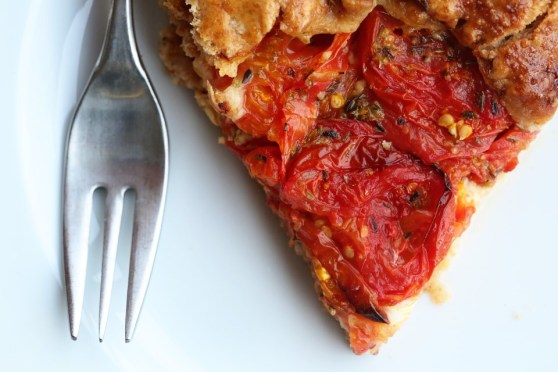
This pie has a bright, peppery and tangy whole-grain mustard on the bottom of the tomatoes and the smooth, chewy layer of cheese in the middle and then topped with two layers of extra ripe heirloom, beefsteak and Roma tomatoes. I decided to use half whole-wheat flour in my usual crust recipe because whole wheat absorbs more moisture and I knew this pie would be pretty juicy. And it is quite juicy, but I decided to stop thinking it had to be like a tart and started to embrace the tomato for what it is: a fruit to be used in a fruit pie! And every fruit pie I’ve ever had, has an adequate amount of juiciness throughout. Why should a tomato pie be any different? So if you will embrace it, too, I think you will really love this recipe. The flavors are electric. And I hope that you have some good tomatoes left in your garden. And if you don’t, you’re more than welcome to stop by and pick some from mine! Happy October 🙂

Rustic Tomato Tart Rustic Deep Dish Tomato Pie

Rustic Tomato Galette

  • Servings: 6-8
  • Print

1 recipe fool-proof pie crust with half the flour being whole wheat
About 3 pounds fresh tomatoes in an assortment of sizes and varieties
2 tablespoons whole grain mustard
2 cups low-moisture mozzarella (shred it yourself – don’t buy pre-shredded or it won’t melt right)
dried oregano
salt and pepper
1 egg, whipped

Preheat the oven to 400F.

Slice the tomatoes into 1/4″ slices and lay out on paper towel-lined sheet pans. Sprinkle with kosher salt on each side of the tomato and let them sit and drain for a few minutes this way. This draws out excess moisture. Let the tomatoes drain while you handle the crust.

Roll your pie crust out and gently form it into a 10″ cast iron pan, letting the excess hang over the edges. Spread the whole grain mustard evenly on the bottom of the crust. (I used this brand and yes, it looks like nothing but mustard seeds!)

Spread the shredded mozzarella over the mustard and then give the cheese a generous sprinkling of dried oregano.

Arrange the tomato slices evenly over the cheese in an overlapping pattern. Sprinkle that layer with oregano and then finish up with the rest of the tomatoes. Gently fold the overhanging pie crust over the tomatoes. It doesn’t have the be perfect. “Galette” is French for “I stopped caring how this looks.” So you get a free pass. If the crust breaks off, just pinch it back together. Really, this is forgiving and you want the extra crust to be there. It’s a buttery, flaky, tomato-juice-absorbing wonder.*

Place the pie on a rimmed baking sheet and brush the crust with egg. Bake for an hour, until the crust is golden brown and the pie is bubbling like crazy. Place a sheet of tin foil over the pie and let it bake another 15 minutes. Let it sit for ten minutes before slicing and serving.

*At this point, you can chill your pie overnight if you’re making this ahead. If you do that, increase your bake time to an hour and a half (or even longer – you’re just wanting a deep brown in your crust and an almost caramelized top layer of tomatoes.)